My Bathroom Trim Issues Solved!!
Y’all, I am so excited because the solution to my bathroom trim issues came to me yesterday (and honestly, was probably inspired by one of your comments), and I have been chomping at the bit to get in there and see if this idea will work since yesterday morning. I spend Wednesday afternoons at my mom’s house, and then Wednesday evenings at my church small group, so I woke up this morning excited to get through my morning routine and lunch so that I can get to work. In fact, I had planned on tackling a reader decorating question in today’s post, but I’m way too excited, and my mind is way too distracted, for me to give that the thought and attention it deserves.
Unfortunately, I may not get very far on implementing this idea today because I still need to take down all of the boards and spacers that I had already installed, and there will probably be some ceiling drywall repair needed since I used construction adhesive to attach those spacers.

So that will probably be a whole day’s work removing that trim and repairing the ceiling. But at least now I feel incredibly motivated to do it because I have a solution to my trim issues!
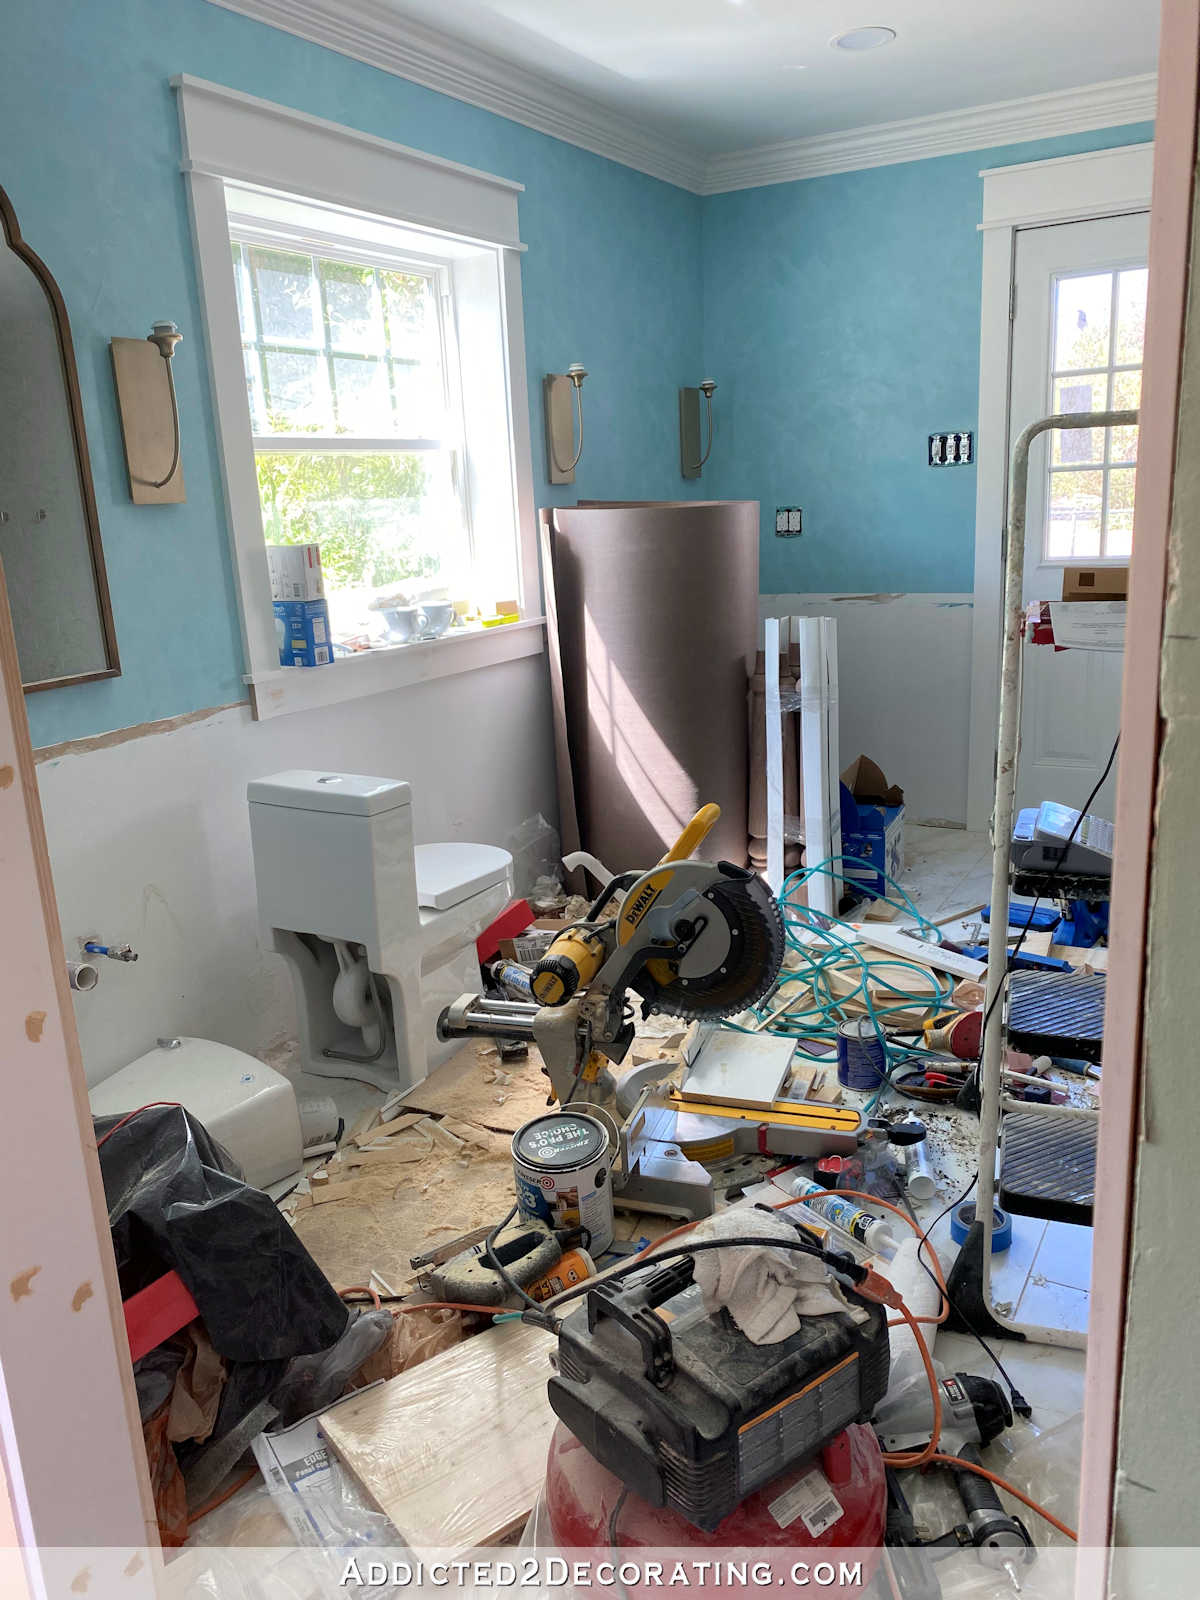
So first, let me back up a bit and explain the issues. My plan from the beginning was to install crown molding continuously around every part of this bathroom, including the toilet area and the shower. I had to come up with a way to make the crown molding continuous and smooth as it transitioned from the main part of the bathroom into the shower, which was a challenge since there’s this 1″ x 5″ board delineating the main part of the bathroom from the shower.
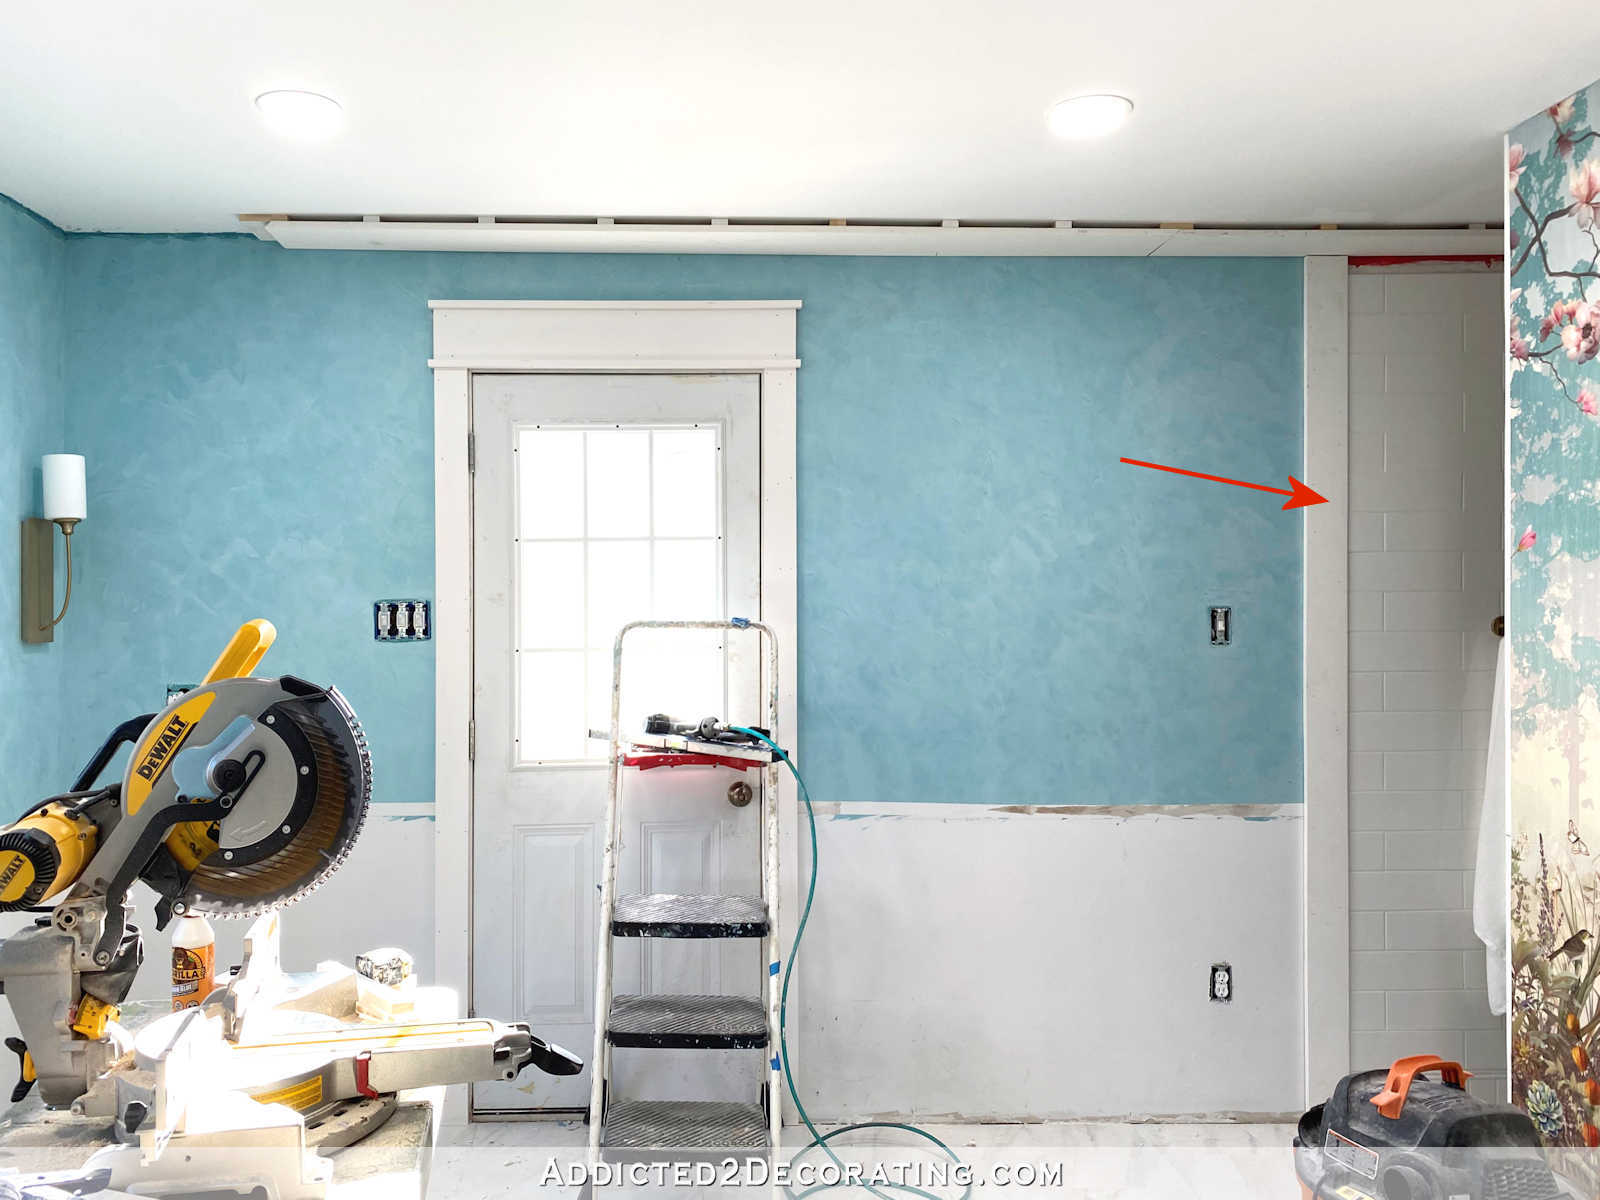
I also had to figure out how to deal with the fact that on the shower side of that transition board, there’s tile on the wall that sticks out 1/4-inch.
So my plan from the beginning was to install a 1″ x 4″ (or a 1″ x 3″) board all along the top of the walls to make it flush with that transition board. I had planned to deal with the 1/4-inch difference in the tile by using my table saw to cut a rabbet into the back of the 1″ x 4″ board so that the top of the board would rest against the wall, and the rabbet on the bottom would accommodate the 1/4-inch projection of the tile (think of how a rabbet is cut into a picture frame so that the glass can be recessed into the frame). Once those 1″ x 4″ boards were installed, then I’d just install crown molding on top of that, continuously around the entire room.
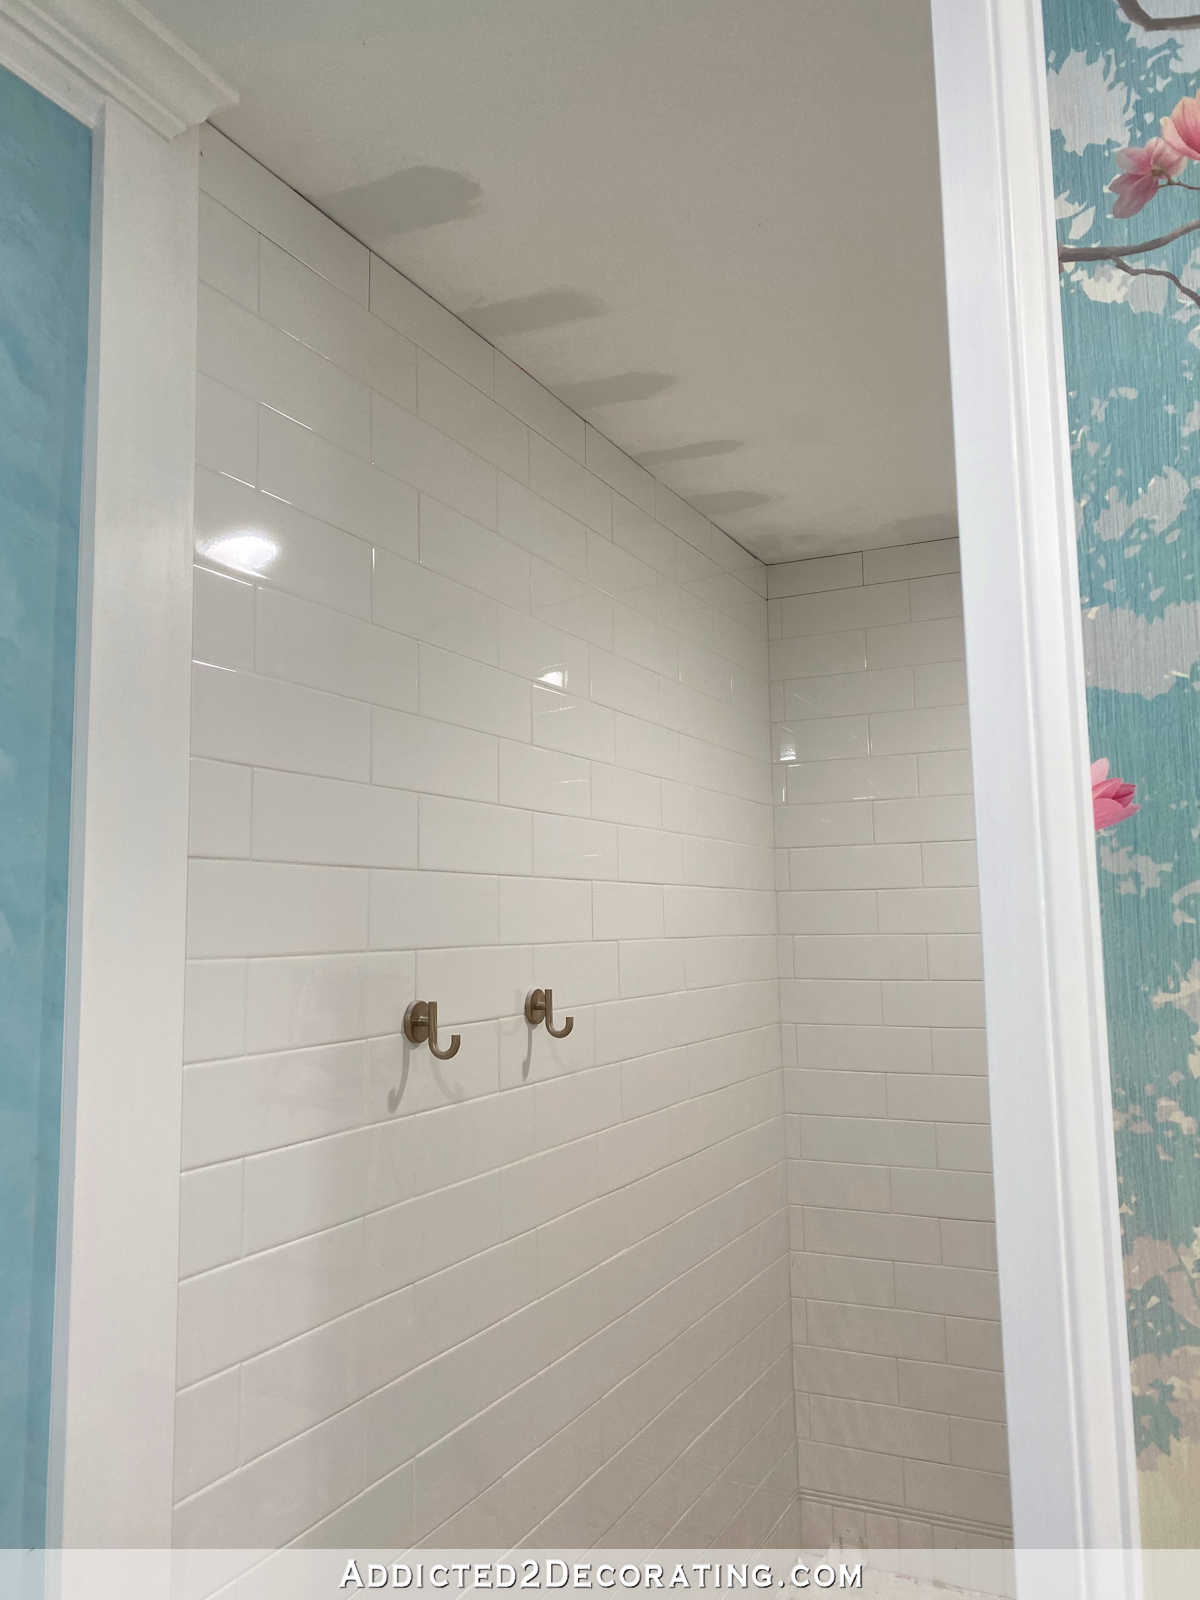
That plan was all good and well except for this pretty significant dip in the ceiling in the shower.
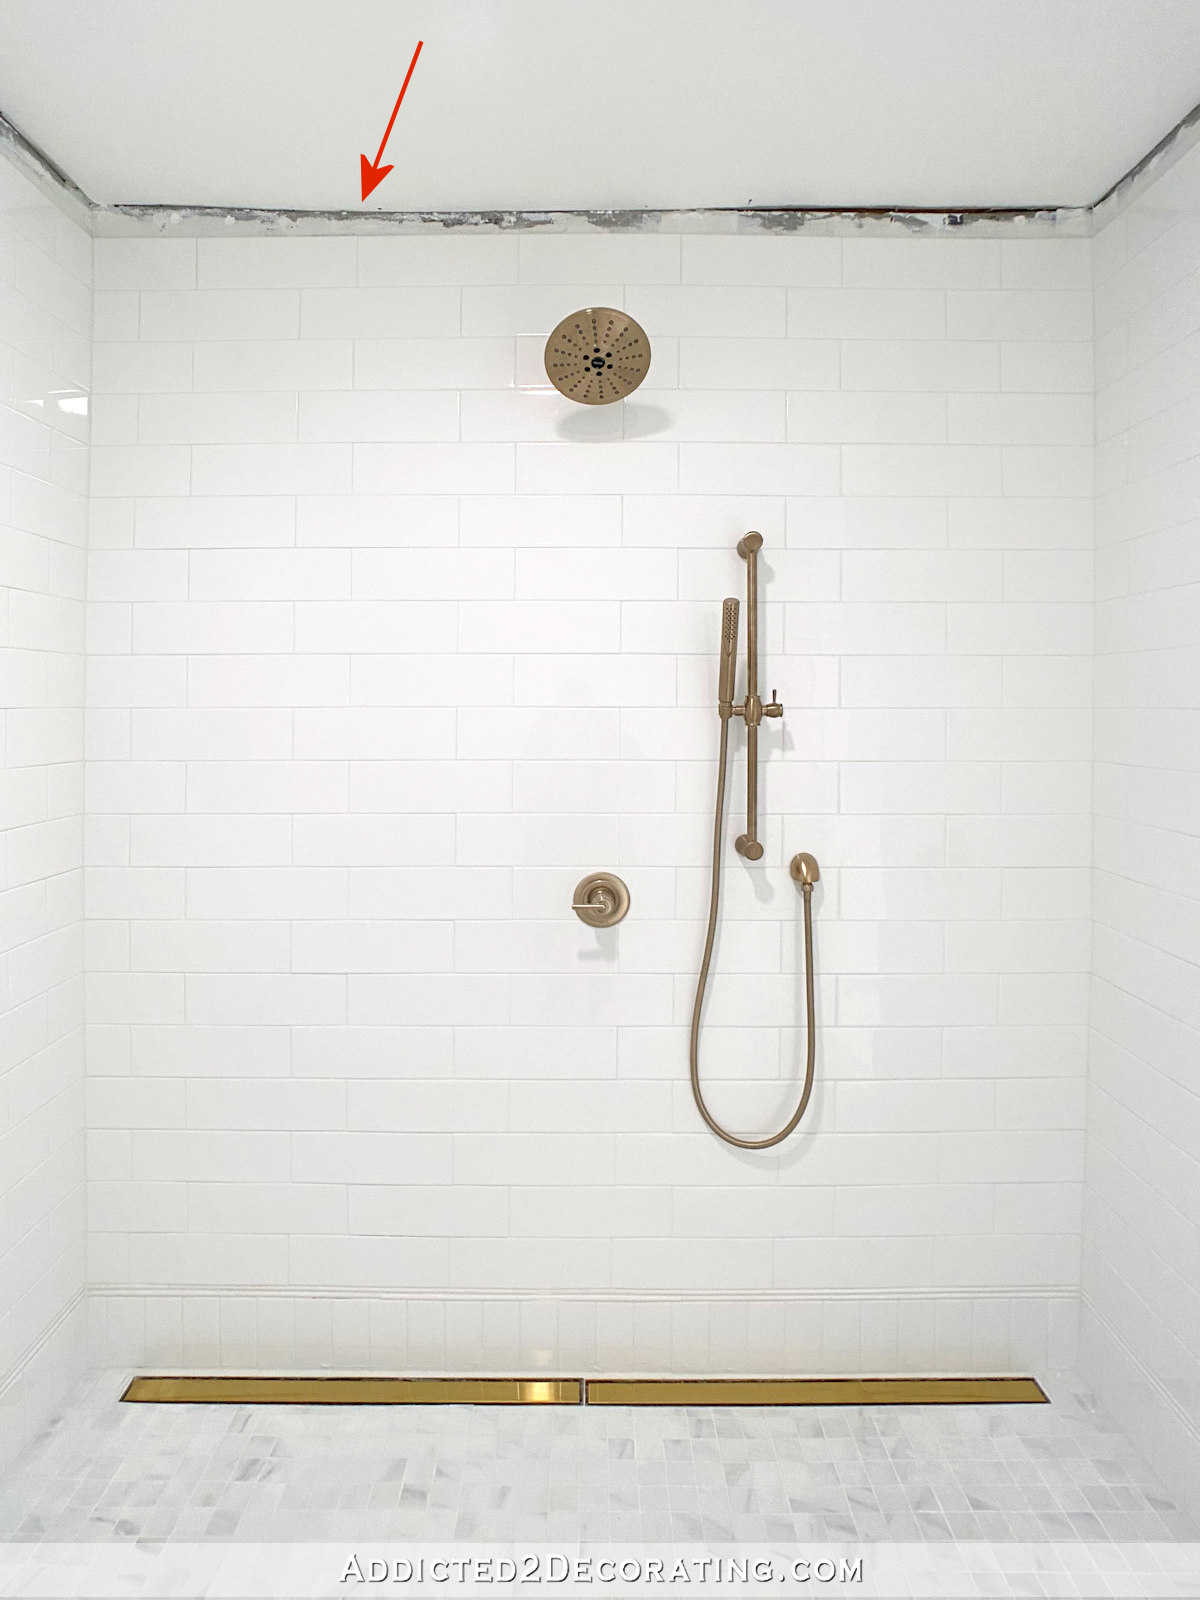
My contractor didn’t notice that, and his guys didn’t notice that. And I can’t get upset with them about that because I didn’t notice it either (me, Ms. Eye-For-Detail, Ms. Perfectionist). I didn’t notice it at all until my work on the shower (i.e., the tiling) was almost completely finished, and there’s no way I’m having things torn up at this point to fix it. If it were on a wall that’s a focal wall from the main area of the bathroom, then maybe I’d have it fixed. but it’s on a wall that’s only visible when you’re standing inside the shower, and I’m just not going to worry about it.
But it does affect crown molding. And that discrepancy is way too much to just scribe and cut the top of the crown molding to fit (that would make it more obvious). And that’s when I came up with the idea of doing a drop down around the perimeter of the room, and then installing crown molding. But that made the crown molding way too close to the top trim on the doors in the bathroom.
So that’s where this has stood, and I’ve been racking my brain trying to come up with a solution. The obvious easy answer to the shower was just to tile all the way up to the ceiling. Bright white tile meeting a bright white ceiling makes that ceiling issue disappear.
But then that left me with the issue of how to end the crown molding at the entrance to the shower without having to use a hanging return, which I do not like, and just refuse to use in this bathroom.
Not only do I not like the look of hanging returns, but then that leaves me with the 1″ x 5″ vertical transition board just…there — just dead ending into the ceiling with nothing finishing it off at the ceiling. So I’d have a hanging return, which I dislike, right before a vertical board dead ending right into the ceiling. None of that works for me. NONE of it.
And that’s where my brain has been stuck for a very long time now, and I couldn’t seem to see past my trim problems at all.
Until yesterday!
Yesterday morning, I finally put some concerted effort into coming up with a solution. I realized that I needed to find a solution that (1) finished off the tops of the vertical boards on either side of the shower entrance (as well as the entrance to the toilet area, since they need to be symmetrical) so I don’t just have boards dead ending into the ceiling, and (2) that provides some depth so that the crown molding in the room can dead end into the side of whatever I use to finish off the tops of those transition boards. That way, no hanging return is needed. All I’d need is a straight cut on the crown molding that dead ends into whatever is at the top of those transition boards.
So I started looking for ways that people dead end crown molding, and I found two different solutions that could work for me.
First, I came across these mid-molding blocks from Lowe’s.
I can’t find the size that I need anywhere, and the ones I did find (like the one above) look awfully fancy for my house.
But how hard would that be to make? It’s just a squared box at the top, which could be made out of scrap lumber, and then three small pieces of crown molding at the bottom. That’s pretty simple. And if I use the crown molding that I’ll be using in the rest of the room, mine would be a lot simpler in design that that fancy one. This is the crown molding that I use, so you can see how much simpler in design mine would be.

So basically, I’d make four of those to go on either side of the entrance to the shower and the toilet area. They’d be installed at the top of those 1″ x 5″ transition boards like this…
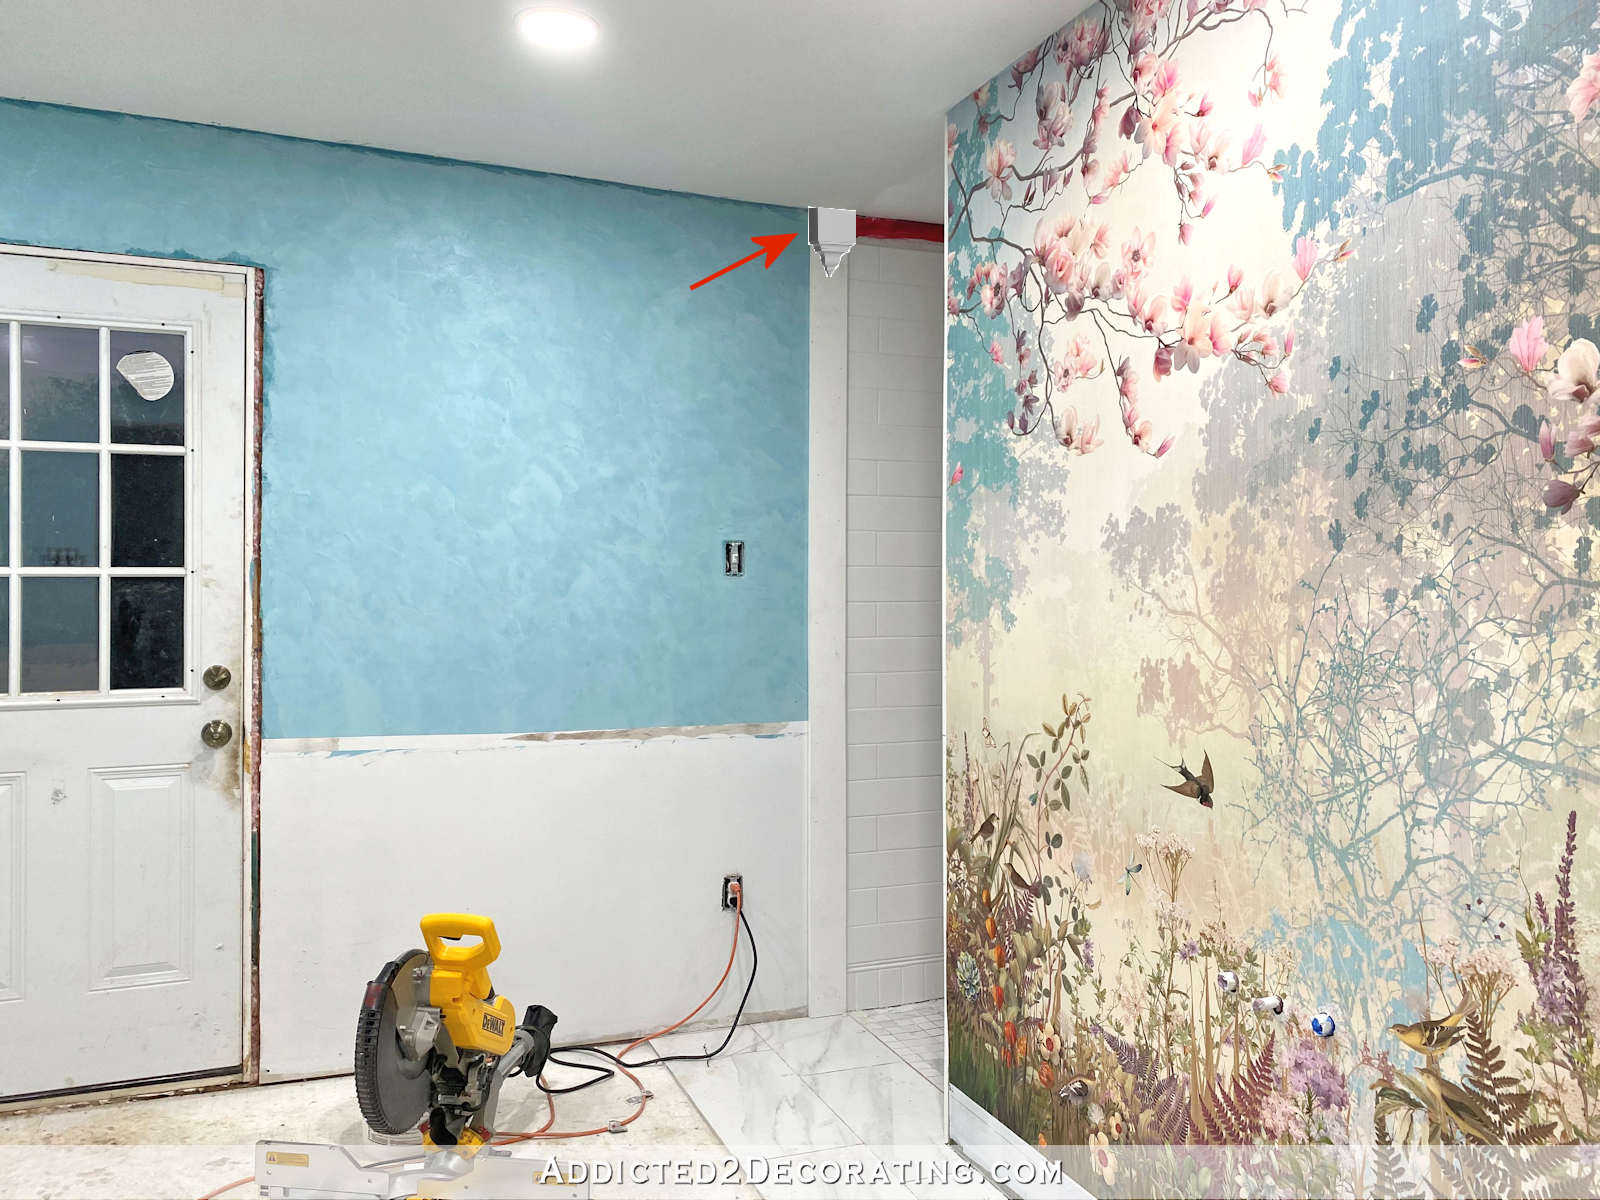
And then all of the crown molding can just dead end into those top blocks.
So that’s one solution that I found, and I think it could work and look really pretty and intentional. That’s the key. I want whatever I use to look intentional, and not like an afterthought. Having a 1″ x 5″ board dead end into the ceiling with a hanging return on the crown molding just before that board would look unfinished and like poor planning, and I want to avoid that at all costs.
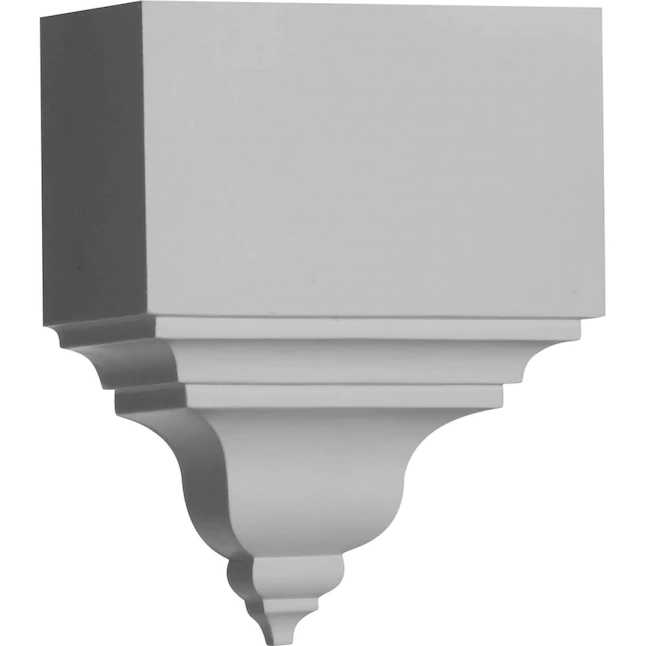
The second idea came from this style of mid-molding block, also from Lowe’s.

I actually like this idea much more because it looks like a pretty corbel. But there’s no way my perfection-seeking brain would let me use something like that if it doesn’t perfectly match the profile of the crown molding in the room.
So that got me to thinking about how I could make something like that. It would basically be a corbel that is 4.5 inches wide, and that has the same exact curve profile as my crown molding, but is larger than the crown molding so that the crown molding can dead end into the side of that corbel.
So basically, I would want to take the profile of my crown molding, enlarge it about 125% or 150%, and then turn that design into a corbel that could be attached at the tops of those vertical transition boards.
But this solution is a lot harder and would require more work. The easiest way to go about this would be to start with a block of wood (probably by gluing 1″ lumber together until I get the right thickness), and once it’s dry, using a band saw to cut out the design. But that’s the problem. I can’t find a band saw that can cut a 5 inch thickness.
I could cut the design out of 1″ lumber using my jigsaw and a detail curve blade, cutting each piece separately ((which would take six individual pieces per corbel, and I’d need four corels) and then after they’re cut out, glue them together to form a corbel that’s 4.5 inches wide. But cutting them out separately would require a whole lot of detail finishing after they’re all glued together. But I might try it anyway just because I really like the corbel idea more than I like the other design with the square block at the top and the pointy crown molding detail below.
I might make both of them and then compare and see which one I like better. But I’m pretty sure that one of those ideas will be a winner, and that will allow me to get moving on this trim, and then move on to other projects in the room.

Addicted 2 Decorating is where I share my DIY and decorating journey as I remodel and decorate the 1948 fixer upper that my husband, Matt, and I bought in 2013. Matt has M.S. and is unable to do physical work, so I do the majority of the work on the house by myself. You can learn more about me here.

Amazing what the mind can do in the background when you least expect it! Great idea Kristi!
What about 3D printing the one you like?
I was going to suggest the same thing!
Interesting. I hadn’t thought about that. I’ll see if there’s a local place with a quick turnaround.
I personally like the 2nd idea, the first one reminds me of a drop of water… Maybe the 3D printing idea will help with this complexity and maybe you can make it where it fits easier?
I think it’s a brilliant solution to your crown molding challenge!
Maybe see if there’s a woodworking club in your area. Folks who do bandsaw boxes have larger bandsaws that can cut that thick of a chunk. A 14″ bandsaw should be able to handle up to 6″. They’d likely be happy to help you out.
Understand I don’t know a lot about your dilemma but in my mind’s eye I’m wondering why you don’t 45 crown at corner, go your 1”, 45 again, go across the 1×5 and then go the same on the other side? In other words you are following the shape with the crown crown molding. If 1” is too small to do that then could you replace the 1” with something thicker?
I did consider that, but that vertical board is only 3/4″ thick. (1-by lumber is only 3/4-inch thick, not actually 1 inch thick). So making a 45-degree cut to jog around a board that only sticks out 3/4-inch would (1) be incredibly frustrating (I don’t like cutting and working with tiny crown molding pieces if I can avoid it), and (2) would look like an afterthought in my mind, and (3) that little bump out would then not match the board on the right side of the shower entrance (i.e., the matching board on the end of the mural wall that forms the “door casings” leading into the shower area). The left side would have that 3/4-inch bump out, and the right side wouldn’t. I think that little detail would look unplanned.
I am so happy you have found a solution or two that you can live with. My husband is in a wheelchair also, so I am familiar with allowances that have to be made in building and designing items.
Great ideas that both look terrific. Is there a Maker group in your area — they often have specialized tools that someone will use to make what you want or will allow you to use. Or rent the tool you need, or check with a library or other tool-lending group that you might be able to find nearby…
You may also try doing a resin pour of that desired shape, which would require you to possibly create it from paper mache or something then casting a resin mold then you could make several duplicates, I mean you are going to be painting these after all? So it could be a great idea? OR… another possiblity is to try something similar to what you did with the porch toppers, and use other wood products to recreate that similar shape? You are the ultimate mastermind afterall KRISTI!!! Good luck….cant wait to see what you come up with!!
Great solution!
I’m glad you’re excited again! Good luck as you explore how to make your solution work. It was fun to read this post, your enthusiasm really came through! 🙂
Hi Kristi,
I believe Home Depot sells a larger size of the same crown molding profile that you use. If you normally use the 3 5/8 inch size, would this 4 5/8 inch one work for you?
https://www.homedepot.com/p/Woodgrain-Millwork-WM-47-19-32-in-x-4-5-8-in-x-96-in-Primed-MDF-Crown-Moulding-10001938/203898759
Looks like they also have it in 5 1/4″:
https://www.homedepot.com/p/Woodgrain-Millwork-LWM-45-19-32-in-x-5-1-4-in-Primed-MDF-Crown-Moulding-10000964/100321426
And that larger one is in stock at my local Home Depot!! WOOHOO!! You’re brilliant! I didn’t even think about looking for a larger version of my crown molding. 😀
Yay! Glad I could help! I love your blog SO MUCH, btw! 🙂
Hi, is there a reason that you can’t continue the crown moulding across both the shower and toilet entrances including the mural!
I’ve considered several options that would include the crown going continuously around the main room, including across those openings. I just didn’t like any of them. I really wanted the ceiling to be uninterrupted throughout.
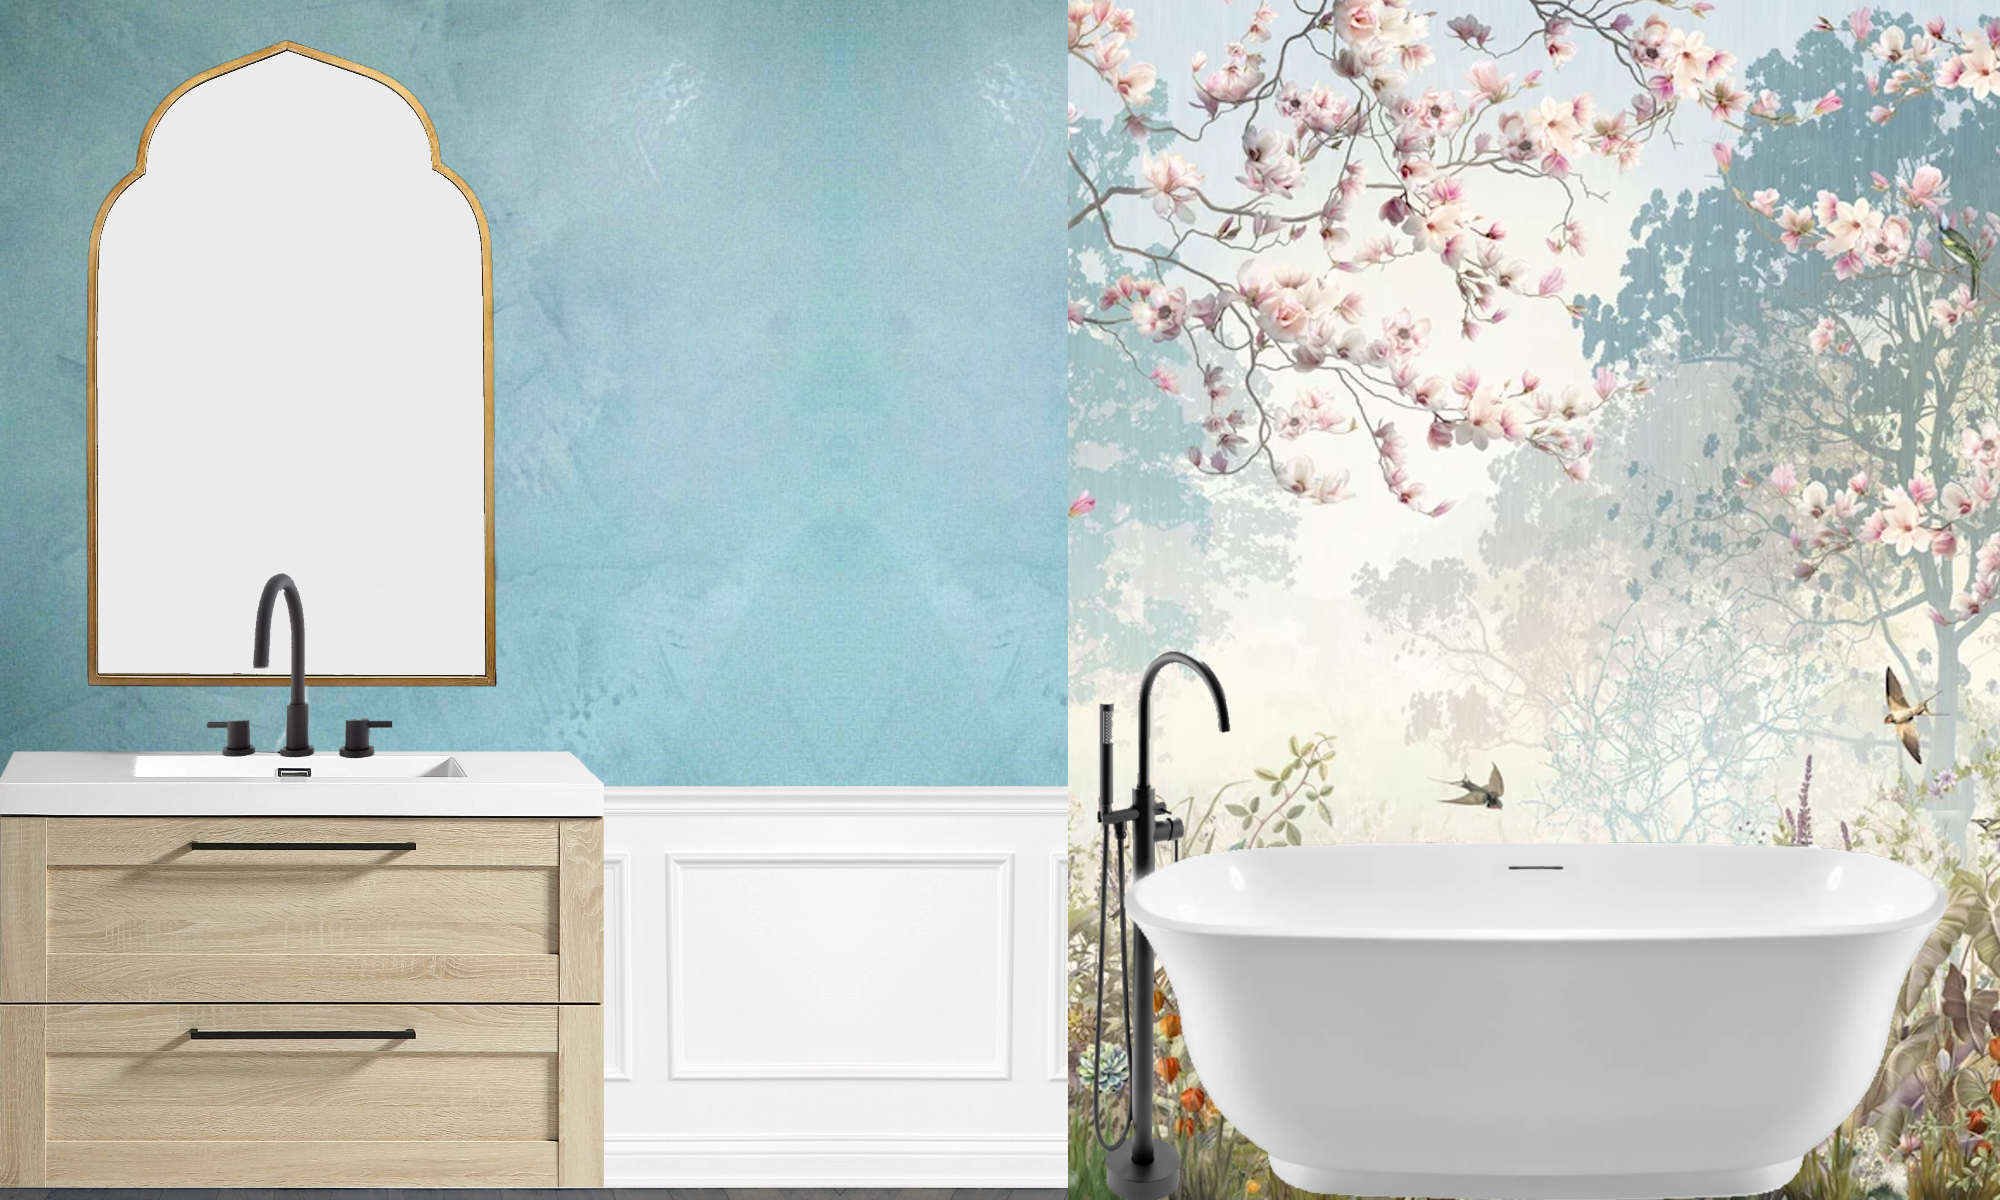
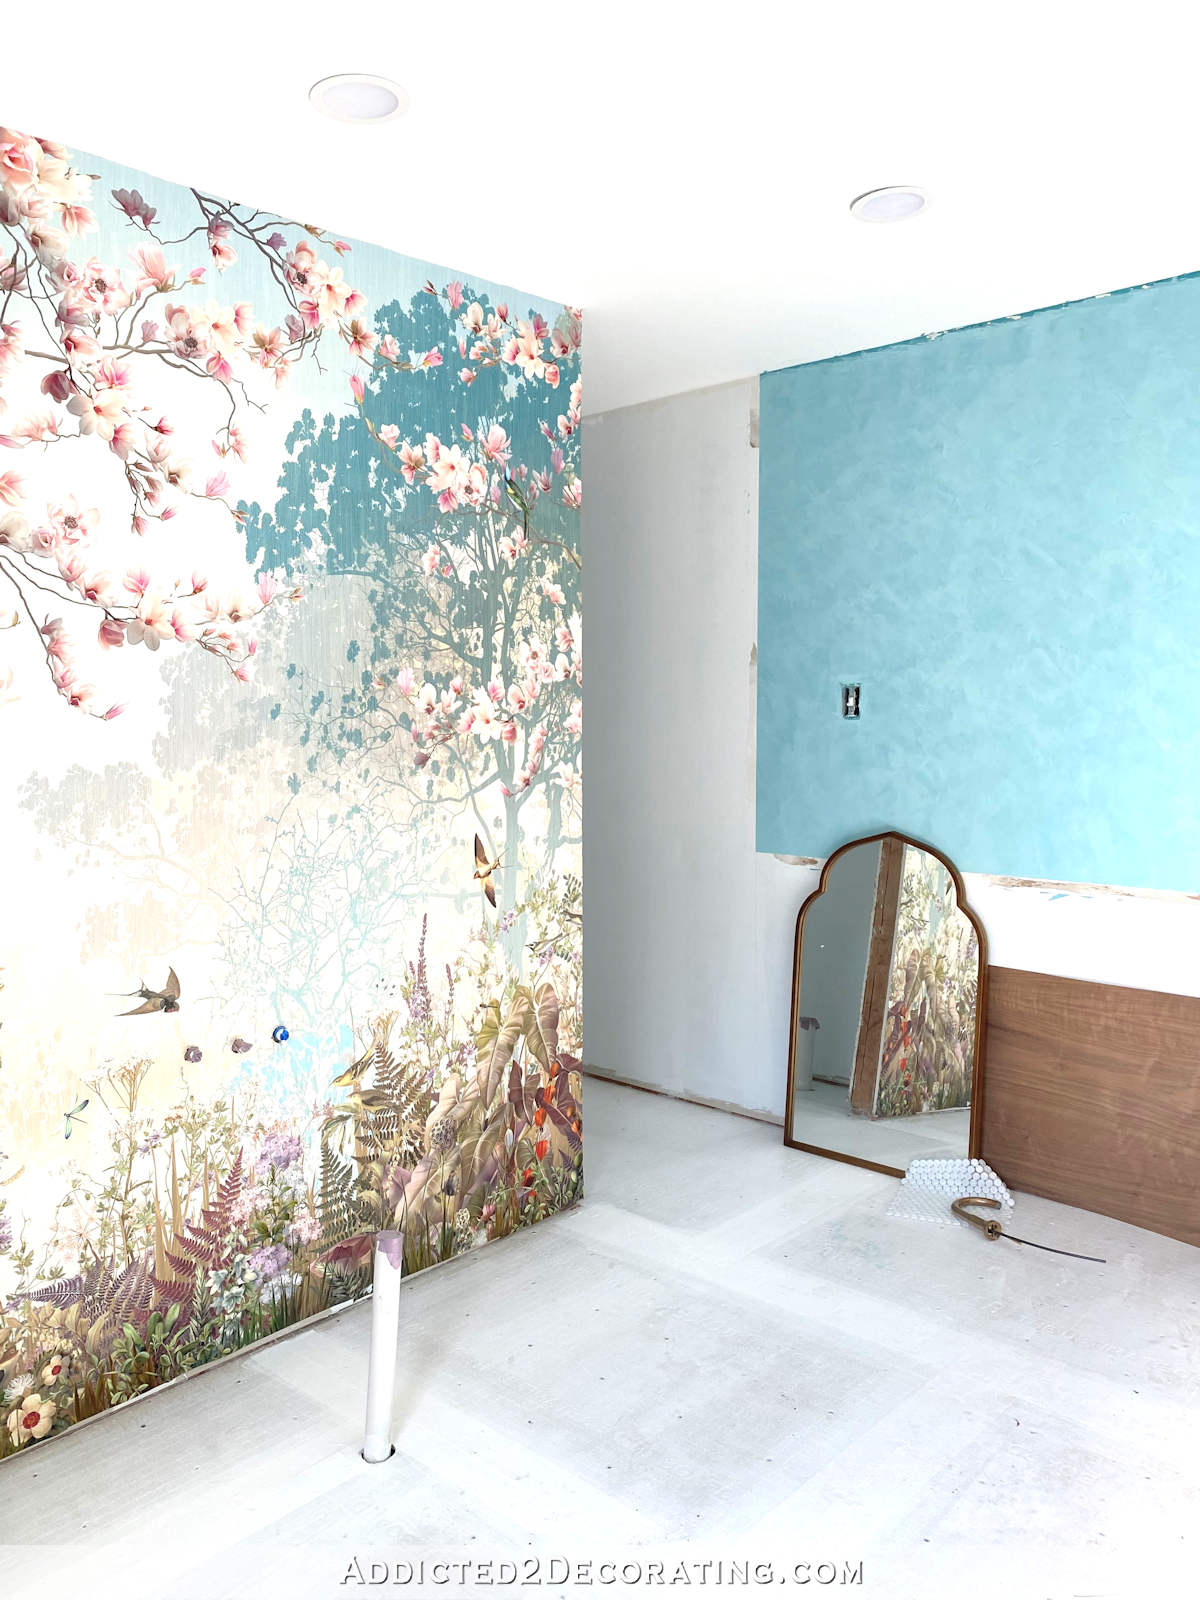
The blue is a beautiful shade. Is it a wash? and want are doing with the white area of the wall.
The blue is Modern Masters Venetian Plaster finish. The white will be either picture frame wainscoting like I have in the music room, or judge’s paneling like I have in the hallway bathroom.
Glad the corbel idea is a winner – excited to see the results.
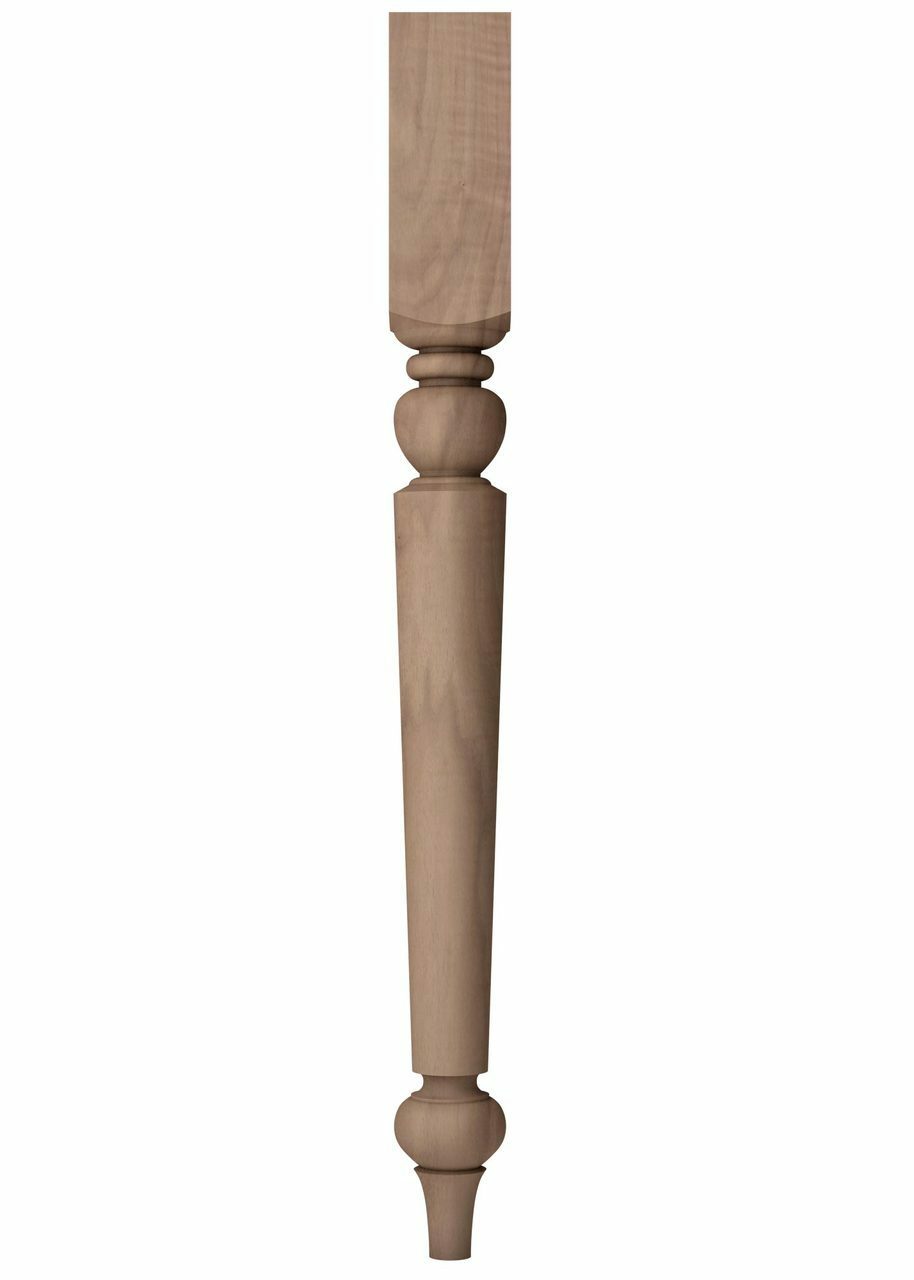
What about making the vertical boards look like intentional rectangular columns? If using a pre-fab column, Maybe even splitting the column vertically so half is on either side or if u build your own, just don’t make it very deep so it doesn’t stick out too far. The bathroom is stunning, and whichever option you choose, it will be gorgeous!
I can’t afford to lose any more inches of space in the doorways. I’m already under the ADA recommended 36 inches, so I can’t add anything that will make those entrances to the shower or toilet area any narrower.
Makes sense. I think the solutions you’re looking at will work fantastic. Can’t wait to se the finished bathroom!
This is a great idea! I love the corbel idea the best, either one will work for your idea!
Either are great ideas and you will make it look intentional and fabulous. I had no idea it had a name but my last house had a hanging return that just ended in the middle of the wall between the living room and kitchen and I always thought it looked ridiculous. I even talked to the sales rep about the new house I am building making sure it wasn’t going to have another one of these. You are such a wealth of knowledge, I’m glad I have a name for it now.