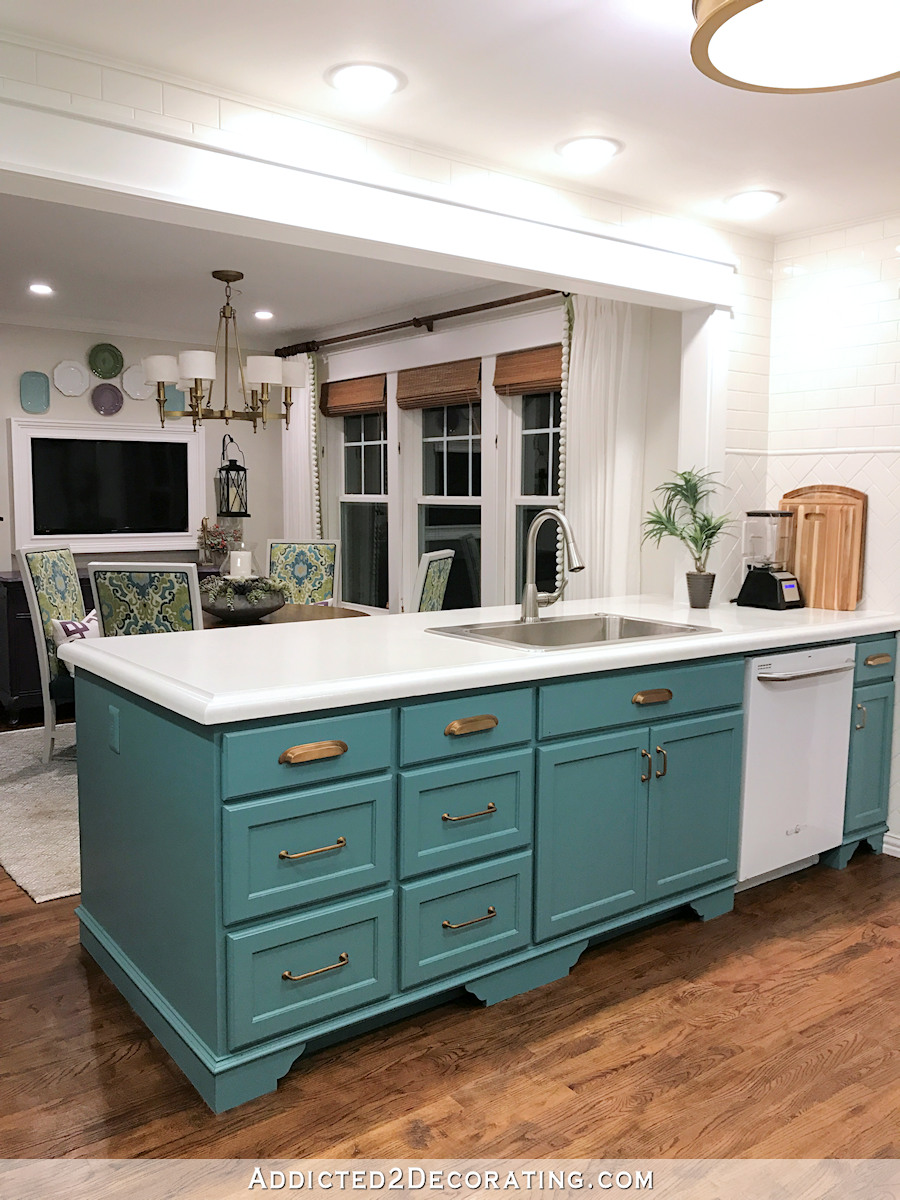
Cabinet Doors Updated With Molding
If you’re looking to update your kitchen but can’t afford new cabinets, then Brandi from Don’t Disturb This Groove just may have
The doors started out looking like this…
And after the molding was applied and the cabinets were painted, they now look like this…
Pretty amazing, right? I especially love the added “X” detail on the cabinet doors above the stove. Head over to Don’t Disturb This Groove to see many more photos and details of the cabinets.
I’m no stranger to budget cabinet door makeovers myself. When I couldn’t afford new cabinet doors for my kitchen, I had to do a little creative surgery on my double raised panel doors to turn them into recessed panel doors. When buying new cabinets isn’t an option, it just takes a little creativity to update what you have!

Addicted 2 Decorating is where I share my DIY and decorating journey as I remodel and decorate the 1948 fixer upper that my husband, Matt, and I bought in 2013. Matt has M.S. and is unable to do physical work, so I do the majority of the work on the house by myself. You can learn more about me here.

Hi Kristi! A million thanks to you for featuring my updated cabinets. My husband and I smile every time we walk in the room, knowing that we were able to drastically change the look of our kitchen on such a small budget!
We used moulding and paint to spruce up our 50’s plywood cabinets, too. We were originally going to do both the upper and lower cabs, but ultimately just did the uppers. Although we chose to make the moulding stand out by painting it the same colour as our wainscot. Our kitchen is no where near finished (or updated at all), but it was a huge improvement over the former forest green (which the counter, unfortunately, still is!).
You can check it out here, if you’re interested! http://flickr.com/gp/58197583@N03/H0647T
Wow ! This looks amazing.
These cabinets look awesome. I am going to do this to my ugly 1980s laminate cabinets. Question, what did you use to attach molding? Also what tools are needed to cut the molding. Thanks! Renee
Renee, if you click on one of the links or photos in this post, it’ll take you to the original source of this project. I think she gives the details on her blog. 🙂