DIY Cabinet-Style Bedside Closets – Part 1
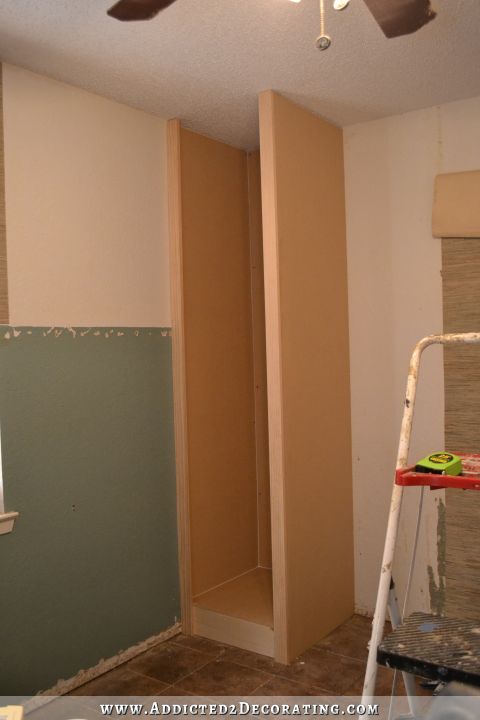
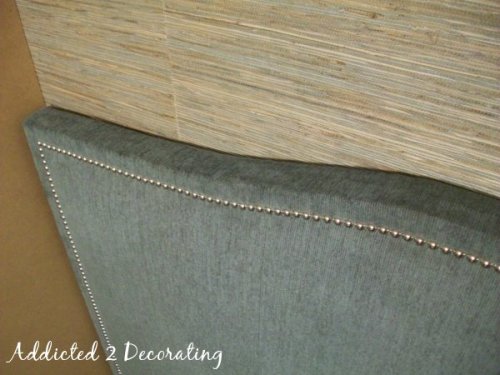
I ended up not spending as much time at the condo this weekend as I had originally planned, but I did manage to get one of the bedside closets completely built, with the exception of the baseboards and trim at the top. But the basic structure is finished, including the door. Here’s how it looks right now…
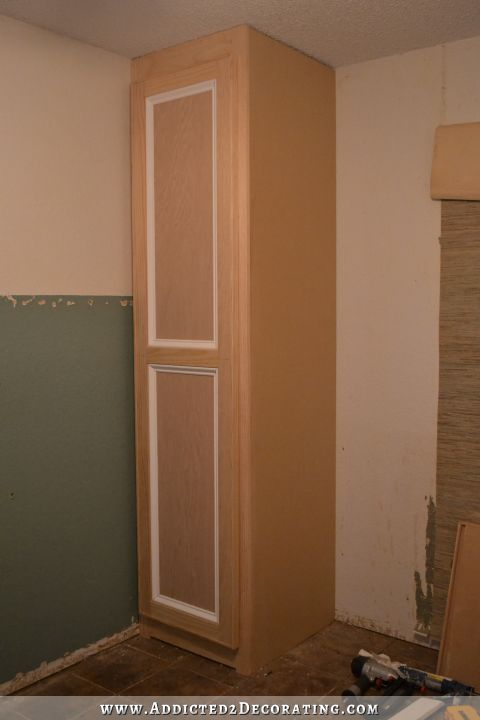
Not too shabby, right? 🙂
I did end up using MDF for the box of the cabinet, but this time I used 1/2-inch MDF for the two pieces that are attached to walls, and 3/4-inch MDF for the one free-standing side. Last time I used 1/2-inch for the entire thing, and I just didn’t feel good about the way it was built.
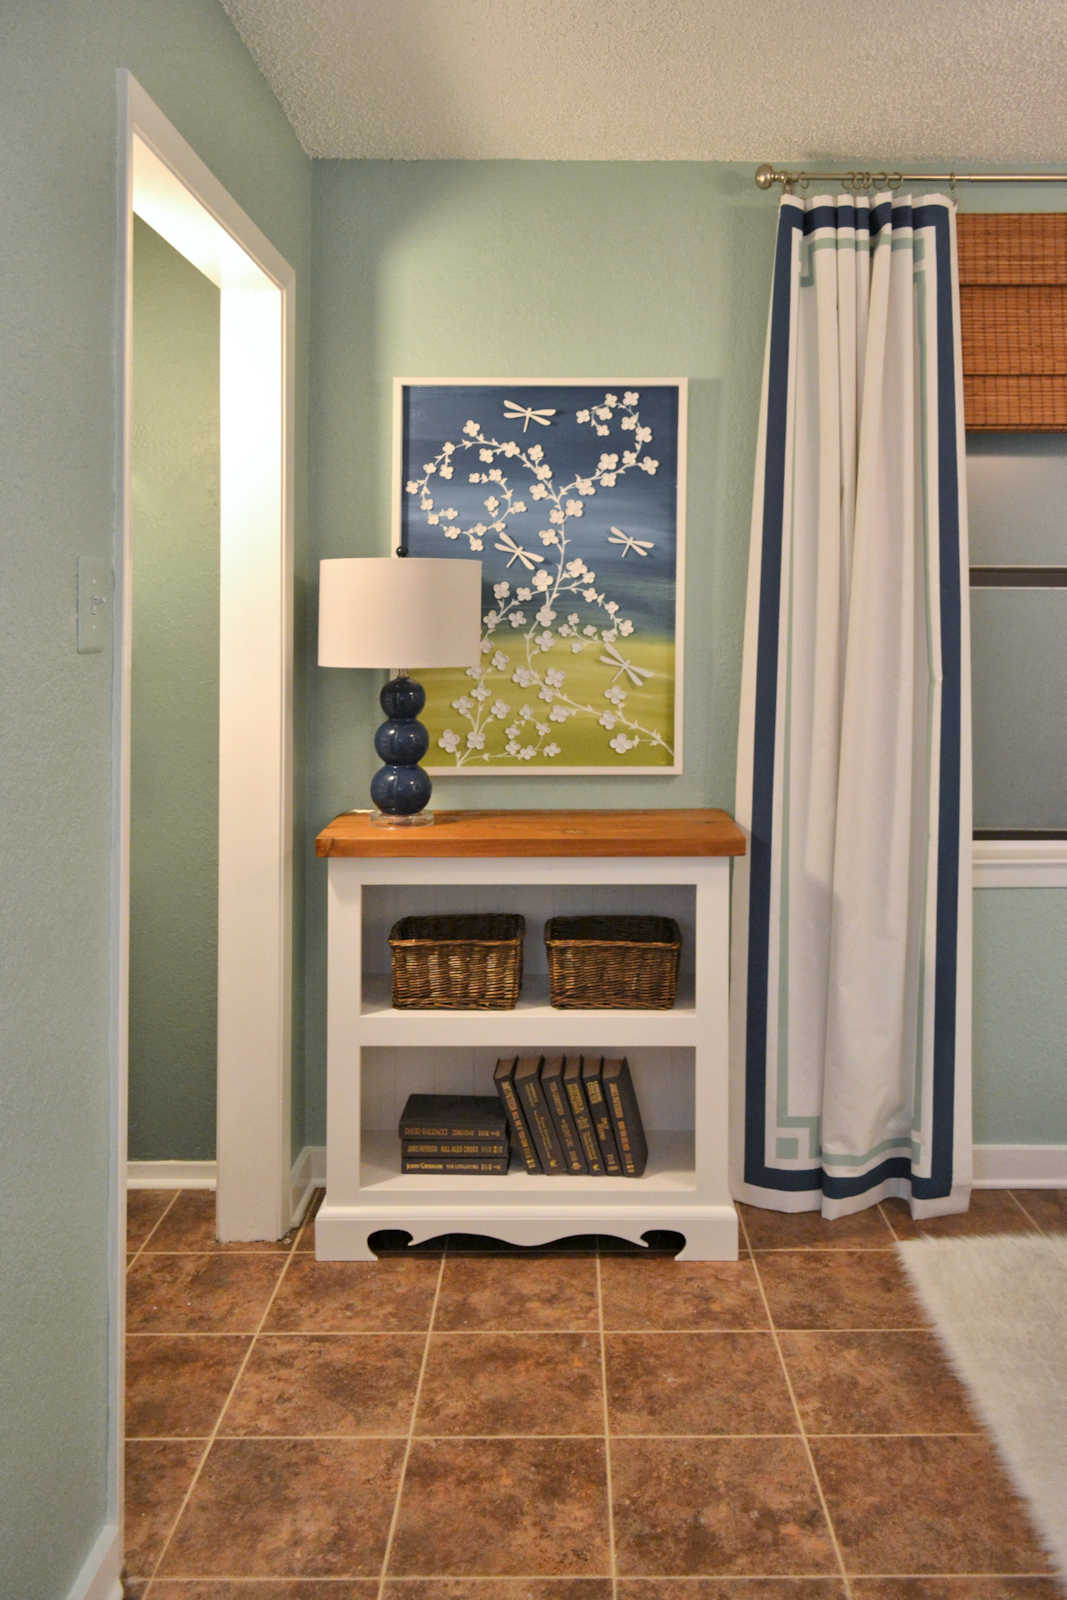
I also made these closets narrower than the other ones. I heeded the advice of many of you and allowed for room for shelves or very narrow tables on either side of the bed. The available space between the closets will allow for up to a a queen size bed with room to spare for shelves or very narrow tables, but at least it’ll be something to set a drink, phone, glasses, book, etc., on at night.
There are probably 100 different ways to go about building a closet like this, so let me show you how I did mine.
Materials & Supplies:
- 1/2″ MDF*
- 3/4″ MDF*
- 2″ x 6″ lumber*
- 1″ x 3″ lumber*
- 1″ x 6″ lumber*
- 1/2″ plywood*
- lattice strips*
- base cap moulding*
- quarter round
- 1″ x 3″ MDF board
- 1″ x 2″ MDF board
- pine cove moulding
- Wood glue (this is the best brand)
- 1.5″ screws
- 1.5″ 16-gauge nails (for nail gun)
- 2.5″ 16-gauge nails (for nail gun)
- 1″ 18-gauge nails (for nail gun)
- 2.5″ wood screws
- latex caulk (this is my favorite)
- cabinet door hinges (I used these)
- magnetic cabinet door catch (like these)
- adjustable closet rod(s) (I used these)
- wood filler
- 150-grit sandpaper
- primer
- paint
- paint brush (this is the only one I use!)
*Amounts and cut sizes will depend on the number and size of the closet(s) you’re building. See instructions below for how each item is used to determine how much and what sizes you’ll need.
Tools:
- circular saw (this is a good one)
- drill (and don’t forget your screwdriver bits)
- air compressor (I purcased this set and love it!)
- 16 gauge nail gun (yep, this set again)
- 18-gauge nail gun (and again…I love this set)
- framing square (that looks like this)
- caulk gun (this one is great)
- level (longer ones are more accurate on a tall project)
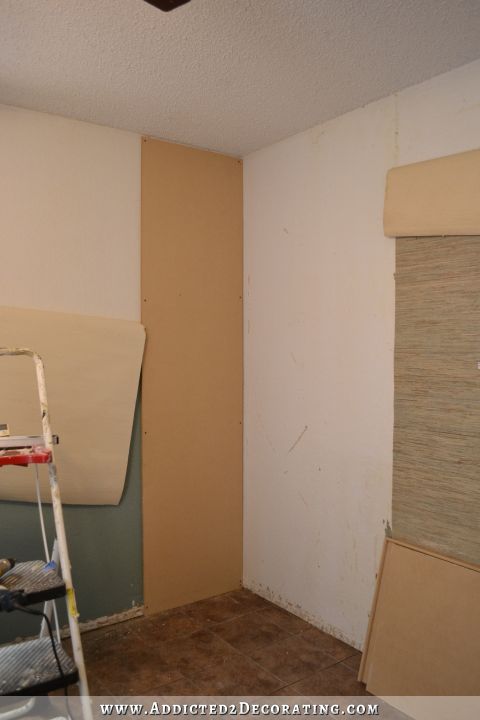
I started by tearing out the old closets…obviously. This left my wallpaper is pretty sad shape. The wallpaper had somehow attached itself to the MDF on the old closets, so as I pulled the MDF off the walls, it pulled the wallpaper off.
So to build the new closet, I started by attached a 1/2-inch piece of MDF to the wall. This piece was literally a full sheet of MDF cut exactly in half (I had Home Depot cut these for me), so it was 24.5 inches wide. I used my circular saw to cut the height down to 95 3/4 inches.
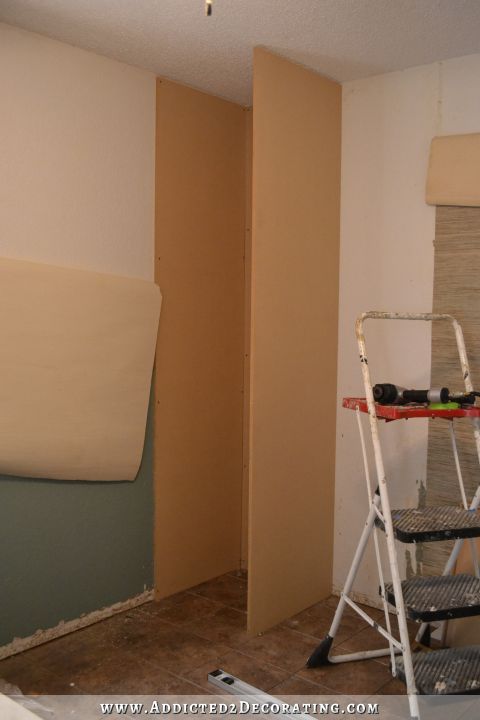
Next I screwed the back piece to the adjacent wall. This was also a 1/2-inch piece of MDF, cut to the width that I wanted the inside of the closets. In this case, the back piece was 23 inches wide.

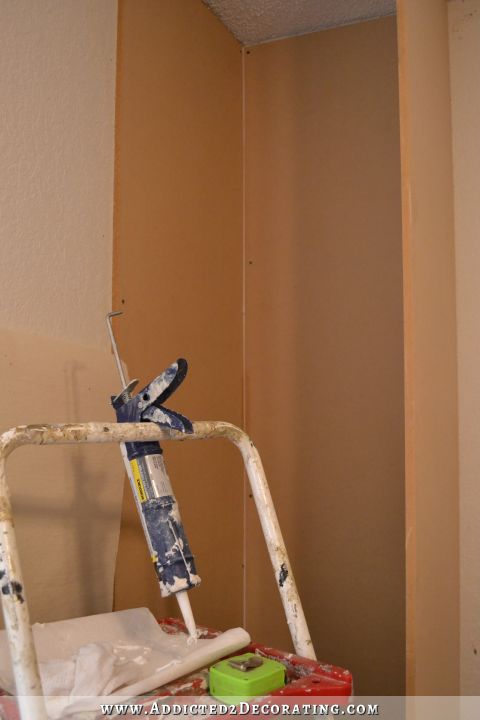
And then I installed the third side of the cabinet. This is the 3/4-inch piece of MDF, and I attached it using wood glue and 1.5-inch 16 gauge nails in my nail gun. I used my framing square to be sure that this piece was sitting perfectly square to the back piece.
While I was still able to get a ladder inside, I went ahead and caulked the corners.
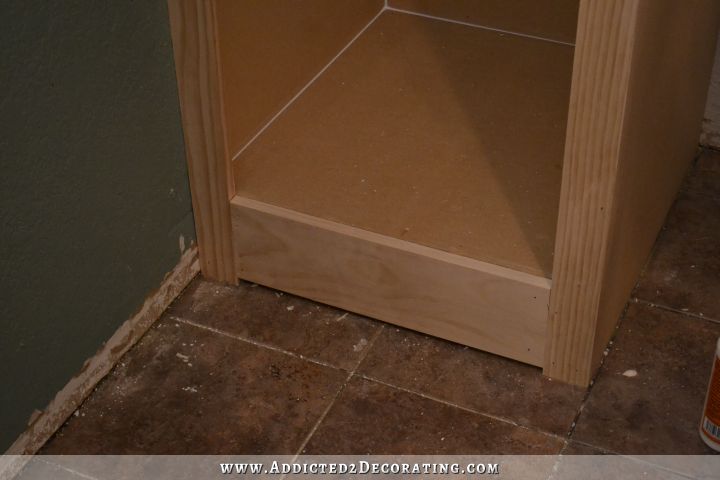
Next I framed out the “floor” of the cabinet. I used 2″ x 6″ lumber for the outer box. I measured, cut the pieces, and placed them in the bottom of the closet to be sure they were the right size. Once I had the pieces cut correctly, I removed them and used 2.5-inch screws and wood glue to assemble the box.
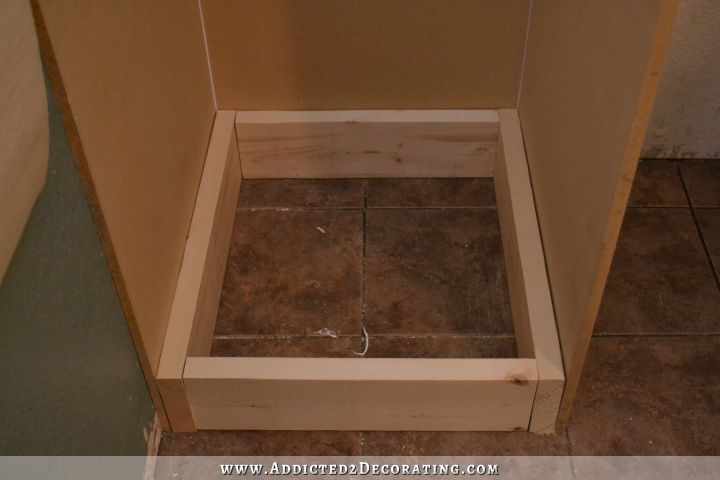
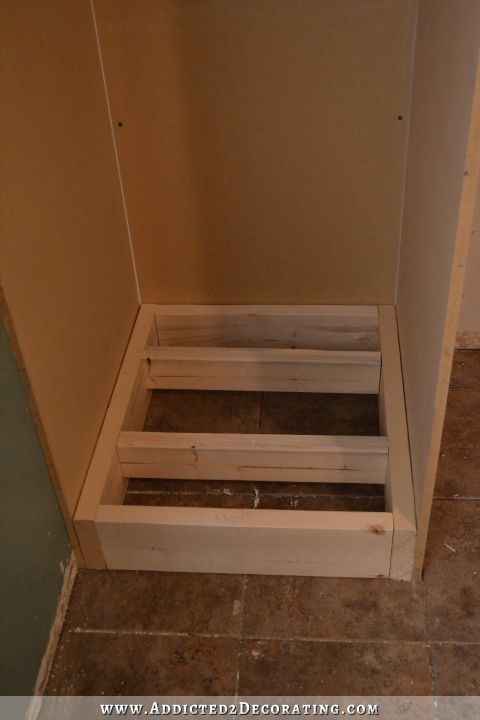
I also added support in the middle using 2″ x 4″ lumber, and also attached those using wood glue and screws. When I had the base built, I added wood glue on the outside of the three pieces that would butt up against the MDF pieces, and then put the base in place. I also used 2.5-inch 16 gauge nails in my nail gun to attach the base to the MDF on the sides and back.
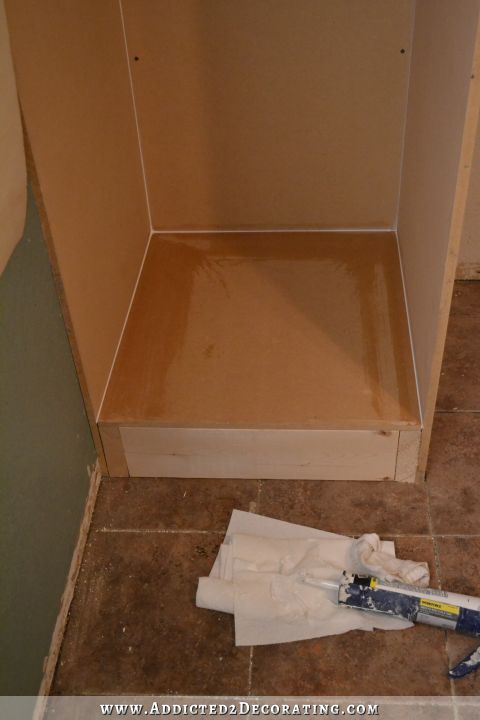
Next I cut a piece of 1/2-inch MDF to go in the bottom. I glued and nailed it into place, and then caulked the edges.
With the very basic structure finished, it was time to start adding the finishing pieces. I started by adding the stiles (the vertical pieces) to the front. For this, I used 1″ x 3″ lumber.
This is something I’ve learned about building, and that I did differently from the old closets I built in here. It’s generally fine to build things like this out of MDF, but when it comes to trimming it out, it’s always better to use real solid wood boards instead of MDF boards. The rails and stiles really do lend a great deal of strength and integrity to the structure, and MDF boards are just not as strong as real lumber. So I suggest always using real wood boards to frame out a structure like this.
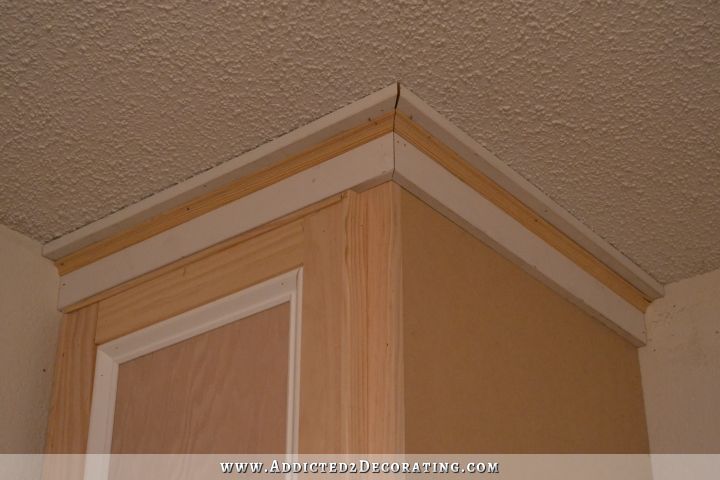
So the stiles (verticals) went on first, all the way from the top to the bottom. Then I used a scrap piece of MDF board cut to the width of the closet interior, and used a liberal amount of glue and several nails to attach it to the ceiling just behind the stiles.
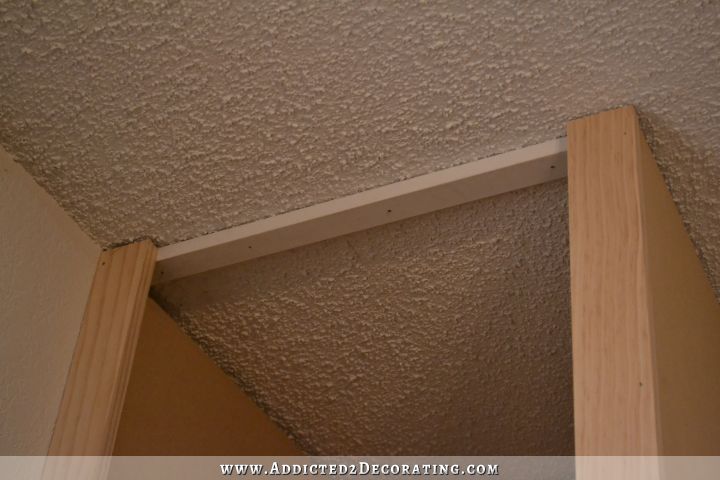
This gave me something to attach the top rail (the horizontal piece) to. Another option would have been to use my Kreg Jig to build the entire frame separately, and then attach it, but I forgot to bring my Kreg Jig with me, and this worked out just fine.
So then I cut the rails out of 1″ x 6″ lumber, and attached one at the top, using wood glue and nails and attaching it to the board I nailed into the ceiling. It’s also glued to the stiles.
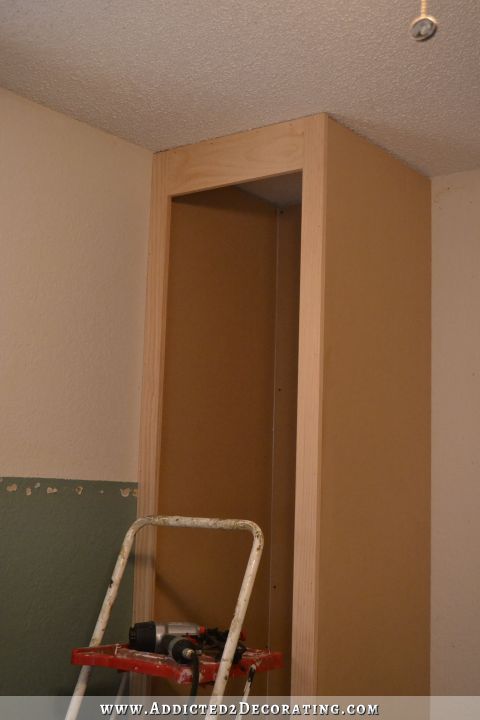
And then I attached the bottom one by gluing and nailing it to the 2 x 6 behind it.
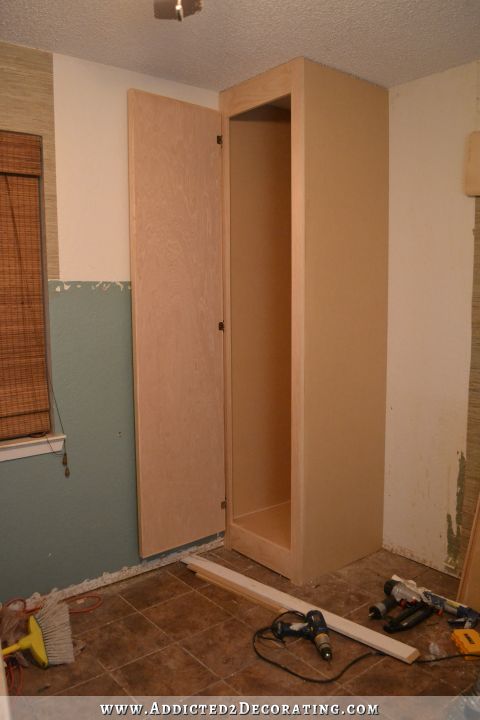
And with that, the basic cabinet was finished.
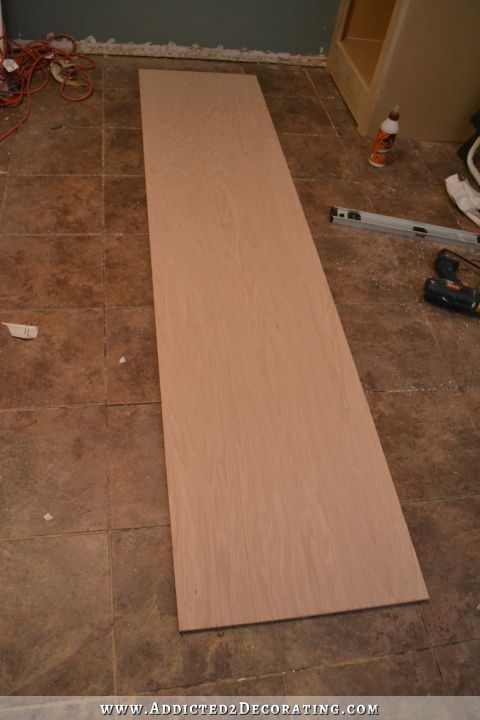
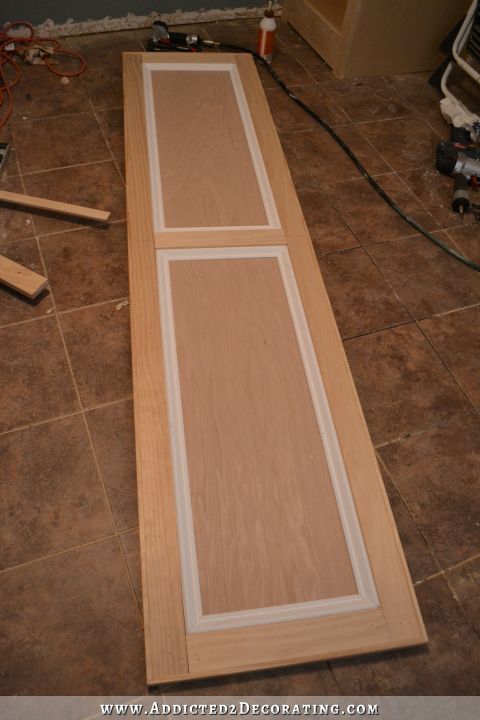
Next it was time to build a cabinet door. For this, I started with a 1/2-inch piece of plywood, cut to 20 inches wide and 86.5 inches tall.
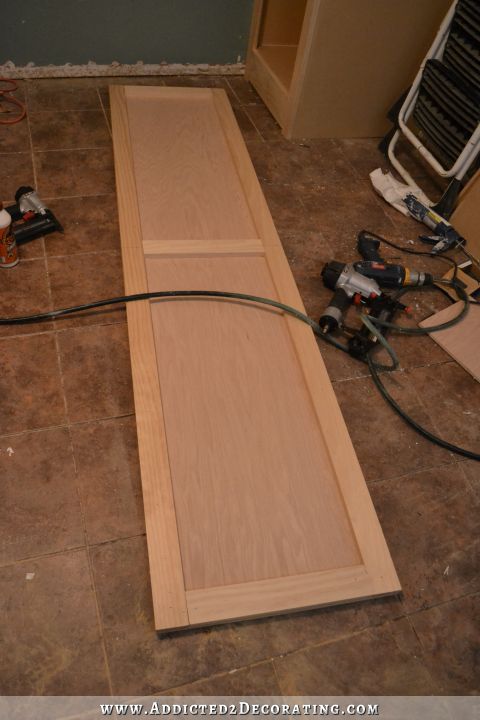
Using 1″ x 3″ lumber, I cut stiles for the sides, and attached them to the face of the plywood using wood glue and 1-inch 18-gauge nails with my nail gun.

Then I cut three rails out of the same 1″ x 3″ lumber, and attached them in the same way, with one at the top, one in the middle, and one at the bottom.
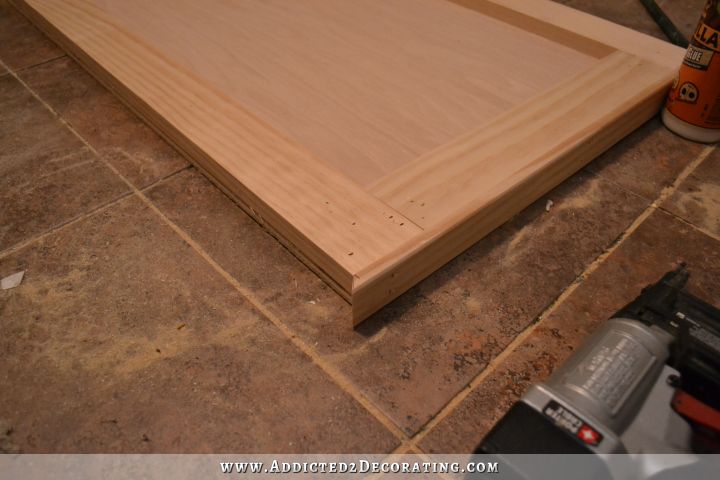
Since this method left unsightly plywood edges exposed, I needed to cover those up. I did so by using pieces of thick lattice, mitered on the corners, and attached to all four sides of the door with wood glue and 1-inch 18 gauge nails. This gave the edges a nice finished look.
And then finally, I used the same base cap that I used on my recent fireplace upgrade…
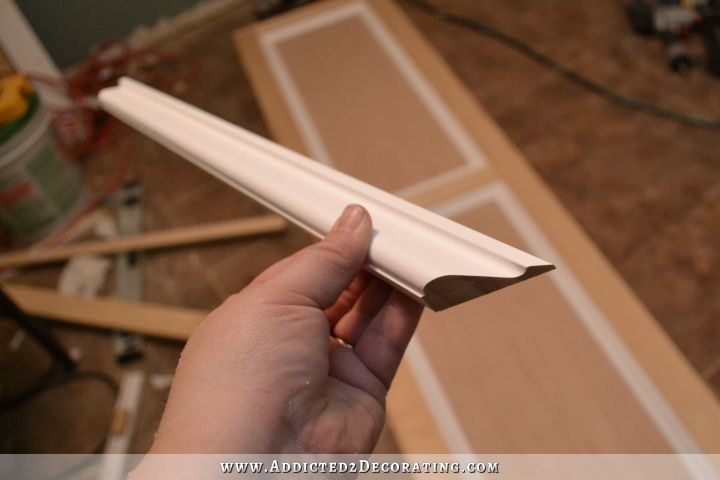
…and I cut pieces to go inside the frames created by the stiles and rails. I glued and nailed those into place.
That finished up the basic door build, so I decided to go ahead and install the door. I’ll need to take it off to paint the cabinet, but I just wanted to be sure that it fit properly, and that everything worked like it should. I used three cabinet door hinges to hang the door.
And since my hands were a bit full and busy as I was hanging the door, I didn’t get a picture of how I installed this big door by myself. But the way I did it was to use a scrap 1″ x 3″ piece of MDF, which is the same height as the baseboard I’ll be using, and I placed it up against the cabinet. Then I took two scrap pieces of 1/2-inch MDF and stacked those on top. That would allow spacing between the baseboard and the bottom of the cabinet door. And then I placed the cabinet door on top of that stack. This allowed me to easily center and level the door, and then freed up my hands (as I held the door in place with my head) to screw the hinges into place.
But everything works great, feels really solid and sturdy, and I think it’ll look great when I get it all trimmed out, primed, and painted. I still have quite a bit of wood filling, sanding, and caulking to do before I can get to the priming and painting, though.
I would imagine this project will take me at least two more full days. But hopefully the second closet will go much faster since I know what I’m doing now. The first one took a while since I was trying to figure things out along the way.
And as far as the cost, one closet cost $168. That’s not too bad for almost 30 cubic feet of storage, right? 🙂
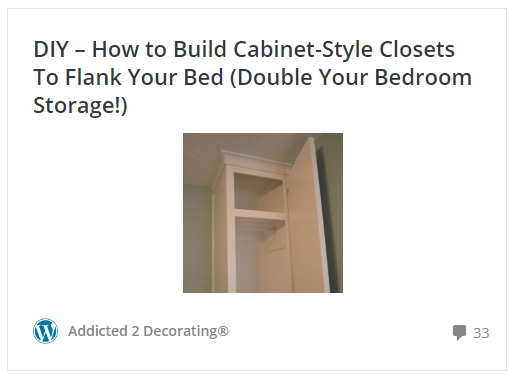
UPDATE: Click here to see Part 2 of this project…
And to see the final post on this built-in closet project, click here…
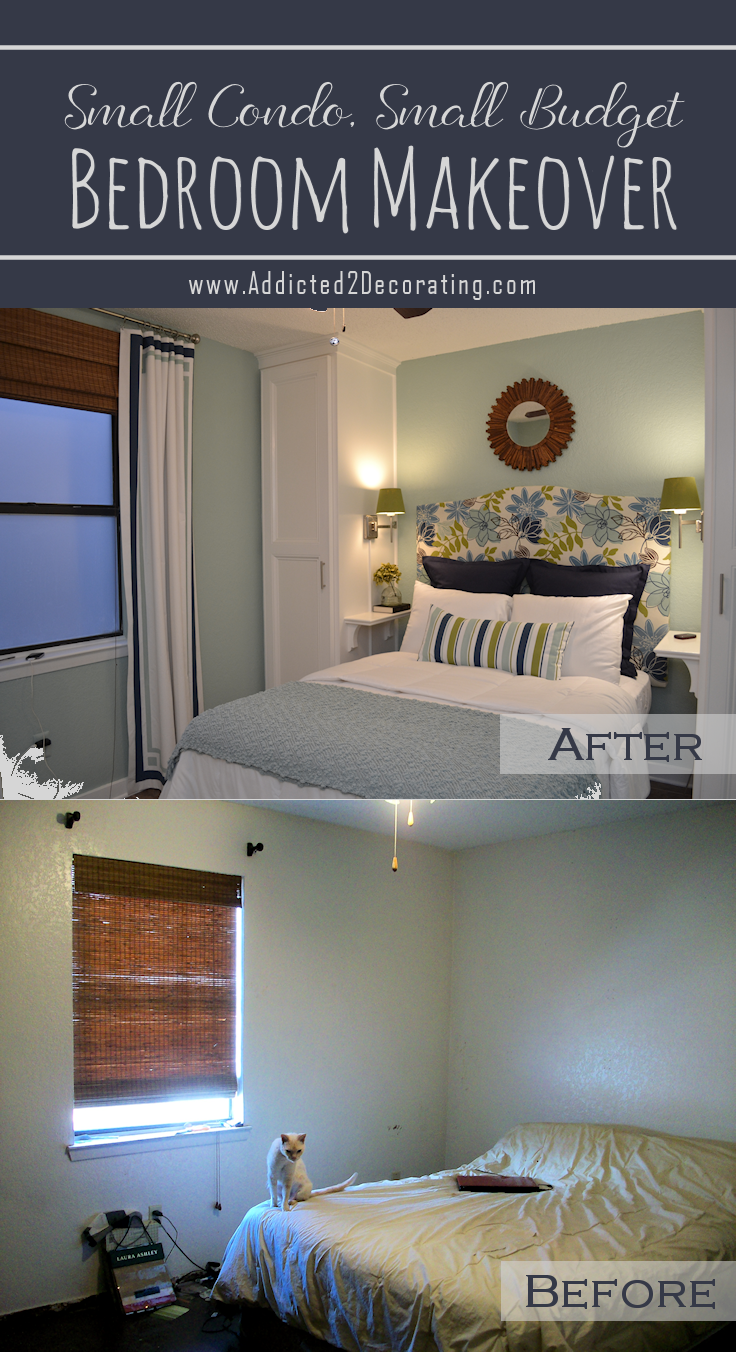
And don’t miss this finished bedroom makeover! You can click here to see the whole before and after of this small condo, small budget bedroom makeover.

Addicted 2 Decorating is where I share my DIY and decorating journey as I remodel and decorate the 1948 fixer upper that my husband, Matt, and I bought in 2013. Matt has M.S. and is unable to do physical work, so I do the majority of the work on the house by myself. You can learn more about me here.
Nobody, but NOBODY does it better. And don’t argue with me, lol.
I’m glad you left room for a small table – everyone needs an alarm clock beside the bed. Looks great!!!
This looks great so far. An idea for small table would be to build a support inside of the cabinet and then attach a small shelf right to the cabinet with a decorative corbel. The shelf could be finished off nicely w/moulding or even cut on a curve. Hopefully that makes sense, because I sure can picture it better than I can explain!
If you were actually going to use this, wiring lights inside would be nice. But it should work great for the next owner as is!
I love the way you built the door. I may try that soon.
You make things look so easy.
“I used my framing square to be sure that this piece was sitting perfectly square to the back piece.”
Would you show how to use a framing square in a future post please. I read about them on all the DIY sites but I really don’t know how to do it.
I’ll try to remember! I took a picture yesterday for you, and then left my camera at the condo when I left last night. 🙁
First of all, congrats to both of you on your weight loss. Very impressive.
Secondly, that closet is really nicely built and I’m sure the second one will be just as good. You could put a small fold-down shelf on the side of each closet that would hold a lamp, alarm clock and/or glass of water.
great storage space and good for whoever is buying that gorgeous flat that they not only have the cupboards but that you are so considerate about the space for tables! I love your tutorials because they explain so much – I’ve just recently poked around a decoration blog that got a lot of hype but which has none of your very helpful explanations. So I will stop reading that because why should I always complain about missing instructions internally when I get them at your blog ALL THE TiME? You rock 🙂
Yay! I’m so glad you and others find my tutorials helpful. 🙂
If I ever have my own home, I’m SO making these! ~:)
Sizing the closets to enable a queen size bed to fit in between was a great idea. With the added room for a small table, someone might even be able to fit a king-size bed, maybe? Will you be adding a shelf and hanging rod(s) into the new closet(s)? With all the new added storage, I have no doubt that your condo is going to sell very quickly once you put it on the market.
And congratulations on your weight loss!
Onward and Upward!
Without the shelves/small tables, a king-size bed would definitely fit in there. But those rooms are so small that a king-size bed pretty much takes up the whole room. 🙂 I will be adding hanging rods to both of the closets. I’ll put two in one of them for short items like shirts and such, and then in the other I’ll put just one for long items.
Sounds great!
This is JUsT what I needed to build in my laundry room. Love your blog. You have helped us remodel so many things!!
The closet looks great, but how are you going to fix your beautiful wallpaper? Do you have extra lying around to fill in where the closet size narrowed? I would love to see how you fix wallpaper pulled off the wall, I know someone with a similar problem. Thanks for all the great posts, you inspire me to start renovating( without my husband having to do it ;o) !!
I do have extra, and I’m just hoping it’s enough!! A coupe of pieces that came off the wall are salvageable. They came off in whole pieces. But a couple of others were ripped, so they’ll need to be replaced.
You made this project seem so easy. Breaking down the steps is a plus! Looks great so far
You are doing so great! This condo will be sold before you know it. I couldn’t be more proud if it were my own. I, too, was wondering about the grasscloth wallpaper. Is it possible to rehang what was pulled off?
Some of it is salvageable. Thankfully I have an extra roll of the grasscloth, so I think I’ll have enough to fix everything.
You get so much done in a day. I have a question — why did you choose to build it attached to the wall vs. building an independent piece? I know you are selling the condo, would you do it that way if you built at your current home?
I wanted them to actually be buiilt-ins rather than looking like I went to IKEA and purchased some free-standing wardrobes. I personally prefer built-ins to free-standing pieces. I think they make a room look more custom. I would do it the same way if I were building it in the house.
The new owner will love all the storage!!! Could you put shelves on the outside of the cabinet so that the person wouldn’t need a table at all? I know that I couldn’t make it look good, but I’m sure you could.
I’m considering doing that. I have a few extra corbels somewhere in my garage that I don’t plan on using at the house, so I could use those and attach some shelves.
That is one gorgeous closet, Kristi! Of course it is – YOU built it! I still cannot get over how talented you are building all this stuff by yourself. “This allowed me to easily center and level the door, and then freed up my hands (as I held the door in place with my head) to screw the hinges into place.” I guess your head is a tool, too! 🙂 The creative things you do to get the job done never cease to amaze me!
Wonderful! The door is fab and the closet size looks perfect for the room. What color paint will you use on these awesome closets?
I’m thinking they’ll be white like the trim color. Or maybe I’ll paint them the teal/turquoise of the lower wall. Hmmm…I hadn’t really thought that far ahead! 🙂
I think the white trim color would make these closets look fabulous and accentuate the built-in look!
Incredible as usual!
I love reading your blog and watching your projects come to life! Thanks for all the inspiration and great ideas!
Krist,i thank you so much for detailed sharing, you encourage me again. I have the same project to do, and now, even detailed instruction from you
Kristi, is the ceiling at an angle? Closet looks amazing!
Nice job you have done with alittle space.
Beautiful closet.
I have loved this idea ever since I first saw it and wanted it in my house. Now I think I’ve found a place for it. I want to put a cabinet/closet like this in my laundry room for coats and such. I do have a question…. Will the MDF board be strong enough to hold a rod with a bunch of coats on it?
It should be, but my preference is to attach a small square of plywood to the MDF (be sure it’s attached with wood glue and nails), paint it the color of the interior, and then install the bar to the plywood, preferably using screws that will go through the plywood and into the MDF. That will most definitely be strong enough for whatever you want to hang on the rod.
Dang! I just saw this and I am seriously building the courage to do the same thing. Those cabinets are so perfect for a small room. Amazing job!!!