Cheap & Easy Curtain Panels Customized With Paint
The condo bedroom now has new curtain panels to go with the new headboard fabric, and I made these two panels for about $30. That’s $15 per panel. Not too bad, right? Especially for curtain panels that look like they were custom made to go with the headboard. I don’t think I could have done better had I shopped at WalMart!
These couldn’t be easier to make. I started with six yards of drapery lining. I don’t know the specific name of the lining I used, but it’s very similar to blackout lining but lighter in weight. It has the fabric side and the rubbery side just like blackout lining, but it’s about half the weight of blackout lining. I’ve always called it dim out lining, but I know that’s not the actual name. Anyway, it costs $7.99 per yard, but of course, I bought it during a 50% off sale. I never, ever pay full retail price at JoAnn Fabrics.
I cut the pieces to the length I wanted, plus 12 inches. That left me with six inches for the top hem, and six inches for the bottom hem. I put a double 3-inch hem in the top, and another double 3-inch hem in the bottom. In other words, I folded the fabric up 3 inches, pinned it in place, and ironed the crease in. Then I folded it again 3 inches, pinned, ironed, and sewed it in place. I did that on the top and the bottom. I didn’t even put a hem on the sides because this lining fabric doesn’t fray or unravel along the selvage edges since it’s backed by the rubbery stuff. And I didn’t bother to do any type of blind hem stitch. I just sewed right through all of the layers off fabric. I made this as quick and easy as possible.
With the panels hemmed, I was ready to create my design. For this, I used paint. Just regular latex paint. I added paint conditioner (Floetrol) to the first paint color, but then skipped that step on the second paint color because I don’t really think it’s needed. It does make a slight different in the ease with which the paint spreads on the fabric with a brush, but the difference isn’t enough to warrant purchasing paint conditioner if you don’t already have some on hand.
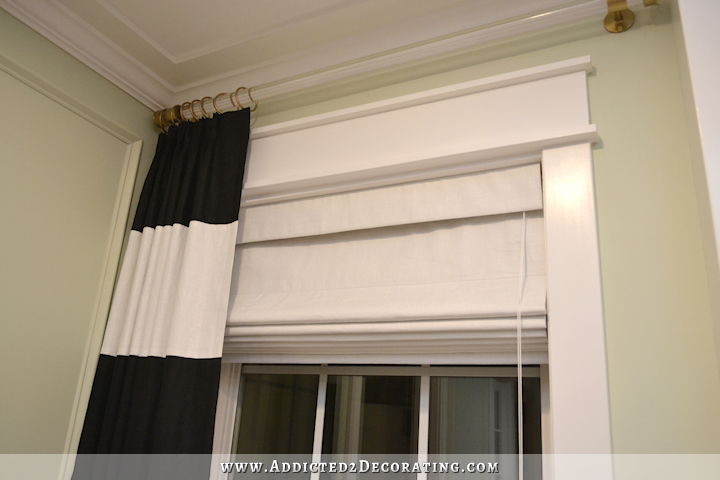
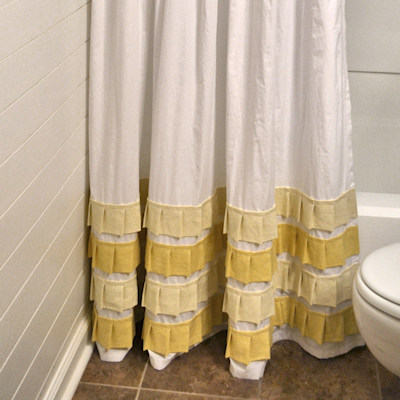
I started by taping off a 2-inch band all the way around the panel, and I painted that navy blue.

Then I let that dry, removed the tape, and taped off the design for my second color. I used the paint that I used on the walls for this one.
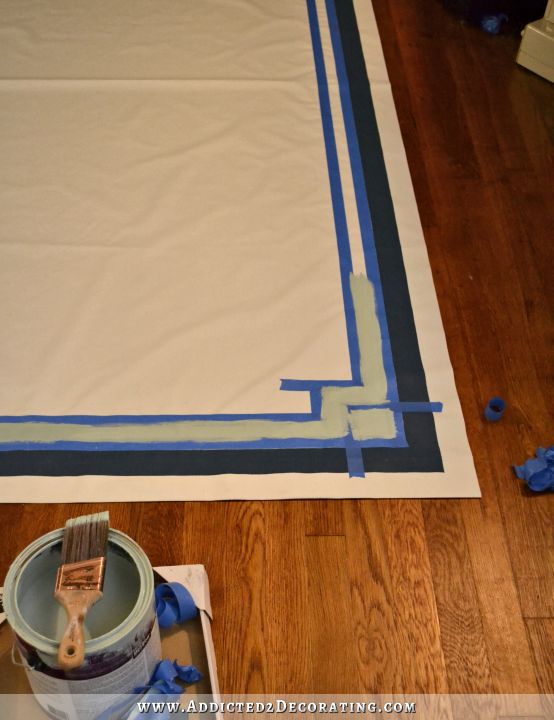
With the second color painted on, I removed the tape and left the curtain to dry for a few hours.

One thing I love about painting on this type of drapery lining is that the paint doesn’t bleed through to the back side. You can see the design on the back, just like you would on any type of printed fabric, but the back still has a nice, clean look to it.

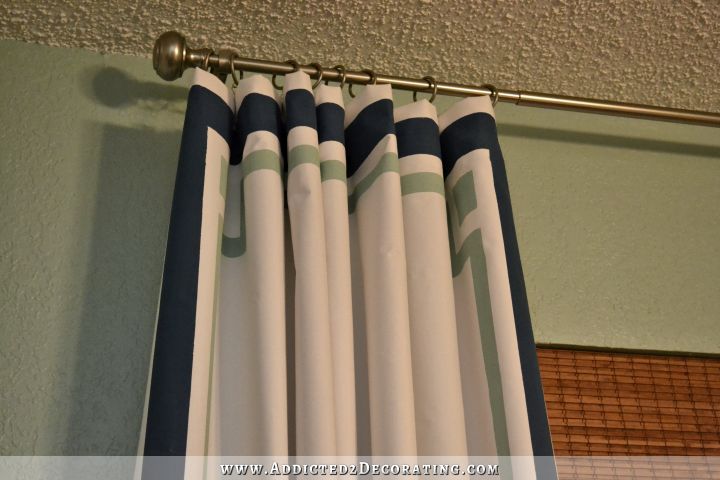
I hung the panels with clip rings and a curtain rod that I already had on hand. So simple!

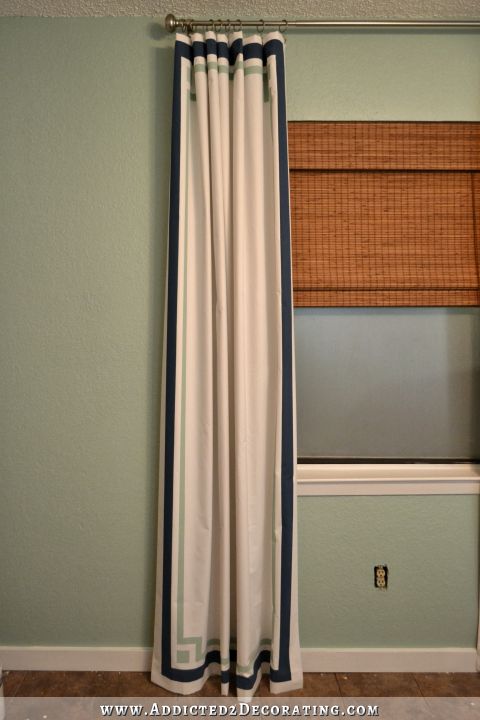
I think they turned out great, and they look really nice with the headboard. As soon as I get everything cleaned up and staged in here, I’ll show a wide view with the curtain panels, closets, and headboard in place.
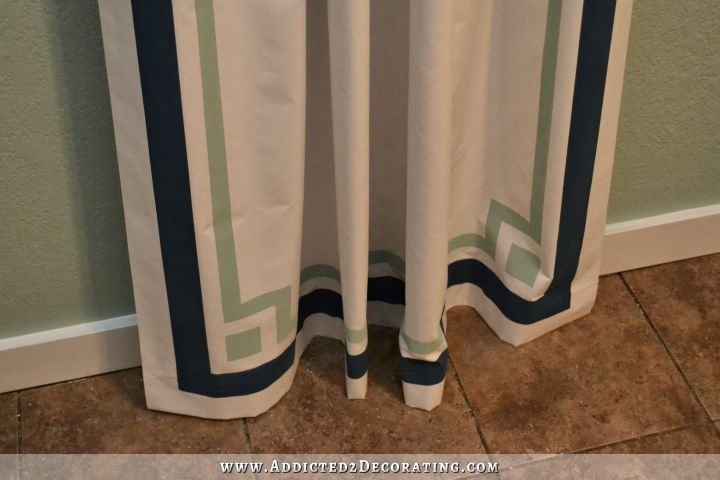
One thing about this fabric is that it’s so lightweight that it’s probably a good idea to use drapery weights at least at the bottom corners of the panels.
I’ll probably go back and add some weights so that they hang straight (I had to do quite a bit of wrangling, and even had to turn off the ceiling fan to get decent pictures), but rather than buy drapery weights, I think I’ll try Robin’s homemade drapery weight idea that I came across on Pinterest last night. She used pennies glued to paper clips and clipped to the bottom corners inside the hems. I already have those things on hand, so there’s no need to spend extra money on weights if I don’t have to!
For as little money and time as I spent on these, I think they turned out great! And I hung them high and wide so that (1) they wouldn’t block out any light, and (2) they would give the illusion of a much bigger window. Before we actually show the condo to any prospective buyers, I’ll open the shades all the way to let as much light in as possible.

What I love about painted curtains is that you can get a custom look for very little money. And as far as the design, the options are endless. You can use stencils and/or painters tape to make just about any design your mind can come up with.
My main tip is to just be sure that you burnish the tape down with your fingers right before you paint. I would work on about two feet at a time, pressing the tape down really well, and then painting that area, then pressing the next two feet down really well, and painting that area. Other than that, it’s really pretty self-explanatory, and incredibly easy. Just a brush, painters tape, and latex paint are all you need. And because it uses so little paint, I think the sample pots of paint would be plenty for most designs if you don’t already have leftover paint on hand that you could use.
Painted curtains are very durable. I painted these curtains for the hallway/laundry room in the condo two-and-a-half years ago…
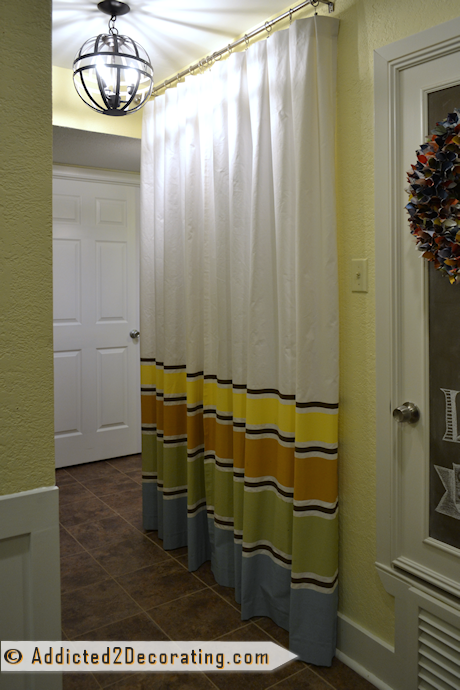
…and the paint still looks the same today. The curtains need to be washed, so I’ll be washing them by hand and hanging them to dry. We’ll see how that turns out. I definitely wouldn’t dry them in a dryer, though, because the paint could crack just like it does when you get paint on a t-shirt and then wash and dry it.
I’m almost finished with this room. As you can see from the pictures above, I still have to buy some outlet covers and install the quarter round on the baseboards. I also still have one wall that needs wallpaper removal and paint. And yes…some of the tile still needs to be grouted. 🙂
I’m actually really excited to see this room finished, even if it won’t look like I had envisioned it all these years. It just might turn out better!

Addicted 2 Decorating is where I share my DIY and decorating journey as I remodel and decorate the 1948 fixer upper that my husband, Matt, and I bought in 2013. Matt has M.S. and is unable to do physical work, so I do the majority of the work on the house by myself. You can learn more about me here.


You did a great job on them.
..They look fabulous!
You did a great job on them…They look fabulous!
Those look really good! I’ll be proud when you can mark the condo off your list.
They look awesome! Very custom.
Those curtains look so expensive and “custom”. They’re the perfect touch in that room. Amazing!
Love the curtain panels. And I LOVE the bedside closets. Completely awesome. I admire your talent and motivation! You could move the wood blinds up onto the wall above the window to complete the illusion of a larger window, if that’s worth your time. Good luck with that list of condo projects. I’m sure you’re going to have a relatively quick sell.
Krisiti,
These are gorgeous and your tutorial is as usual very clear and concise.
A question on the fabric you used – Would that be heavy enough but not too bulky to make fabric roll up shades or would it need to be glued to the shade vinyl?
Thanks.
I don’t think this particular fabric would be heavy enough. A blackout lining would probably be heavy enough, though. And I think it’s about the same cost at JoAnn Fabrics.
Beautiful! It looks like you didn’t have a problem with tape pulling up paint from the first stripe. Was that an issue?
I don’t think it would be an issue even if the paint dried completely before removing the tape, but I always remove my tape when the paint is still wet so it’s never an issue for me.
These came out so pretty!
Mind blowing! I would have never thought to do that!
I am so doing this for my living room especially since I haven’t found anything that really wows me for this new room. Thank you!!
Love it! Before reading your post I had thought it was grosgrain ribbon, but paint, wow! How cost effective, and looks FANTASTIC! Another job well-done!
Love them!
OMG they are absolutely beautiful. I just washed and ironed my drop cloth “drapes” and re-hung them in the living room. Now I think I will take them down after Thanksgiving and paint a few lines on them. I always get such good ideas from you and I thank you for them!
Nice!
Just what I need. And you’ve scored again!
Kristi,
You’ve convinced me that I can do this project!
I own a drapery workroom and have gone to an install without extra drapery weights before (professional no-no), but discovered that a 1″ lead washer is the perfect weight for drapery side hems.
Cute panels!
Cute drapes. I have heard of using washers (from the hardware section) for drapery weights. They already have a hole in them so you just sew them on somewhat like you would a button.
These look great! I painted some curtains for my boys’ room but used drop cloths instead of drapery panels. Definitely a more rustic look, but I loved the flexibility of choosing the exact colors that were right for the room. And of course, I loved the cost: curtains can get expensive! They are probably one of my favorite DIY projects to date. I just love them.
The one thing I personally would have done differently is to use a fabric medium so the curtains could be washed. Things in my house must be washable: I know that now!
These curtains are beautiful! Actually, the perfect design for my dining room. Will have to wait on a JoAnn’s coupon and get to work! Thank you, Kristi!
wow – these look GREAT — I was just thinking how great of an idea this would be if we used that cool new FrogTape that comes in shapes like Wavy and Chevron! I can imagine that with the ease of paint the sky’s the limit with ideas!
LOVE THIS!!!
They look great and the tutorial was very clear. I actually had never thought about painting curtains before but what a great idea!
I knew it! When you gave us a glimpse of the curtains a couple of days ago I instantly knew I’d love them: they are perfect!! I’ve already been toying around with the idea of painting fabric for my blinds and curtains, so thank you for giving us a tutorial on time!!
A question (because paint conditioner for fabric isn’t very easy to come by in Germany): Do you only need it for the spread of the paint or for the fabric to be washable afterwards? And do you specifically recommend Floetrol? I need to hunt down an American product anyway on the web, so I might as well go for something that you think is worth it 🙂 Thanks in advance for your advice!
The paint conditioner that I used (Floetrol) isn’t really meant for painting on fabric. It just helped the paint to flow a bit better, but it’s not really necessary. But if you do want to be able to wash your curtains, you’ll almost certainly need to use a fabric medium added to your paint. I believe this is the kind that I used when I painted my sofa, so you might be able to find it on Amazon or another online store that will ship to Germany:
http://www.joann.com/delta-ceramcoat-clear-textile-medium-8-oz/4226593.html
many thanks for the quick reply! I already ordered the medium and am looking forward to experimenting with it. Have a great weekend!
Kristi, You’ve done it again! Great job!!!
Beautiful!
You may have mentioned this and I missed it, but washing the curtains/fabric BEFORE painting them is very important. Our daughter just stenciled a beautiful green pattern onto some IKEA curtains that turned out gorgeous, until she washed them–suddenly they were about 6+ inches shorter!
You are doing a wonderful job! You inspire me every day.
Those turned out great. I can not believe the outcome for the little amount you spent.
I’m just curious, have you thought about moving the matchstick blinds up to the height of the curtain rod, so that they’re hanging over that part of the wall, making the window look even taller? I’d let it hang just over the top of the window, with that extra 18″ on the wall, making the window & room look bigger.
I actually went over yesterday and did that. 🙂 It looks great! Makes the window look much bigger.
I need to hang curtains in my entrance and didn’t want to spend too much money. This looks like the answer I’ve been looking for. Thank you!
Fabulous job on the drapes! I love the idea of customizing them with paint. Thanks for linking up to my post about homemade drapery weights; I hope it’s useful for both you and your readers!
where do you get your ideas and energy? I have been painting my bathroom for years! I would like to paint an old sisal rug. Do you think just latex paint would do ok??
That looks intense. I’d never have the patience to do that, but it looks great!
I came across this post whilst looking to solve my window problem. I need brown outside, white inside drapery liner and can’t find anything. Light blocking is strongly preferred. I was considering paining one side of regular light blocking liner. Do you think this would work? I know you haven’t had them up for long but do you think they would be washable, both the fabric paint and the liner itself?