DIY Kitchen Countertop — Installing New Laminate Over Old Laminate
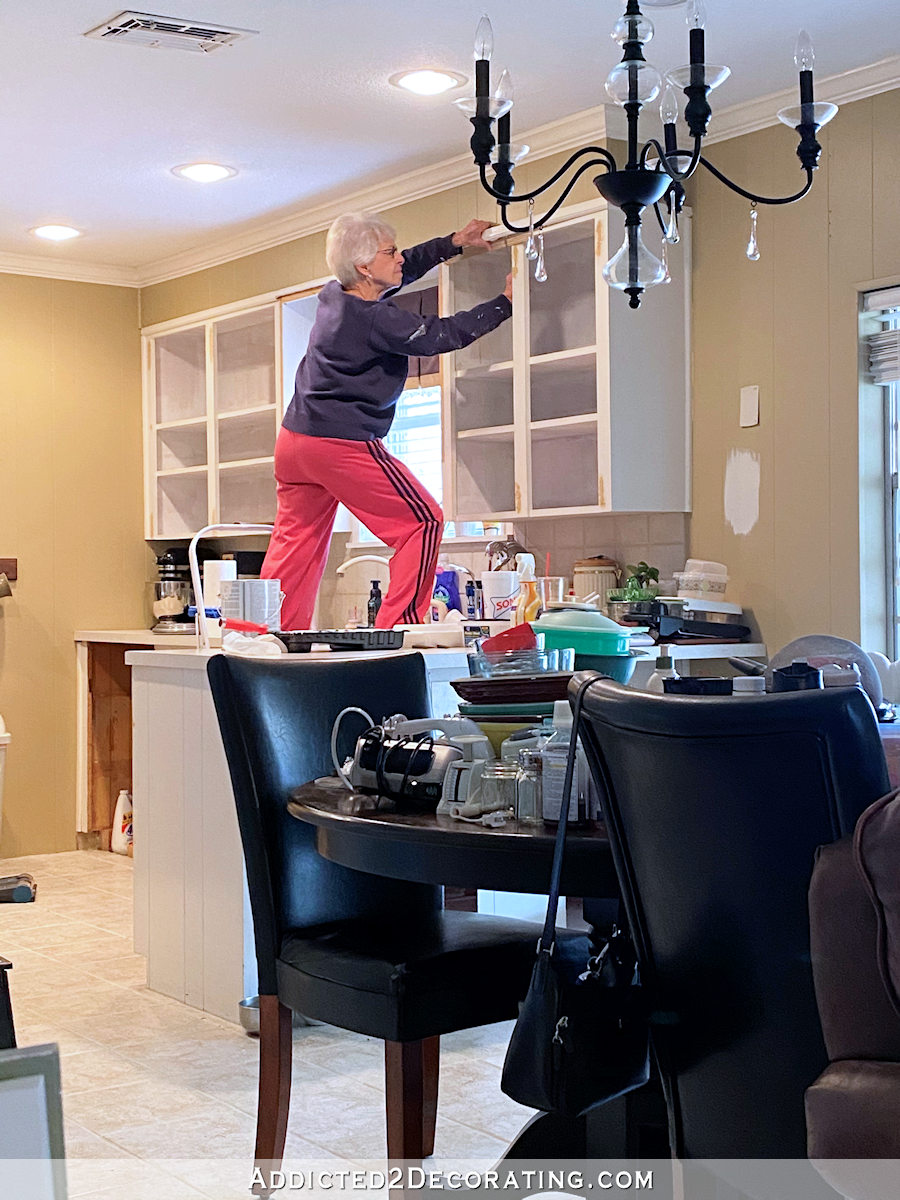
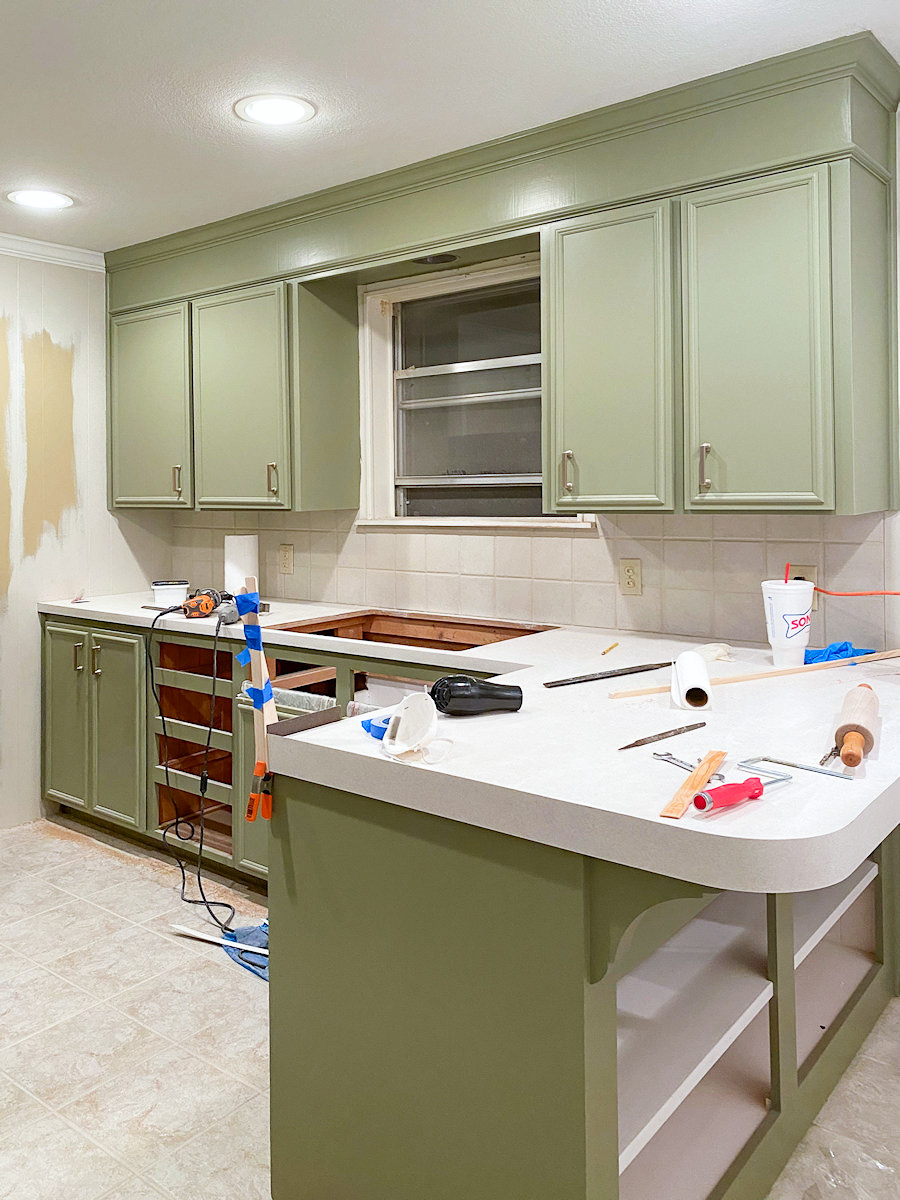
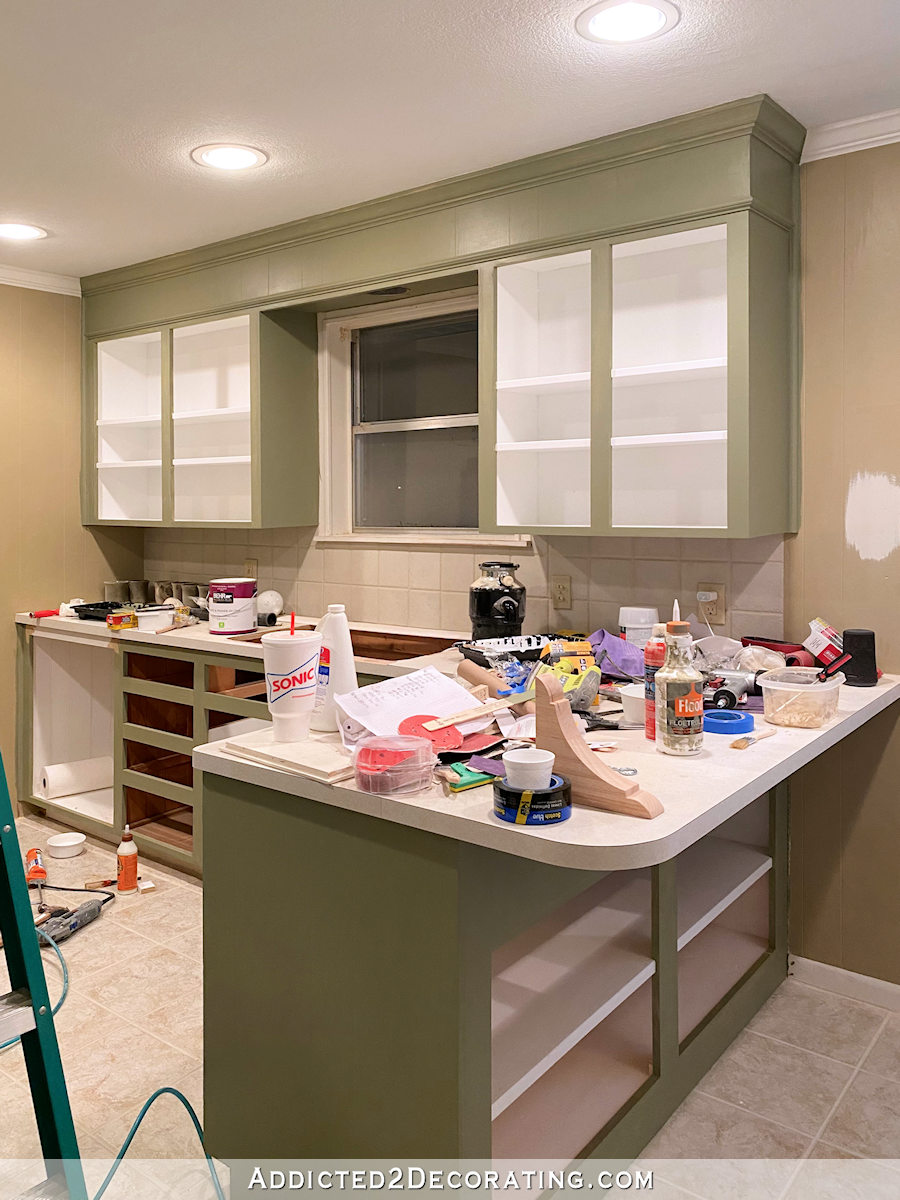
My mom and I are still moving right along on her kitchen, and we’re so close to finishing! Over the weekend, I got eight of the drawer boxes almost finished. (They would have been finished except that she decided she wanted the bottoms of the drawers painted white. 😀 ) But we also got the countertops finished!! And instead of building all new countertops with new plywood and everything, we decided to install the new laminate right over the old laminate, which made this project so much faster.
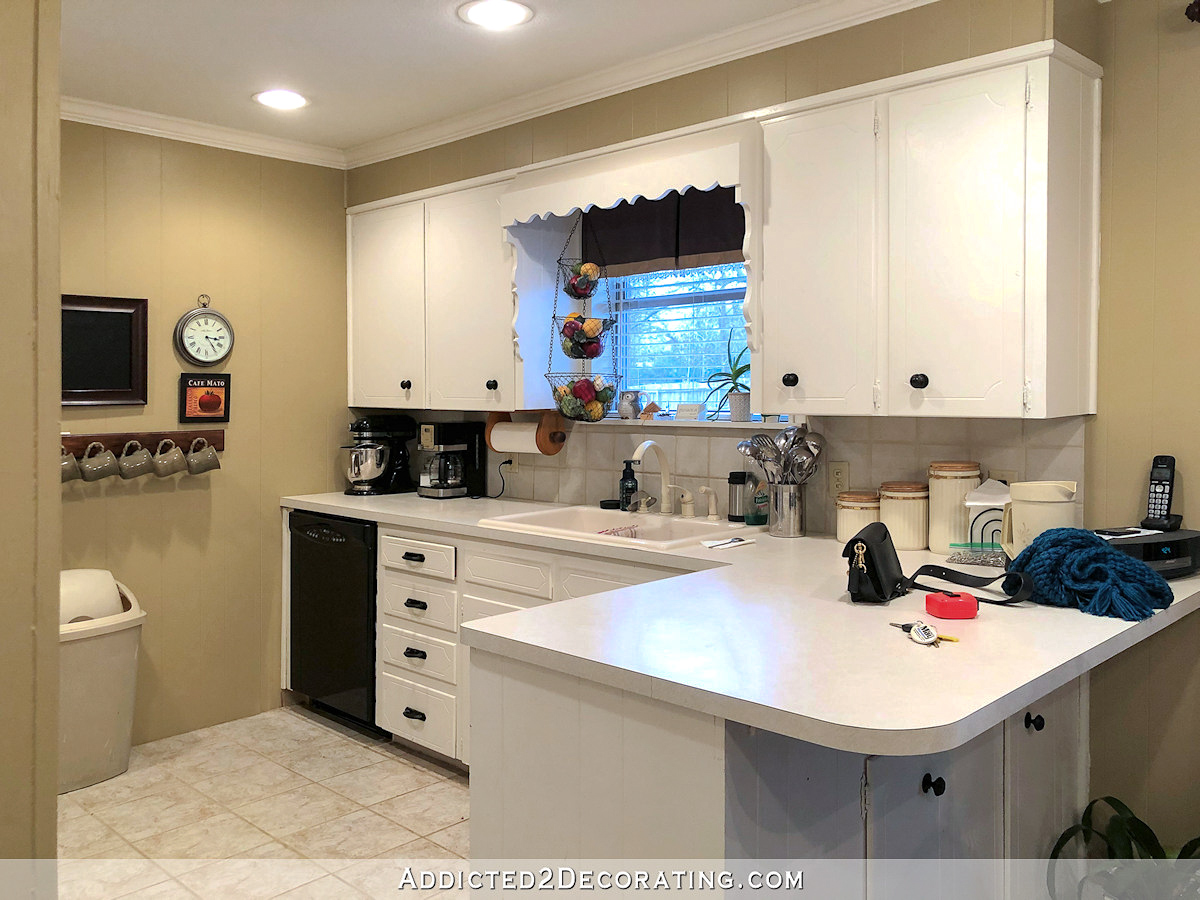
When we started this kitchen project, we had no intention of doing anything with the existing countertops. Her laminate countertops were probably about 15 years old (I honestly can’t remember exactly, but they’re far from new), but they were still in fairly good shape. But then when we tried to remove the old sink to install the new sink, things went south pretty quickly. The sink had been adhered to the countertop so well that no matter how slowly or carefully or methodically we removed it, it caused cracks and breaks in the laminate all around the sink area.
And unfortunately, those breaks were too wide to be covered by the new sink. So we ordered new laminate and prepared ourselves to build all new countertops.
Then someone in a comment on a previous post asked if new laminate could be installed right over the old laminate.
WHAT?! I hadn’t even considered that option, so I went in search of answers. And the answer is YES! Yes, it sure can. I was so excited to find this out! Installing the new laminate right over the old made this project go so much faster than having to build all new countertops from scratch. And it saved some money as well.
We definitely learned some tricks along the way, so I wanted to pass those along to you in case you have a laminate countertop that could use a refresh but you don’t want to go to the trouble of building all new countertops from scratch.
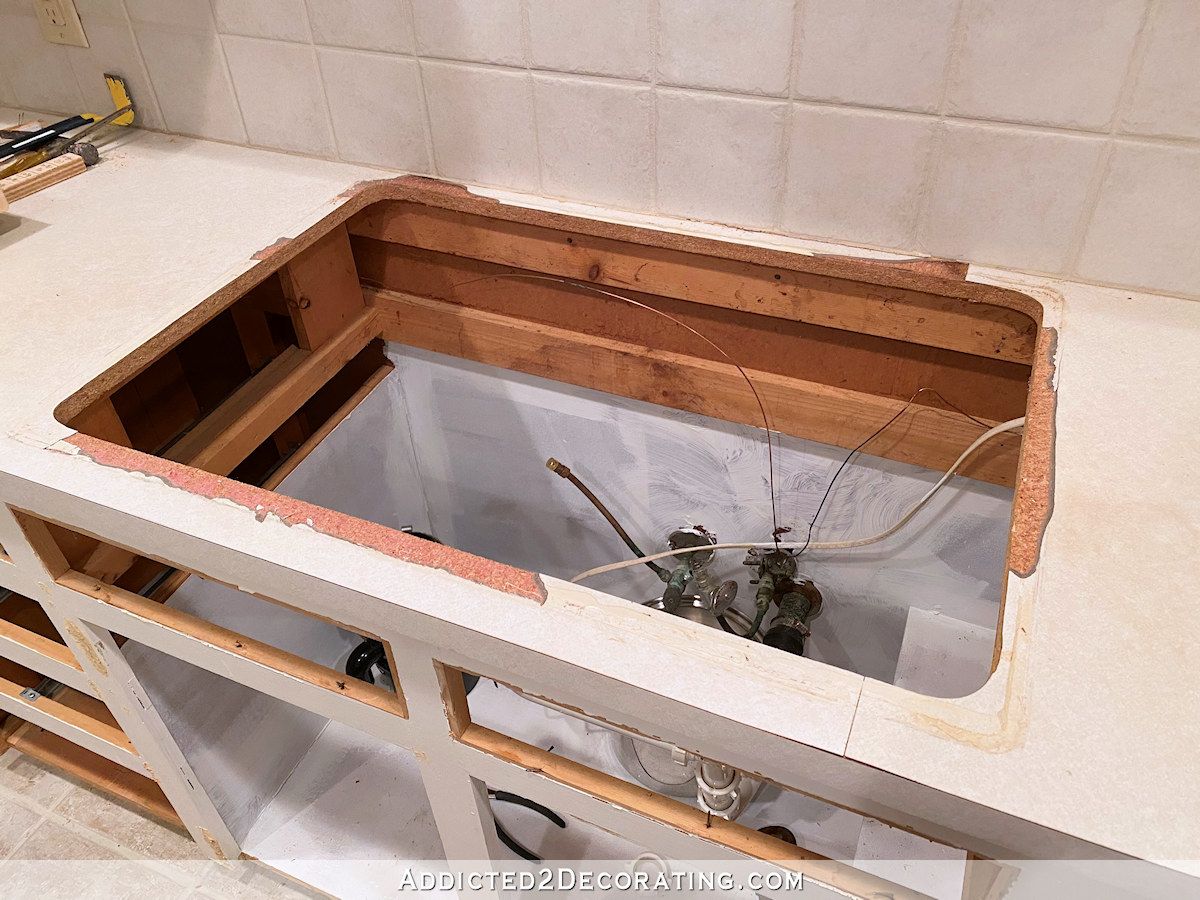
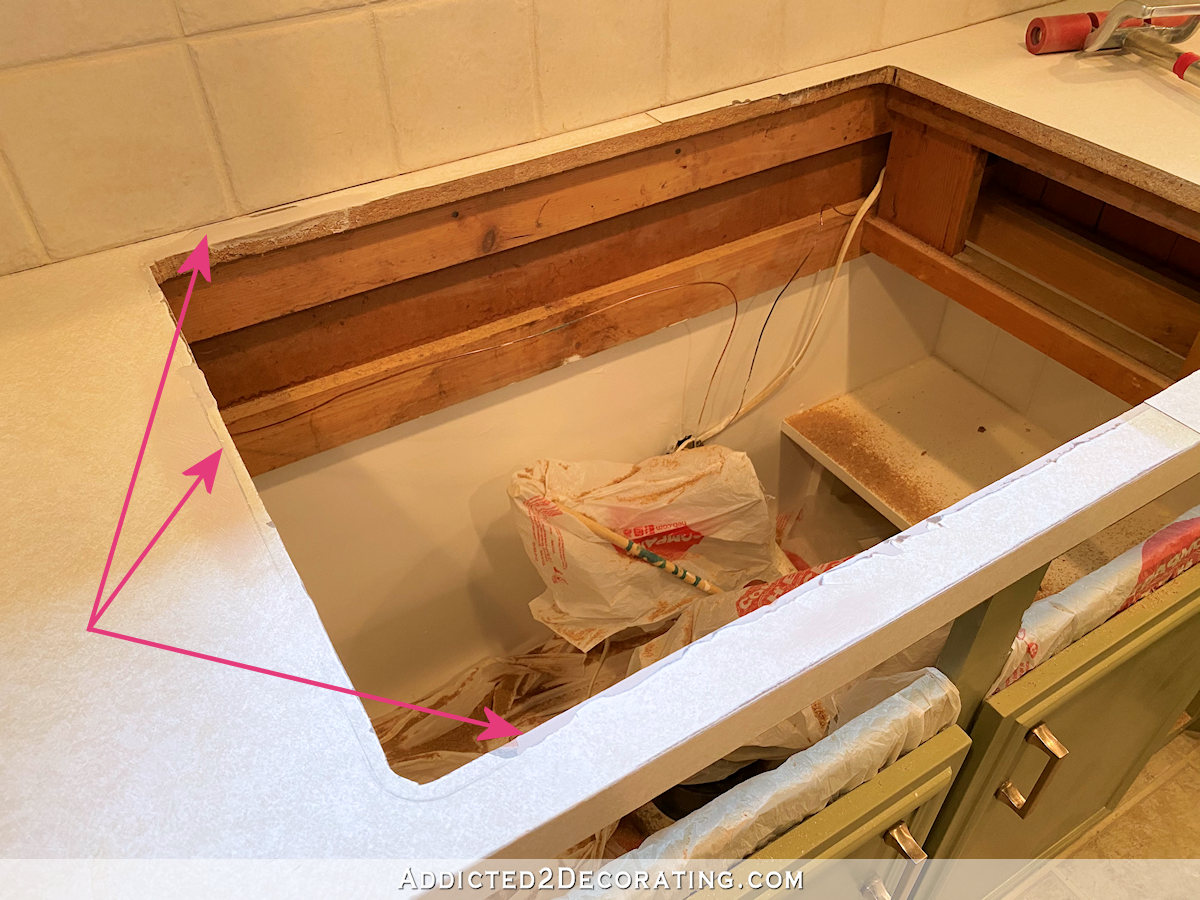
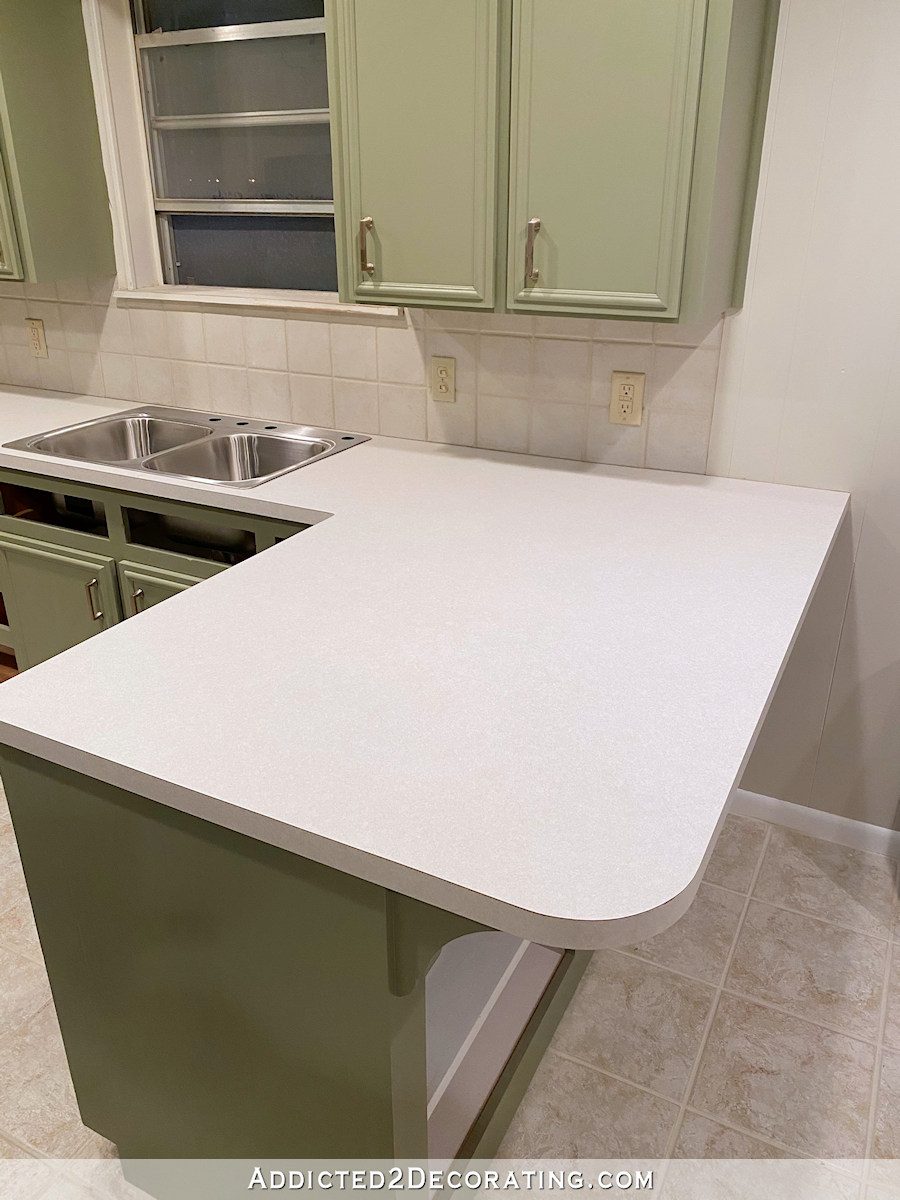
1. Cut the new sink hole before prepping the countertop and before installing the new laminate.
The new sink that my mom selected was bigger than the old sink, so that required me to cut the sink hole bigger. I did this before doing the prep work on the countertop, and definitely before installing the new laminate just in case the jigsaw blade chipped the laminate.
To cut the sides and the front, I used my jigsaw…
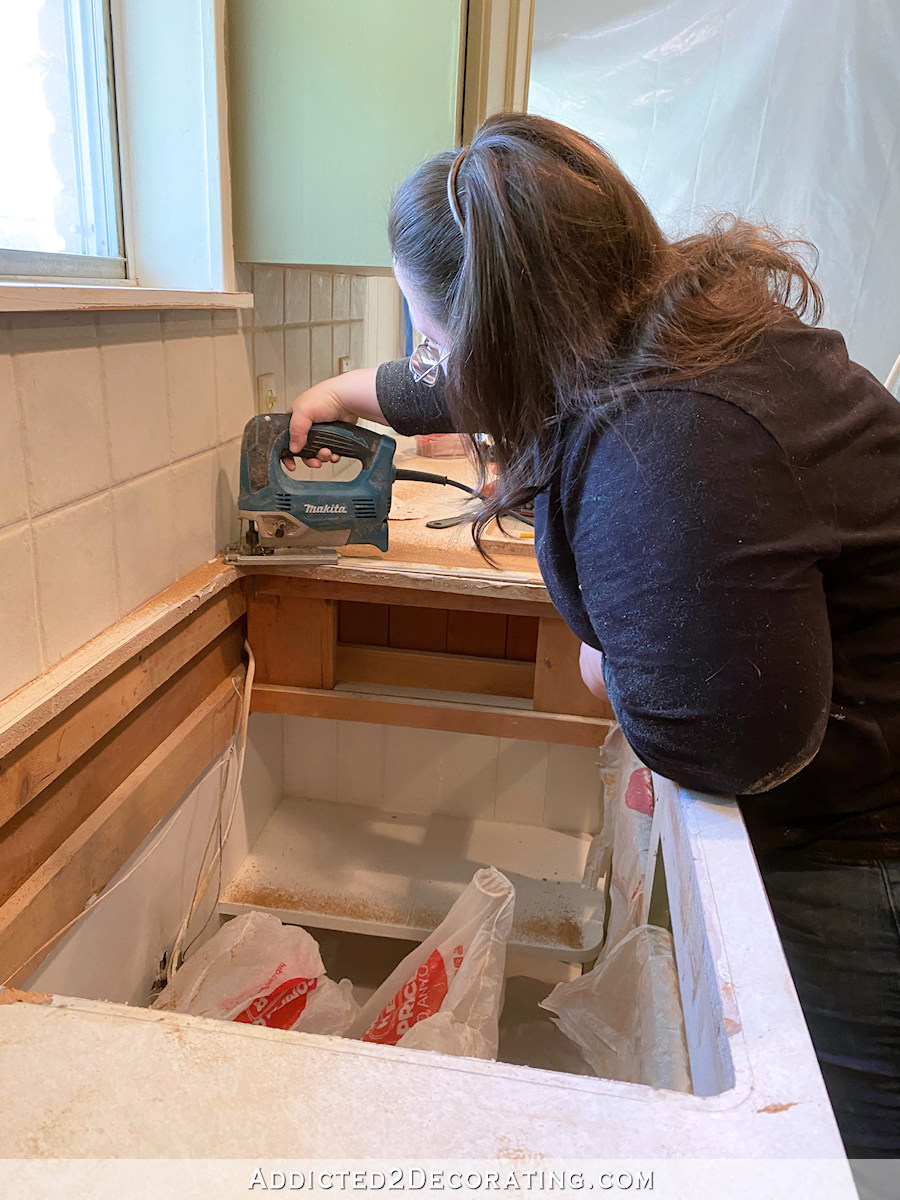
Once I got to the back edge at the wall, my jigsaw wouldn’t fit, so I had to finish up that area using my Dremel Multi-Max. If you don’t have one of these tools, I highly suggest you pick one up! This is one of those tools that I purchased, and then wondered how I lived so long without it. I use it constantly, and used it for several things on this specific project.
You can find a Dremel Multi-Max on Amazon or at your local big box home improvement store.
2. Scratch and scuff the surface of the old laminate.
Before installing the new laminate, the old laminate has to be scratched and scuffed in order to give it some “tooth” for the adhesive to grab on to.
I thought this would be no problem. After all, I have a pretty powerful belt sander, and I was fairly confident that that belt sander outfitted with 36-grit sandpaper would do the job very quickly.
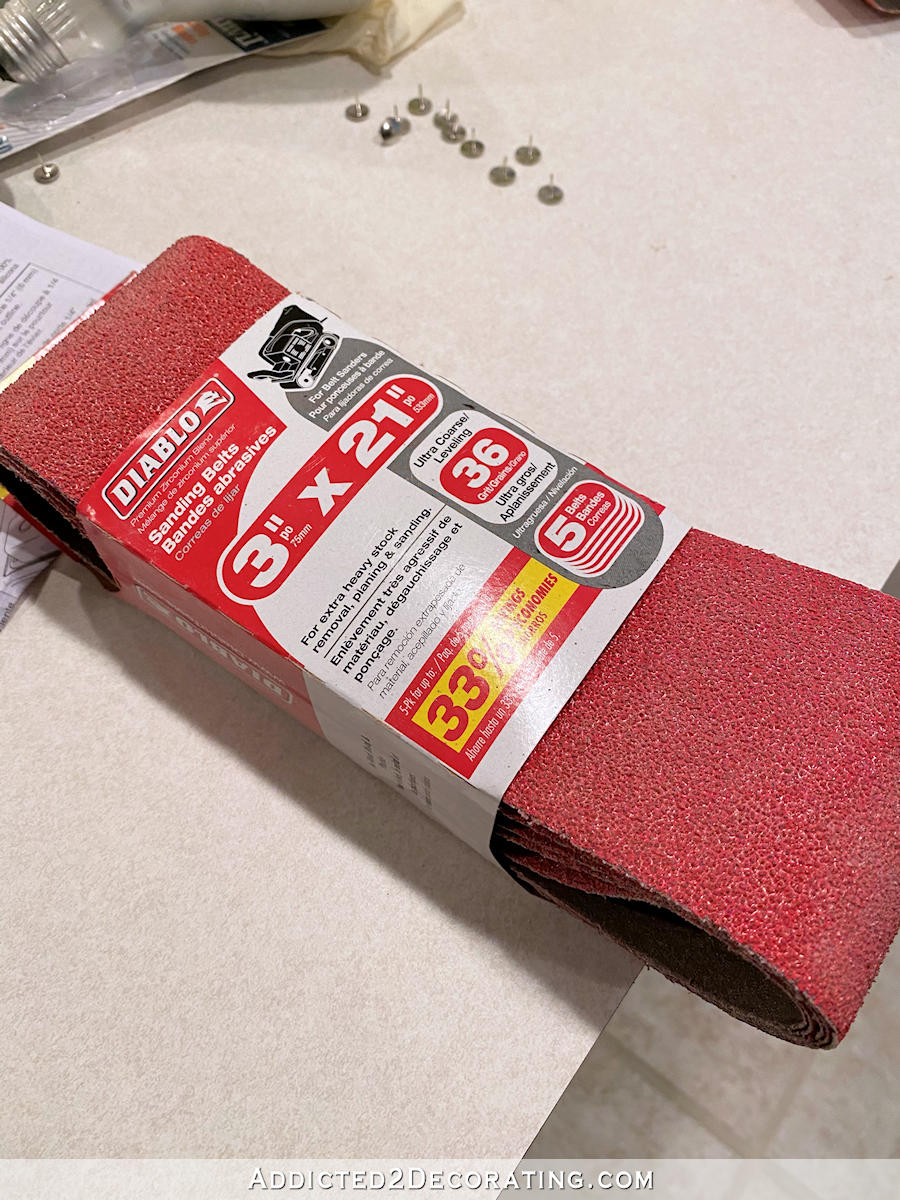
Well, no. I was wrong. 😀 Y’all, laminate is some tough stuff!!! I did sand the entire surface with this, but in some areas (most areas, maybe) it felt like it didn’t even scratch the surface at all.
However, I did find that a coarse metal file worked much better.
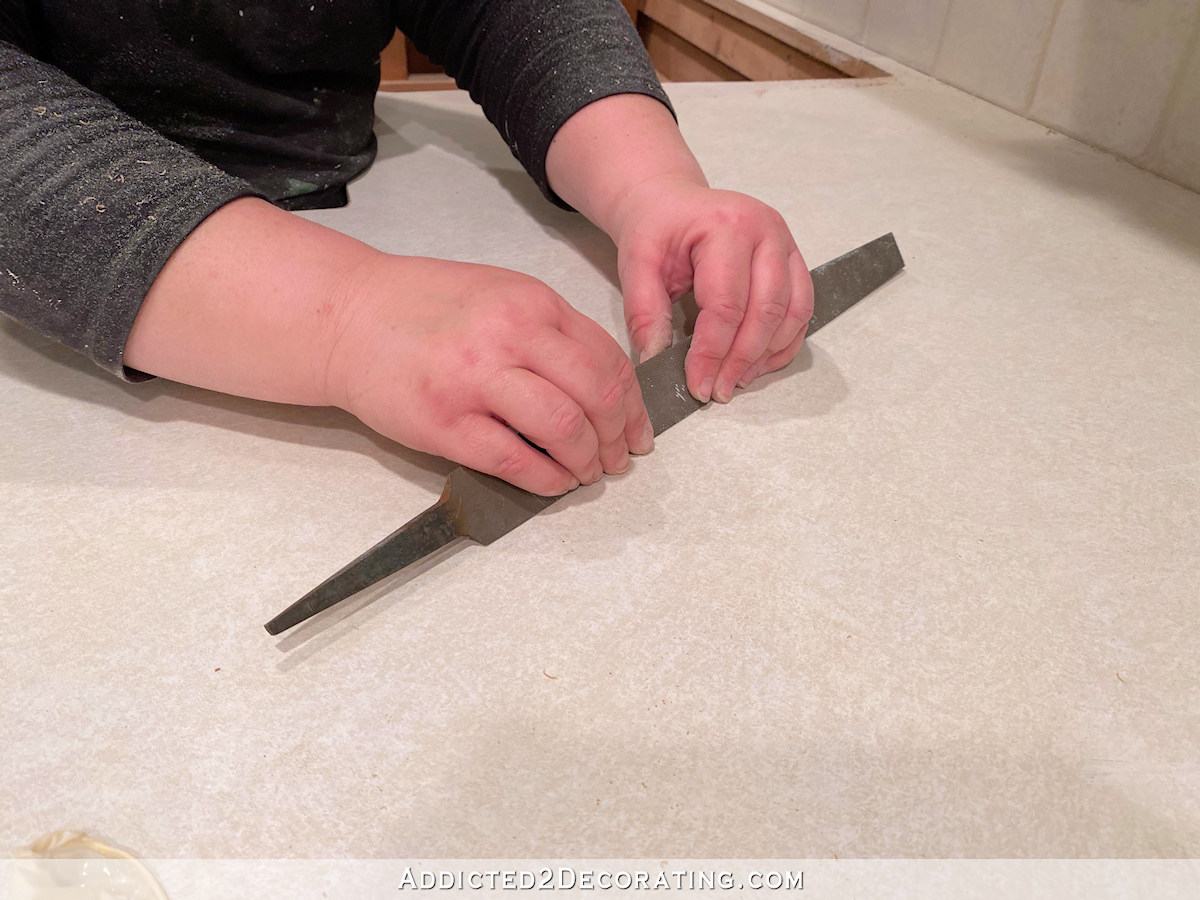
I used that file over the entire surface, moving it in swirling motion while putting quite a bit of pressure on it, and it did a great job at scuffing up the surface.
I never would have guessed that a coarse metal file would do a better job than a belt sander with 36-grit sandpaper! But that was certainly my experience.
3. Fill any cracks and broken areas with Bondo.
My mom’s countertops were in pretty good shape overall, but the area around the sink needed some help. Just keep in mind that any imperfection — crack, bump, piece of sawdust, etc. — can and probably will show through the new laminate. And once the new laminate is down, it’s virtually impossible to get up to remove a piece of wayward sawdust or fix a broken area.
So I used Bondo to fill in those cracks and broken areas. This stuff is so stinky and unpleasant to use, but it does the job. Once mixed, you have to work quickly to spread it on (which is why I forgot to get pictures), but then it dries in just an hour or two. I used my regular rotary sander with 150-grit sanding discs to sand the Bondo smooth.
4. Cut, scribe and trim new laminate pieces.
We bought a 5′ x 12′ piece of laminate, which was enough for my mom’s entire kitchen. When marking and cutting the new pieces of laminate, I made sure to leave at least an inch (sometimes more) of extra laminate on all areas around the edges. It took forever to cut the new pieces of laminate because I made the mistake of using a utility knife with a razor blade.
BIG MISTAKE! Not because it didn’t work, but because it took so long.
I can’t stress this enough. If you want to make quick work of cutting laminate, use a Dremel Multi Max with a carbide blade in it. It takes a fraction of the time as using a razor blade, it causes way less frustration, and there’s way less of a chance of breaking or chipping the cut edges since cutting with a Dremel requires no folding and snapping of the cut lines. It cuts cleanly right through the laminate in one pass.
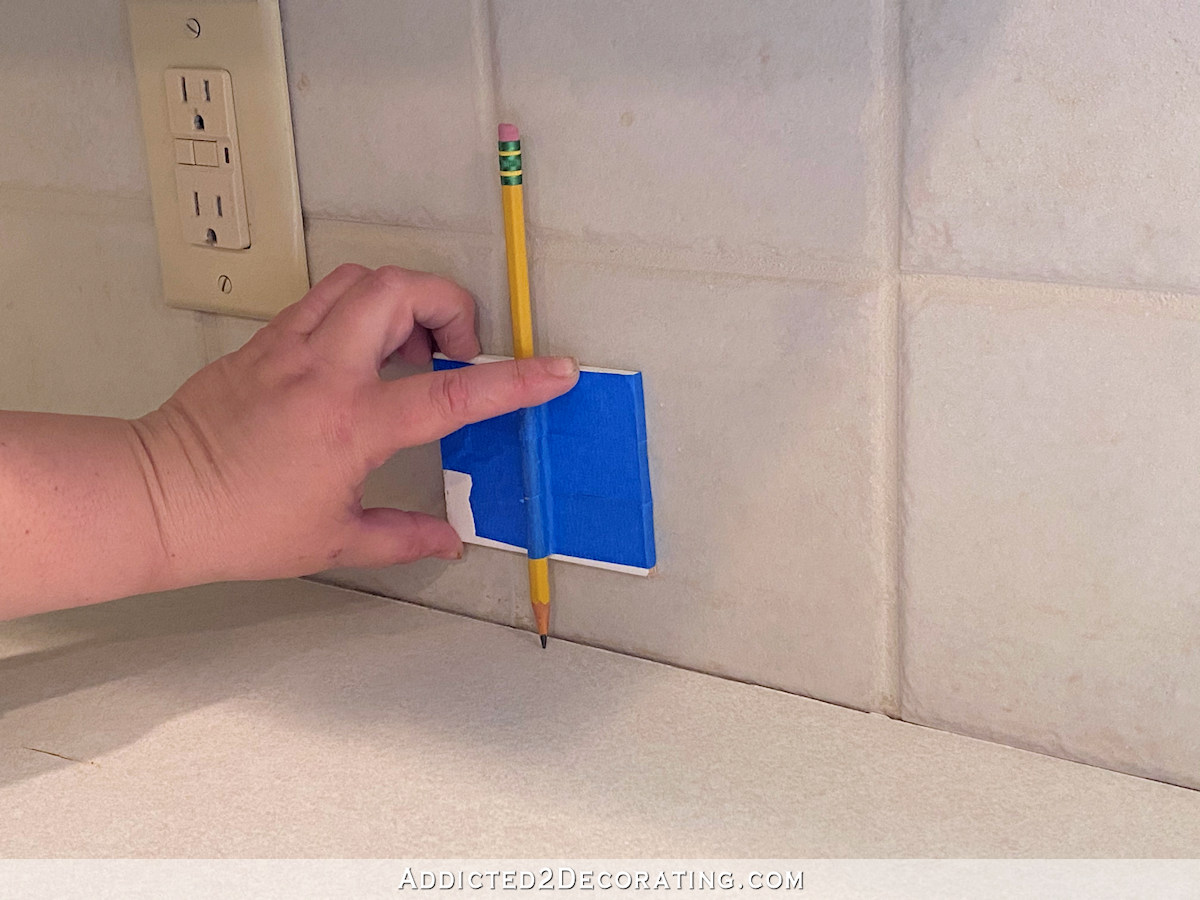
Once the pieces are cut, the edges that go along the wall have to be scribed to the wall before installing. This is done because the laminate edges are perfectly straight, while walls are never perfectly straight. And since this is being installed against a finished backsplash, it needs to fit as snugly as possible so that any small crack left can be covered with caulk. Without scribing and trimming, some areas of the laminate may stand away from the wall as much as 1/4 inch or more, which is way too much to rely on caulk to cover.
There are tools you can purchase especially for this process, but I simply used a piece of 1/4-inch-thick wood, and taped my pencil to it. Then I ran it along the wall while marking the edge of the laminate. I did this the full length of the wall.
And then once I had my line drawn, I placed the laminate onto a piece of 1-inch rigid foam insulation and used my Dremel Multi Max with the carbide blade to trim along the marked line.

I learned very quickly that it’s imperative to have someone hold the laminate while cutting it with the Dremel. Without someone securing the laminate, the vibrating blade of the Dremel can catch on the laminate and break it.
5. Install the edges first.
This is just standard procedure when installing laminate. Install and trim the edges first. But I did want to pass along a couple of tips that we learned.
First, in order to get the laminate to bend around the curves, we used a hair dryer on the hottest setting to made the laminate a bit more pliable. A heat gun probably would have worked better, but honestly, I’d be afraid of burning the laminate. Heat guns get ridiculously hot. The hair dryer on the hottest setting seemed to do the trick.
I did have one area around the curve that didn’t seem to want to lie perfectly flat against the laminate underneath. So I rigged up this contraption and let it set overnight. The gaps were at the top, and I didn’t have any clamps that would reach far enough. So I extended the reach of the clamps with paint sticks, and then taped them together so that the curve of the paint sticks would press against the gaps.

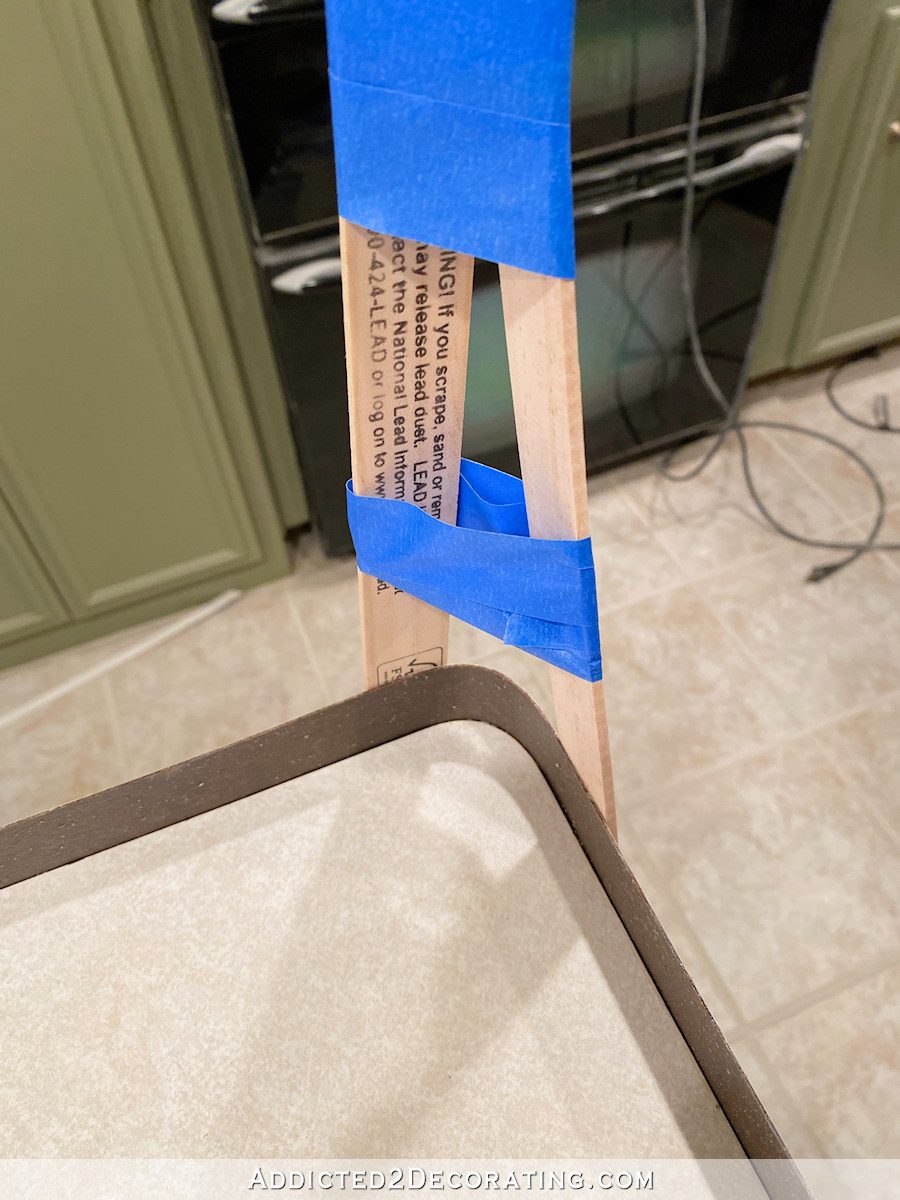
Now keep in mind that when I say “gaps,” I’m talking about tiny gaps that weren’t even 1/16 inch wide. They were probably more like 1/32 inch wide. Tiny gaps, but gaps enough to bother me because I wanted that laminate right up against that curve. If you have big gaps, the laminate will need to be removed and reinstalled.
But this did help to close up those gaps almost all the way. If tiny gaps remain, Bondo can be used to fill in those tiny gaps (fill, let dry, and sand smooth) before the top laminate is installed.
6. Choose the right router blade to trim the laminate.
I made the mistake of thinking that a bigger router blade with more blades was better for this job.
Nope. I was wrong.
There were two flush trim router blades that fit my little router. The one that I used for my studio work tables was the smaller one with two blades. It worked great, so I have no idea why I thought I needed to change this time.
But I saw this blade that was slightly larger and had three cutting blades instead of two, and decided that it would be better.
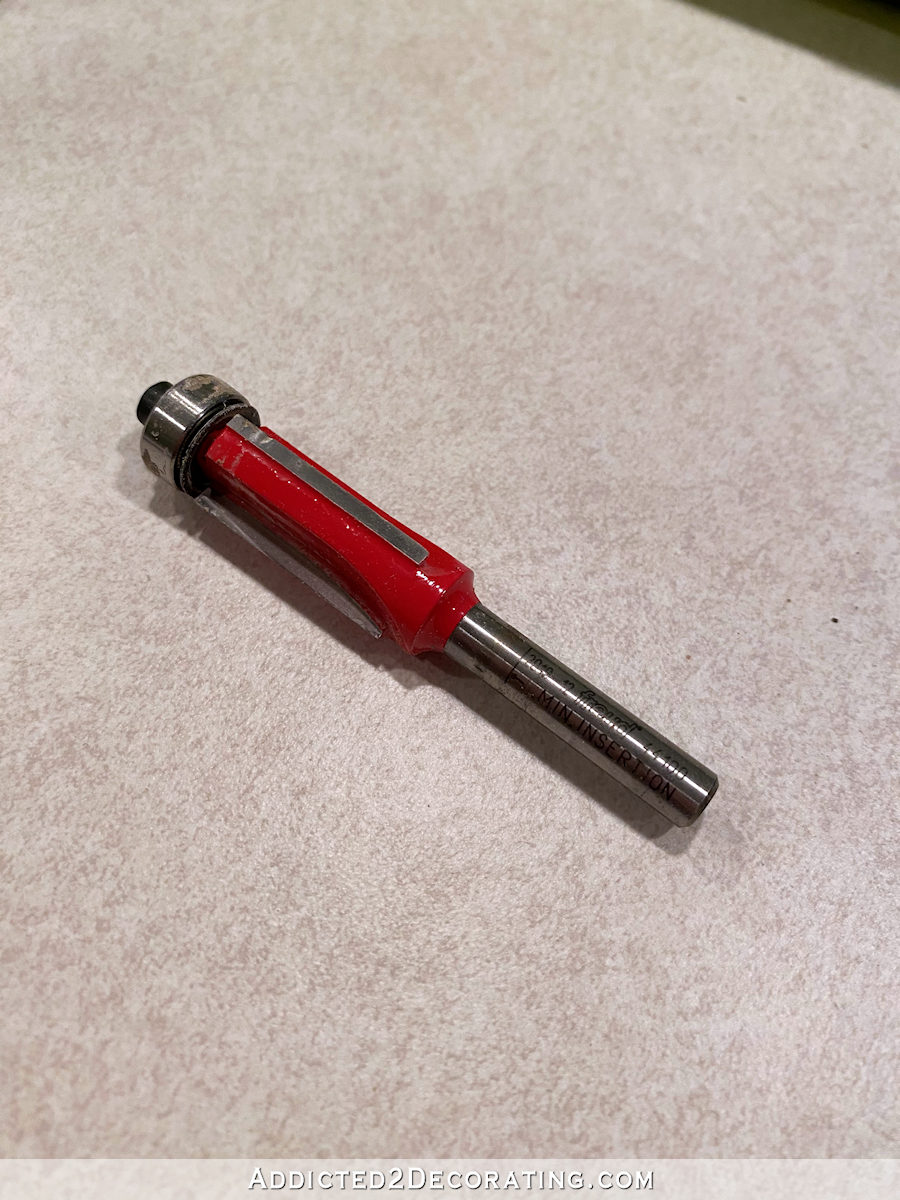
I should have taken a picture comparing the two blades. If I remember, I’ll do so and add it to this post.
Anyway, lesson learned. I’ll leave this big blade for woodworking projects only, and stick with the small blade for laminate. The big blade is just too too much for laminate, and ended up taking some of the top layer of the laminate off of the edge when I went around the corner.
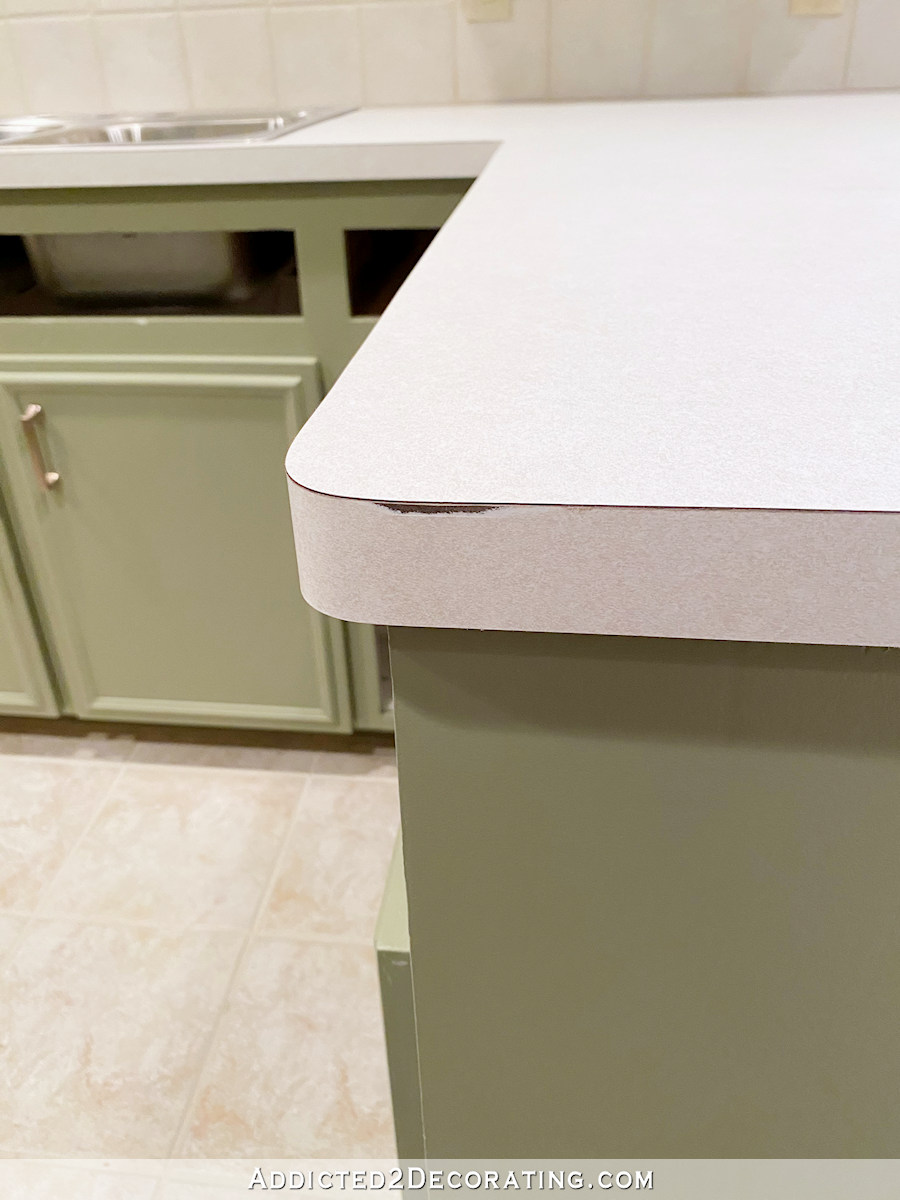
I was so disappointed by that that I could have cried. I immediately switched to the smaller blade, and things went much smoother after that.
And as far as that blemish goes, I’m quite confident that either my mom or I can work some magic with a touch of paint and clear flat topcoat, and no one will ever notice that mistake.
7. Trimming laminate against walls where the router won’t fit.
Since we were installing new laminate over old laminate with the countertops in place, there were places where the router couldn’t be used to trim the laminate all the way up against the wall.
I got online to see how others tackled this problem. The only ones I found used a straight edge and a razor blade. But again, I don’t like that method, because it requires scoring the laminate repeatedly (which increases the likelihood of error if the straight edge slips and the blade goes off course), so once again, I turned to my trusty Dremel Multi-Max.
I didn’t get a picture of this process, but this is very important.
Trimming next to walls with a Dremel Multi-Max is a two-person job!!
One person needs to hold a piece of wood or other straight edge along the edge of the piece that is being cut, while the other person uses the Dremel Multi-Max to trim the laminate.
The purpose of the piece of wood or straight edge being held firmly agains the edge of the piece being cut is because the Dremel has a tendency to grap and rip about the last 3/8-inch of the laminate if it’s not being held down firmly. That will result in a break right on that corner. Ask me how I learned this. 😀
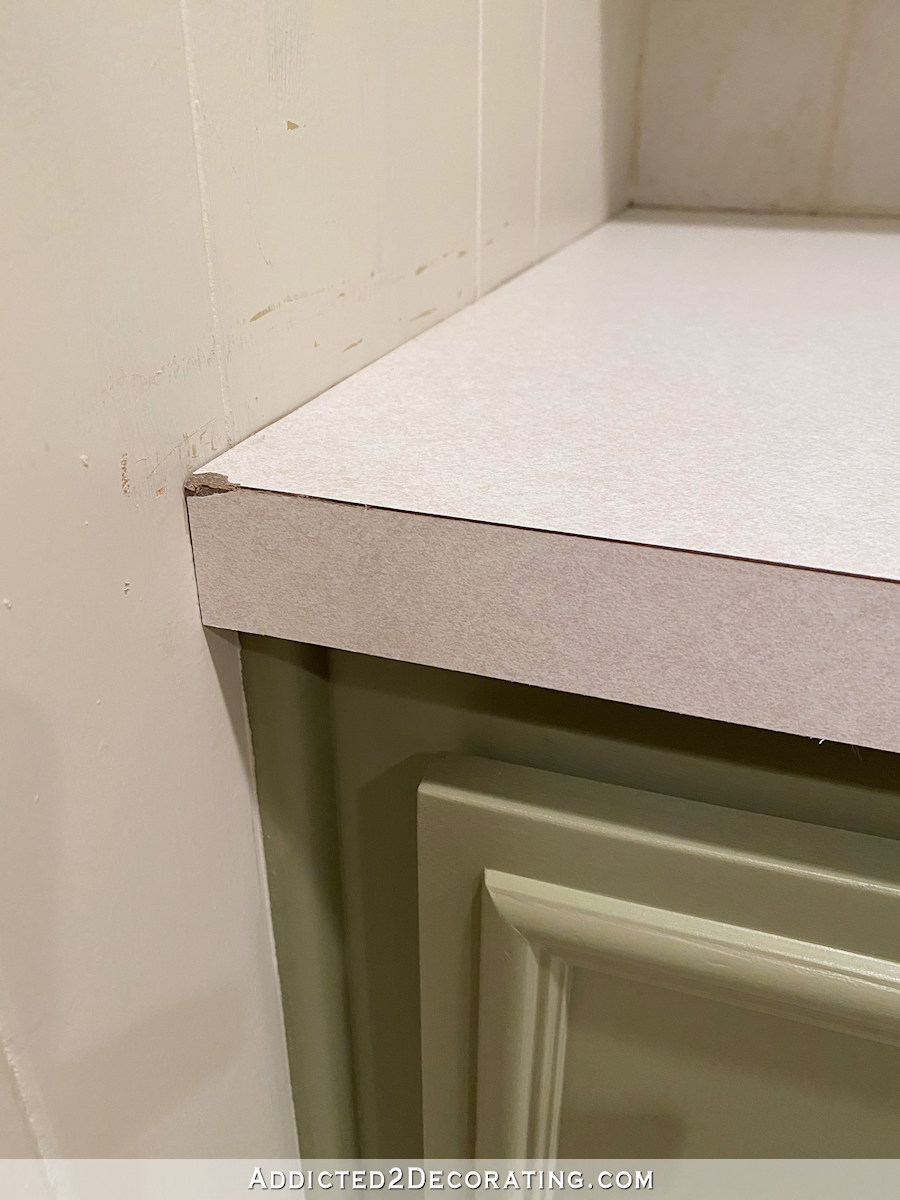
Yeah. That’ll need some repair, but I’m pretty confident we can work some magic and no one will ever notice that.
A piece of wood or other straight edge held very firmly against the laminate all the way to the wall will prevent this from happening and give a clean cut to the laminate all the way to the wall.
So those are my tips for installing new laminate over an existing laminate countertop.
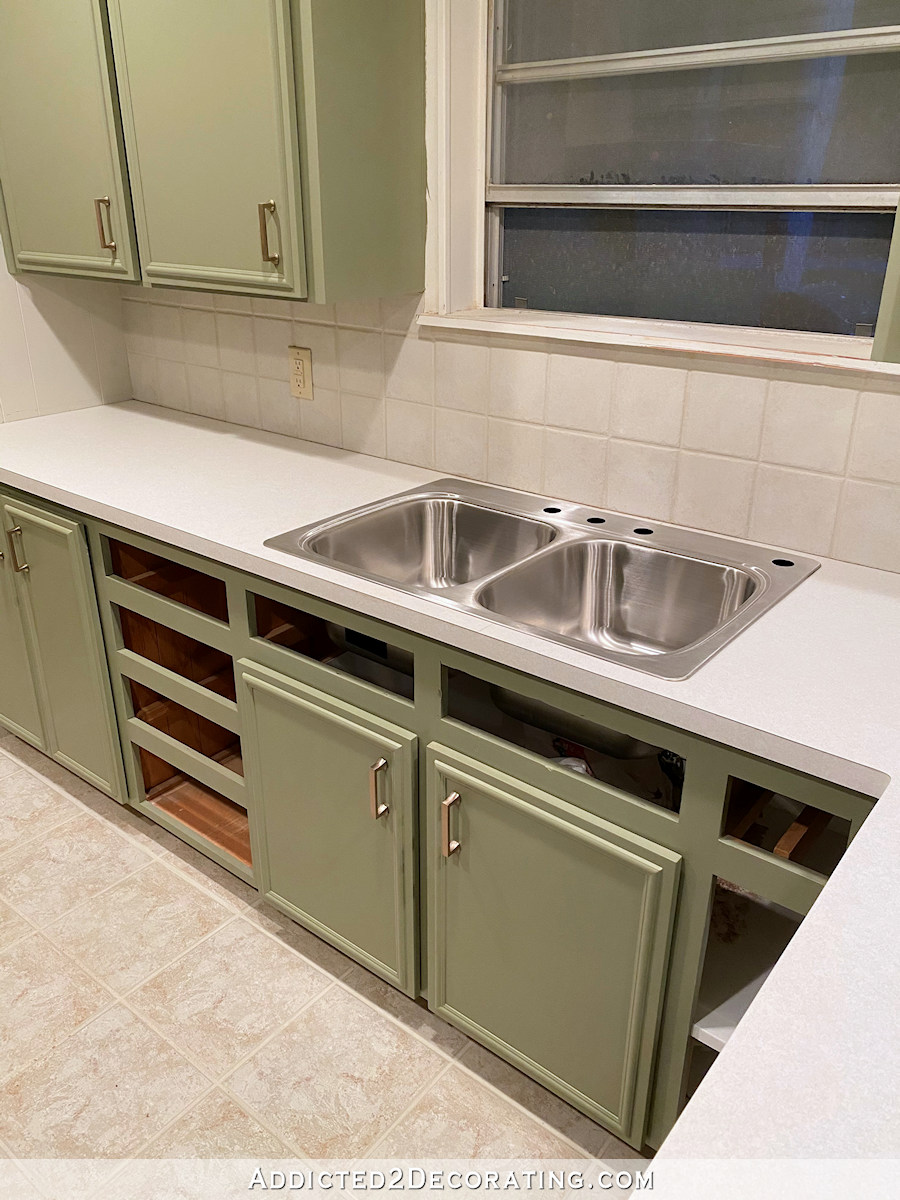
We didn’t do a perfect job (although, neither do the professionals 😀 ), but I’m very pleased with how these countertops turned out.
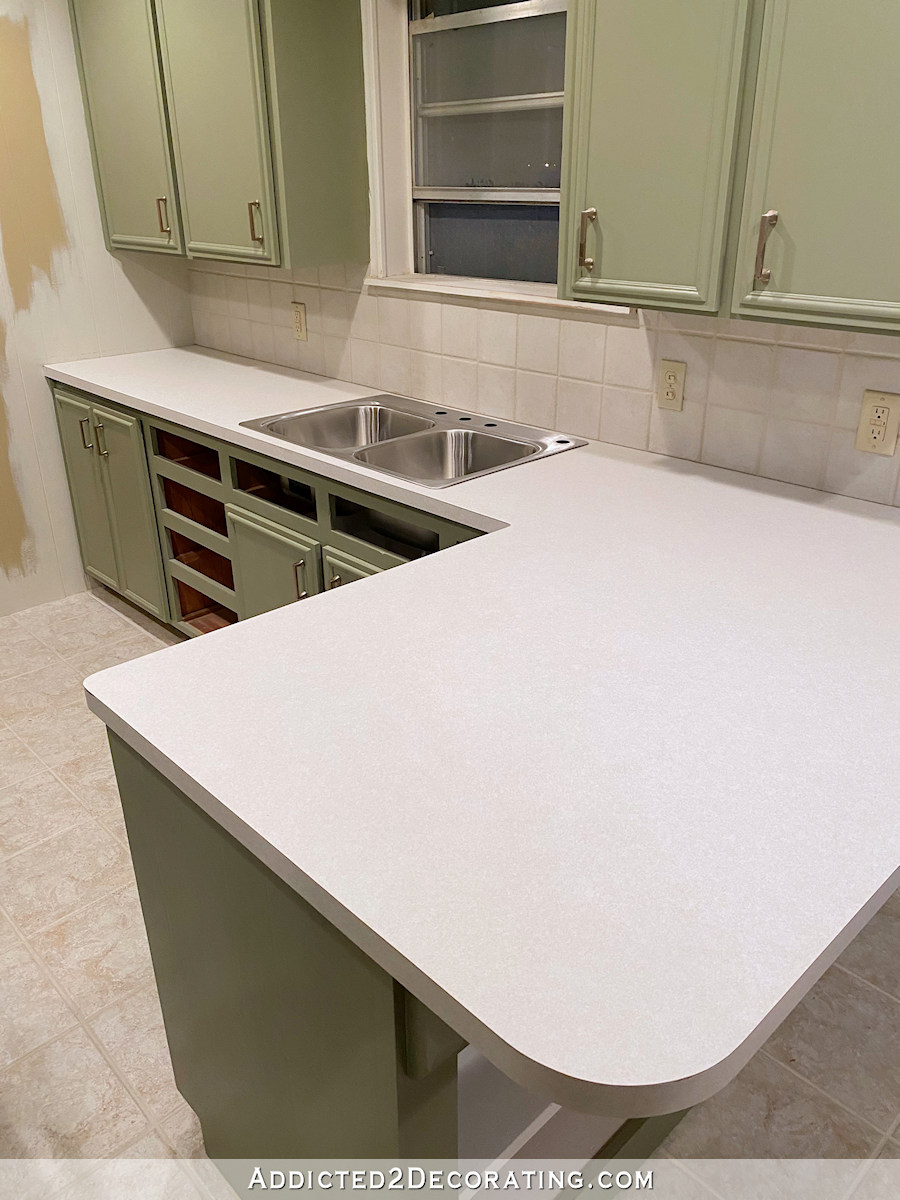
It’s not a huge difference from before. The two laminates were almost identical, but the new laminate is just a touch lighter and brighter than the old. And of course, the new has no stains on it anywhere.
But most of all, I’m so glad that this laminate-over-laminate method was possible! I was dreading the thought of building all new countertops from scratch.

Addicted 2 Decorating is where I share my DIY and decorating journey as I remodel and decorate the 1948 fixer upper that my husband, Matt, and I bought in 2013. Matt has M.S. and is unable to do physical work, so I do the majority of the work on the house by myself. You can learn more about me here.
Looks great Kristi!
Thank so very much for sharing your wealth of knowledge.
Great job. Please tell me the color of the cabinets and what kind of paint. I’m sure you already said but can’t find it. Thank you. You are a machine! And so is your mom. (:
The color is Valspar Sweet Carolina, but I had it color matched in Behr Premium Plus paint in an eggshell finish, and then topcoated with General Finishes High Performance Topcoat in a flat finish.
Did you spray it or brush/roll it?
You and your mama…. one dynamic duo! Thanks for the diversion 😘👍🏻
This looks fantastic! We installed all new laminate countertops a few years ago because we couldn’t afford to replace them with quartz, but I never considered covering the very stained, existing laminate!
I hope laminate comes back into “vogue”. I have it in my laundry room and I love it! It’s so easy to wipe down.
Two stable geniuses in one family!
This is so great! I have laminate with the ugly silver metal trim strips between the countertop and the backsplash. If I remove the backsplash, can I get the silver strip off the back edge of the countertop without ruining it? Plan would be to put new lam on top and put in a tile backsplash. You are so inspiring and confidence building. 👏👏👏
I tried this in a friend’s kitchen. The metal strip actually extended under the laminate counter and tore the laminate when we tried to pull it up. We ended up cutting the metal strip off with a metal blade on an oscillating saw, and luckily the tile backsplash covered what was left behind. I hope that helps!
I had this situation. We just butted the new laminate tight against the metal strip, caulked the gap, and the backsplash tile covered all nicely. Just make sure you know the gap width, and choose tile thickness accordingly. The teensie gap between backsplash and counter filled in nicely with sanded caulk that matched the tile grout. An alternate plan might be to cut the metal strip off first with a metal cutting blade on the Dreml tool. (I think I’d try this first)
I’m so impressed by your abilities and I love the fact that you show your glitches, too! I totally felt the tears about those two tiny damaged parts, but I am with you that you or your mum can surely repair them so nobody sees it! And it helps me SO much to see that you finish this difficult job with such a great result, that is still not perfect. That is the reason why I now dare to tackle things after reading about them on your blog which I wouldn’t have otherwise. So a very big thank you for being real and so so honest! (And while you did such a fabulous job on it, laminate surely belongs in the category of things I’m not tempted to try my hand on, even with your explanations it looks far too difficult for me 🙂 ). I still appreciated the post a lot as a diversion and an update from your end of the world!
It’s beautiful. I know when you and your mom fix the little “ouchies” no one will be the wiser!
We covered our old laminate with tile. Hubby went to Home Depot and talked to the guys there about doing that instead of replacing it! This was in 2005, so I knew you’d be able to “re-cover” your old laminate! Great job, can’t wait for finished room 😋
Luckily, layering laminate makes very little difference in height. When we had our old tile countertop torn out in the kitchen, we saw that someone had laid the tile over a previous layer of tile. To make things worse, there was about a half-inch mud bed under the top layer. I always knew there was something wrong with the height of that counter, especially since I’m 5’4″ inches tall. My new quartz countertop is normal height, which is comfortable even for me.
Just brilliant!
Hey, I wouldn’t complain about your work, because you are 100% right – the pros make mistakes too! And they won’t admit it unless it’s obvious. Moms kitchen is looking so good. I bet she’s getting so excited to put it all back together and start using it! And doing all this with what is going on in the country is probably a good stress reliever for both of you while also keeping you away from others! Hope you both know how lucky you are to have each other and something to work on right now!
Wow Kristi, you’ve done an amazing job installing the laminate! Your Mom must be ecstatic with how this transformation is taking place. It’s looking so good. I’m always in awe of everything you do and you give so many of us such confidence to DIY projects. Can’t wait to see the finished kitchen reveal. On a side note, your posts are always so appreciated and especially now during such global challenges. Stay safe, stay well.
The kitchen just looks so fresh. I’m really looking forward to seeing it when it’s finished. You ladies are doing a great job and the tips will definitely be helpful for anyone thinking of laminating or relaminating a countertop.
Thank you for showing and mentioning the tools that you are using for your projects! As I was reading this blog, I was sitting on the edge of my seat and the anxiety was building! You are brave, and you ARE the bomb! I understand what you mean by the term “tooth”. I can’t wait to see the finished project! I hope your Mom’s upcoming party won’t be cancelled due to the virus. At least it can be postponed and your mother will have her beautiful new kitchen. She must be very proud of you!
I love it!!! You did an awesome job. Laminate countertops are my favorite, I’d never have anything else. 🙂 Yes, they’re super sturdy, I think people forget that! I should have mentioned right away that you can install laminate over laminate, as it’s something that I researched and was planning on doing to an old Formica and chrome dinette set that had the chrome legs in great condition but stained and scratched Formica. Didn’t even occur to me. D’oh!
You can easily fix those blemishes. I’m sure you know of this trick on how to get crisp angles with Bondo, but if you don’t, I doodled a short explanation since I’m bad at explaining only with words. 😀 https://ibb.co/nbVjQGG Done this trick far too many times when my repairs need super crisp edges.
I used laminate on my new countertop and ran the laminate all the way to the cupboards which created a backsplash. The contractor was doubtful about it.
As a teenager I cleaned houses for wealthy people in their old Victorian mansions. Many of them had marble on the counter and backsplash. I copied that but of course mine is not the real thing.
It draws compliments and some people have been surprised that it isn’t real. And it looks so pretty which is what the contractor said when he finished. Love your mom’s kitchen!
Great job! It all looks so crisp and clean. Love all the colors and choices you made.
It looks great! I don’t recall- are there plans to update the tile backsplash and/or floor? The fresh new counters and cabinets are really showing them up!
She posted early on how they’d cleaned up the grout on the floors and they’re staying.
I get so excited for your posts! It’s looking great! Thanks for always showing us the mistakes as well as the successes- getting to see the *whole* learning process is what makes your posts so real to me and inspiring. I love what you do!
I put laminate over a workbench in my basement next to the shop sink, and it was a great inexpensive way to get a waterproof work surface. I installed with my dad, who’s done plenty of countertops over the years. He cleans up all the overhanging edges with metal files. I’m sure it’s slower than the router, but it’s pretty fast, gets into corners well, and gives you a lot of control.
I like it! The laminate looks fresh and pretty 🙂
I know you’re not changing out the backsplash, but pleeeeease tell me you’re doing something with the outlets and covers, haha! Nice bright white ones would look so fresh!
You and your Mom did an amazing job! It looks so fresh and new.
What a great makeover! Did you use the router to cut the sink hole in the new laminate?
So impressed by you two ladies.
This is not meant as a criticism at all because I admire everything you can do. However, have you thought about painting the window sill the same color as the cabinets?
Thanks for this informative article! Question that wasn’t answered in your instructions…. did you use contact cement or another bonding agent to secure the new laminate to the old? Thanks
Yes, I used Contact Cement.
Thankyou so much for sharing,Kristi. Cabinet makers say it can’t be done but you prove them wrong.You have given me the courage to re laminate my kitchen benches. I’m in Australia so some of the products will have different names but I understand what is required.Well done.
that was great to see. I am looking to renovate my kitchen bench and paint the doors. what colors to you think to use with black appliances ?
Where did you buy your laminate?
I bought it at a local building supply place. But you can purchase it online, also.
Great job! A trick my husband and I learned when doing this was to put the Contact cement on both surfaces – the old laminate and the back of the new, put bamboo garden sticks at close intervals across all the old surface at right angles and pull them out one by one so you can press down the new laminate (once it’s become clear) tightly. If the new piece sticks down before you’re ready it will break if you try to lift it again. And the Contact cement softens the new laminate so it’s more fragile. How did you stick it down so carefully?
Superb article! Very clear instructions and helpful photos. Thank you very much! I want to try this on existing backsplash laminate. If you have any suggestions on how to do this beyond this excellent article on countertops I’d be interested to hear them…
Thanks for the explicit post!:)
The countertop looks great! Thank you for sharing your experience.
i love the article but I would really love a video tutorial!!!
This is an awesome article on putting new laminate over old laminate. Something I never considered doing until now. What router and bits did you use by chance. That is something I will need to purchase.
I used a 1/4-inch Dewalt router and a laminate bit.
Thanks for all your tips. I had my counters done by a ‘professional’ who said I couldn’t leave my curved counter corners. He squared them off and I’ve never liked them near as much as the previous curved ones. I’ve since moved and, if I replace the current laminate, which is 99% sure, shall follow your great ideas. Nothing like experience to guide one and your little ‘blips’ will disappear under tinted paint. Wish you luck!