
Front Porch Skirting Progress — Mapping Out The Design
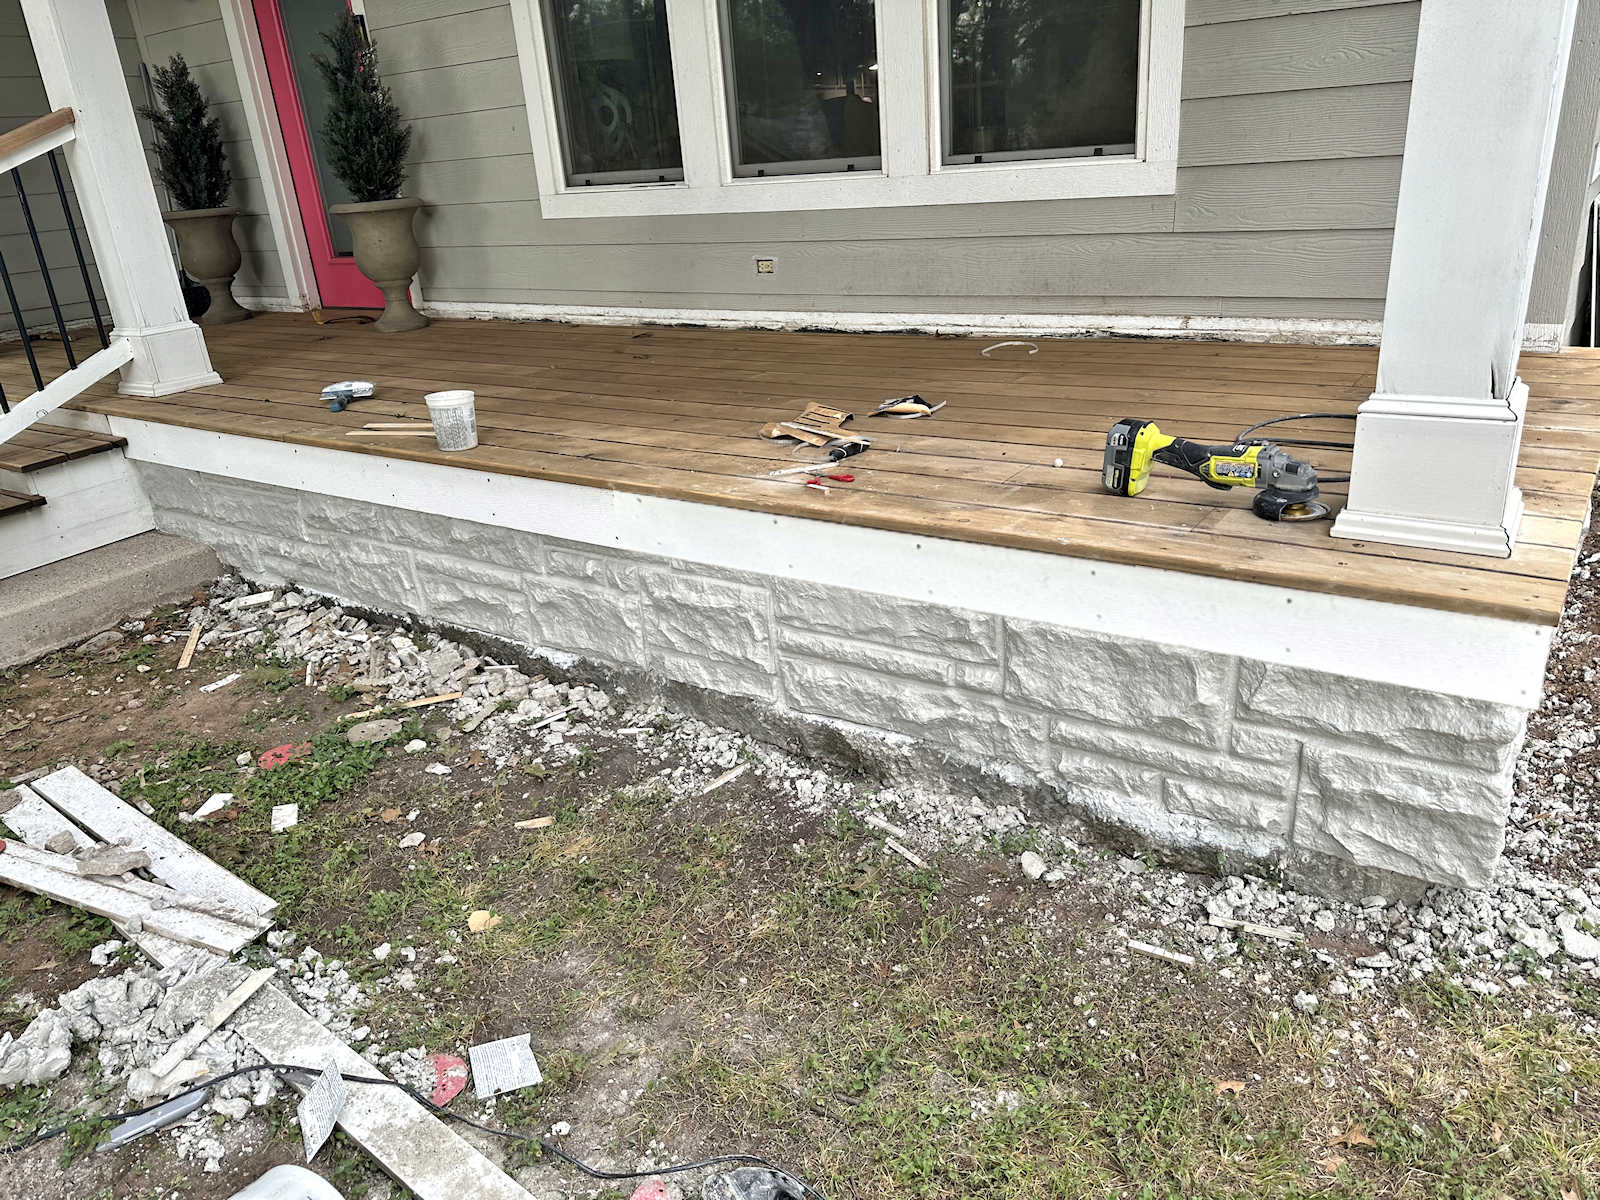
I’m still working away on pouring all of the concrete faux stones for the skirting area of the front porch. When I left you on Friday, my plan was to get all of my molds that I had made for the faux stones set up in the carport, start mixing concrete, and basically have an assembly line going all day Saturday so that I could get as many stones created as possible. But then I realized I had skipped a crucial step. I had no idea exactly how many of each stone I needed to complete the skirting. And to figure that out, I had to map out the design before I started pouring concrete.
Note: This is a multi-post project. You can see all of the posts in this project here: DIY Concrete Faux Stone Facade Archives
Or you can see the last post in this project here: DIY Concrete Faux Stone Facade, Part 3 — Pouring The Faux Concrete “Stones”
My initial thought was that I could use ChatGPT to create this design map of my stones. I had eight different molds, and all eight were different sizes, and I thought for sure that ChatGPT could do this much faster and better than I could. I mean, AI is much smarter than I am. So I went to ChatGPT and gave it this prompt:
I’m working on a front porch project. The skirting area (i.e., the front and side vertical portion) is solid concrete, and I want to adhere a faux stone to the skirting area.
The area that needs to be covered measures 13.5 inches high. The front of the porch that needs to be covered is 154.5 inches wide, and then on the far right side, there is a 90-degree outside corner, and the side skirting area of the porch is another 60 inches wide.
I have faux stones in eight different sizes that I’ll be using to cover this area. The stones are the following measurements:
- 5″ high x 24″ wide
- 2″ high x 16″ wide
- 5″ high x 15″ wide
- 7.5″ high x 15″ wide
- 5″ high x 20.5″ wide
- 2.5″ high x 7.75″ wide
- 7.5″ high x 15.5″ wide
- 5″ high x 16″ wide
Between the stones, I want to leave 1/2 inch for mortar lines. However, I do not need mortar lines below the very bottom row of stones or on top of the very top row of stones. I also don’t need mortar lines on the far left side of the arrangement on the front of the porch skirting (i.e., where the stones meet the front porch steps). On the outside 90-degree corner, I want my 3/4″-thick stone facade to look like complete stones, so I want consistency from the far right on the front of the skirting to the far left on the skirting area on the side of the porch.
I don’t mind cutting the stones, but I’d like the overwhelming majority of the stones to be used whole.
Based on all of that information, please create two diagrams — one for the skirting area on the front of the porch and one for the skirting area on the side of the porch — arranging the stones in the available sizes to create the most random arrangement without an obvious repeat in the arrangement.
I’ll be pouring these faux concrete stones myself using molds that I built, so on the diagram, I’ll need you to use the numbers associated with each size that I listed above to show me where each stone needs to be placed, and so that I can know how many of each stone size to make.
I was pretty excited to see what it would come up with, and I was also confident that it could come up with a much better design than I could. It took quite a while for it to generate the images, so I walked away from my computer for a while, and then came back later, anxious to see the amazing design that it had created for me.
Imagine my disappointment when I saw this…
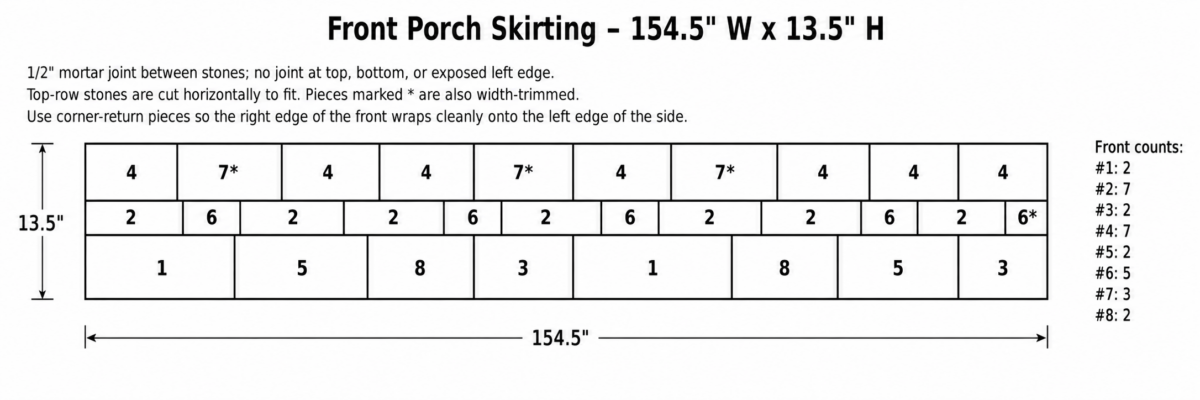
Yeah. That’s terrible. There’s nothing “random” about the placement of those stones. I could have done that in the same amount of time it took ChatGPT to do it. But that’s the exact kind of design I wanted to avoid.
And, unsurprisingly, it just continued that same design around the side of the porch.
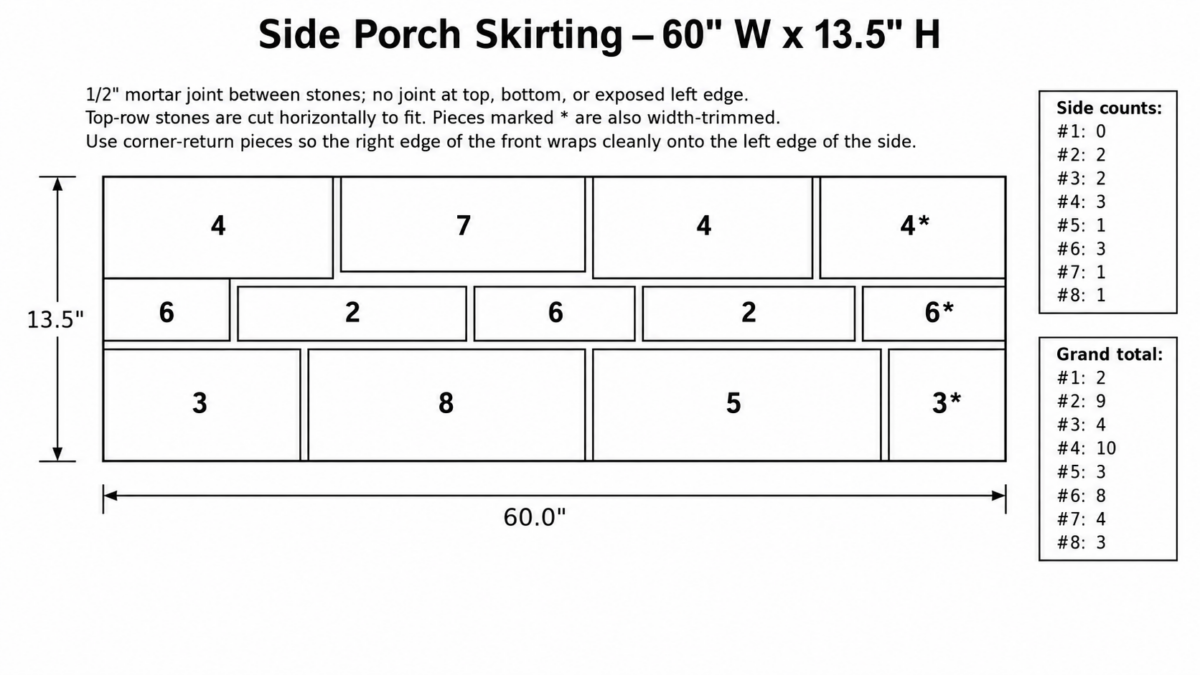
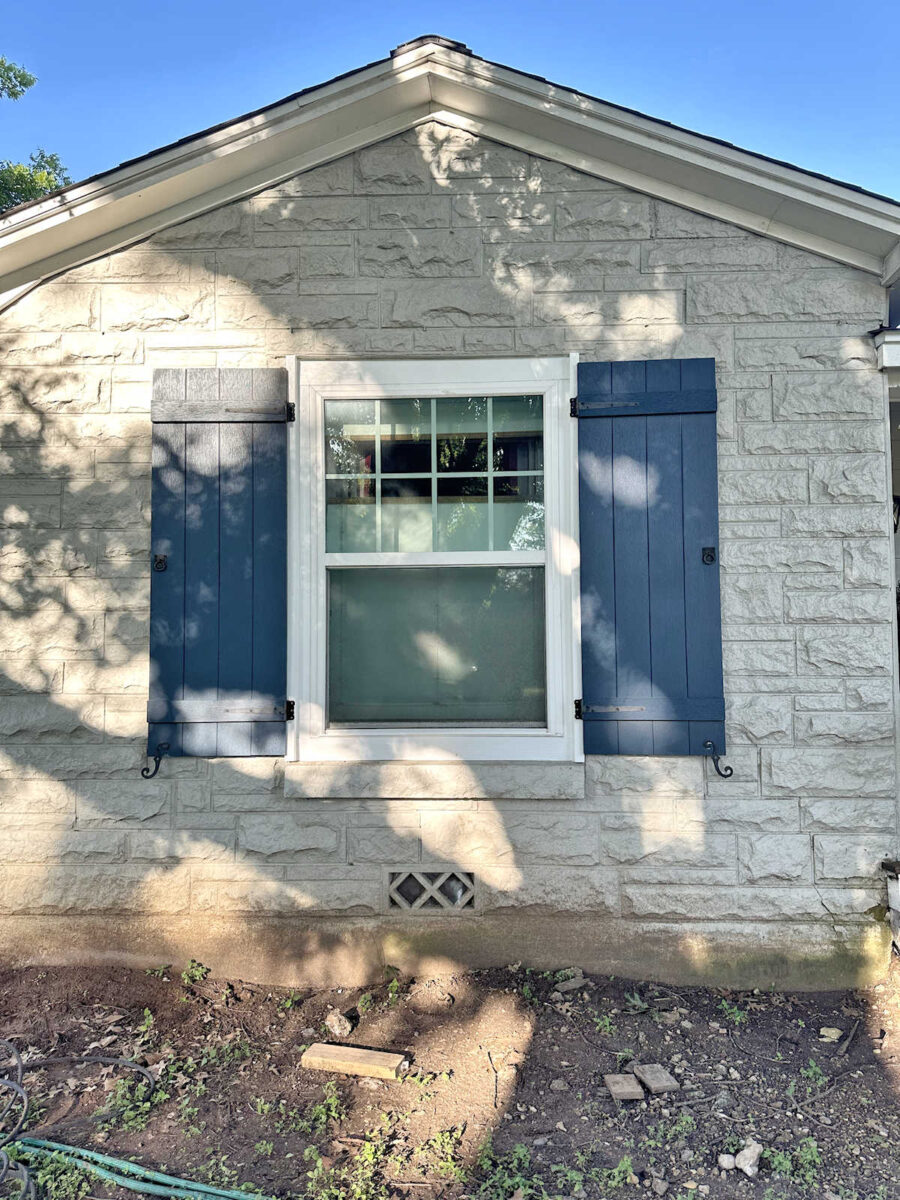
There was no way I was going to arrange the stones in that pattern when the real stones on the rest of the house are arranged in a truly random pattern. Well, obviously, they’re not random. There was a lot of thought and planning that went into this. But the arrangement isn’t predictable or in a an obviously discernable and repeating pattern…
So with ChatGPT completely failing me, I had to come up with my own design. I used my photo editing software to create an image of each stone with its proper measurements, and then I copied and pasted each of those images onto a larger image that I had created to represent the exact dimensions of the front porch skirting area.
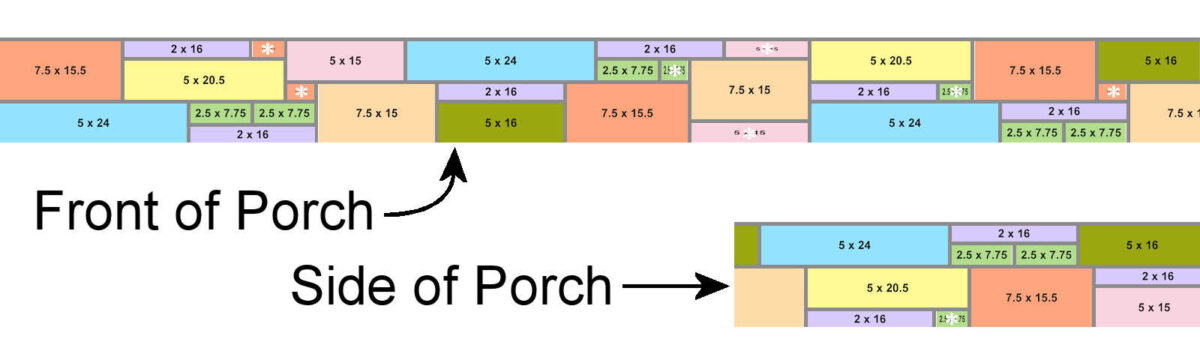
As I had explained in my prompt for ChatGPT, I wanted to use as many whole stones as possible, but I was okay with cutting a few of them to fit. This is the arrangement I came up with. The stones with the little white asterisks on them are the ones that will need to be cut to fit.

And then this is the design I made for the side of the porch.
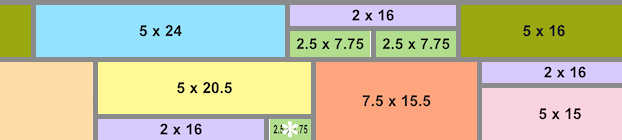
So the plan is to end the right corner of the porch with two stones (the green and light orange stone) that will be cut at a 90-degree angle, and then those will wrap around to the side of the porch to create the look of full stones, and then continue on with the rest of the design.
And to test out the design and make sure I got the proportions right, I copied and pasted the map onto an actual picture of the front porch skirting area. It looks like I got it right!
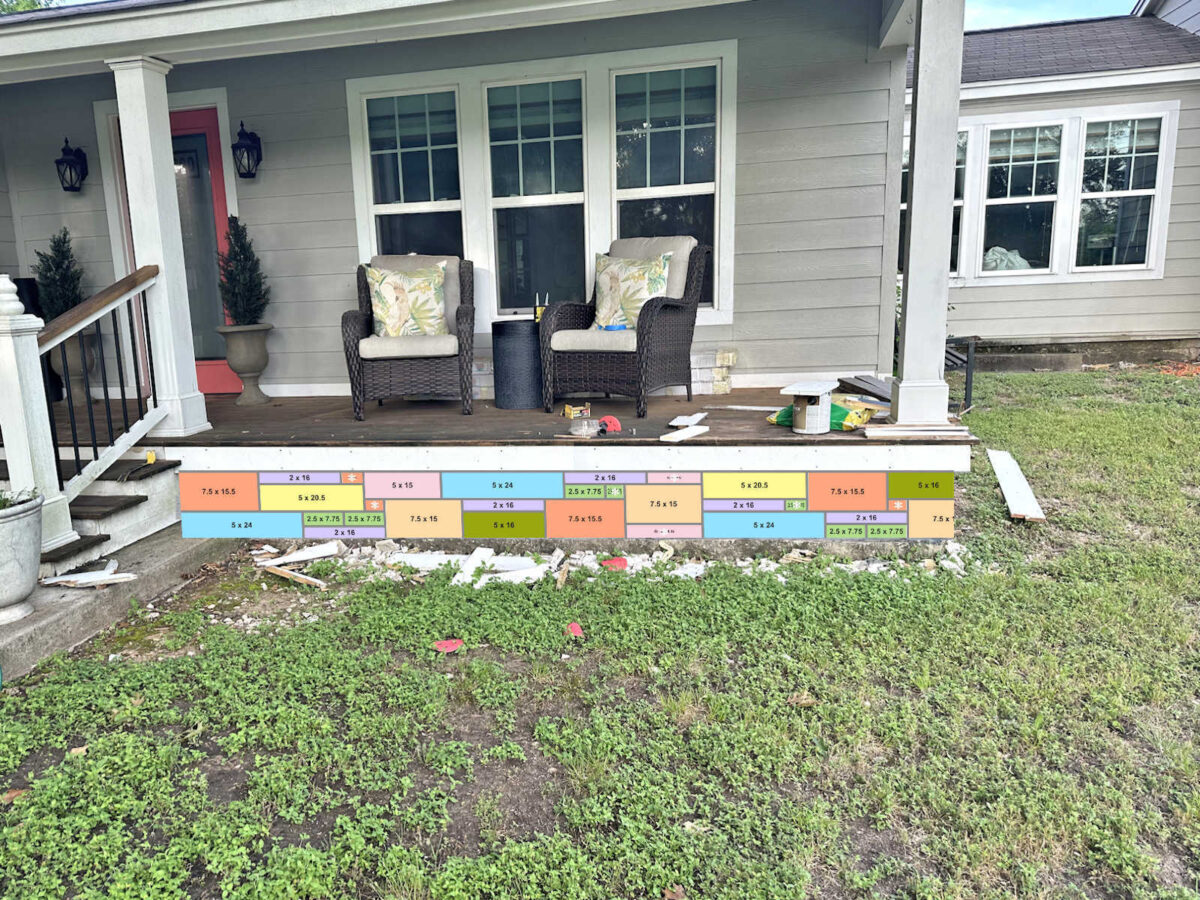
I’m not going to lie. This was a very time-consuming process. I not only had to account for the sizes of the stones, but for the 1/2-inch mortar lines to make sure that I covered every square inch of the skirting area. But with those two maps in hand (I still need to do one for the small area to the left of the front porch steps), I knew exactly how many of each stone I needed. I was kind of shocked to see just how few of the larger stones I need. Had I just set up my assembly line and started pouring concrete, I would have wound up with way too many of the big stones, far too few of the small stones, and I would have wasted a whole lot of concrete and time.
The actual concrete pouring process went really smoothly. I set all of the molds up on a folding table in the carport and made sure they were all level. And then I mixed the concrete in small batches — just two quarts of concrete and 1/2 quart of water at a time — and worked as fast as I could mixing batch after batch until all of the molds were filled. And then I babysat the molds for a while, spraying them down with water as the concrete started getting really hot to keep them from cracking as they cured.
The demolding process was the most time-consuming part of the whole process. Because these stones are so textured, I had to remove one side of each mold to pry each stone out. Then I had to reassemble the mold, readjust the sand under the textured silicone mat, and re-caulk the mold to get it ready for the next pour.
I actually didn’t get very far on the concrete pouring. I got my first batch done, got the molds ready for the next pour, and then Matt needed my help with something that took quite a bit of time. By the time I was ready to head outside to do the next pour, it was pouring down rain. I mean, it was pouring so hard that everything under the carport was getting wet, including my bags of concrete. So rather than pouring more concrete, I had to spend all of the time I had left moving concrete and tools to protect them from the rain. And of course, the area where I had my table set up with the molds was getting pummeled with rain as well, as were my concrete stones that I had placed on the ramp to the workshop.
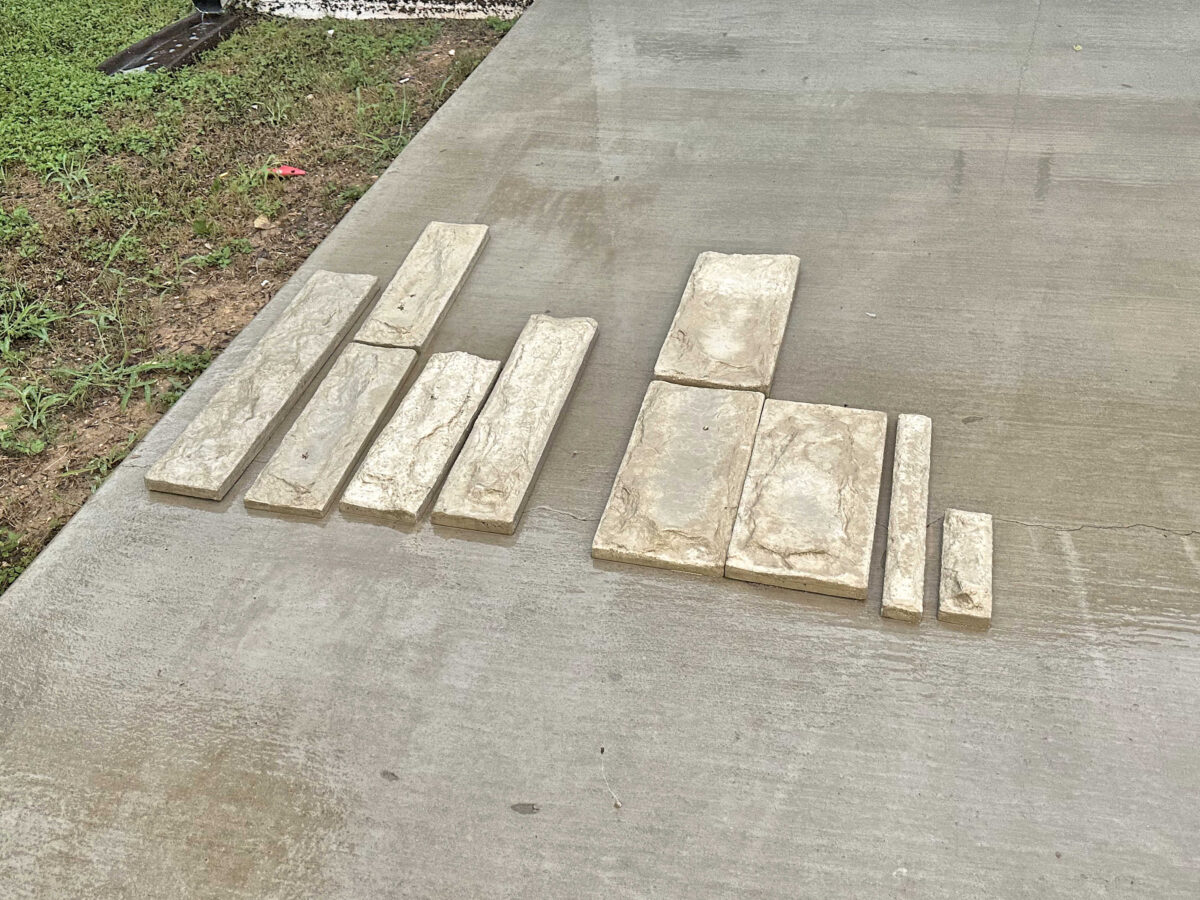
So once again, I got derailed by rain. It’s the middle of June. In central Texas. The rain should be gone by now, and we should be having high 90-degree weather with nothing but sunshine. This rainy weather is really starting to frustrate me. I haven’t even looked at the forecast for this week, but I’m really hoping that my week (which is supposed to be my last week of working on outdoor projects) doesn’t get rained out!! I’ll be so disappointed if that happens. But there’s not a whole lot I can do about it, is there? I might have to be flexible this week and come back to this project at a later date.
More About Our House Exterior & Yard

see all exterior &
yard diy projects
read all exterior &
yard blog posts

Addicted 2 Decorating is where I share my DIY and decorating journey as I remodel and decorate the 1948 fixer upper that my husband, Matt, and I bought in 2013. Matt has M.S. and is unable to do physical work, so I do the majority of the work on the house by myself. You can learn more about me here.
I’m curious why you don’t use the inside of your workshop.
My workshop doesn’t have electricity yet. But even if it did, I probably wouldn’t want to pour concrete inside my workshop.
You could just put a big tarp down to ensure you don’t slop concrete on your floor.
Yeah, I was thinking the exact same thing. It’s raining constantly here, too, and if I was working on concrete right now, I’d be doing it in my garage…which is kinda my ‘workshop’!
I looked into weather and got a magic 8 ball forecast…. Apparently related to a forming El Nino. it’s unique model/forecast the local weather people are curious and confused. My forecast has today being the best, then it gets worse and worse until thunderstorms all day by Friday. Whatever you got, is slowly shifting and oozing to where I’m at by the weekend. It’s usually zooming over to be just 12/24hrs off.
I was doing this to prep & drop off kiddo at a local park this morning for *the* favorite camp for the summer. To learn about coding and flying drones complete with a mini show/display. It looks like it’ll get partly rained out. We do have a “Rained out” fun badge that’ll likely come into action. I hope it holds off until evenings as much as possible over here.
You could install eyehooks + carabineers to create a tarped sidewall. Have the bottom edge weighed down with wasted blocks. Unfortunately If the rain is reaching in the carport a bunch, the wind is likely a big factor and good sidewalls are frustrating to manage in high wind or could create unwanted damage to the carport if they hold well.
That’s a good idea! We actually DIDN’T have a lot of wind yesterday! But the rain came down so fast and so heavy that the ground couldn’t soak it all up. My mom sent me a video of her back patio, and it was covered in about an inch of water (from what I could tell). Her patio is built like my carport, but with a lower roof because it’s not built for cars to pull in. Her patio has NEVER had water covering it during a rain like that. It was a crazy downpour! There’s damage and flooding all over the city today as a result. We were under a flash flood warning. We’ve gotten heavy rain plenty of times, but what we had yesterday was above and beyond what we’re used to here in central Texas.
If you do it. Do plan as a temporary fix vs a room.
Use zip tie loops on strategic connections. Windscreens around tennis courts are attached with zip ties so it breaks away vs causing damage to the poles of a chain link fence. You pick how and where it fails. Frustrating to replace zip ties and dodge a tarp. But okay alternative to to repairing trim or structure after a gust.
You could install a canopy to be under out of the rain. If you wanted to bad enough I suppose. I hope the rain stops this week. Good luck with it all.
Our forecast (southeastern Louisiana) is for rain most of the week, coming from Texas. Would it be feasible to put a tarp or something down to protect the floor of your workshop and pour the concrete in there?
I can if I need to. Hopefully I won’t need to. I can work in the carport even if it’s raining. But what we got last night wasn’t just rain, it was a deluge. We had a flash flooding warning, and lots of areas of the city were damaged. So that’s a little out of the norm. If we’re just getting normal rain for the rest of the week, I can stay put in the carport.
Could you pour in your workshop/shed? You’d be out of the sun and protected from rain.
The stones are looking great!
Can you work inside the workshop. Maybe put a tarp or piece of plywood down as a work surface to keep the concrete off the floor?
the stones look great! your duplication process is definitely ON POINT! Is it possible at this point to open the shop door and work inside there on this project? As you will be protected from the rain and I dont think this project requires power tools? Just a thought to keep you on track with your time line as Mother Nature seems to be fickle and rather uncaring as to our projects! LOL!! I work full time and have been trying to get my garden in here n there afterwork and weekends, she keeps raining on me at the most inconvenient times! The audacity!
Oh my goodness, great job figuring out the dimensions and planning the front. It is going to look really pretty when you get it completed. Thanks for sharing your trial and errors with chatGPT.
What you have completed and taught us thus far is pretty amazing. I didn’t have a clue that you could make your own molds.
It will all work out in the end.
Oh, please do not do yourself a disservice: you are MUCH smarter than AI! There is no actual “intelligence” behind artificial intelligence, it just spits out the most statistically likely response that it’s scraped together from the internet, and will outright lie to you whether or not it can find a correct answer, just to give an answer (and waste water while doing it). There’s already plenty of studies showing people who rely on AI chatbots are losing cognitive abilities, so keep using that brain of yours, even if the task seems like a hassle! 😀 As you can see, your plan looks 1000x better than what it came up with, absolutely worth the mental exercise.
Hope the rain lets up for you soon!
Great, meticulous planning. I hope you can pour and pour this week so that task is behind you. Actually putting them up will be so fun!
One thing I’ve learned with chatGPT is that you have to push back. A LOT. When things like this happen, it helps to tell it that the presented design is not random at all and to do it again. Another good tip I learned is to always include this in the prompt: “Ask x clarifying questions to ensure you understand my request.” If you don’t state this it will always just assume.
Watching the massive flooding in Waco. Hope y’all are ok! Let us know!
We’re fine! The flooding in some parts of the city was crazy, though! The traffic had to stop on I-35 because of the flooding, and cars were floating away in areas beside the highway.
We got 1/2″ rain but some parts of Waco got 5″ of rain and there was much flooding on HWY 35. Crazy Texas weather.
Too bad you hadn’t done your pouring in your workshop. Then you would not have had to move everything, and stuff would have stayed dry. The humidity may have killed you, however. I hate to see you stop on this project just because it is your birthday. You need to be flexible and finish the job. Your storage room will always be waiting for you.
Hope you have a good week overall this week.
El Nino effect?
The 2026 El Niño brings a shift toward wetter and cooler-than-average conditions across Texas, particularly noticeable through the fall and winter months. This climate pattern typically suppresses tropical activity in the Atlantic due to high wind shear, but it enhances the subtropical jet stream, leading to frequent severe storms, flash flooding, and increased winter snowfall.