How To Build An Easy DIY Custom Frame For A Wall Mounted TV – Part 1
I decided weeks ago to forgo the idea of finding a way to cover up and disguise the TV, but I still didn’t like the idea of a TV just hanging on that wall. I do plan to decorate around it, but I still wanted to address the TV itself. So I’ve been looking for ideas, and I came across this amazing custom frame for a wall mounted TV…
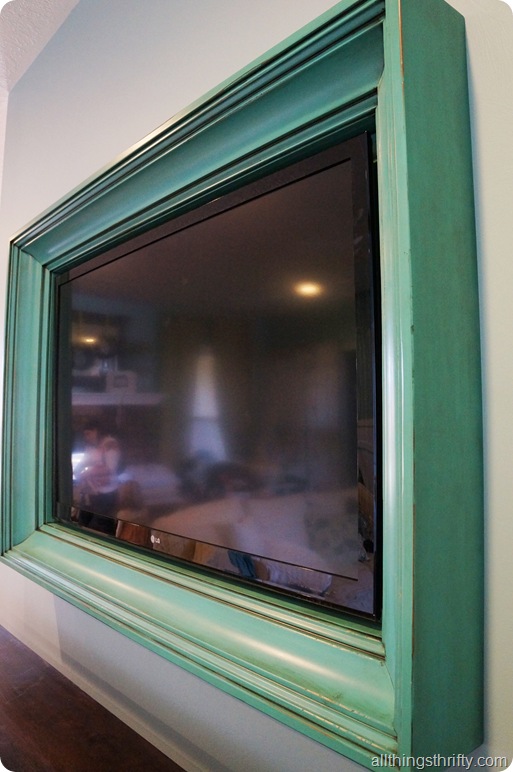 via All Things Thrifty
I love the idea of framing a wall-mounted flatscreen television. I searched for a tutorial online, and didn’t really find anything that I wanted to replicate. My favorite one was this one, but it uses crown moulding as the decorative face of the frame. And I’m fairly certain crown moulding was used for the one pictured above as well. Y’all know I have a strict “avoid crown moulding at all costs if and when possible” rule. (Yes, I have a Kreg Crown Pro jig, and yes I can cut crown if I need to, but I still have an aversion to it and avoid it if possible. 🙂 )
One of my biggest issues with using crown moulding (besides the hassle of cutting it) is that if you want to make a wide frame, the outside edge of your frame is going to be very thick. The frame in the tutorial linked above is 8.5 inches thick on the outside edges. I think that’s fine, and even looks very nice, in a large, open room. But my breakfast room is kind of small, so a frame protruding from the wall 8.5 inches seemed extreme for my particular case.
I knew there had to be a way to get a similar look without the hassle of using crown moulding, and sure enough, there is!
The key is that for the face of the frame, you need to use any type of moulding that is naturally thinner on one edge and builds up so that the other edge is much thicker. Mouldings that will work for this are some of the really decorative (i.e., not basic) door and window casings, as well as the nicer chair rail mouldings.
The one I found that I liked the most was a door casing that actually came in a kit with three pieces of casing and two rosettes. (This is the one I used.) And because the package was missing a rosette, I got it at 20% off. So the moulding for the face of my frame came in at around $16.
So here’s how I built my frame…
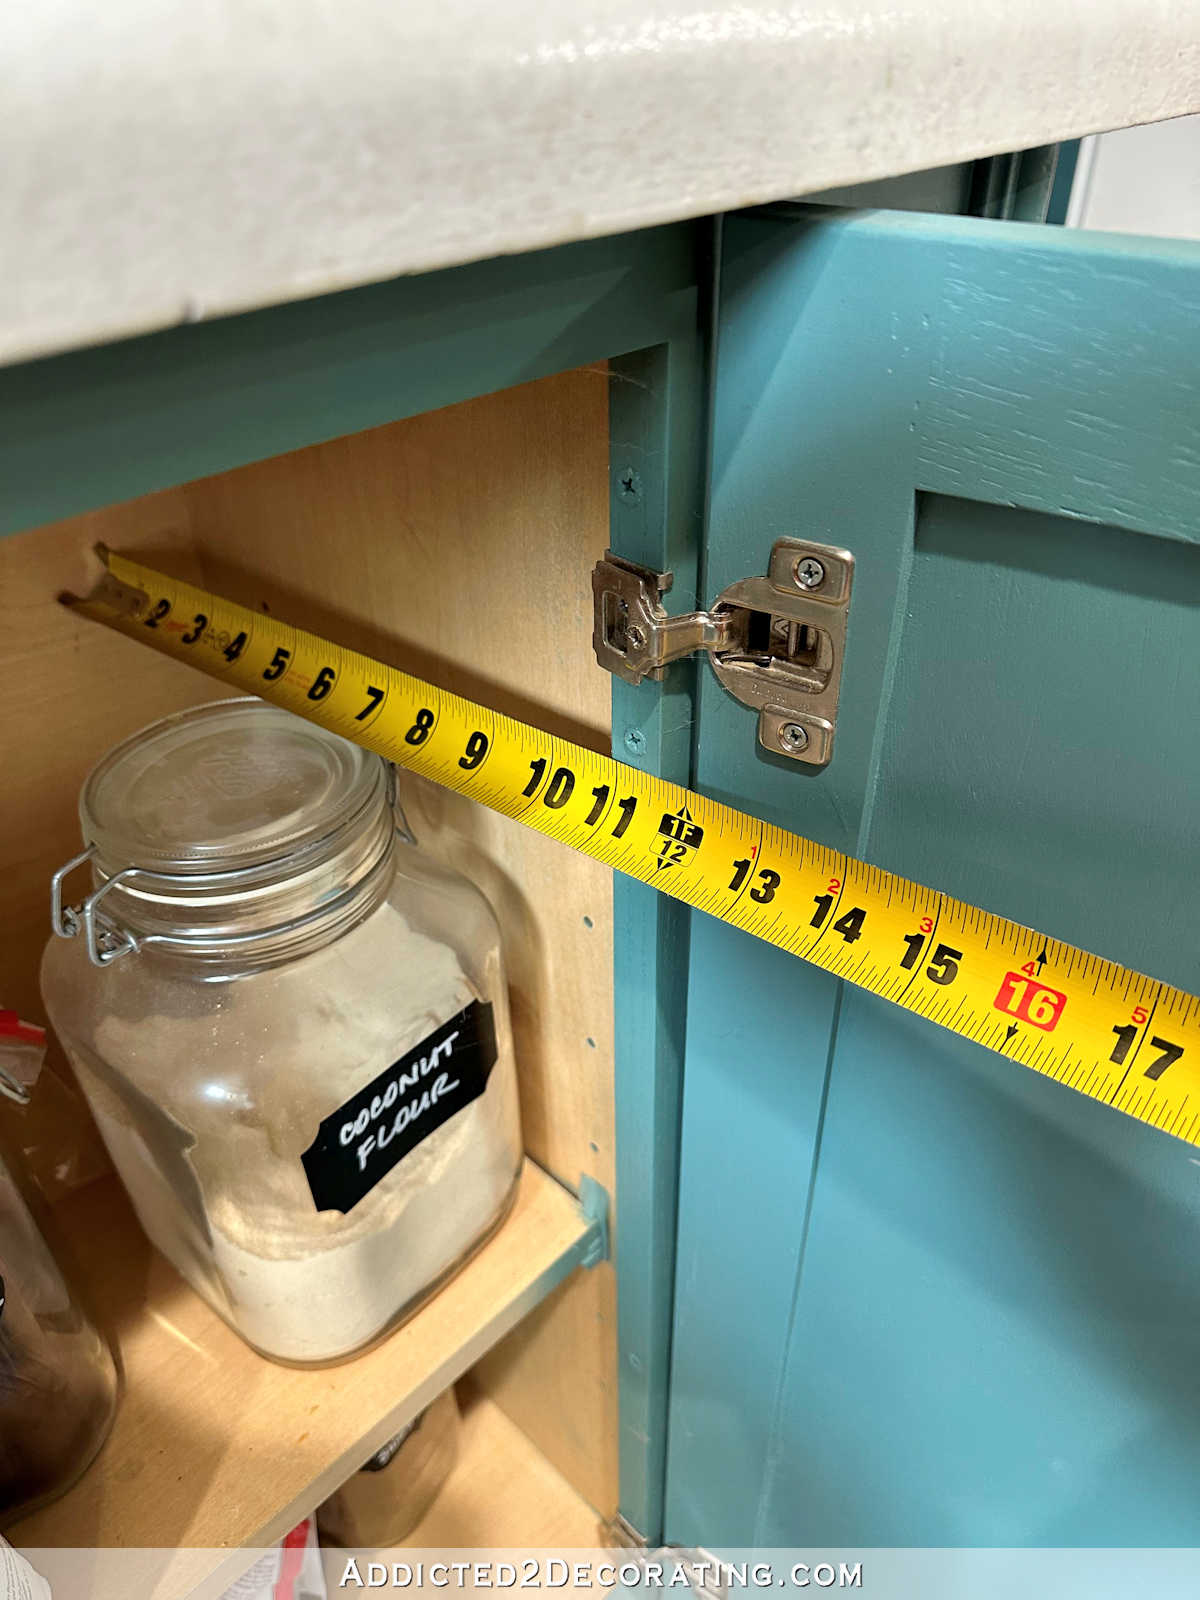
I started by measuring my TV, which was already mounted on the wall. I measured the height, width, and the distance from the wall to the front of the TV. I have a 42-inch TV which measures 22 1/4″ high, 37 3/4″ wide, and projects 4 inches from the wall.
So using 1 x 4 MDF boards, I made a box that fit around the TV with 3/4″ space around all four sides of the TV. So the inside measurements of my finished box were 23.75″ x 39.25″.
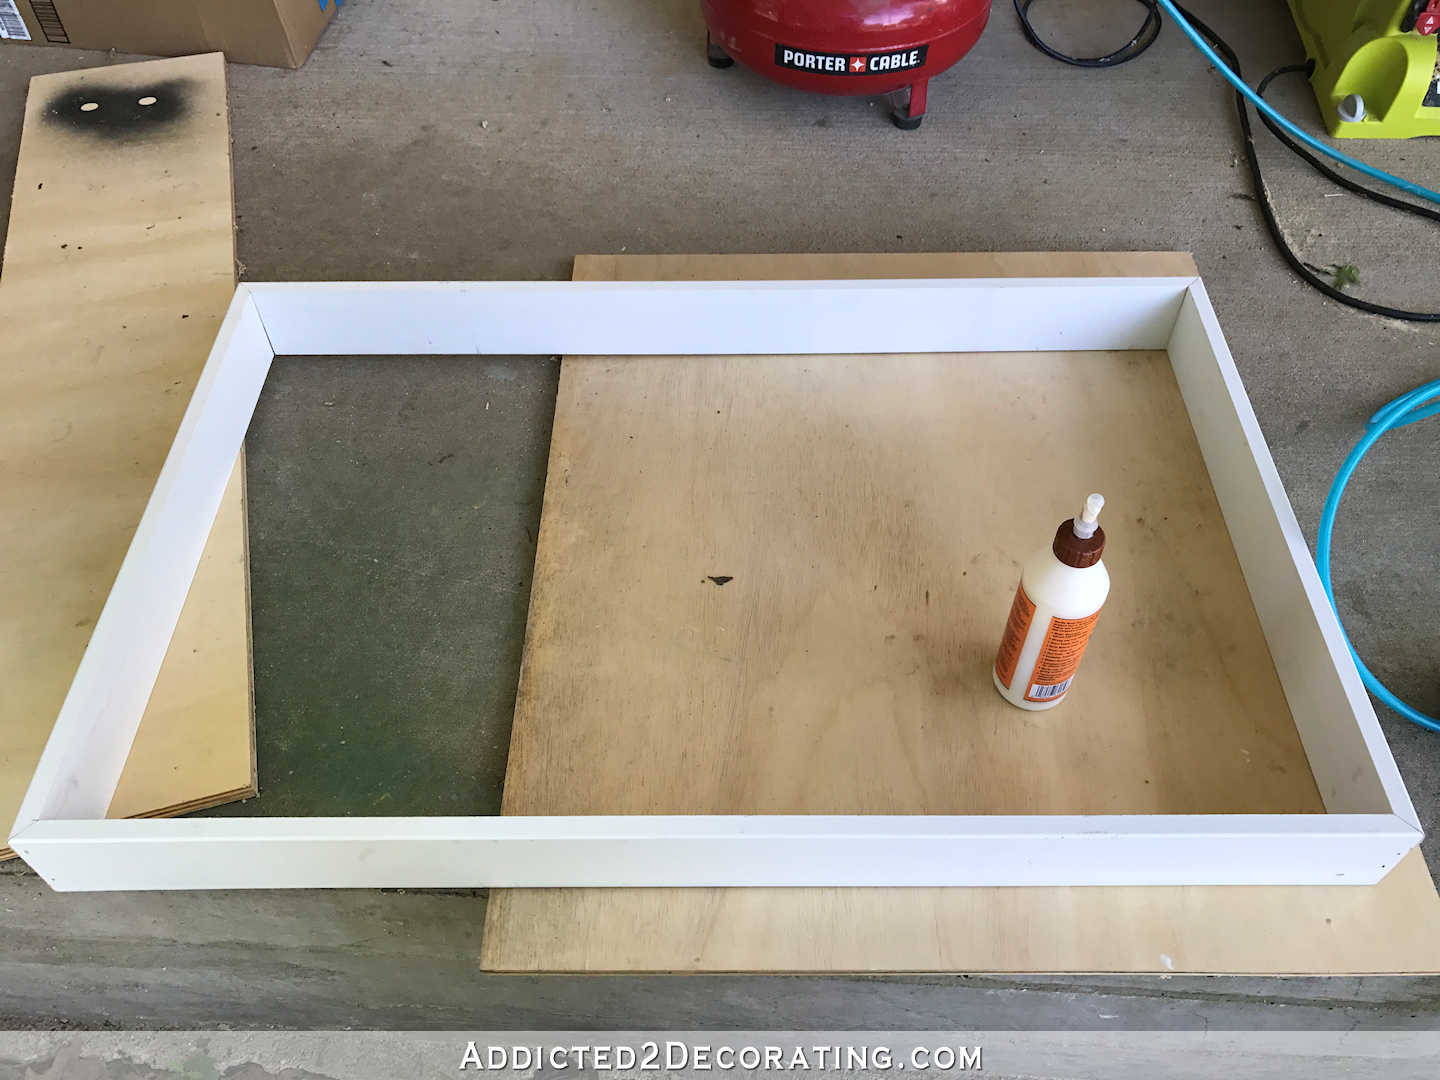
I put that together using wood glue and 1.25″ 16-gauge nails in my nail gun.
So why did I decide on 3/4″ of “breathing room” around the inside edge of the frame? I have no idea. It just seemed like a reasonable amount of room. 😀 I figured if my big refrigerator only requires 1″ of space at the back and the top, and 1/8″ on the sides for proper circulation (as per the owners manual), then my TV should be fine with 3/4″ on all four sides. Of course, you can add any amount of space you feel comfortable with to allow for circulation and air flow to the back of your TV.
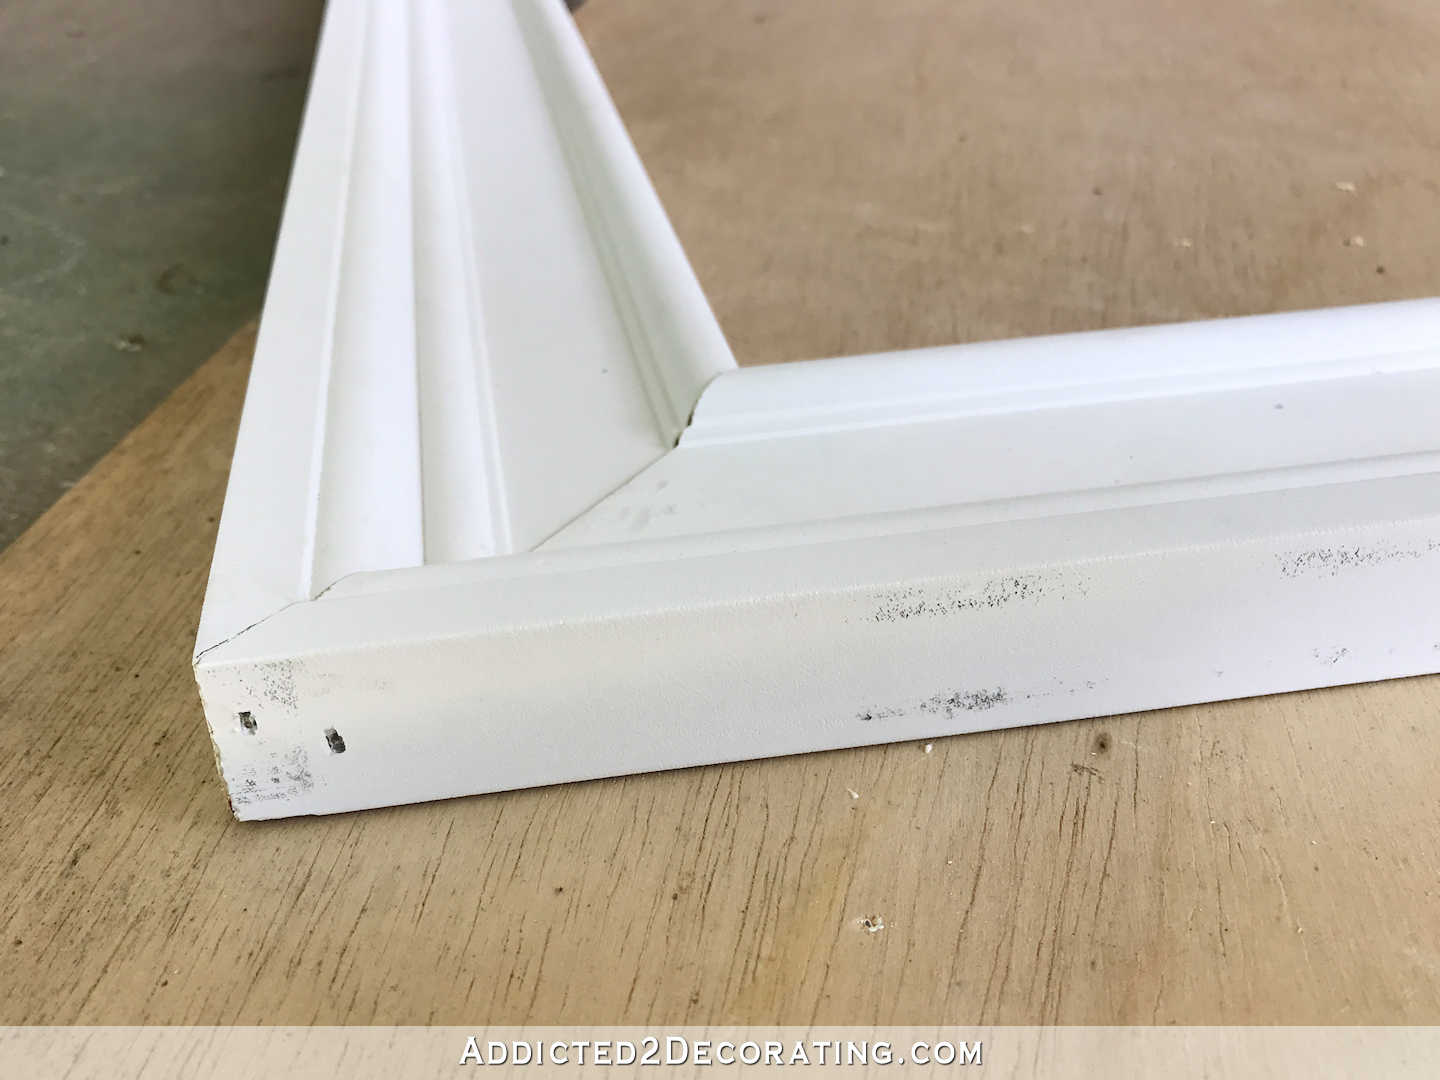
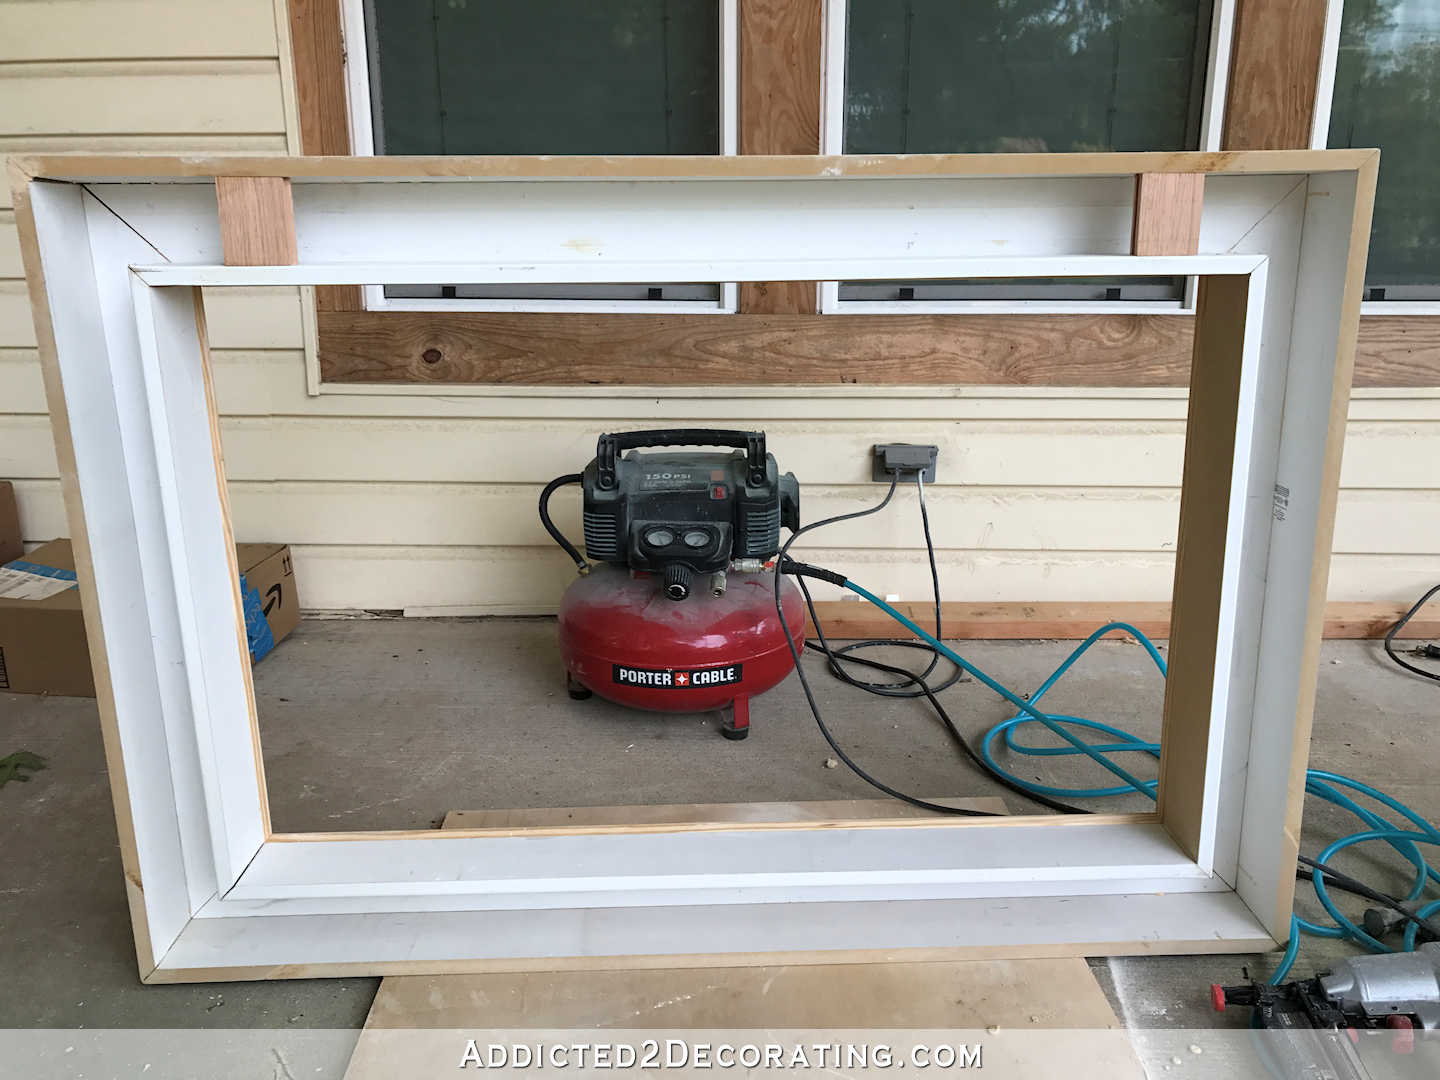
Next I cut the decorative casing moulding to make a frame, mitered on the corners, so that the inside edge lined up with the inside edge of the box above.
I put this together with wood glue and 1.25″ 16-gauge nails, with two nails going each direction on the corners.
And then I placed the frame on top of the box and secured it with wood glue and 1.25″ finishing nails.

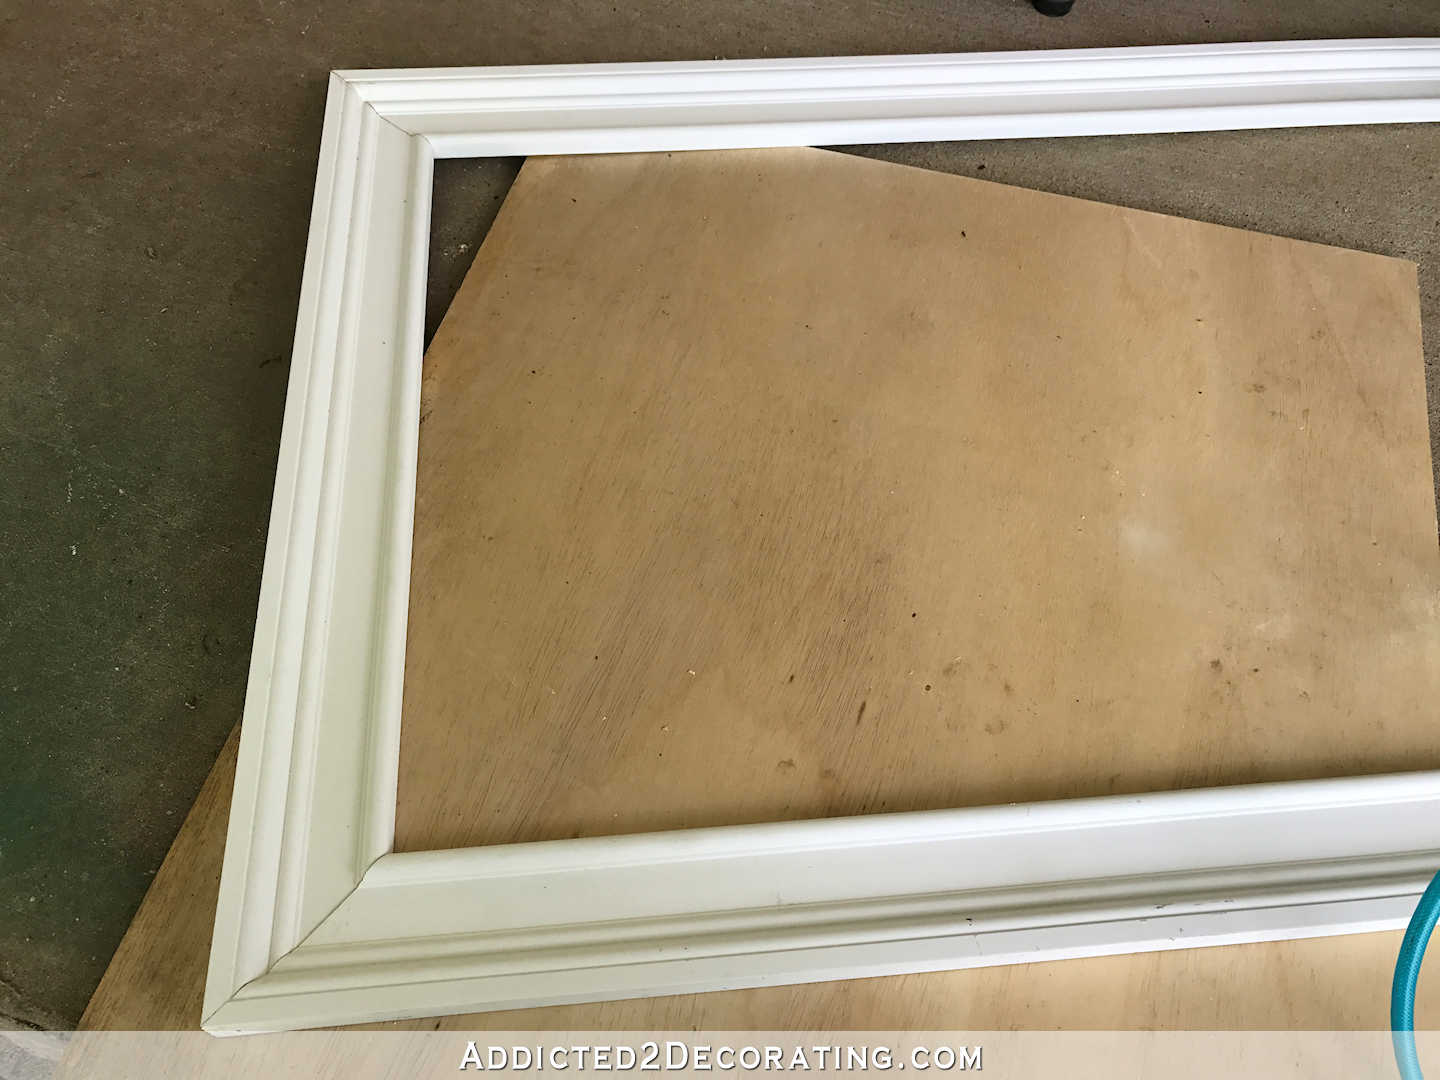
At this point, it looked like this with the outside edges of the frame cantilevered over the edge of the box.

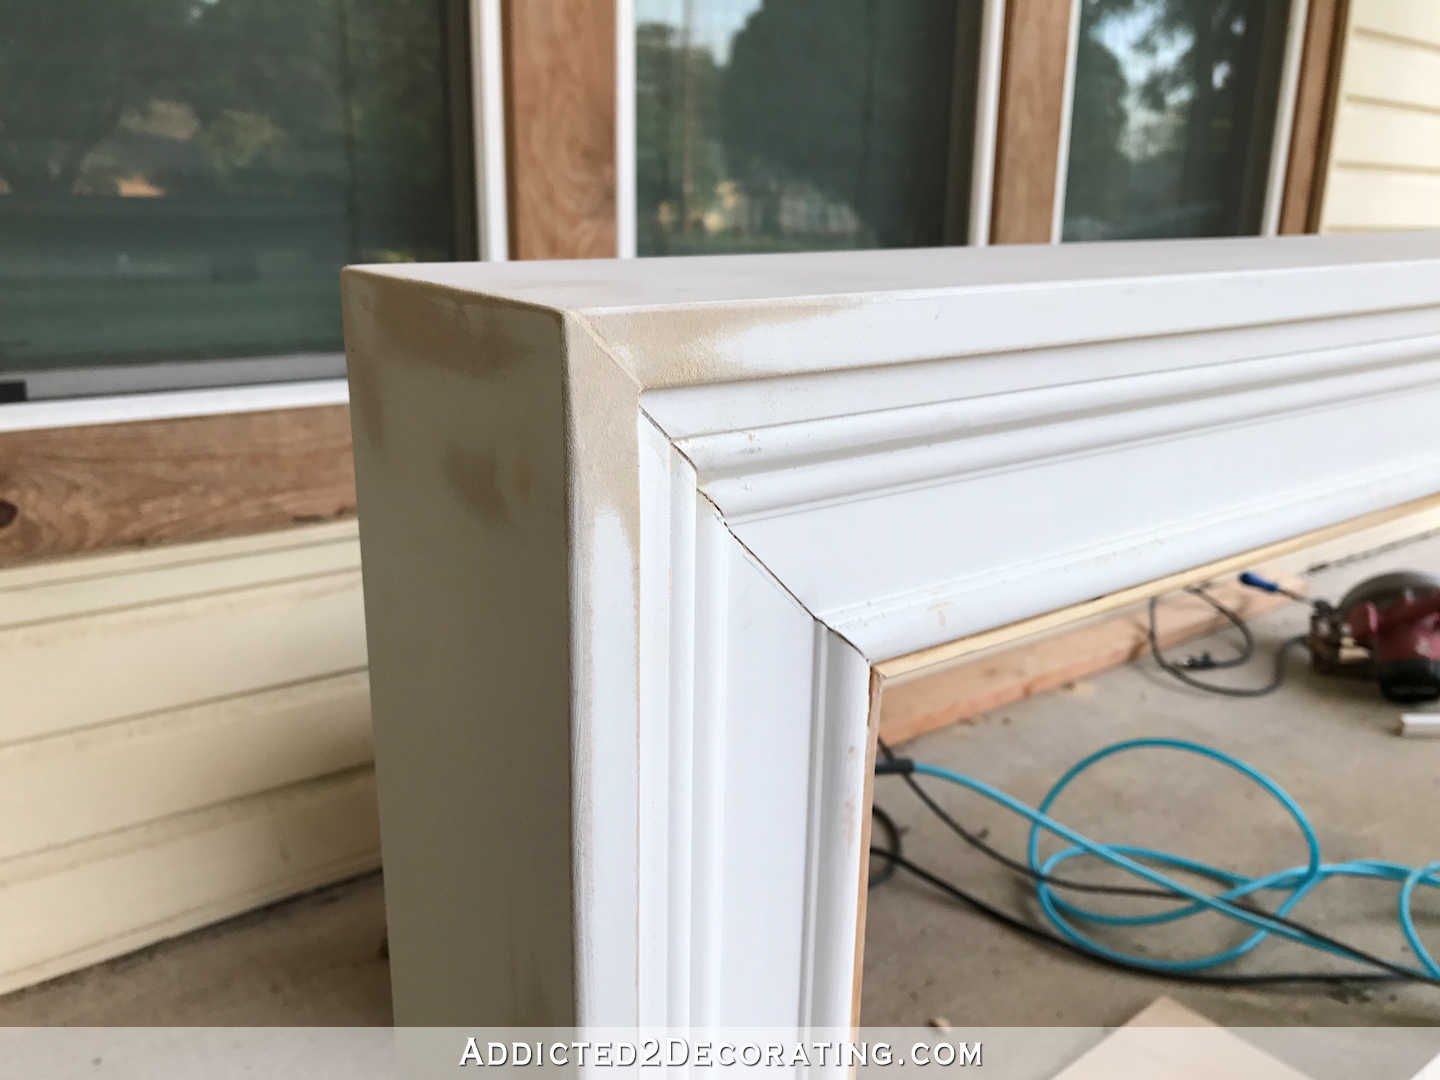
To finish the outside edge, I cut more MDF boards, mitered on the corners, and glued and nailed them around the edges. I intentionally attached these so that they would protrude about 1/4″ past the face of the decorative moulding so that it looks like that edge of the MDF board is actually part of the decorative moulding, and adds to the width of the frame. I used 1 x 6 boards (which are actually 5.5″ wide) for this part, and before I attached them, I ripped them down to about 5″ wide.

I did that on all four sides, so the finished thickness of my frame on the outside edges is 5 inches.
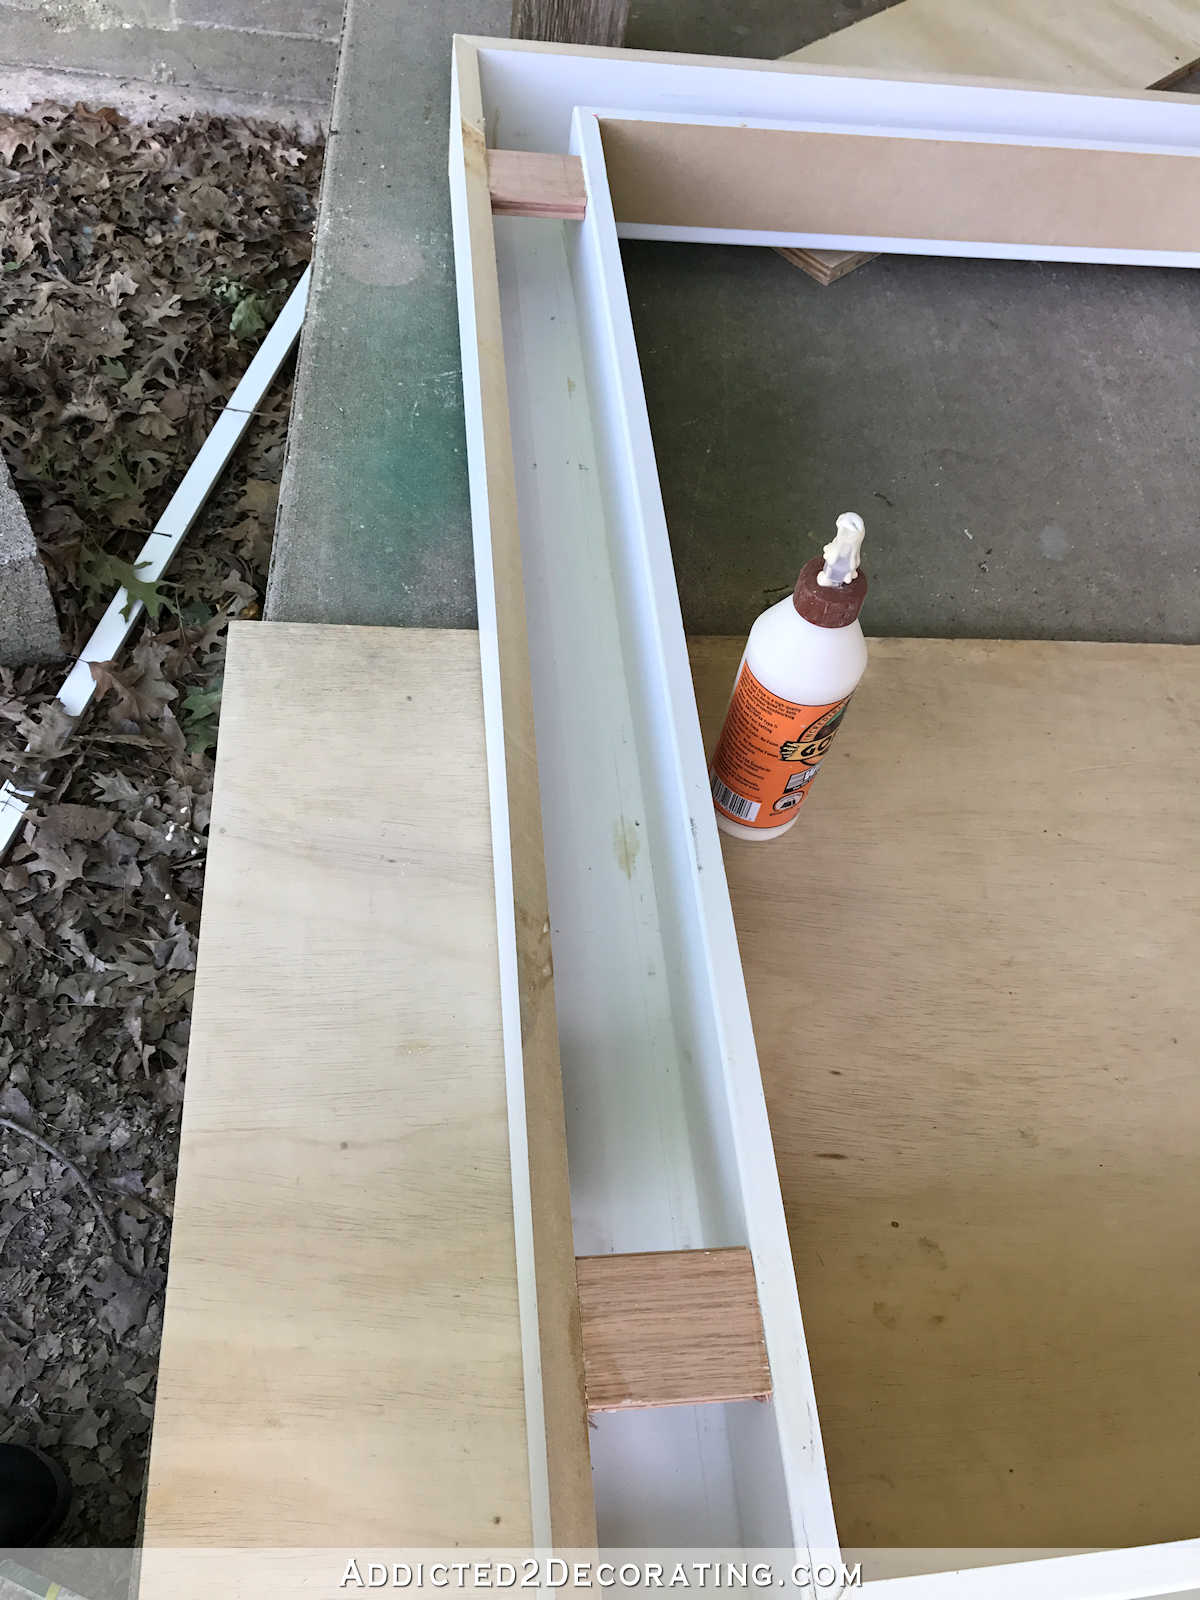
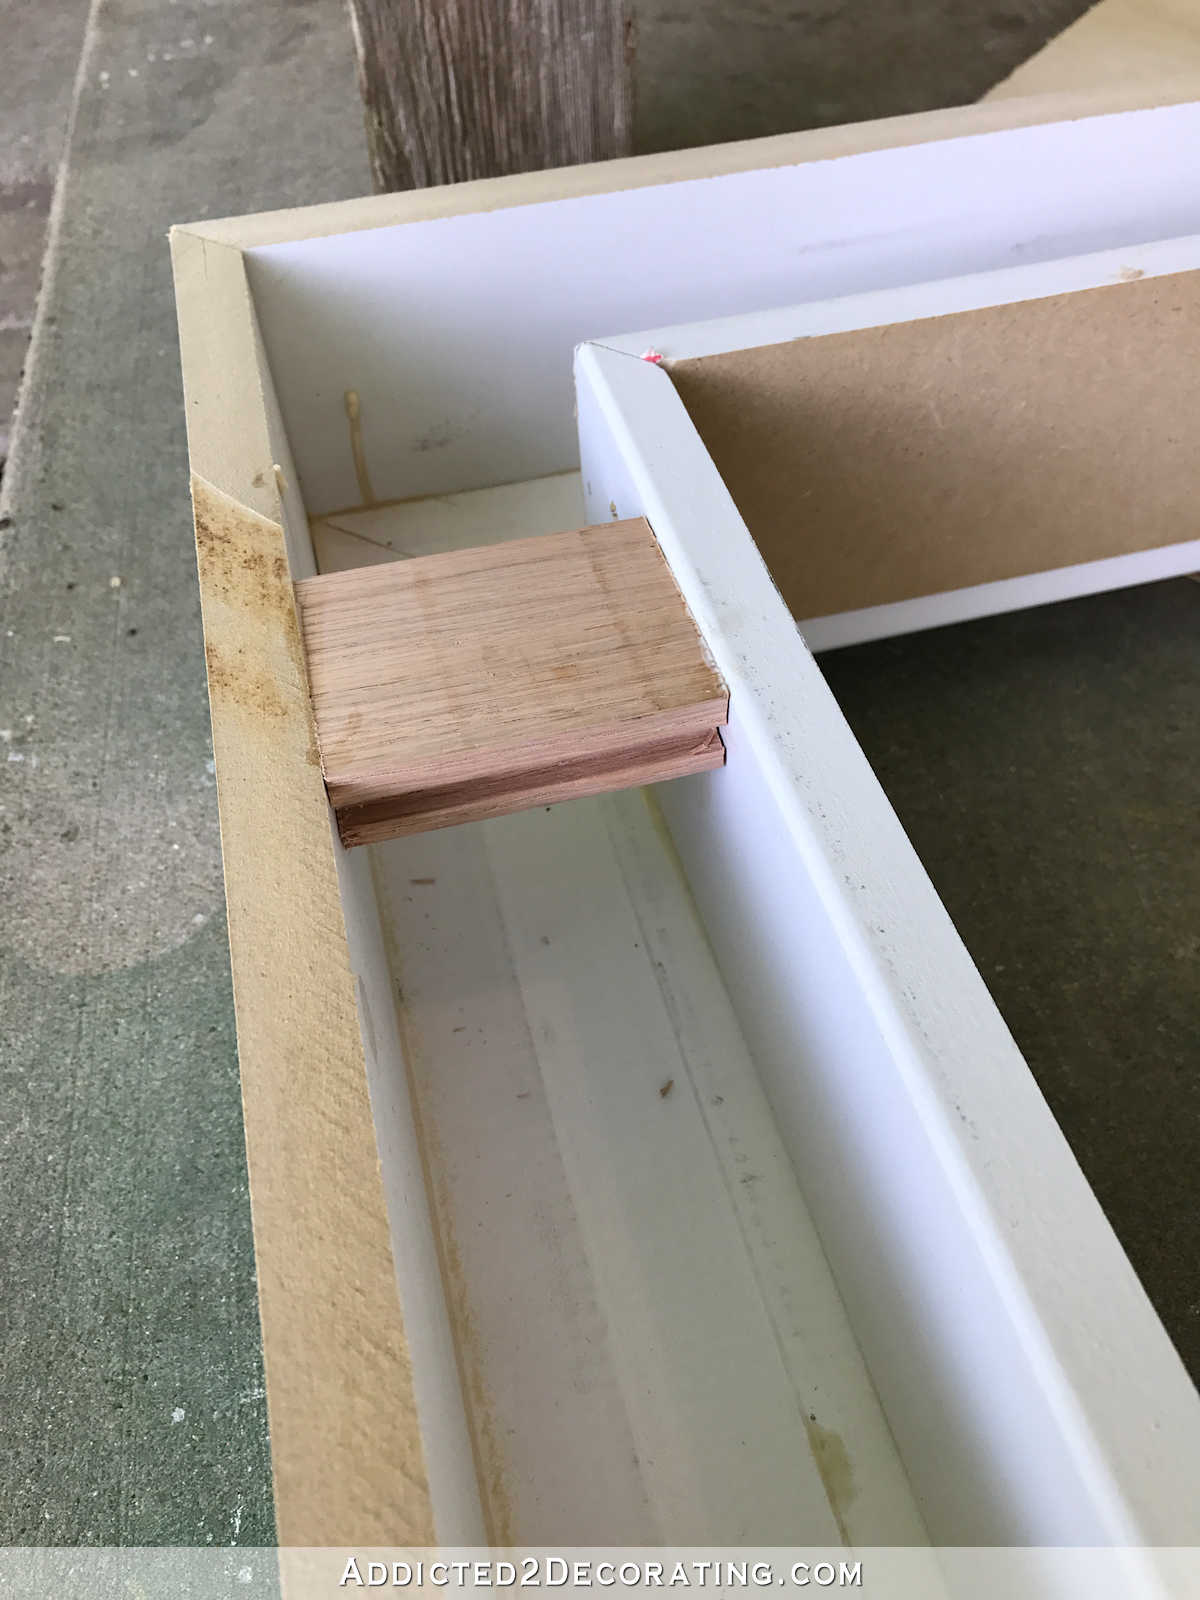
The frame at this point was very sturdy, but it will be installed so that the top board is holding the entire weight of the frame. (More on that tomorrow.) So I wanted to give it a bit more reinforcement by adding two spacers, cut from leftover hardwood flooring boards, and glued and nailed into the inside and outside boxes of the frame.
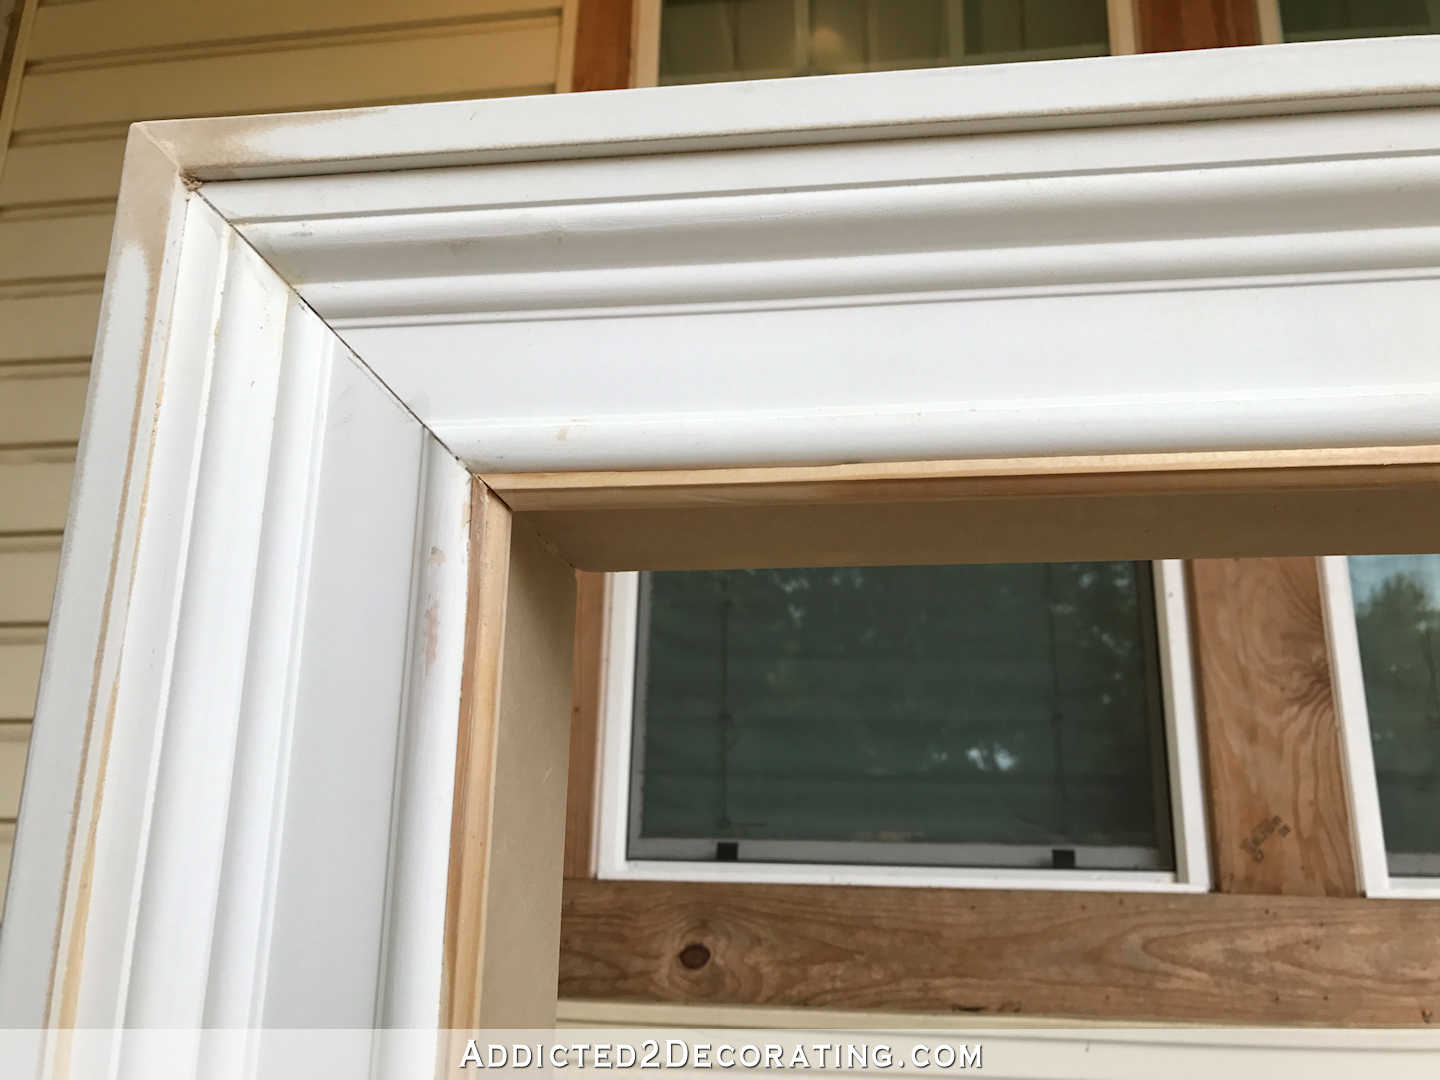
And as a last step, I wanted to do something to hide this area where the frame meets the inside box. Evidently my cuts weren’t exactly perfect (they never are 😀 ) and the frame and box didn’t line up perfectly in some areas, so it had an unfinished and sloppy look that I wasn’t satisfied with.
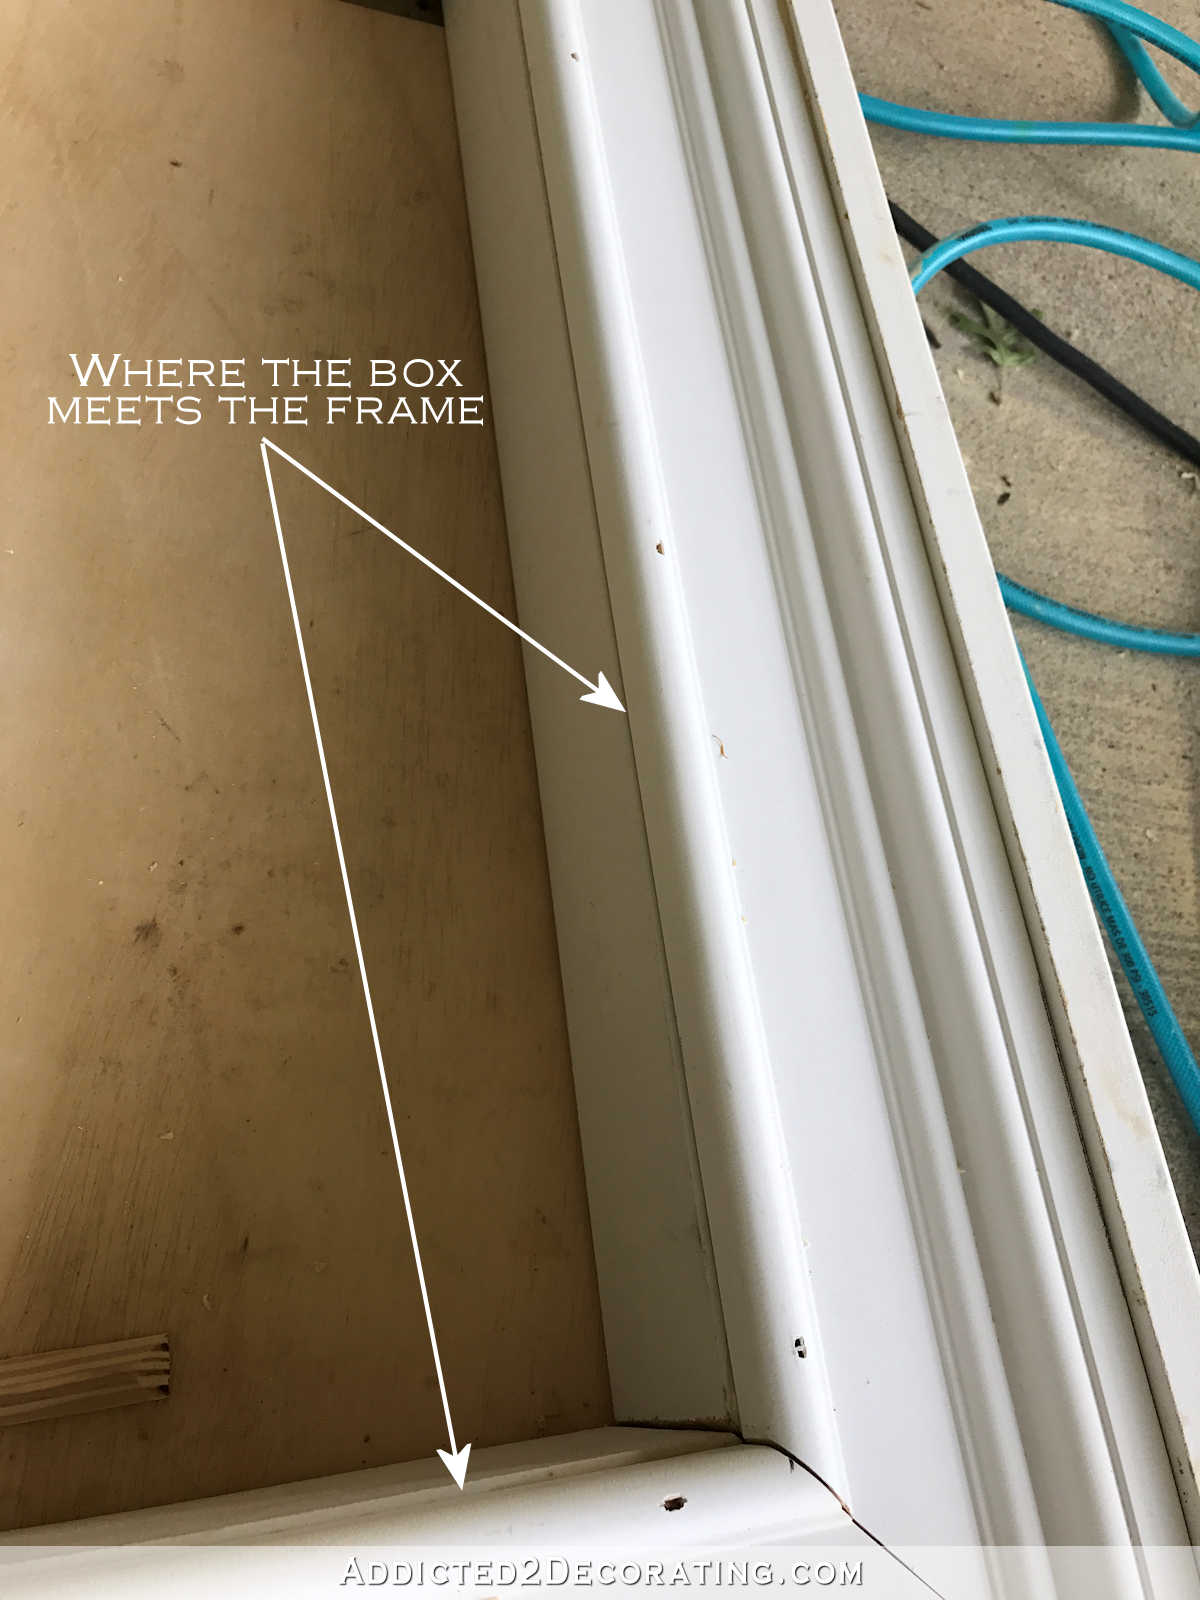
So I used some very small cabinet moulding to disguise that area.
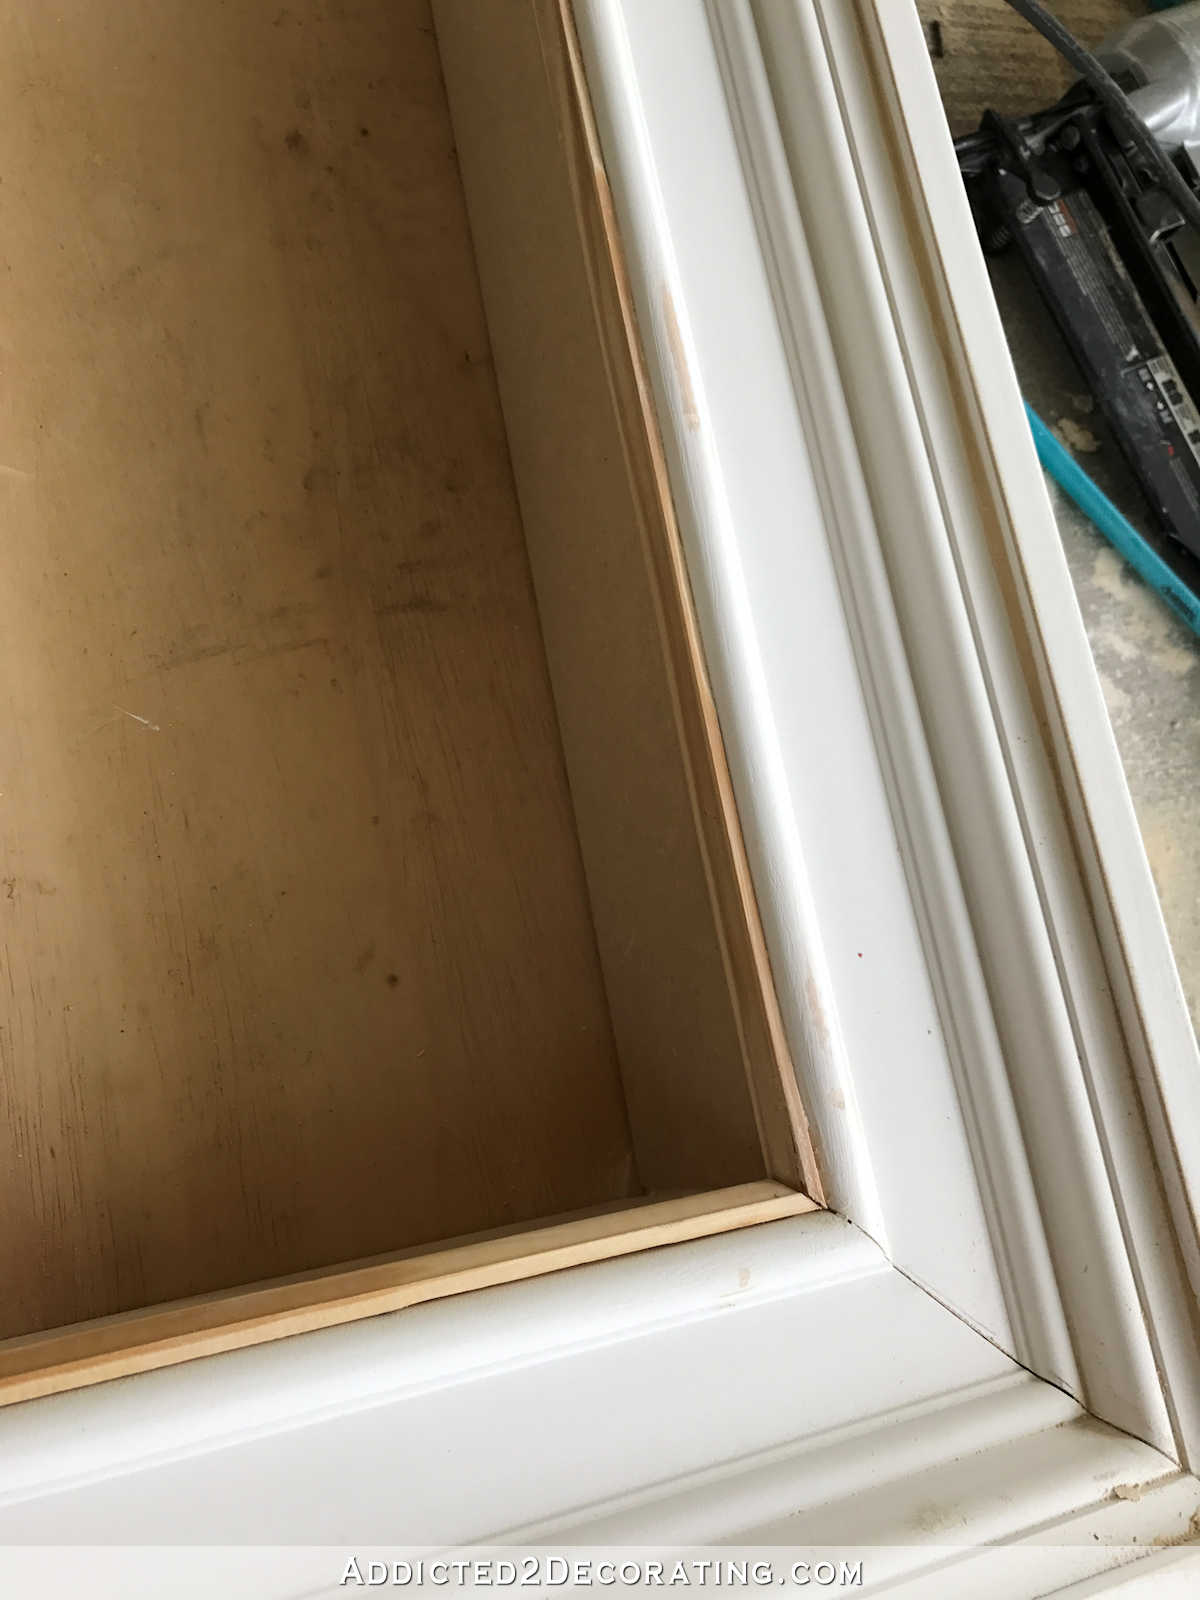
With the basic build finished, I filled all of the nail holes with wood filler and then sanded them smooth. So far, here’s how the frame looks from the back…
And here’s how the front looks…
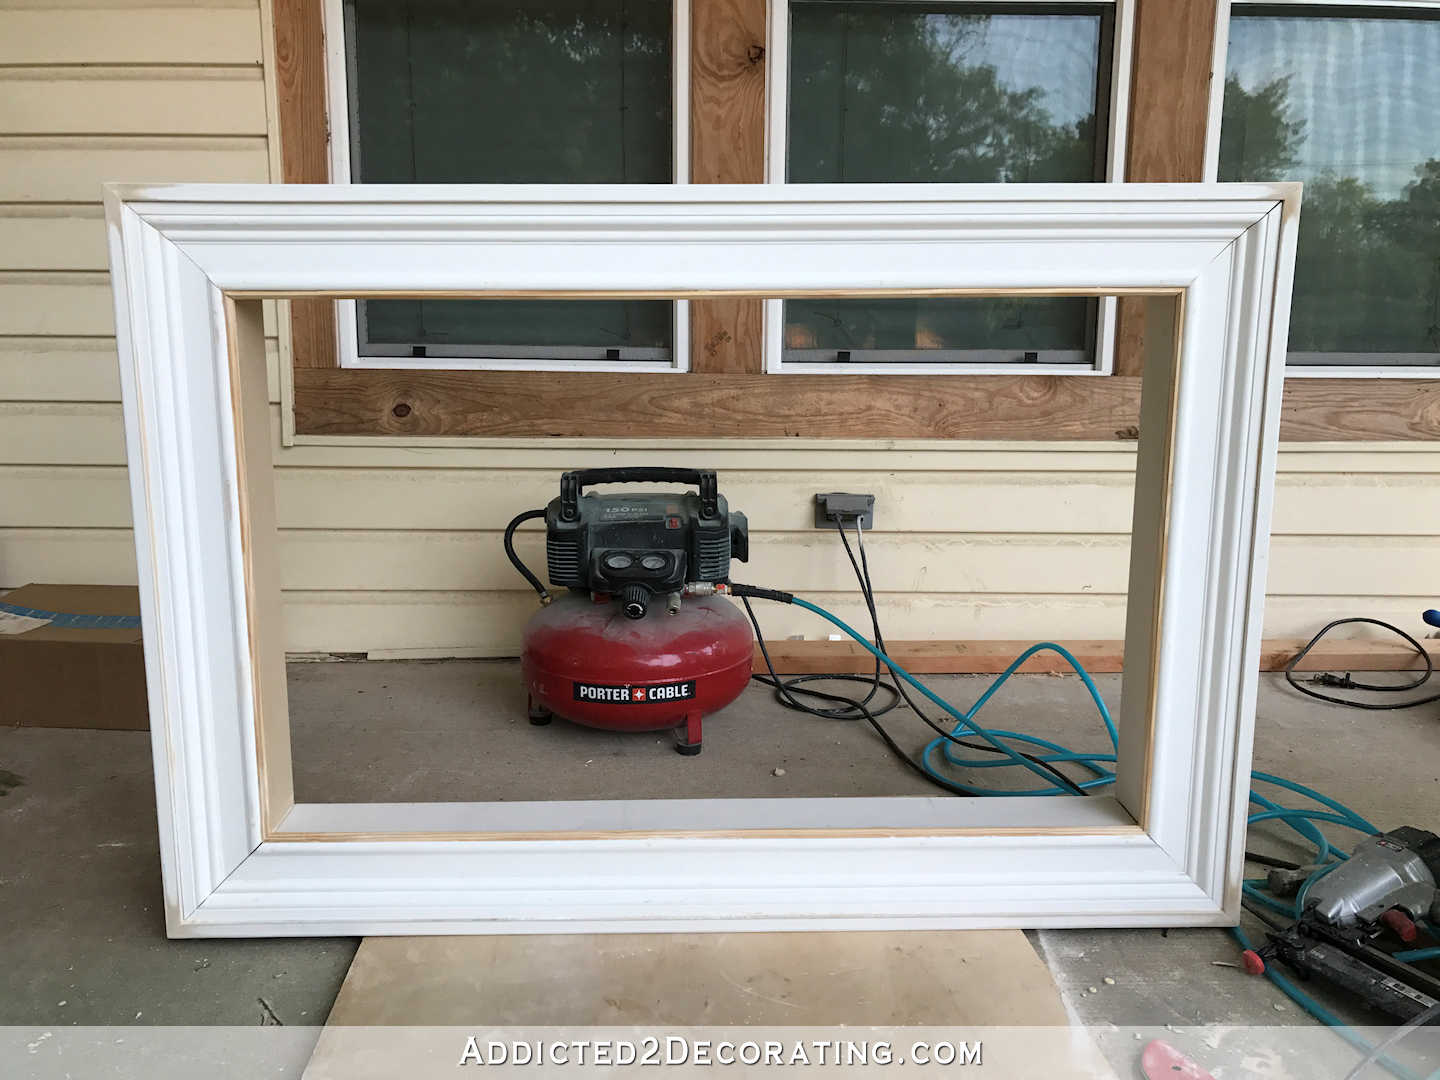
I still have quite a bit of caulking to do so that all of these separate pieces (i.e., the outside frame, the decorative casing, and the small cabinet moulding) will look like one continuous piece of moulding…
And then, of course, I need to paint the whole thing and get it installed. I’m hoping I can finish this up today
I’m still not sure what color I want to paint it. I had considered green, but when I brought the frame in yesterday and propped it up on the buffet, I realized that I the white looks really pretty in the room. So I might test out both before making a final decision.
By the way, I’ve revised my goals for the month. You can read details on the “update” at the end of Monday’s post. The nutshell version is that my priority this month needs to be cleaning out my garage and storage room so that work can begin on my studio. Adding the pantry into the mix this month just feels stressful, and not in a good way. So this month, I’ll concentrate on my garage and storage area, while also hopefully finishing up my breakfast room and kitchen completely. I also want to have my plans in place for the pantry so that I can jump in with both feet on that project on June 1st.
UPDATE:
The TV frame is now finished and installed in my breakfast room! Click here to see the finished project…


Addicted 2 Decorating is where I share my DIY and decorating journey as I remodel and decorate the 1948 fixer upper that my husband, Matt, and I bought in 2013. Matt has M.S. and is unable to do physical work, so I do the majority of the work on the house by myself. You can learn more about me here.

The TV frame that is your inspiration is very cool! I can’t wait to see your version painted and on the wall. It looks like it’s going to be nice as well.
Very creative way to make a wall-mounted flat screen TV look a little less TV-ey? LOL
Mark
Seriously LOVE this idea!
Love the frame idea! I think this would be a great place to just go for the white. I’m wondering if green or another really saturated color might cast a weird tint on the tv screen and distort the colors a bit.
I want one! We have a TV mounted above the dresser in our room, and when you walk in the room you can see it from the side. So of course you see all the wires in back and the mounting bracket too. This would be perfect. But since hubby just made a farmhouse style vanity for our basement ( per my request ) I think I’ll have to wait. Basement work is priority one now so family can use it in June.
Wise of you to put off the pantry, and take time thinking how you will use it while you get the garage and storage emptied. One thing I will mention for the pantry is pull out shelves on the lowers. We just got them and I love them! I only wish the side rails were taller, so I could stack things high without them getting caught. Also, wonder if full height “pantry” cabinets in the corners would make sense? I hate the wasted space in corners, or the dead areas that are tough to reach!
Looks great thus far. Love that particular casing molding and have used it for a few projects. My fav is around my bathroom mirror with mosaic tile on the flat area.
OHH! Great idea with the mosaic! I was wanting something more decorative than the casing or crown that I could find, but that would entail buying some expensive moulding, so I could go with the casing and jazz it up with mosaic! Excellent idea!
Best wishes with your project!
Timely post! I had hubby create a recess area for the flat screen to set inside in my kitchen, but wasn’t quite sure how to get a frame around it. Between the link you provided and your pictures, I’m sure he will get the right idea of how to accomplish the crazy imagine I have in my mind!
Thanks!
Looks great! We used crown molding but turned the ‘wrong way’ so it slopes from the tv toward the wall. Also purchased an inexpensive IR repeater so the remotes work with the equipment stored in the cabinet below. Oh! We found that our frame is lightweight enough that we have just attached it to the wall with stick-on hook and loop. It’s been up for 5 or so years without any problems or issues.
Brilliant idea! I thought the TV looked a little bit “unfinished” and “utilitarian” just hanging there on the wall. But I would go with white, I just can’t see a green framed TV hanging above an eggplant buffet.
You are just amazing Kristi….!!!
What a great idea to frame the TV. It’s going to look amazing. Looking forward to the reveal tomorrow. Also I think it’s a good idea that you revisited your May goals and leave the pantry for now and tackle your garage and storage, ready for the Contractor. This way you’ll also be able to have little breaks to finalize some of the items in your kitchen and breakfast room.
I love this idea!! On your roku there may be an app to view your own personal photos. You can use that to turn your tv into a large piece of art when you aren’t watching something 😊 If you don’t mind keeping it on…
Here’s some ideas on how to do it. There may be more ways too (because this is an old blog post).
https://blog.roku.com/blog/2015/07/09/how-to-display-your-vacation-photos-and-videos-on-the-big-screen/
Kristi, you’re so creative and such an inspiration. Now, I’m imagining how I might use a framed mirror to pull colors together in two adjacent rooms. Do I marble, distress, create fine lines of different muted colors in each crevice of the molding, go bold with vertical stripes…time to start a project board! Thank you for sharing; I ❤️ the vibrance you’ve created in each of your rooms.
Do you have a link to a tutorial about how you do all your caulking/filling? We just installed crown molding in our house (I know why you hire it out!) and while we did a decent job cutting pieces, we now have the huge task of caulking/filling all of it to hide the gaps and imperfections. Any advice on how you caulk, even for pieces like this TV frame (do you tape? use a tool to smooth it? brand of caulk?) would be very useful! Thanks!
I’m so impressed with how you create these kinds of things so quickly–not the actual building, which is impressive in its own way, but the actual idea of how to do it, what to use, etc. I know it would take me forever, if I even got there! Just one of the many reasons why I love your blog!
What a cool idea! I can’t stop thinking of it in black, even when trying to conceptualize other colors, especially with the deep purple buffet under it. “They” say every room needs a little black, and this just might be it.
Projects like this are very soothing for anal retentive folks (like me!) who do not like to see the back sides of their televisions.
I love this idea. Do you have to worry about the TV overheating or is there enough air circulation around it?
I think Kristi addressed that in the post towards the beginning.
I had not thought to worry about breathing room. I missed the first time I read Kristi’s post but see it now. I also read the linked blog from the original and saw people there concerned about air movement in the comments.
I wonder if 3/4″ is enough? Fridge’s have fans and such blowing air around. Not sure TV’s do? I think it’s a good idea to leave a little space whatever you arrive at being the right amount. After all, the next TV might not be exactly the same size anyway and if you leave some space you have a better chance of fitting the next one. I wonder if you could paint the back/inside black so that it wasn’t obvious the black TV didn’t go to the edge?
Mark
This idea is so cool! My exposed T.V’s all over my house are definitely an eyesore!! I am always looking for good t.v solutions. This will look really nice on your wall. I’m excited to see it finished and how you address the wires. Great solution! Wow… you work fast!
Kristie, What makes cutting cutting crown molding and getting the corners right more difficult than what you did in the photo? Bear in mind this is coming from pure ignorance on my part; either one would challenge me.
I’m hoping that you will address the wires in the next post. I’m waiting until I get my retirement home before buying a flat screen TV and then I can retire my “big butt TV”🤣
you read my mind!! yesterday i saw your post and thought , that TV needs a frame and here you go. Creative minds think alike!! Looks great. I just wish i could get an accurate miter. That is such a feat for me. I have a great miter chop saw but just can’t seem to master it. Love your blog. Look forward to reading it at the end of my day.
It’s perfect! Of course. What about painting it the eggplant? Then the TV doesn’t stand out and draw attention from the buffet (or to itself). The eye would see the buffet as a larger “wall” unit. It’s all so beautiful. I am loving this room!
I’ve been searching for weeks to find a tv frame tutorial that really explains exactly how to get it done in understandable terms and yours is hands down the best tutorial I’ve ever seen on absolutely anything! Your pictures were awesome at visually explaining how and why you did everything which no one else seems to think is helpful but it makes all the difference in the world. I am so excited to do this now!! Thank you so much!