Original Artwork (by me!) + Super Easy DIY Modern Framing
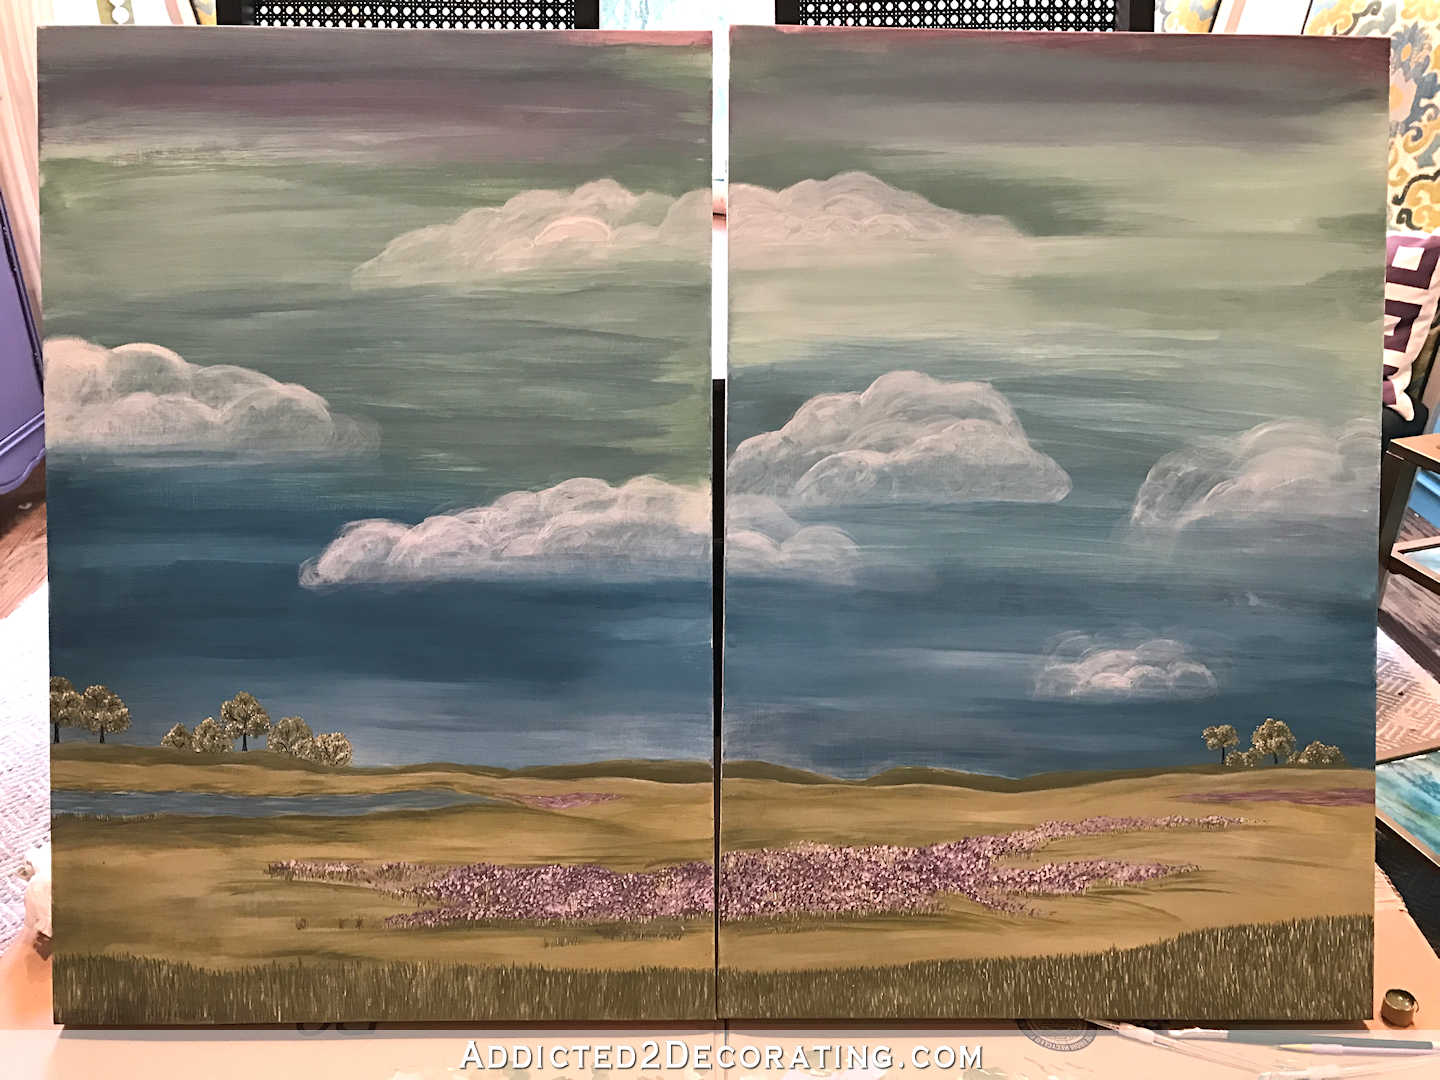
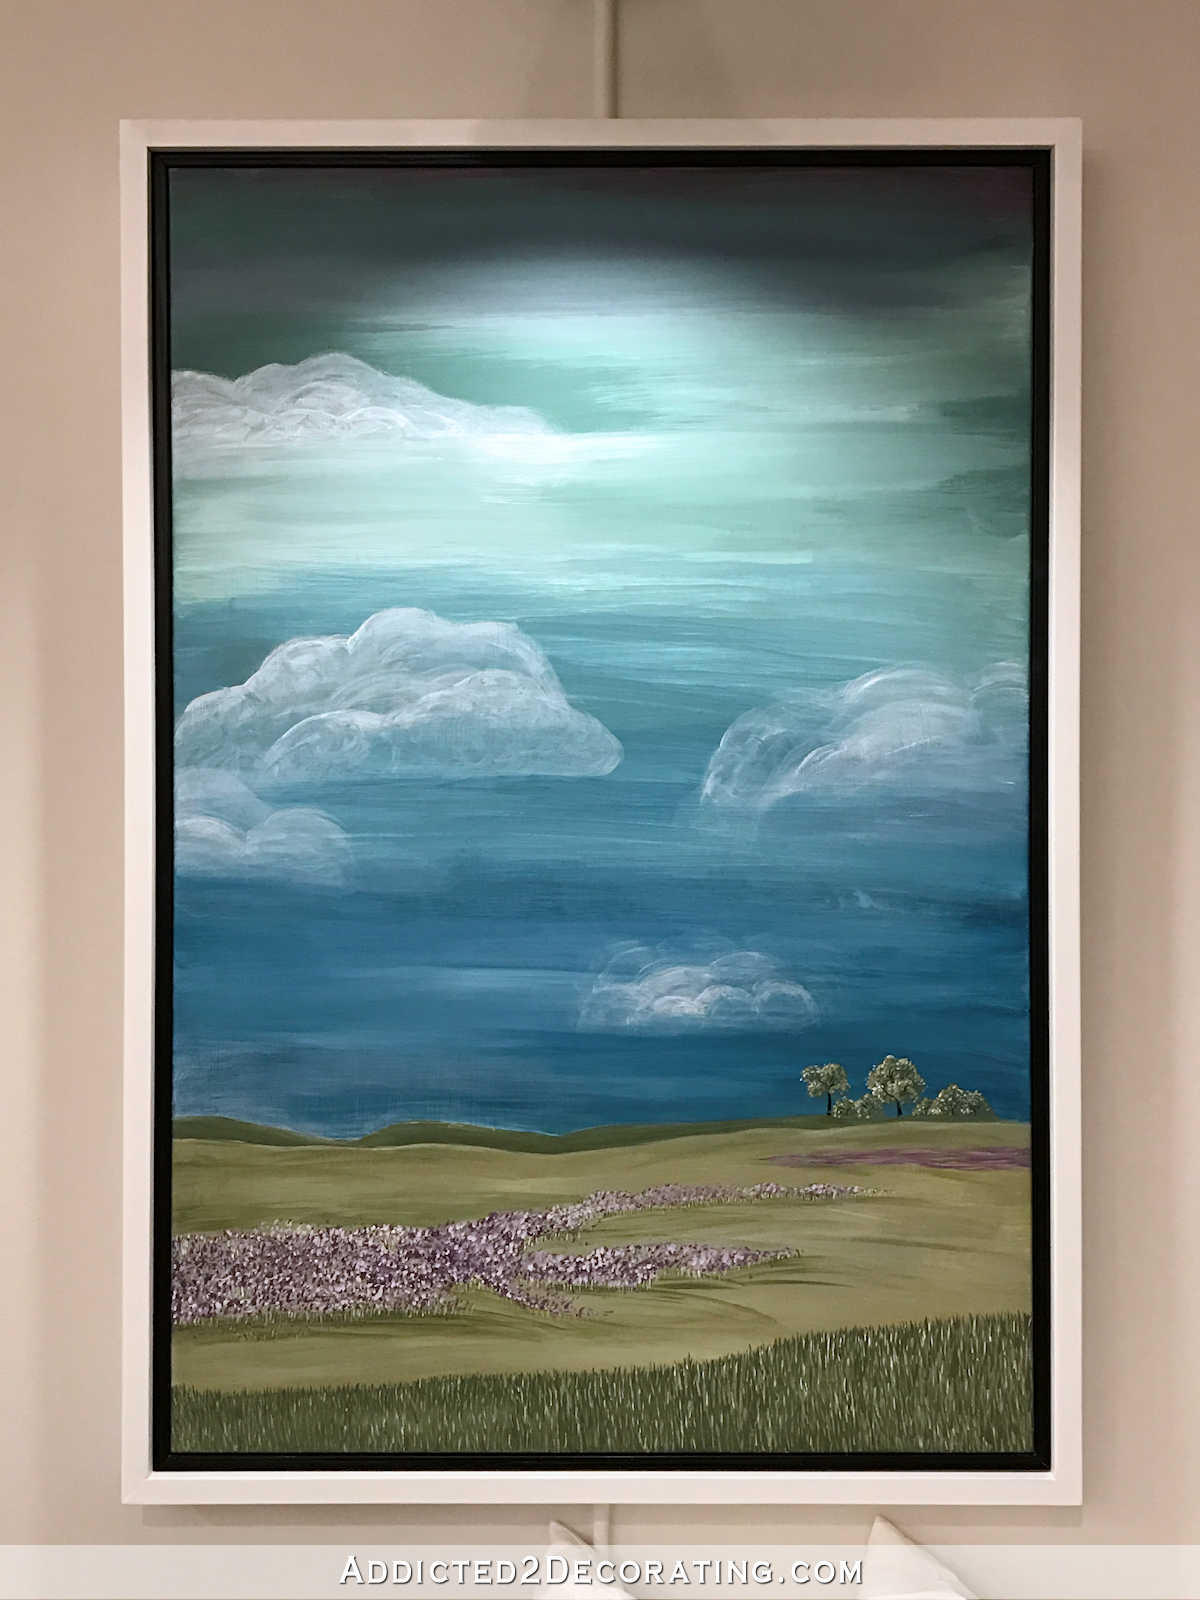
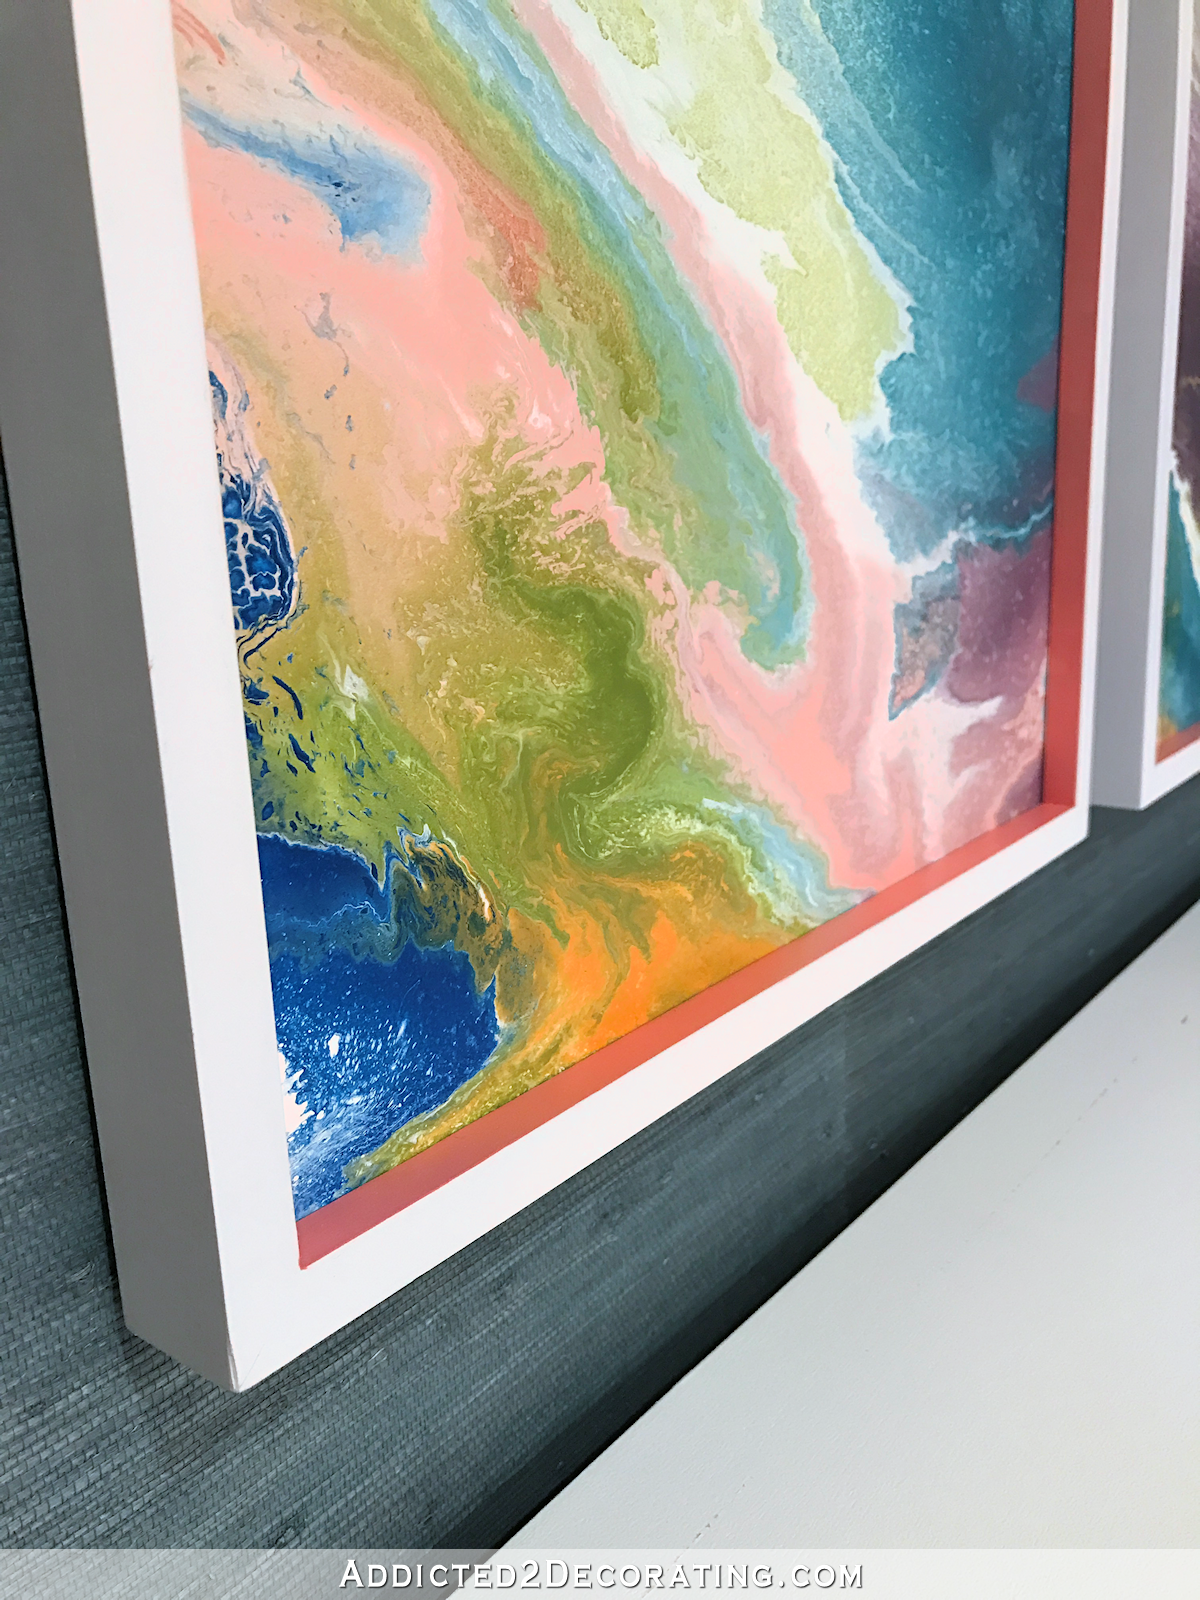
I spent the weekend doing something very fun, relaxing, and creative. I painted my own original artwork for the breakfast room! As I set out to do these paintings, I knew that I wanted super colorful landscapes. I basically wanted an explosion of color on canvas. I painted them on 24″ x 36″ gallery wrapped canvases from Michael’s (purchased at 50% off, of course) using acrylic paints. And after a day-and-a-half of painting, here’s what I had…
I wanted to do some very simple yet substantial framing on these. I knew I wanted large white frames, but I thought it needed a little something extra added to the white frame. So I came up with the absolute easiest way ever to frame these canvases.
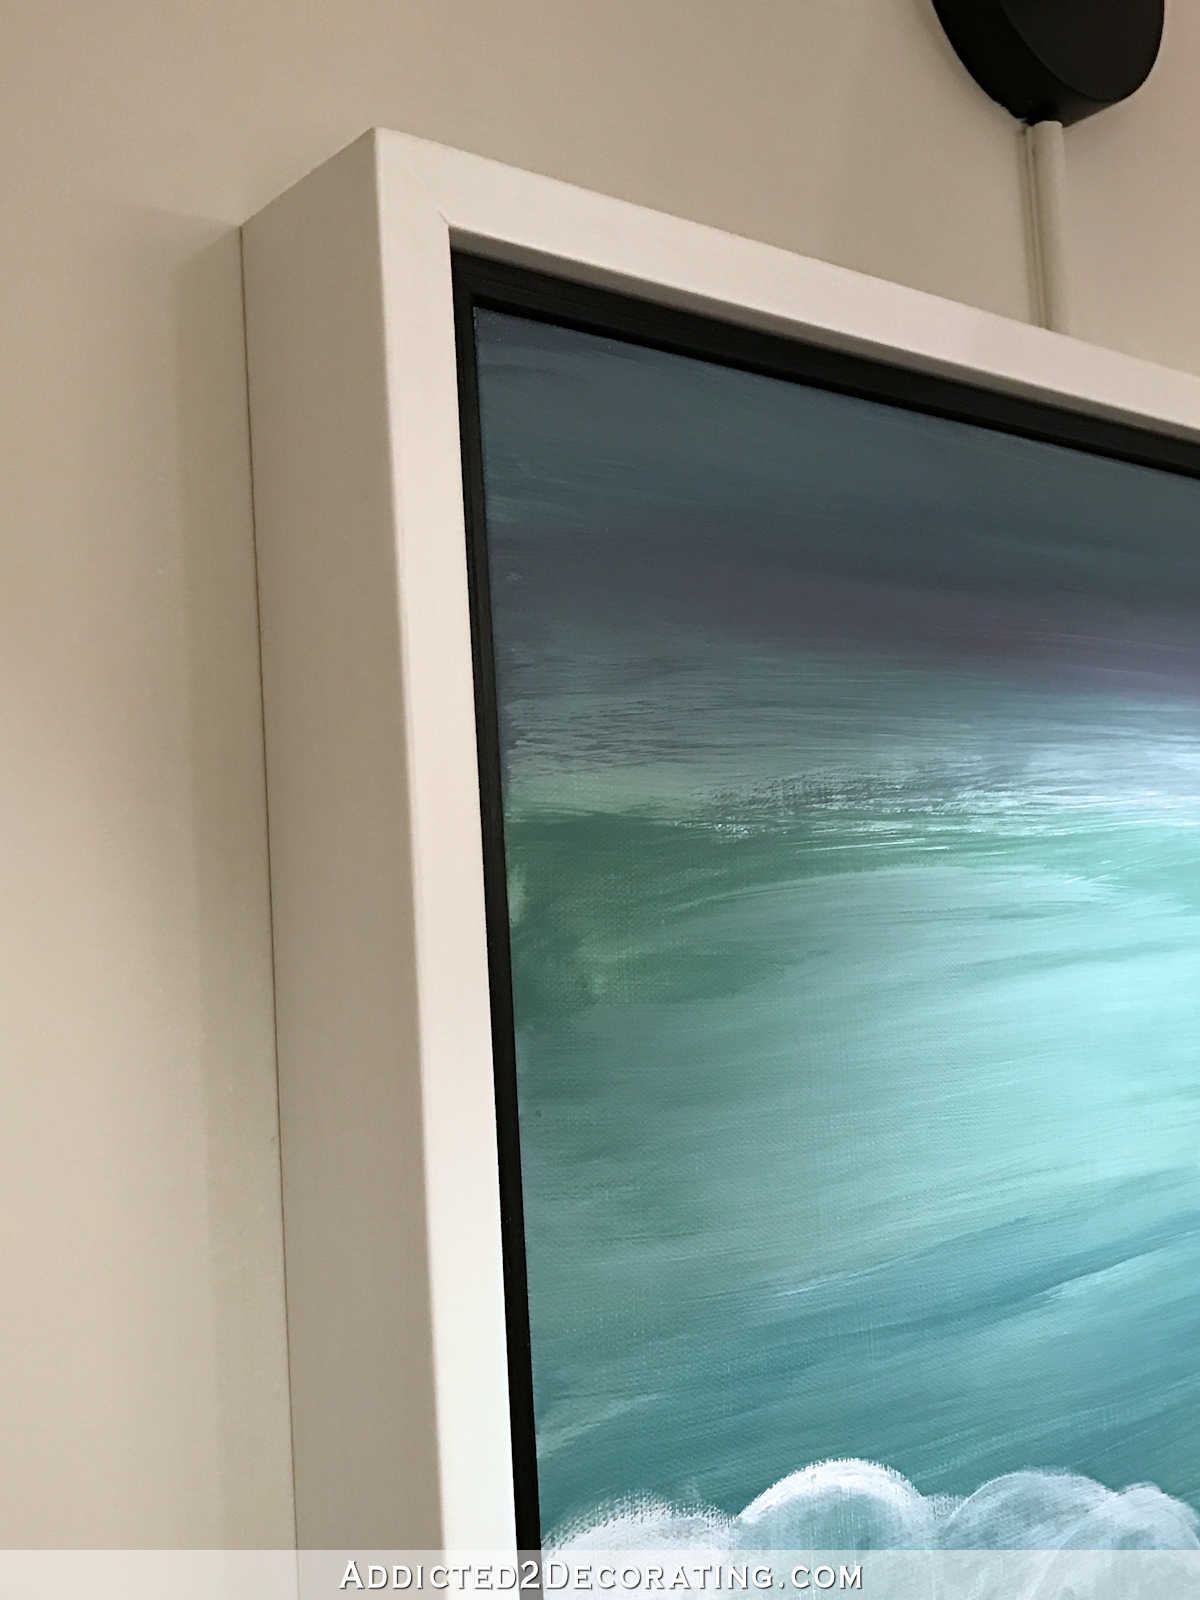
First, I cut pieces of pine stop moulding (from Home Depot, it looks like this), mitered the pieces on the corners, and then nailed them into the canvas stretcher around the edges. I painted the pine stop pieces black and let them dry completely before attaching them. Not much of this would show, so I didn’t bother painting the whole thing.


And then I cut pieces of 1″ x 3″ lumber to go around that, mitered on the ends, and painted white. I nailed these directly to the pine stop and canvas stretcher as well. I did have to do some wood filling, sanding, and painting after it was assembled, but I made sure that at least the inside of the white frame (i.e., the part that’s right against the black part) was completely painted before I attached the pieces.
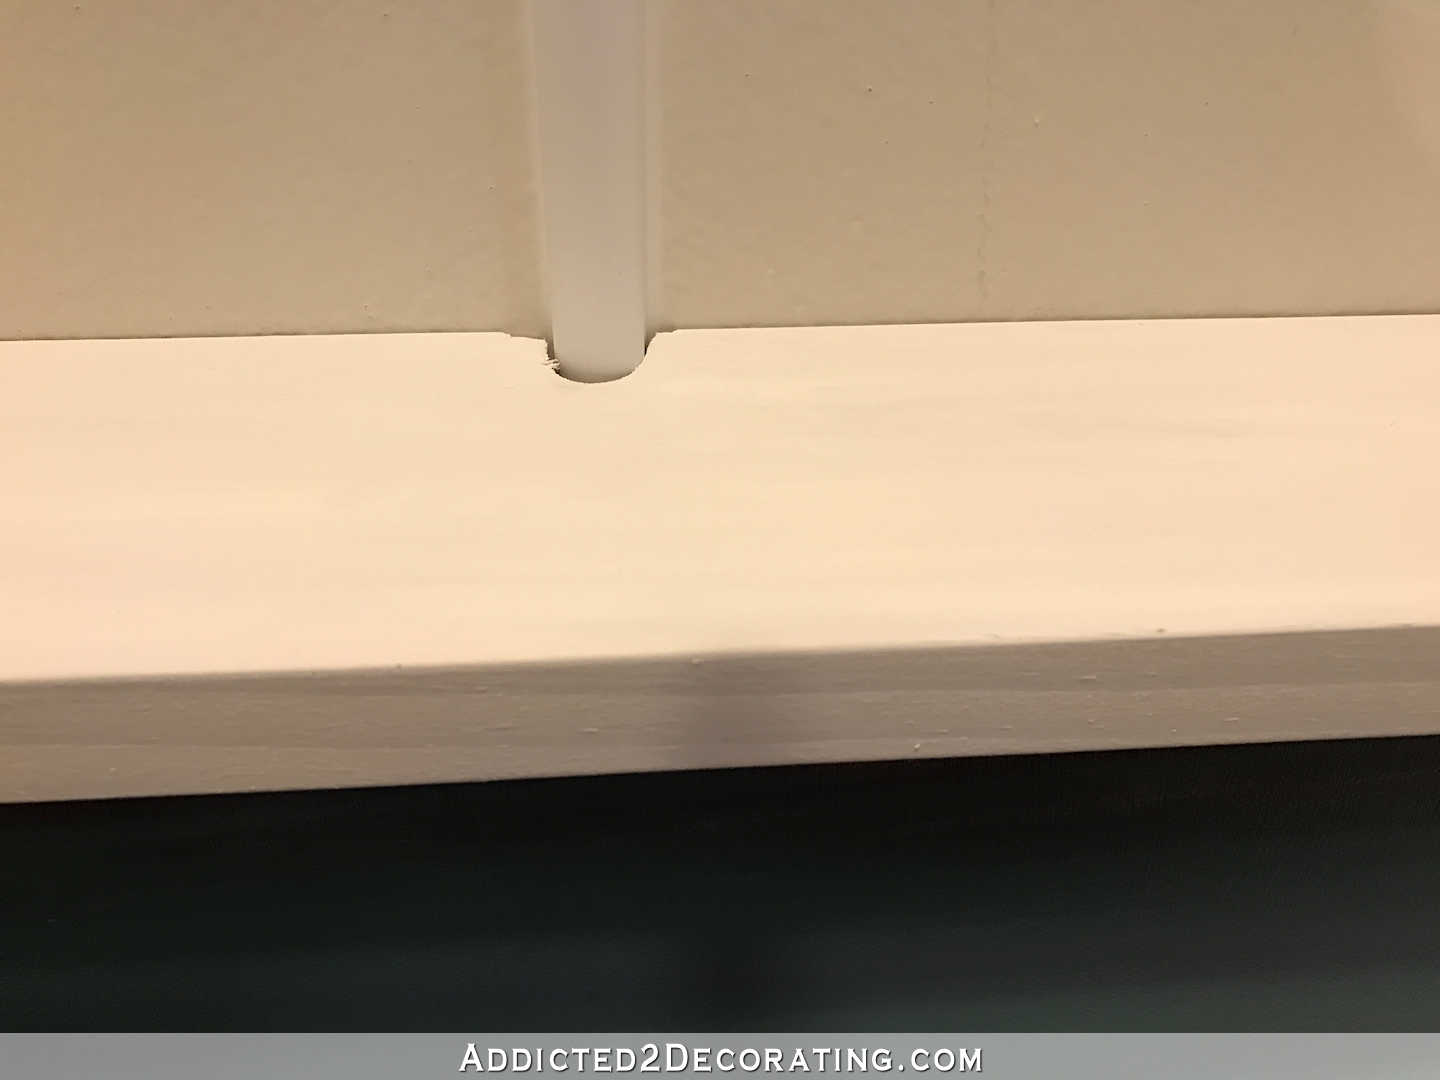
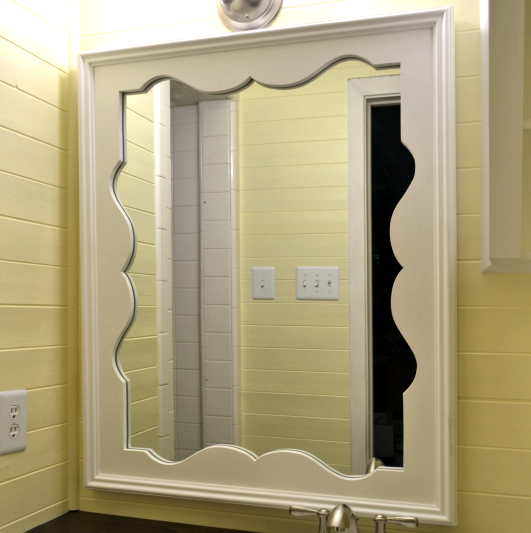
And because I wanted my frames to lie flush against the wall, I needed to cut holes in the top and bottom 1 x 2 pieces on each frame to go around the cord cover hiding the cord from the sconces. I did this by using a 1/2″ drill bit to drill a hole about 1/16″ from the edge of the wood piece. Then I used my jigsaw to turn that hole into a half oval that would fit perfectly around the cord cover.
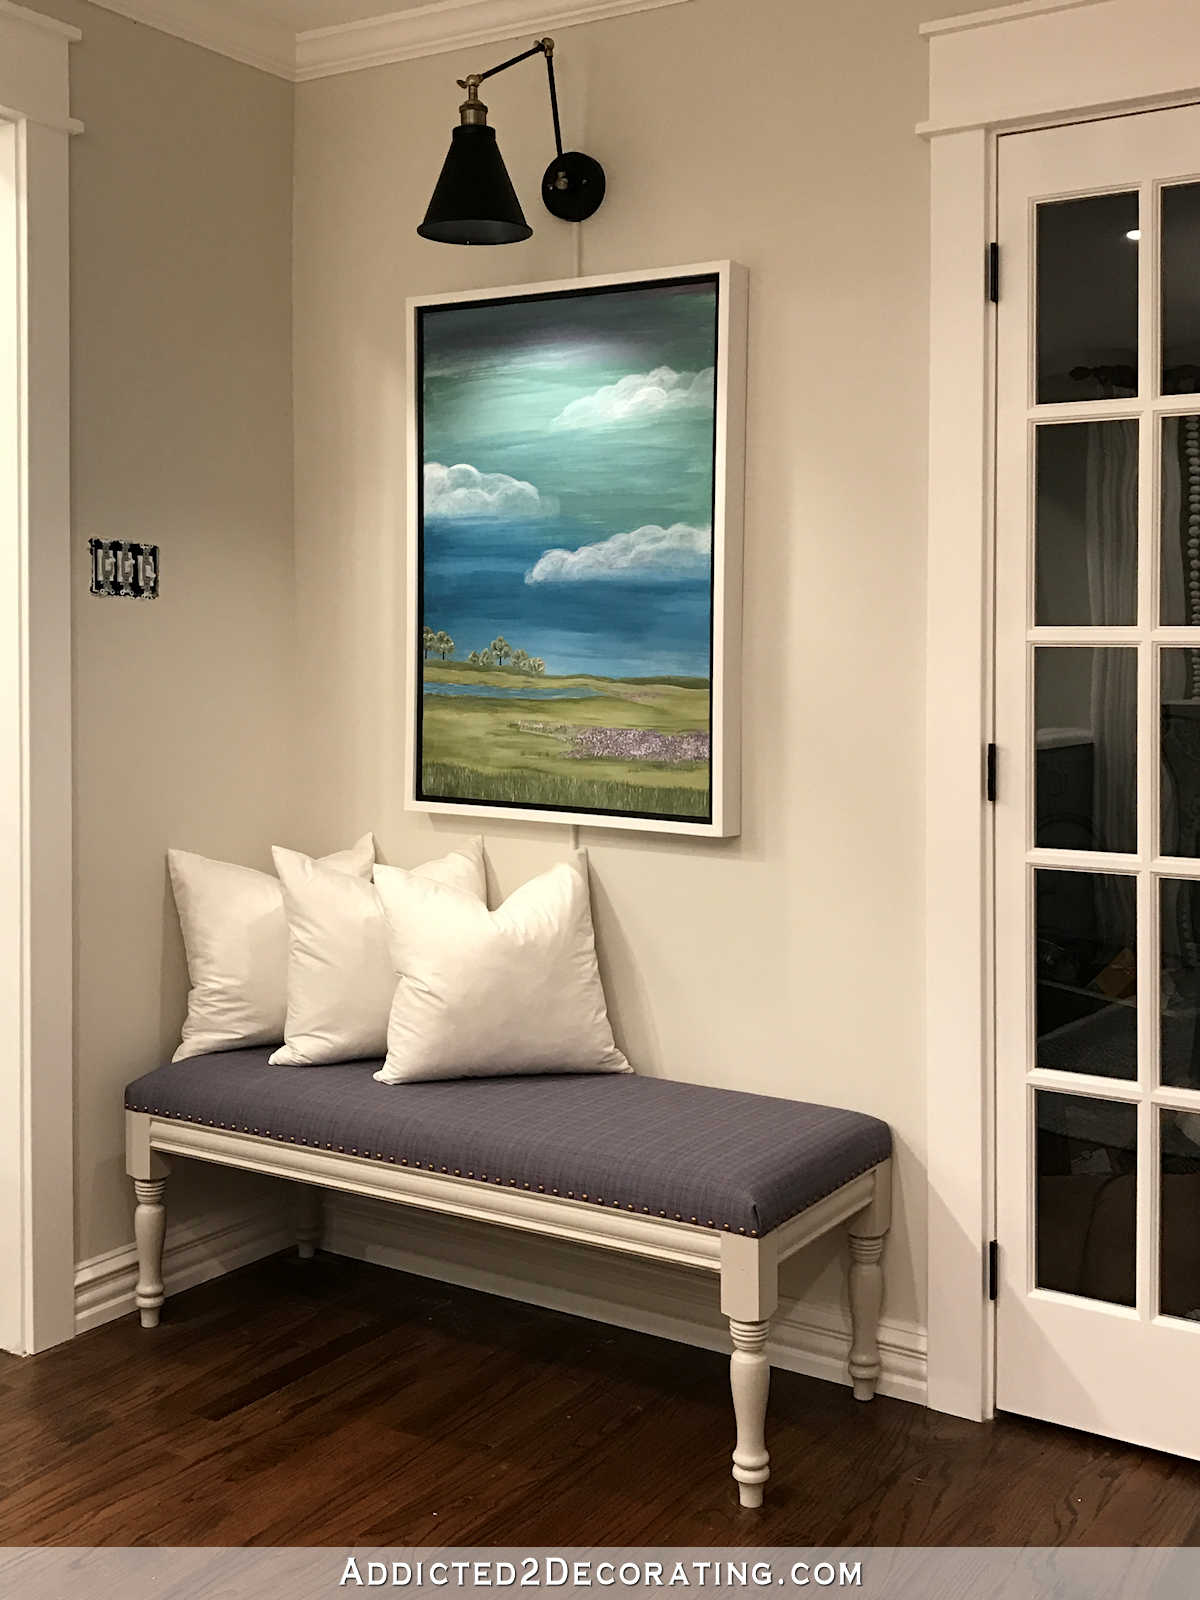
And here they are all framed and hung on the wall. This is the left side…
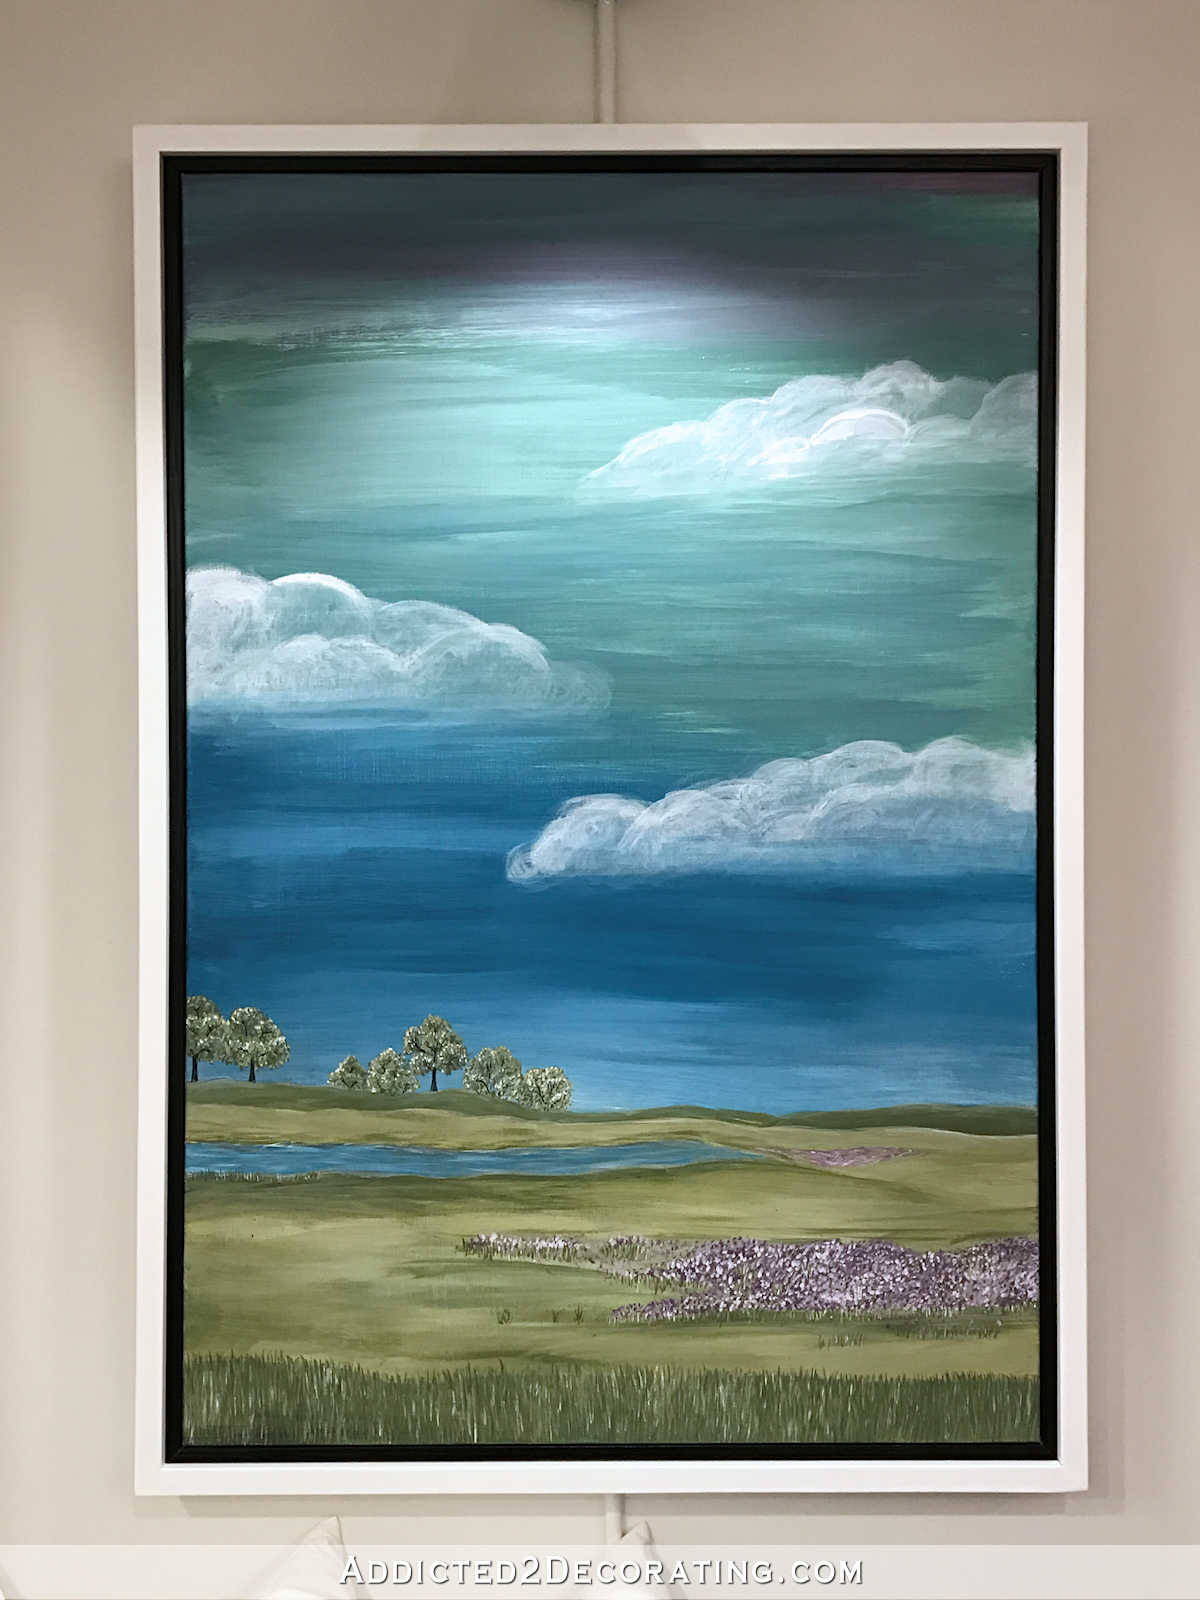
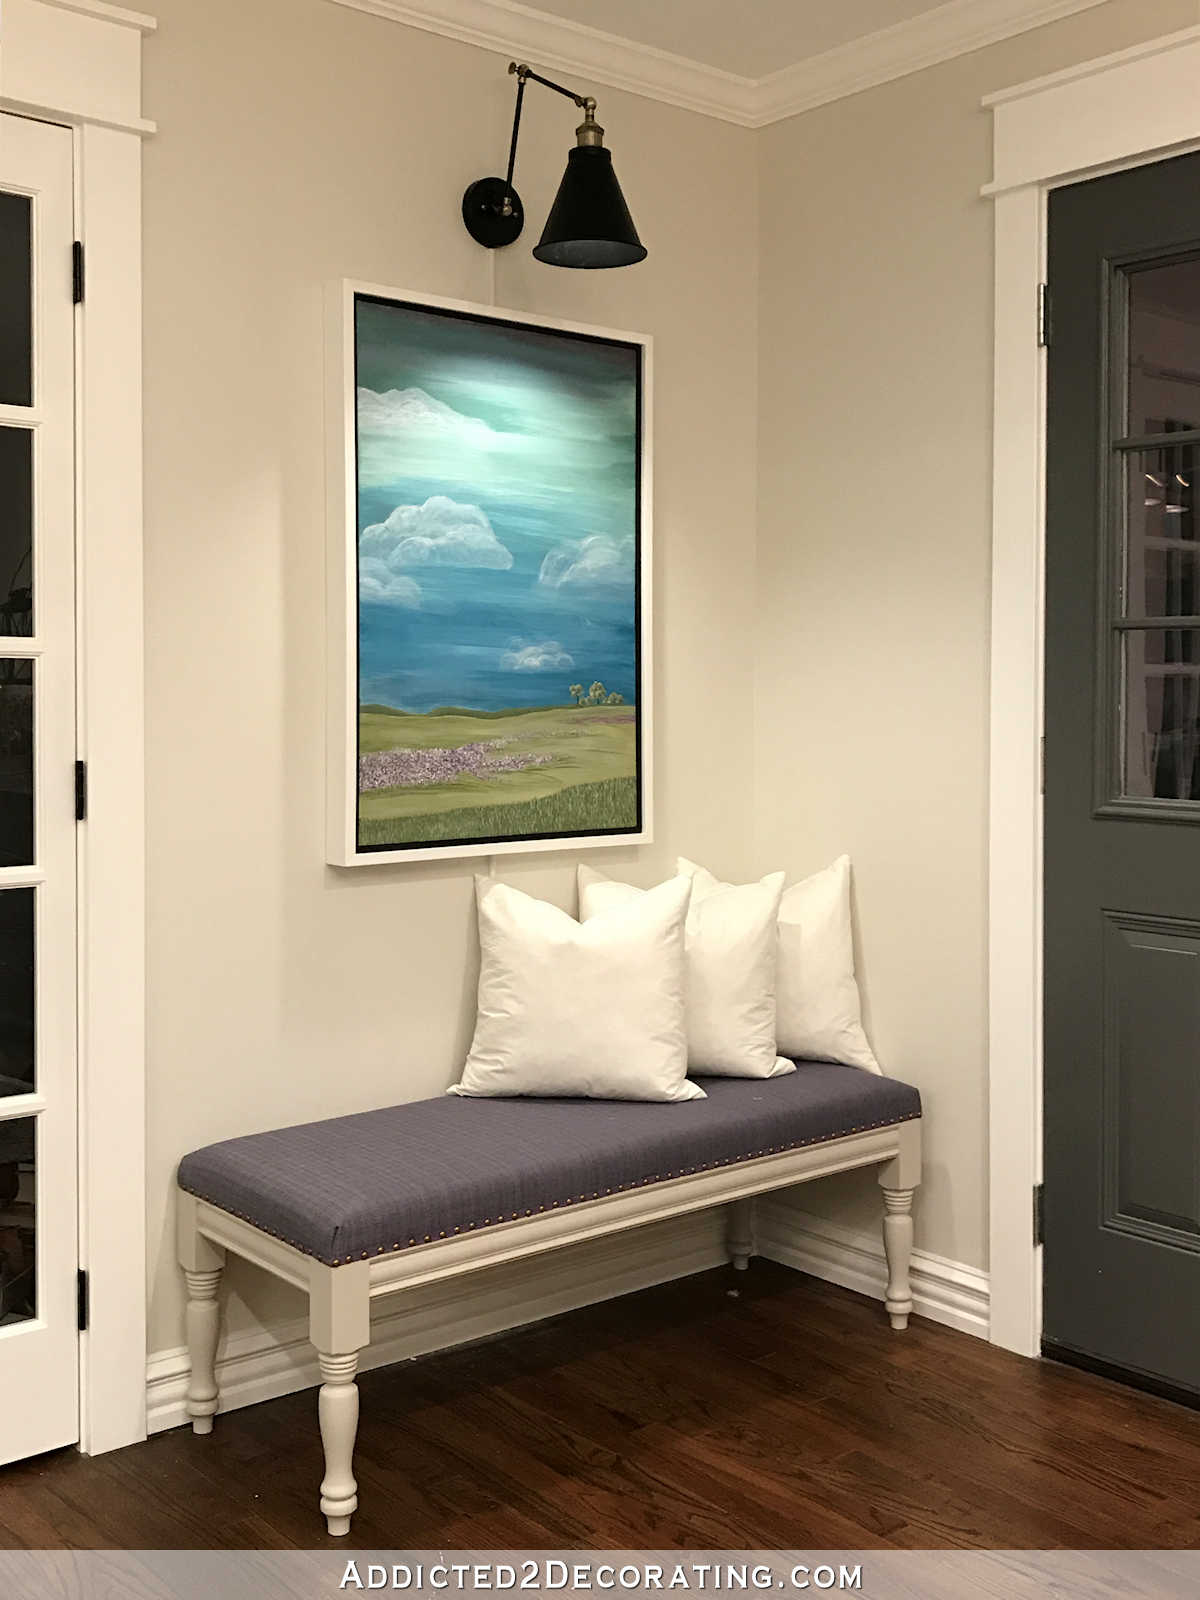
And the right side…
So here’s how the whole left side, with the bench and sconce, looks as of last night. I still need to find or make pillow covers for my pillows. And I keep forgetting to get a switch plate for my light switches. Those are the finishing details I’ll work on today.
And here’s the right side…
I know I’m not an accomplished artist, but I have to say that walking into the breakfast room and seeing that colorful artwork on my walls just makes me happy. It really helped to liven up that wall in the breakfast room.
So this week is an exciting week for me! Other than pillow covers and a light switch cover, my breakfast room is finished. And I just need to do a few more things (like paint the five new cabinet doors) and my kitchen will be finished as well! I’ll be sharing a full before and after post with loads of breakfast room pictures at some point this week, and if work goes well in the kitchen, I’ll have a before and after kitchen post very soon as well!

Addicted 2 Decorating is where I share my DIY and decorating journey as I remodel and decorate the 1948 fixer upper that my husband, Matt, and I bought in 2013. Matt has M.S. and is unable to do physical work, so I do the majority of the work on the house by myself. You can learn more about me here.
My first thought when I saw your pics was how relaxing! It’s classy & colorful…job well done. Glad to see that you are keeping up with your goals!:)
You’re an amazing artist! I believe some of your Mom’s talent rubbed off! Love the colors and frames.
Great job! The addition of black molding really makes the art stand out and makes it look expensive. What was your inspiration for the landscape? Is is a favorite place or somewhere from your imagination?
I actually spent a while looking at artwork on Minted.com to get an idea of what I wanted. I came across two paintings in particular that really served as inspiration for me. This is my affiliate link to the first one…
http://bit.ly/2q9BK0q
And the second one…
http://bit.ly/2rtLEh0
You can see that mine look nothing like either one of those. Copying someone else wasn’t really my goal. I was just inspired by the vibrant colors of the first one, and the cute little trees in the second one. So with those elements in mind, I had an idea of what I wanted in my mind and just tried my hardest to get the image in my mind onto canvas. 🙂
Beautiful! I love how you framed the paintings too! Great job!
You always amaze me. So much talent. Love your work, I enjoy looking for you here.
Peggy
Those look great especially how you incorporated all the colors in the room. I was wondering how you were going to disguise those cords will still hanging artwork on these walls. The room really looks wonderful. The difference between the original room and how it looks now is amazing.
You never cease to amaze me!! Dotting all i’s and crossing all t’s!!! Paintings are beautiful as are the frames that you built!! I do believe you could build a house from ground up and it would be perfect! It’s nice that you even paint your own artwork and are able to incorporate your colors!!!! The walls look great!!!
AWESOME KRISTI.. you do such a wonderful job..
Those are VERY beautiful! Serene landscape just bursting with color that makes it come alive. You are so incredibly talented.
Love, love, love it!
The colors are just so calming and beautiful!
Is there no end to your amazing talents!!!! Surely, there must be something you are unable to do. How do you always have the knowledge of the design needed for a project, but to have all the basics as to what is required in getting it set up to be accomplished. And, even if I had the materials, I would have trouble putting it together. Congratulations!
oh wow, Kristi, I love those paintings! the walls look perfect now, verrrrry beautiful!
Those came out great! Love how the room is coming together.
Kristi, So beautiful!!!!!
These paintings are beautiful and serene, Kristi. They were created by an artist. Cheers, Ardith
I just keep thinking back to the before picture of this room. What you have accomplished is unbelievable! Love the paintings! Love everything! Beautiful!
You are so amazingly talented. You inspire me with every post. I agree with Shirley that you could definitely build a house from the ground up. Seriously Kristi – Have you ever considered offering “how to workshops”?
I have considered it! It’s something that I’d LOVE to do at some point in the future.
Sign me up!
Great attention to detail and your artwork is lovely.
Happy, serene, colorful, unique, PERFECT!
Lighting makes so much difference! When I saw the first picture at the top I didn’t think they looked so colorful, but once they were on the wall and under your wall sconces, bam, they really popped! Beautiful work – both the art and the framing/hanging/lighting. Wow! Really love it!
Mark
Colorful, but serene at the same time. Perfect finishing touch!
Aren’t you the cleverest! Love the paintings. 🙂
Very pretty 🙂 Actually, you ARE a talented artist!
Those look great! Thank you for sharing–I paint every once in a while, too, and have never been able to figure out a way to frame them. I usually just use canvas clips. Thank you, again!
Beautiful! I’m going to have my hair husband do that exact framing to some canvas I have in my living room.
🙂
You have a hair husband? 😆
🤦🏼♀️
Yes, don’t you?! 😂
Is it weird to be proud of somebody that I don’t even know? Because with so many of your accomplishments, it’s how I feel. You do so much with such tenacity and as you can tell by your blog follower’s comments on a regular basis, we stand in awe.
Great job. Remind me; do you have a breakfast room table?
Oh Kristi, those are just WOW. I so wish I had the confidence to create something on canvas. And your framing idea is spot on. Love it.
The light shining down on the paintings seems to add even more depth to the image. I like it a lot! Have you ever seen any works by Leonid Afremov? I bit more colorful than what you typically do, but I feel like you would like it! I love his rainy street scenes!
I wasn’t familiar with the name, but I just looked him up and I’m very familiar with his work. I love how colorful his painting are!
Oh my gosh, I’ve never heard of him or seen his work before, but I love it!!! Thanks for sharing!
Yep….just beautiful 😉 I know you said your pillows are just filler, why not use something like white linen to make covers for them? The white “pillows” look beautiful on the benches under the artwork!
I have been following you for a while. I have just retired due to health issues. I am finally getting back to doing what I love, decorating. You inspire me to get up and do something. I love all your work. You are a very talented person.
Your artwork is beatiful! Can you please take a picture straight on, with the pantry door in the mddle and the paintings on either side? That way we can see the while thing! Thanks!
When I do the full before and after post of this room in a couple of days, I’ll get photos from every possible angle, as well as every detail, so that y’all can see the whole room and how the rooms flow together.
I am going to die waiting for this next post aaaagh please hurry Kristi I so badly want to see both pics together…. SO beautiful.
You’re so talented!!
It’s lovely, as always. Love how the black inner edge on the paintings is accented by the black sconces, which are gorgeous. I love the paintings too–so serene. What a lovely room you are building.
Way better than I could do! Mine always looks like a third grader did it. ;-/
I love your subject matter – very Texas!
You are amazing!
Yes this is your style. Beautiful work
These are gorgeous paintings and for such a great price. I was a little concerned about the electrical cords showing but with the pictures covering them I don’t even notice. Your work is so amazing.
Love the way the light radiates down your paintings natural like sunlight. Really highlights the saturation of blue …would love to see that shade carry down onto your pillows in maybe a silk shantung or dupioni. Beautiful !
Beautiful, you’re so talented!
The framing on these is just brilliant! Looks expensive and so gallery-like, very professional. Those paintings are strikingly gorgeous, the colors look good enough to eat. BUT THOSE CLOUDSSSSS! I want to step inside those paintings and run away into that field!
Love it, looks amazing!!
Congratulations! Everything looks so crisp and polished!
Kristi! Is there anything that you can’t do? These are stunning. And the framing is fabulous.
I can’t wait for your before and after post. I would love to see the visual of both pictures framing your pantry door!
The colors are terrific!! I love it….fabulous job on the paintings! Landscapes are hard too! Thanks so much for the tips for framing. It drives me crazy to get artwork framed because I end up paying a fortune….that’s with my 50% off coupons. The framed look on those paintings look so nice, I may never get anything framed again! I love your idea of covering the wires with the artwork. It is all coming together. Can’t wait to see the result.
Oh my gosh, a month ago I just came up with pretty much this exact framing system for a canvas oil painting that I purchased at Goodwill and the edges were a little damaged so I wanted to hide that. The only difference is that I stained my outer wood pieces to look more like driftwood and used angle braces at the corners that I spray painted antique bronze for a more rustic look. I should send you pictures, I was giddy that it worked out so good!
Those look really good. I love the way you notched out for the cord covers. Thanks for the inexpensive framing tips. I was thinking of doing a really large canvas and was hesitating because of the cost of framing; now I think I’ll go for it.
You have so many talents!! LOVE your paintings. Great job!!!!
Beautiful paintings and they look amazing in your breakfast room with your new benches and the sconces! I love them!
Creating original art to decorate your home is certainly worthwhile! Taking the extra step to frame the artwork also takes things to the next level. It can be difficult to find artwork that really goes with your décor, and creating your own solves this problem.