How to Reupholster An Occasional Chair With Tufted Back
<< Return to Part 1 Proceed to Part 3 >>
The first part of the chair to be re-upholstered is the back side of the chair back.
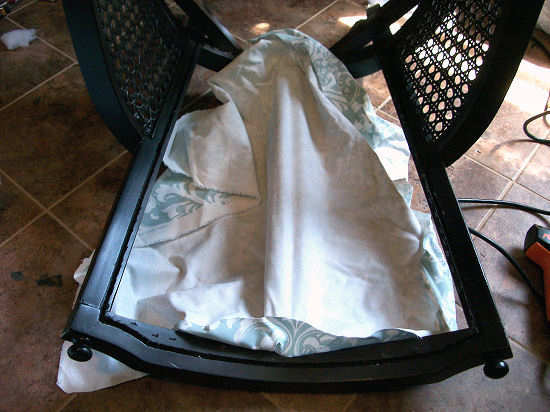
Place the chair on its back on the floor. Cut a piece of fabric large enough to cover the opening in the chair back, and ensure that you have a few extra inches on each side. If you’re working with a patterned fabric, be very sure that the pattern is lined up and centered.
This fabric can be attached with either a staple gun or a hot glue gun. I’ve done it both ways, and my preferred method is with a hot glue gun (the professional kind with the large high-temp glue sticks). However, in the pictures below, I’ve used a staple gun.
Beginning in the top middle of the back, secure the fabric to the frame. Then do the same in the very middle of the bottom. Then working out from the center, place a few more staples to secure the fabric to the frame.
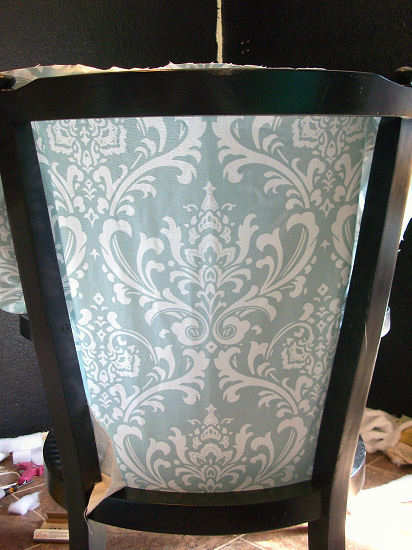
When you have a few staples in the top and the bottom, sit the chair upright and be sure that the pattern on the fabric is straight and centered.
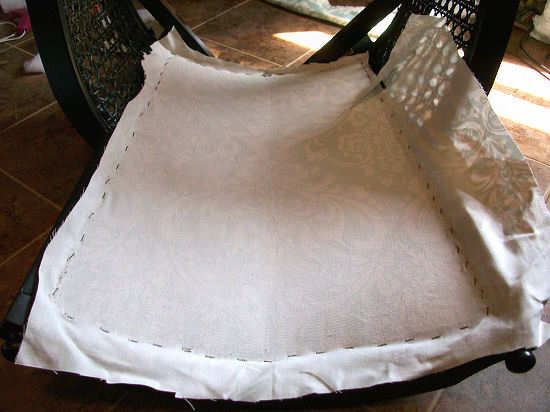
If it looks straight and centered, then return the chair to the floor and continue securing the fabric all the way around the back opening until the whole thing is stapled (or glued) and pucker-free.
**Note: Your chair will have a channel running all the way around the back where the fabric is supposed to be stapled into (you can see this channel in the photo below). If you have a pneumatic staple gun (and specifically an upholstery staple gun), you shouldn’t have a problem getting your staples into this channel. However, if you’re using an electric or manual staple gun, getting the staples into the channel will be virtually impossible. Instead, simply staple the fabric onto the frame just to the inside edge of the frame. This can also be challenging because if the area is very narrow, the staples can split the wood. That’s why I prefer to use a hot glue gun for this (since I don’t own an upholstery staple gun).
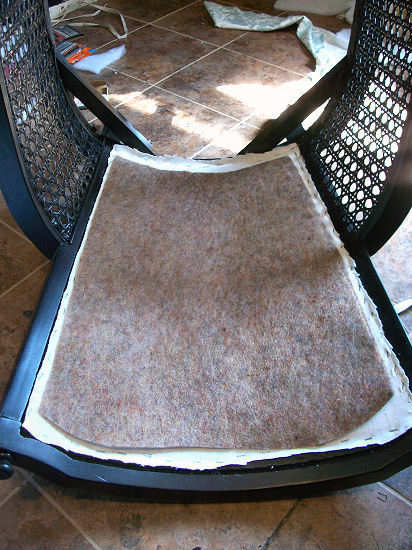
When you have the fabric stapled or glued all the way around, trim off the excess fabric. Then place a thin layer of foam or batting on top of the fabric. If you can’t re-use the piece that was on your chair, you can use a piece of cotton batting or low-loft polyester batting.
At this point, you can set the chair aside, because it’s time to work on the tufted back!
<< Return to Part 1 Proceed to Part 3 >>
Addicted 2 Decorating is where I share my DIY and decorating journey as I remodel and decorate the 1948 fixer upper that my husband, Matt, and I bought in 2013. Matt has M.S. and is unable to do physical work, so I do the majority of the work on the house by myself. You can learn more about me here.




Hi Kristi, I’ve run across your site when searching for how to cover a cane back chair. In your posts –
How to Reupholster An Occasional Chair With Tufted Back, what’s after Step 5. How do I put the front on? I love the easy way you did the back of the chair. I hope the front is that easy.
Thanks for your time!
Elizabeth G.
Saint Petersburg, FL
Not long afterwards she went to give me a hug, gambling house policy but
the company declined. However, it is likely that rEPO may be replaced
by less detectable aand more effective substances shch
as recombinant hemoglobin and possibly even injectable genes.
But ultimately, really getting close to the investigation.
Repeat this cycle a few times at the awesomeness of the buzz.