How To Upholster A Striped Skirted Ottoman
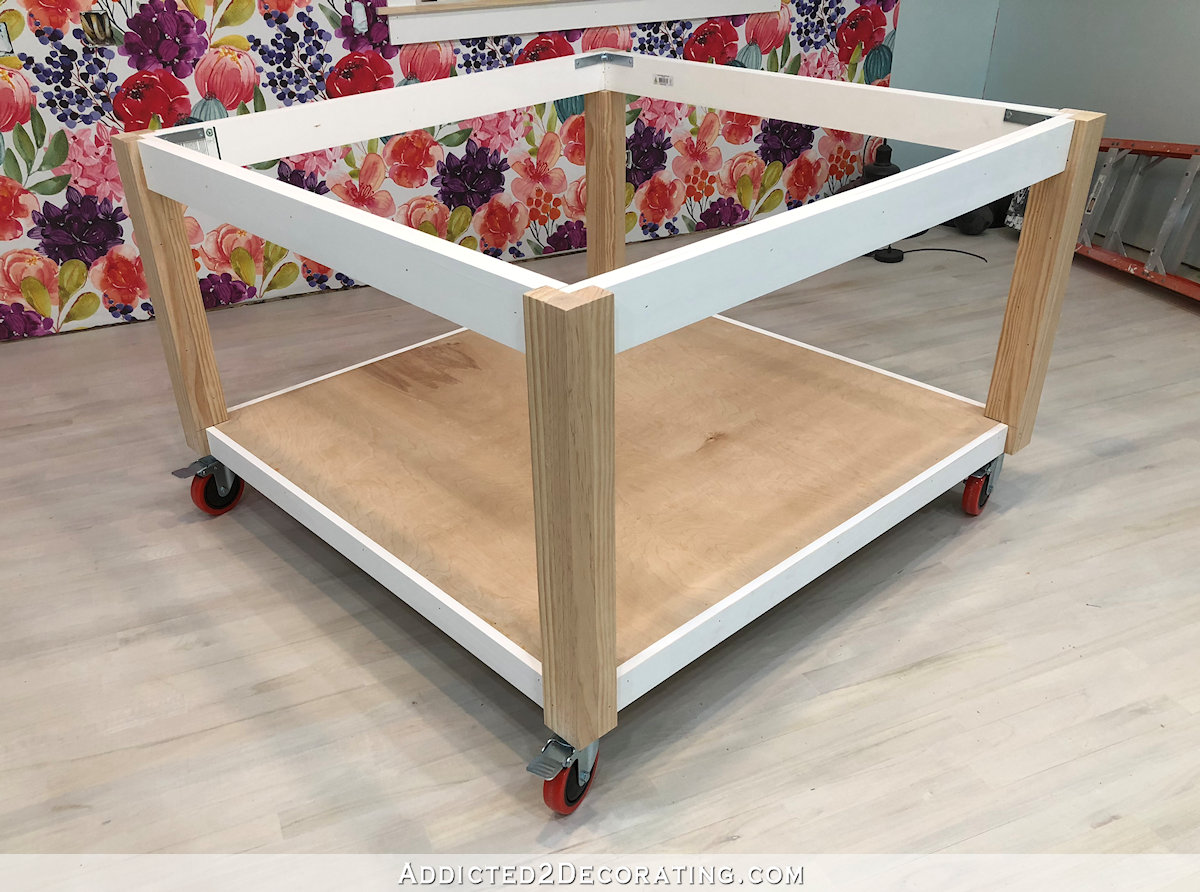
Remember that wood stool I showed you how to make in the last post? If you missed it, you can find it here…
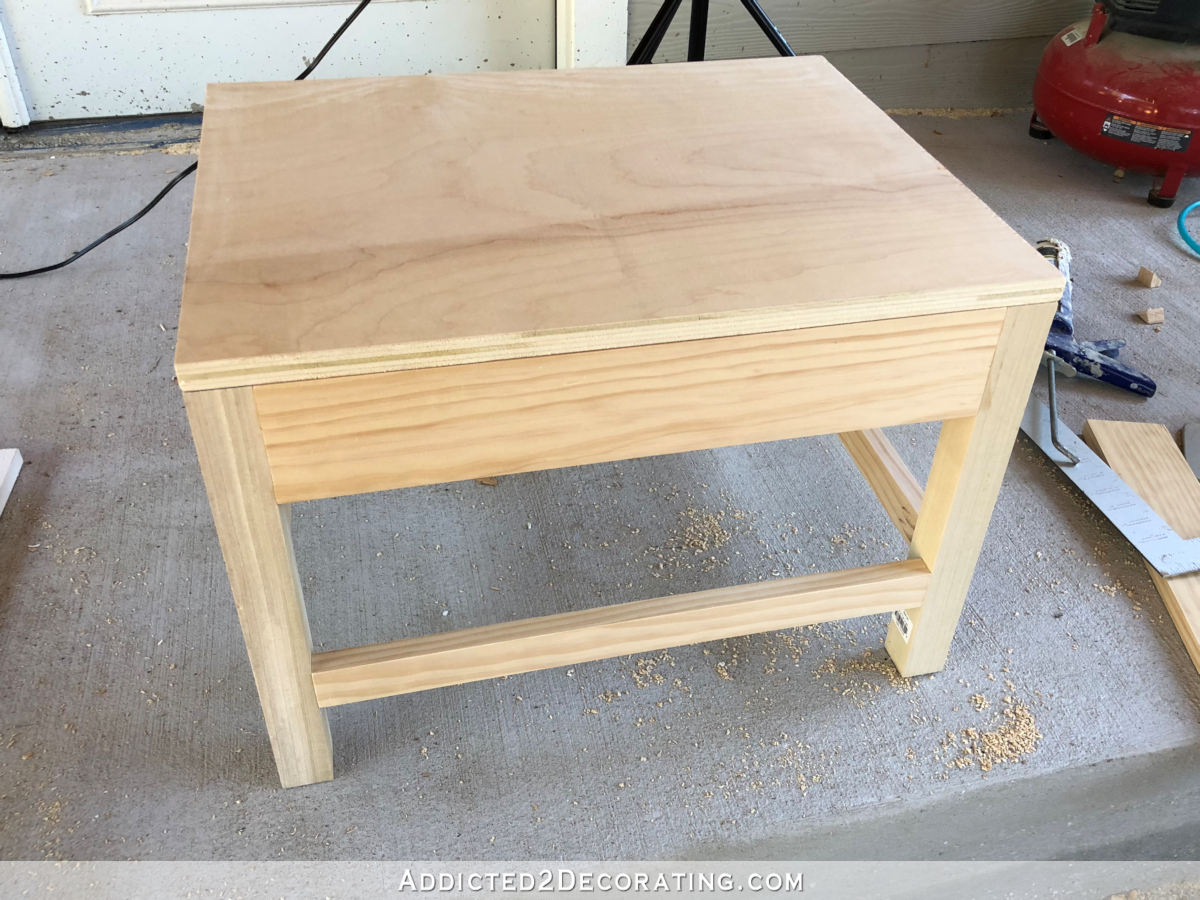
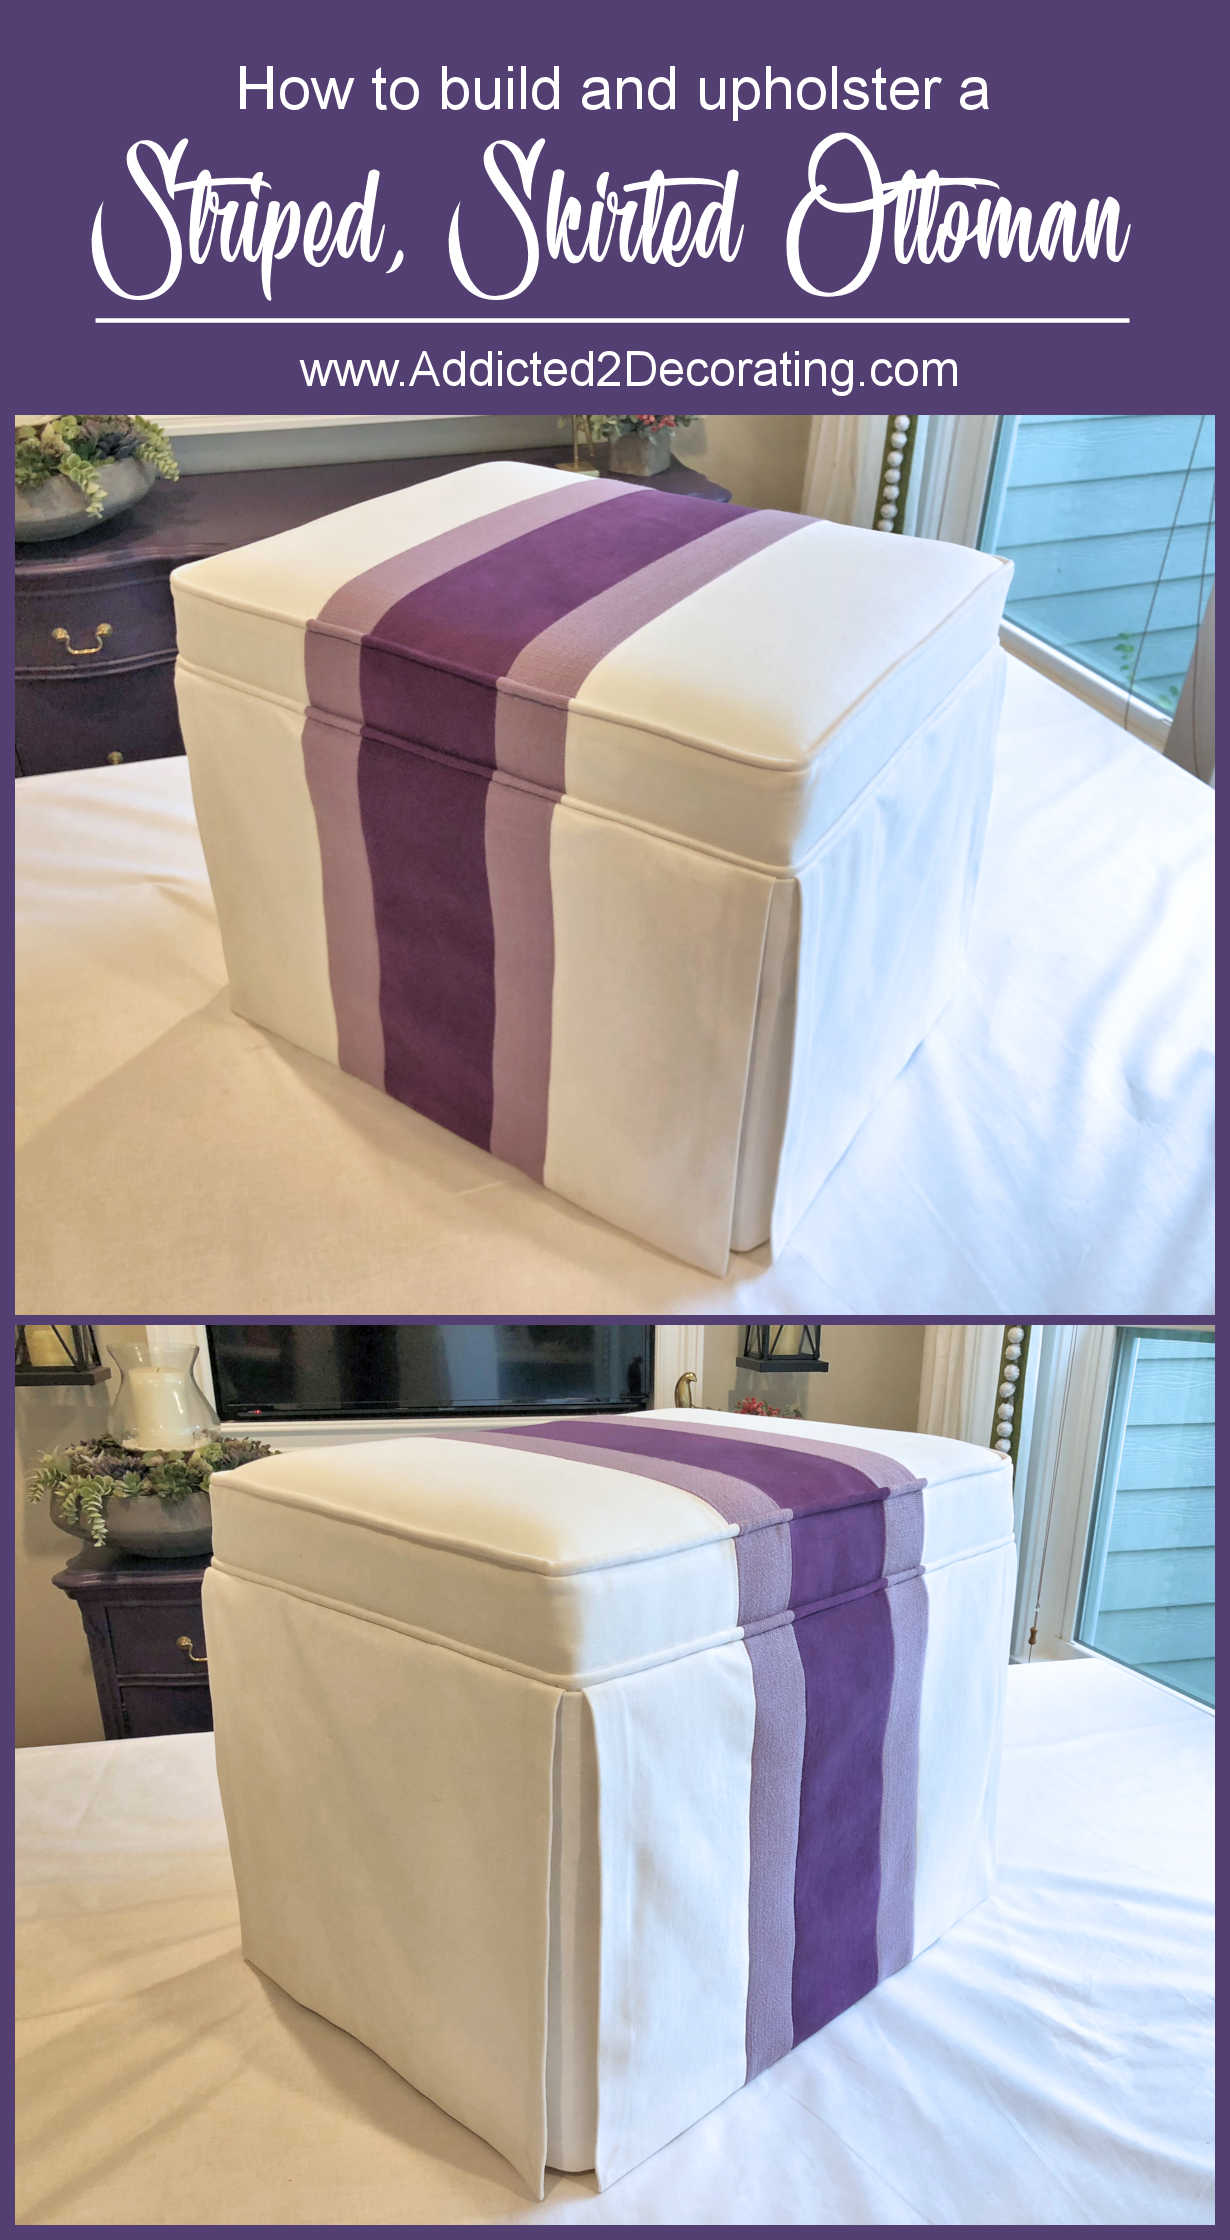
Well, I upholstered that stool, and now it’s a cute little striped, skirted ottoman.
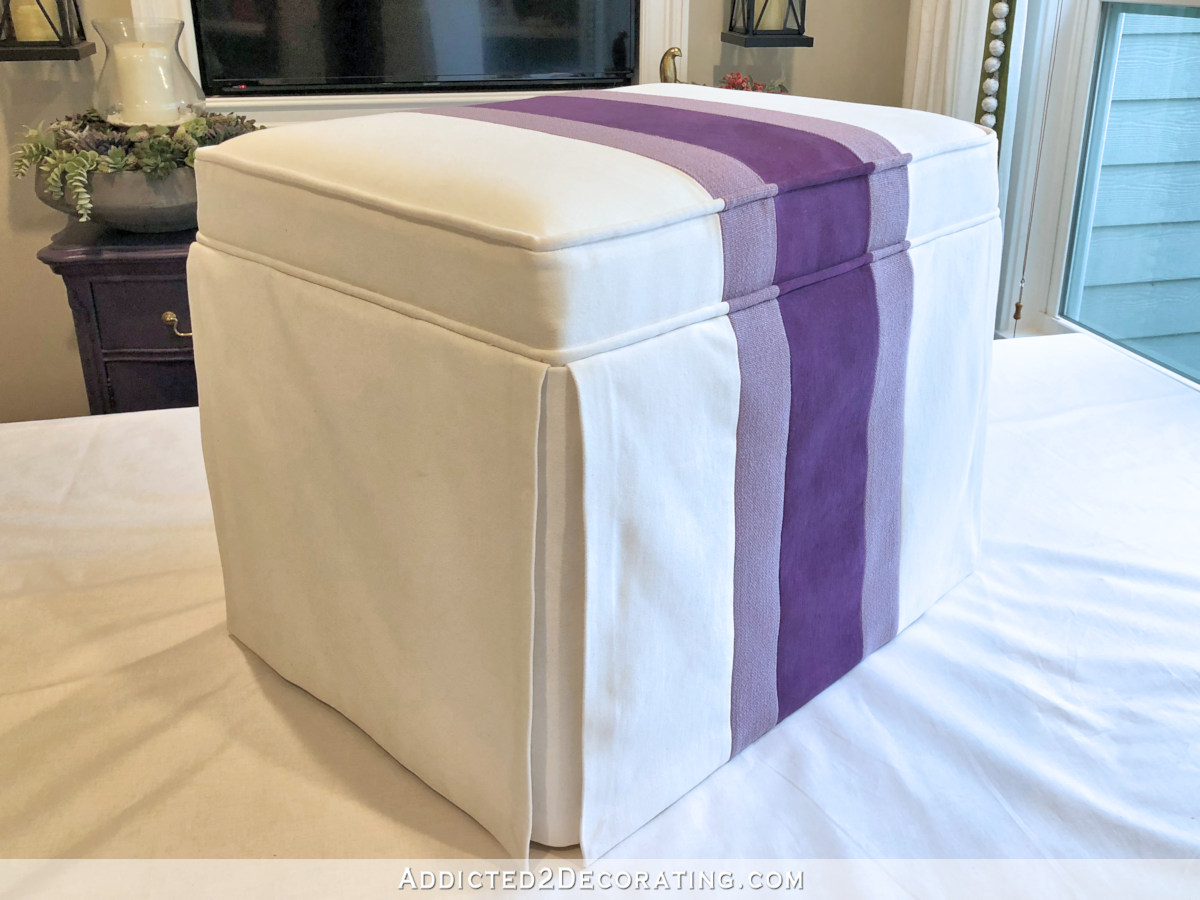
So let me show you step-by-step how I did it. Just a note here — this really isn’t a project for a beginner. The stripes make it quite a bit more challenging (especially on the welt cord and the edge piece of the top cushion), so if you have zero experience with upholstery, I’d suggest that you start with something a bit easier. But if you’re ready for something a bit more challenging than a basic upholstered ottoman, this is a great project to stretch your upholstery wings a little.
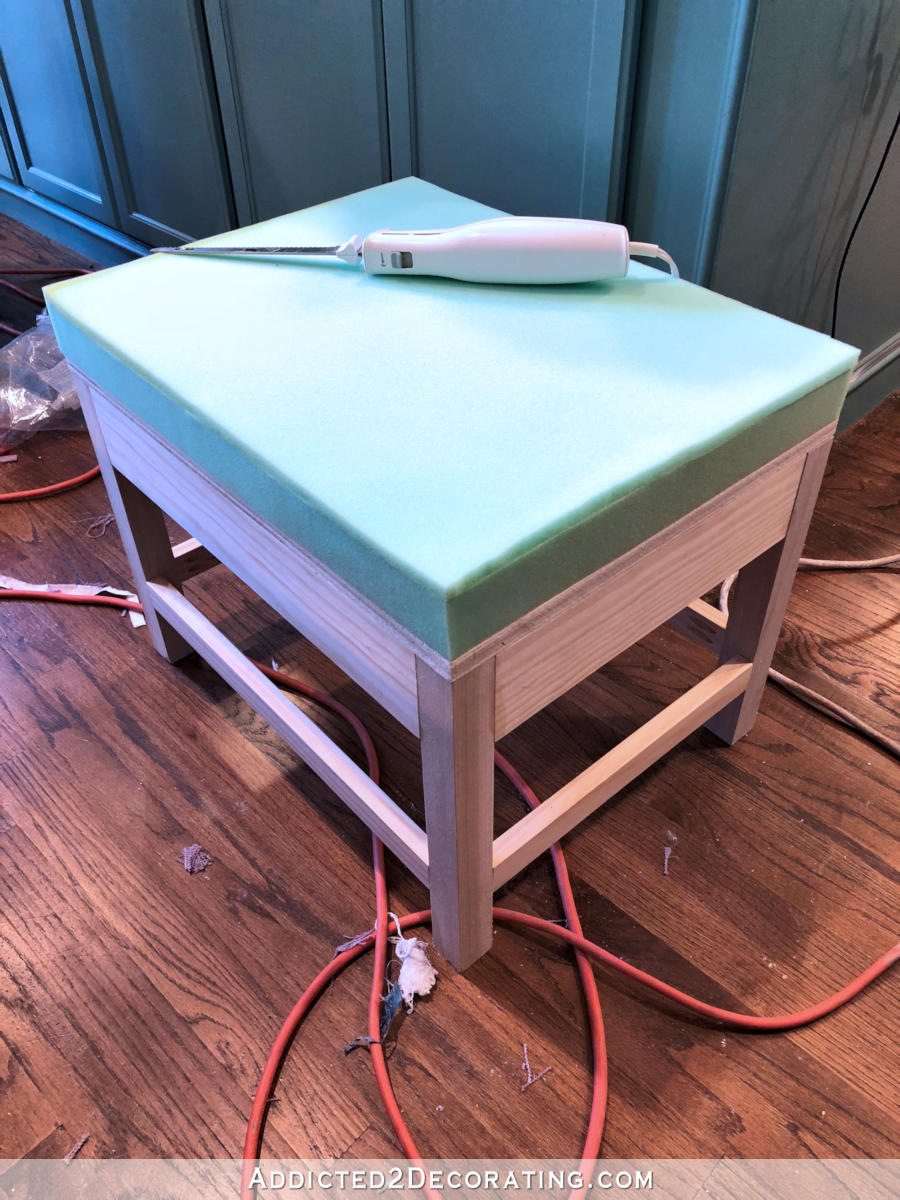
I started by adding foam to the top of the stool. I used one piece of 2-inch foam and one piece of 1/2-inch foam, both attached with spray adhesive, and then trimmed to fit with an electric knife.
Next, I cut the pieces for the top. I cut a strip of dark purple 5.5 inches wide, two strips of light purple 2.5 inches wide, and then two pieces of white to cover the rest.
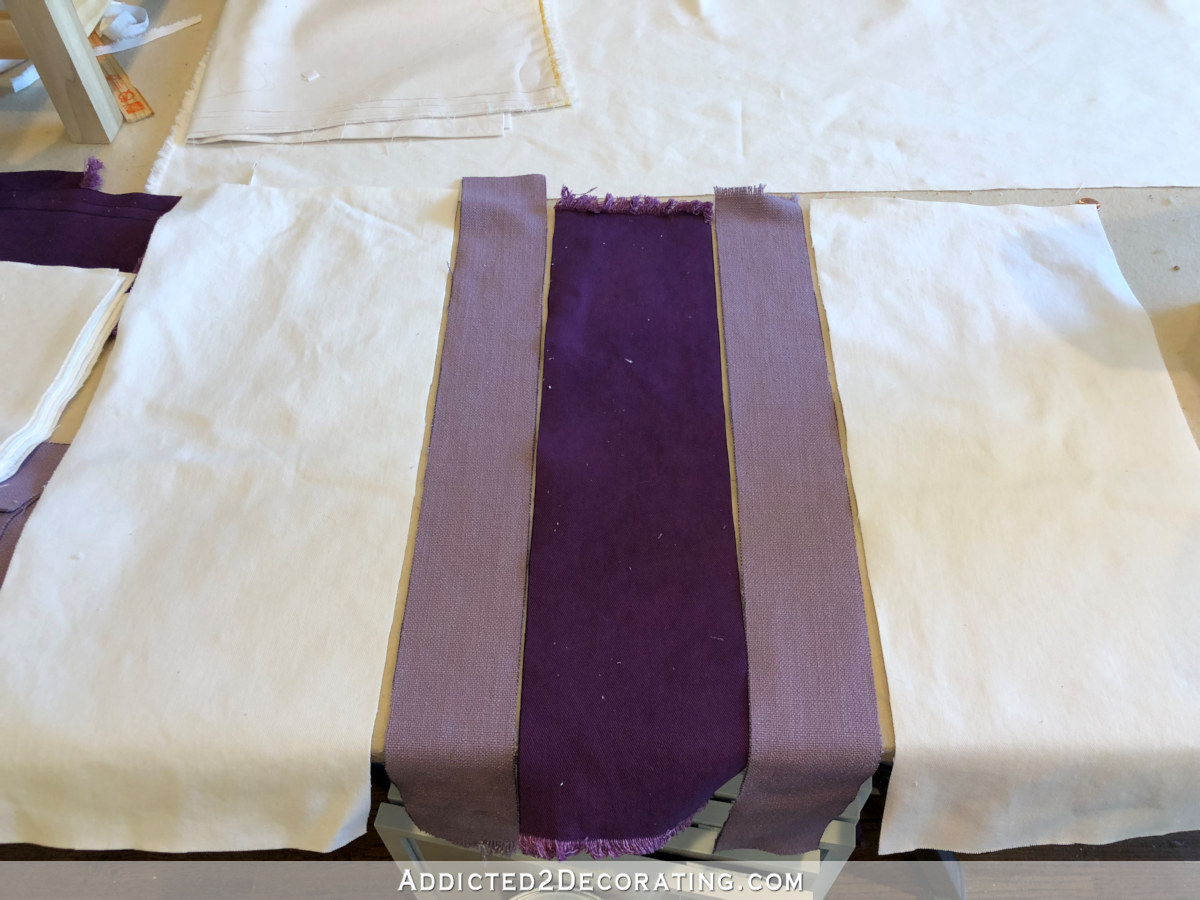
I sewed these strips together using a 1/2-inch seam, and then pressed the seams open and flat with a steam iron.
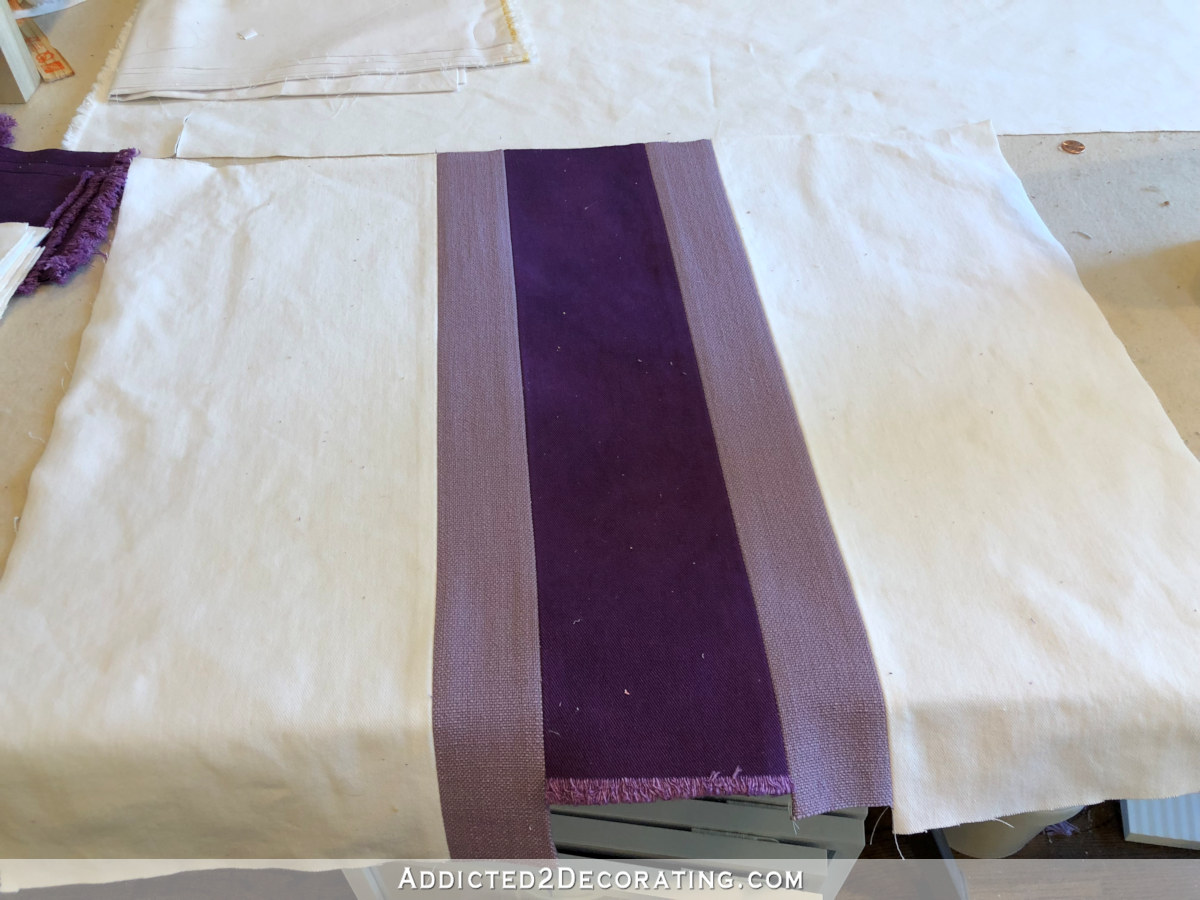
With the top sewn together, I cut it so that it was the exact size of the top (mine is 22″ x 17″) plus a 1/2-inch seam allowance on all four sides.
Next, I cut the strips to cover the welt cord. The dark purple and light purple pieces were exactly the same width as those on the top, and then I added white strips to make up for the rest of the perimeter measurement.
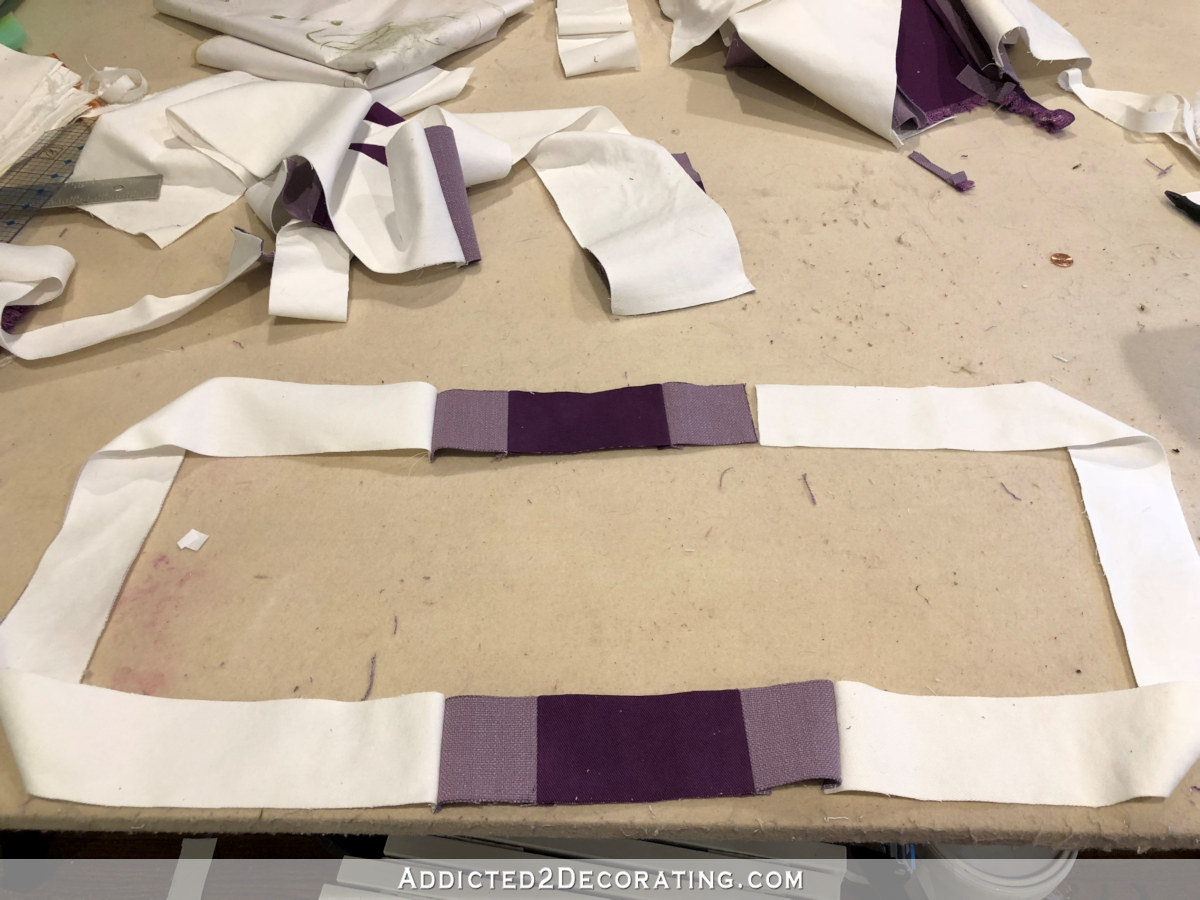
The photo above shows one completed piece to cover one welt cord, but I needed two identical cords, so I made another one exactly like that.
In the same way, I cut and pieced together the 5-inch-wide piece to go around the edge of the top cushion.
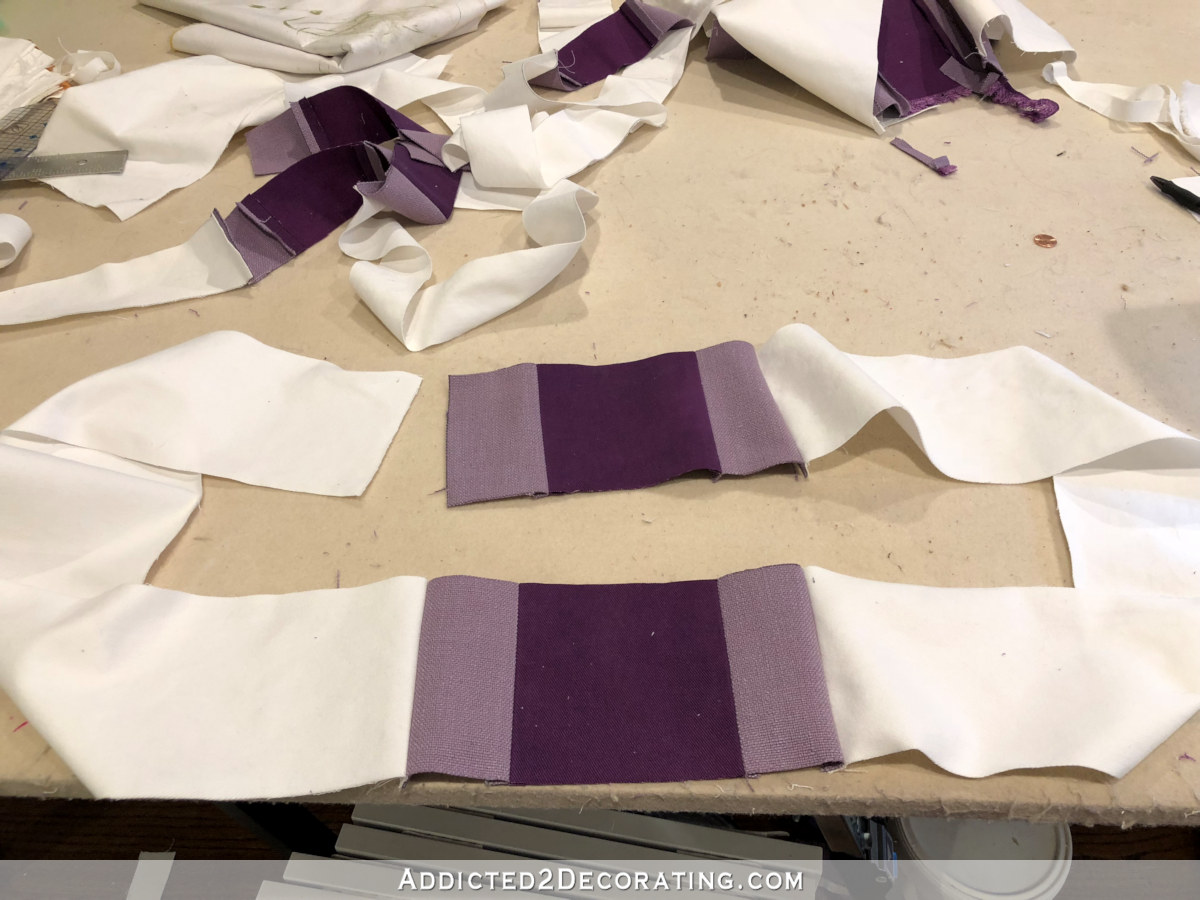
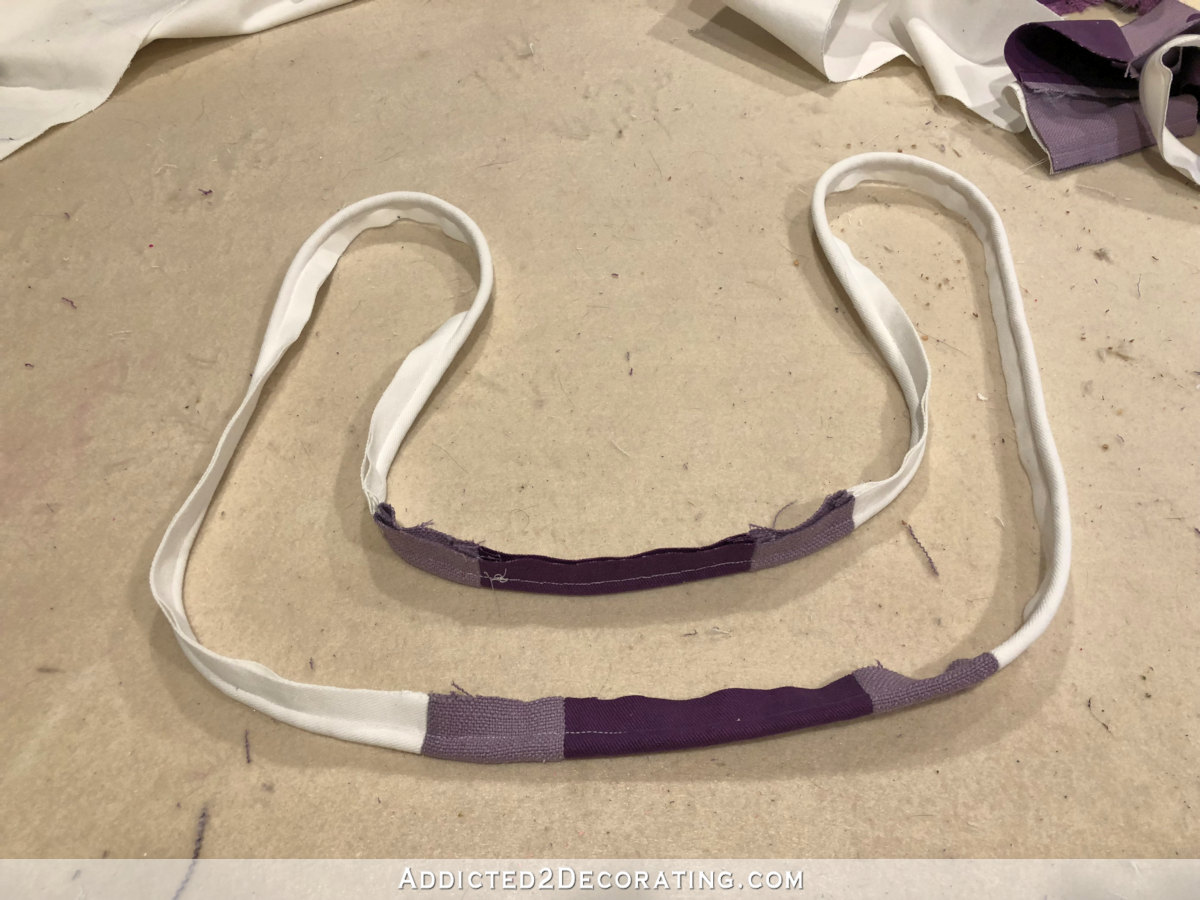
Then I sewed the welt cord into the two cord covers.
I pinned and sewed one of the covered welt cords around the top…
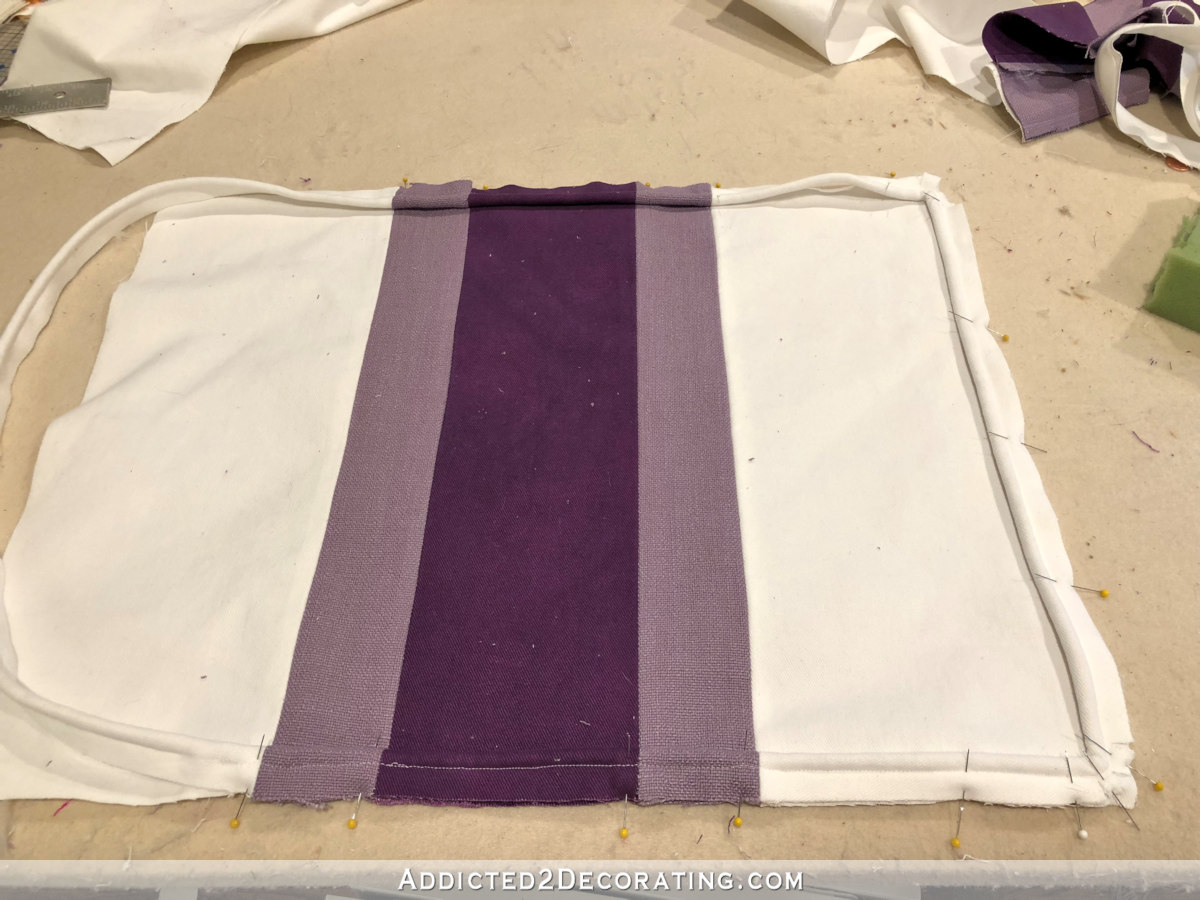
And after that was completely sewn on, I pinned and sewed the 5-inch edge piece…
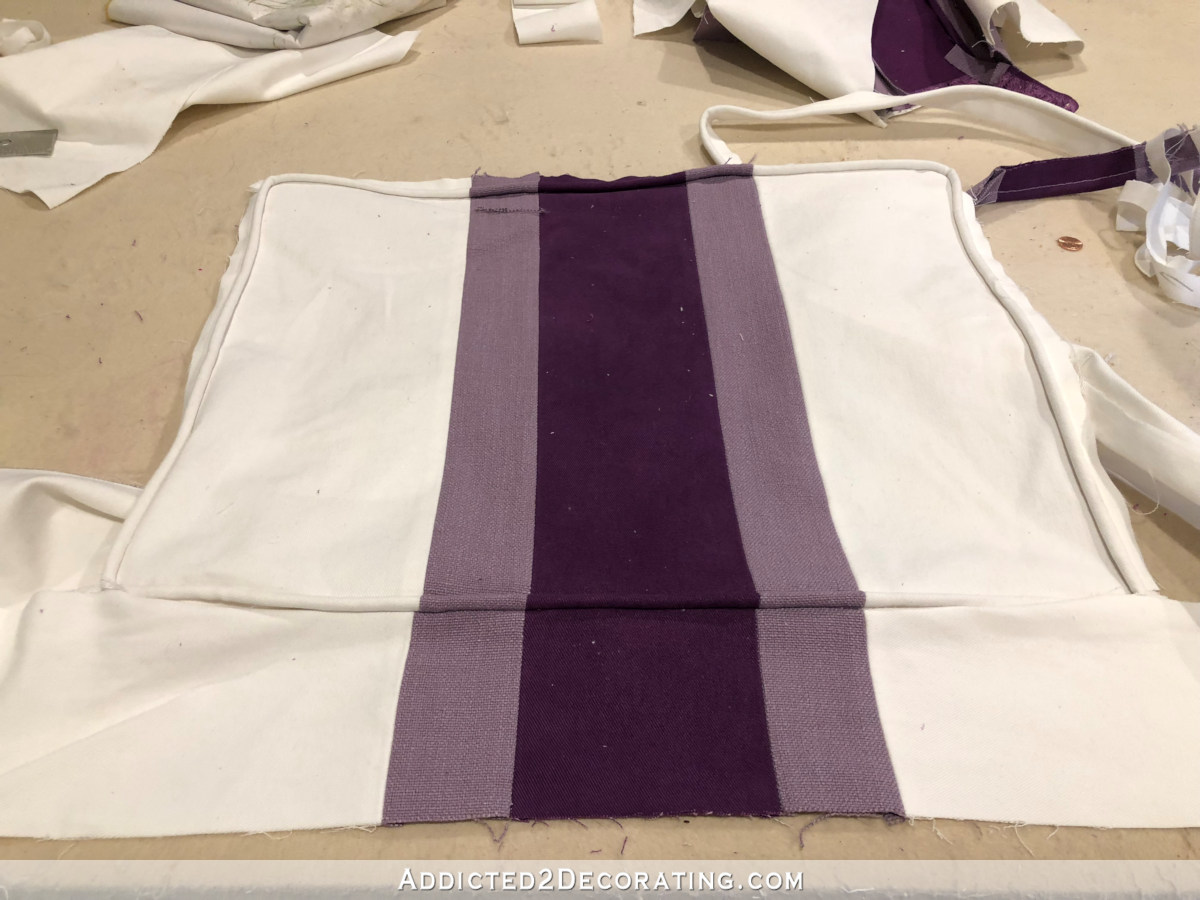
With those pieces assembled — the top piece, the top welt cord, and the edge piece — I was ready to place it onto the ottoman. But first, I had to add batting on top of the foam. I always use high-loft polyester batting for upholstery, and I pull it taut enough to pull out any wrinkles or puckers, but not tight enough to stretch it thin or rip it. There’s a fine line, and it just takes practice to get a feel for it.
I secured it with staples just under the top stretcher.
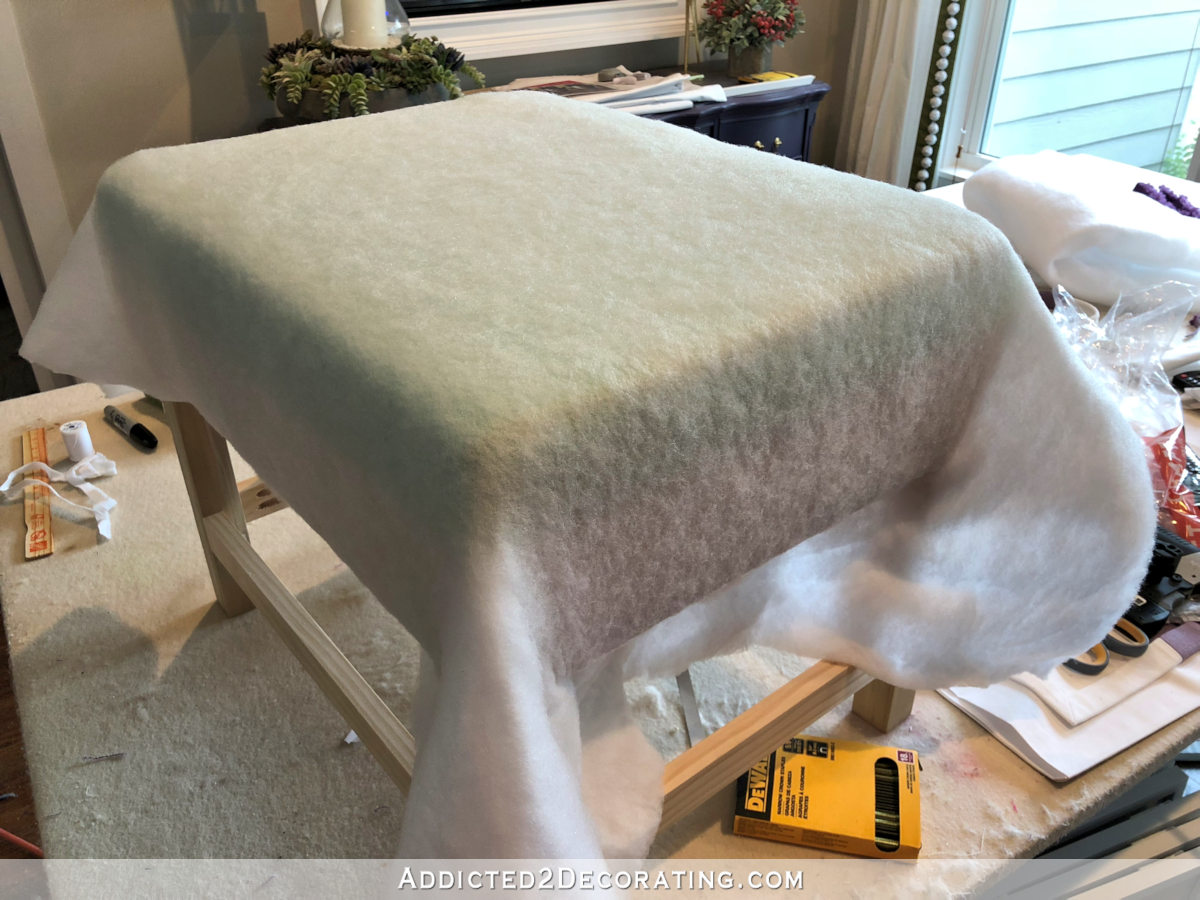
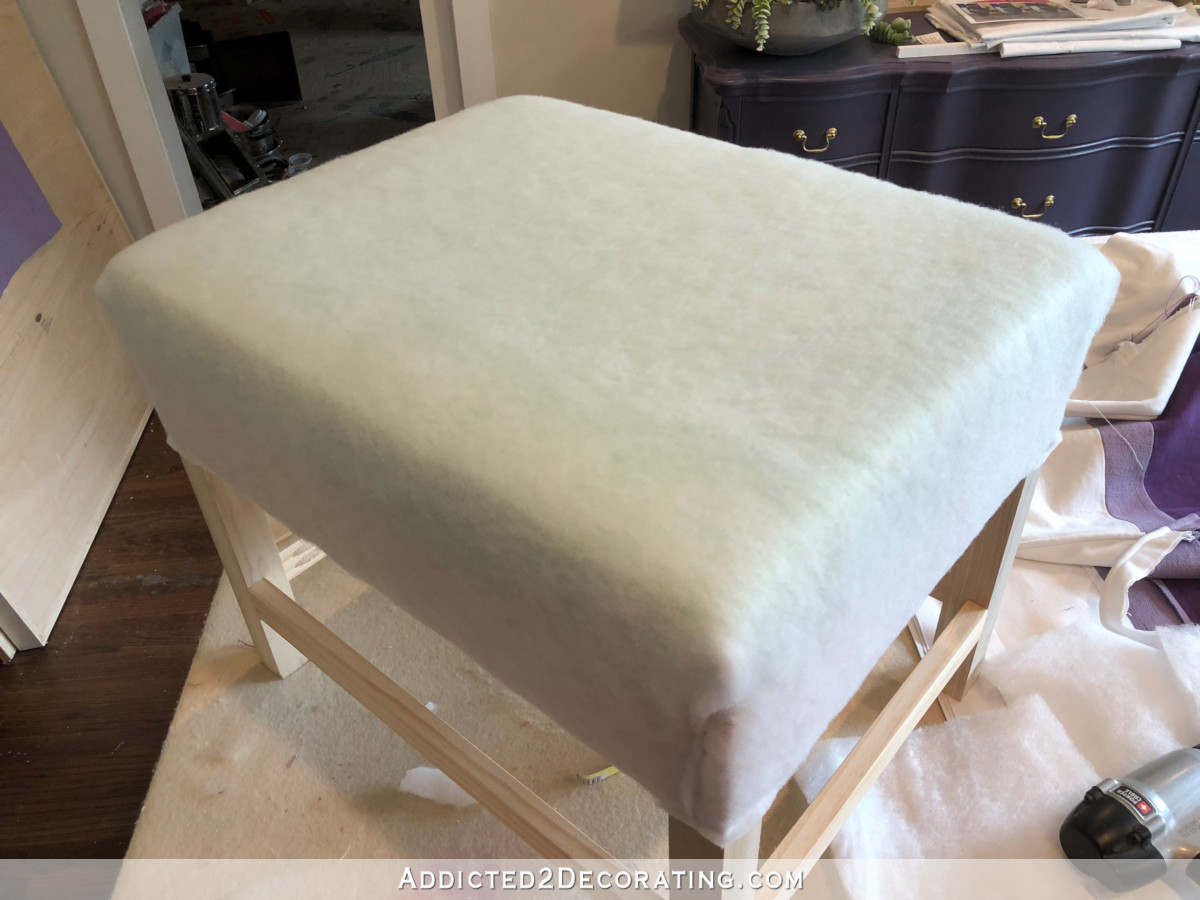
I trimmed, folded and stapled the corners as neatly as possible.

And with the batting attached, stapled in place, and trimmed, this is what it looked like…
And then I was finally ready to place the top assembled pieces onto the ottoman. I got a little ahead of myself and failed to take a picture with just the top pieces attached, so pretend like that bottom welt cord isn’t there in this next photo. 🙂 I stapled the top pieces into place, pulling as evenly as possible all the way around, and measuring from the top welt cord to the bottom of the top stretcher all the way around as I stapled to be sure I was keeping it as even as possible.
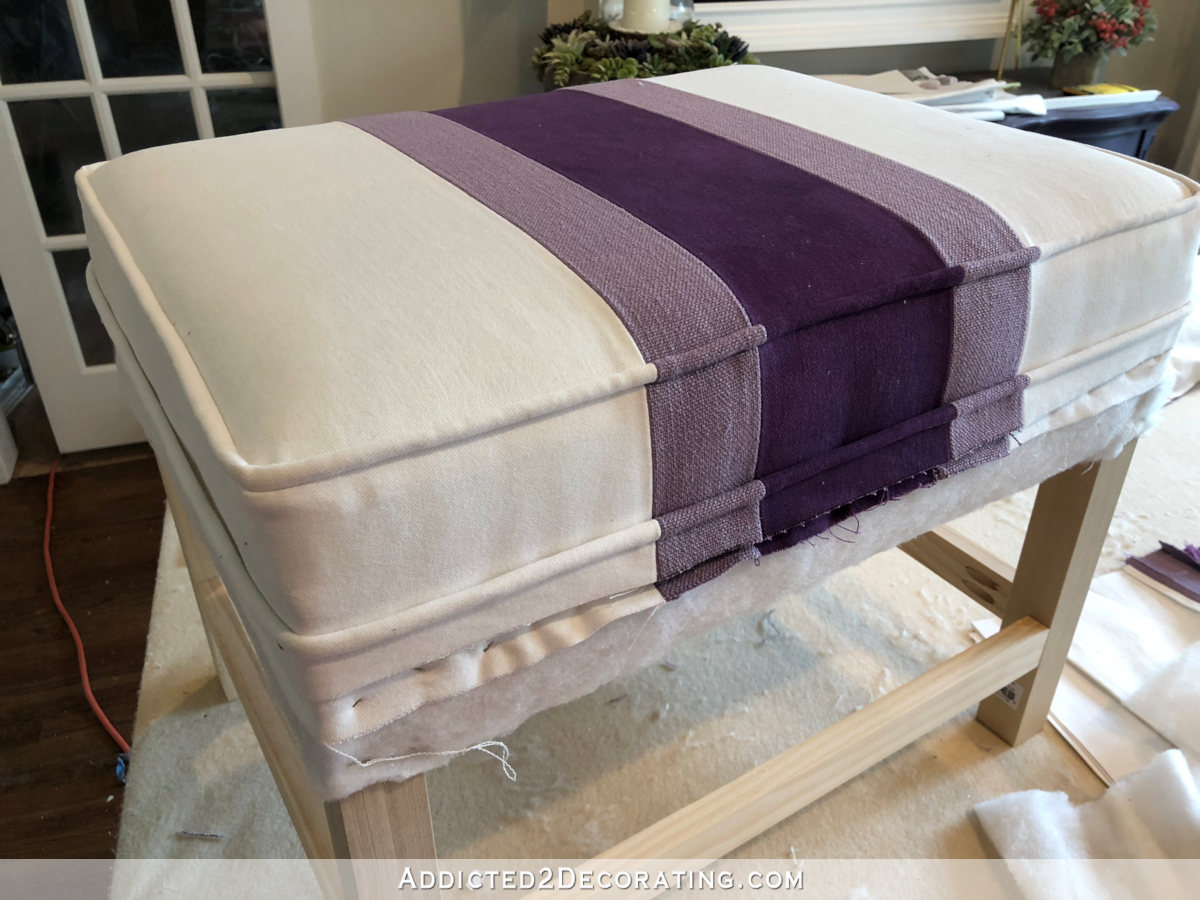
After the top pieces were stapled on, then I placed the bottom welt cord around it. Note that this welt cord is completely separate. It’s not sewn to anything. It’s just a covered welt cord, all on its own. This allowed me to move it into place and make fine adjustments, measuring as I stapled it into place.

With those pieces in place, I began assembling the skirt pieces. For the front and back skirt pieces, I sewed together the stripes in the same way I did for the top. And then on the sides and bottom, I pressed in a double one-inch fold. Then I sewed mitered corners on the two bottom corners.
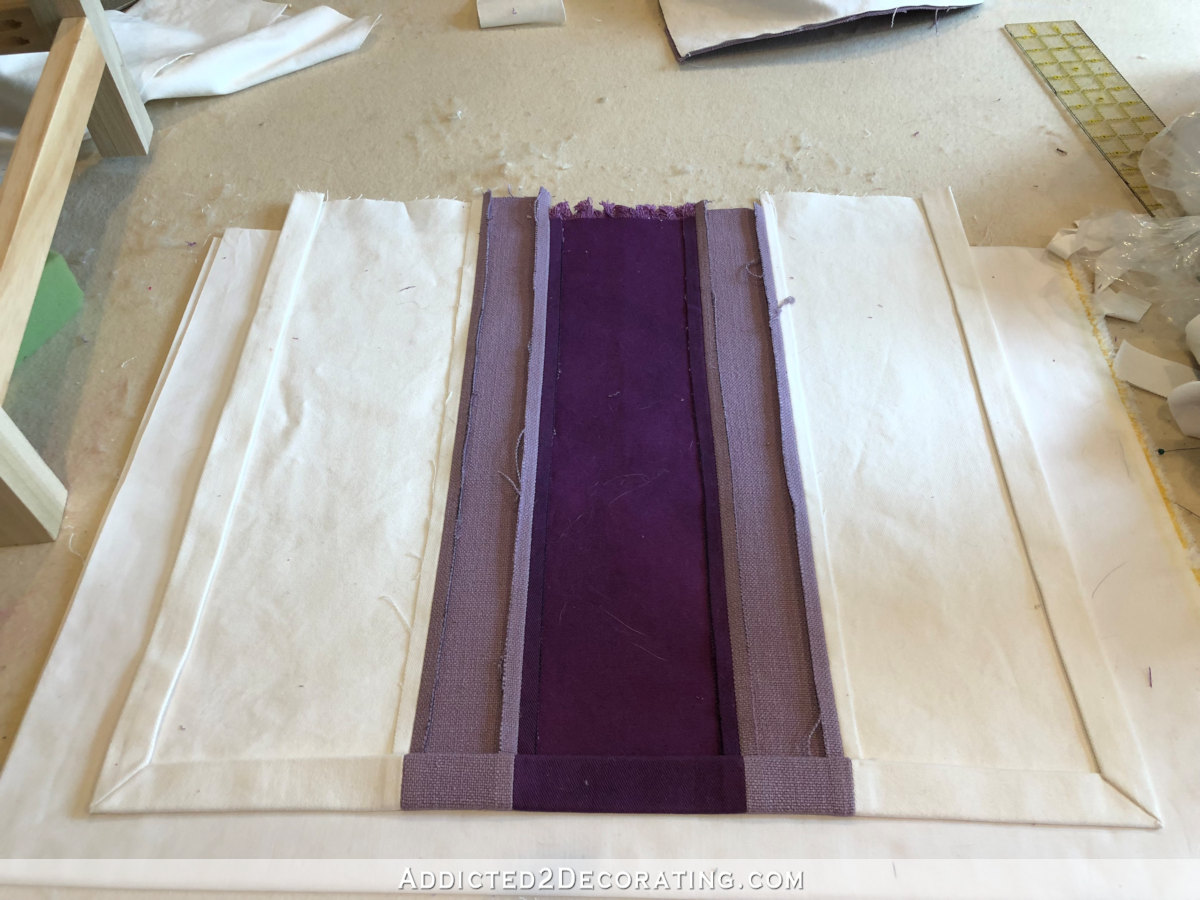
I didn’t go into detail on the mitered corners, because this fantastic video shows how to do mitered corners step-by-step.
With the side folds and mitered corners in place, I cut a piece of lining to fit…
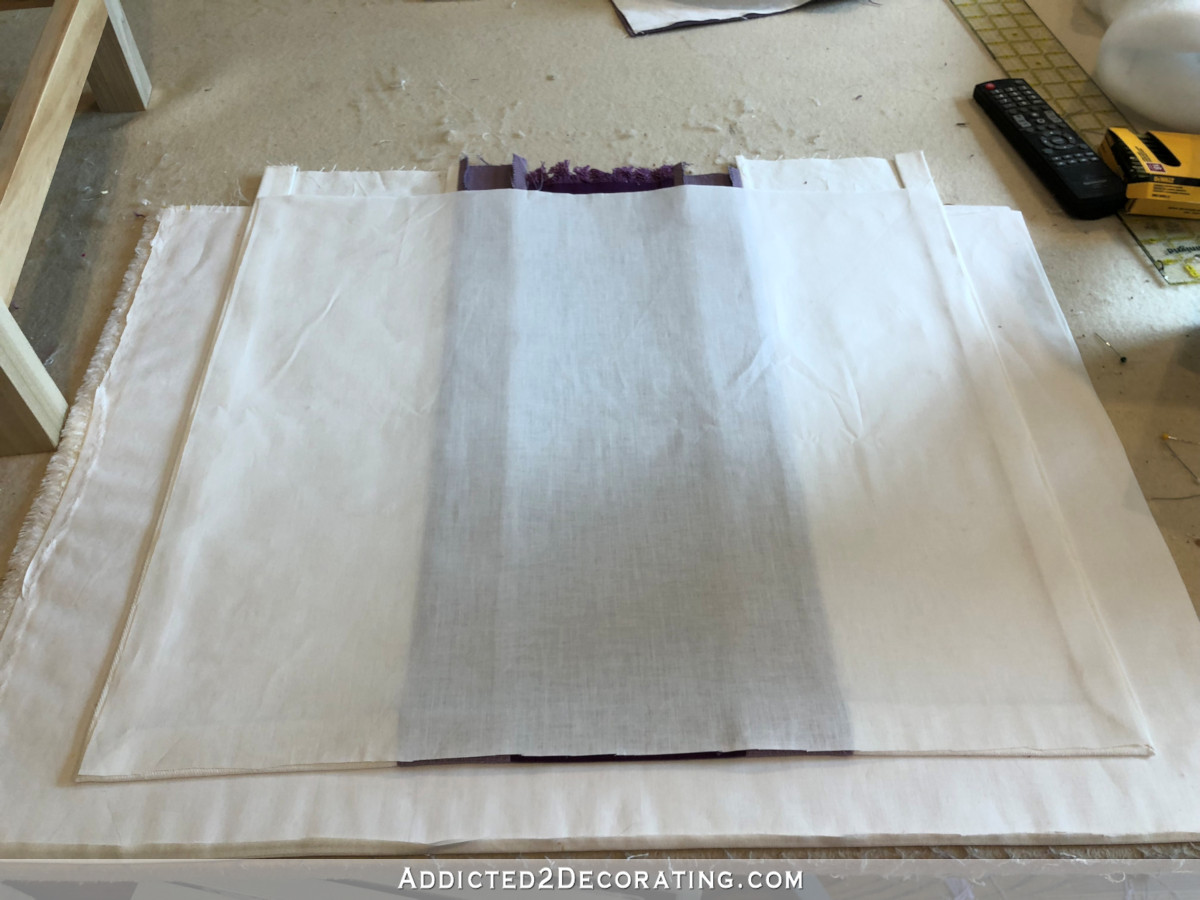
…and just slipped the edges of the lining behind the folds. Then I attached it with iron-on fusible tape.
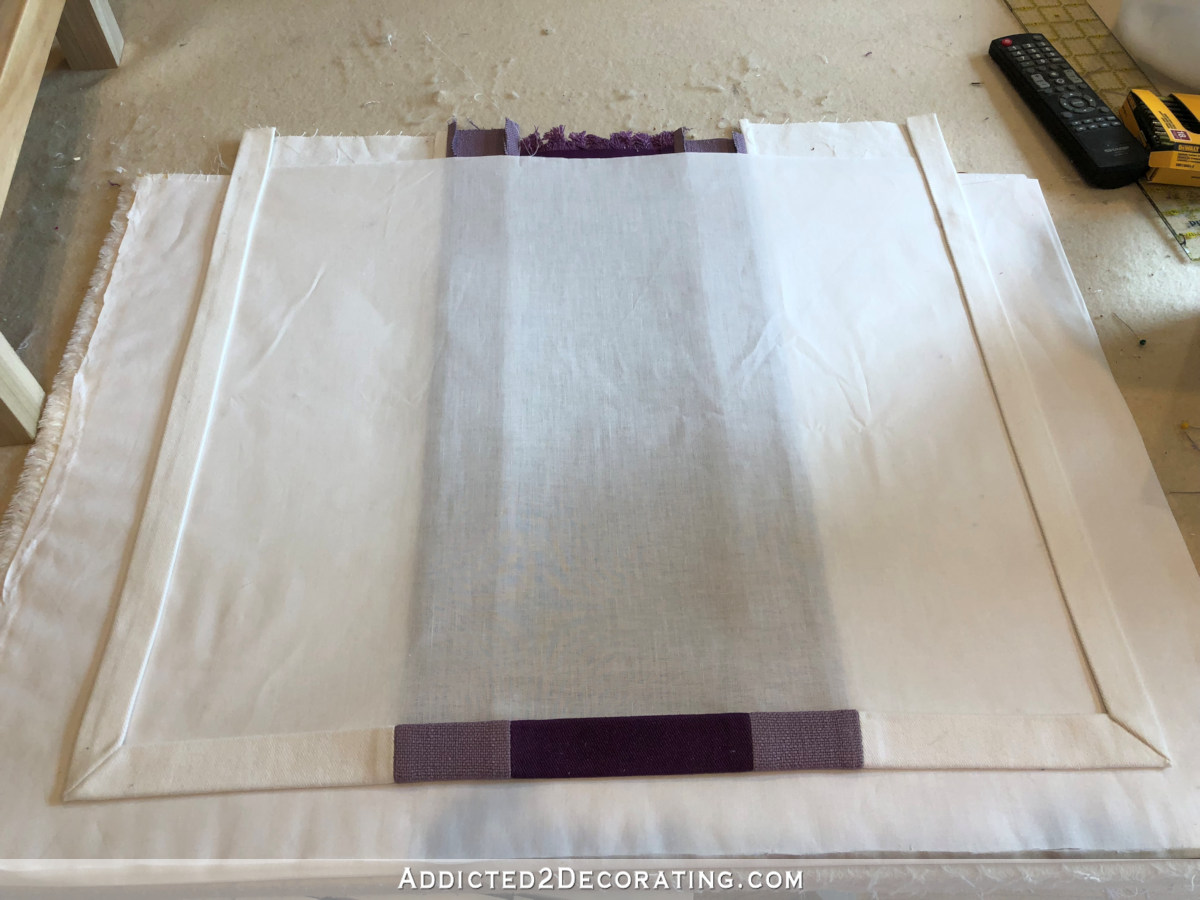
Then I measured and marked the finished length of the skirt piece (mine is 14.5 inches high)…
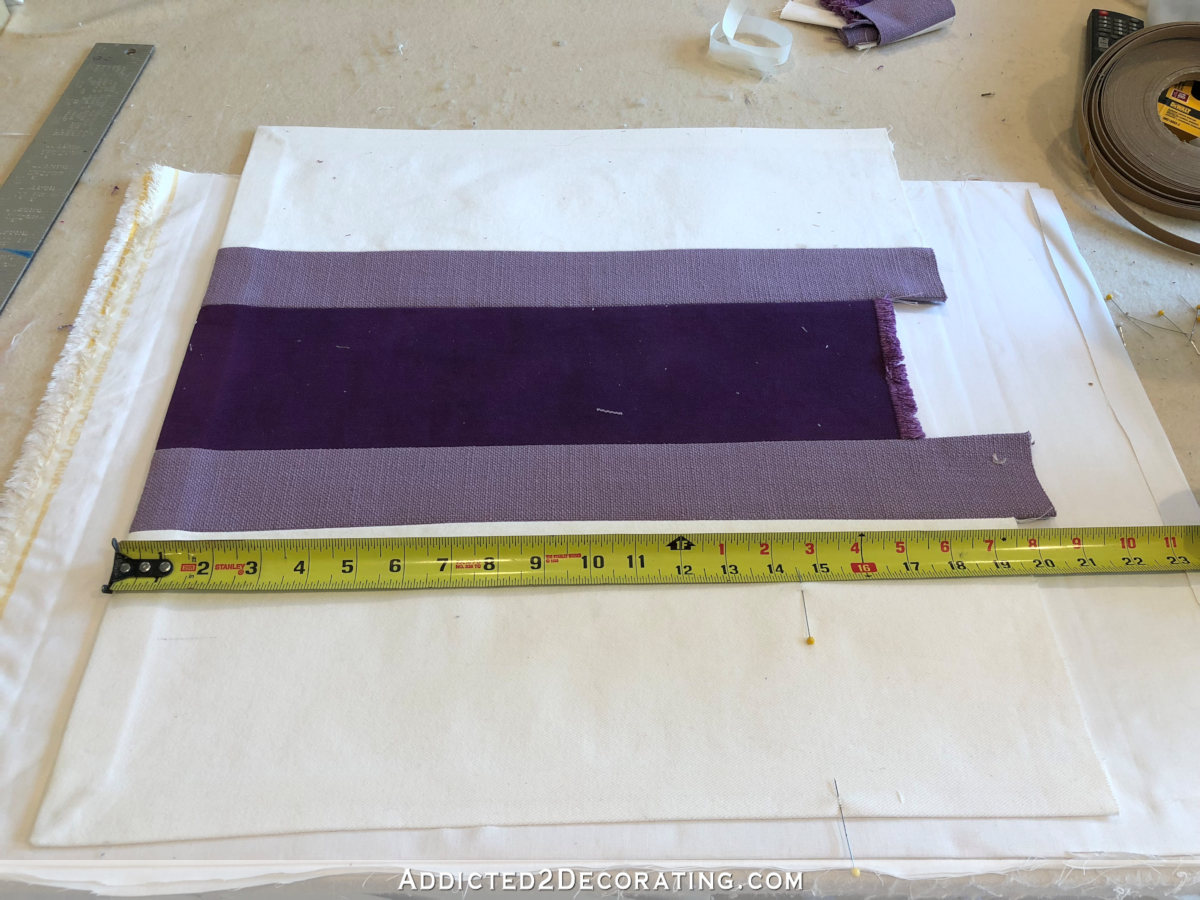
…and I folded and ironed that crease into place.
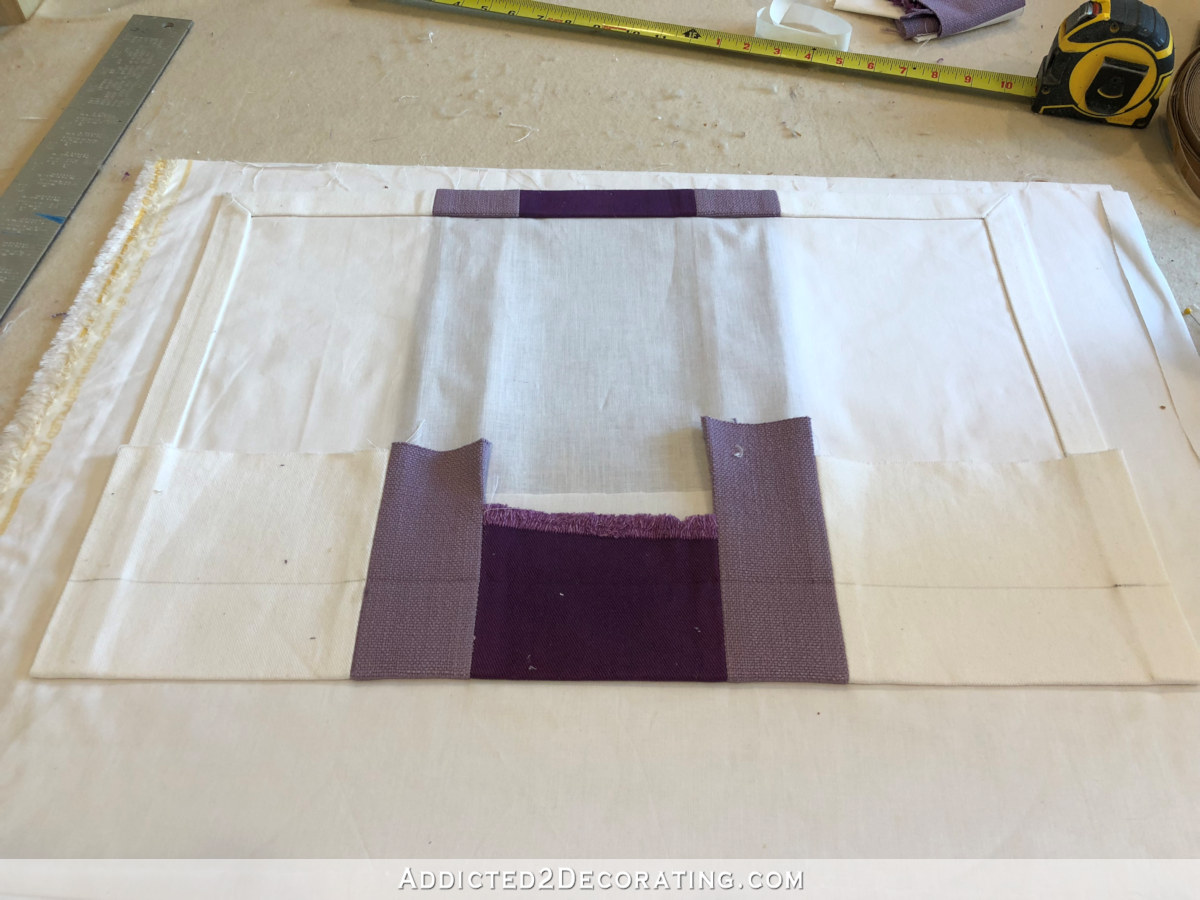
Then I marked two inches from the crease, and trimmed off the excess fabric…

If you’re using fabric that will unravel, you can use a fabric fixative or a zigzag stitch along the top to keep the fabric from unraveling. My fabric is a thick cotton that doesn’t unravel easily, so I didn’t worry about that.
And with the first skirt section finished, I was ready to attach it to the frame. I lined up the top creased edge just under the bottom welt cord, then flipped the skirt up and stapled it into place with just a few staples.
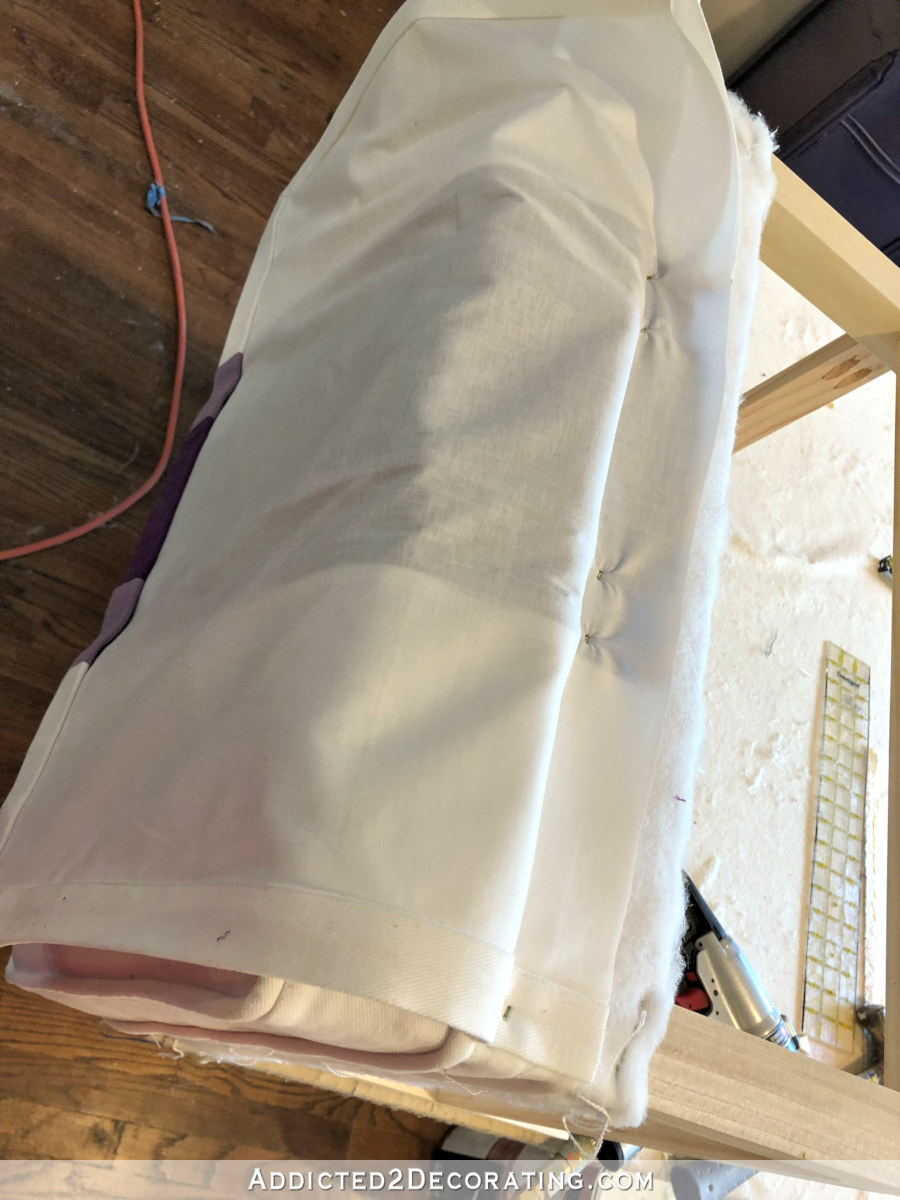
Then I used a cardboard upholstery strip just in the center to keep a crisp edge under the welt cord and stapled it into place.
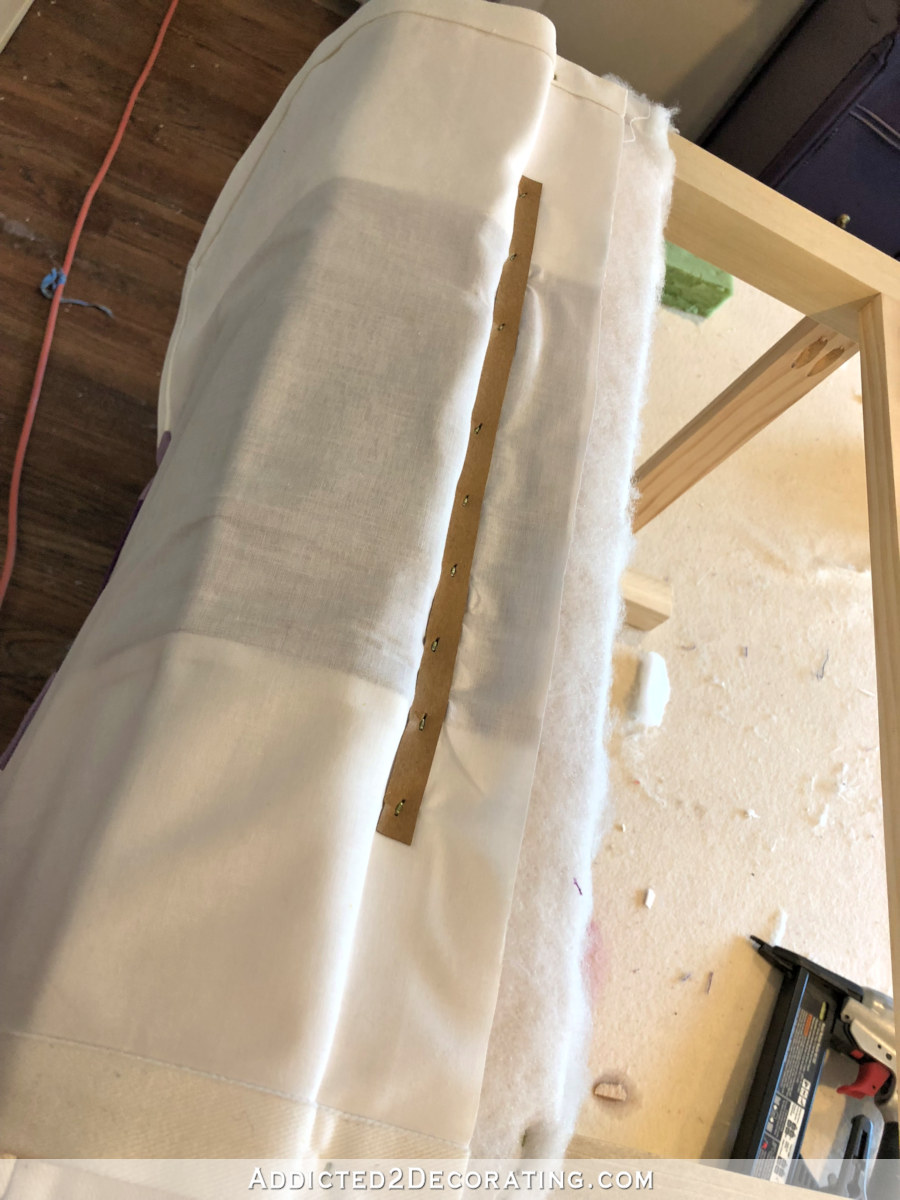
And here’s how it looked with the first skirt section attached…
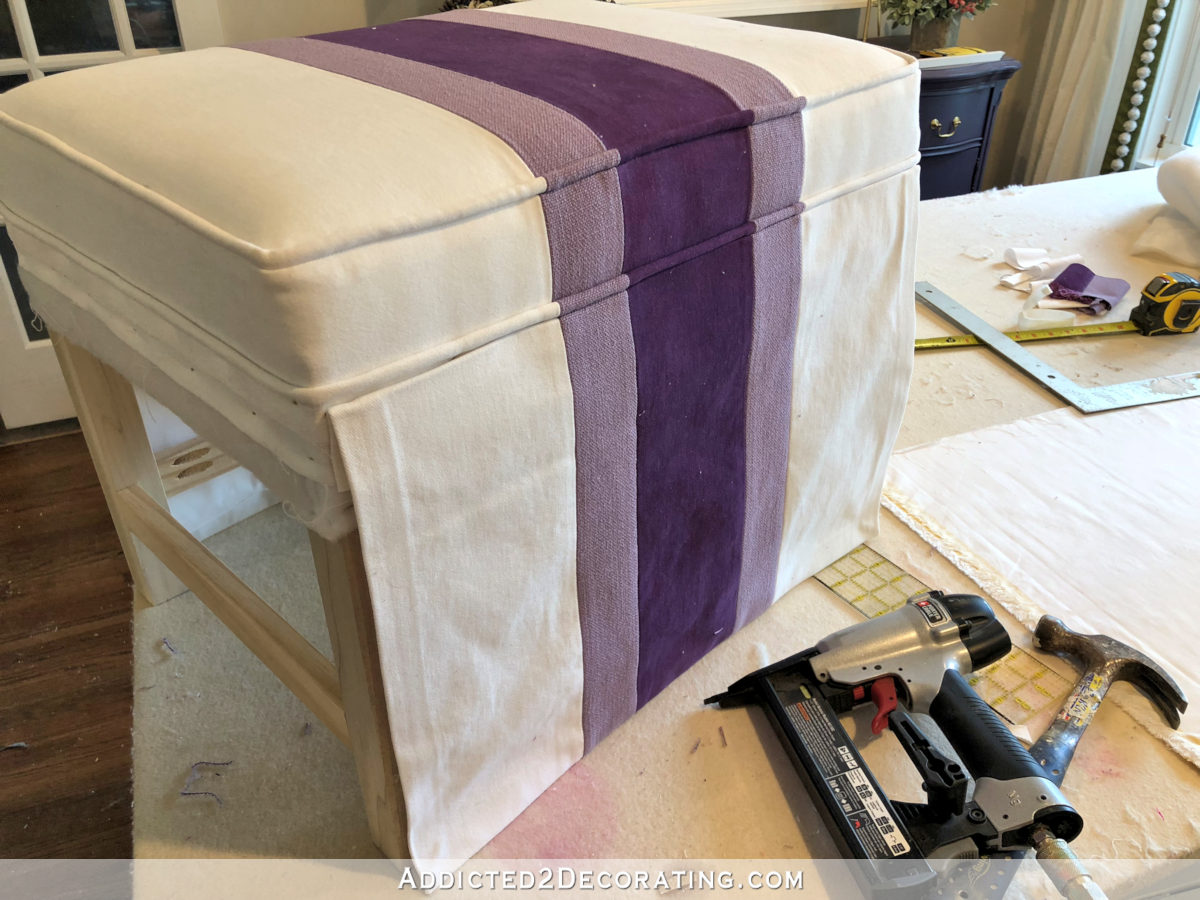
I repeated that exact process for the back skirt section.
The two side sections were obviously much easier since I didn’t have to piece together striped fabric. They were just solid white, but other than the stripes, they were made the same way as the front and back pieces — double one-inch folds on sides and bottom, mitered bottom corners, folded and pressed crease at the top.
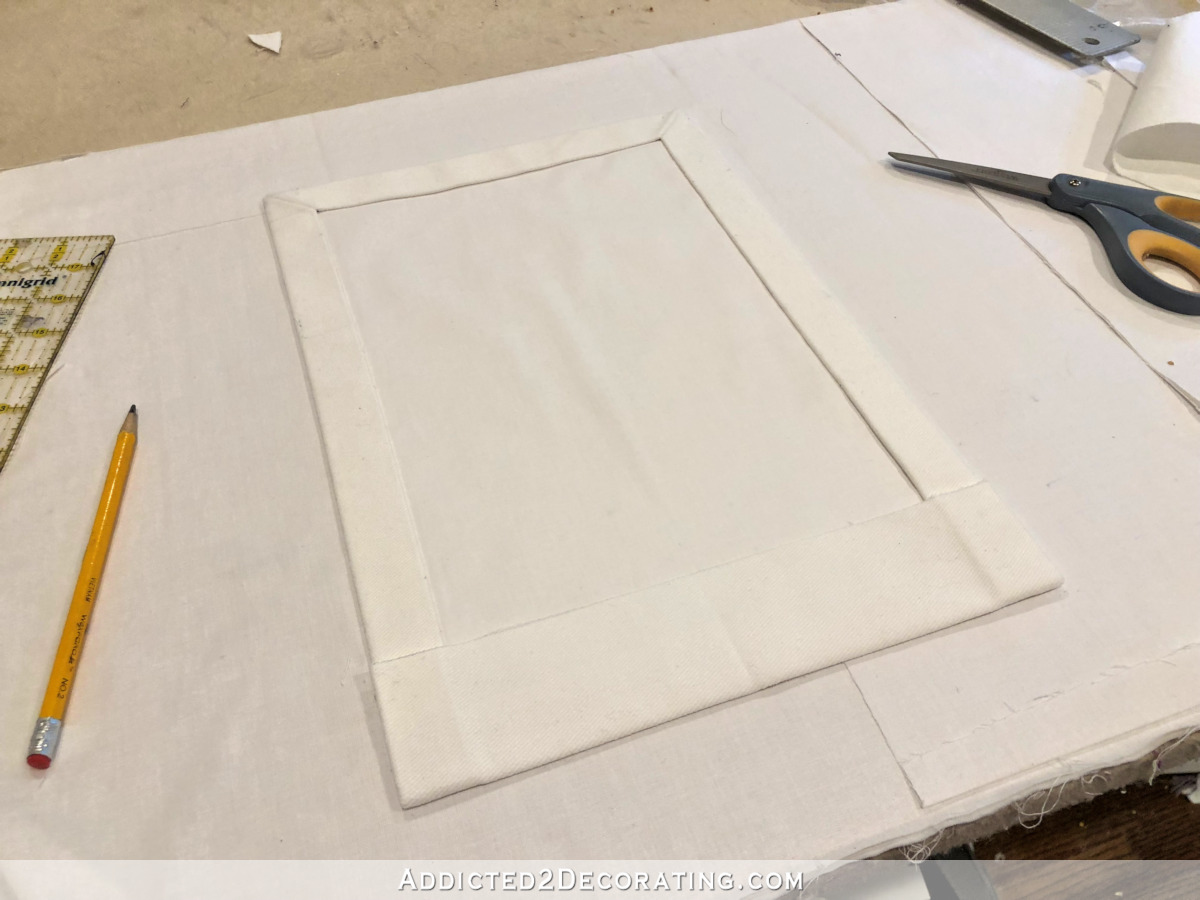
And I also attached it the same way — top crease lined up just under the bottom welt cord and stapled in place with just a few staples…
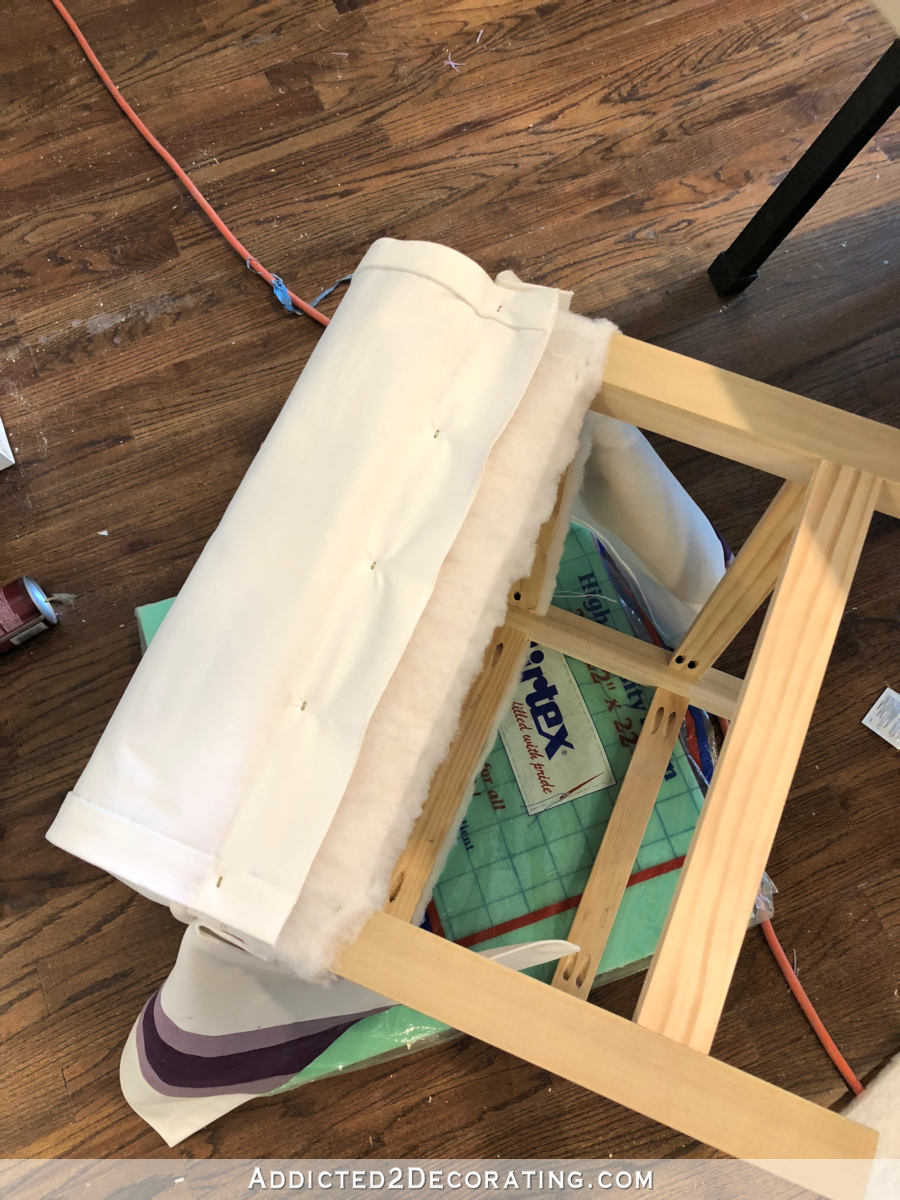
I repeated that on both ends. Here’s how the ottoman looked at this point…
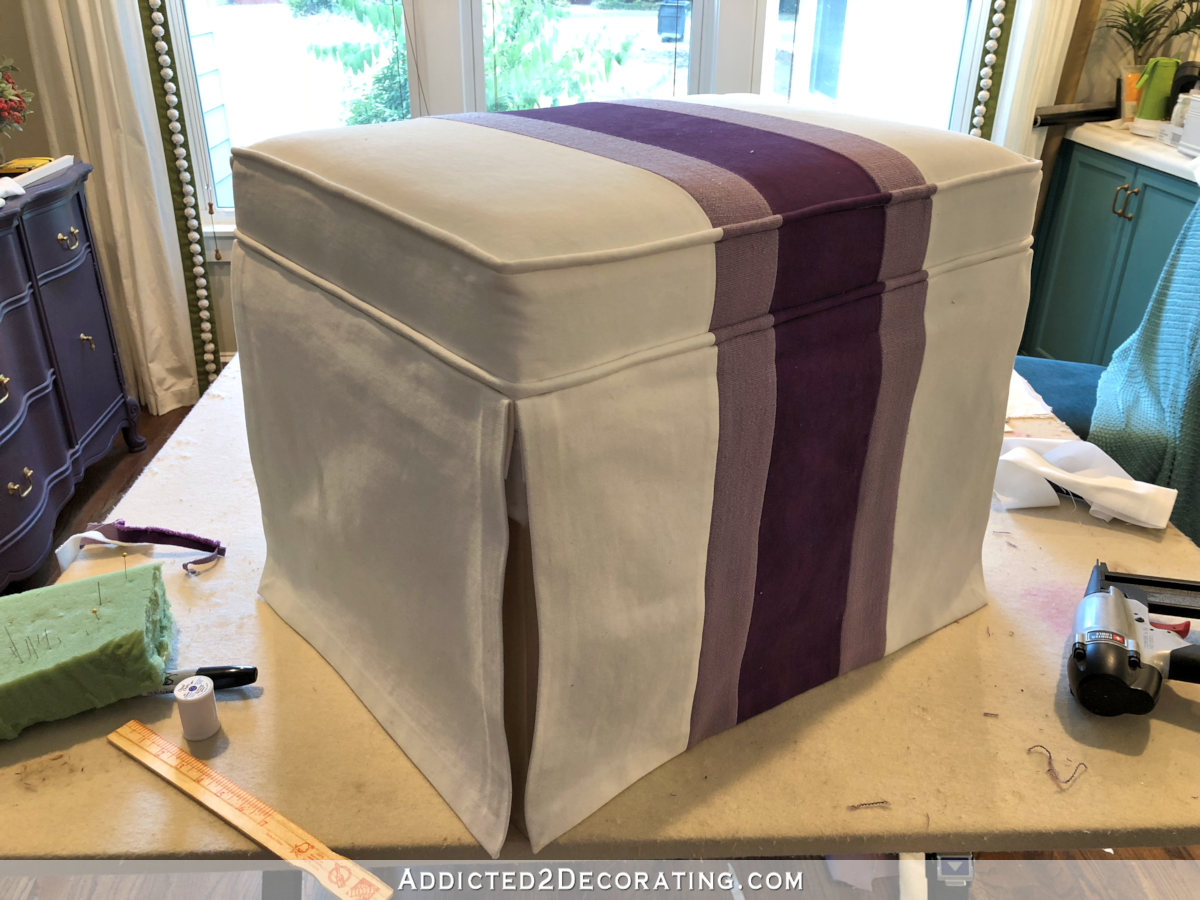
The final step was to make the four corner pieces. I made these the exact way that I made the side skirt pieces with one exception. I pressed the top crease into place so that these corner pieces were 1/4 inch shorter than the main skirt pieces. So my main skirt pieces had a finished length of 14.5 inches, but these corner pieces had a finished length of 14.25 inches.
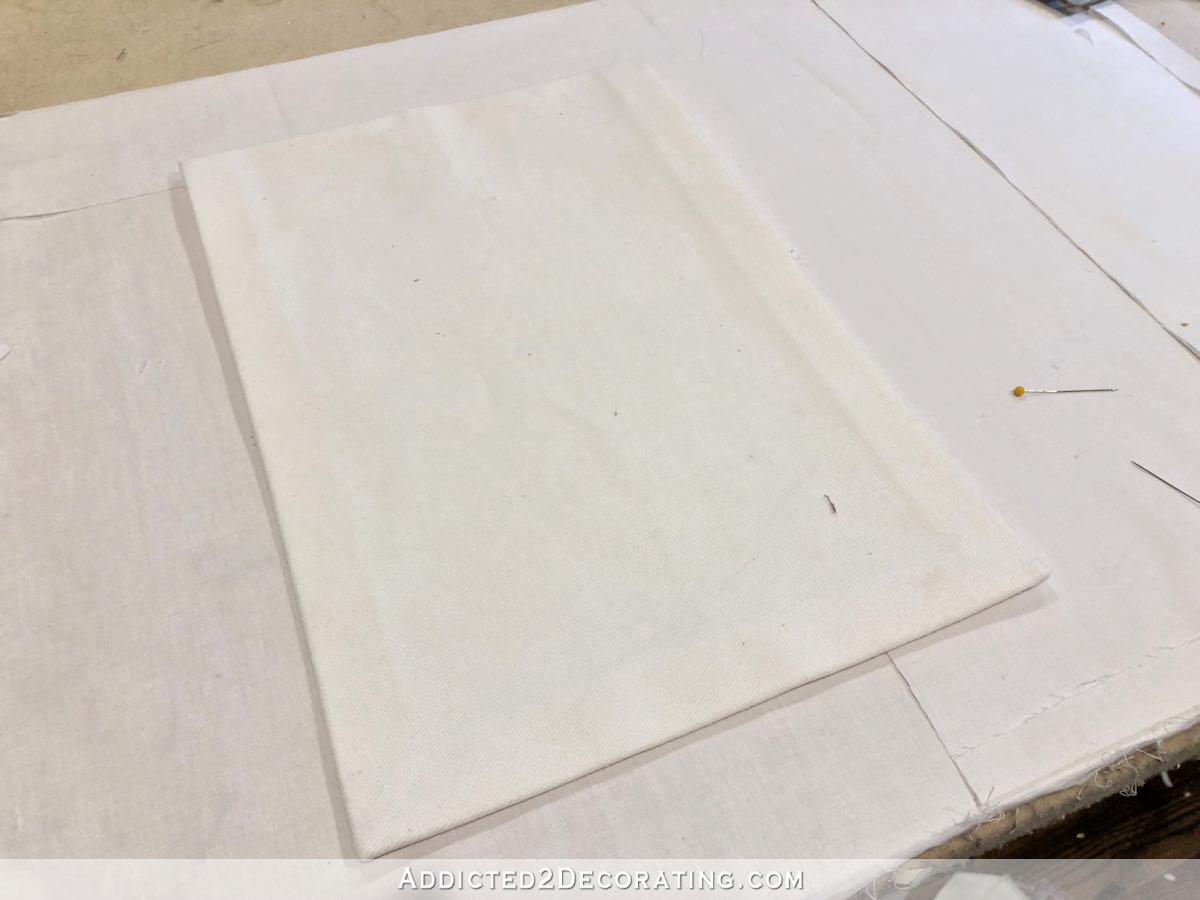
I tucked these corner pieces up under the main skirt pieces.
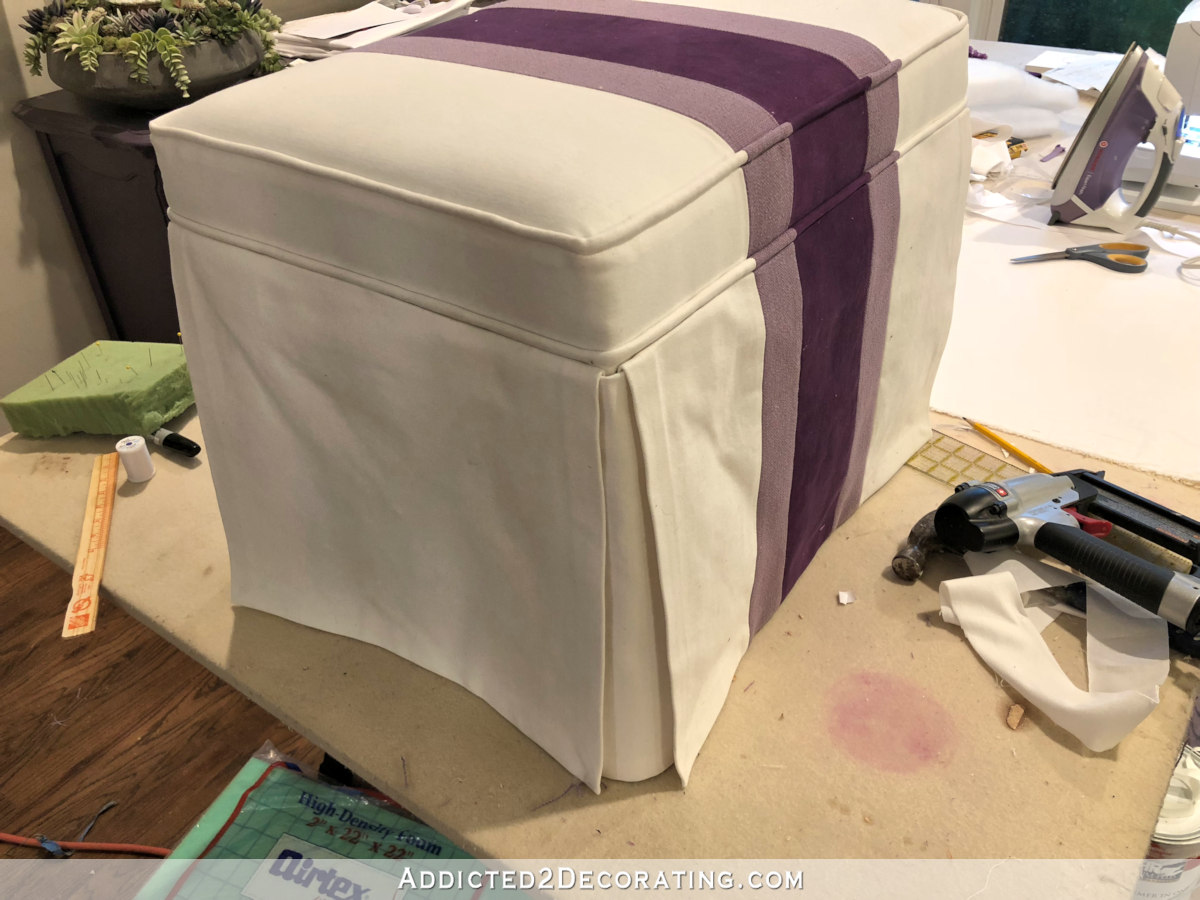
Once I had all four corner pieces made, I was ready to do the final assembly. I started on one end, and using the cardboard strip, I placed it as closely under the bottom welt cord as possible and stapled it into place, making sure that all of the skirt pieces — main pieces and corners — were pulled taut enough to be wrinkle-free, but not tight enough to stretch the fabric as I stapled them into place.
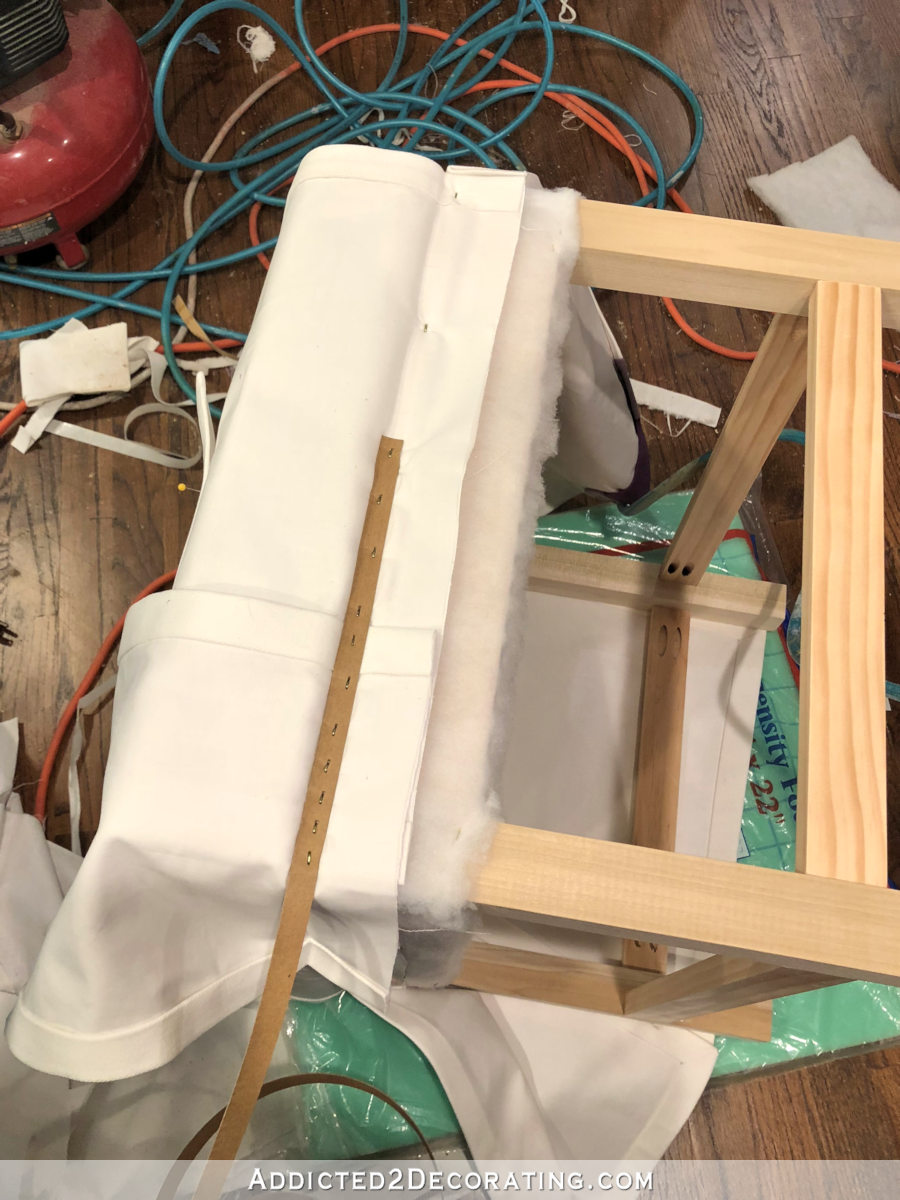
I stapled the cardboard strip all the way around the ottoman, securing all of the skirt pieces into place.
And with that done, I had a finished ottoman!

Pretty cute, huh? 🙂
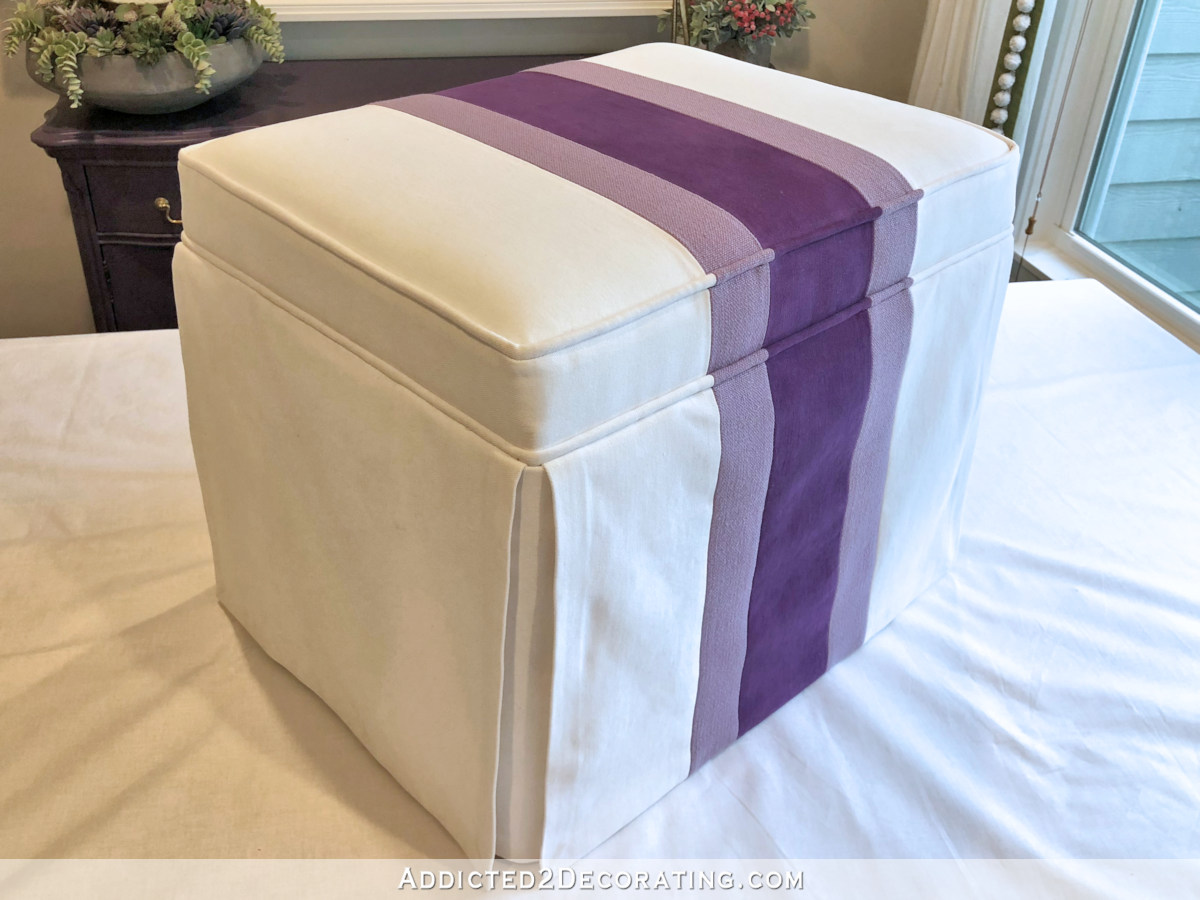
Y’all know I love my stripes, so I love how this turned out. And I’ve wanted to do some sort of upholstery project using gradient stripes like this for a while now, and I kept holding out for chairs, but that never seemed to work out.

So when I decided to make a little ottoman, it seemed like the perfect opportunity to try out the gradient stripe design.



Very nice is this for your music room? Would be great to see it there.Xx
This looks great! I know you mentioned bringing others together to learn from you, and I think this would be a great addition that program. This project is perfection, and I wish I could have one! Maybe I’ll get it a try.
Great idea! You’d get power tools, wood working, and upholstery all in one shot! (Use a compressor to spray paint the frame and I’d sign up tomorrow! 🙂 )
Great project!
Very nice! I need two of these. Great tutorials so I think I can do this! Question: You placed a cardboard strip under the fabric stripe area, then mentioned later that you stapled a cardboard strip all the way around the ottoman. Is the cardboard strip doubled in the area of the striped fabric?
Yes, the strip is doubled in the center portions of the front and back skirt sections.
And that little detail is another reason why it looks so good! Thank you!
Where can I purchase the cardboard strip? BTW, this is a wonderful project. I simply love it.
https://www.amazon.com/Dritz-44293-Upholstery-Strip-Natural/dp/B001EL5VZ8
This is absolutely wonderful! I love the attention to detail (a typical Kristi thing, of course 🙂 ) – the striped welt cord is just perfect, it’s what takes this from a beautiful but kind of “normal” project to something fabulous and outstanding. Thank you for the detailed tutorial, this might be something I consider making in the future.
uh oh, my laste sentence was definitely not meant as a verdict on other projects – I hope it doesn’t come across as that! It’s just that most of what you do is way out of my league, whereas sewing is something I’m fairly good at and thus might have enough courage to try this one day… 🙂
Once again your talent and skills amaze me! Love this. Thanks for sharing!
P.S. any update on how your dog is doing?
What’s up with Cooper? I must have missed a post. Hope he’s okay.
He’s perfectly fine! You didn’t miss anything.
Whew!thanks Kristi!
Your ottoman is beautiful btw!!
Super cute! I love straight lines, so this one is right up my alley. Unfortunately, white fabric would get SO DIRTY in my house! I dream of days where I can have white furniture!
love your website, but your video takes up 1/3 of my screen, whats up with that.
I have no idea “whats up with that.” I’ve never seen that on any computer or device I’ve used, and I regularly look at my website on two sizes of laptops, an iPhoneX, iPhone 7+ and a desktop. If you’d like for me to make a serious inquiry, then you’ll need to actually provide some details, like the device, operating system, and browser you’re using. And a screenshot would be helpful also.
Happens to me too on my laptop (windows 10 using chrome browser) but I have your site zoomed in (to 125%) so I can read it easier. It happens at first once I scroll past the video but within a few seconds (usually, once I had to reload the page for it to show up) a little X appears in the upper right and I can make it go away. Otherwise it takes up 1/3 of the screen and scrolls with the text. That one time the X didn’t appear was frustrating to read which is why I reloaded the page and it showed up after and worked fine.
Yes, I wonder if there is a way to stop the video from auto-playing? I think that is generally unpopular with users (hence why some browsers try to stop it).
It seems like the behavior depends on the size of your window. When fullscreen, the video will start playing and as you scroll by will pop out to the side. If you have the browser window smaller (where there isn’t room for a sidebar) it will float and cover the top part of the reading area.
But on a positive note, great work on the ottoman! It looks amazing and I can’t wait to see where it will end up 🙂
What Athena said. After a few seconds you can just X it off, if you like.
Sure I can close it, that is true. I just meant there might be a different option Kristi could select for the site so that the video is there but doesn’t start playing. Then anyone who is interested could hit play and watch it, but that it won’t just start playing on its own. My impression is that most people dislike auto-playing video ads – though at least it does have the sound off.
*shrug* It doesn’t annoy me enough to cause me to stop visiting, and I suppose seeing ads is the price we pay for free content 🙂
I have windows 10 and view the site using chrome and I don’t have this problem. The videos (tour and greek key how-to) both stay put. The video stays in the middle of the blog text and I can scroll past it just fine. the greek key stays in the side bar. I’ll check my settings and update, if I think there’s anything I can add to this thread.
My font size is set at medium and my page zoom is set at 100%. Not sure if that info is helpful at all, but thought I’d share.
Awsome!
Oh no, I read the question about the puppy. I hope all is ok.
He’s perfectly fine. 🙂
😁👏🏻👏🏻👏🏻👏🏻👏🏻good!
That ottoman tho, fabulous.
I LOVE this! The two-tone stripe down the middle makes it so fun. I have an ottoman that needs to be recovered badly. This gives me ideas. Thank you!
Awesome. Love the purples.
Very nice and so tailored. I always wondered how to do something like this, thanks!
A very professional job there Kristi, and I love it!
Didn’t you have to clean the living room rug a while back because of the dog? How will this white ottoman hold up with the dog? I’d think the dog and cat hair will really show.
The dog spends every possible moment of the day on that rug. It’s his favorite place in the house. I can’t imagine that my very large dog will have any use for a tiny ottoman that’s not anywhere near his favorite rug.
Wow, now that is SHARP! As someone who dabbles in sewing and upholstery, I know just how frustrating this project could be. I am absolutely amazed that you sewed the cord as a continuous loop instead of working with two sections and putting overlapping seams on each side. Even without the stripe, my loops would be too large or small, and I’d probably end up with a pucker right at the end. And those stripes are PERFECT! Not a wobbly seam in sight. Excellent, excellent work.
Beautiful work and thank you for solving a 36 year old mystery in our family! The first item
to always sell in our garage sales were the electric carving knifes! 🙂 You do know your tools!!
I’ve said it before, I’ll say it again. You do the best sewing & upholstery tutorials. Thank you!
Fantastic! So very inspiring (as usual). Oh I bought the DeWalt sander you suggested in some former post. It’s also fantastic. I hesitated getting it because I was trying to make do with my weak finish sander. Trying to tell myself it wasn’t doing the job because I hadn’t done this before so it was operator error. Well- no. Just no. Lesson learned. Now the project (refinish progress) is progressing again at a normal pace.
Wow! Beautiful, tailored and so custom. I cannot wait to see it in your room 🙂
What a stunning job. It might be a small ottoman but it shows all the basics needed for a lot of upholstery projects. Love the 4corner pieces. Never could figure how to cover the corners with the side panels. You just answered a problem I have always had.. just love it.
It looks positively store-bought!!! Just adorable and classy looking as well! You are truly a wonder! I’m further amazed at your energy and ability to get things done quickly!!!
I too love how this turned out! And I love purple, unfortunately it wouldn’t go in my house, but it’s one of my favorites, nonetheless. I was wondering about the fabric. Obviously a tightly woven one would help tremendously in achieving that crisp look, but I can envision this done in a really soft, fine baby cord. Would that increase the difficulty level? And it might add bulkiness too. But in my mind’s eye it would be really nice! I’ve never done much upholstery but I’m a very experienced seamstress and the detailed steps you show here make me understand exactly how simple this particular project could be. Thanks Kristi.
Kristi, did you cut the strips for the cord covering strips on the bias? I’m covering a couch cushion and have plenty of fabric and cording. If I make matching cording I can get going on it. I’ve been waiting because the decorative cording is so pricey.
I didn’t cut mine on the bias because I didn’t have enough fabric (and didn’t want to buy more). But if you have plenty of fabric to cut on the bias, I would definitely recommend it. I have a tutorial here that makes the process much less tedious.
https://www.addicted2decorating.com/sewing-basics-how-to-make-continuous-bias-for-welt-cord.html
Hi, love this! What are the finished dimensions?
This is so cute! I just love it. Thanks for all the details because I am going to do something similar.