Small DIY Writing Desk — Finished! (Stained & Waxed)
My little writing desk that I built is now completely finished, and I decided to go with a stained and waxed finish.

Please note: This is a two-post project. If you missed Part 1 of this writing desk project, click below to get caught up.

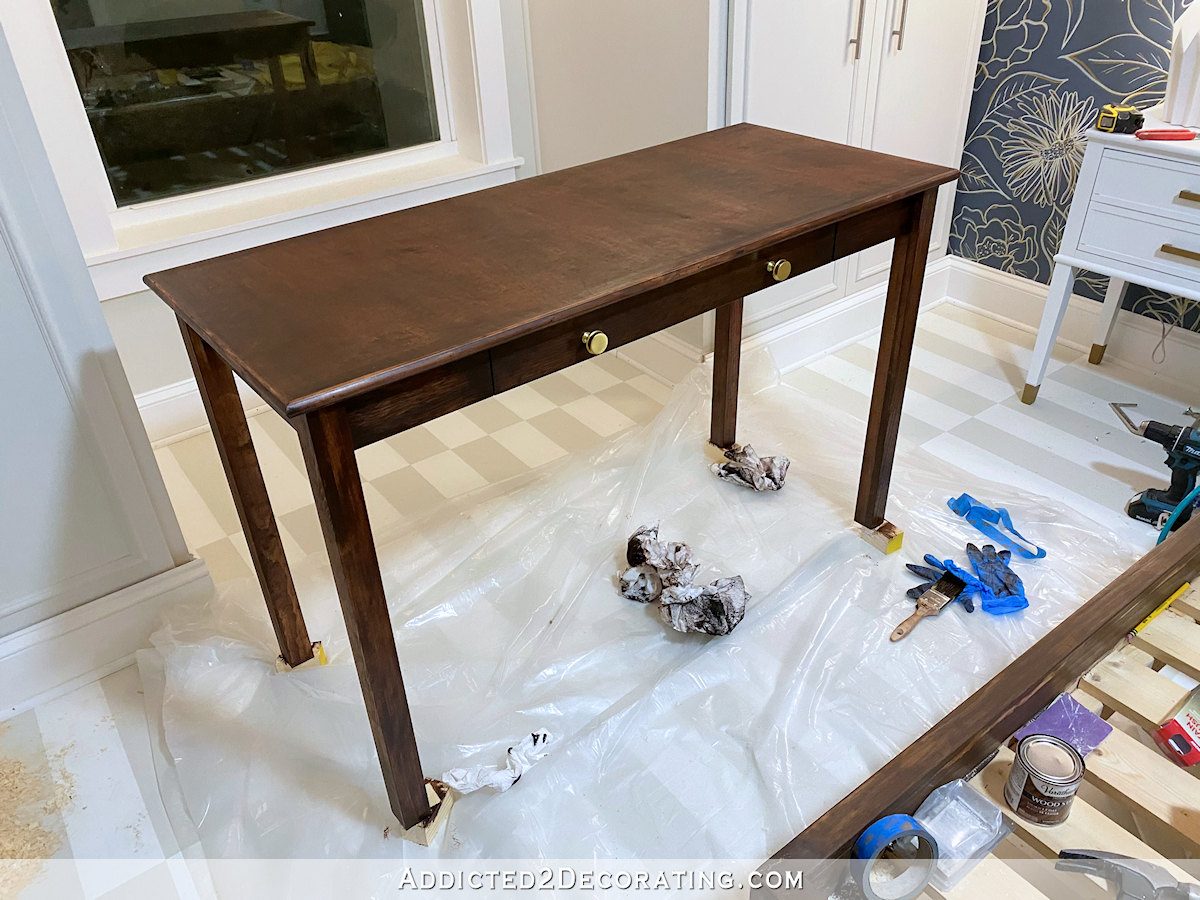
So yesterday, I got to work on the finish. And after spending a bit of time working out all of the room details in my mind (especially how I would use the golden yellow velvet fabric that I had originally intended for a new headboard), I finally had my plan worked out, and decided to go with a stained finish on the writing desk.
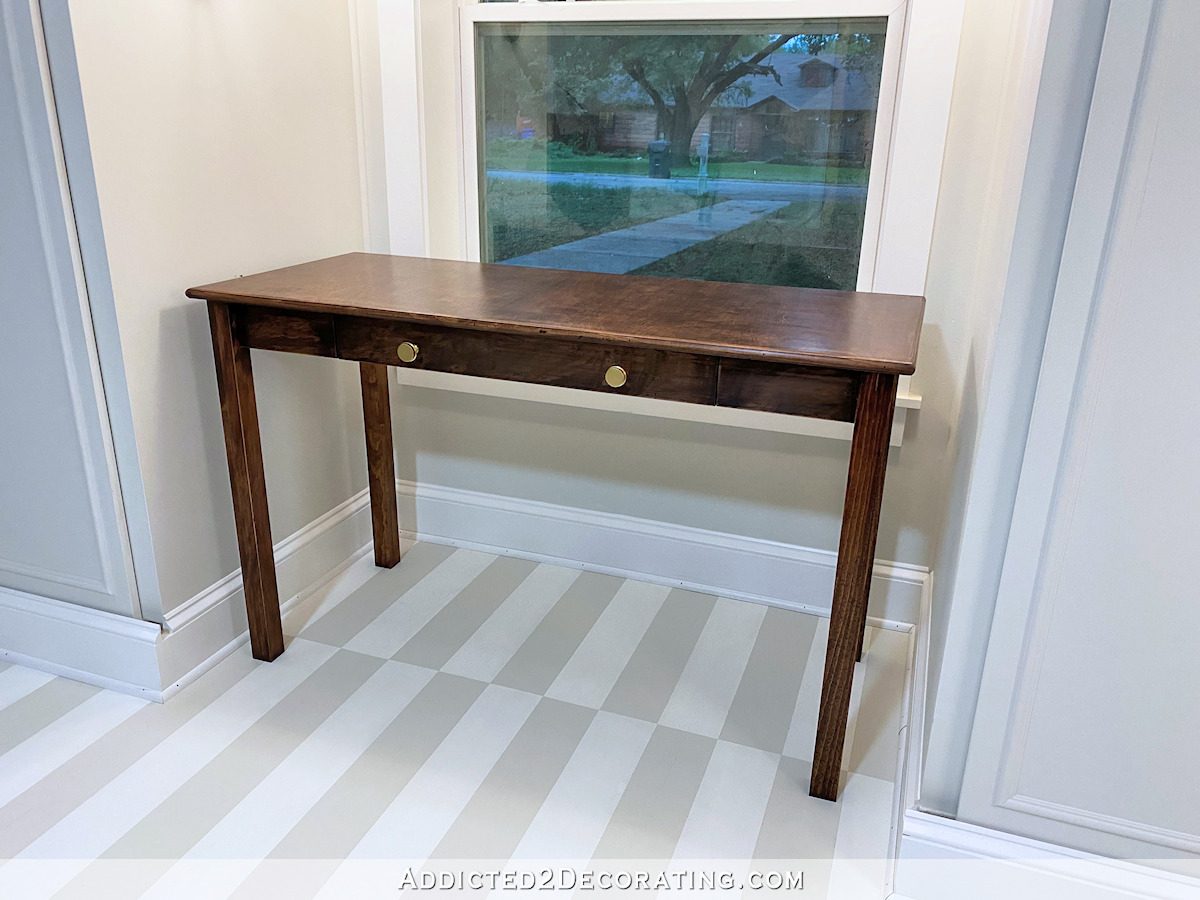
The base of the desk and the trim around the desktop is pine, but the plywood top is birch, so I was afraid that getting it all to match might be a problem. But in the end, I’m very pleased with how it turned out.
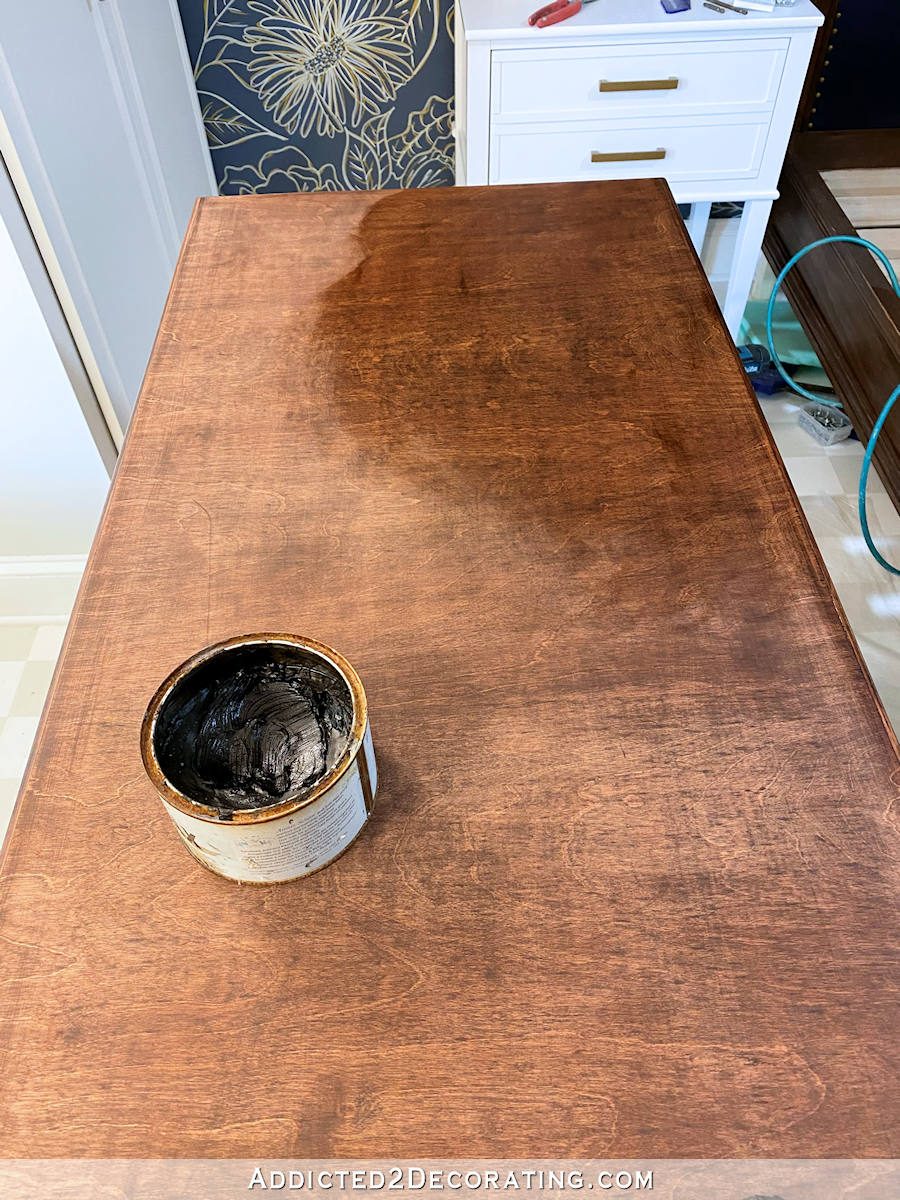
I started by staining the entire desk using Varathane Premium Stain in the color Carrington (affiliate link). This particular stain is not a penetrating stain, but it’s also not a gel stain. It’s somewhere in between, so getting a similar finish on different types of wood is fairly easy with the darker colors. Here’s how it looked after one coat, brushed on with a paint brush, and after it had dried for a few hours.
It was fine at that point, and I could have just put some polyurethane on it and called it good. But the finish seemed really dark, and the stain had covered up most of the wood grain. While I’m not a fan of wood grain on pine, I did think that the birch top had pretty grain, and I hated to cover it up so much.
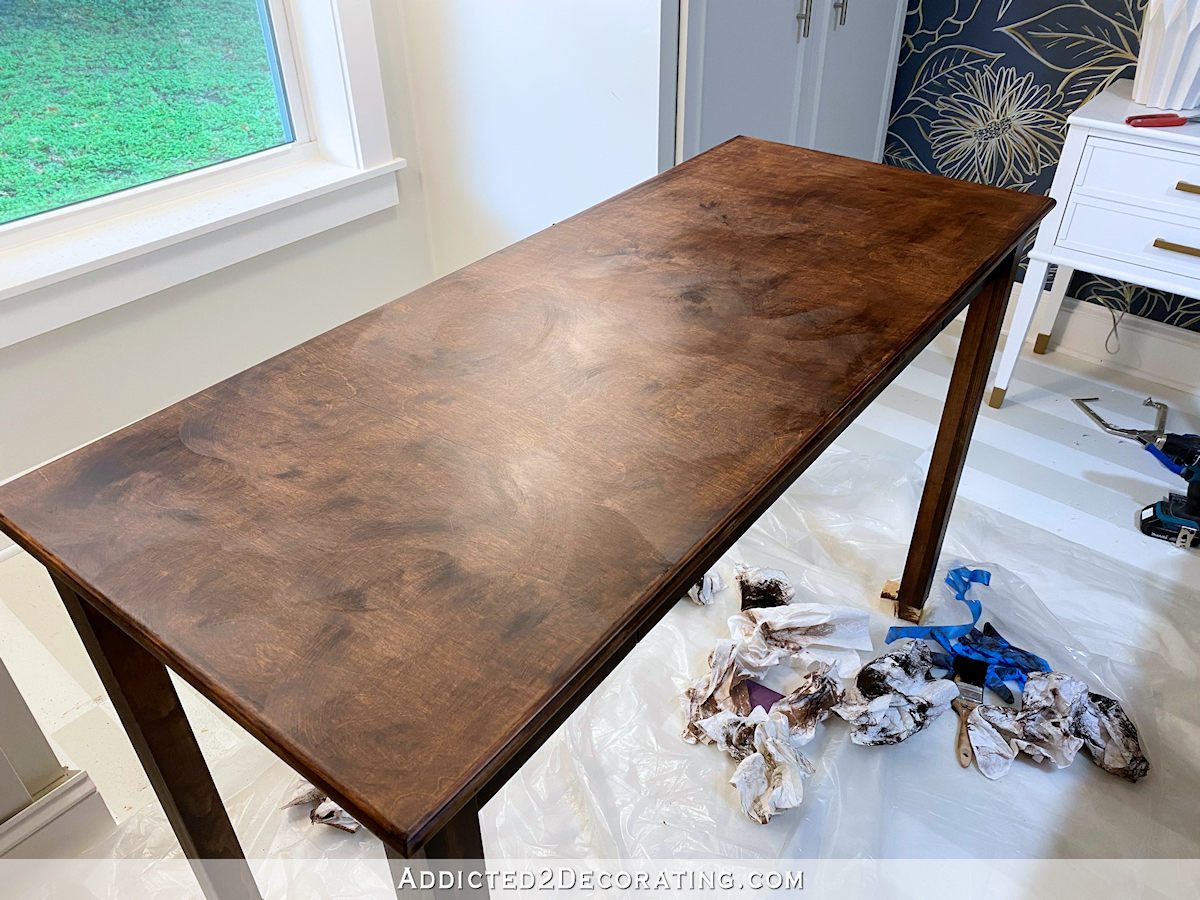
So I sanded the entire desk by hand using 220-grit sandpaper. And I just kept sanding lightly and strategically (meaning that I did more sanding on any areas that seemed particularly dark and splotchy) until I had exposed enough grain for my liking. But then the overall color was too light. 😀
I considered using a polyurethane with some colorant added to it to darken and even out the finish, but then I remembered that I had some Annie Sloan dark wax that I’ve had for years. So I got that out, and used it on the top, and it gave the wood so much depth of color.
I’m not really a furniture wax expert, and I hate reading directions, so I really had no idea what I was doing. At first, I tried getting a super smooth and perfect finish just by wiping it on and buffing it with a cloth all at the same time. That really didn’t work because it seemed to just smear and get streaky.
Then I remembered how I got a really nice finish on the console table that I built for the entryway. You can see that project here if you missed it. On that piece, I used Briwax liming wax (affiliate link), which is a white wax, but the process was to use a more generous amount, let it dry a bit, and then buff it with steel wool. So I decided to try that same process here.
I actually used a paper towel, and applied the dark wax in circular motions. I tried not to let it build up too much because those really dark areas clog up the steel wool pretty quickly, but I had a hard time getting a smooth application, but that may be due to the wax being so old. So after applying the wax to the entire top, it looked like this…
I left it like that for about an hour, and then came back and started buffing the surface using “000” steel wool. I’m sure that “0000” would have been better, but this is what I had on hand, and I didn’t want to make a trip to Home Depot just for steel wool, so I went with this.
It worked beautifully. You can see the center area that I buffed with the steel wool compared to the rest of the splotchy top…
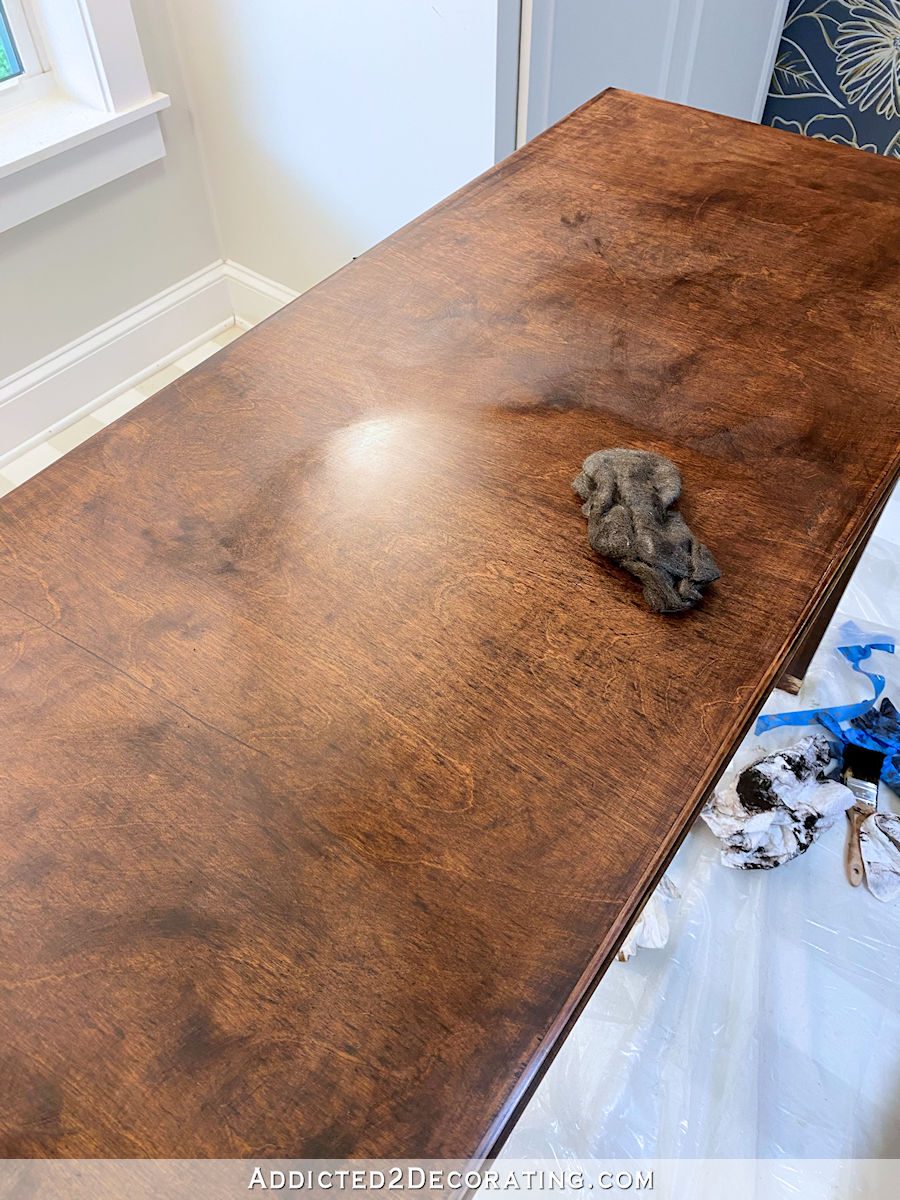
The sheen on the buffed area was beautiful, and it felt velvety smooth. It was every bit as smooth as any factory finish, but it had a much more beautiful, natural hand-rubbed look to it than a factory finish. Here’s what it looked like with the whole top buffed. See that gorgeous satin sheen?

(And hey! Look at me using a drop cloth! 😀 )
But seriously, this finish! I wish y’all could touch it. I mean, it’s velvety smooth. The only thing that would make it better is if I had an electric buffer or a buffer pad for my electric sander. But even without that, I’m so pleased with how this turned out.

So I went ahead and did the base in the same way. Since it’s pine, it doesn’t look nearly as good as the top. But with the base being such a simple design (meaning that there’s just not a whole lot of it), it’s fine.
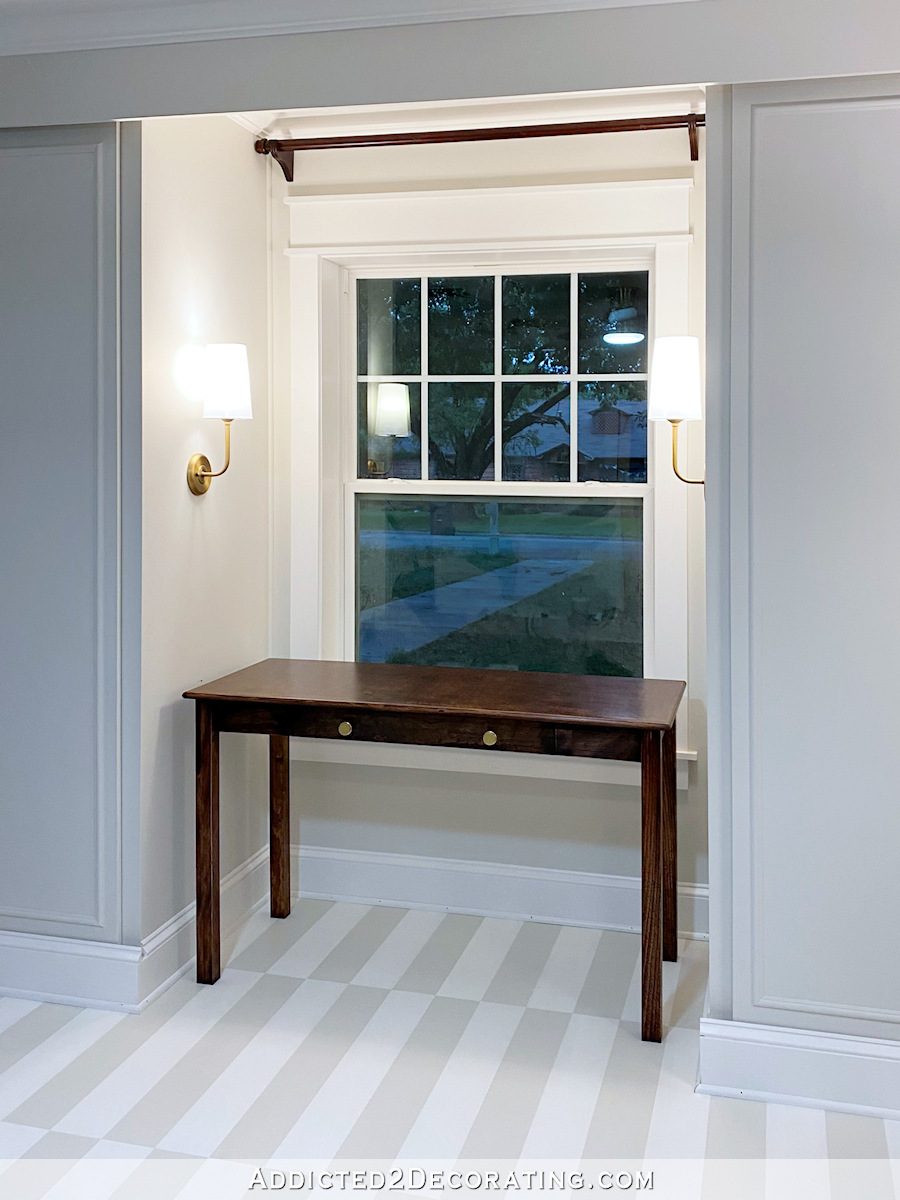
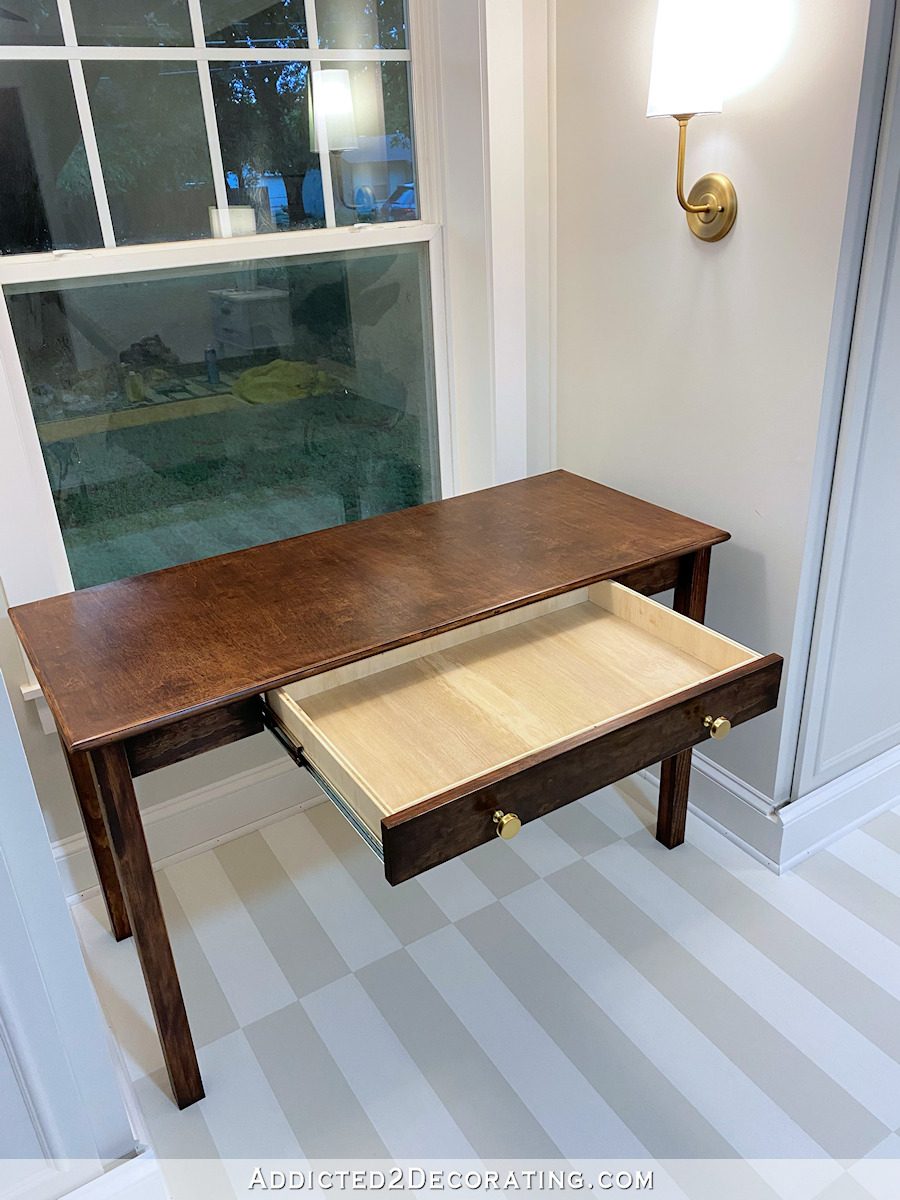
I decided to keep the drawer natural and just stain/wax the drawer front.
This space doesn’t have room for a chair with a back because then the sliding closet doors won’t have room to open. So I need to find a cute little stool to go with the desk. I really love this upholstered stool from Target (affiliate link), and the price is good, but it’s too short to be used as a chair for a standard height desk.
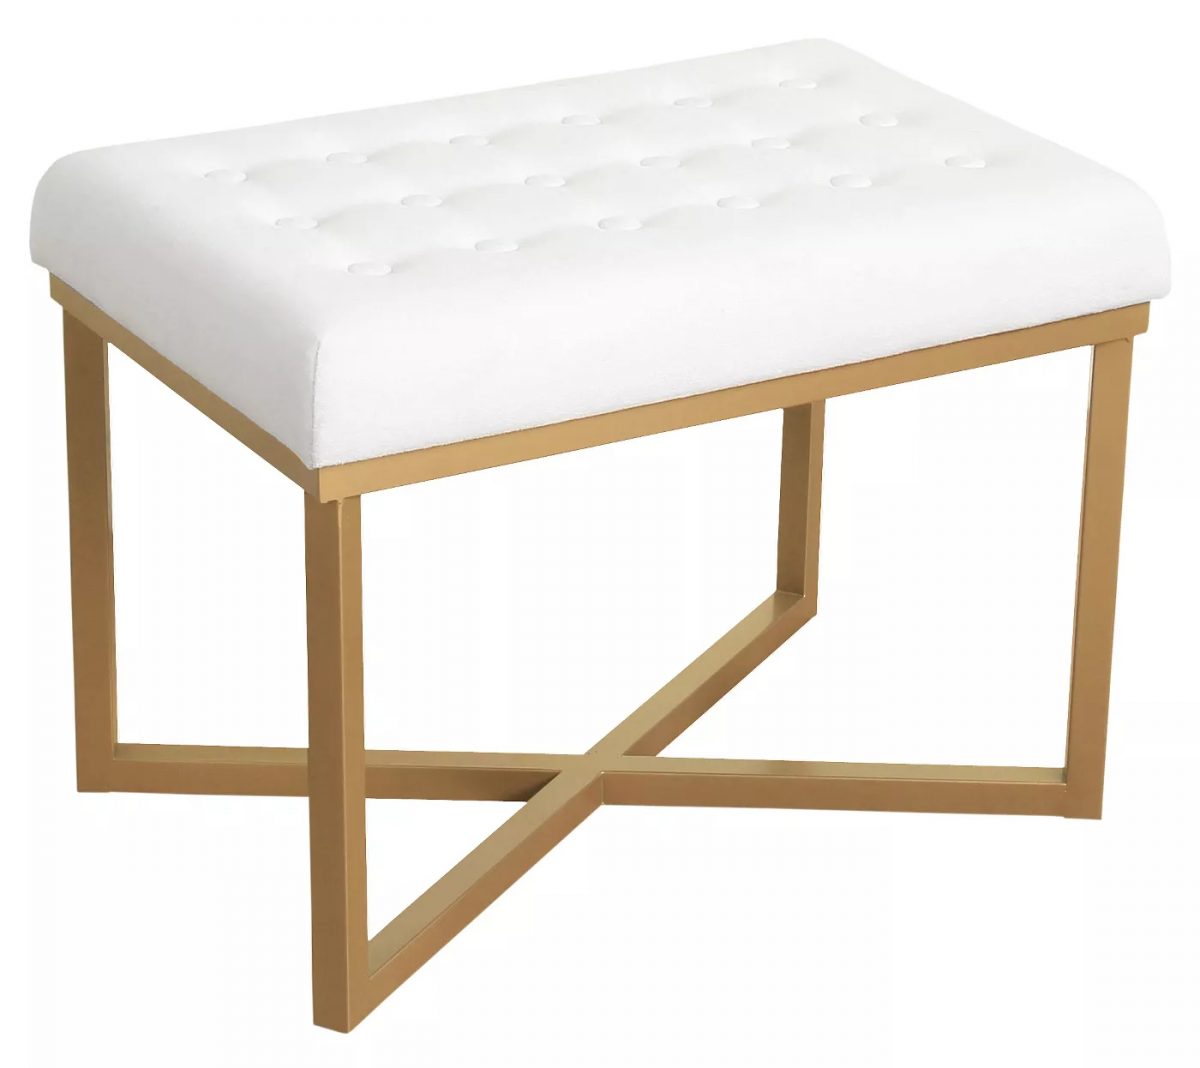
That stool is only 17.5 inches tall, and I need one that is about 20 inches tall. So that’s a bummer, because it’s exactly the type of thing I’m looking for, and it’s the right price. But I’ll keep on looking.

Addicted 2 Decorating is where I share my DIY and decorating journey as I remodel and decorate the 1948 fixer upper that my husband, Matt, and I bought in 2013. Matt has M.S. and is unable to do physical work, so I do the majority of the work on the house by myself. You can learn more about me here.


Christi, I love it! I couldn’t wait to see what you would do, it’s perfect for the room! You never cease to amaze me!!
Kristi — great finish and no pre-stain conditioner! The wood will add warmth along with the bed. Yellow velvet curtains?
Yep, I’ll be using the yellow velvet for the curtains. I only have enough right now for one panel, but I draped it over the curtain rod, and it looks so good!!
I love the little bench from target…. could you remove the cushion from the legs and add a 3″ riser of some sort to raise the seat?
I thought the same thing! You could so easily take the legs off and make the exact same design, just three inches longer. You could even stain them to match the desk. A no-brainer. 😁
I thought the exact same thing! It could match the finish of the desk, paint it white to match the cushion, or maybe use the yellow velvet?
My thoughts exactly! 😊
You may not want to go this route and don’t know how you could do it without it looking wonky, but could you add some kind of caster/wheel to the base? then a light kick would send it under the desk. 🙂
Kristi, you might look at Homegoods for a stool. I have two different rolling stools with gold legs -one with hot pink velvet and another with lavender velvet. They are adjustable in height and slide right under a desk.
Just buy that one and add wheels like you did with the shop chair. Quickie fix and won’t scrape the floors.
From following you for years, I intuit there will be a Kristi-built just-the-right-height stool under the desk. Maybe upholstered in golden yellow velvet.
Did I miss a post about the headboard? Also, how are you doing with your purging?
The headboard is the one I made years ago for our master bedroom. I made it maybe a year after we moved into this house.
The purging isn’t going so well. 🙂 COVID, the lockdowns, etc., really threw a wrench into my plans (and everyone’s plans) for this year. I’m trying to get back on track now.
My first comment was “Look at you protecting your floors, I’m so proud!” haha. That satin sheen you get on your finishes is always so satisfying. I think it’s my favorite part of most of your painting and staining projects, lol.
Look for a sewing machine stool. They are chair height.
Can you put fancy rollers on the bottom of that bench? That would raise it in and make it easy to move.
I’m getting ready to make myself some sort of desk. I just read this morning that for my height, 5’3″, 17 to 18 inches is the proper height for a stool or desk chair. That being said, it also stated that most standard desks are for people 6′ tall on average, and that for my height, similar to yours, should be around 25″. I’d hate for you to shorten your desk legs, but if you did, the stool should work. Just a thought.
The desk is beautiful. I’m sure you can make a bench just the way you need it. You could use some of that golden yellow velvet.
That’s beautiful, Kristi. The whole room is coming together and I’m so proud of you for using a drop cloth! 😜
Love everything in this room so far!! Would casters of some fashion work for the stool? When it’s used, it won’t be drug/pulled along the floor possibly scratching or leaving drag marks.
Love the wood finish on the desk! Great job!
Is the Target stool something to which you could add castors? That would bring it up to the height you need, and make it easy to move it from under the desk and back.
LOVING the entire room as always! Just curious…do you find you are using your studio area for projects?
Oh, yes! My studio gets a whole lot of use. 🙂 Those two big tables are amazing to have.
One of the reasons I love your blog is that you try all kinds of things and change your mind and again change your mind and then after that it all comes out right Plus you use what is on hand – right up my alley. And I am so impressed with your carpentry skills. That desk is so professional looking. I had to laugh at your comment that you had 0000x steel wool so that’s what you used. Anyway, I think your work is great – and the way you do it too. Keep it up.
I had envisioned something like this https://tinyurl.com/PhilipsburgChair or evenhttps://tinyurl.com/LourdesChair for a desk chair. I like the Phillipsburg Chair better but love that the Lourdes Chair comes in yellow gold or poppy orange velvet, either of which would look smashing with the blue accent wall. I would keep the chair pulled out from the desk far enough to not obstruct the sliding doors and turned towards the room, both because that is how I would probably use it most when getting dressed and also because it would give a bright color boost to the room.
https://tinyurl.com/LourdesChair
Can you remove the cushion and add some height to the top?
Although this looks just like a Kristi project ready to be built to your needs!
I was wondering if you plan to put casters or something on the desk (and stool) to make it easier to move out of the way, if an emergency exit out that window is required (and something to protect the floor from scrapes.) It such a beautiful piece. The room is really coming together!
Beautiful looking desk. Could you make a stool the size you want?
I have no doubt you could make a stool exactly like that to your specified height. 😂
My thoughts exactly….!!!!
I love this. My son is taking Wood Tech in high school and I’ve been looking for ideas for him to make me a new desk(he has to do 3 furniture pieces for class). This looks perfect for what I want..