HALO Canless Recessed Lights (Installing My Favorite Ultra Thin Lights In Our Home Gym)
Our home gym finally has lighting! I took some time yesterday to install the four recessed lights in that room, and now I can finally work in there past dark. 😀 I used the same lights in here that I used in my studio and our master bathroom — the 6-inch Halo canless recessed lights (called ultra thin lights).
*This post contains affiliate links.
I love these lights because they really are ultra thin (about 1/2-inch), which is a day and night difference when compared to the traditional style of can lights which have the huge housing that has to go up into the attic and be attached to ceiling joists.
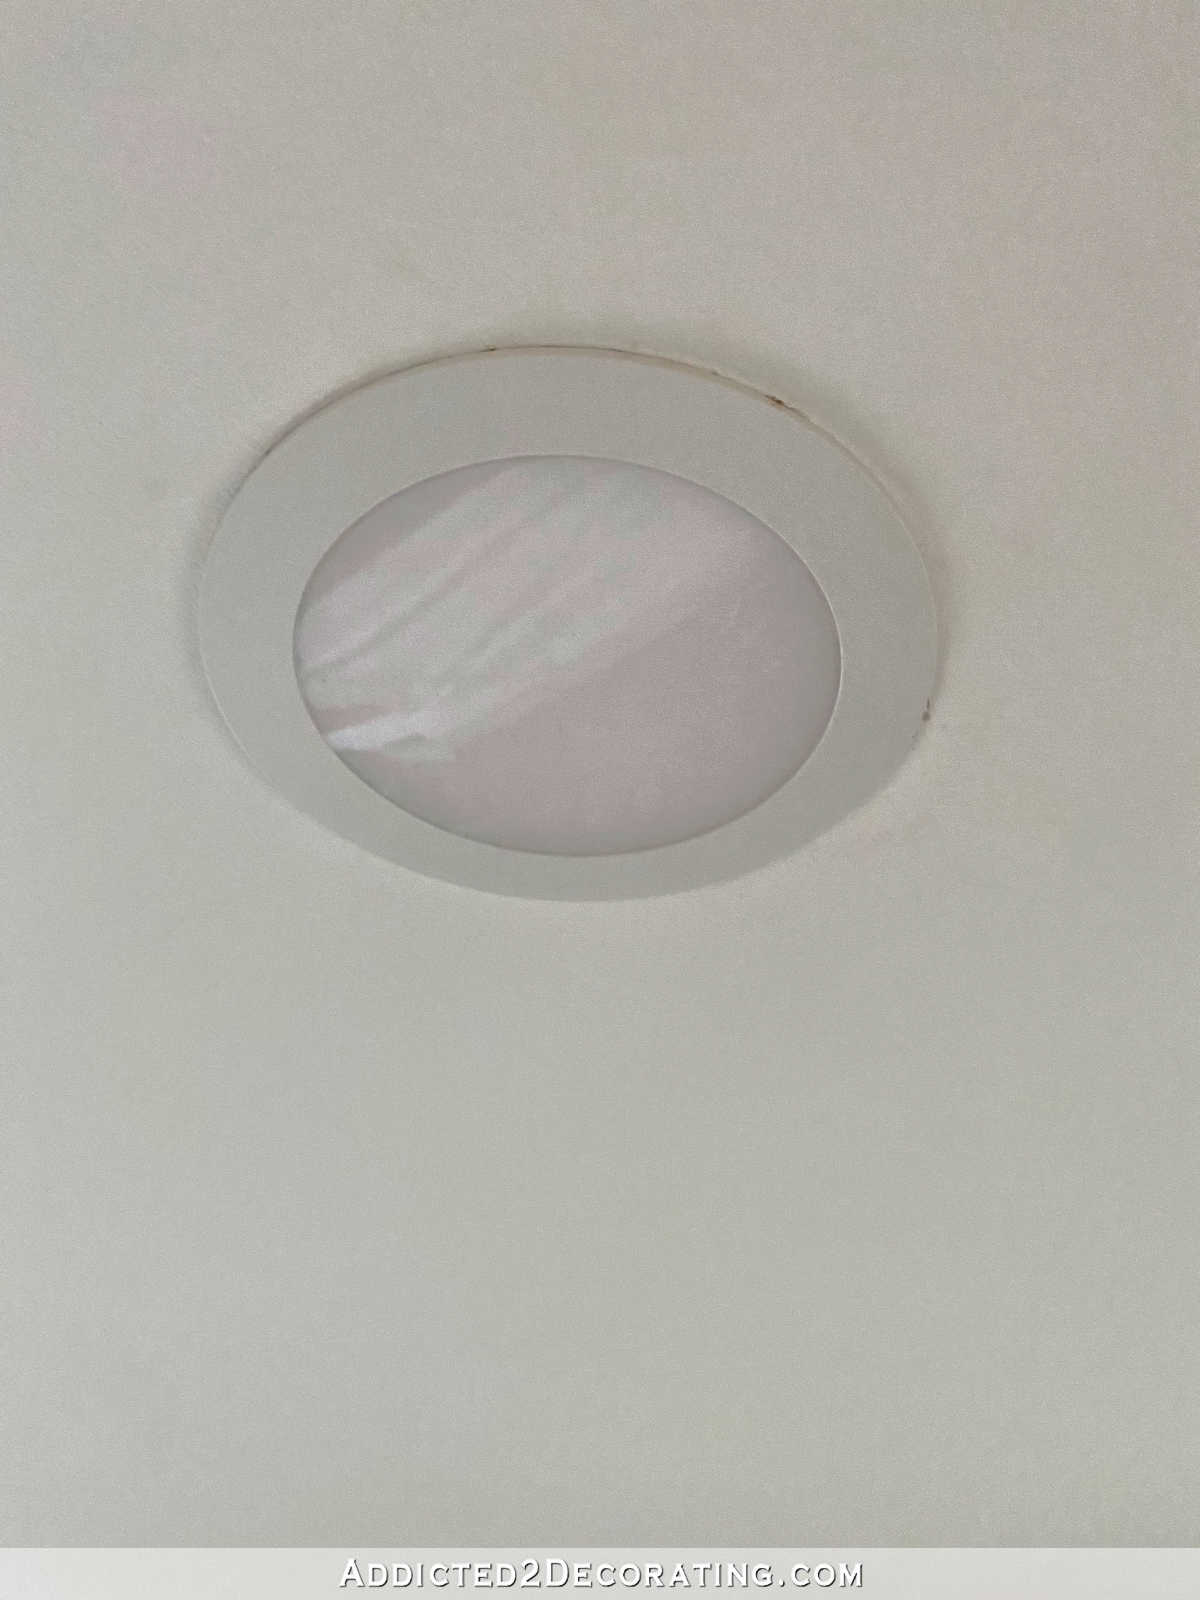
These are so thin that they can be installed virtually anywhere. You can see here that the part that rests against the ceiling is less than 1/4-inch thick. I’d say it’s may 1/8 inch thick or just a hair more than that.
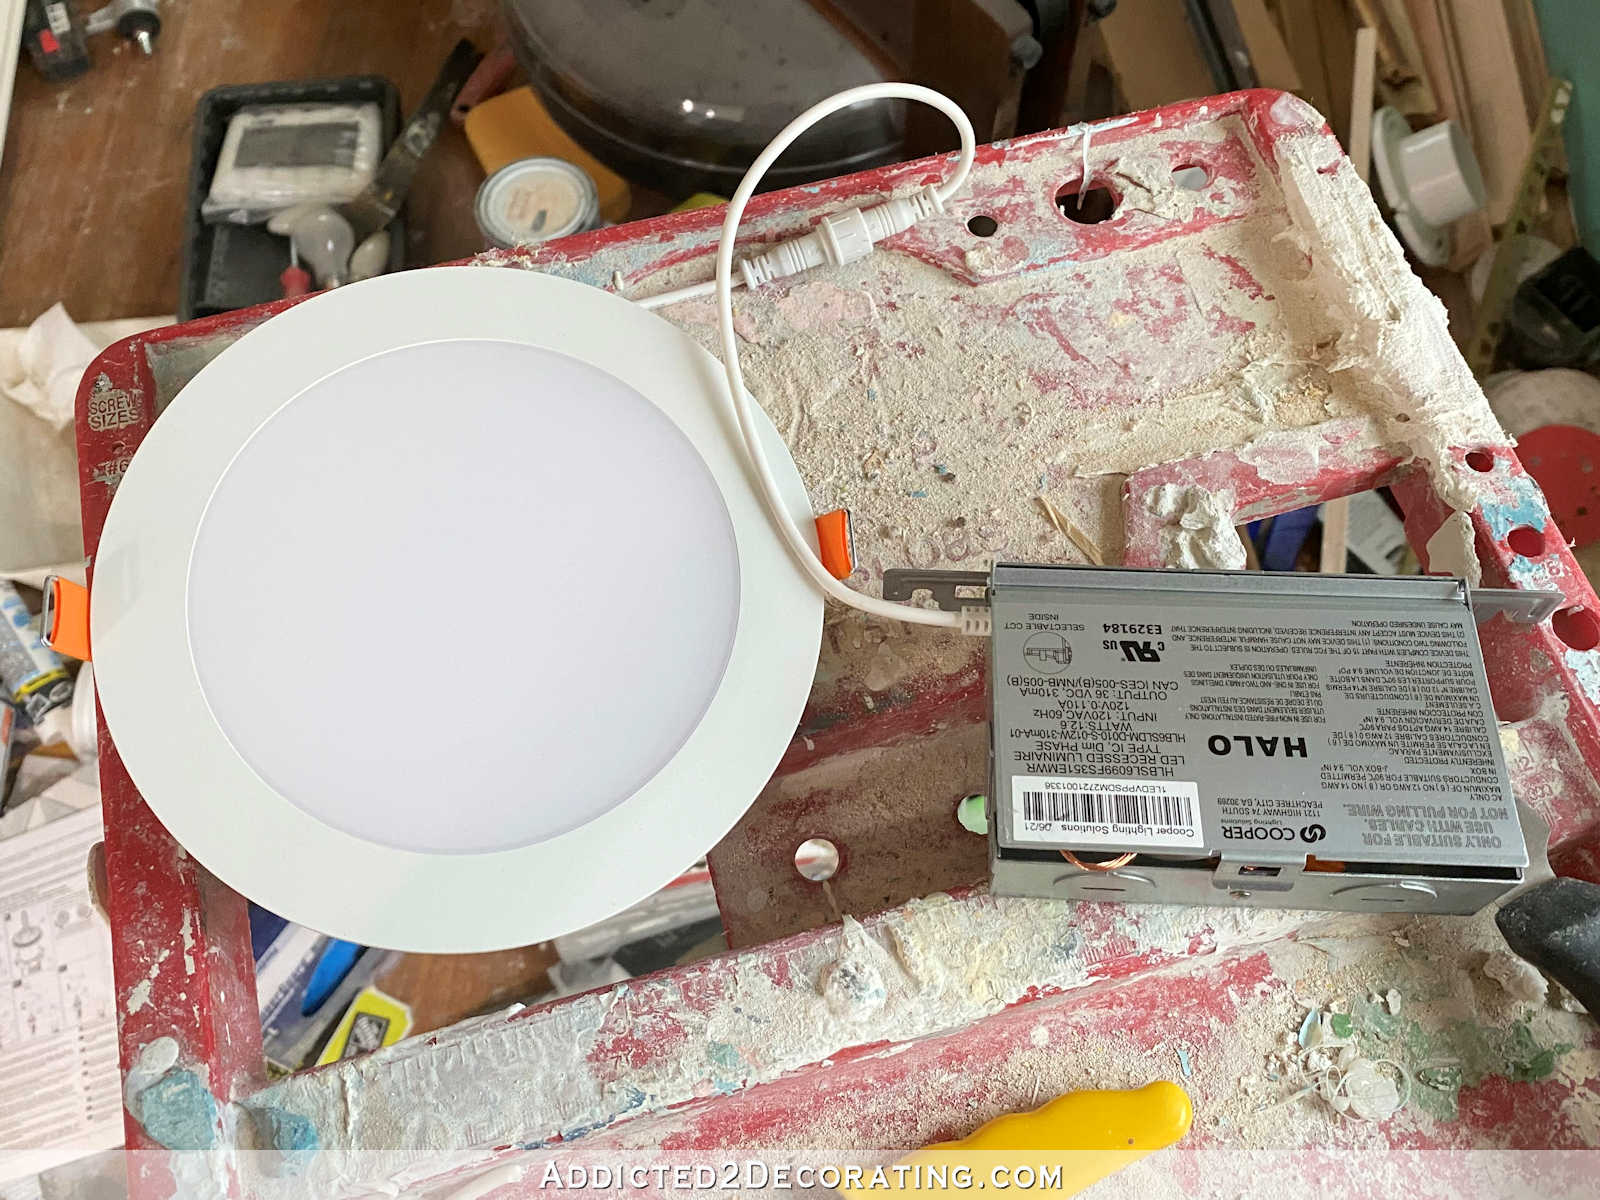
And the HALO canless recessed lights have adjustable lighting. I’ve gotten some that have three settings, and some that have five settings. Here’s the one that has five settings, from 2700K to 5000K.
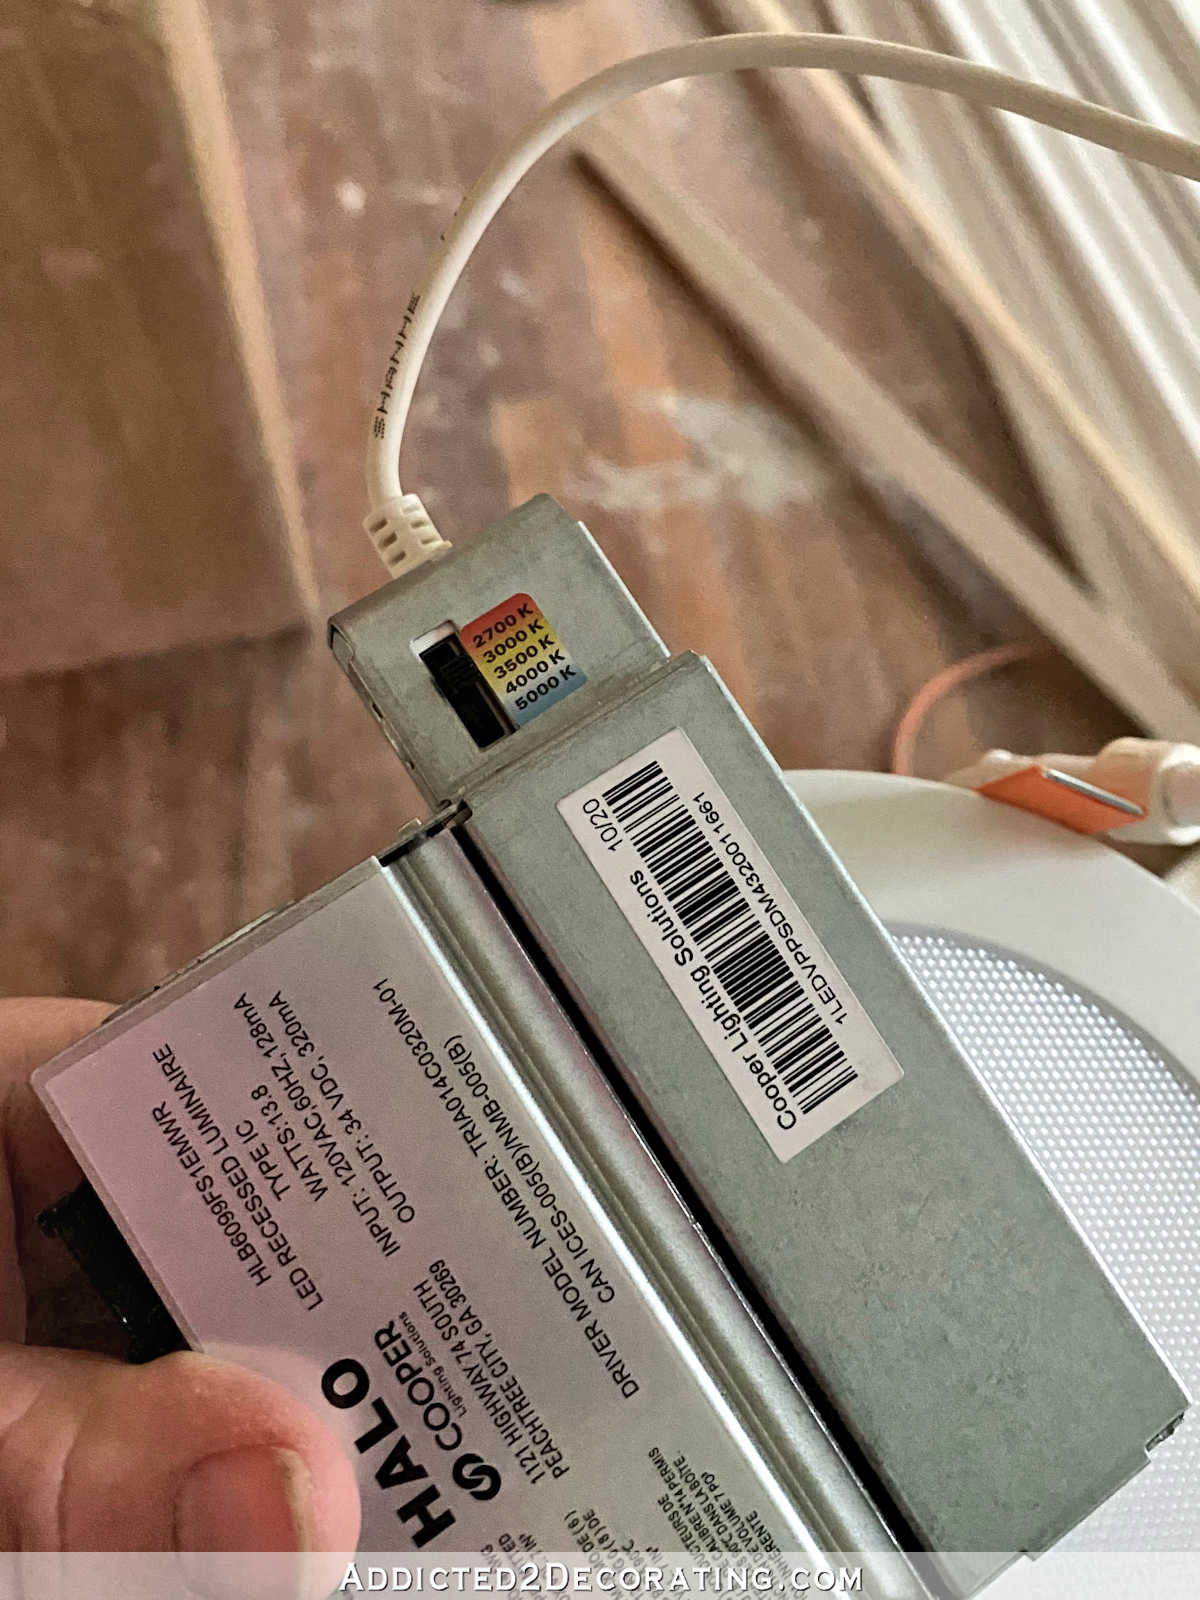
And here’s one that has three settings.
I don’t like that the switch on the three-setting lights is located inside the metal box. I prefer the five-setting lights where the switch is easily accessible on the outside of the box. But for this room, I bought the three-setting light (by accident), and as long as you make sure to put the switch on the setting you want before closing up the box and installing the light, it’s really no big deal. It’s only a hassle if you forget to set the switch to the correct setting and you have to go back and pull the light out, open the box, and change the setting.
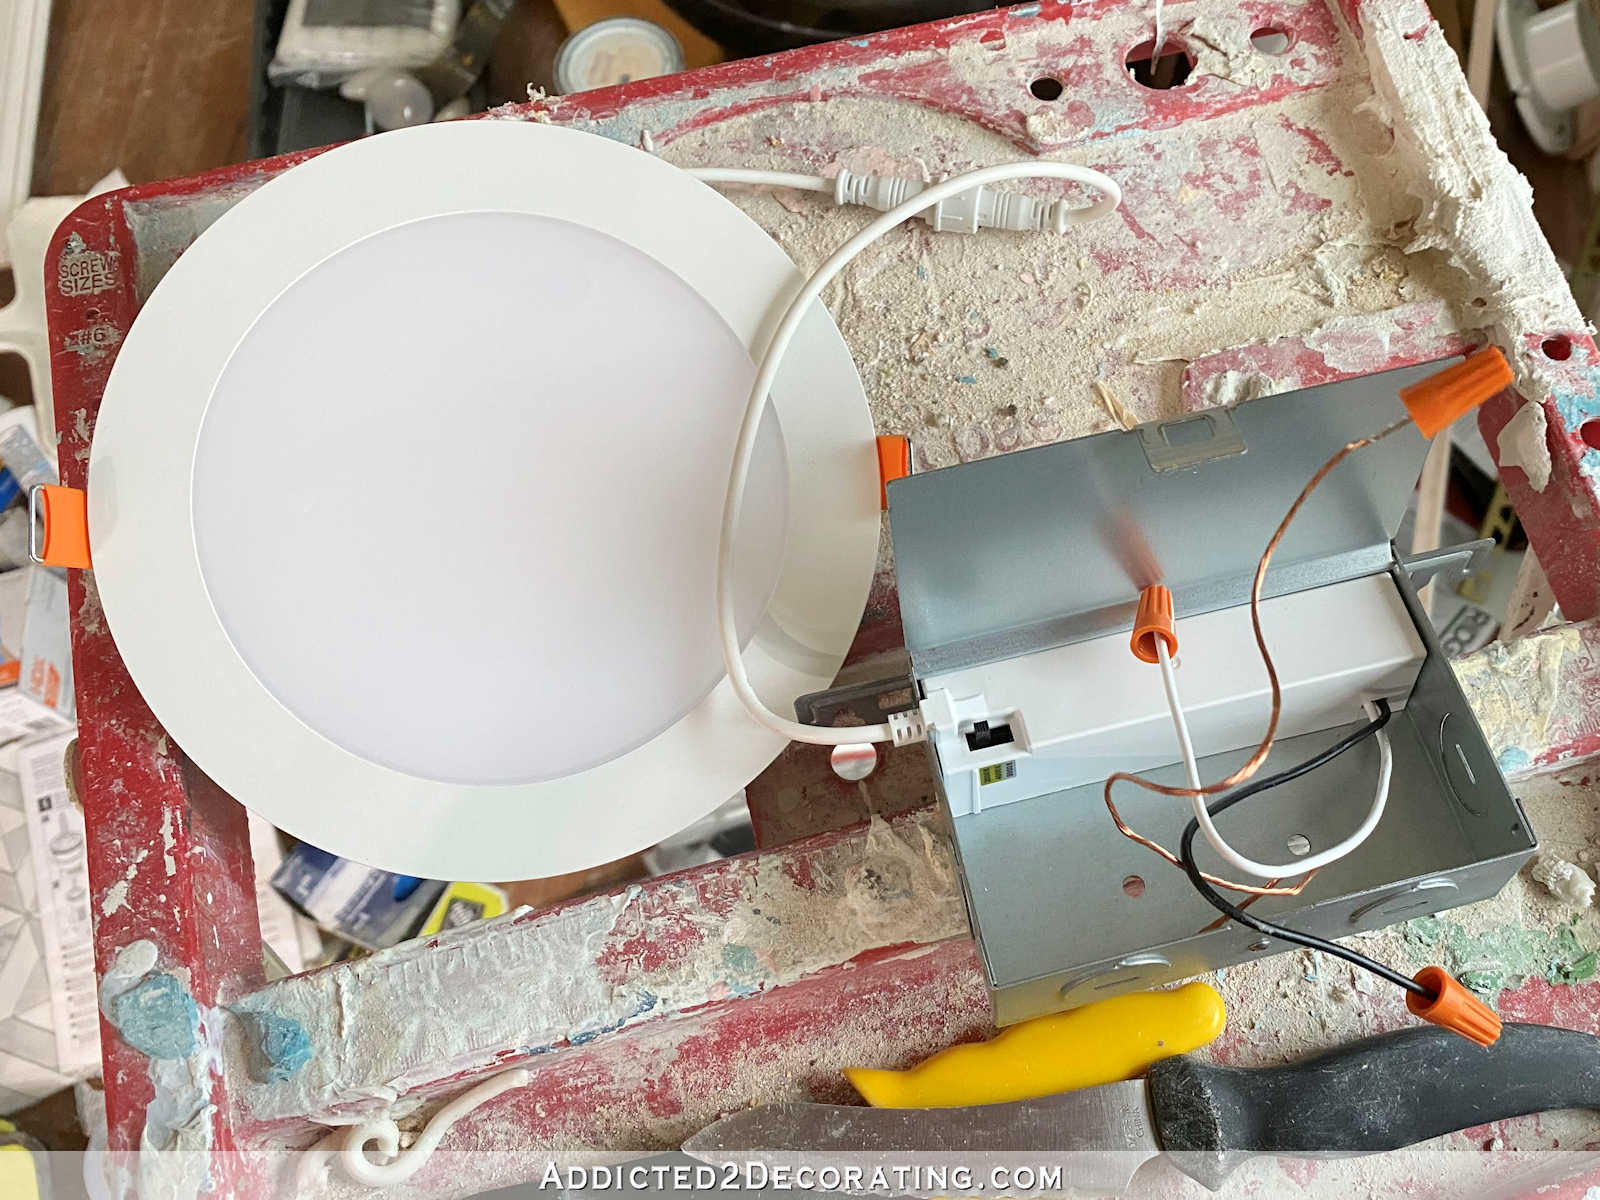
So when you open up the box, you can see the wires. The three-setting lights have standard wires with the wire nuts. The five-setting lights have wires with push-in connectors attached. Either way, the installation is very easy.
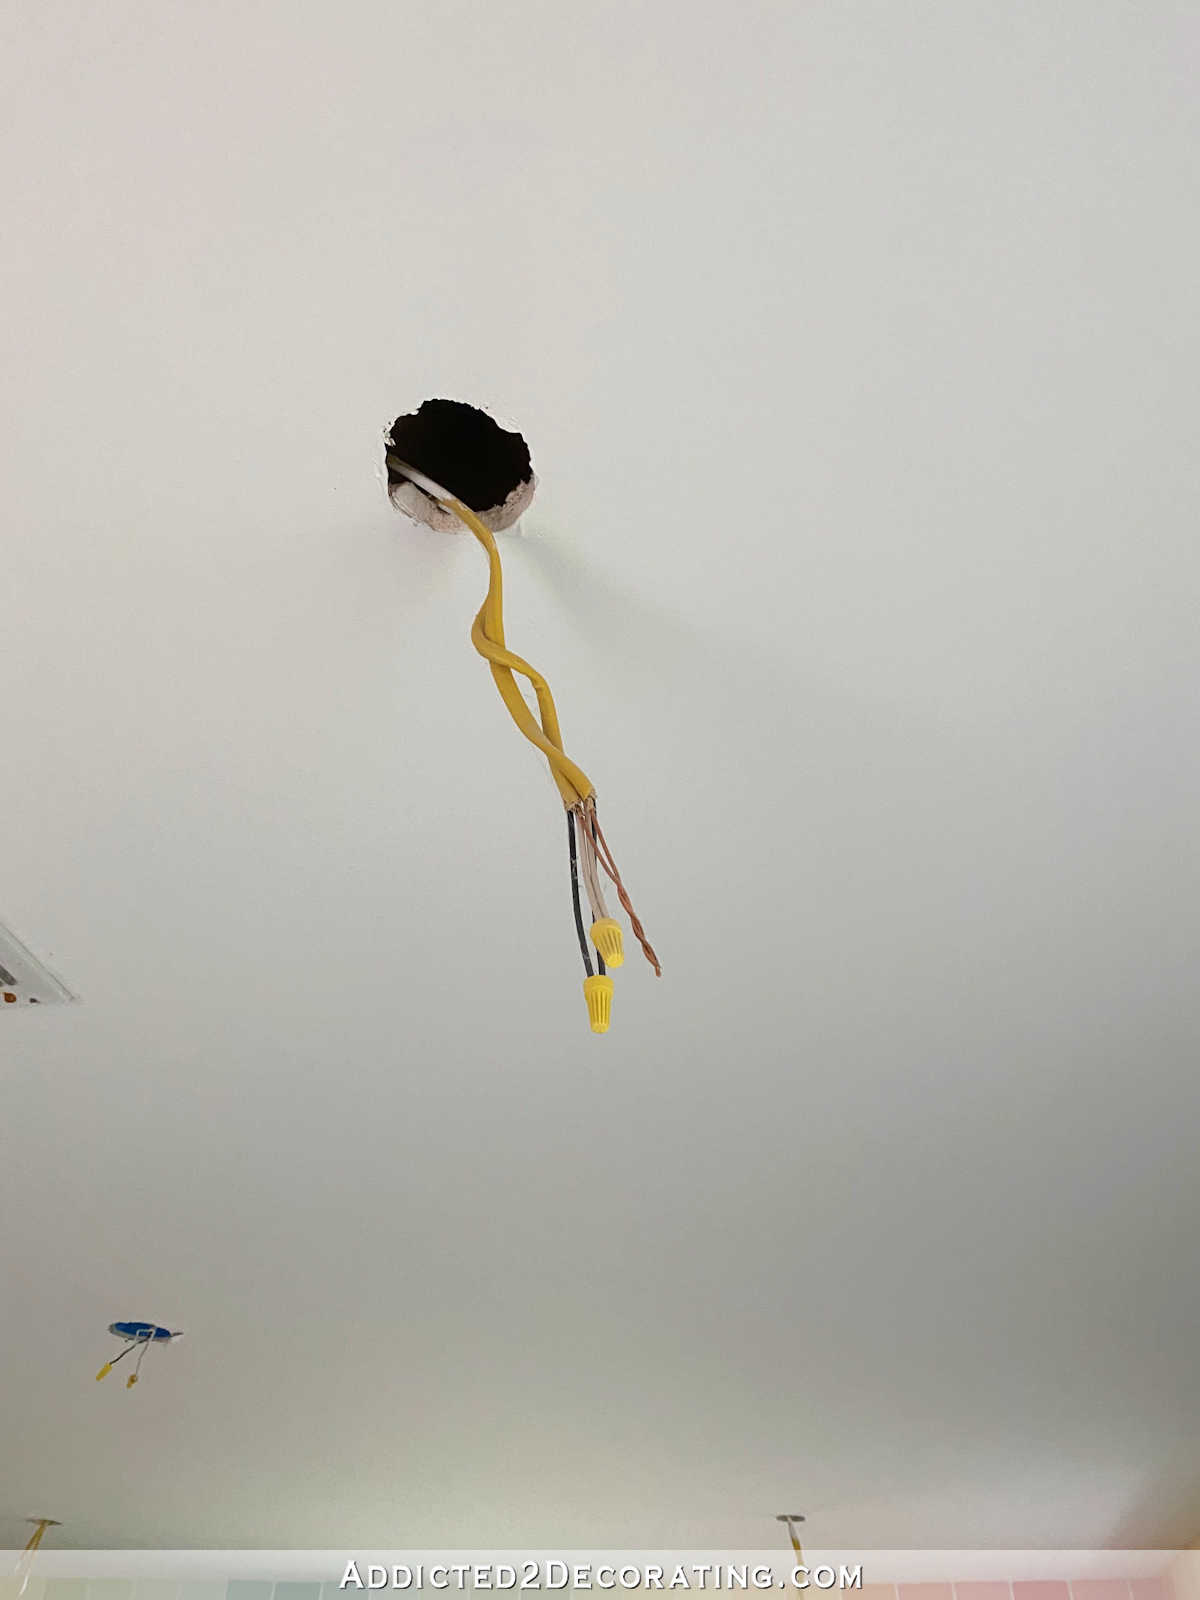
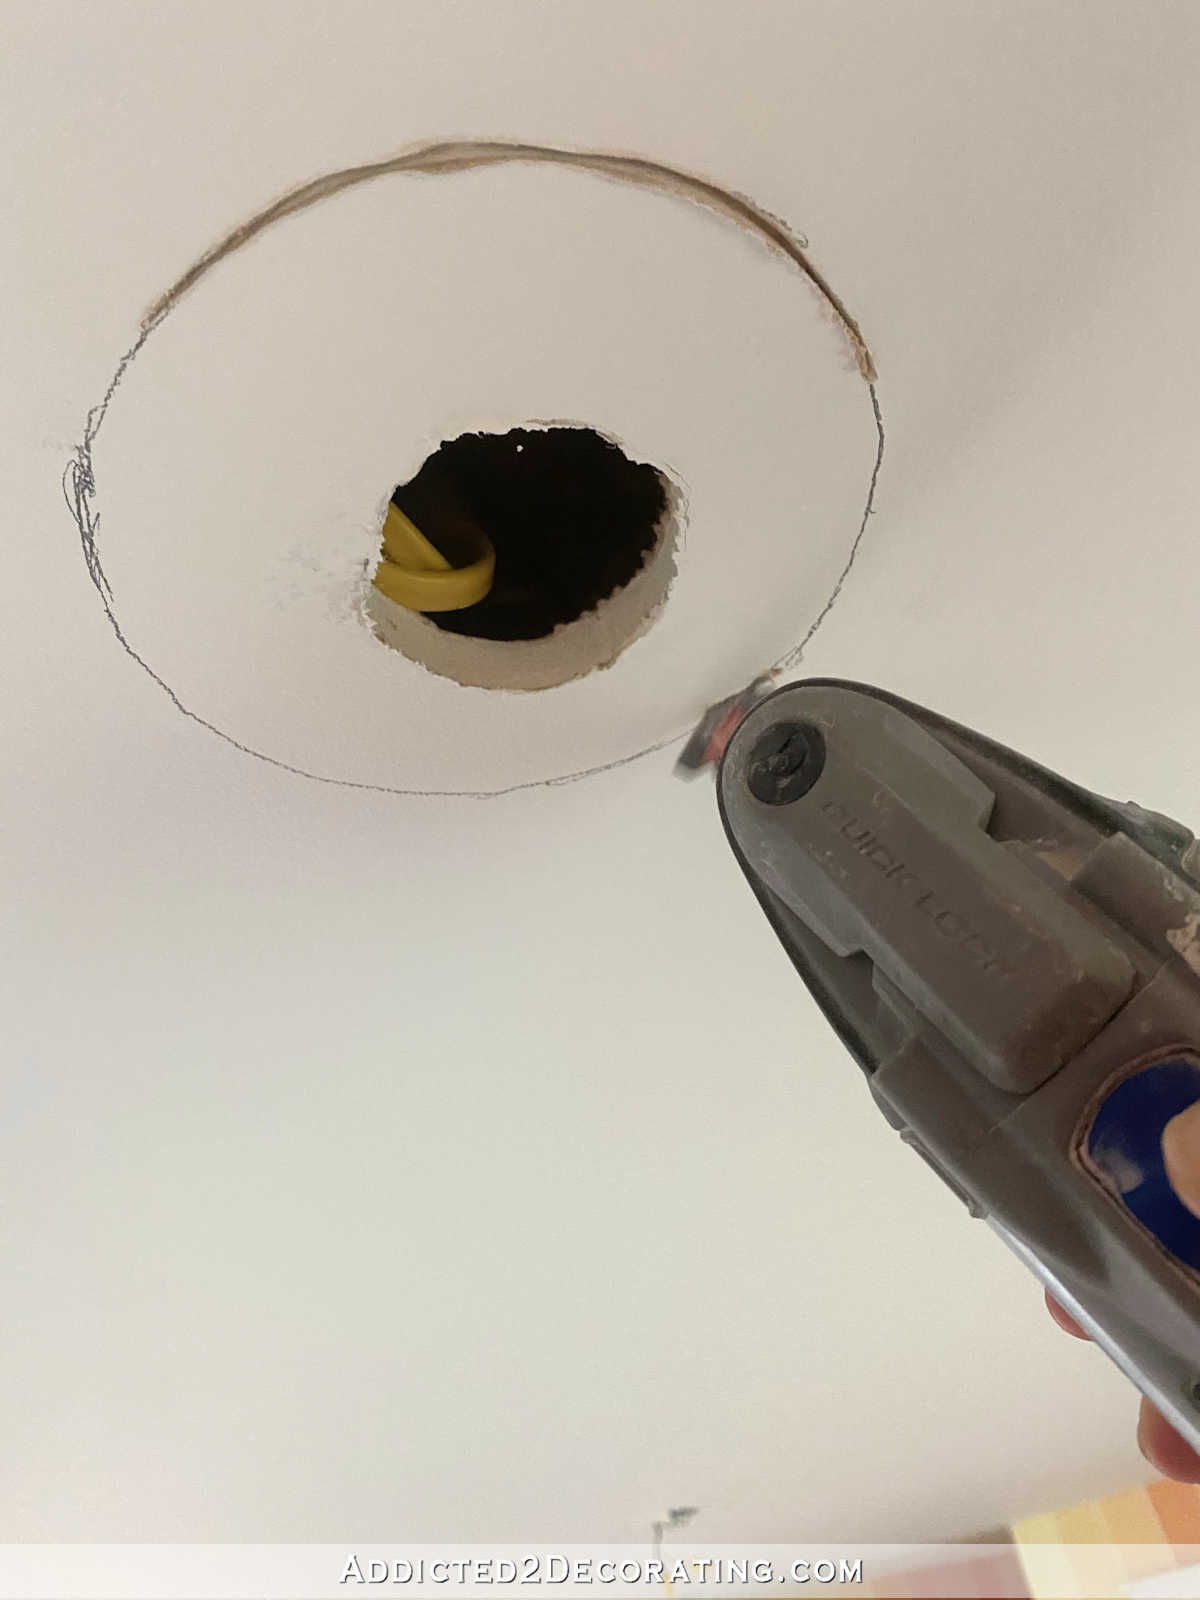
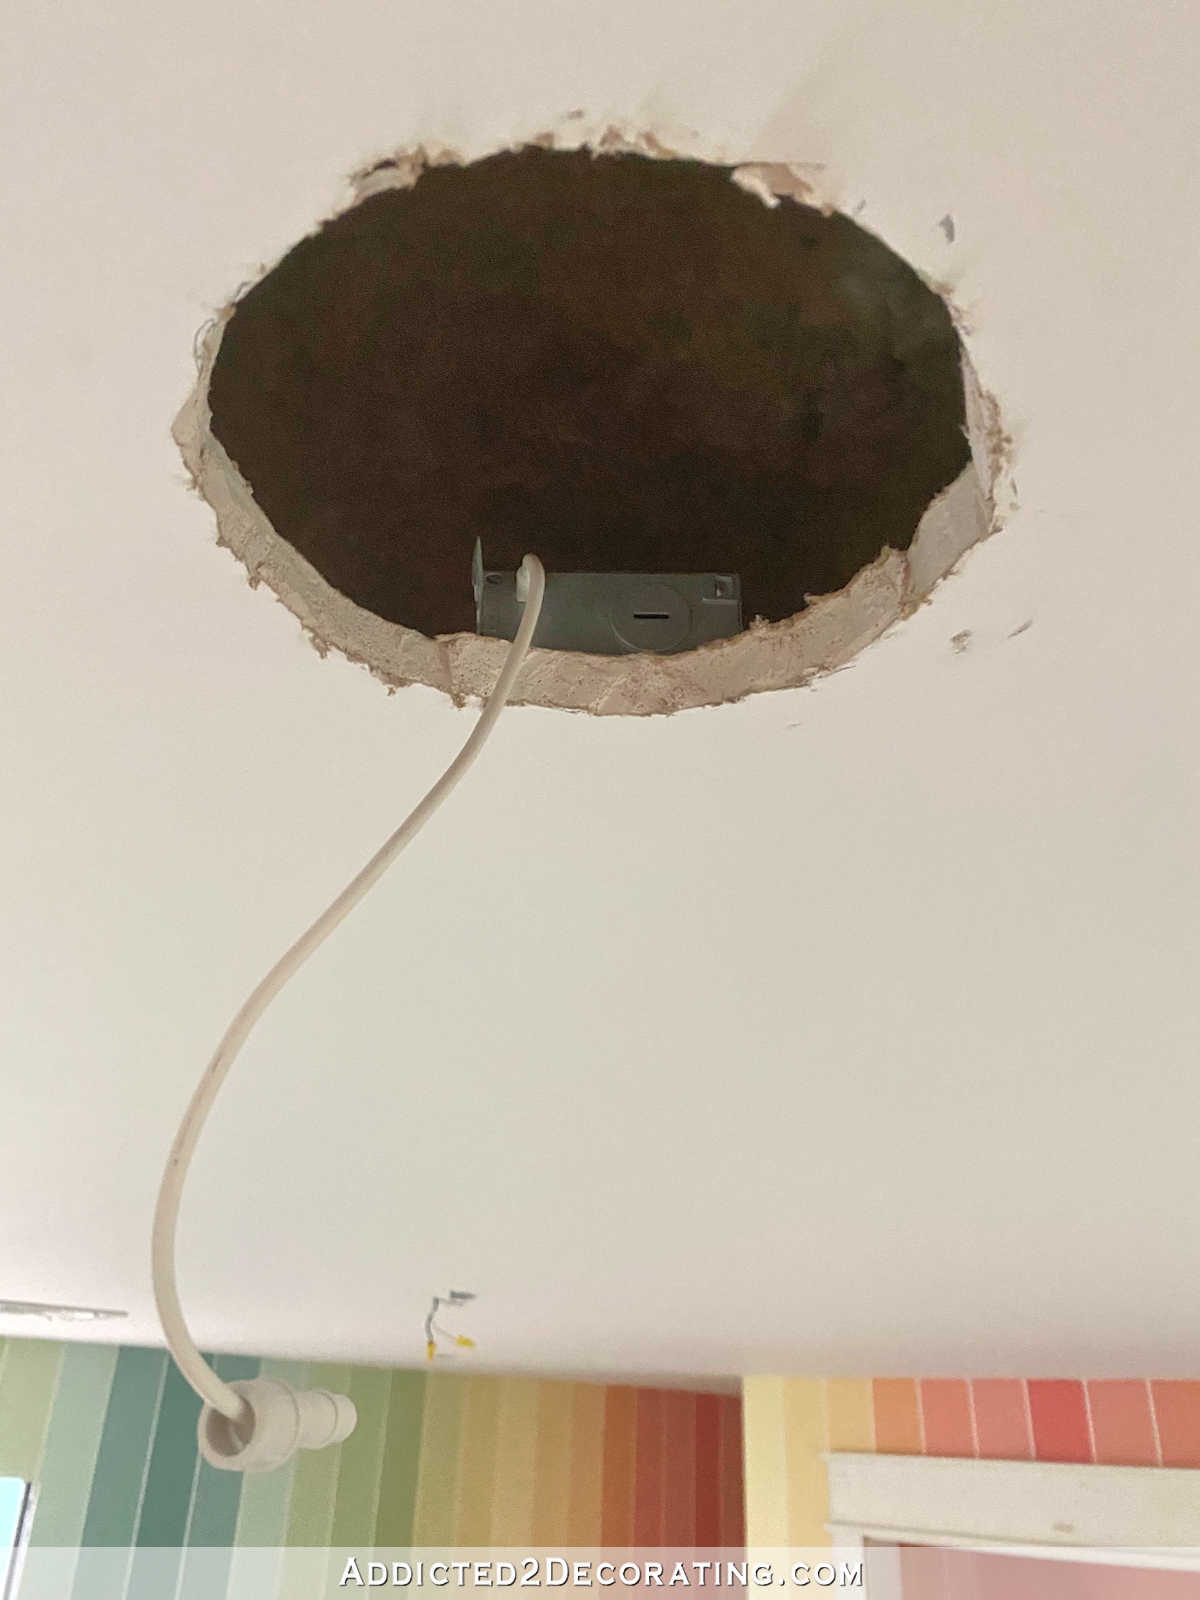
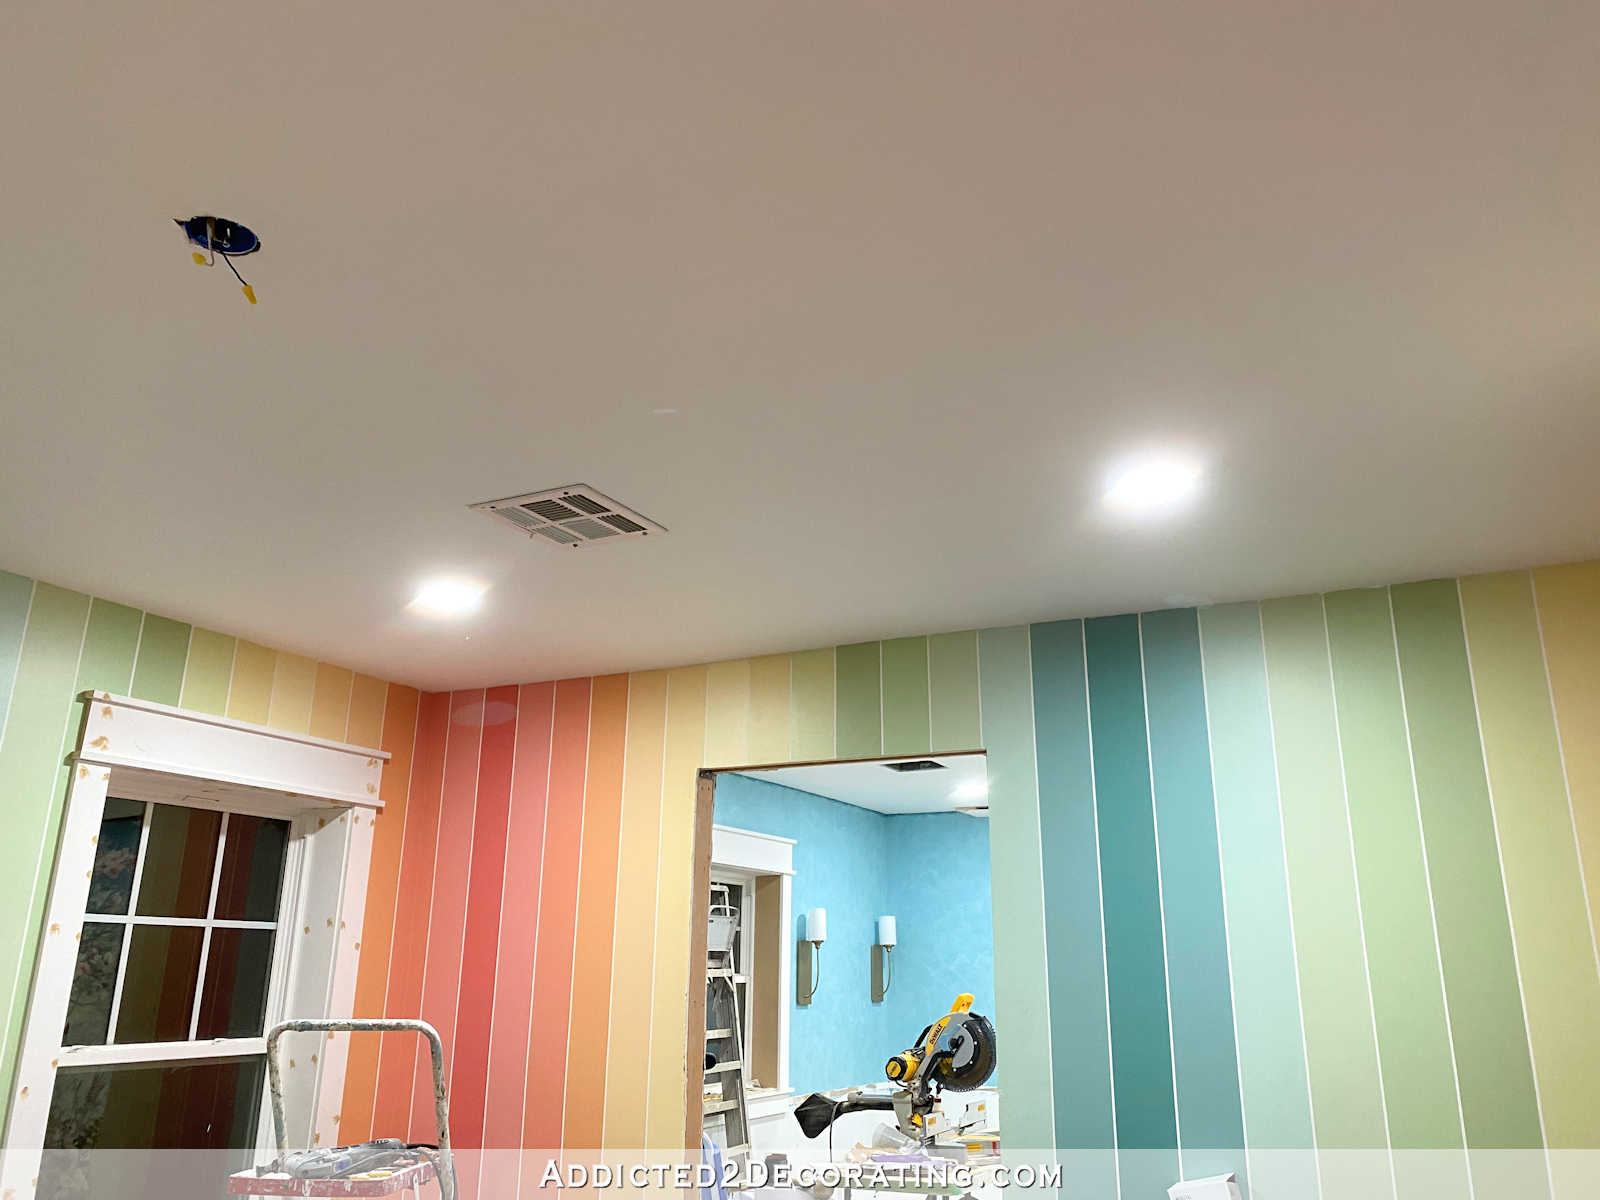
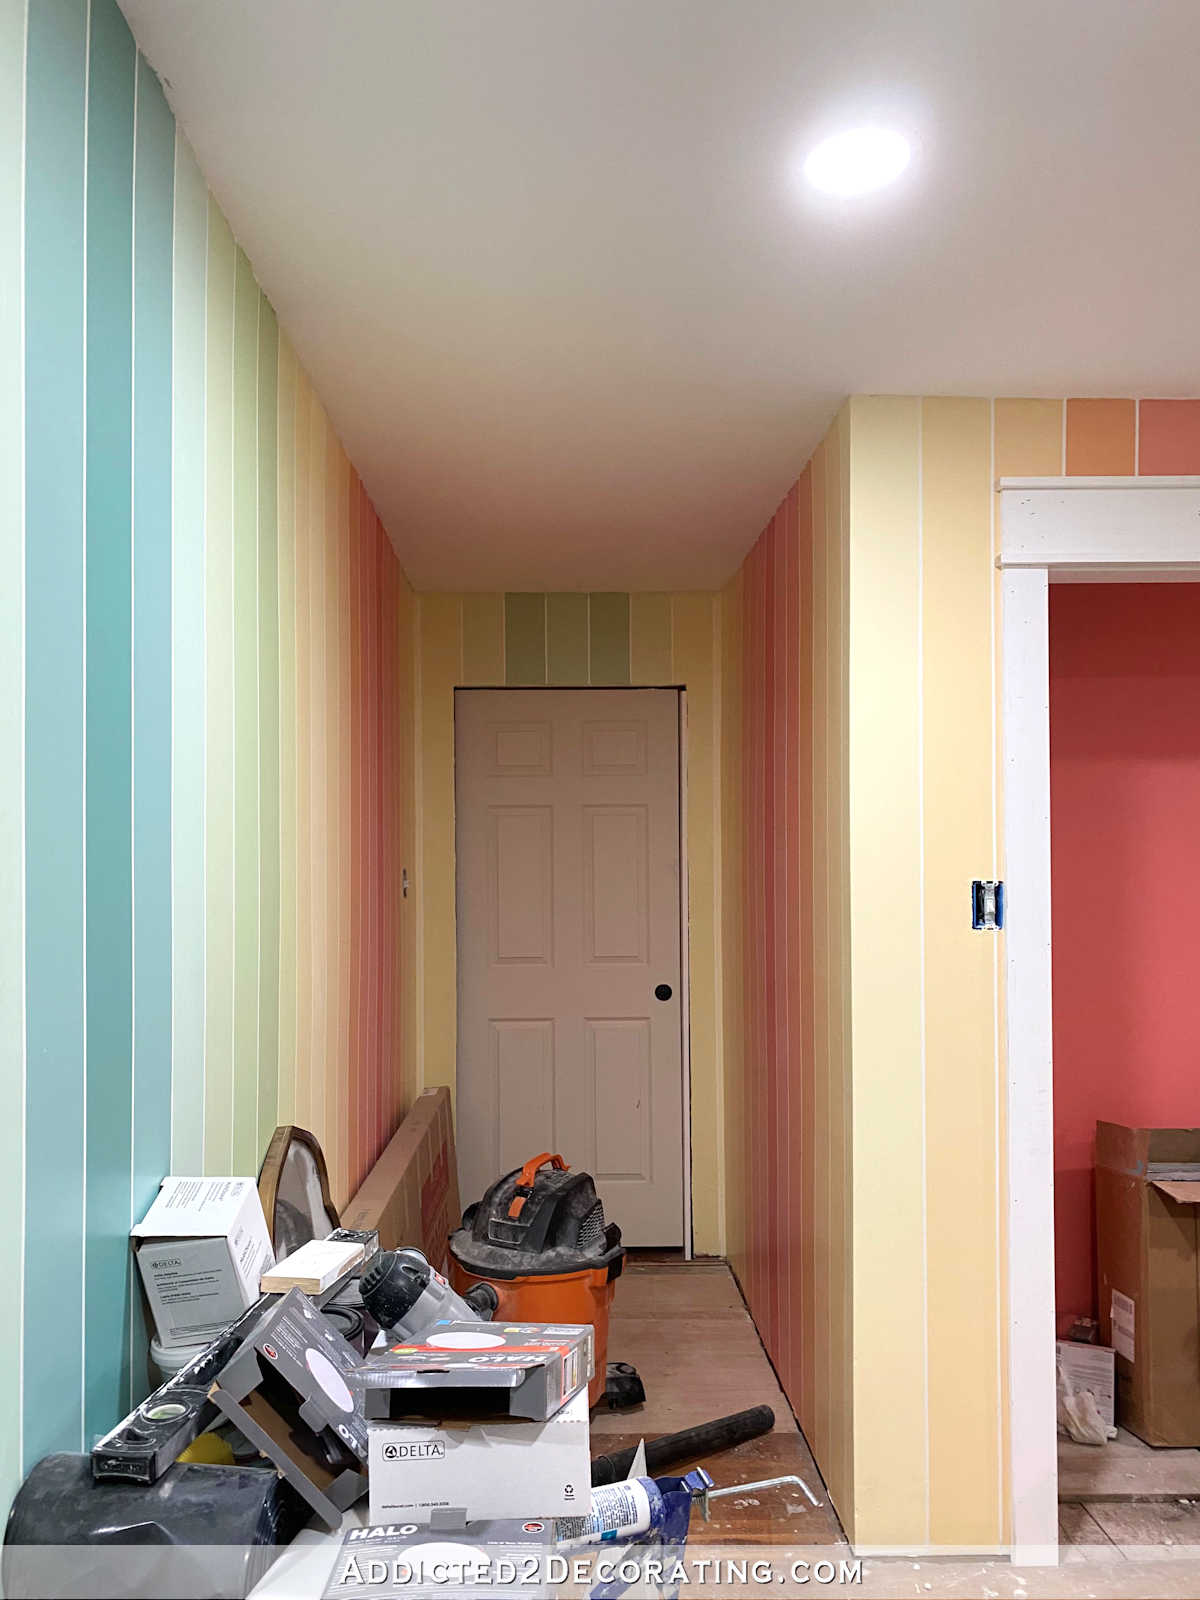
In my ceiling, my contractor’s guys had left me with small holes and wires hanging down. They didn’t cut the holes to size for me because I had forgotten to purchase the lights, so they didn’t know exactly how big to cut them. So this is where I started.
The first step when working with any electrical wires is to turn off power at the breaker box. So after doing that, I was ready to get these lights installed.
The HALO canless recessed lights come with a template that you can use (either a paper template that you cut out, or a cardboard template that is already cut out) to trace the size onto the ceiling.
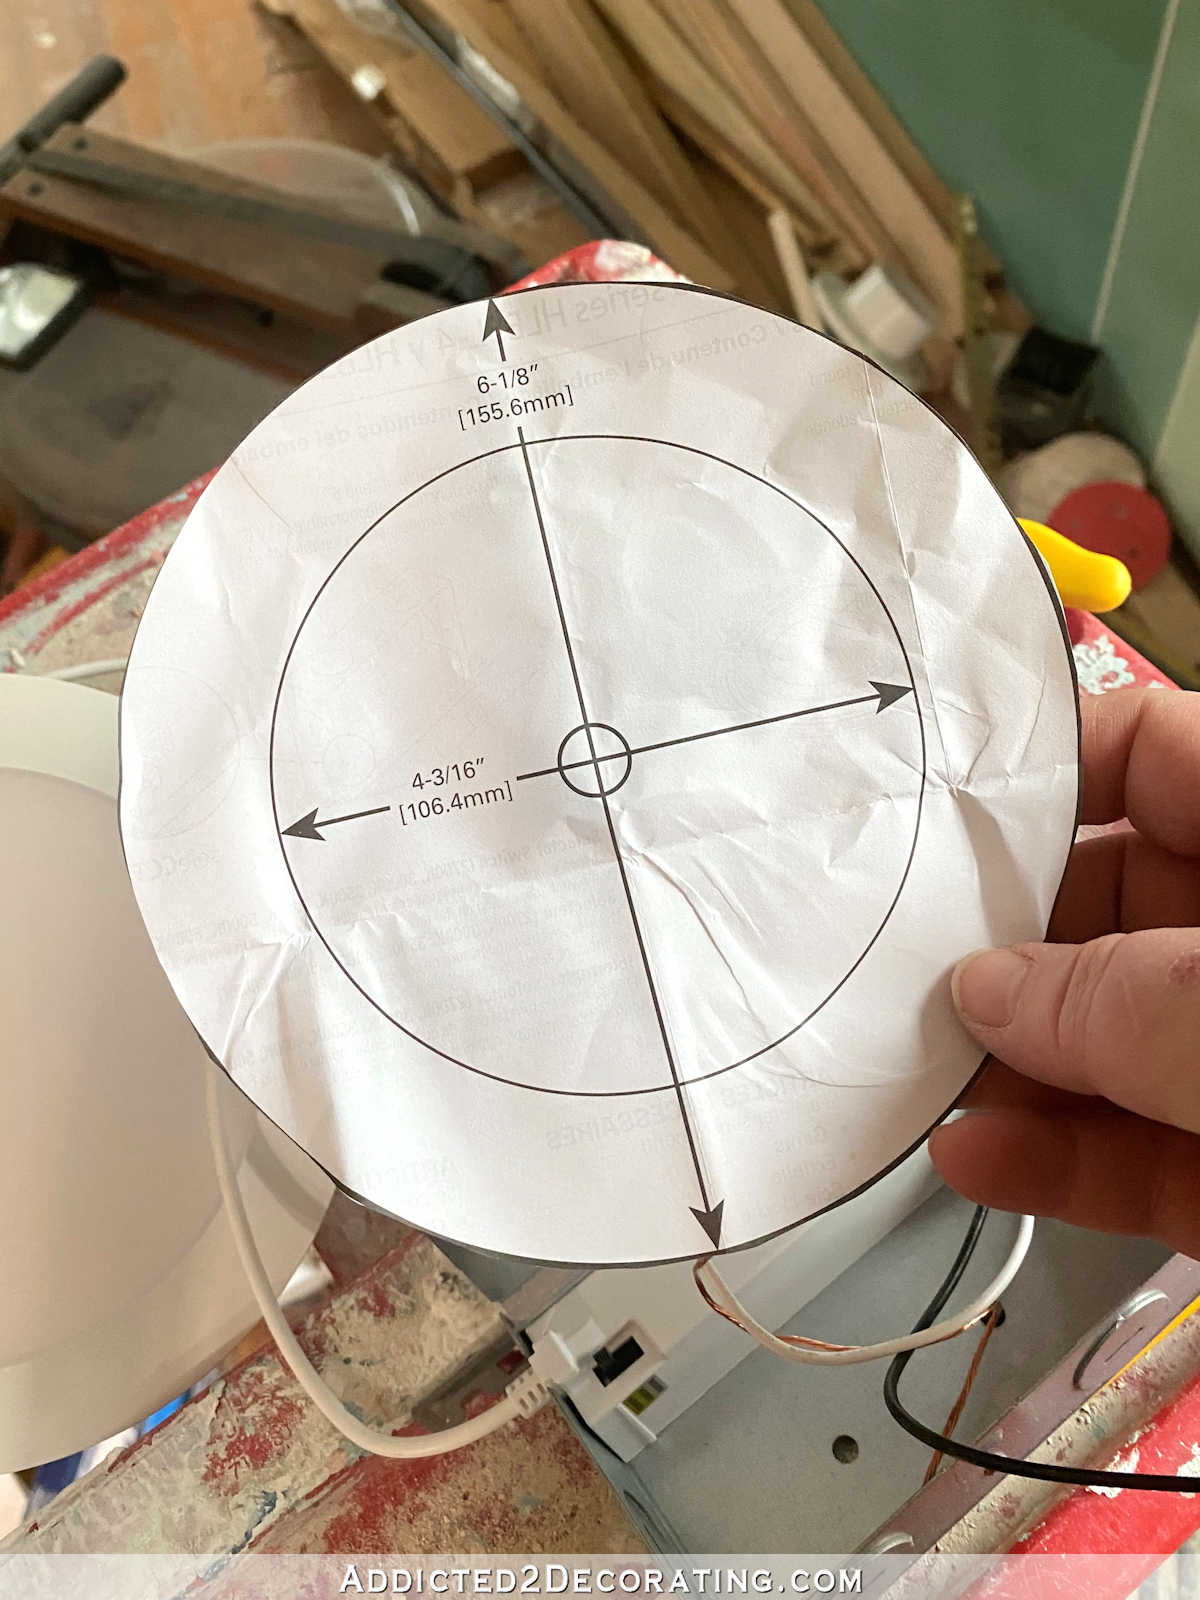
So after pushing the wires back up into the ceiling, and marking exactly where I wanted the light to go, I used the template to trace the circle onto the ceiling.
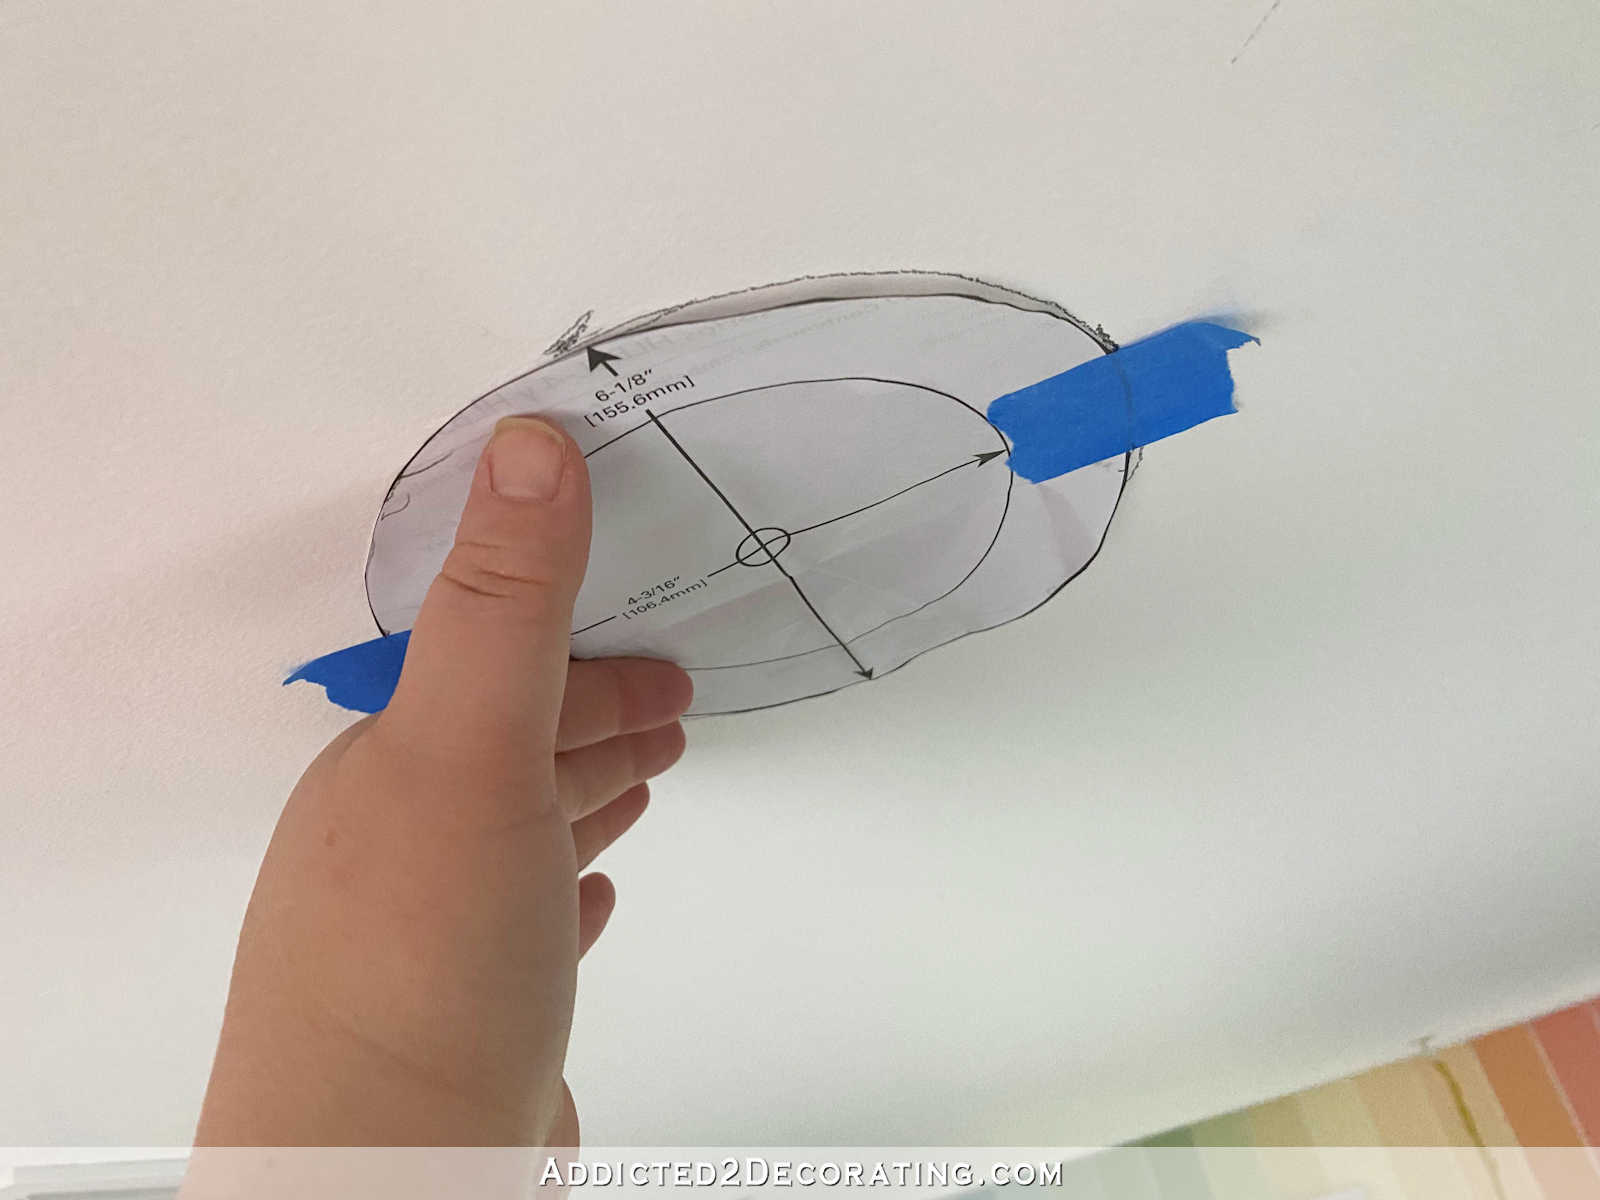
I don’t do drywall work enough to own one of those handy rotozip cutter tools for drywall, which make really quick work of cutting out things like this. So instead, I had to use my Dremel Multi-Max tool, which doesn’t make the neatest cuts on curves, but it did the job. (This is one of those tools that I bought, and then wondered how in the world I had gone so long as a DIYer without it. I use it all the time!)
But yeah. The blade I used isn’t exactly meant for cutting drywall. 😀 But it worked.
They do make a drywall blade for the Dremel Multi-Max, but I didn’t want to make a special trip to Home Depot for that when I’d only need it for this one job, and I already had a blade that would do the job, although not quite as neatly as the drywall jab saw blade would have.
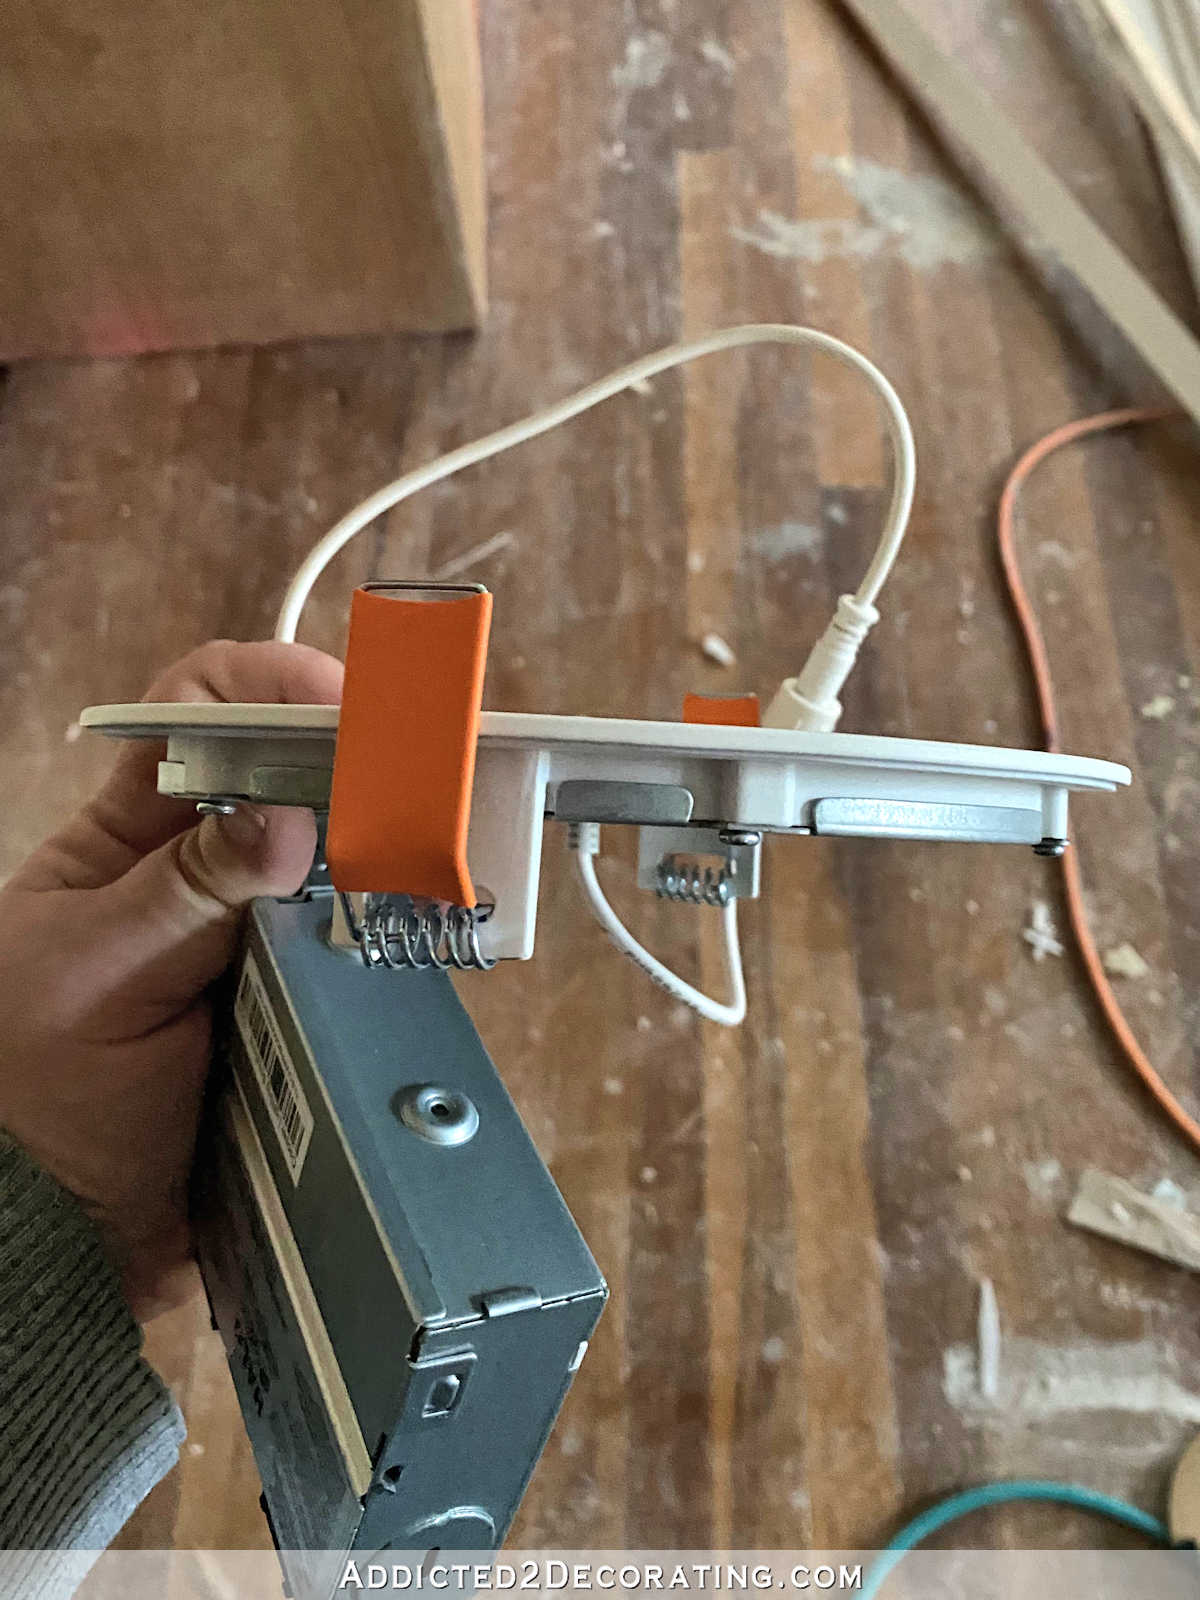
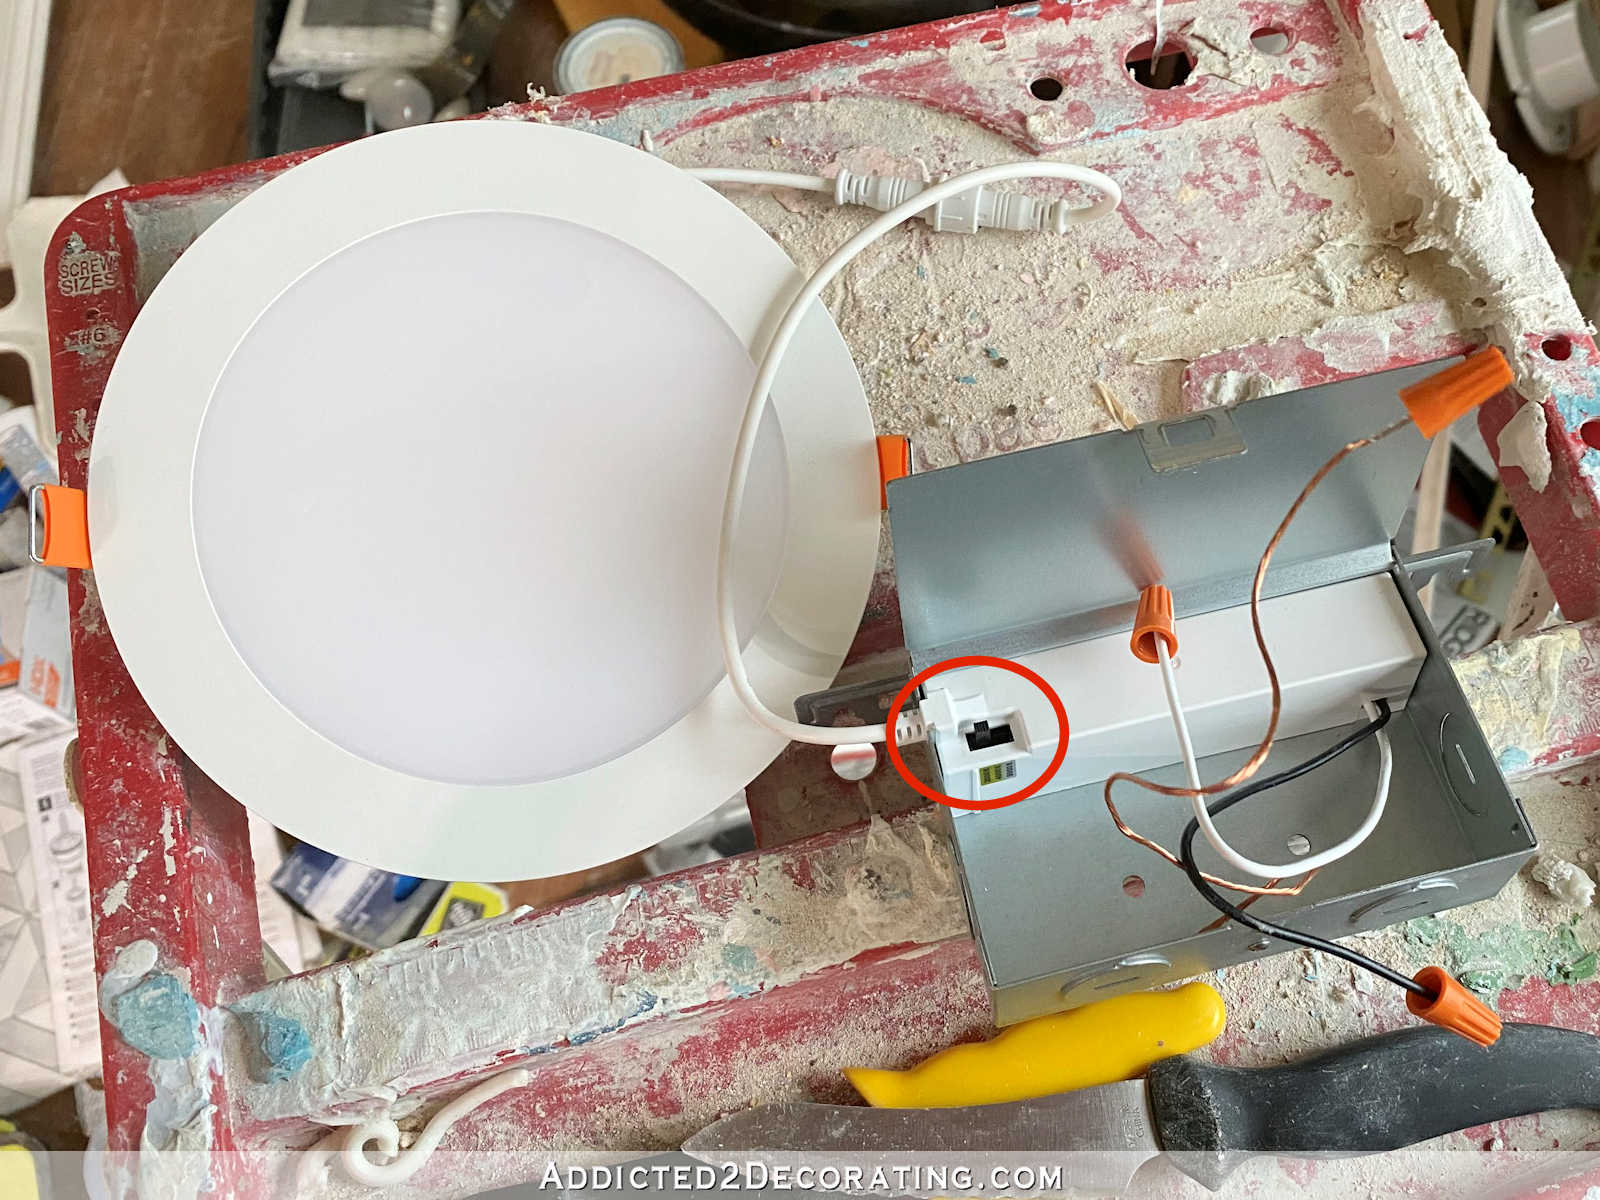
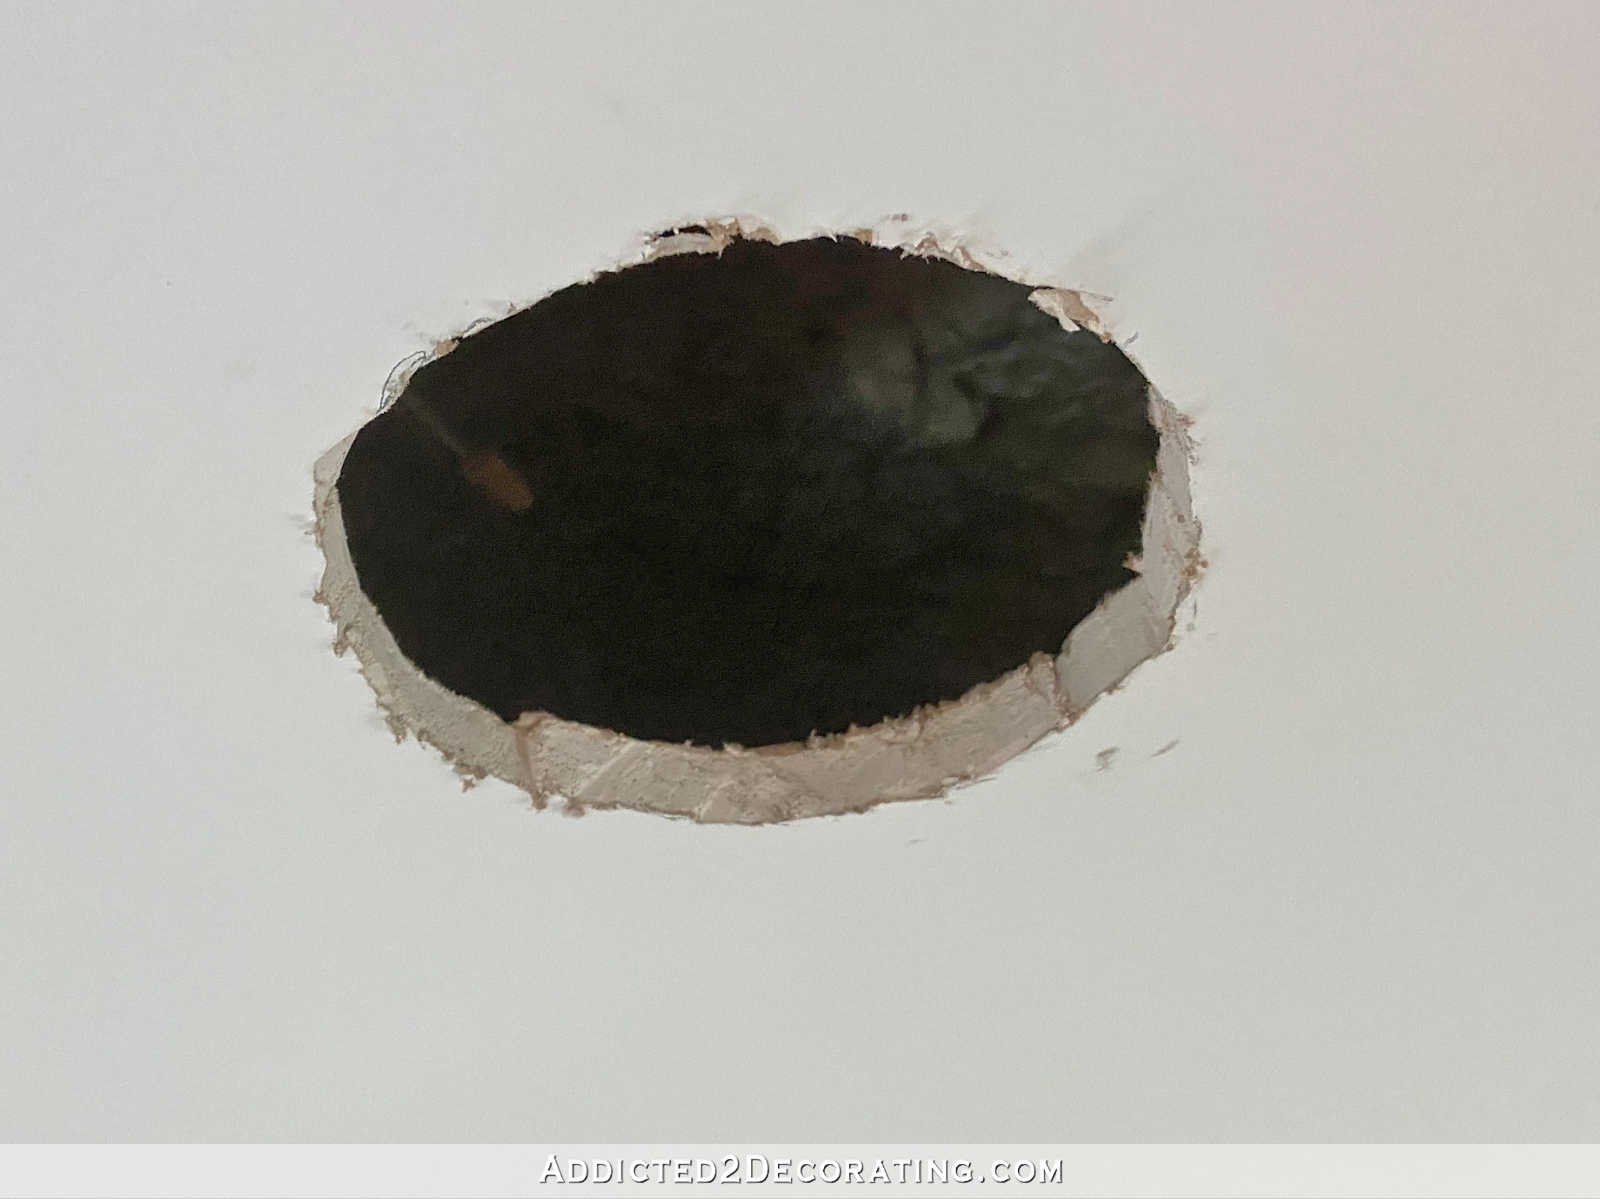
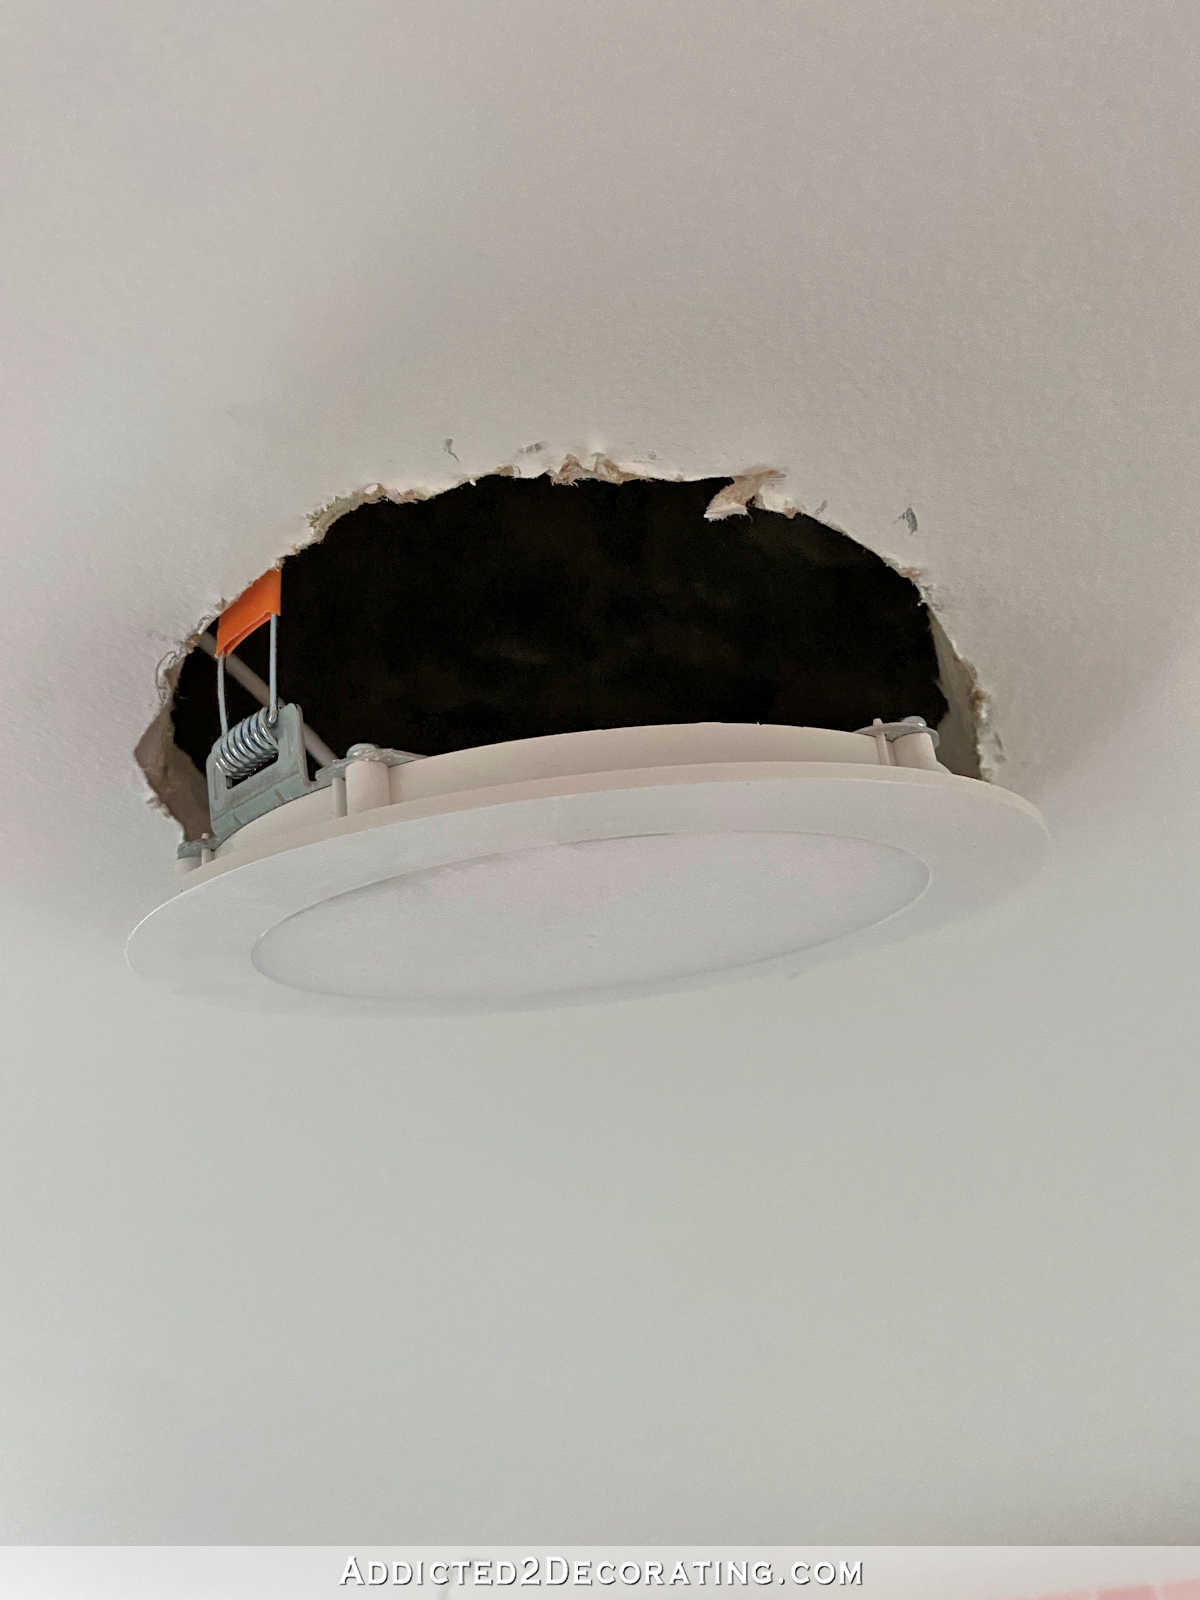
With the hole cut (and I also tested the fit with the light), I was ready to install the light. Before attaching the wires from the ceiling to the wires on the light, I had to knock out one of the four round metal discs on the metal housing on the light.
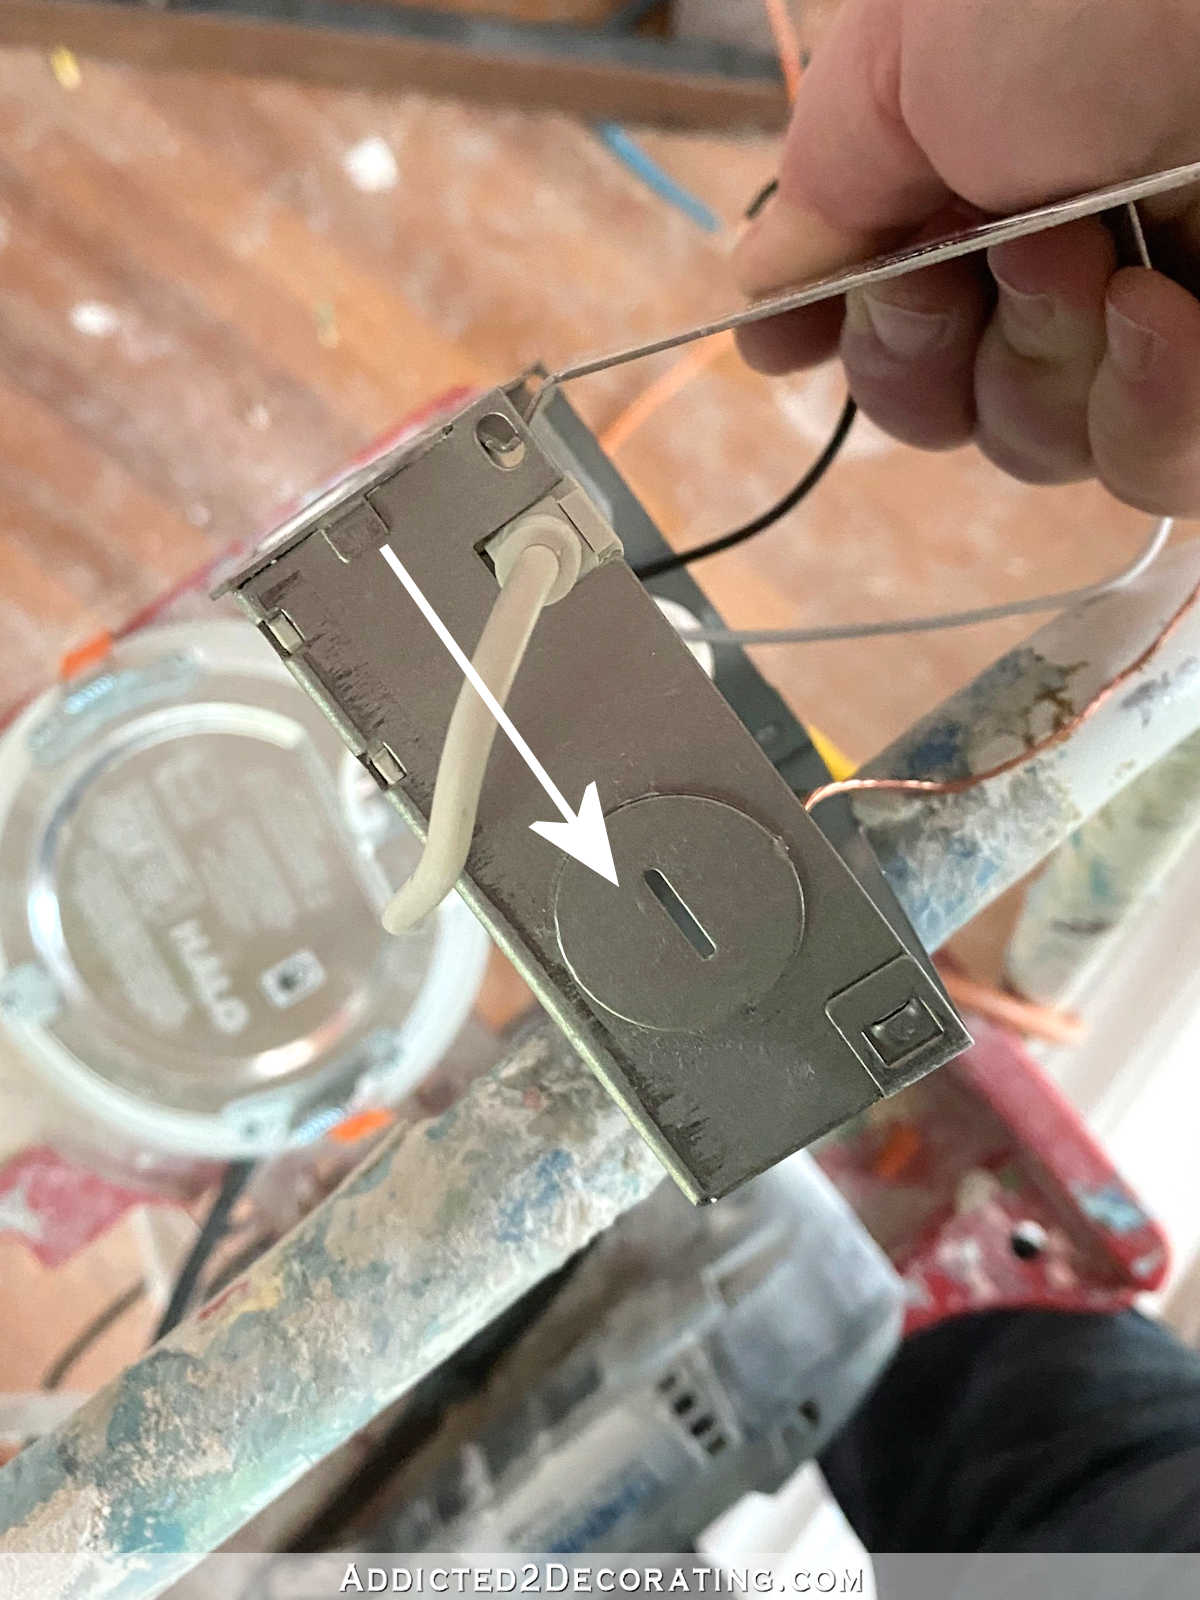
On this particular model of light, there are four of these — one on each end and two on one side. I only knocked out one of them using a flat head screwdriver and a pair of pliers.
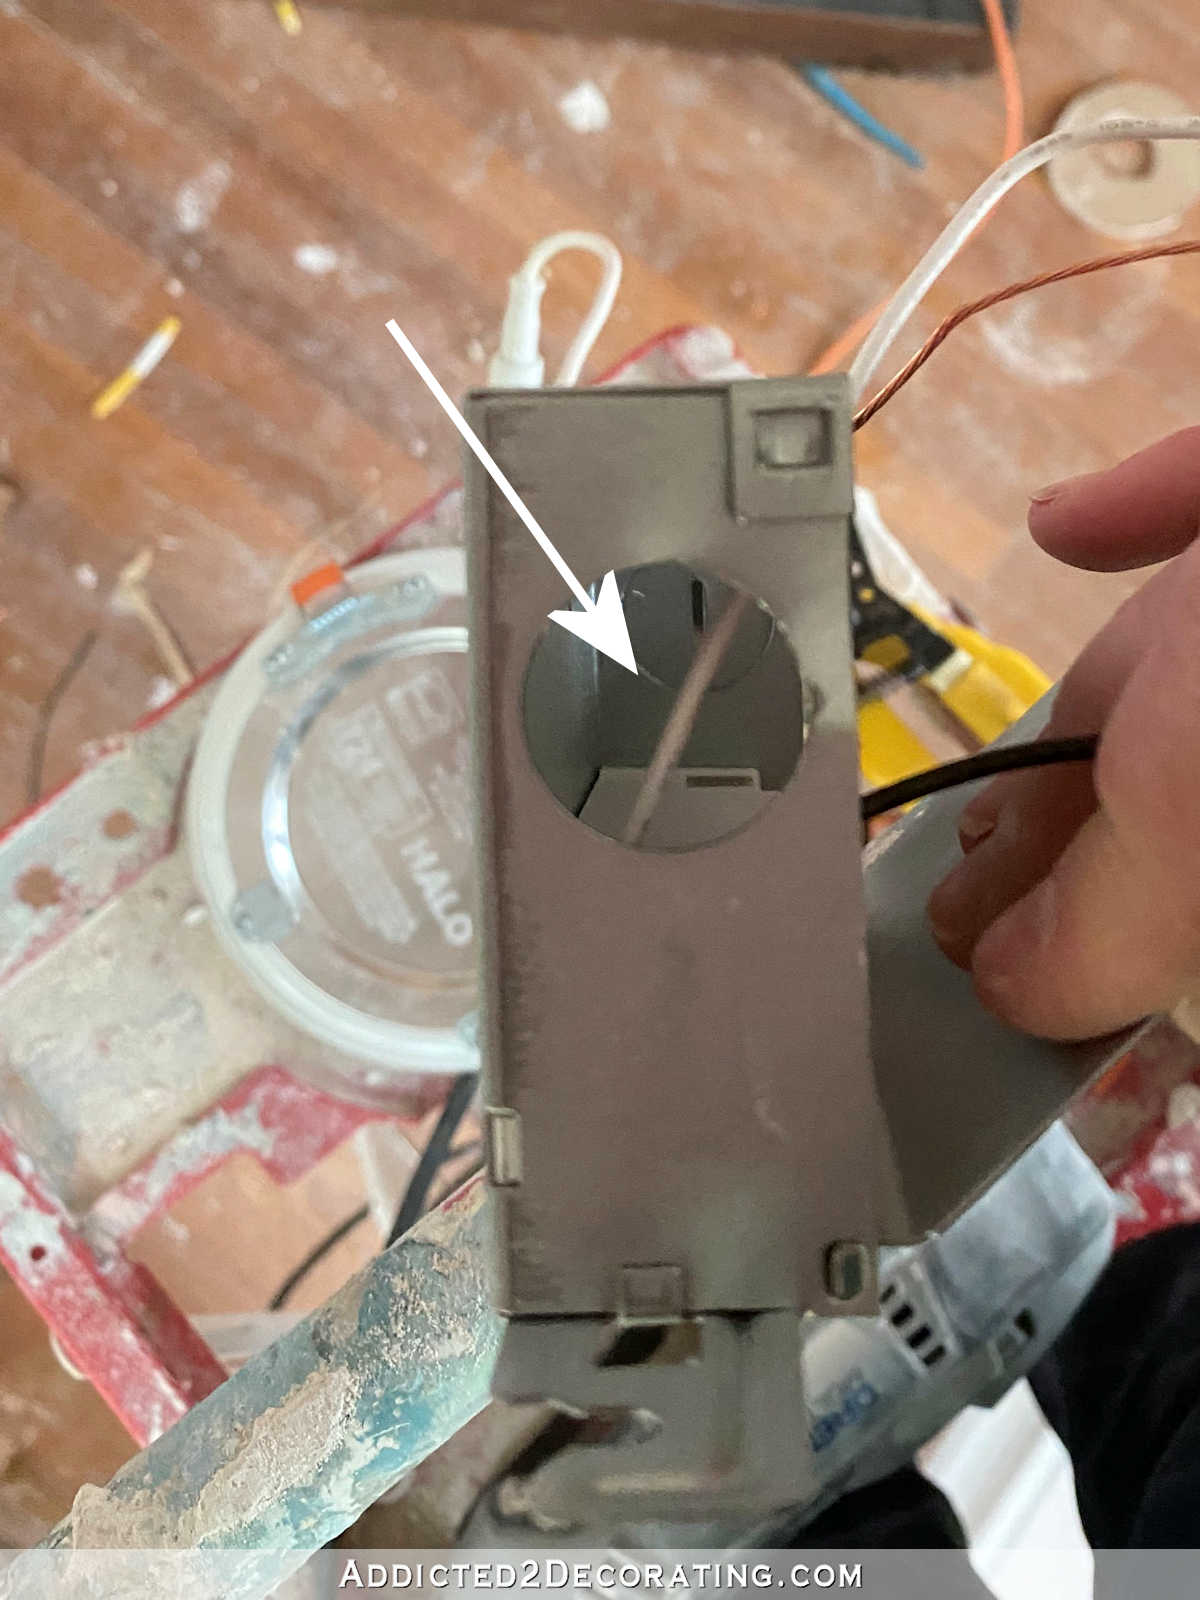
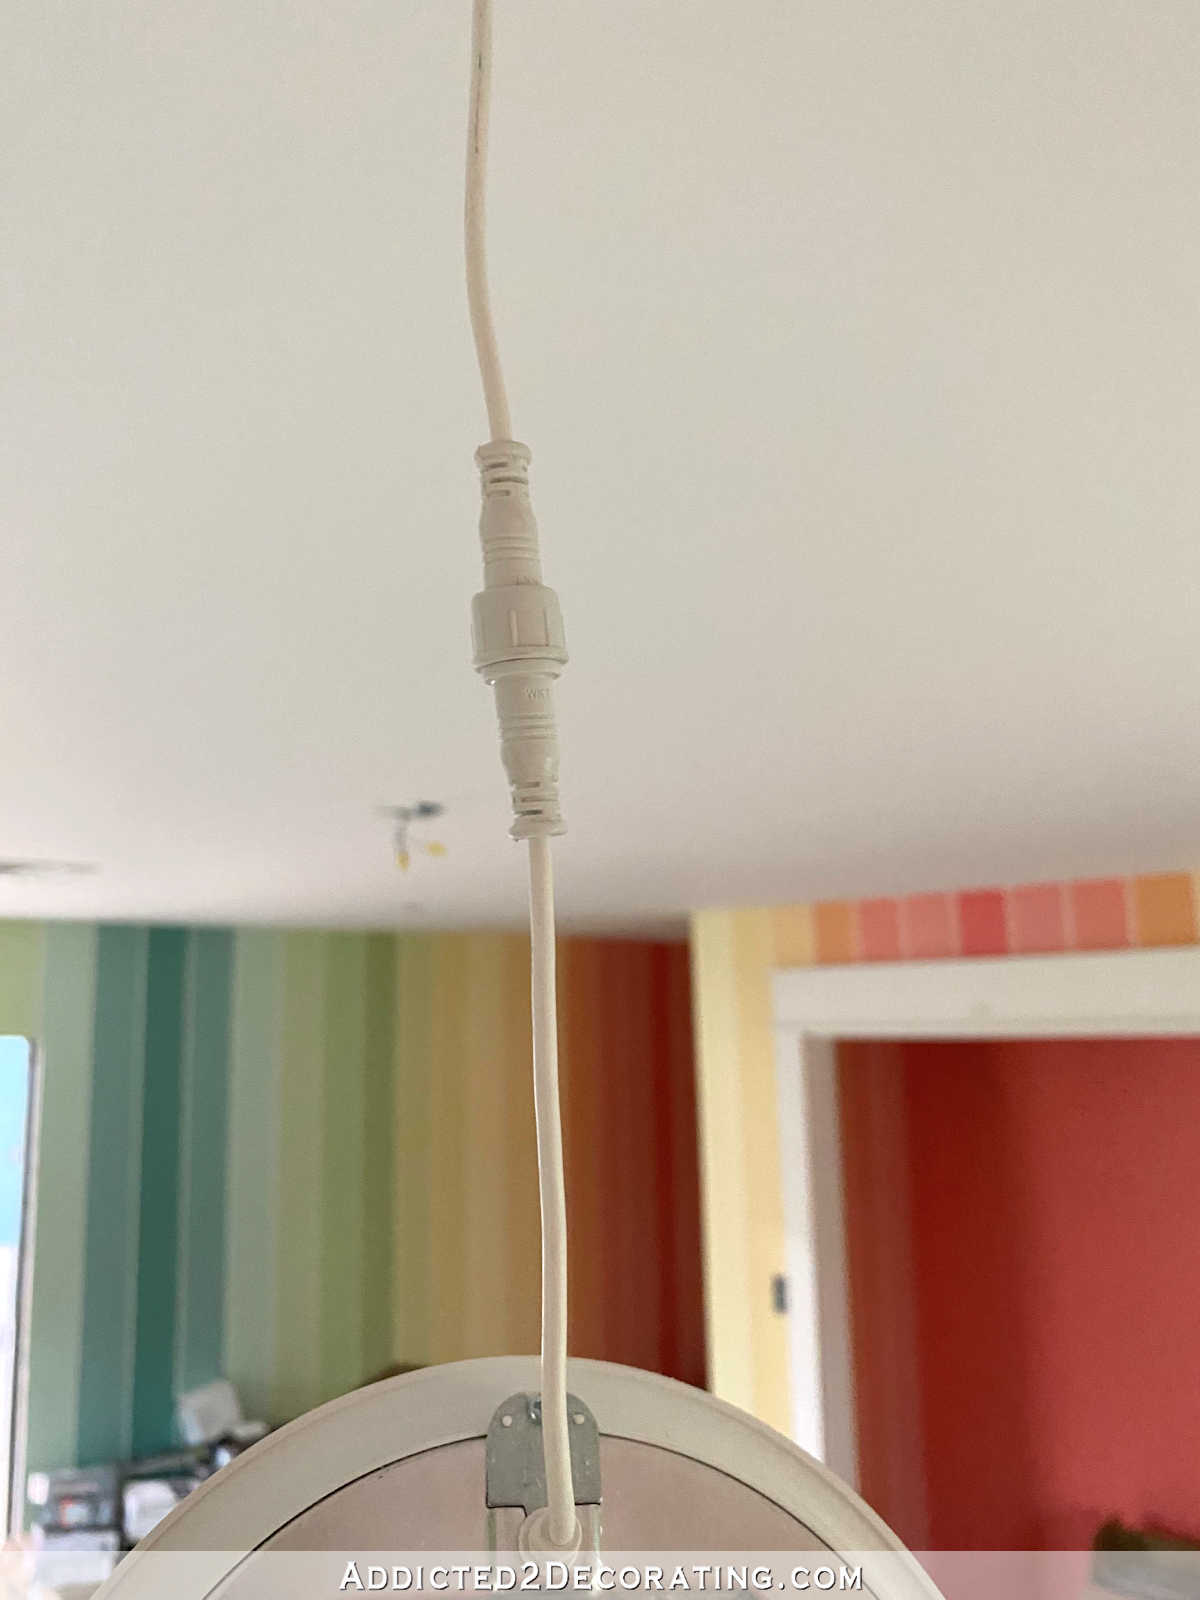
Then I put the wires from the ceiling through that hole, and used wire nuts to connect them to the wires on the lights, connecting all of the black wires together, the white wires together, and the bare wires together.
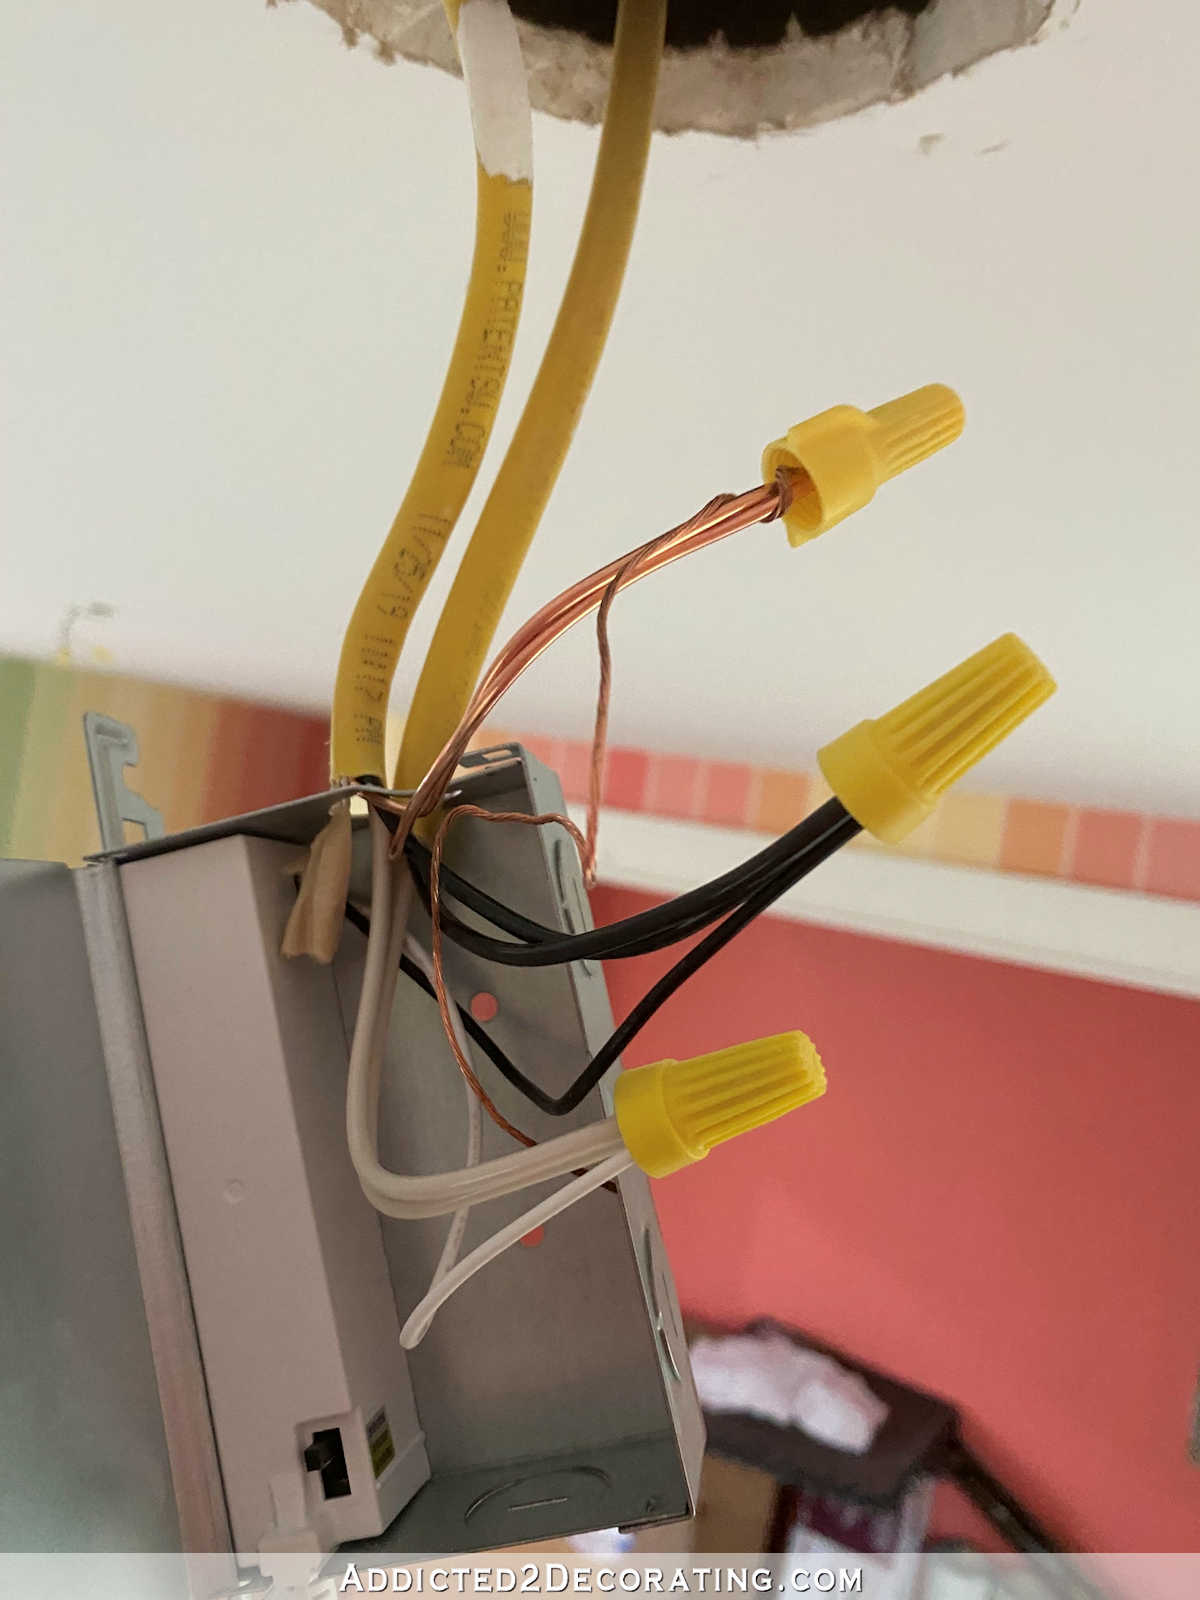
Once they were all connected, I carefully tucked them into the metal box, and closed the lid on the box.
The reason I had two wires coming out of the ceiling instead of just one like you generally see if you’re installing a light fixture is because in this room, I have four of these HALO canless recessed lights daisy chained together so that each light will send power to the next light in the daisy chain.
Here’s how that looks. I have a 12/2 wire going (1) from my breaker box, up into the ceiling, and down to the light switch over by the door. Then I have (2) another wire going from that light switch up in to the ceiling and down to the first light in the chain. And then (3) there’s another wire going from the first light, up into the ceiling, and down to the second light in the chain.
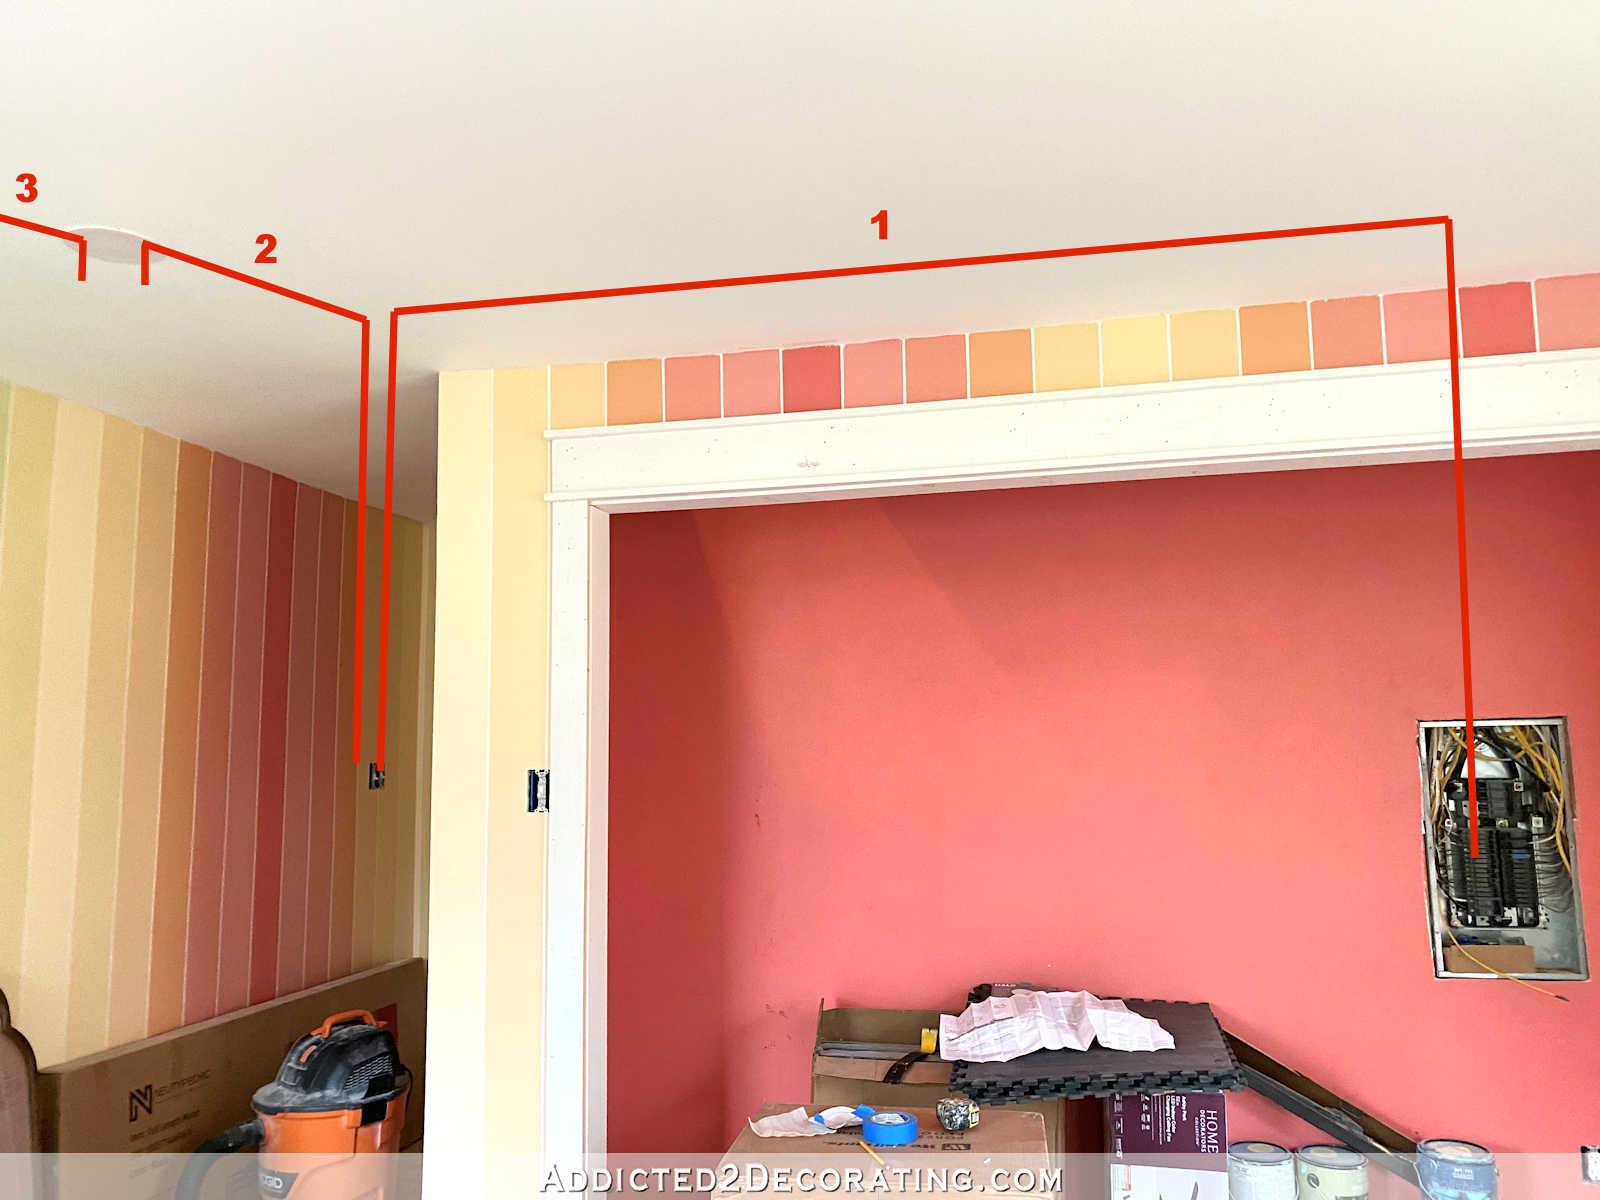
And then (4) another wire going from the second light, up into the ceiling, and down to the third light in the chain. And finally (5) another wire going from the third light, up into the ceiling, and down to the fourth and final light in the chain.
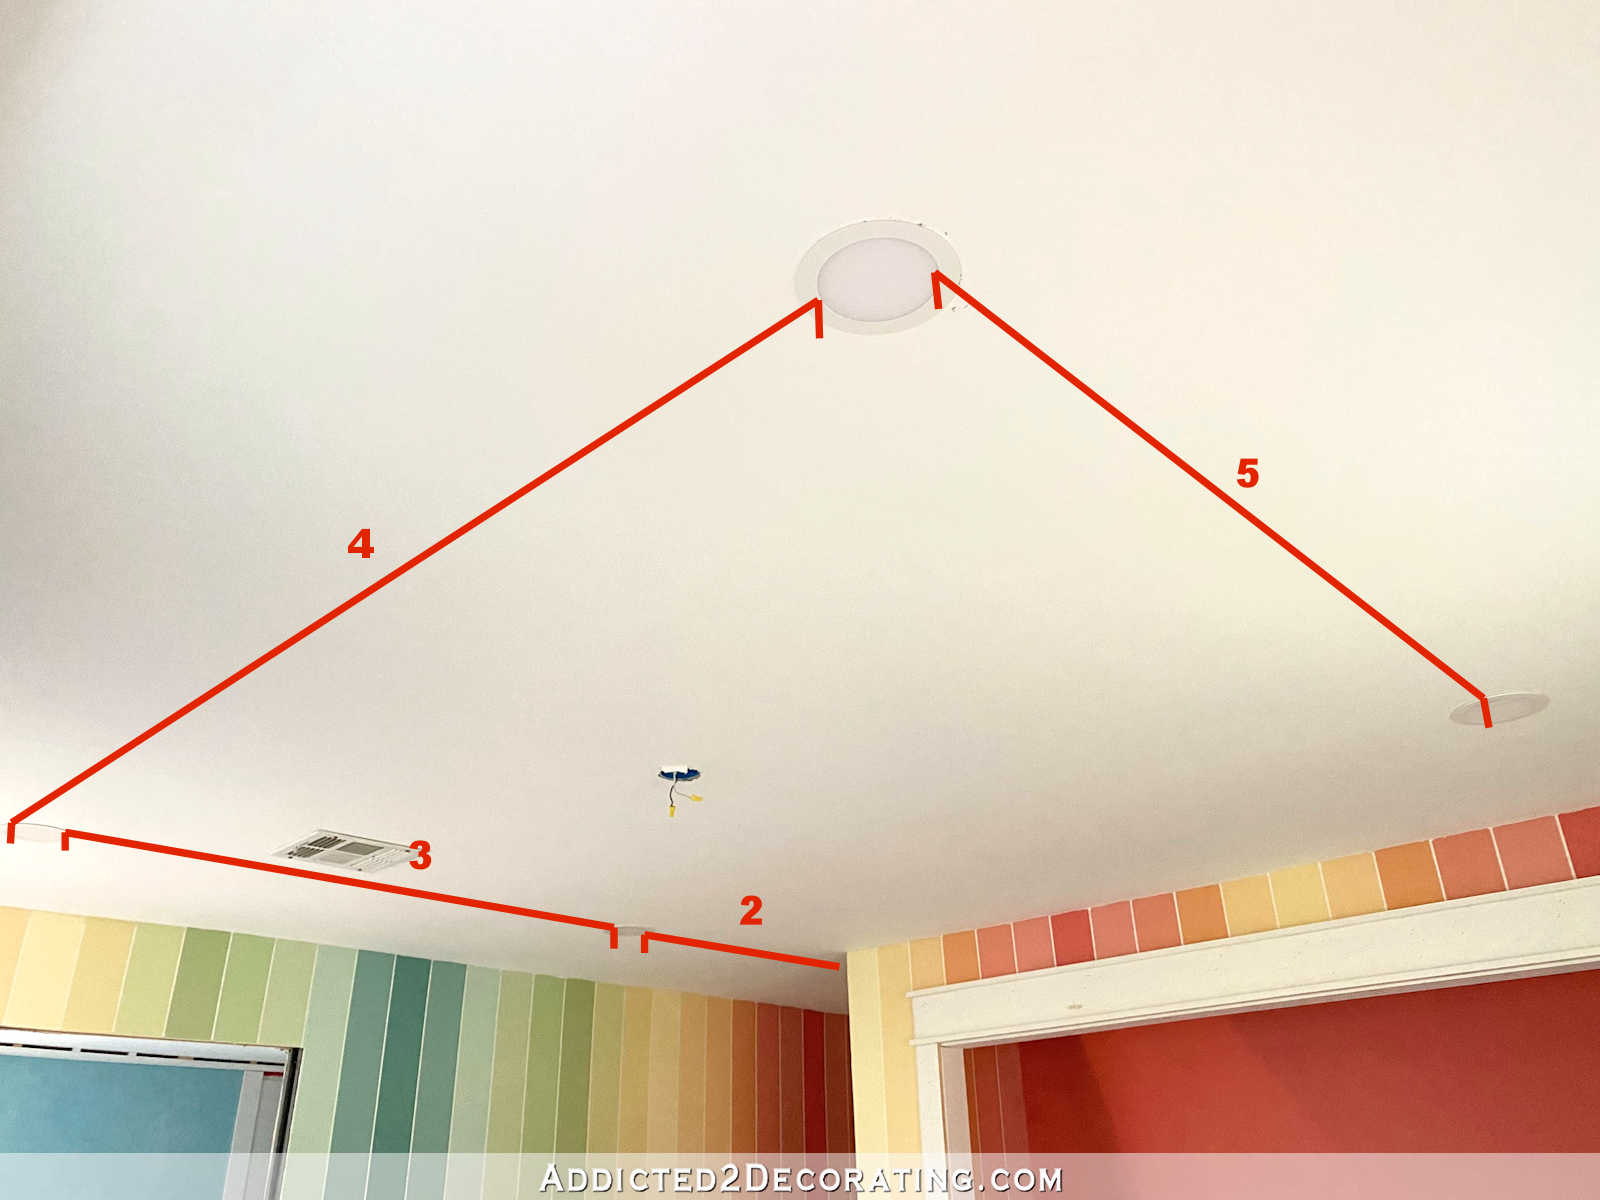
So three of those lights will have two wires coming down from the ceiling that have to connect to the light — one coming from power, and one sending power to the next light. Only the fourth and final light in the daisy chain will have only one wire coming out of the ceiling because it only needs to receive power. Since it’s the last light in the chain, there’s nowhere else to send power.
After connecting the wires, tucking them into the metal box, and then closing the box and making sure it was going to stay closed (if it’s not closed well it can pop open), I placed the box just inside the hole sitting on the ceiling drywall.
Then I reattached the light…
And finally, the light fits inside the hole with these two spring tabs that get pushed into the hole, and then they flatten out and pull the light snug to the ceiling.
And that’s it! It’s so simple! And to be honest, I’d rather install these any day over a regular ceiling fixture. I find these way easier to install, and if you can install a regular ceiling fixture, then you can certainly install these.
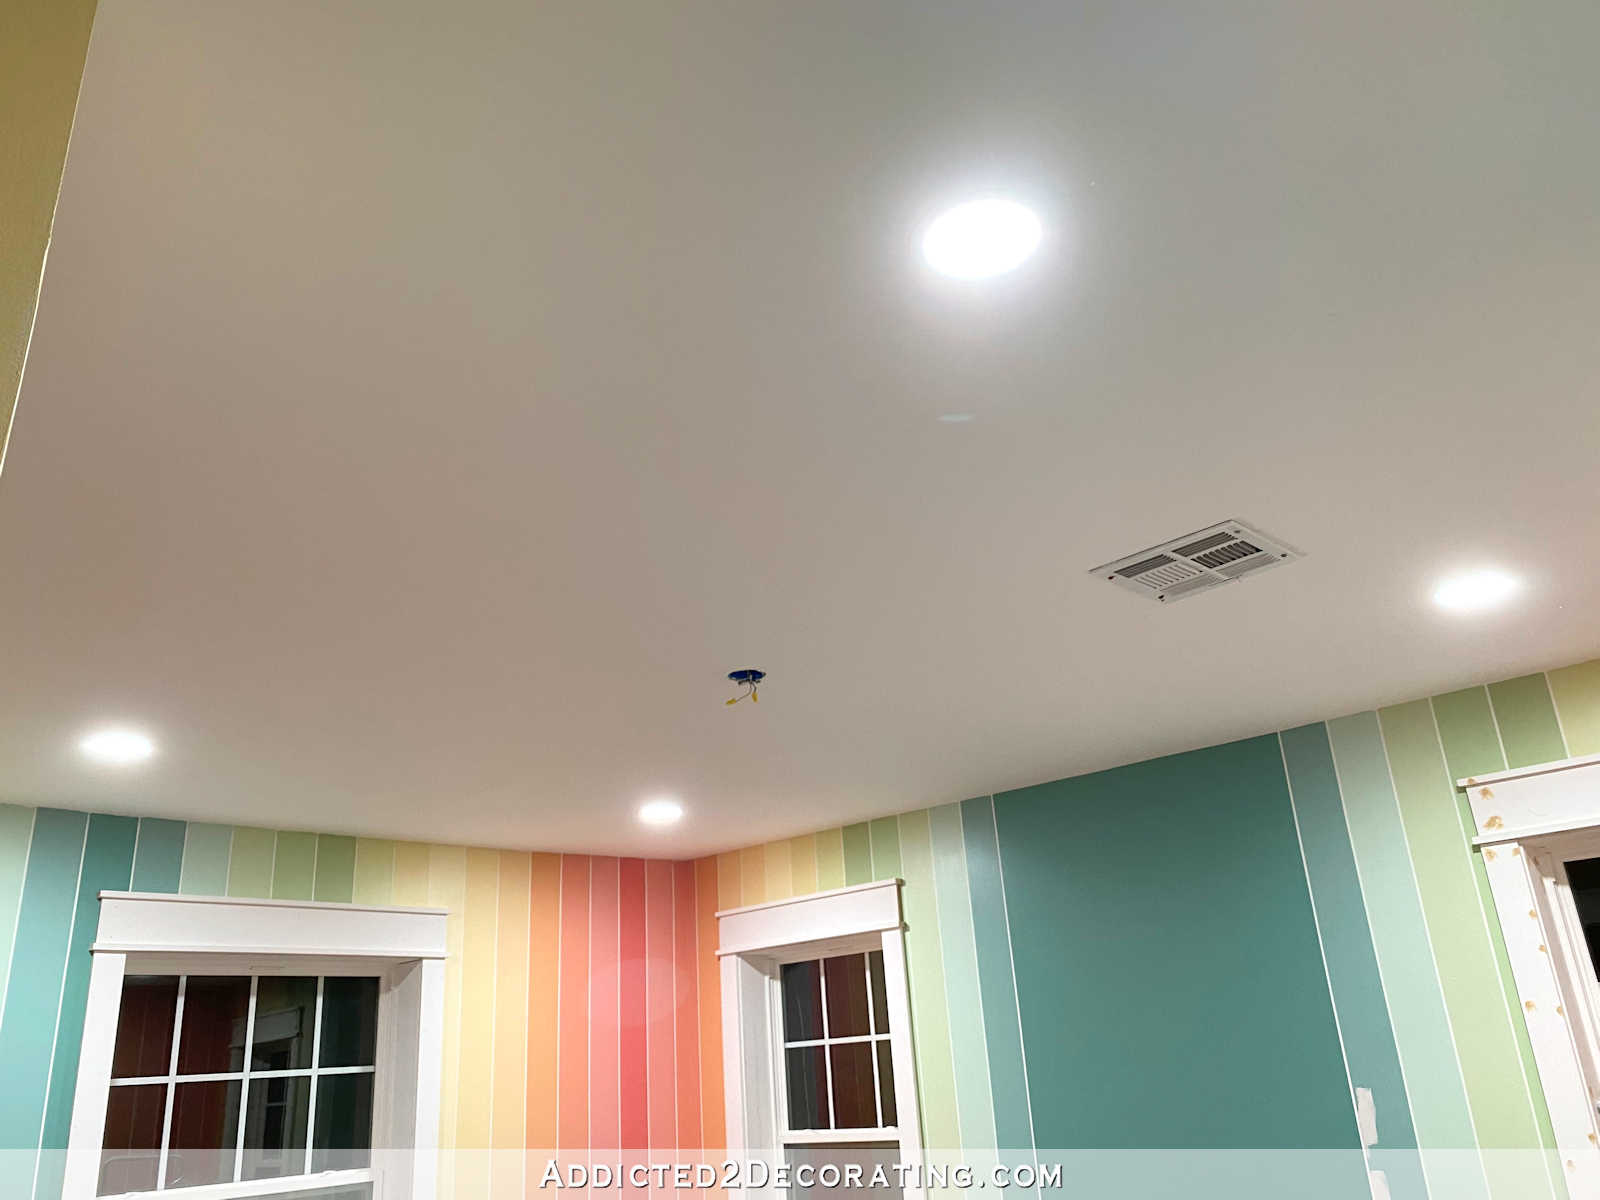
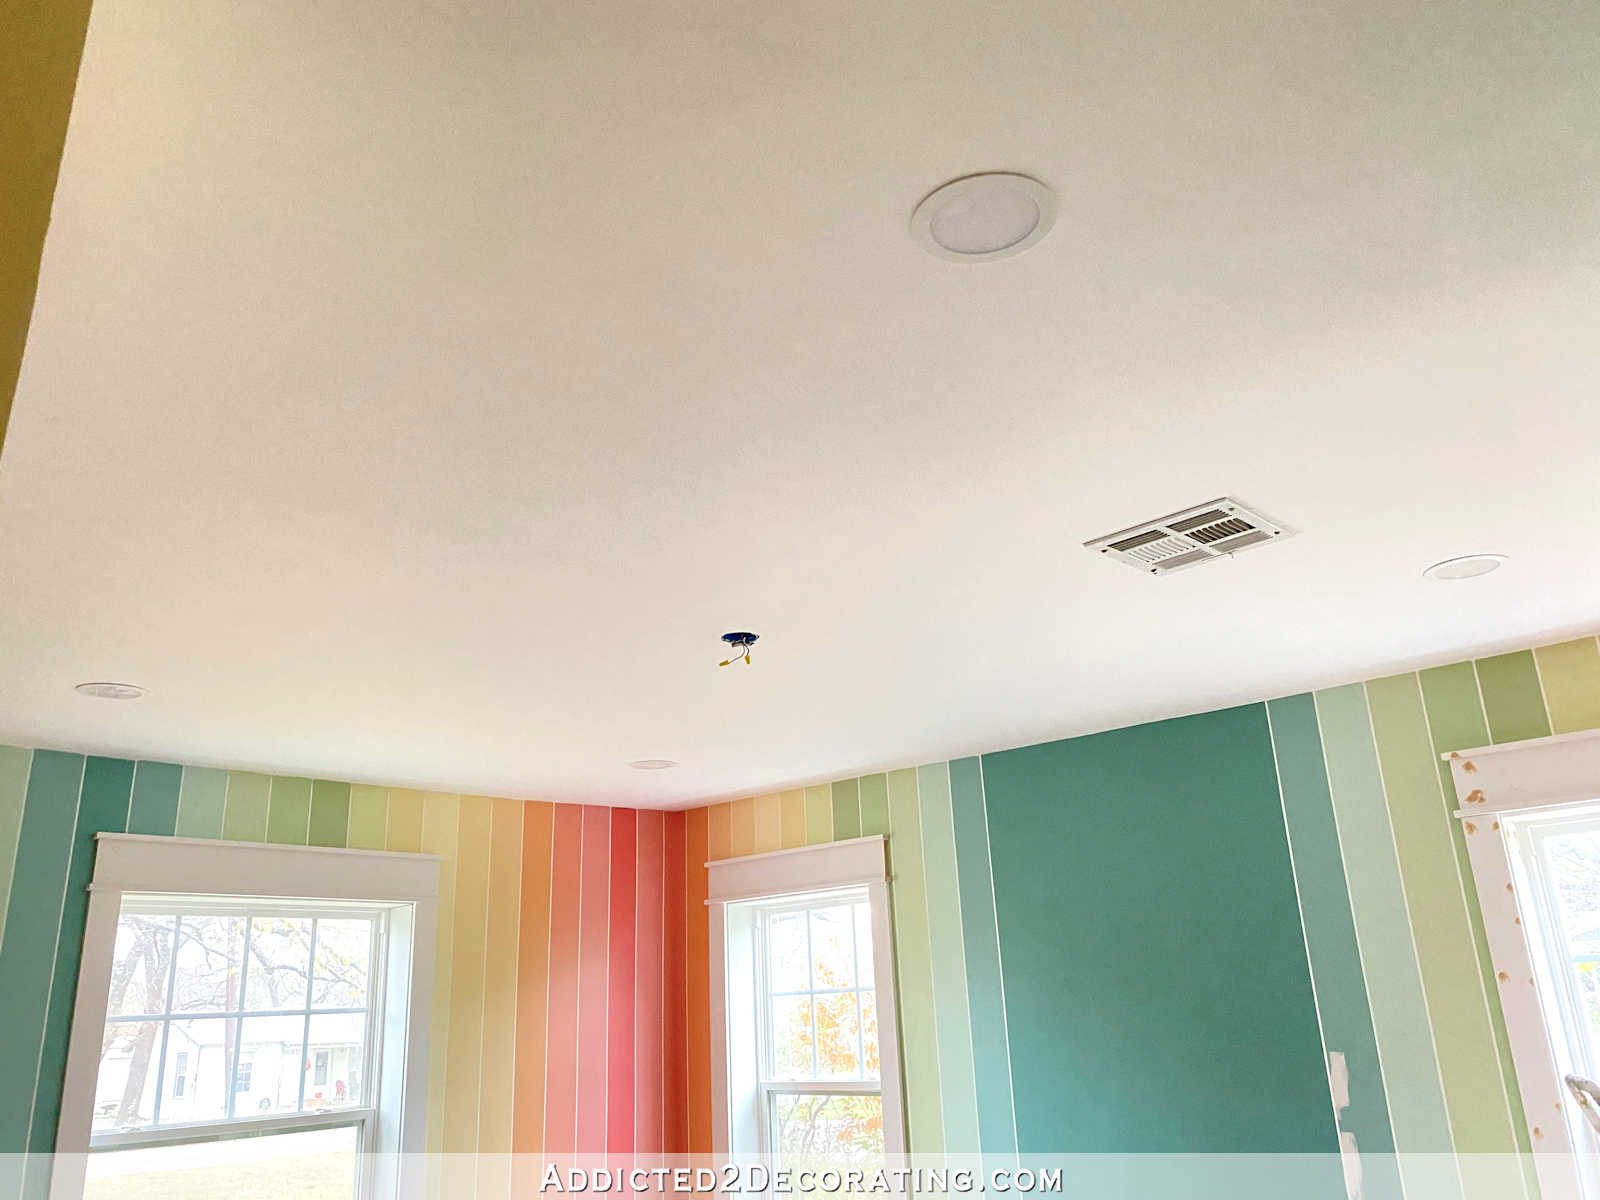
It was after dark when I finally got the last one installed (I was working by the light of the master bathroom when installing the last light 😀 ), but here’s the room at night with the new lights on!

I absolutely love these HALO canless recessed lights, and I can’t imagine going back to regular can lights with the big housing that has to fit up in the attic. I would actually love to go back and replace my standard can lights (like the ones in the kitchen, breakfast room, and living room) with these. It would make it a little easier to maneuver around in the attic on those occasions I need to get up there.
But that’s a project for a much later date. As of now, I have these ultra thin recessed lights in my studio, the pantry, the master bathroom, and this home gym.
When I finished installing them last night, I regretted not putting one in the long entrance to this room. It’s a long and relatively dark area of the room, so I might actually go back and install another one there.
And here’s one final look at them from this morning. With the lights turned off, you can actually see the lights, and see just how thin the exposed part is. It’s such a great design!
So now that I finally have light in this room, I guess I have no excuse for not working past dark. 😀
You can find our home gym paint colors and resources here, and see all posts related to our home gym here.

Addicted 2 Decorating is where I share my DIY and decorating journey as I remodel and decorate the 1948 fixer upper that my husband, Matt, and I bought in 2013. Matt has M.S. and is unable to do physical work, so I do the majority of the work on the house by myself. You can learn more about me here.
Very cool! Our 1986 house has giant recessed lights in the kitchen; would these be able to replace the old ones? In one pic I saw copper wires and I know next to nothing about wiring etc, but do those bare wires array electricity? I’m sure they don’t, but in my head they look scary…and hot 🔥. Actually I thought you had put one by the door and thought…” that Kristi thinks of everything”! 🤪
Finally, I agree, the light intensity should be more accessible. That part is a dumb design. Great post
Not ‘array’…make that “carry”
The bare copper wire dosen’t carry current. It is a grounding wire. Sometimes encased in green.
As Crystal said, the bare wires don’t carry electrical current, but they act as grounding wires. Only the white and black wires carry electrical current. I found that confusing at first because this wire is called 12/2 wire, meaning it’s 12-gauge wire and has two wires inside the main sheath. But when you open up the outer sheath, you see three wires. But they only count the two that carry electrical current. It’s often referred to as “12/2 with ground”. So a “12/3 with ground” would actually have four wires inside, but only three carry electrical current, with the fourth being a ground wire. (12/3 is used for three-way switches).
Those are the best- we used them in our current home when we remodeled- in the shower, over the kitchen sink, in the laundry room- they are terrific and look so much better than cans, and the light output is fantastic. Our electrician had never used them before (I just happened to find them online, wasn’t looking for them in particular but loved the low profile) and even he was impressed and said he was going to recommend them for future jobs.
These are a game changer for sure. I think I used brand “Commercial Electric” but the same as Halo . I used the gimbaled version for my cathedral ceiling. Worked great. They make doing light work almost fun as they are so easy to install. Once I installed these in a couple rooms I followed your suggestion by matching the type of LED light in all other bulbs/existing fixtures. At first it seemed wasteful to swap out perfectly good bulbs but best money I’ve eve spent yielding the most profound, immediate, painless transformation in my house. No going back to old lighting. That’s one of your tips I appreciate as real gem!
Kristi, I saw these in a Family Handyman
article and went nuts over them!
I’ve seen so many brands online. How did you make the decision on which ones to buy?
I didn’t do any comparison shopping. 🙂 I simply bought the one that was available at the local Home Depot store, and loved it. I do think that some of mine (perhaps the pantry lights?) are the Commercial Electric brand. They’re both good, and really, I don’t see any difference in them at all. They’re the same size, and they all have adjustable settings for the temperature of the lighting.
Which of the 3 or 5 settings do you use?
All of the ceiling lights in our home are 5000K.
I say remodeler I love this style of light and use them on so many jobs! One note is when you put your wire through the metal box it is sitting on a sharp edge of the box. By code that wire cannot be put through the box without protection. They make various types of plastic or metal inserts that keep the wire from moving around and risking that sharp edge nicking the insulation and causing an electrical issue. In a worse case scenario it can spark and could create a fire.
I discovered canless lights about three years ago and are replacing my old ones as I go. They are awesome!
That room just makes me giggle. I love colorful stripes. I imagine going through your daily exercise routines in that space is going to be fun for both of you. I am looking forward to seeing all the equipment in place. Those lights certainly do make a difference. A job well done, Kristi. Thanks for sharing the details.
So how long do the lights last? If there are no bulbs you have to replace the whole light?
They’re LED, so they should last a very long time. The one with the five light temperature settings say that it lasts 22 years with 6 hours per day usage. The one with the three light temperature settings says that it lasts 16 years with 6 hours per day usage.
A quick safety note. After you punch out the metal disk on the box you need to install an inexpensive plastic (or metal) cable connector/clamp (code requirement). These keep the insulation on the wires from rubbing and shorting out on the metal edges of the knock out hole.
i noted that as well. essential to ensure no shorting risks. Overall very good though.
I literally joined to say this and elaborate, since it’s one of the first pages to pop on Google for “canless light installation”. Given that the junction box in a remodel application is rarely secured to a joist like it would be in new construction, I’d use an actual NM clamp with two screws, rather than the little plastic push-in bushings. If the wire and box aren’t secured to a stationary object, you don’t want it to yoink out of a little plastic bushing should the house settle, the kids get rambunctious, or a runaway truck bashes into your kitchen wall. I also prefer the type that thread in, and have a locknut for these sorts of applications, rather than the duckbills… But either is WAY better (and code compliant for most AHJs) than what’s going on here.
If you google “NM-B Cable Clamp” they’re quite cheap… roughly 50 cents a piece in a 5-pack. Considerably less than that in quantities from 25 to “As many fit in a 5 gallon bucket”… and they will LITERALLY prevent your house from burning down. Skipping them is an INSTANT failed inspection, and if I can find a missing one in something as easily accessed as a ceiling light, I’m probably using the failed inspection as a reason to get my earnest money back. You had the right idea, but that one missed step is a killer that leads to a whole lot of questions, an angry realtor, and an even angrier buyer.
Also, the voice of experience says… With these thin sheet metal junction boxes, to prevent the bend that’s easily visible in the picture that shows the missing bushing, just use a dremel or your oscillating tool to zip the little bit of material in the knock-out. You won’t mangle the box, and it’ll make putting the threaded NM cable clamp in a WHOLE lot easier. A screwdriver and pliers works great on normal metal junction boxes, but they’re also 4-5 times as thick. Besides that one seemingly small omission, this was NOT a bad install guide.
Looking good Kristi! And I agree that you need a light over the entryway to your gym. I suggest not daisy chaining it to the other can lights as I would imagine you will often use it to light your way to the bathroom.
We installed these lights in our bathroom and hallway and I love them. They were super easy to install and give so much light.
Thank you so much! It is super helpful for you to explain the daisy-chain configuration for your recessed lights. I was unsure why my (burned-out) recessed light had two wires… now I know!
thanks for such a well done project. I am off to buy some of these lights tomorrow.
Dara
Very good write up except for the one major NEC code violation. Where you punched out the hole in the j-box for the inlet/feed, you cannot have the wire go straight through the hole without cable clamps. This is required to protect the wire from the metal edge and to lock the wire to the box so it cannot be pulled out.
You should not run the romex electrical wire into the metal box knockout hole without first installing a plastic push-in wire bushing. The wire can become cut on the sharp edge causing a safety / fire hazard. Pick up a bag of 3/8” diam plastic (non-metallic) push-in wire bushings from Home Depot or Lowe’s and slide them over the wire then push into the hole until it snaps in place.