I’ve Lost Steam (Over A Stupid Issue That I Can’t Figure Out)
Alright, y’all. September is here. The long holiday weekend is over. And I spent a relaxing weekend gearing up for this final push between now and the end of the year because I really want to get the foyer and bedroom finished before we ring in a new year.
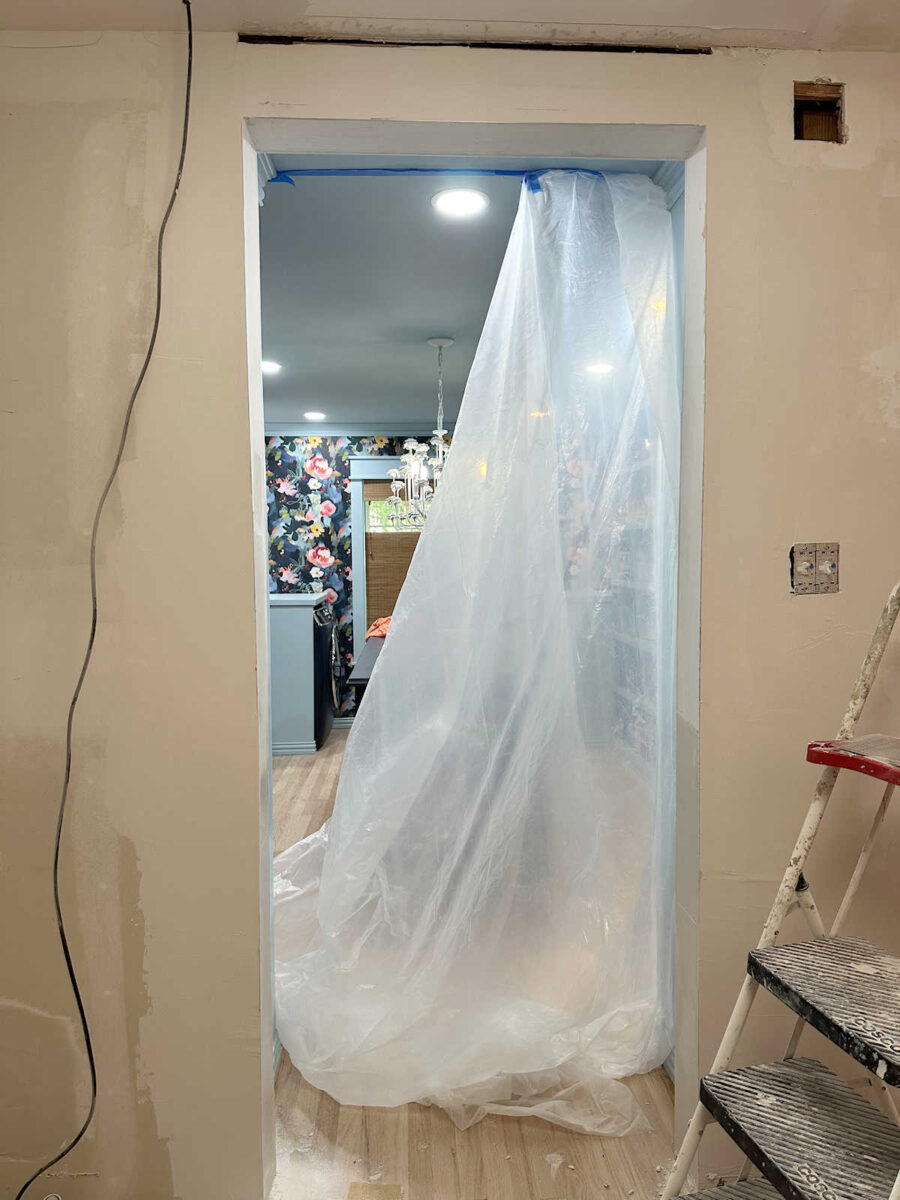
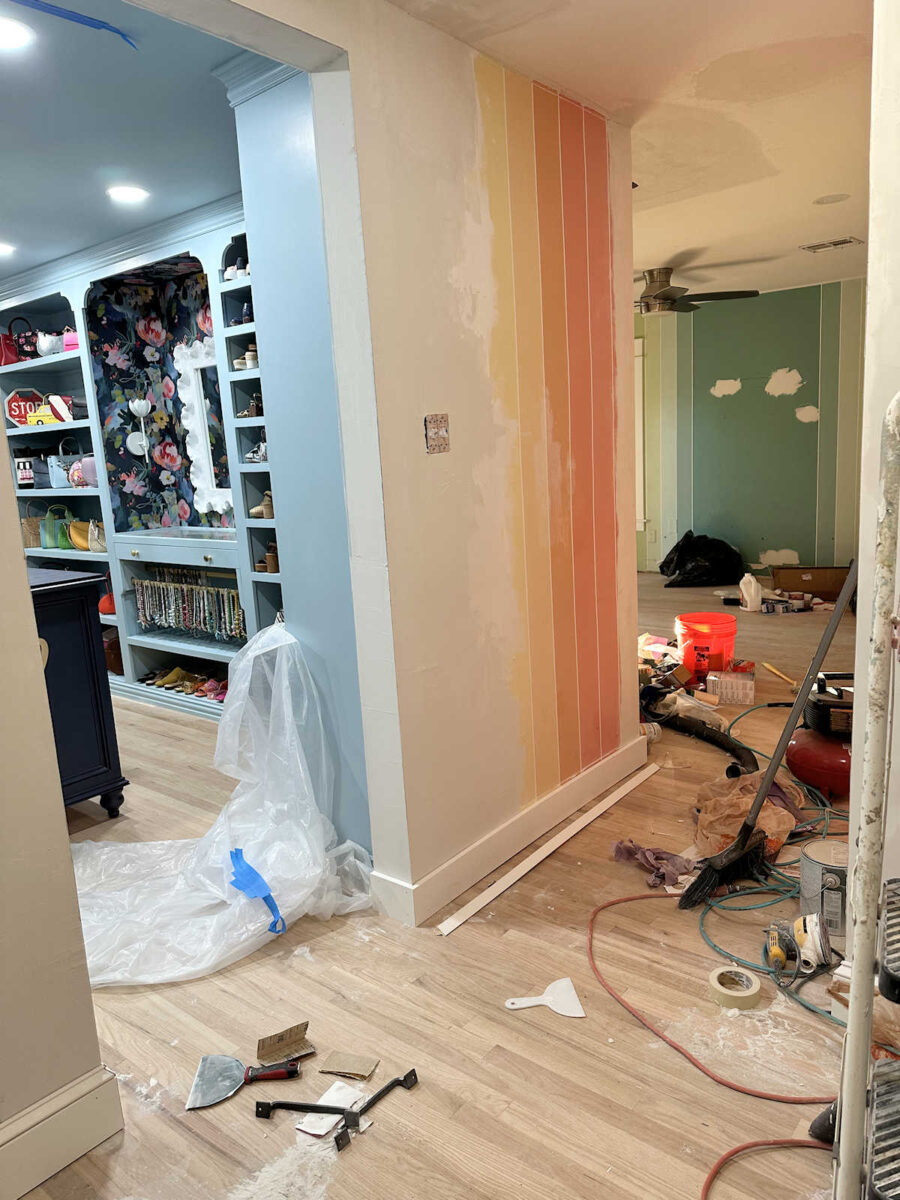
But I have to admit that I’ve kind of lost steam, and it’s over a stupid but frustrating and recurring issue. I had hoped to be finished with sanding the drywall in the foyer by now. Heck, I had hoped to be finished installing the trim by now. But there’s one thing that has hindered my progress, and it’s literally the dumbest issue ever. I can’t get the plastic between the closet and the foyer to stay up.
I know. It sounds stupid, right? But I’ll put the plastic up, then start working (sanding) and maybe have an hour or so to work before I turn around and see this…
At this point, I’ve lost count of how many times I’ve retaped that plastic. I’ve tried different painters tapes, and none of them stick longer than an hour. I don’t know if this is because everything in that closet is painted with Sherwin Williams paint, and it has some kind of non-stick protective quality to it that makes it easy to clean (which, of course, is good in a paint) but also means that tape won’t stick to it. But this has been so incredibly frustrating that I finally just gave up, decided to enjoy the long holiday weekend and not do any work, and then tackle it again today.
Painters tape just won’t work. And it’s not just the ceiling that it won’t stick to. It won’t stay on the sides that are taped to the cabinets, either. My only option seems to be masking tape, but oh my goodness, I hate using masking tape on painted surfaces. If I go to take down that plastic that has been taped up there with masking tape, and it peels off the paint, I’ll cry. That will mean having to go back and do sanding and repainting in the finished closet, and I don’t want to go backwards.
Anyway, I know it sounds stupid, but that one issue caused me to completely lose steam on this foyer. I can’t finish the walls without doing a lot more sanding. And I can’t sand with the plastic down between the closet and foyer. And while I had the excuse of a long holiday weekend to put that on the back burner over the last few days, that excuse has run out today. I’ll put the plastic back up (for about the tenth time) today, and I guess I’ll use masking tape and hope for the best.
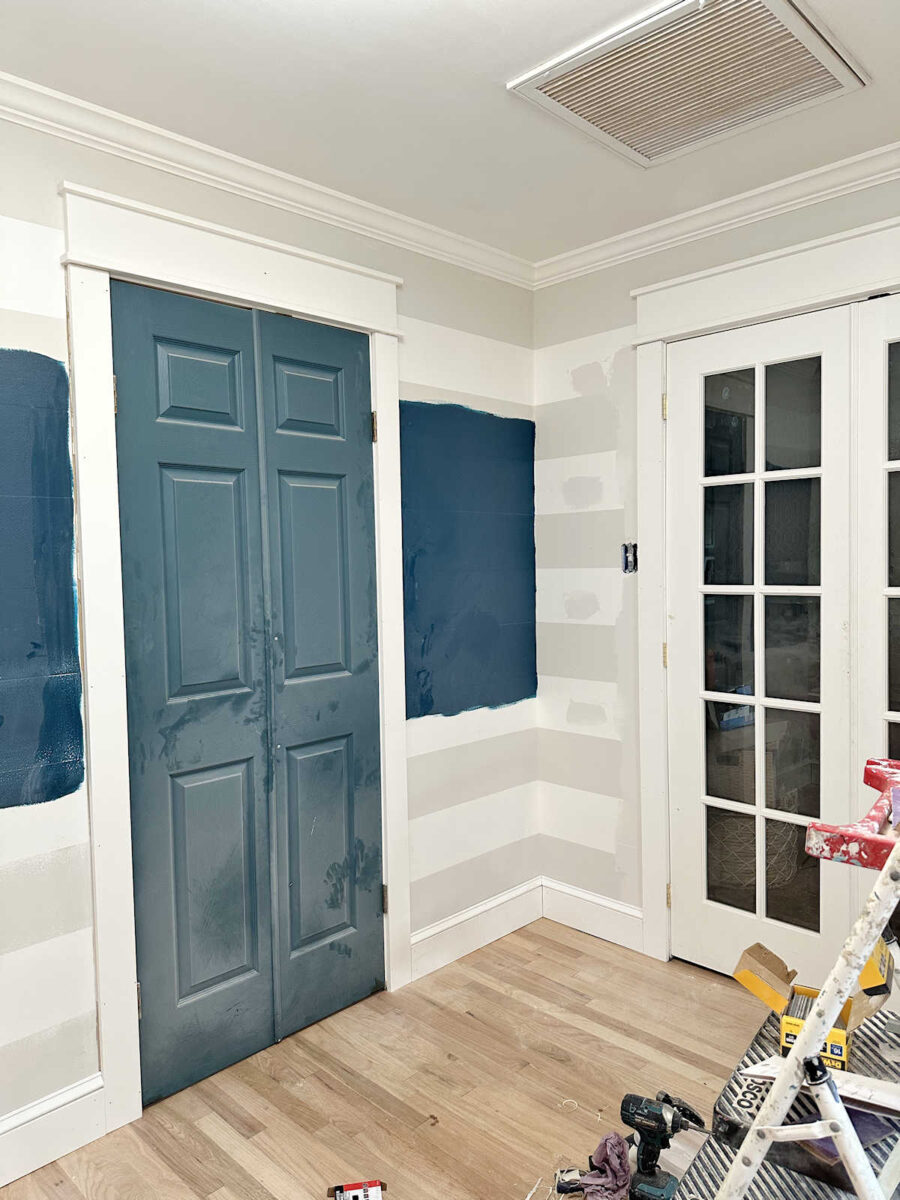
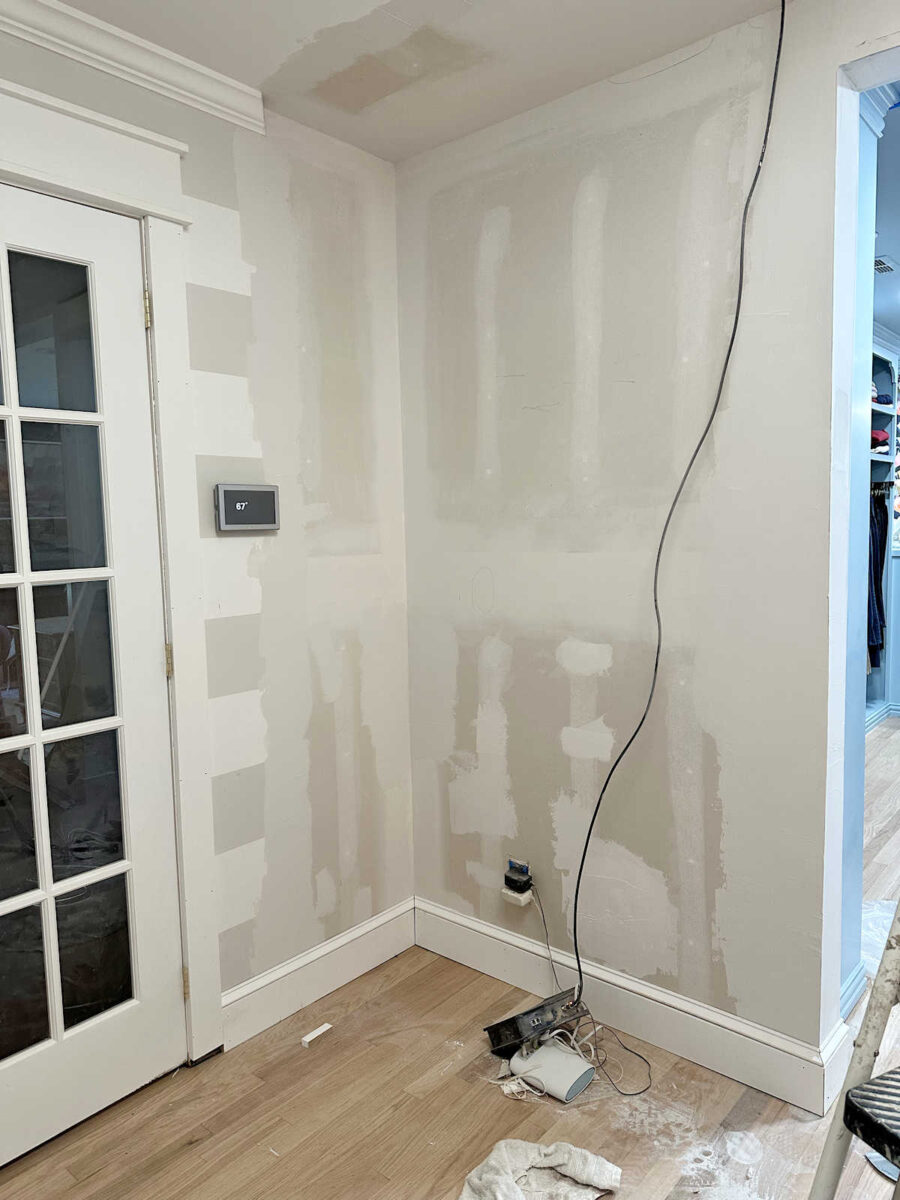
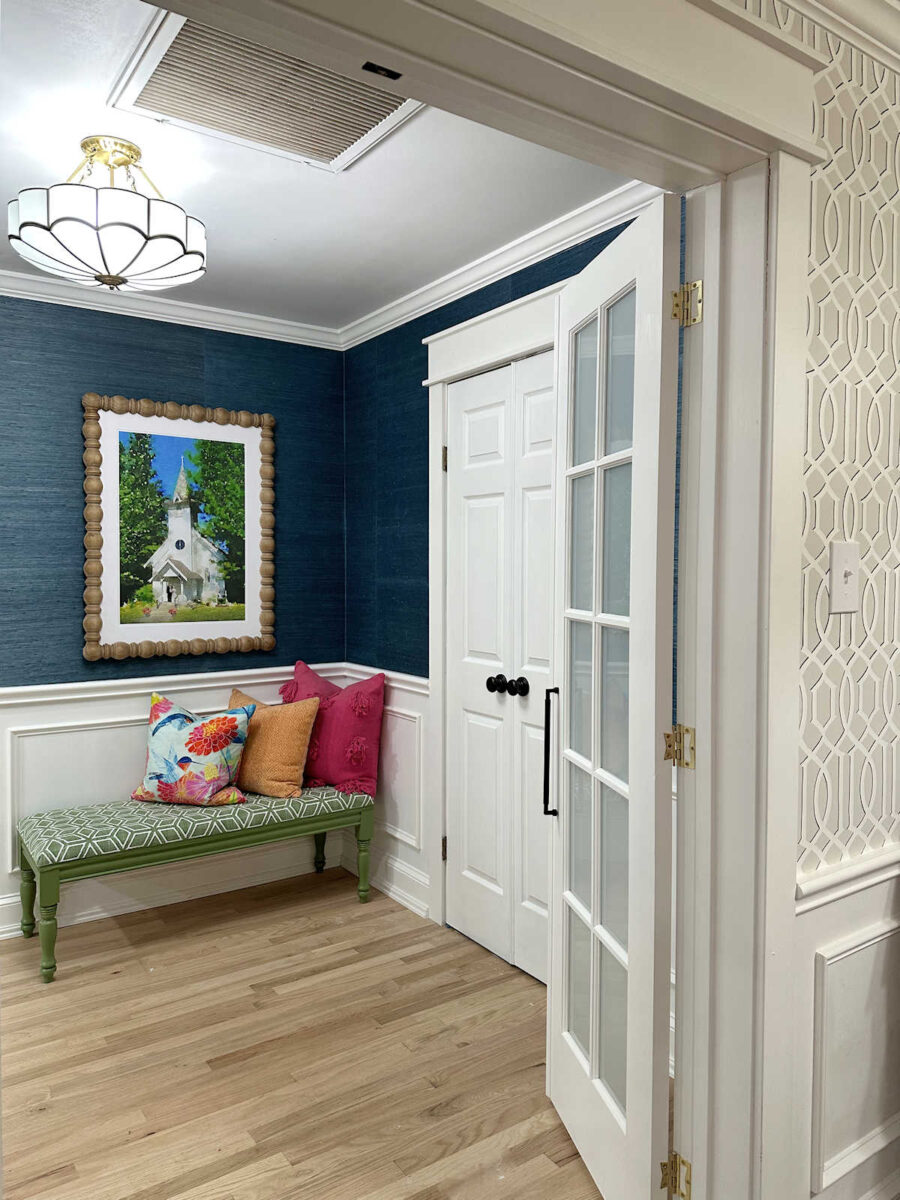
I did finally decide to skip the sanding for now and at least get some trim up, though. I needed to see some progress in that direction. So I got the doors trimmed out and the baseboards cut and attached. And then I got the base cap trim cut, but it’s not attached yet.
Of course, I had hoped to get the walls all sanded and primed before any trim went up, but that plastic issue prevented me from doing this in the correct order. This is what it does after a couple of hours every single time.
And because I was so frustrated, my mind wasn’t really on what I was doing, and I cut the side trim for this door an inch too short. I went ahead and put it up, and I’ll just attach the little piece to the bottom, use wood filler, sand, and paint. No one will notice.
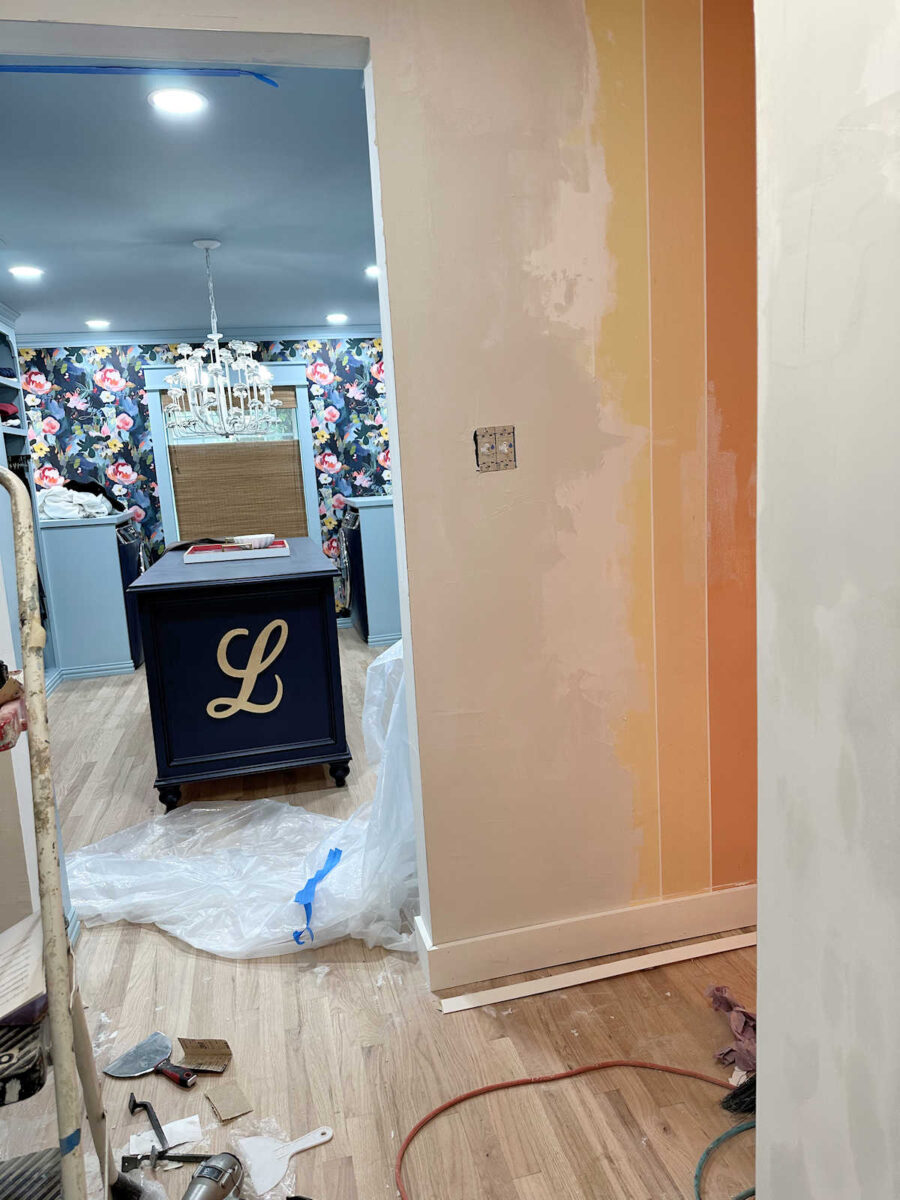
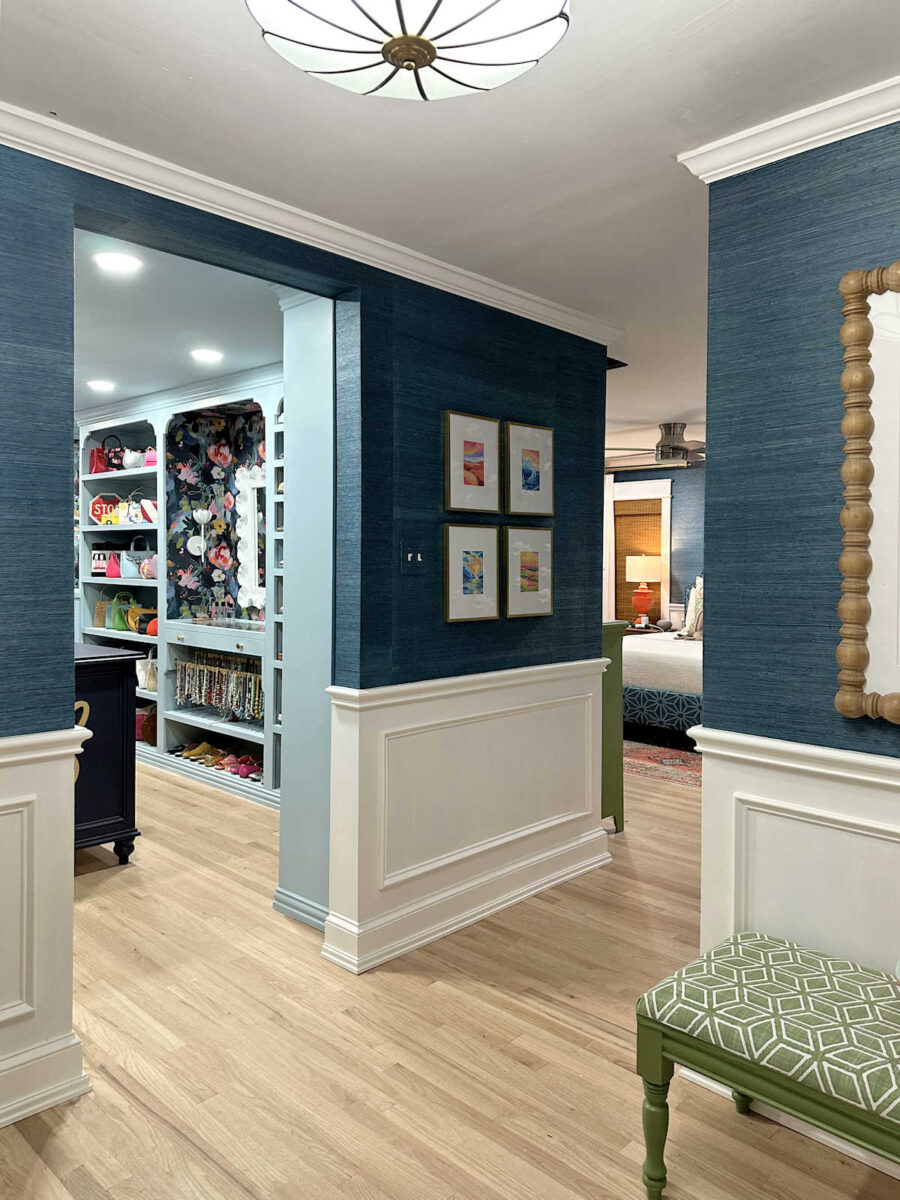
And I did decide to go ahead and wrap the trim around onto the jambs of the closet doorway. I’ll also be wrapping the grasscloth wallpaper onto the jambs as well. It’s the only way that really made sense in my mind if I want to keep that doorway tall and open (which I do) which prevents me from trimming out this doorway like the other doorways.
So that’s it. At least there’s a little bit of progress. There would have been so much more if that plastic had cooperated. This morning, I’ll get the masking tape out and see if that works. If not, I really don’t know what other options I have. If you have any brilliant ideas that I’m overlooking, please share!
More About Our Bedroom Suite Foyer
see all Bedroom Suite
Foyer diy projects
read all Bedroom Suite
Foyer blog posts

Addicted 2 Decorating is where I share my DIY and decorating journey as I remodel and decorate the 1948 fixer upper that my husband, Matt, and I bought in 2013. Matt has M.S. and is unable to do physical work, so I do the majority of the work on the house by myself. You can learn more about me here.


Use thumb tacks. It will make tiny holes, but it will be a lot easier to touch up than if the masking tape peels the paint, and that plastic will not come down.
That’s a good idea. I probably won’t do that on the cabinets, but at least I can do it on the ceiling.
And thumb tack it into the top of the trim above the door. You literally won’t even see the holes and then just use the tape for filling in the gaps. The tape will probably hold because it won’t be bearing the weight of the plastic anymore – the thumb tacks will. (You can also use small brad nails in the same location.)
That’s exactly what I thought as well. Thumb tack it then use the tape to seal the gaps.
I’ve also used a regular office stapler opened up and pressed against the dry wall creating minuscule holes that are easy to touch up. Good luck, Kristi!
My father in law puts up lightweight Christmas decorations with sewing straight pins. They leave the tiniest hole and you can hardly see it. He very gently hammers them in. Might be worth a try before the thumbtacks that are a bit bigger.
I would attach the plastic to a long 2 x 4 then lay it on the top of a ladder that would be leaning on the inside wall.
Put a tension rod across the top then tape plastic around rod.
This is what I was going to suggest!
Me, too!
Yes, that’s what I was going to suggest
How about using a tension rod to hold up the plastic like a curtain?
I was thinking the same thing! Also, that the tension poles (like the ones used for Zipwalls) could be run vertically. Then the ceiling tape may stay up, since the weight of the plastic sheeting is being held by the zip poles.
I’m glad I checked comments first–I was going to suggest this same thing. 🙂
My thought too. Sew a pocket in the plastic, then stuff some fabric in the small space above. Good luck!
This is what they did for construction in our house – did a Zip Wall. But I’m sure you could duplicate it with cheap curtain rods and a $20 zip up plastic off Amazon!
Brace the curtain rods just inside the walkway (tape edges), and with the zipper you still have access to the closet.
I’ve had this happen too. Make a faux door frame with 2x4s and attach the plastic to it. Then wedge it in front of the doorway to your closet. It will keep 99% of the dust out. Good luck!
This is what I thought, except use something lighter than 2×4, maybe 1×2 or even trim moulding, and tack it up with just a couple pin nails here and there. When finished, pull off the wood pieces and snip the pin nails at the surface and tap them into the wall or pull them out with pliers. They will barely show and you will soon forget they are there!
Or maybe try a very thin strip of wood with your smallest finish nails for the top and tape for the sides.
Why not tape the dust barrier on the hallway side of the doorway?
That’s a great idea, too!
I came to say this also. And use all the masking tape you want because it isn’t painted/finished yet. I have some glossy paint nothing will stick too, so I feel your pain.
This is what I’d try also!
Could it attach on the foyer side with nails and then just fill the holes
Could it be that your plastic is too heavy? Maybe cutting it into a more manageable size might do the trick. Good luck!
Maybe removable mounting putty?
https://www.target.com/p/scotch-2oz-removable-mounting-putty/-/A-13356391#lnk=sametab
Tape it to the inside of the opening and put thumb tacks through the tape
Kristi, give a piece of cardboard a try, wrap the Visqueen around it a few times and then staple or tack in place, you will only have a few tiny holes to fill in the end, but you will have that dust barrier you want and need. I think you are doing just great and keep up the good work. Ever Forward!
Sending all the energy I can your way.
Cheers to you and Matt!
Push pins to keep plastic up. Leave the tiniest little hole that you could easily is a tiny bit of joint compound in mixed with the paint color and no one will notice when you’re done
Try a spring loaded curtain rod / shower rod and drape the plastic over it.
Thumbtacks spaced across on top of the tape. Tiny holes to touch up easily
Make a inexpensive doorframe with the plastic to fit the opening use weather seal. pretty-much something like a canvas that’s smaller than the doorway then the perimeter is cut to fit wood with weather stripping to seal? Have it grab, then hang from a removable tension rod. I don’t remember how much tape is these days. Or if my suggestion is budget friendly….but that would be my thing something to grab n stay vs stick. This won’t be the first time you’ll have to seal the closet for work. So just store it in the workshop.
I had similar problem with plastic couple years back. Took a 3 foot ruler and stapled plastic to it, then used a narrow screw to attach to top of door. Then used combo of painters tape and couple of thumb tacks to hold on sides. Of course I had to go back and repair the screw holes, but that it did keep the dust out.
Shower curtain. If not a ‘real’ one then tape or staple the plastic to a tension rod.
command strips.?..I have them holding up shelves so they should work for plastic sheeting
Why dont you just tack it up and those little holes will be easier to cover up later.
What about clamps?
I’ve used push pins in the past and they worked beautifully. Easier to remove than thumbtacks and the holes were not noticeable to me or anyone else in my family. Now, full steam ahead😁
Can you put a tension rod up in the doorway and tape the plastic to itself to hold it up?????
Not to be discouraging, but we also had that issue after a painter used SW paint. I asked the most recent painter about it and he shrugged and laughed and said that is an issue with SW paint. How about cutting a 4×8 piece of Sheetrock down to the size of the opening and leave it in place, not attached, while you sand. It can lean against a ladder or something like that? To keep it upright
So it is the Sherwin Williams paint! I had my suspicions about that. I guess that’s what makes it so durable and easily cleanable — nothing sticks to it! That’s great unless and until you need something like tape to stick to it. 😀
Is there an edge anywhere with those metal corner pieces under the skim coat where magnets would work? If not, you could use these magnetic command strips: https://a.co/d/00F2zjO
Buy the Zipwall stainless steel telescoping poles at Home Depot or Amazon. They work great, fast and easy to put up and take down. We use them to make a painting booth in our garage.
I would drape the plastic over a spring tension curtain rod.
What about stapling the plastic to a strip of lath and bradnailing that up across the opening?
Good Morning….may I suggest using a cheap tension rod to hold up that plastic across the opening? Years ago, when we were kids, we did not have central air nor money for it. My mom would cordon off the hallway like that so that her window unit A/C could keep the bedroom end of our tiny ranch house cool during the hot summer nights! We hailed mom the cooling genius of the century! Still do for that! LOL! Any how it could perhaps help in this situation too! Best of luck….tension rod hack!
Tape the plastic on the other side of the door (in the hall). Problem solved.
The hallway side is what I’m working on. I need to do a lot of sanding in that doorway. Tape won’t stick to that side, either, because the walls aren’t primed yet.
I’d wrap it around a skinny little board and then tack the board above the door with two small pin nails. Sure, you’ll have a couple pin nail holes, but that’s what to fix or ignore, your choice. You can wrap the bottom around a 2×4 and that will hold it in place. It’s not perfectly sealed against the wall on the sides, but it’s way better than otherwise.
It’s not really a bargain solution but they do sell “plastic dust barrier poles” that are tension mounted and hold the plastic up to your ceiling. It might be worth the money, especially with the volume and scope of projects you do. Or, I’m sure you could cowgirl engineer something similar! =)
With all the reno you do I would spring for a Zipwall system.
You could get a tension rod and drape the plastic over it and tape it to itself.
Try ‘pinchers’ (sorry can’t remember what they’re called in english) black clips you’d use on a big pile of paper? You could clip to the shelves….
Binder clips!
Had another idea: Get that cardboard strip that you use for upholstery along the edges. It’s thin and light. Wrap the plastic edge around it and staple the edge to the other side, then tack that up to the wall.
Ah, yes! Picture hanging command strips! Easy to take off with no harm to the paint. From other suggestions, maybe rig something using upholstery cardboard strips attatched with glue gun or double sided tape around edge of plastic and command strip to wall. That might be overkill though, lol
Have you tried the self cling plastic? It’s worked well for me in the past and all I use is SW paint. https://www.homedepot.com/p/Easy-Mask-9-ft-x-400-ft-Cling-Cover-Plastic-Sheeting-79400/203490675
Use small push pins. You easily spackled then touch up. Or call a paint store ask for advice. I had to do that once. They knew. Did you ever get that stain out of the concrete? Just asking cause I’m OCD about my painters gettting paint on my porches. Front and back. I have an RV slab next to house as well.
Would that sticky tak stuff work? Like the stuff people use for posters and whatnot?
It’s such a simple fix. Take a staple gun and staple it. Tiny holes can be easily patched. Additionally, Sherwin Williams has professional double sided tape, we use all the time that will hold it.
Can you get a sheet of that 4×8 foam board? You could screw it to the outside walls of the closet do all the big sanding and when you remove the foam board sand around the doorway carefully.
If thumb tacks don’t work try a spring curtain rod in door frame or tape to foyer wall
Pop a twistable shower rod in the doorway. Drape plastic over that.
Staple the plastic up. Then patch and paint the small holes. I have done that several times.
Maybe try stapling it after the tape goes on? The holes would be so tiny that touch up paint would fill them.
We had an asbestos removal project in a room that is all stained paneling and trim. 50+ yr old house and could not risk damaging because we could never match it. We used Scotch mount double sided gel tape. We used fairly heavy plastic and it came off without any damage. I would suggest purchasing a Zipwall zipper for the plastic so you can enter your closet easily, it comes with two for a full door but i always just use one and step through.
Use PVC pipe to make a frame that fits snugly in the opening, wrap the plastic around the frame and wedge it into the opening. PVC pipe has enough flex that it will stay in place and when you are finished with it, it can be reused elsewhere.
I have used straight pins to keep plastic up, it makes tiny holes. Then, you can touchup easier.
Another vote for the real zipwall poles. You have many more projects in the future, so I’m quite sure you’ll use them again, and they really do work very well. We use them all the time at work when doing work in/around occupied spaces, including patient care.
Depending on where nails/screws are behind the drywall, heavy duty magnets work great!
Can I just say I love this comment section? Y’all are all so clever and helpful and I love every one of you. I was having a rotten day and reading all of these smart, clever and kind suggestions to help Kristie just really warmed my heart. I needed that show of kindness today. 🙂
Women are awesome.
Have you heard about what the contractors use – the plastic sheeting is held up by floor-to-ceiling tension rods! The TRIMACO E-Z Up
Kit at Home Depot
SKU# 1002706493…
Staple it up! Easy to take care of the tiny holes afterward.
Velcro dots from the dollar tree would work too. Just a lil paint touch up after, hang it from the ceiling.
Push pins!
Staples.
Get a tension rod and staple /tape a pocket ? (Term?) to slide plastic “curtain “ over. It should keep it up.
How about using a spring tension rod to hold the plastic dropcloth in place. Get it flush to the top of the door opening and hang like a curtain.
A spring-loaded curtain rod could help; drape the plastic over that. There may be a little gap at the top, but it will be better than all that frustration.
If you’re going to wrap the jamb anyhow do it now and stick the plastic to the primed wood. Tape will stick better I’d think.
Use a few thumb tacks to keep the plastic up.
Use straight pins push pins and stick them on top of the door frame. No one will ever notice pin holes.