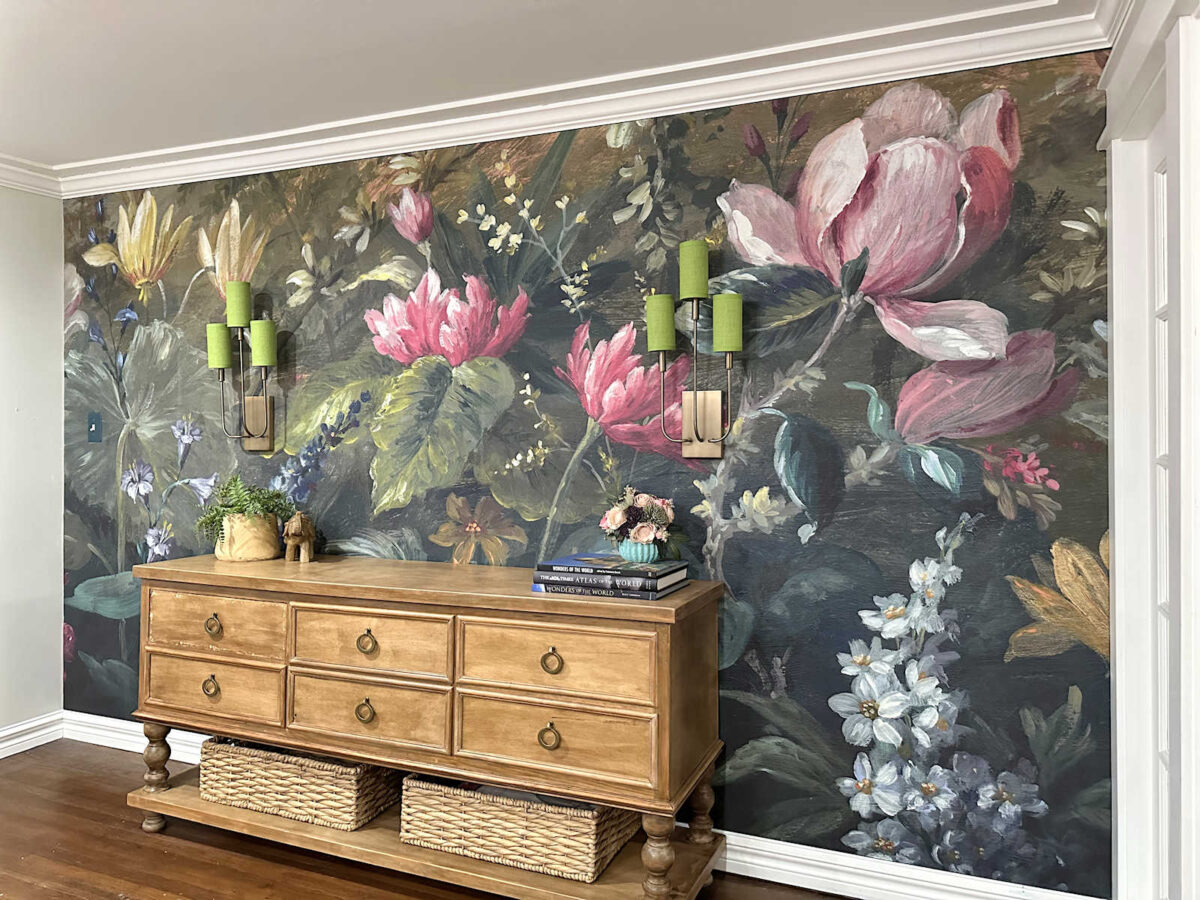
Repairing Holes In Wallpaper (I’m Amazed At How Good This Looks!!)
I’ve done a lot of art projects and home repair projects in my life, but I don’t know that I’ve ever been so proud of myself as I am right now. Yesterday, I repaired the holes in the floral wallpaper mural on the entryway wall, and they turned out amazing!! Going into this, I didn’t really have high hopes. I was sure that the repairs, no matter how good they looked, and no matter who did them, would stick out like a sore thumb. But after repairing these holes in the wallpaper, I really don’t think that anyone would ever be able to detect that these areas had holes in them.
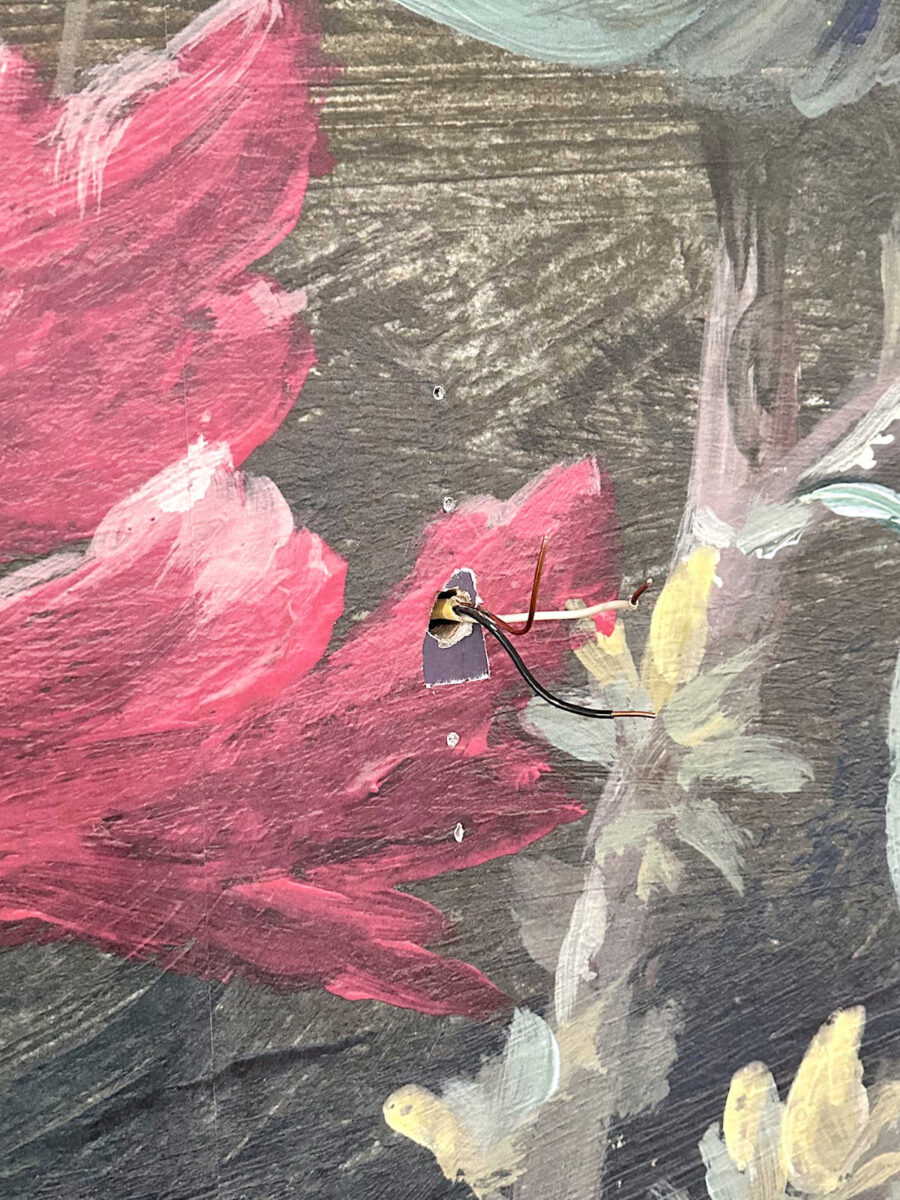
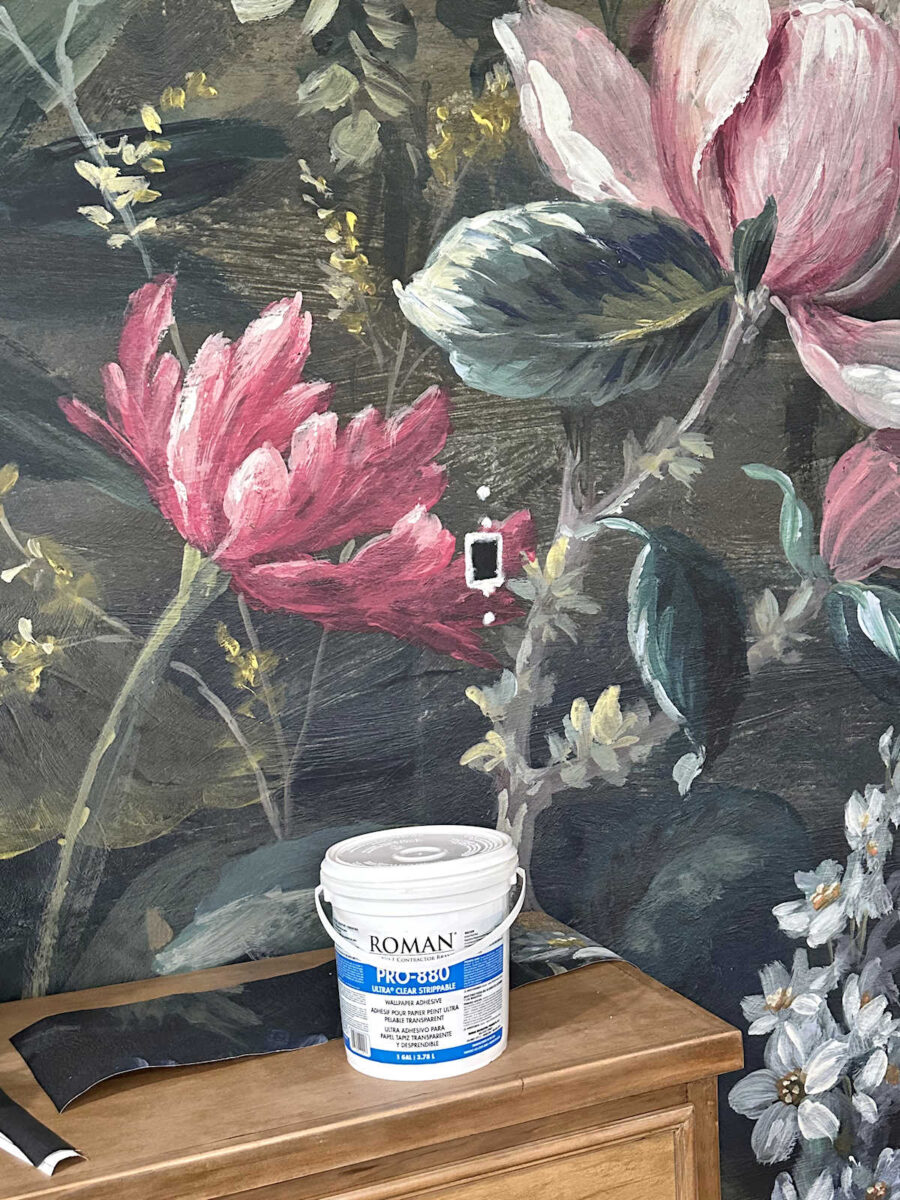
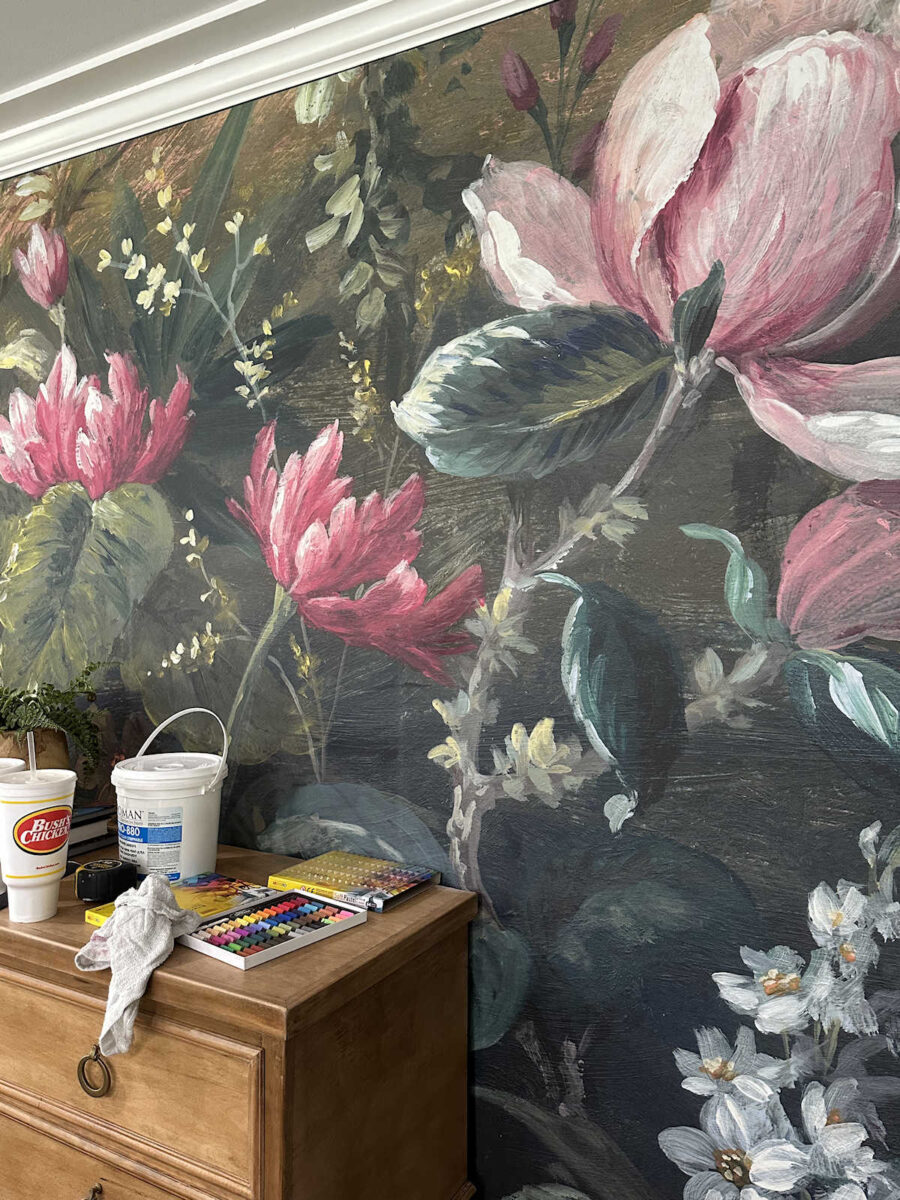
So let me back up a bit and remind you that the reason my wallpaper had holes in them in the first place is because when I installed this floral wall mural from Anthropologie, I had originally intended to keep my wall sconces. So during installation, I cut holes in the wallpaper so that the wires for the sconces could come through.
Then I decided that I wanted to use table lamps instead of sconces, but that left me with these holes in the wallpaper. On each side, I had the big hole for the wires, and then smaller holes where the mounting plate for the sconce was screwed into the wall. Here’s what the one on the right looked like…
And here’s what the one on the left looked like…
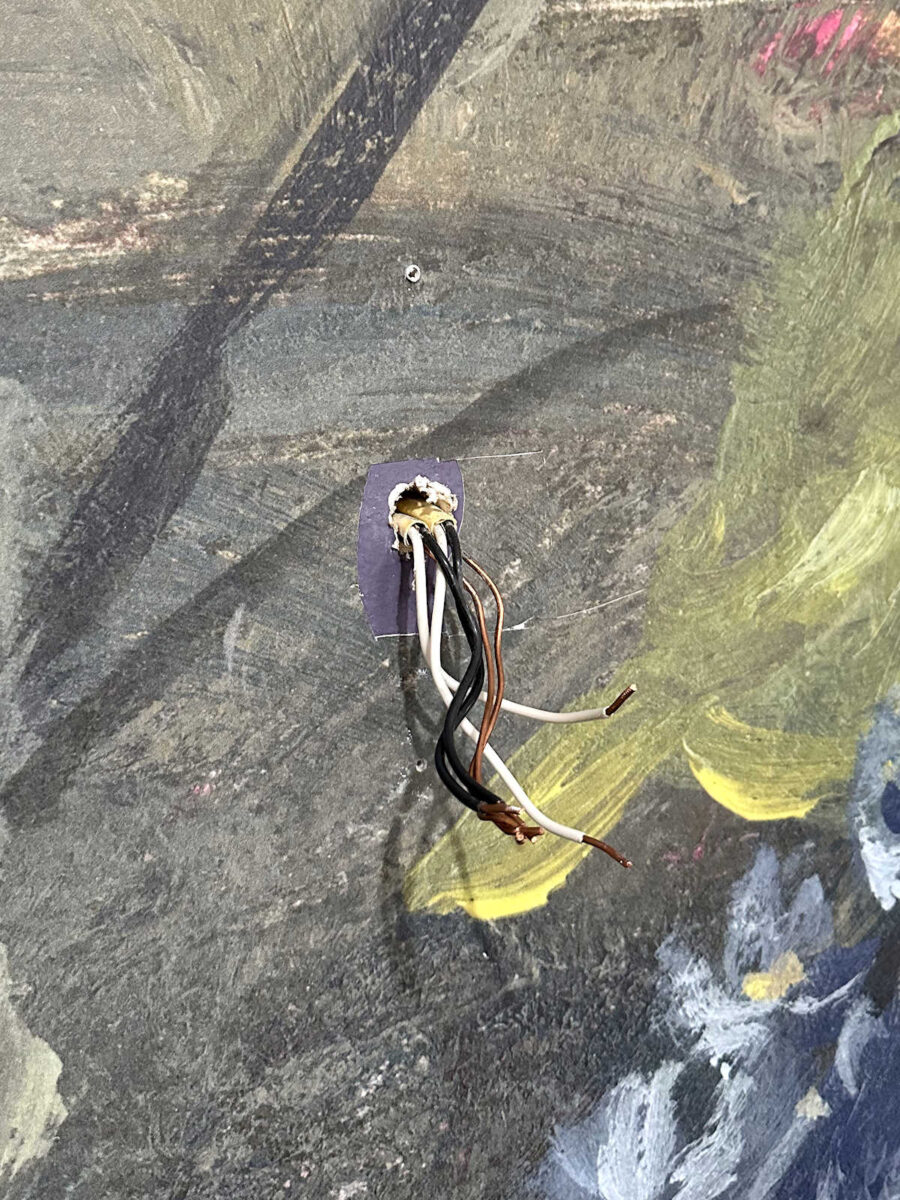
The first thing I had to do was get the wires tucked into the wall. Don’t yell at me, but I haven’t yet disconnected the wires from the switch, but I did tape the switch so that it couldn’t be accidentally switched on. I will disconnect the wires from the switch tomorrow. But I’m the only person in the house who has ever flipped the switch on, and I won’t be flipping the switch on, especially now that the switch is taped so that I can’t. But once the wires are removed from the switch, these wires will be completely dead, so there no harm in having them buried in the wall.
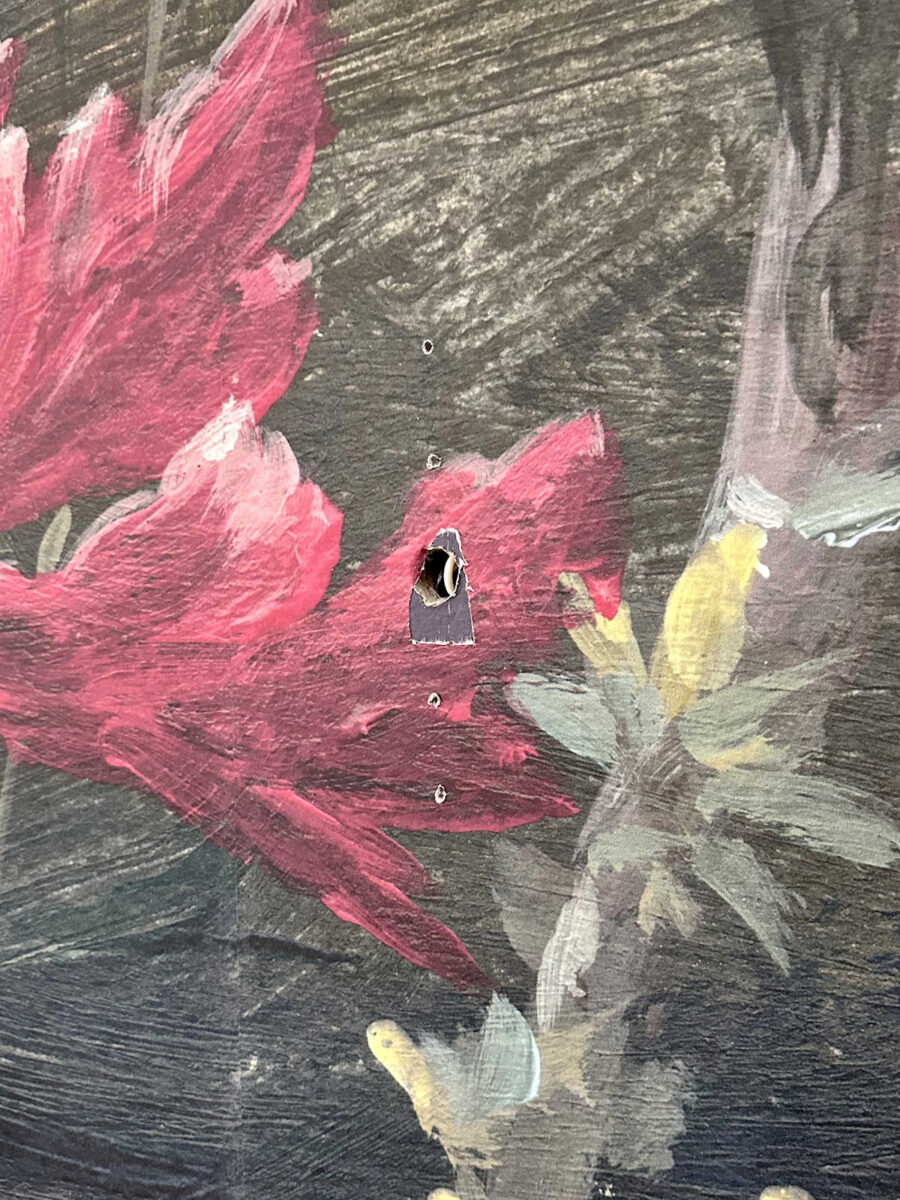
Next, I had to cover over the big hole with wallpaper. Since this is a mural that doesn’t have a repeating pattern, I just used a random piece of the extra paper. I held it over the hole, and then used a utility knife with a new blade to cut a smaller square out of both the patch and the mural underneath at the same time so that they would be the exact same size.
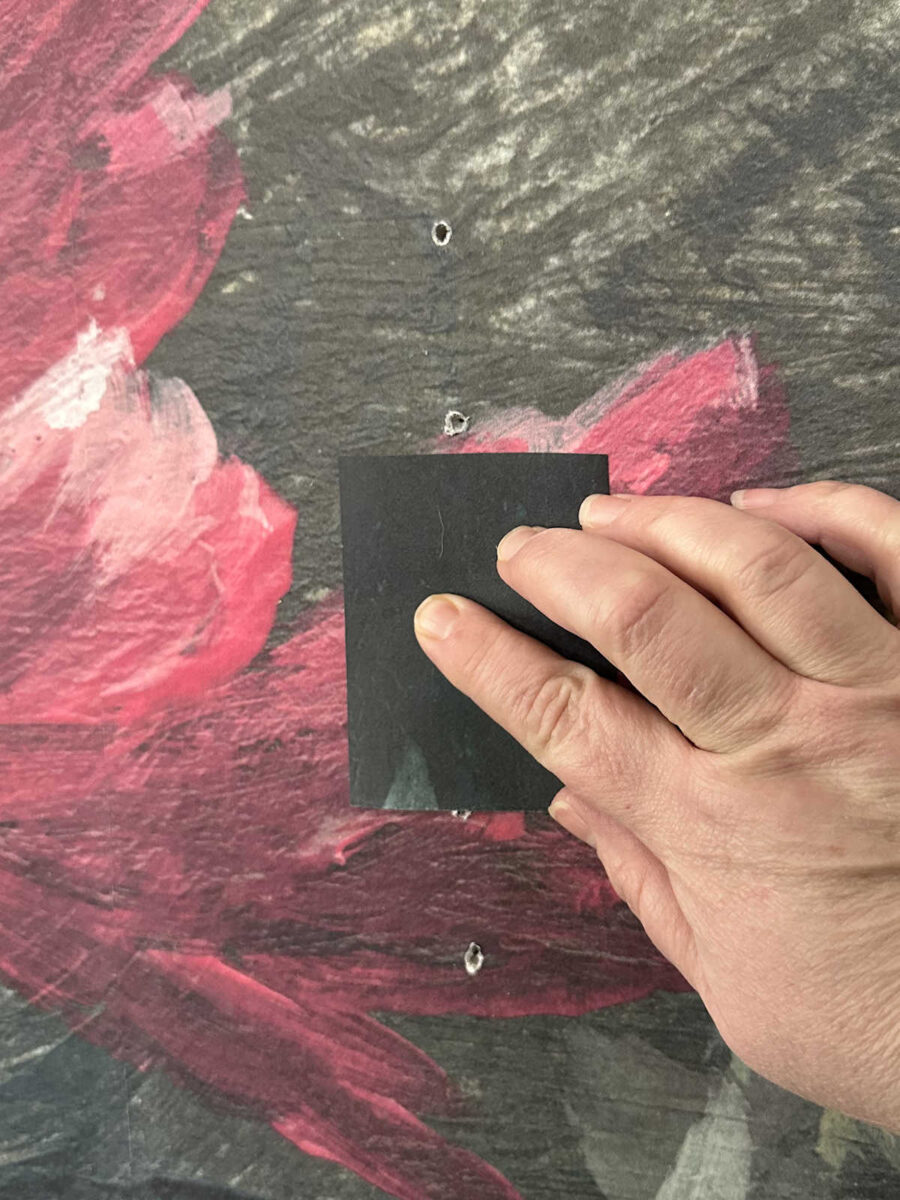
With both pieces cut, I removed the excess to make room for the same sized patch.
Then I used wallpaper paste to attach the patch to the wall.
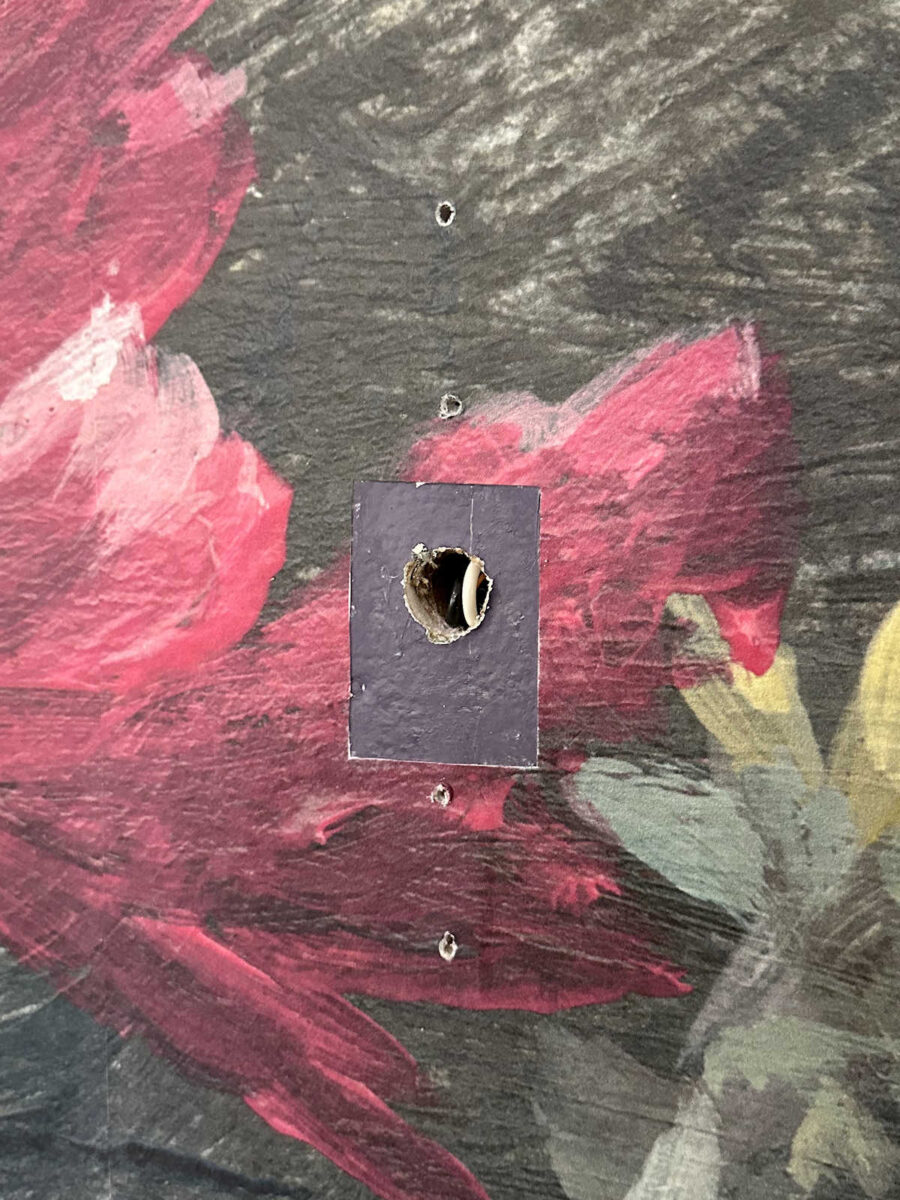
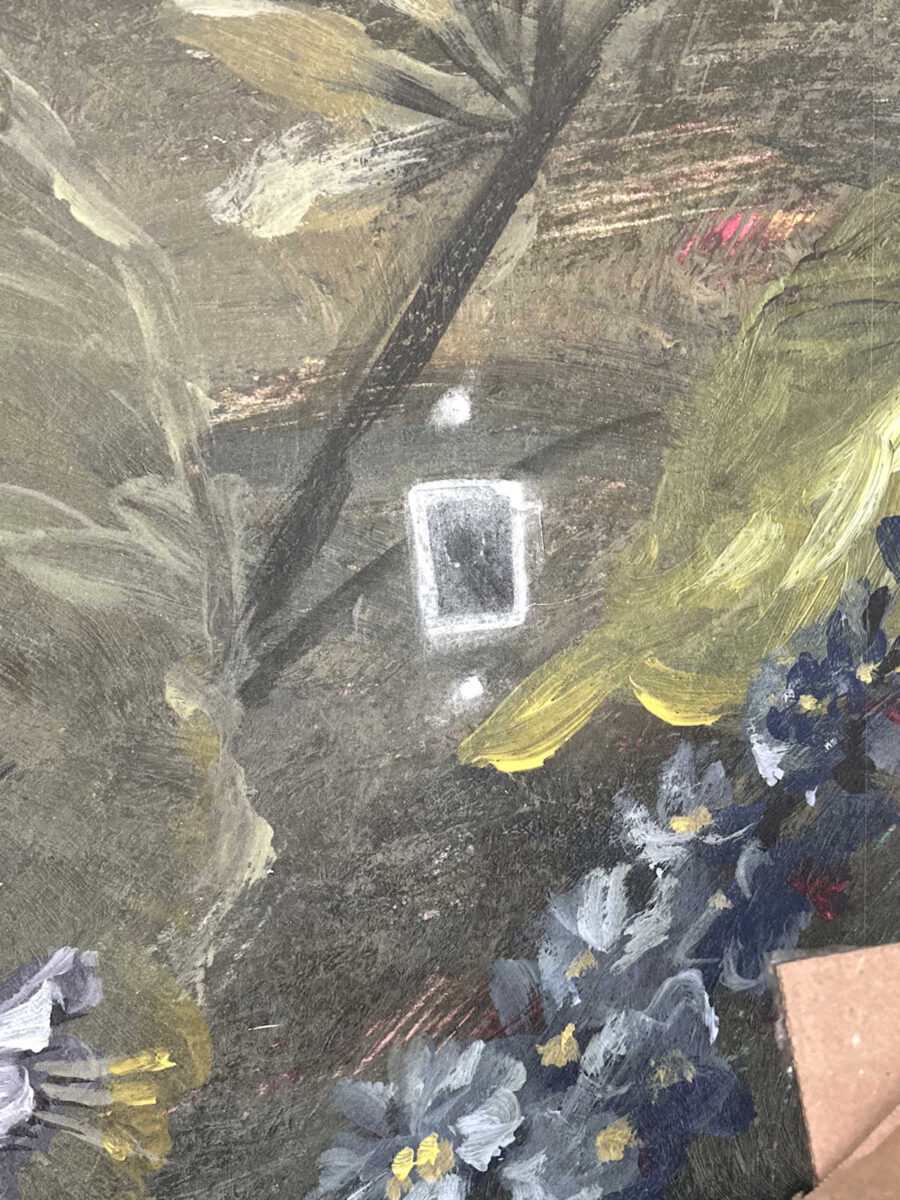
Next, I used lightweight spackle to fill in the screw holes and to fill in the tiny hairline space between the mural and the patch.

And I repeated that whole process on the other side.
I’m not going to lie. I was nervous. And at this point, I was very doubtful that this whole process would work.
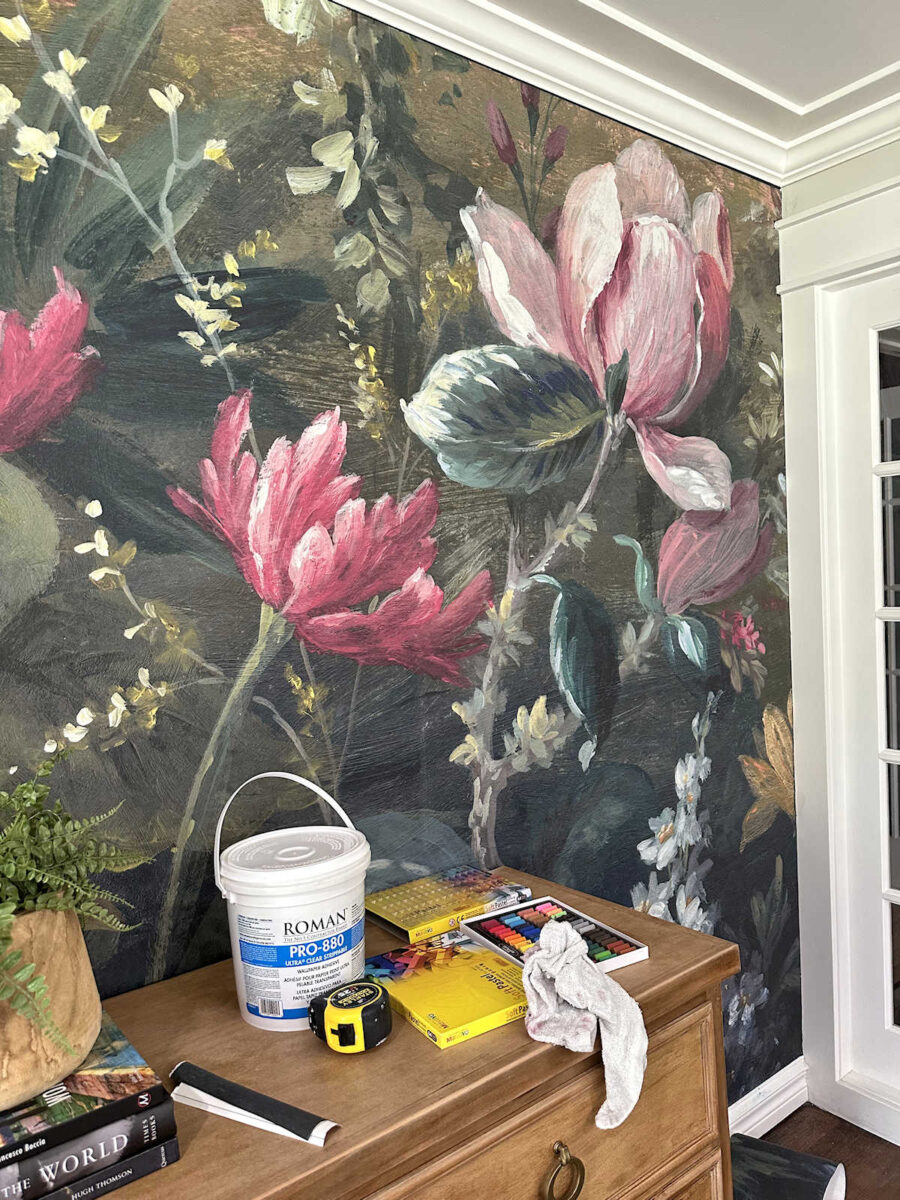
After the spackle was completely dry, I sanded it smooth using 220-grit sandpaper.
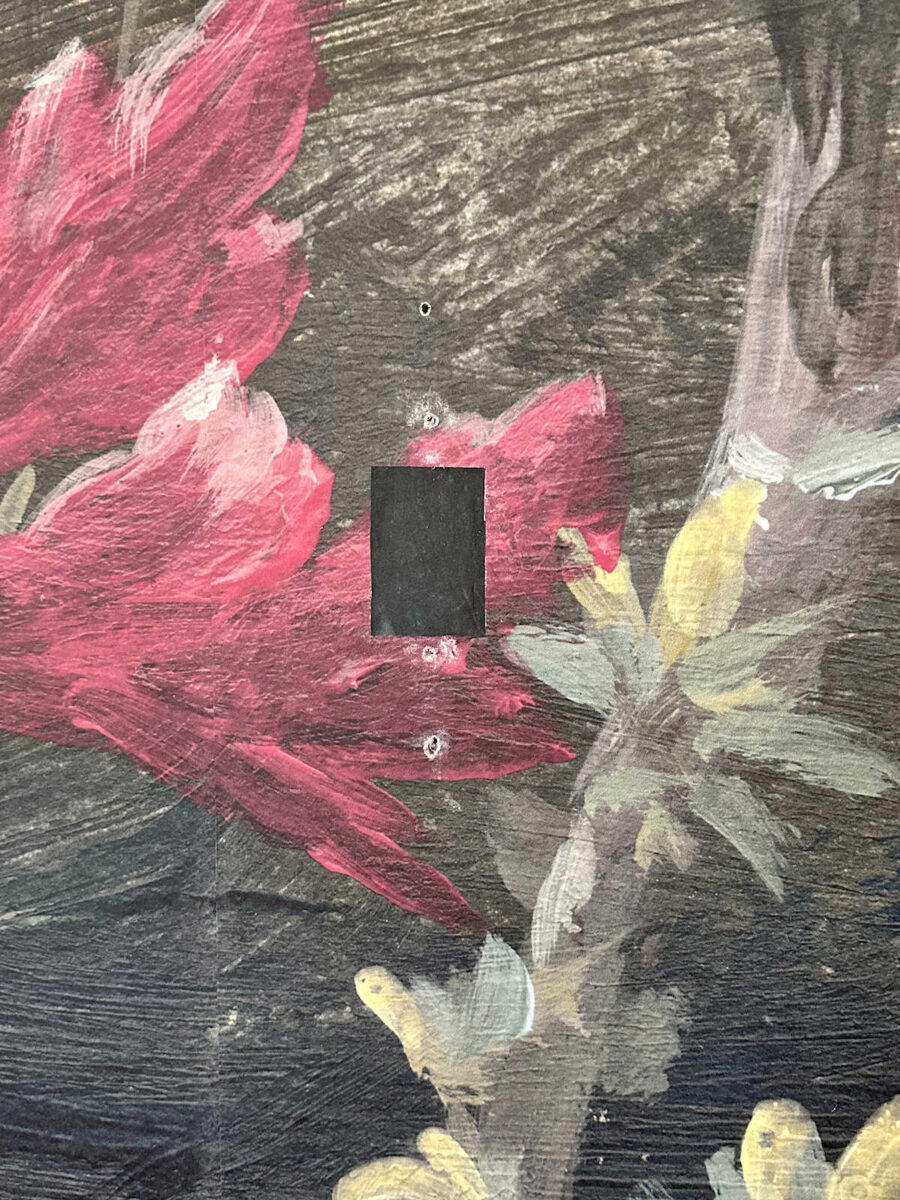
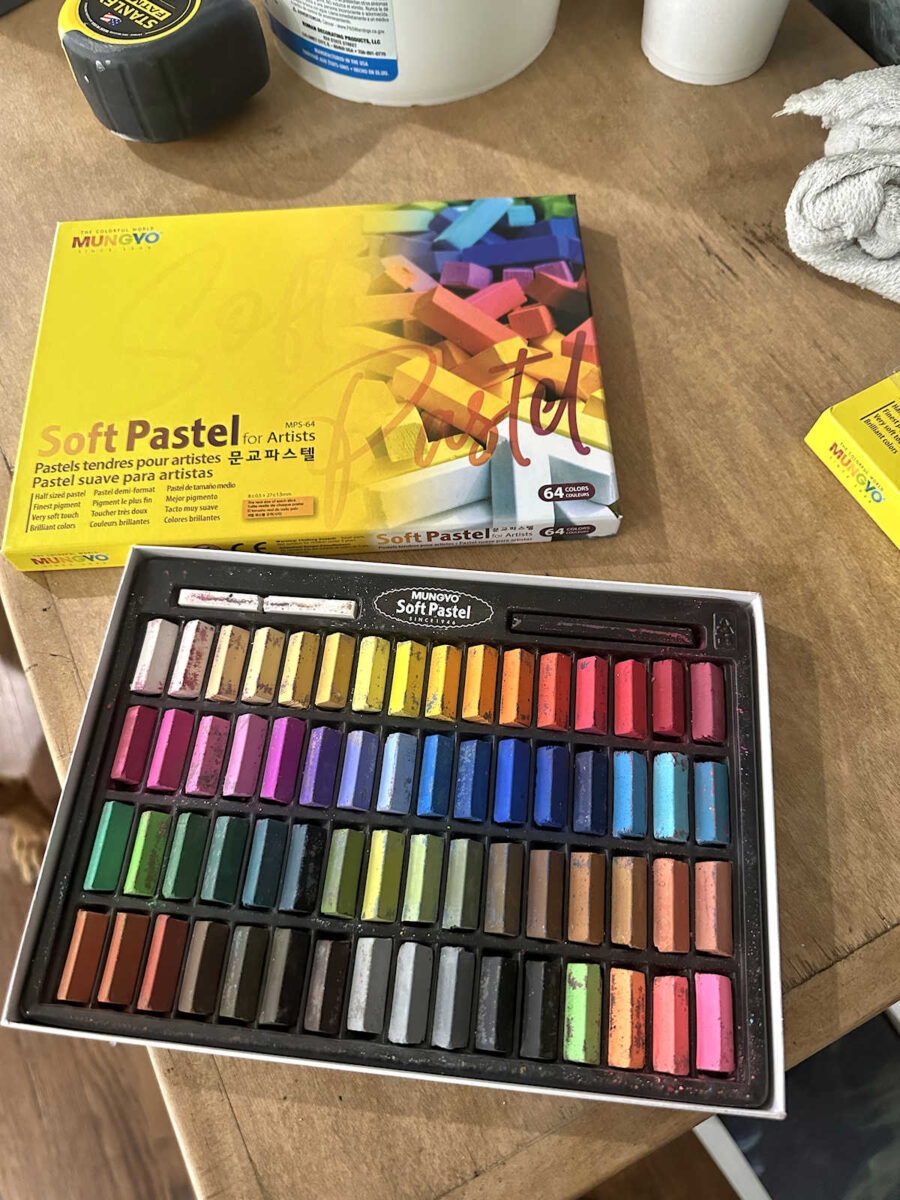
At that point, I started rummaging through all of my paint to find just the right colors to paint these patches to match the mural. I really struggled with this because I just couldn’t imagine how I was going to achieve a match using acrylic paints. And then it dawned on me that I would come closer to achieving a match with some sort of art pencils. And then it clicked. Pastels! That was probably what I needed! They’re easy to use. They’re blendable. And they have a very matte finish, which is precisely what I needed.
So I texted my mom, my on-call artist, to see what she thought. She thought it was a great idea! So I went to Amazon, selected this 64-color set, and an Amazon drone dropped them in my back yard about two hours later.
During our text conversation, my mom asked if I wanted her to come and do this for me. I answered, “I’d like to try it. If I mess up, I’ll need you to fix it. 🤣” So that kind of gave me some confidence to just go for it since I knew I had my on-call artist as a backup in the event that I royally screwed this thing up. After all, I don’t think I’ve ever used pastels before (but being an artist, my mom has), so I thought the likelihood of me messing this up and having to call her over to clean up my mess was pretty high.
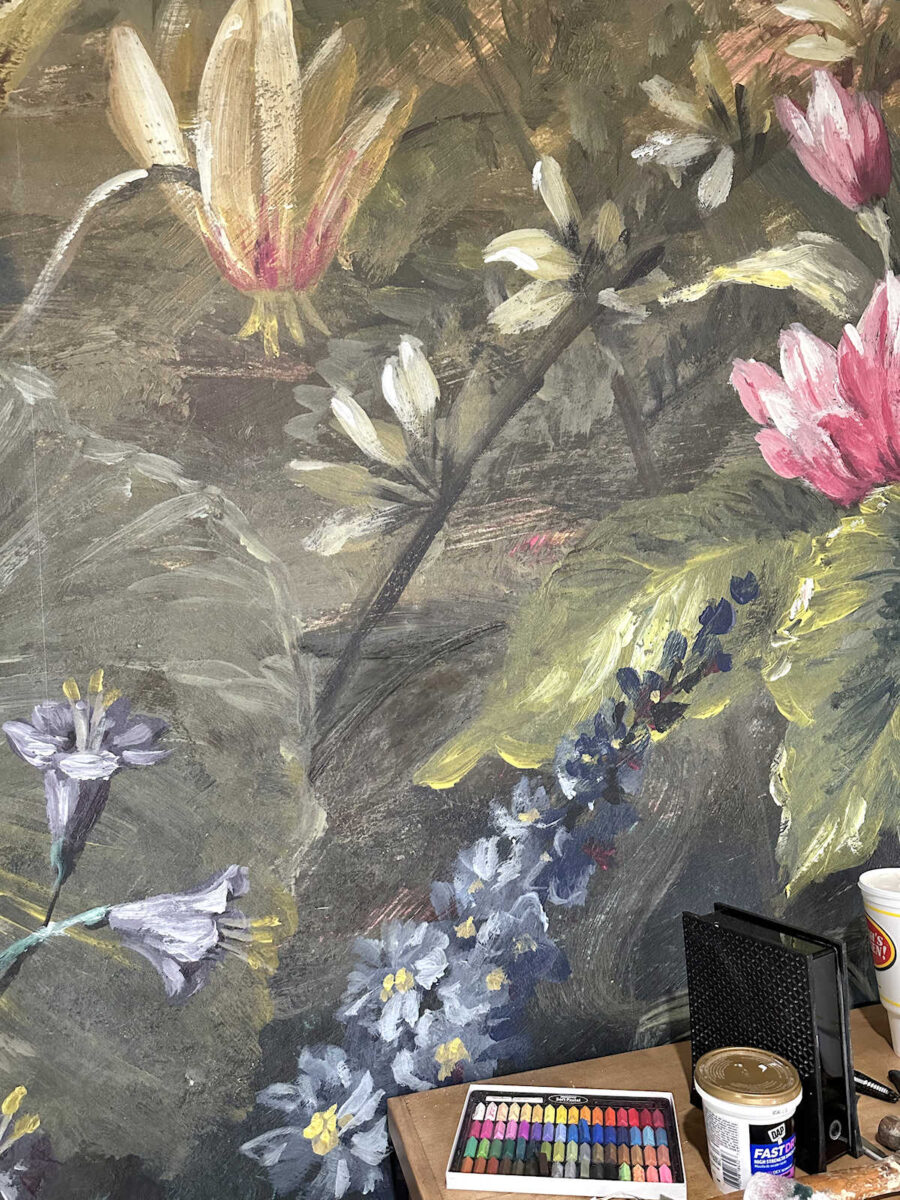
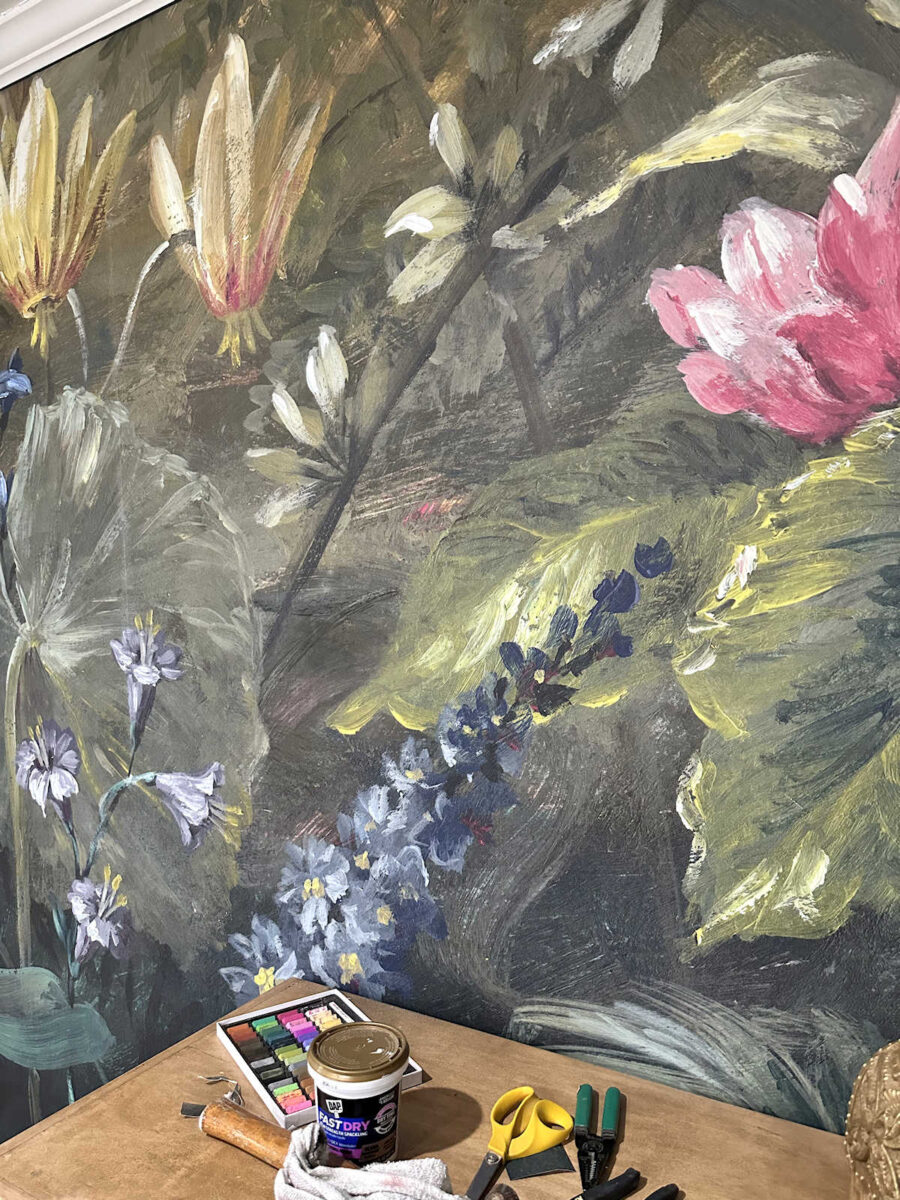
But y’all! Check this out! I did it! This is what it looked like the first time I thought I was finished with this side.
I mean, that looks pretty darn good, if I do say so myself.
It turns out that pastels are very easy to use, very FUN to use, and very forgiving.
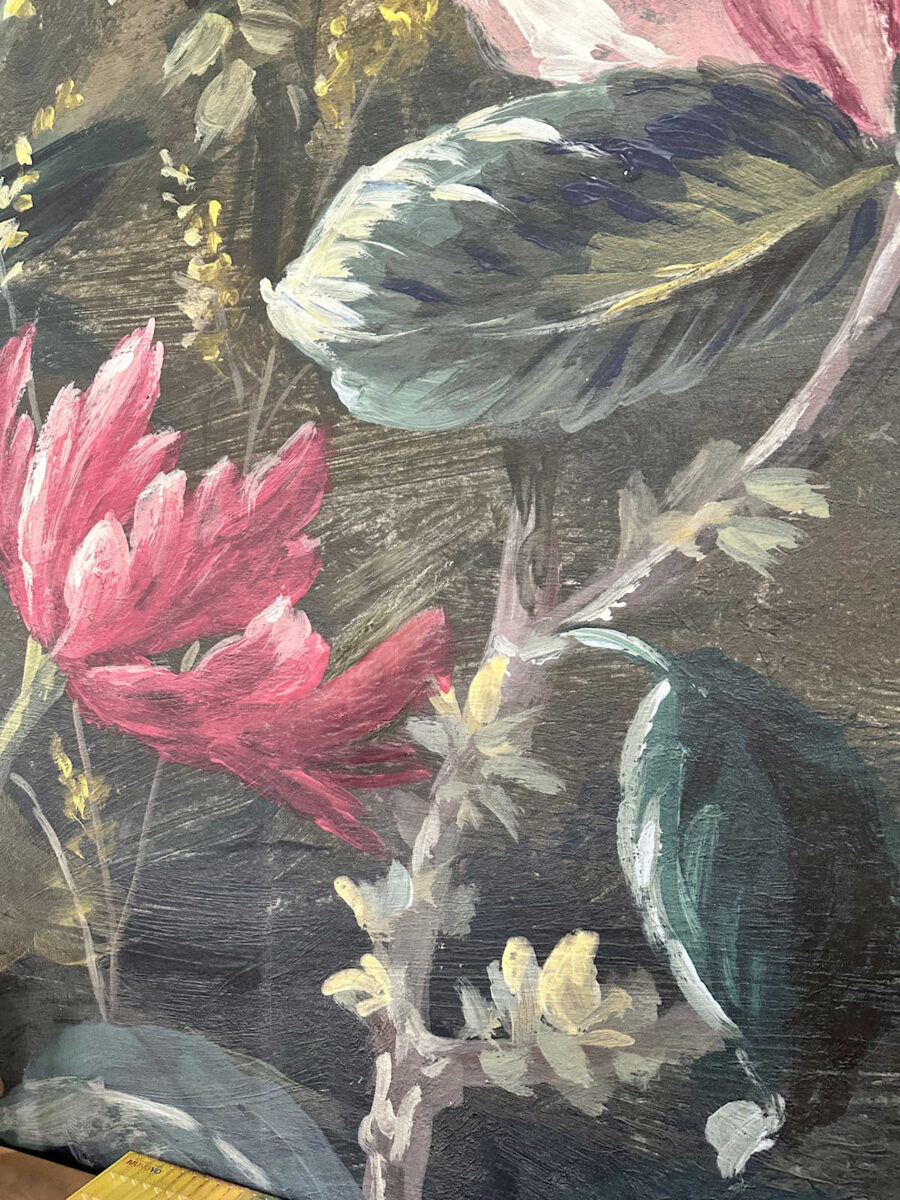
You can add layer after layer of color. You can blend the colors together just using your finger. You can get different textures by using different areas of the pastel. You can get sharper lines by using the end, or more broad and textured looks by using the wide side. They are very fun to play around with. It took some mixing and blending and patience to get the color just right, but I was pretty proud of my work! This is the area that I was working on, and when I got it to this point, I originally thought I was finished.
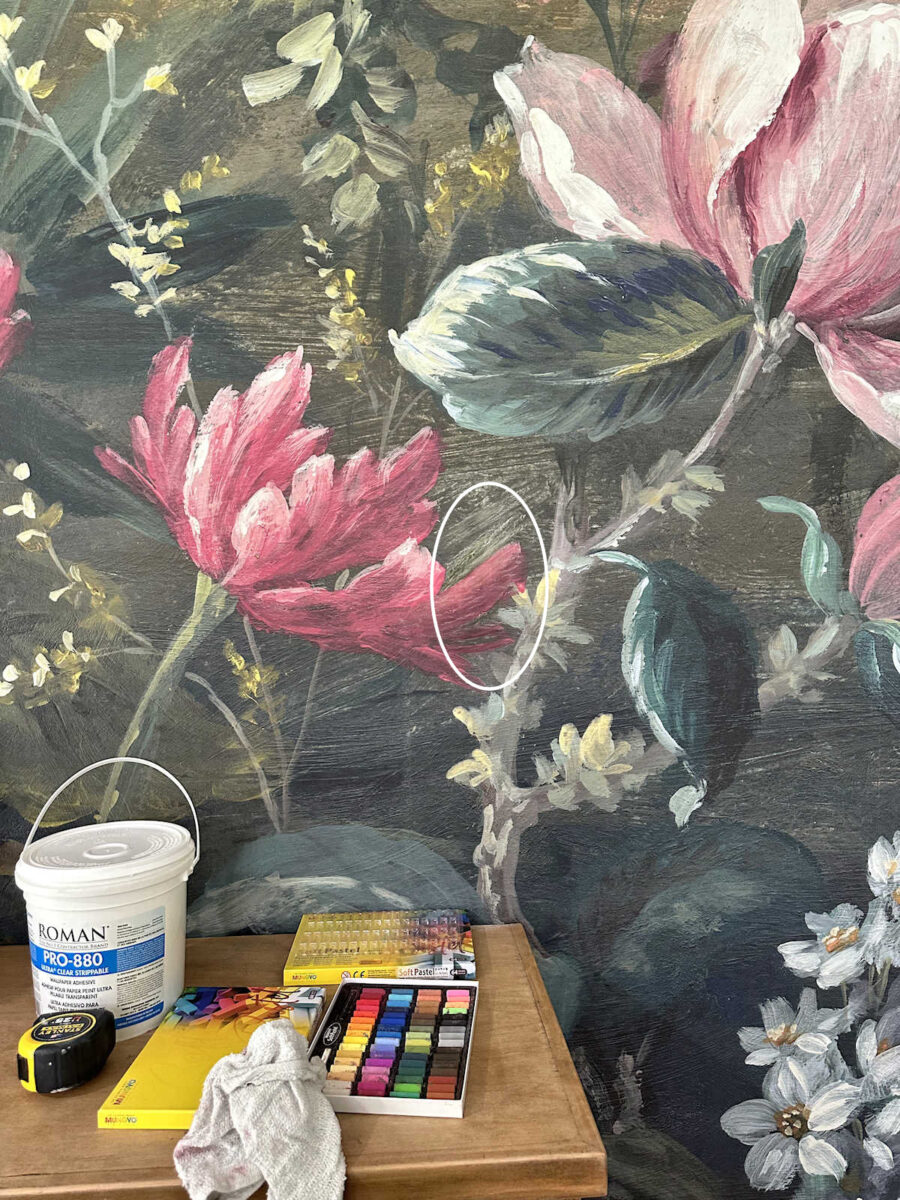
But I decided to go back and add a little bit of highlights to that petal, and then darken that area just above the petal. So this is the final version. Does it look exactly like the wallpaper? Nope. But I don’t think anyone would ever detect that there’s a patch there.
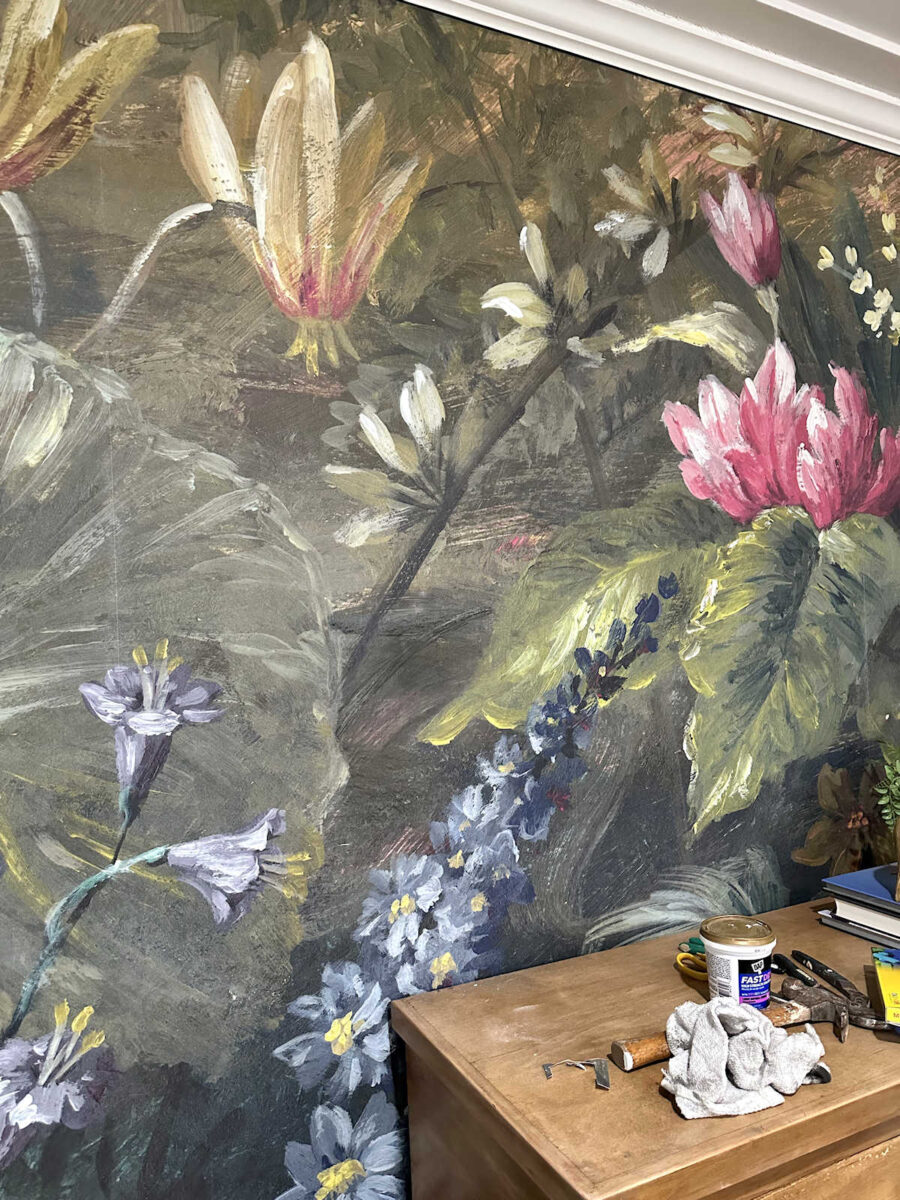
Here’s a side-by-side comparison of the before and after.
And the best thing was that I got the approval of my on-call artist. I’m proud to say that she was amazed at my work, and that made me very proud.
For some reason, I thought the other side would be easier, but it ended up being way more challenging than matching the flower. Here’s what my first “finished” version looked like.
I wasn’t pleased with it, so I went back and added some light streaks to bright then area. But I still wasn’t pleased.
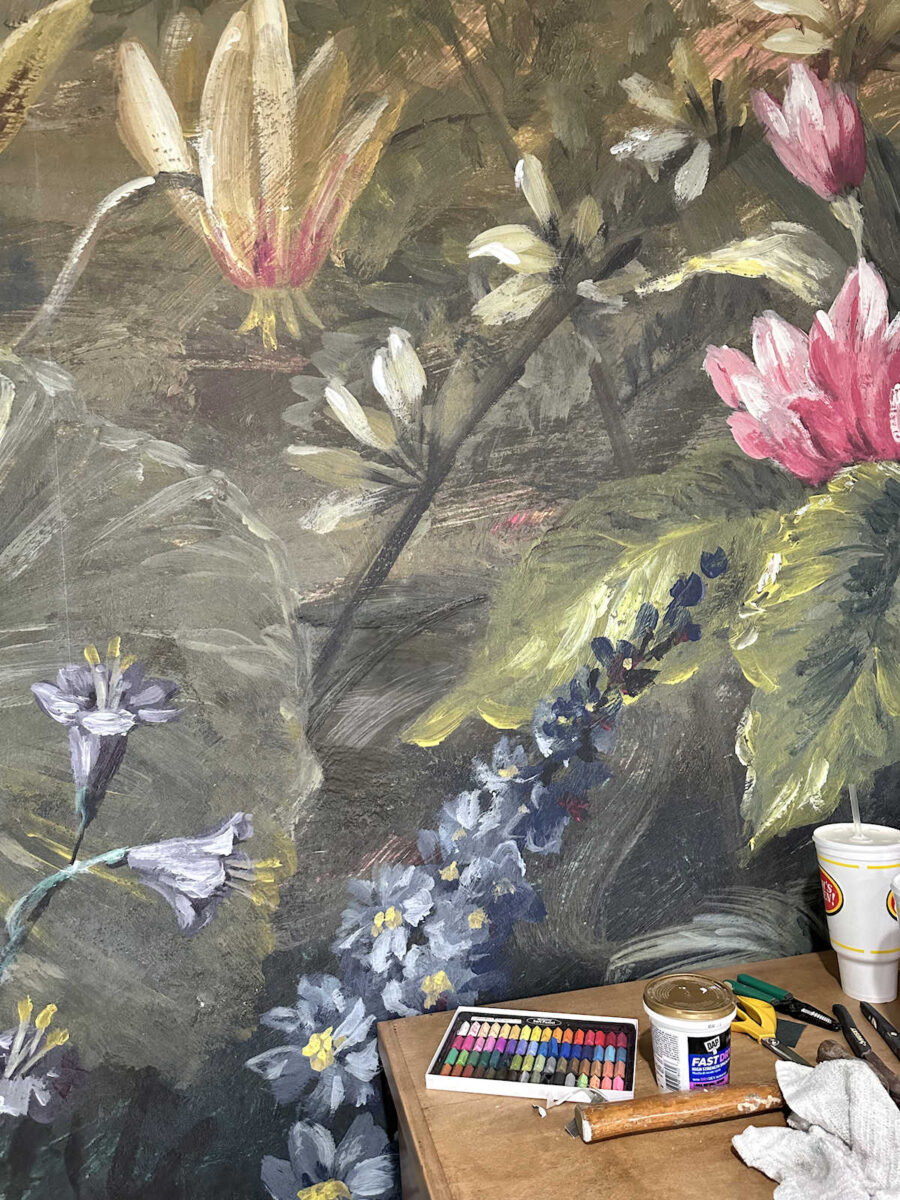
But then I noticed that a lot of the streaky areas in the rest of the wallpaper had color in them. They weren’t just white streaks, but they had orange and coral. So I added some orange and pink to make a coral color, and then added black over it. It was better, but still not quite right.
But with a little more black and gray added, and then a little more blending, I was finally okay with it.

I wasn’t quite as proud of this side as I was the side with the flower, but it was fine. Again, I don’t think that any casual observer would ever detect that there was a patch there.
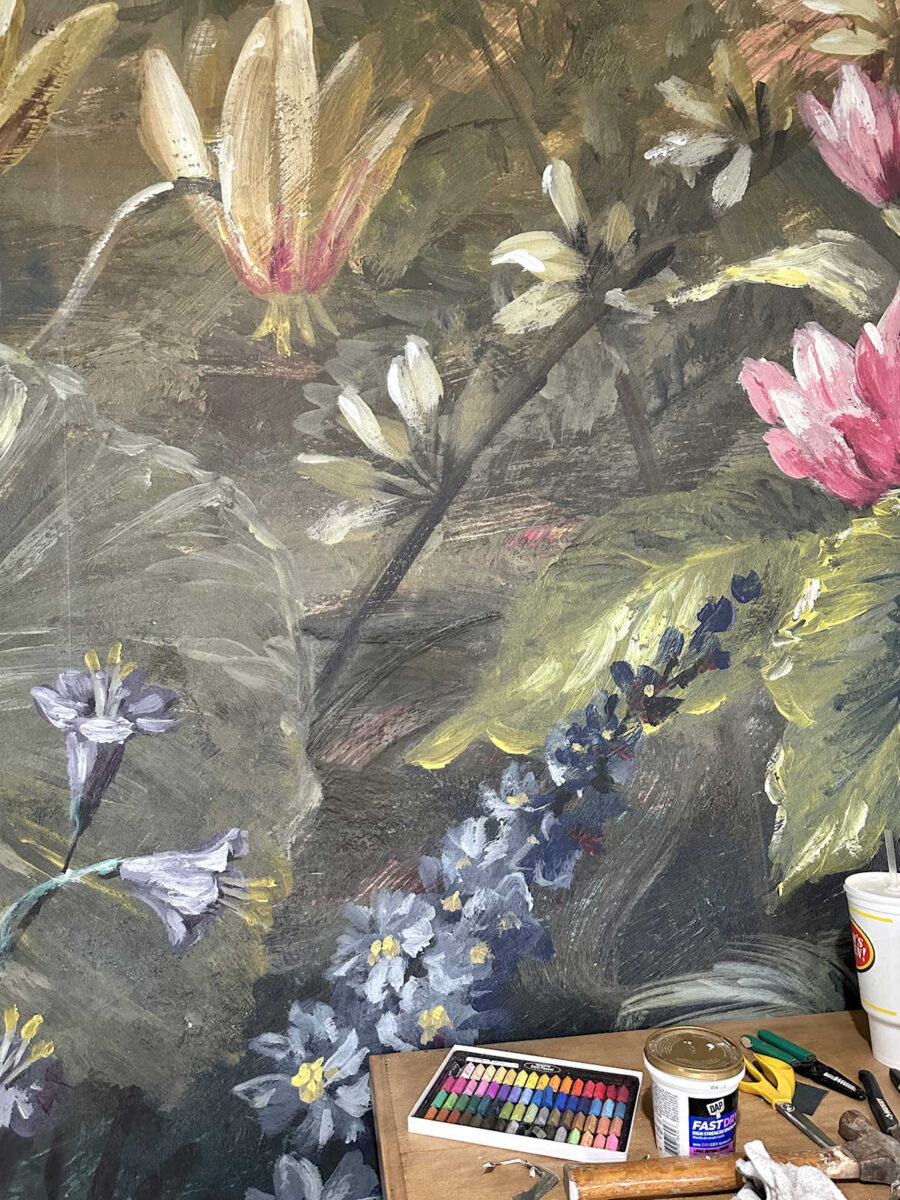
The fact that this wallpaper is so busy really helps to disguise the areas that are patched and covered in pastels.
Here’s a side-by-side comparison of the before and after on this side.
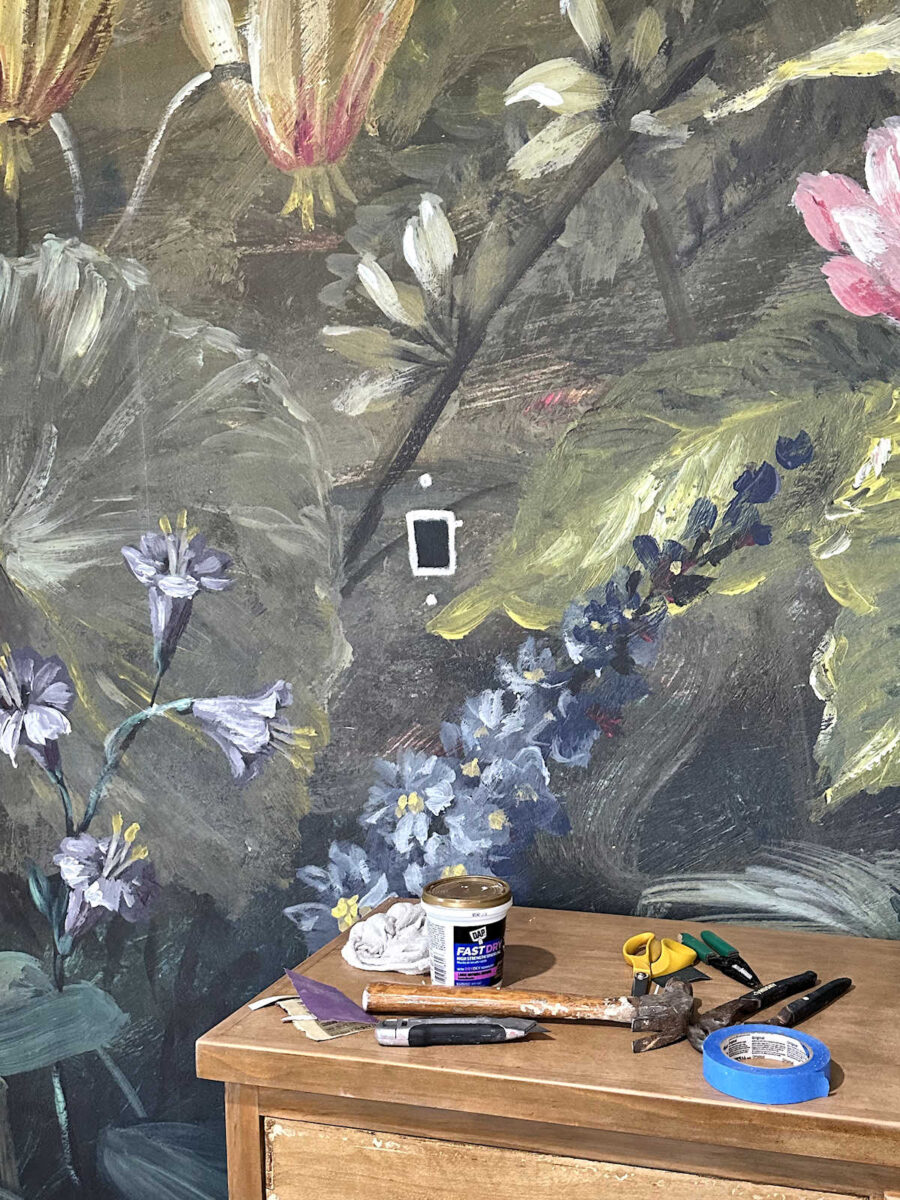
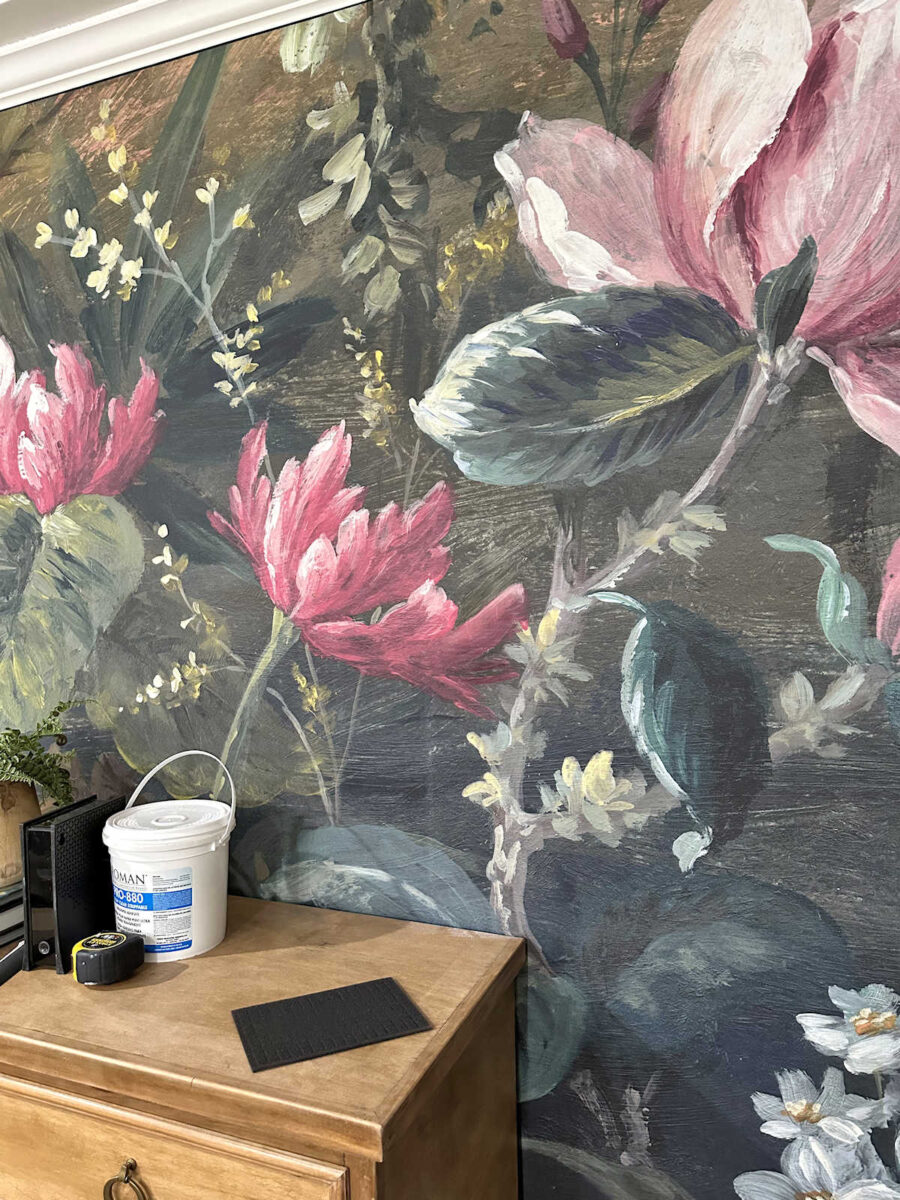
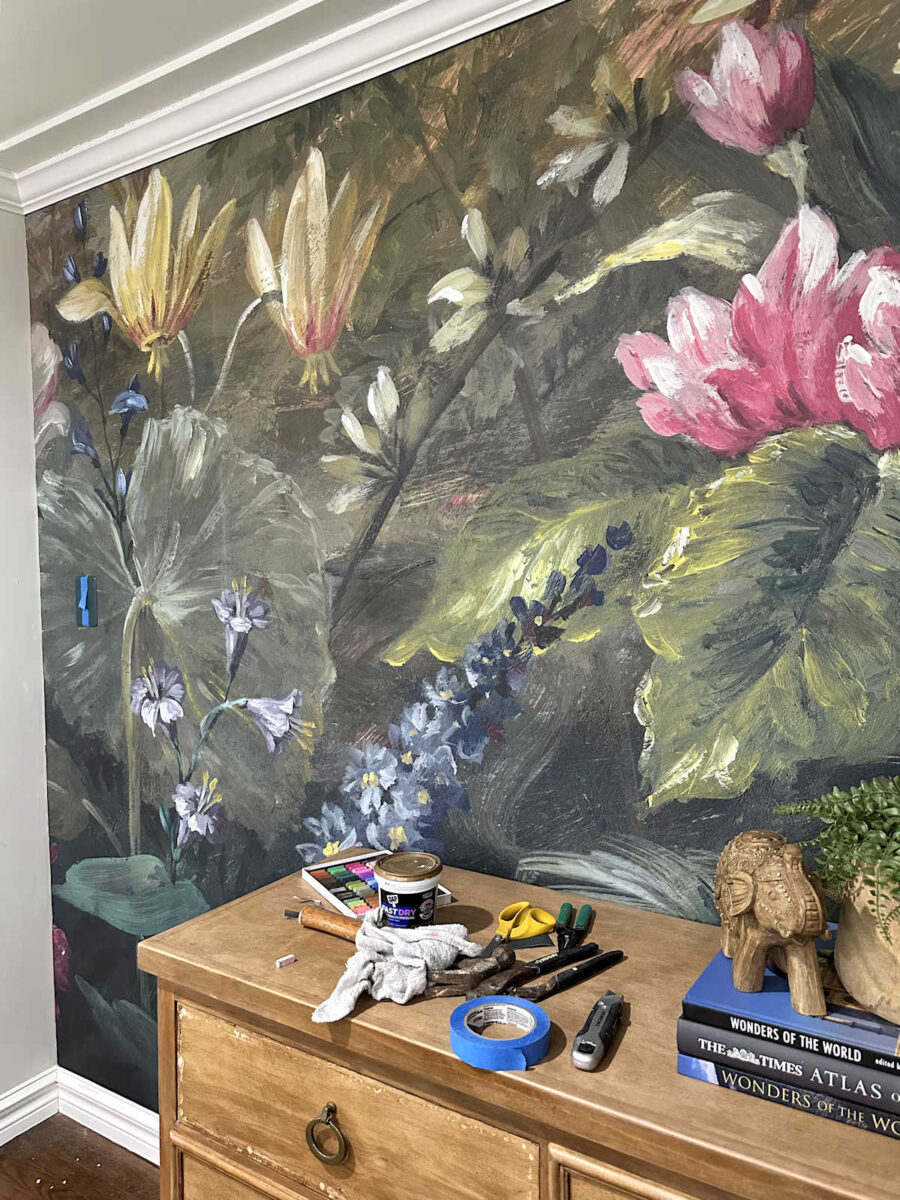
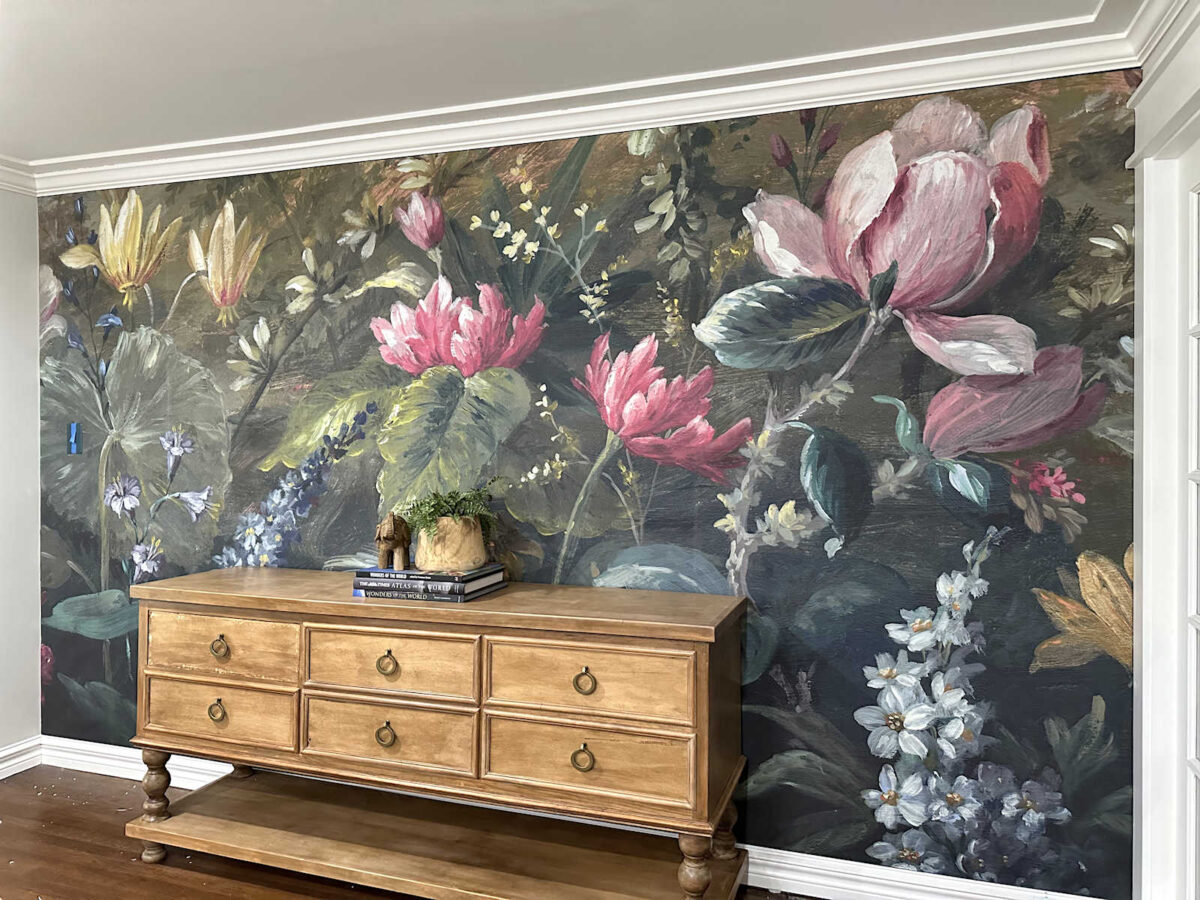
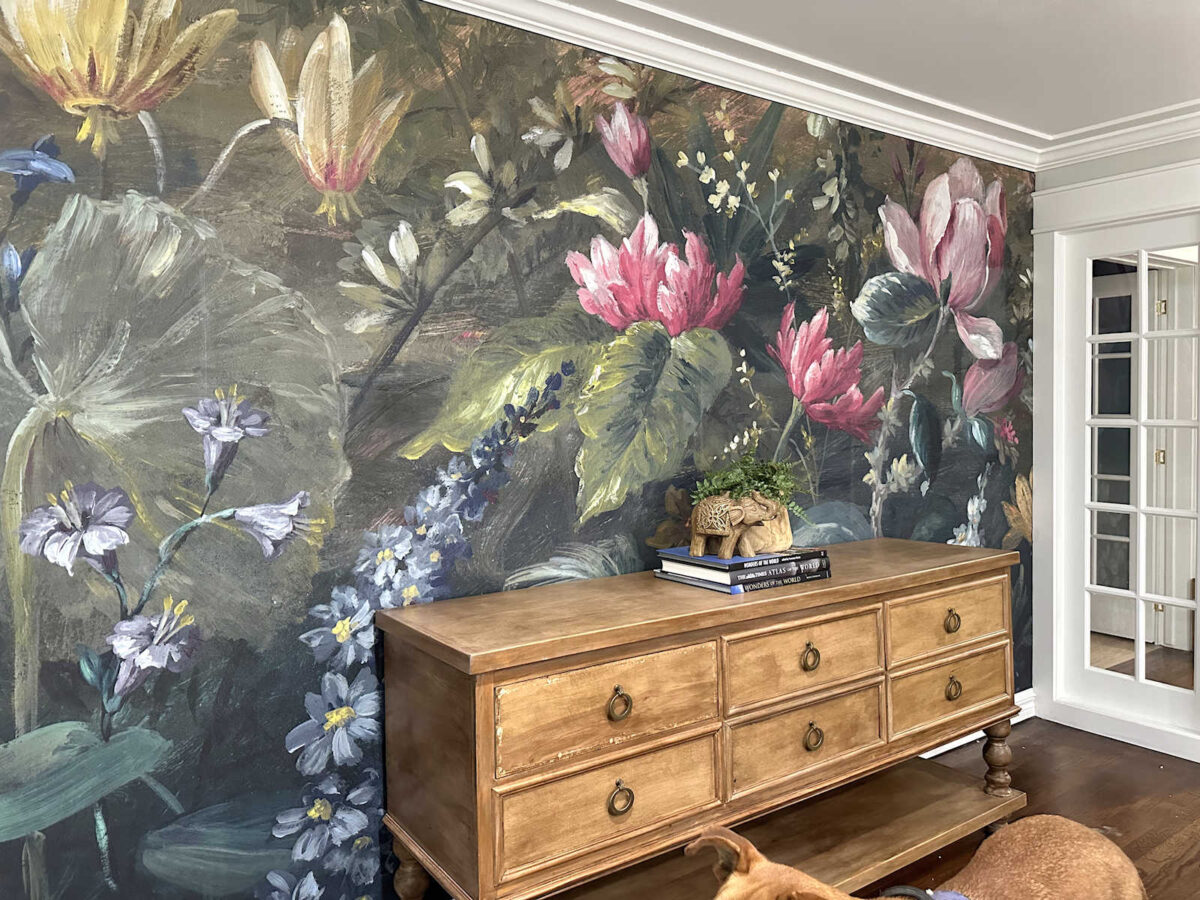
And here’s a look at the whole mural with the patches finished. Can you tell where they are? Even standing in the room, I can’t see where they are.
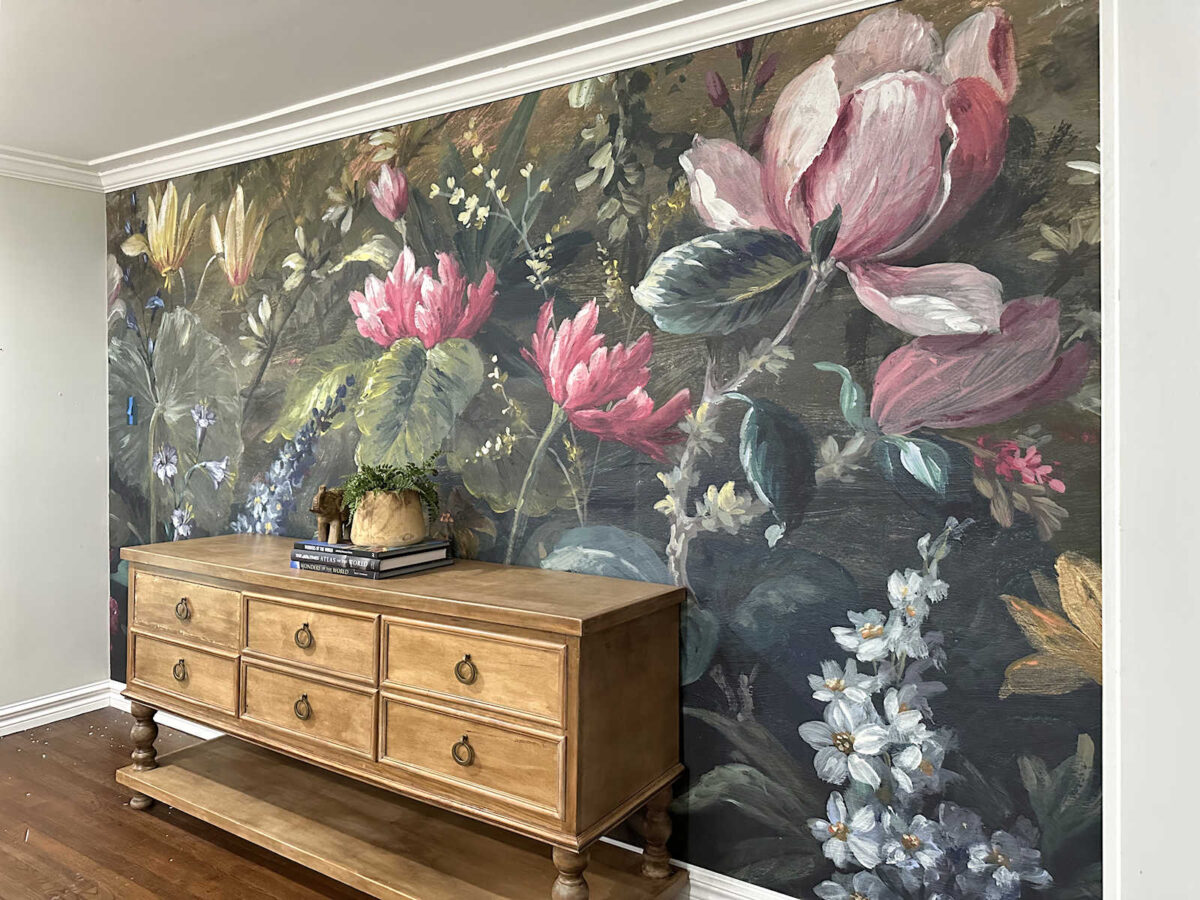
Not only did the colors blend in beautifully, but the sheen is a perfect match as well.
If this were in a high traffic area where a person might accidentally brush a sleeve against it while walking past the mural, I’d probably use a matte artist spray over those areas. But since they’re on a wall that no one will ever stand near or walk close to, I’m just going to leave them alone.
I’m so proud of my work, y’all! And I may have found a new favorite art medium. Pastels are so fun to work with, and now I want to try making some artwork with them! I want to spend a bit of time in Instagram and find some pastel artists to inspire me.

More About Our Entryway

see all entryway
diy projects
read all entrwyay
blog posts

Addicted 2 Decorating is where I share my DIY and decorating journey as I remodel and decorate the 1948 fixer upper that my husband, Matt, and I bought in 2013. Matt has M.S. and is unable to do physical work, so I do the majority of the work on the house by myself. You can learn more about me here.

I couldn’t tell where you patched it. AWESOME!
Me either, until she pointed it out!
Wow! That really does look incredible! I knew you’d find a way to do this, because that’s who you are. But I’m still impressed by how well it blends in.
Me, looking, enlarging the pictures, squinting, looking again, giving up.
Same.
Great job!
Looks amazing!
Wow! Awesome job!!!!
Your secret is safe with me.
If it helps, when you posted the ‘after’ pictures, I was squinting and critiquing the wrong spot!! 😂 So I’d say you actually nailed it! Well done!
It looks amazing! I would have used acrylic paints and never would have thought of using pastels. Perfect for blending and achieving the perfect colors.
WOW! Color me *IMPRESSED*!!
Holly Cow…I cannot see it at all! I tried going back and forth first…no clue where it was…even when you put them side by side, I just see the overall mural with lots of texture/colors and I cannot see it at all…Great idea/Great job! Congratulations, this is so beautiful.
Wow! I have no words really! Im impressed!
This is extraordinary! I had to go through all the photos 5/6 times to see if I could pick out the repairs. Even knowing the landmarks, I had a difficult time finding them. When I took oil painting lessons, there was a woman in class who worked in pastels and made some fabulous paintings. I wish I could have bought one or two after she went to a nursing home.
Anyhow, I digress….congratulations on this beautiful mural.
High 5, girl! You are amazing!
Awesome work.
No way!! I thought I could see your patch in the flower but soon realized I was looking a bit too high. And every different iteration on the leaf side I never could find the patch. Amazing job.
Okay, this is genius! I kept having to scroll back to “before” pictures to figure out what area you were working on. It blends in that well! And for the record YOU are a very talented artist too Kristi. You definitely inherited your Mom’s talent. Great work! Blessings from NC!
I never doubted you 🙂 It looks great!
wonderful!
congratulations on a terrific “fix”
WOW! Fantastic repair job!
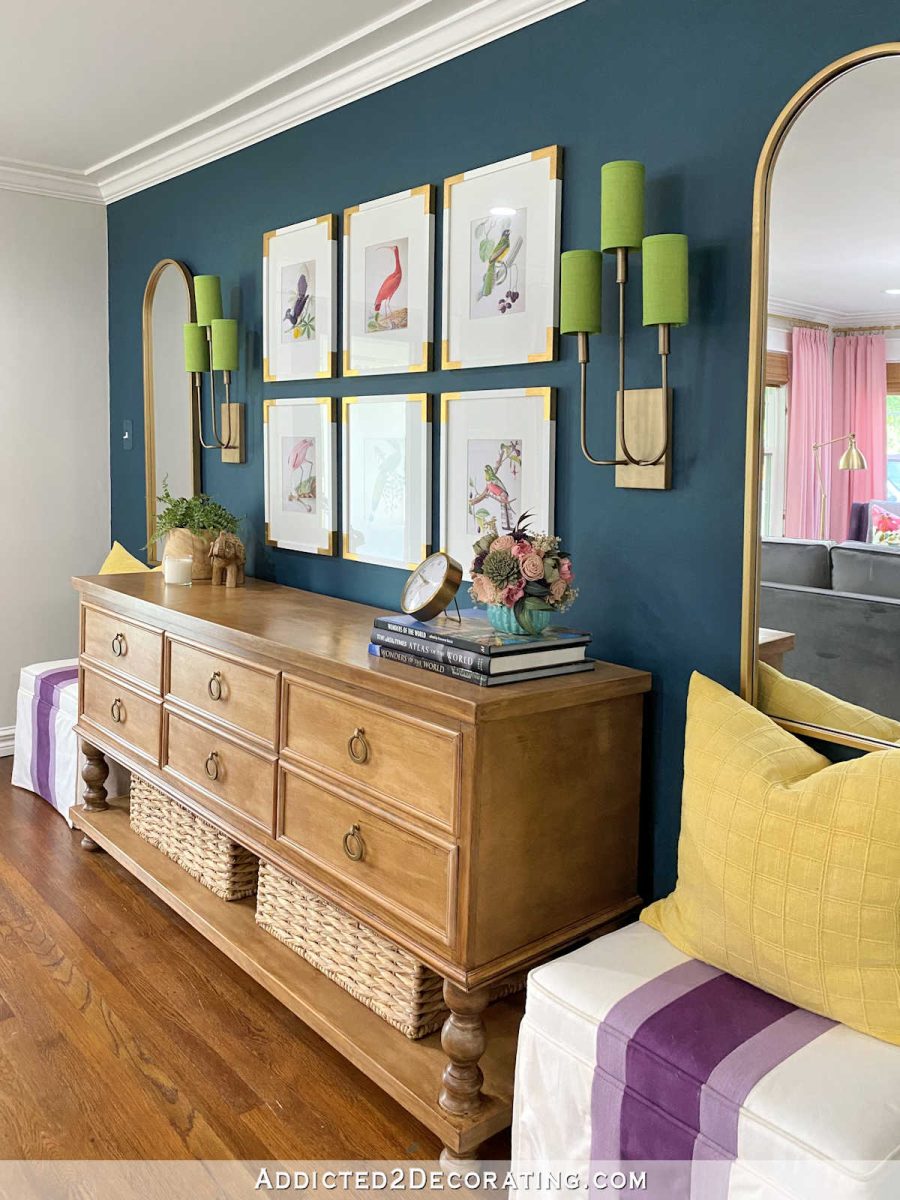
I wanted to add my two thoughts about the buffet/console since I didn’t get a chance to weigh in the other day. I love it just the way console the way that it is. You made a beautiful piece of furniture with a finish that does not compete with the mural. My eye notices the detail and the weight of the console, but in its current form, the console serves as a beautiful accessory to the “star” of the room, the mural. Most of the time, people paint furniture that they consider “less than” for whatever reason, including castoff or found furniture. I like the wood finish which seems more “natural,” especially with the floral (from nature) mural. While I admit that you have a much better eye for color than I do, it reads as a warm neutral to my eye (not a competing “orange” color). I would love to see you leave the console as it currently exists.
I agree
Awesome job, Kristi! You always inspire me to find a way to solve a problem. I find myself picking up some really “lost cause” looking pieces from thrift shops and yard sales because you have inspired me to jump in and just try it. Thank you for sharing your talent and encouragement.
Bravo! You are truly a gem, Kristi 🙂
I couldn’t see the repair even when you did the side-by-side comparison!
Great work. I often find ways to change colors that don’t work in our house (on ceramics I use nail polish diluted with acetone; for prints I have printed out the right color on transparency film and put that between the glass and print). Your technique could also be used to change colors on prints or wallpaper so they better match the room.
Your mural looks beautiful and your fixes on the holes is top notch. I also didn’t get to respond on your update on painting the credenza. It would be a terrible shame to paint it a color. The gold-ish color of the credenza is stunning. It brings out that color that is on the mural. It’s okay to love color but sometimes it can be too much. Keep it natural!
I agree, the credenza, does make the wallpaper pop and it matches some of the flowers in the mural.
Your wall looks perfect. You are just so talented.
Bravo!!! If anyone could make it work, is you! Thank you for never being afraid to show us all repairs, thoughts and actions, even when it doesn’t work out. However, this did and I was so happy to see the end results. Your were brave and moved forward…one of the best things about you.
Kudos to you, Kristi! I thought your first attempt was good, but the refinements are just A. MAZ. ING. Isn’t it great when a plan comes together? What a satisfying repair!
What did you decide regarding the console?
I’m still contemplating the options. 😊
You. Are. Amazing.
Kristi, l am a long time professional portrait artist. My favorite medium for this is pastels. I use the finest sandpaper for them. You can find artist sandpaper for this but honestly regular fine or extra fine wall paper works. You did an awesome job. A word of warning about pastels. The dust is poisonous to your lungs. Every student l have had wants to blow the dust away. Instead stand the paper up and tap it on the back. I do that over a garbage can. You will really love working with pastels. You can see some of my work on my Facebook page under photos/ albums. There are 2 albums.
Sandy M Keller
Excellent job, before I got to the first side by side photo, I’d scrolled back to the patch to see where it was in the wallpaper because I couldn’t find it.
Kristi, this is wonderful! As did others, I kept trying to see where you patched the wall. I can’t. Even the side by sides, I can’t. Great job.
I wish I had your eye for colour.
As for the credenza. When looking at the final picture, I like the colour it is now. I cannot imagine a big splotch of colour taking up all that space from that gorgeous mural…probably because you would not see that in nature. Whereas with wood…wood is part of nature and because our minds know this, the credenza is not a distraction at all, unlike what I think the colour would be.
Wish you lived a lot closer. My favourite colours are blue and green and I’m having a difficult time creating a soothing flow.
God bless.
Kristi, this is wonderful! As did others, I kept trying to see where you patched the wall. I can’t. Even the side by sides, I can’t. Great job.
I wish I had your eye for colour.
As for the credenza. When looking at the final picture, I like the
Kristi, what repairs…I don’t see any.😊
As for the credenza. When looking at the final picture, I like the colour it is now. I cannot imagine a big splotch of colour taking up all that space from that gorgeous mural…probably because you would not see that in nature. Whereas with wood…wood is part of nature and because our minds know this, the credenza is not a distraction at all, unlike what I think the colour would be.
Wish you lived a lot closer. My favourite colours are blue and green and I’m having a difficult time creating a soothing flow.
You should have pointed out the area we were looking at for all the versions of your fixes, because i couldn’t find them and I had no idea what I was looking at! 😆
Just goes to show that from the first versions of your corrections, it was already pretty darn good. Love it. Now don’t forget about these patches and decide to wash that wall in a few years 😉
Genius idea and such a beautiful job! I am, once again, amazed at your creativity.
Well if you aren’t a great fixer!!! Wonderful job!!
Masterful!
This looks amazing – I literally could not tell where the fixes were made!
I would recommend covering with artist spray or matte workable fixative. I know a sleeve wouldn’t brush against it, but your lamp shades might, then they would be hard to clean up!
LOOKS FANTASTIC!
Wow…. just wow!
Wow you are an artist. Love the mural and now I have put pastals in my memory bank if anything goes wrong with my entryway wallpaper. Absolutely beautiful
You are AMAZING!