DIY Marbleized Back-Painted Glass End Table
This weekend, I had so much fun getting crafty and experimenting yet again with back-painted glass. And this time, my experiment ended with something that I can and will actually use — marbleized back-painted glass end tables for my living room!
It started when I was just playing around with my living room, trying different furniture arrangements, and decided to bring back the metal and glass end tables that I got a year ago from Overstock. Remember those? Out of the box, they looked like this (after being assembled, that is):
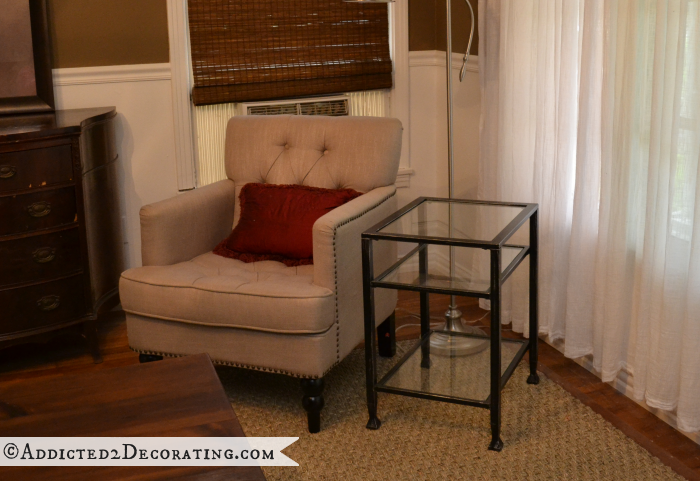
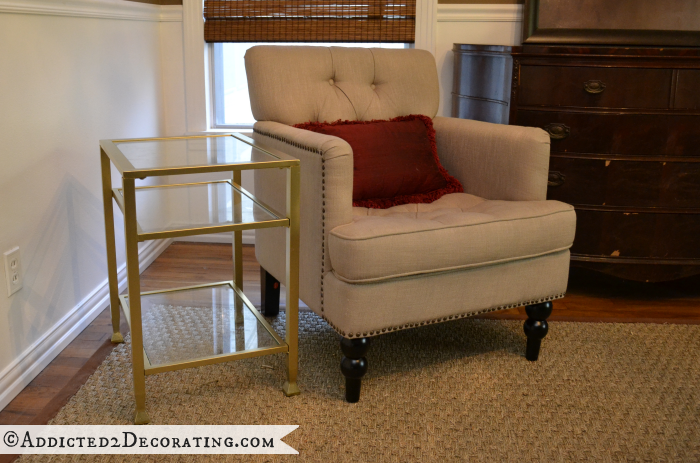
And then I decided that I didn’t like the black, so I painted the one table that was assembled with gold spray paint.
And then I decided not to use them at all. So for a year now, I’ve had one gold end table stashed in the sunroom, along with another end table that was still in the box that had not yet been assembled.
So I decided to get those out and try them again in the living room. I headed to Michael’s to get more Design Master gold spray paint, but they were out. I had to get antique gold instead. That turned out to be a happy accident because the antique gold has more of a weightier look to it, which I prefer.
But after painting them, I still wasn’t satisfied with the tables. It finally dawned on me that I didn’t like the glass. So I brainstormed a few options. I could use wood, but that would take the look in the opposite direction I wanted. I could have some marble remnants cut for it, but they would be too thick since the glass pieces are only 3/16″ thick and fit down inside the metal frame.
Then I remembered…back-painted glass! I decided not to use it for my kitchen backsplash since I could never get it to look just right, but this would be a perfect opportunity to give it another try!
And try, I did. Again, and again, and again, and again. I painted, scraped off, and painted again about fourteen times before I finally got the hang of it. I still have three more to scrape off and do over for the second end table. But this process is so fun to me that I don’t even mind! 😀
So I’ll start at the very beginning and take you through all of the main iterations that I went through on this process. These first ones didn’t work out for me, but you might see something that sparks a creative thought in your mind, and it could be the beginning of an amazing project for you.
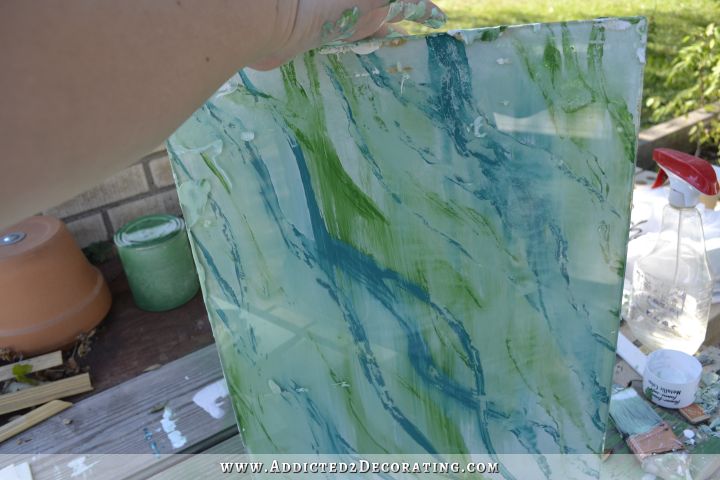
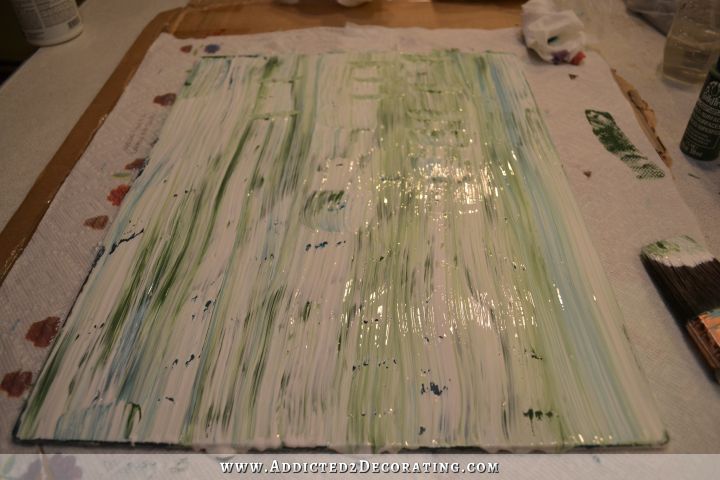
Originally, I started out thinking I wanted to use teal and green. I used Folk Art Multi-Purpose craft paint (from Michael’s — our Hobby Lobby doesn’t carry this). It’s made for use on various surfaces, including glass, and takes 21 days to air cure. Starting with the teal, I squirted out some squiggly likes onto the back of the glass.
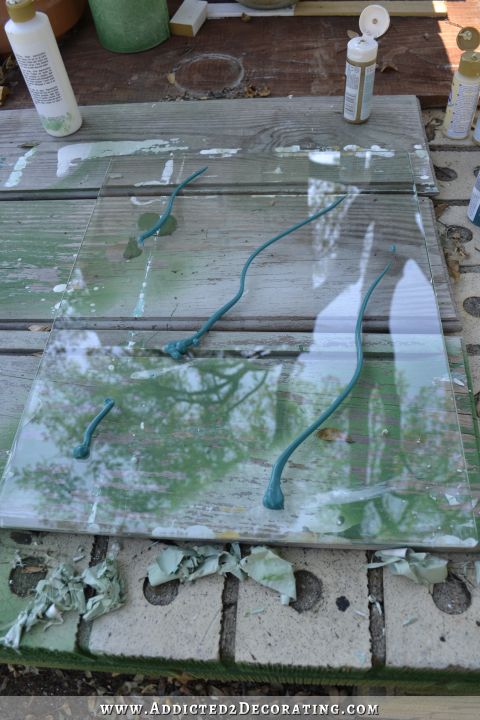
I used a 1-inch craft brush to brush those out, and then I did the same thing with the green. I tried to intertwine the two colors.
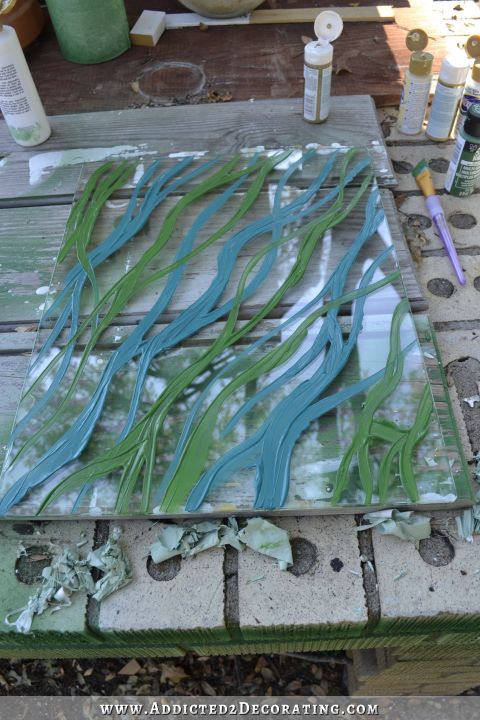
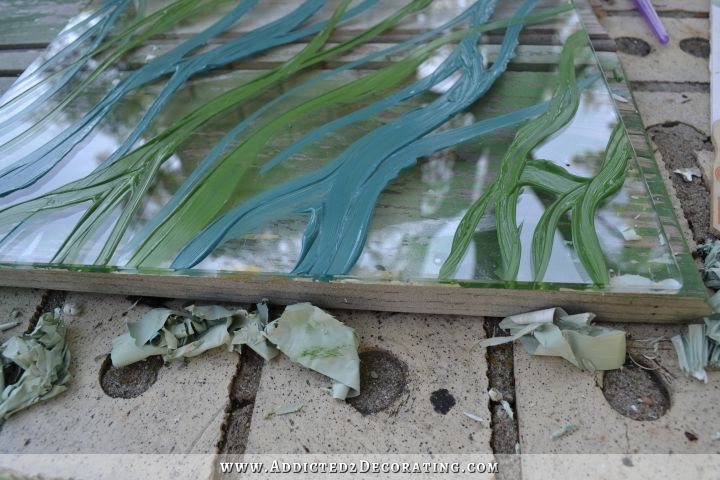
You can see that it wasn’t perfectly smooth. I did leave some areas built up with paint.
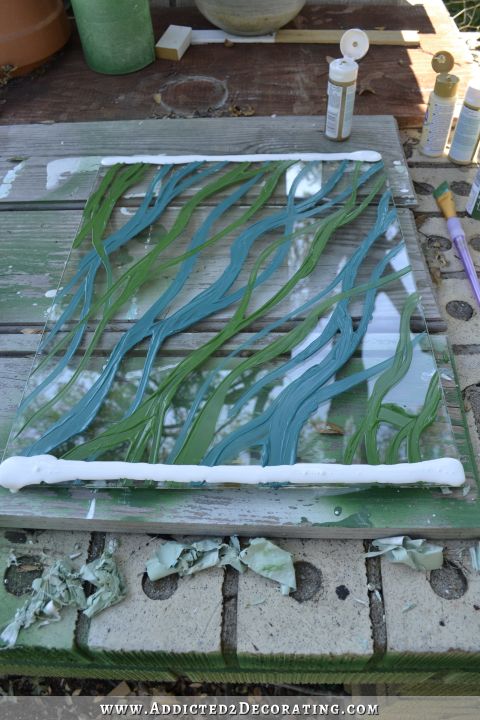
I waited until the thin areas of paint were dry, and the built-up areas were still wet, and then I added white. I placed large amounts of white at the top and the bottom of the piece glass.
And then I used my 2-inch Purdy paint brush to brush the white paint all over the back of the glass. After that, it looked like this on the front.
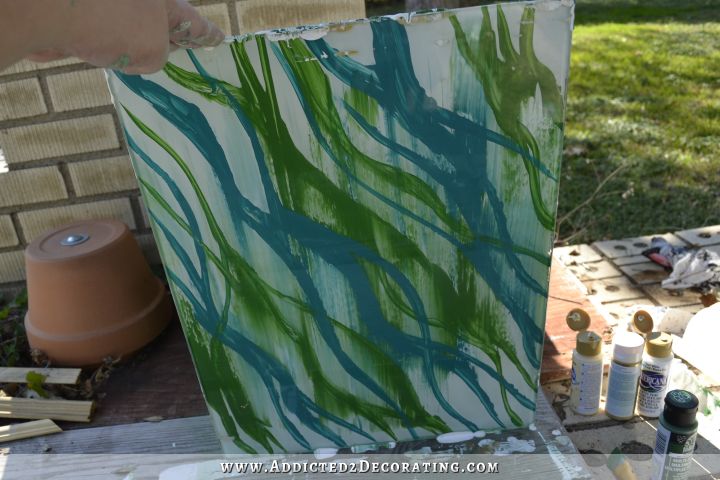
Definitely not a good look. So using my 2-inch Purdy paint brush, and with the glass standing on edge so that I could reach the back while looking at the front, I used my brush to dab the paint from the back. As I did that, the paint started to move, separate, blend, etc. It was really fascinating to watch! You can see on this next picture that the top right corner and some down the right side has been done.
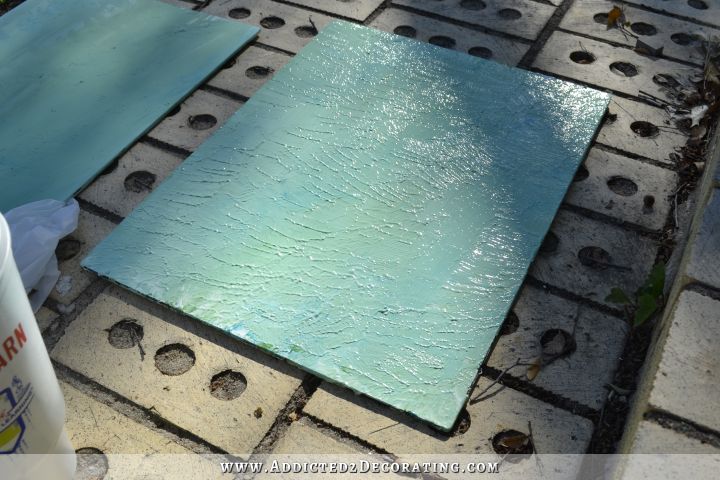
And here’s what it looked like after I did the whole thing…
The back was kind of messy,so I just put it in the sun to dry completely.
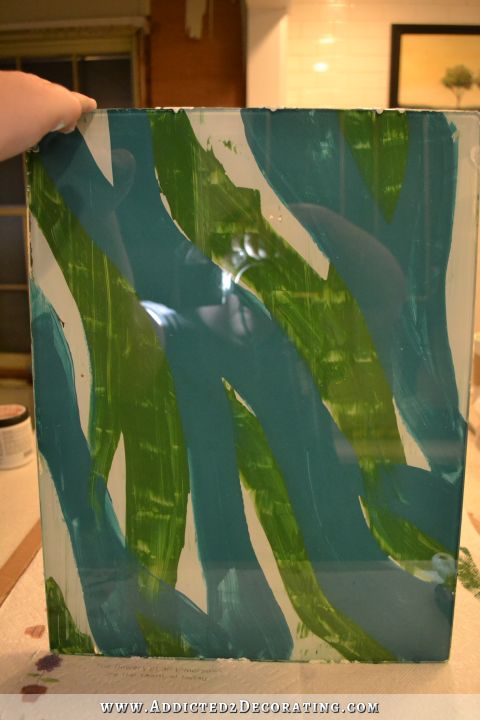
I thought that was a good start, but I didn’t really like the thin “strings” of paint. So on the next one, I decided to do some wider areas of paint, and intertwine the two colors much more. I started with the teal.

And then added the green.
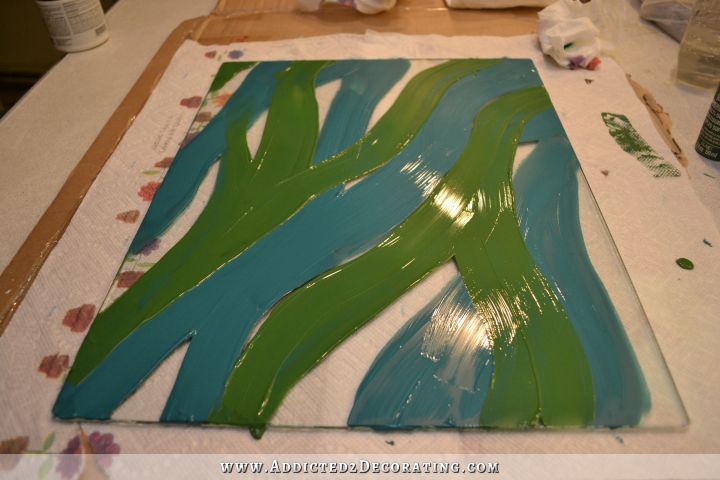
I waited until the thinner areas of paint were dry, and the built-up edges of paint were still wet before adding the white paint. And this time, I also decided that I needed more white paint, so I squirted it all over the back and then brushed it over the back. I liked this process much better.

Here’s how it looked after I brushed the white over the back.
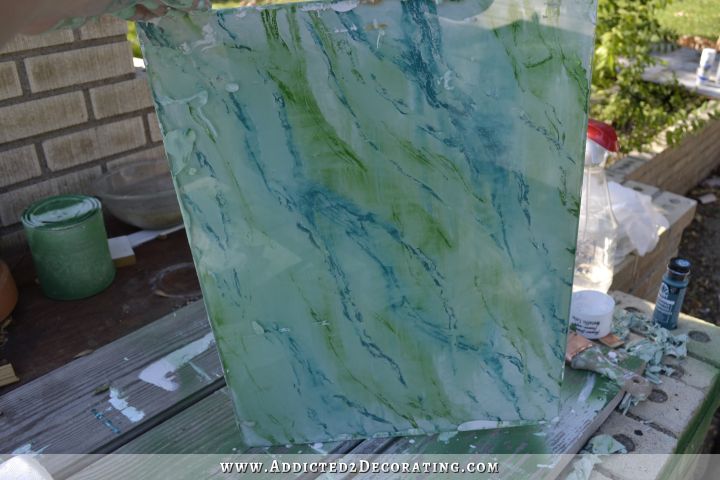
Then I stood it up on edge and this is what I had.
So once again, I used my 2-inch Purdy brush to dab, move, blend, etc. I tried to be somewhat controlled and deliberate about this process, although the control is only about 50% up to me and my brush, and about 50% up to the paint and whatever it decided to do. That’s what makes this process so fun to me. I think you could start out with two pieces of glass with the same paint design on them, and still end up with two very different pieces of glass.

So here’s how that one looked when I was finished.
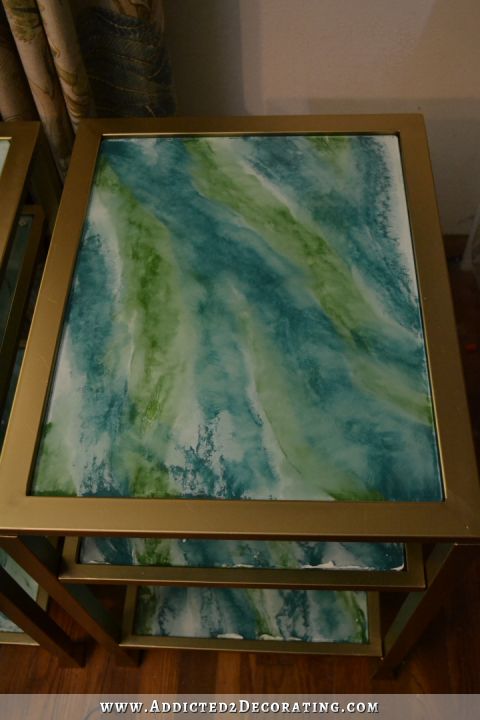
I liked it much better, but I still wasn’t really excited about it. I didn’t blend enough, and I left way too many lines still intact. Also, since I was using dark colors, they were getting mixed with the white and becoming lighter…obviously. It doesn’t really show in the picture above, but the glass from a distance actually looked aqua overall. I didn’t want aqua tables in my living room. 🙂
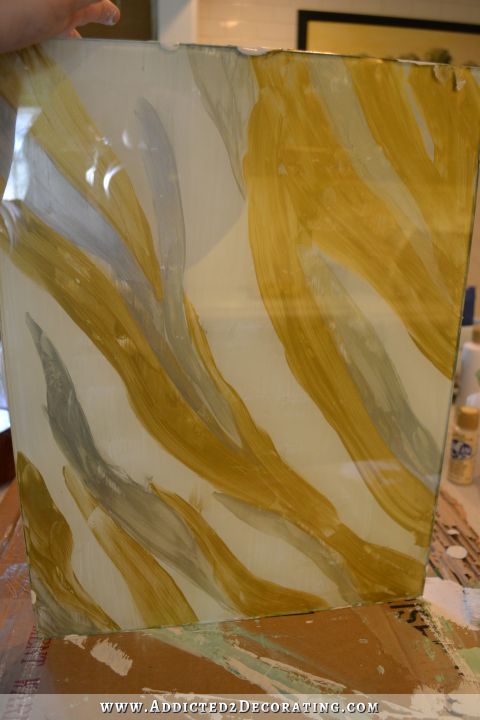
So on the next try, I decided to use metallic paint instead. I used Martha Stewart metallic craft paints. These are also specified for use on glass, but I’m not sure how long they take to cure. And again, I did wide, random areas of color, and tried to intertwine the colors as much as possible.
I liked the metallic much better than the colors, but again I just wasn’t blending enough. I ended up with “fingers” of color on a white background.

So I tried again…
In progress…
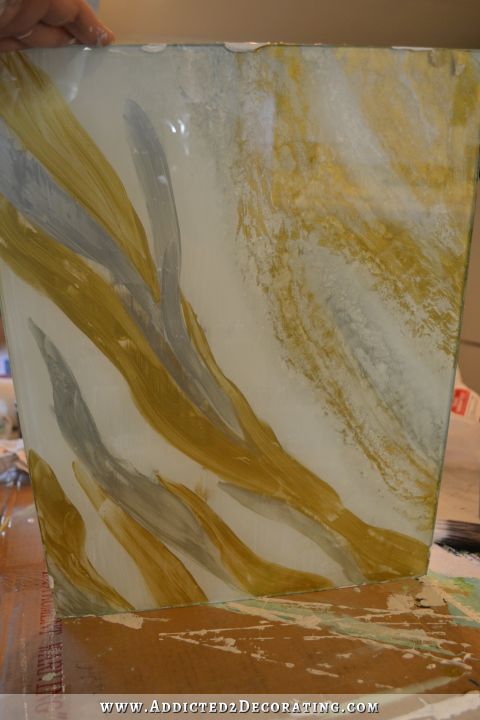
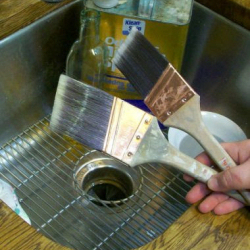
And by the way, this is what your brush needs to look like while working on the back of the glass. If it’s a Purdy, it’ll survive the abuse. 🙂

This one was a little better, but I still had “fingers” of color.
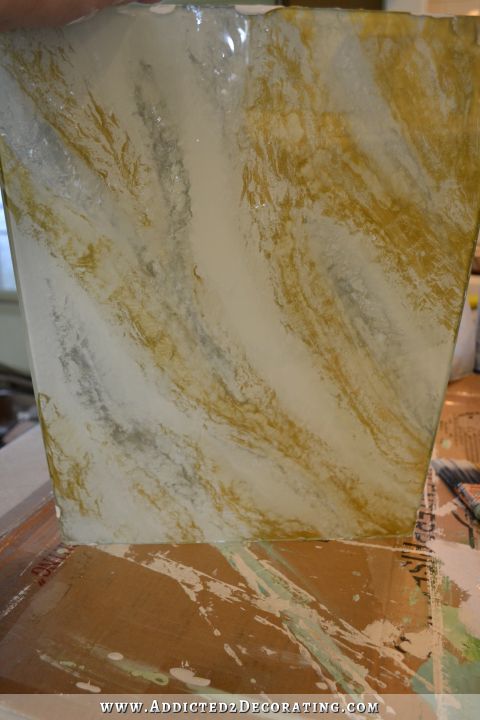
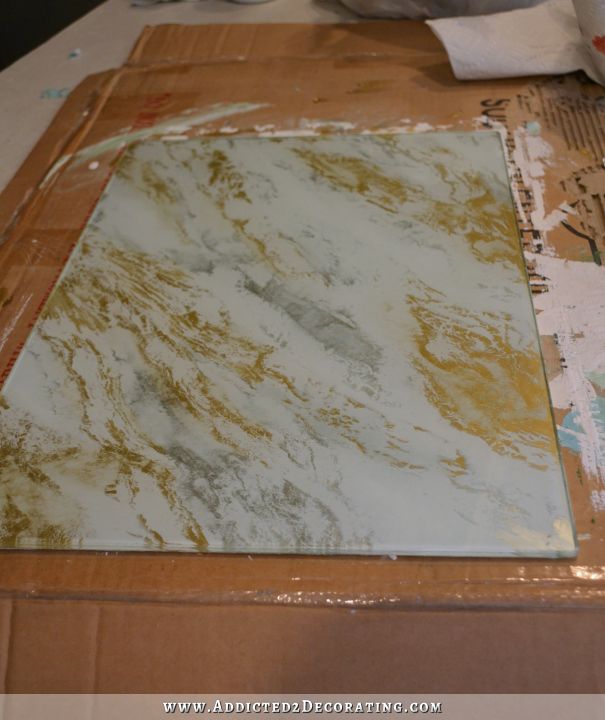
So on my third attempt with metallics, I decided to really go for it. First, I covered almost all of the glass with paint, leaving only just a few small areas clear. And I really, really intertwined the colors, connecting the areas so that there were no “stripes” of clear (which would end up white) going all the way from one side of the glass to the other.
And then when it came to the dabbing, blending, moving, separating with the brush, I really did quite a bit.
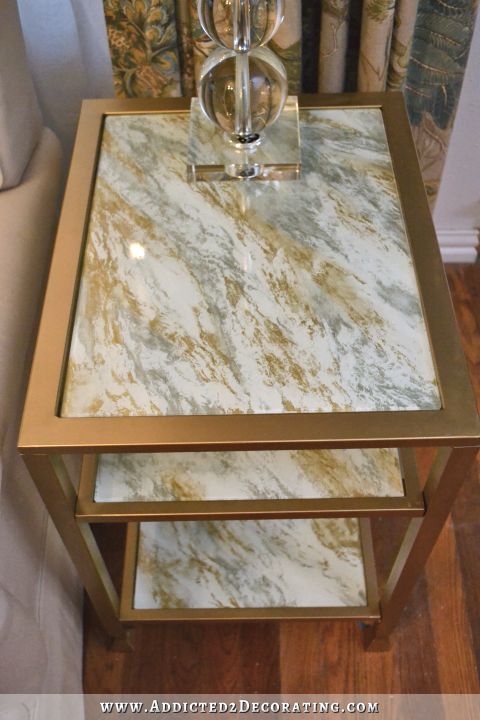
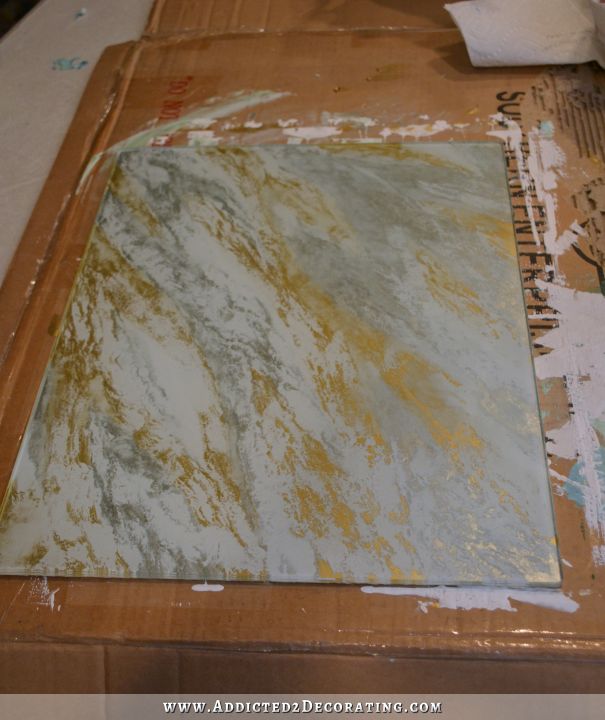
And BINGO! That was the winning combo! No “fingers” of color, and no stripes of white. I loved it.
And I absolutely love how these look up close. It’s just so fun to watch and see what the paint will do as you move the brush around on the back of the glass.

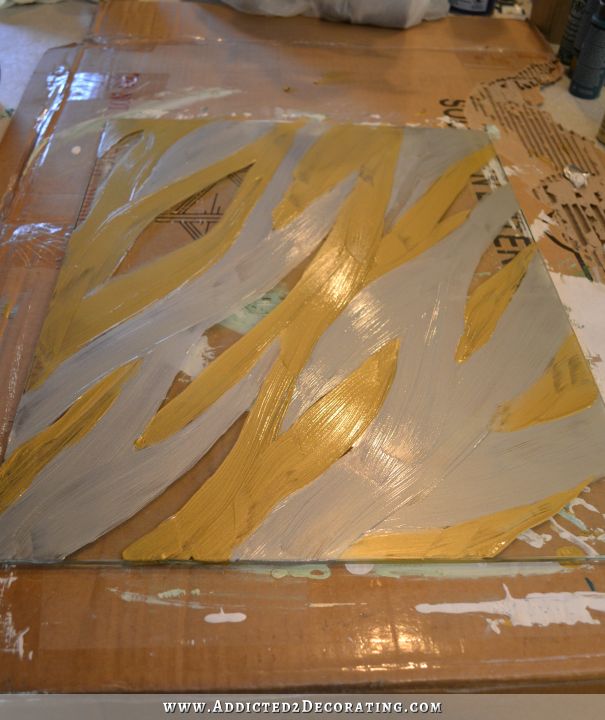
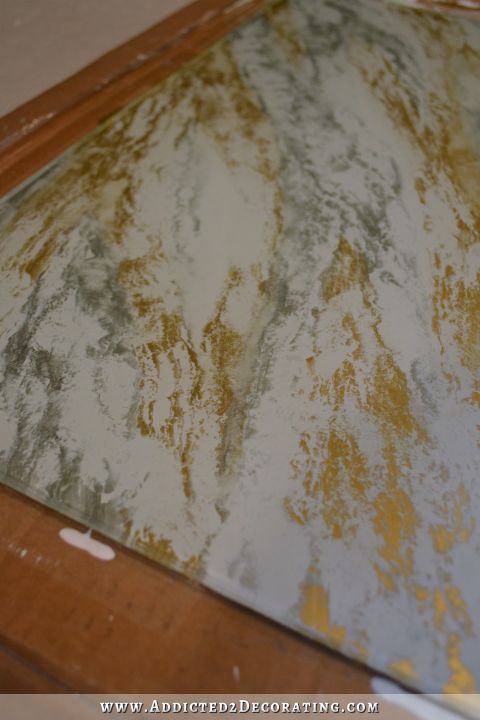
So using that same technique, I did another one. On this one, I used a bit too much silver on the top right for my taste, but I still like it.
I especially like this area on the bottom left.
So that’s how the process came about. It’s so much fun to do!
Again, the keys (at least when using metallics) are:
1. Cover almost all of the back with paint, leaving only just a few small areas of clear, unpainted glass.
2. Intertwine the colors as much as possible, connecting the areas so that there are no “stripes” of clear/white going from one side of the glass to the other.
3. Wait until the thinner areas of paint are dry, and the built-up areas of paint are still wet before adding the white.
4. Use lots of white. Don’t be stingy with it at all. The more, the better.
5. Dab, blend, move the paint quite a bit, especially on the areas where the two colors (in this case, the gold and silver) are right against each other, so that you’re not left with “fingers” of color on the final piece.
6. Make sure you have plenty of paint on your brush. After covering the back of the glass with the white, do not remove any paint from the brush. Keep it completely loaded to do the dabbing and blending. If your brush isn’t loaded with paint, it’ll start pulling paint off of the glass. You might even need extra white paint on the side so that you can add paint of you see your brush start pulling paint off of the glass.
7. Have fun and experiment! Remember, it’s glass, so if you mess up, you can easily scrape it off and start over again. But do not wait long to scrape it off. When using these paints that are made to be used on multi-surfaces and can be used on glass, if you wait too long (even 24 hours) the scraping becomes much more difficult.
8. If you get paint on the sides and front of the glass (which you will, without a doubt), wait until the back is completely dry before scraping off the sides and front with a razor blade.
After the paint was completely dry, I gave each of them a coat of Rust-Oleum white primer so that any small areas that were left without any paint on them would be covered in white.
I love how this table turned out.
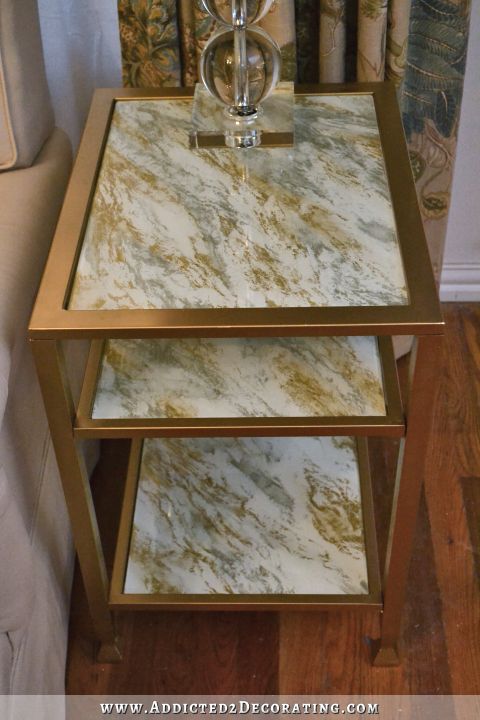
I don’t know that anyone would actually be fooled into thinking that it’s marble, but I think it looks like a pretty good artistic version of marble!
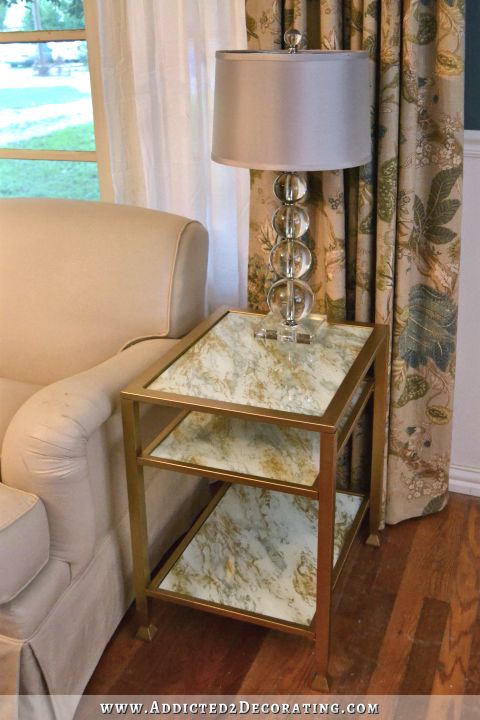
And once again, here’s the before and after:


Addicted 2 Decorating is where I share my DIY and decorating journey as I remodel and decorate the 1948 fixer upper that my husband, Matt, and I bought in 2013. Matt has M.S. and is unable to do physical work, so I do the majority of the work on the house by myself. You can learn more about me here.


That final picture is just stunning! I love every element — table, glass, lamp, drapes, etc. You did a great job.
Lovely, your house is the tops in my book. Love seeing it come together.
it looks so good on the table and if you did it for the kitchen backsplash you would not have done it on the table. i did not like it when you tried it for the backsplash but love it on the table.
I love the outcome- I admire that you stuck to it. I am pretty sure I would have gotten frustrated and given up! You are an inspiration!
OMGosh I am so in love …from the moment I laid eyes on that table my heart flipped…gorgeous then seeing the process and the final result…WOW! I am so in love with this whole room but those tables ….envious!
Gorgeous! and just the right amount of elegance!
Love it a little sparkle added to the room
Love the table -what perseverance! Such a great way to use those tables you already had. I’m not a big fan of the lamp -I really liked the first small lamp you were trying to mimic and the mercury glass one had a better shape for the length of this table. Love how things are coming along!
I decided to keep these when I realized they repeat the design on my rolling doors. 🙂
That is beautiful especially with the lamp!
This look is exquisite. I love the lamp with it. I’m saving this post–just an incredibly useful tutorial. Thanks so much.
Love it but I must say you have wayyyyyyyyyy more patience than me!
Love how you are starting to really glam things up in the living room. The gold/silver tables will help the living room feel more like the rest of your house. I was thinking, I think that one of the things that is missing from that room is contrast. The green cabinets with the white tiles have a lot of contrast, and the black “barn” doors add a lot of drama to your home too. Continuing the theme with the breakfast room, there will be LOTS of drama. I hate to say this, but I think the color choices in the living room seem too safe. Maybe the curtains could be changed to up the drama. I LOVE the ottoman though. I think that is a statement piece and the new marbleized tables are great. Just think some of the other pieces seem too safe. Does that make sense?
Is that your couch in front of your big window? Furniture rearranged??
p.s. beautiful tables. 🙂
I’ve always loved gold and marble together – it’s just so classic. The table looks beautiful and elegant. I also noticed, did you move your sofa to the front window? Will you show a picture of the whole room arranged that way?
Wow, I admire your ability to keep trying techniques and not get discouraged. Most people would have given up, but you continued till you got a great effect…you did a really beautiful job;)
Beautiful tables, I love the gold marble look on the glass, thank you for sharing this post with us!
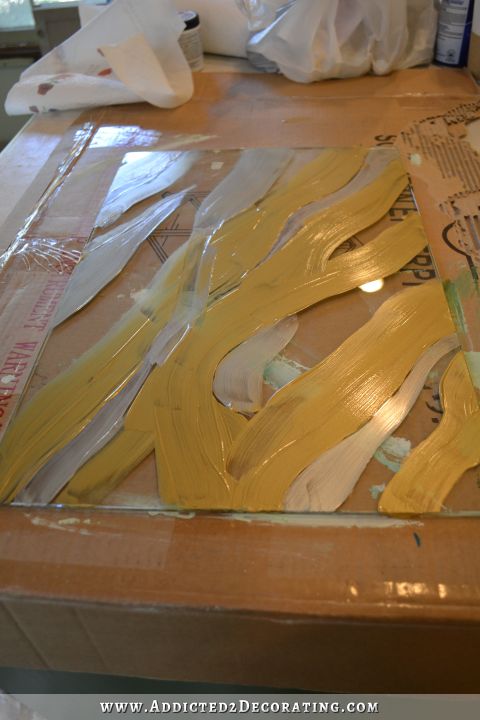
And I feel like doing that to my kitchen table now, I have a glass top but don’t like it and this will do just fine, except I have to use the two colors in the room, banana cream and black, and of course the white… I think it will look great.
I love how they turned out! The room is gorgeous.
Wish I saw how you did this before I painted my countertops! 🙂 How do you think this would translate to painting from the ‘top’ (not being able to smudge/blend from the back like you did with glass)? I had bought a kit that’s supposed to make it look like granite, but I don’t like granite, so I tried my hand at making it look like marble. I really like how it turned out, but let’s just say your project looks much more accurate!
Love the tables!…Wow!!…you did a great job as always!…That look is just beautiful and I love the tables in the living room…You just “Keep-on-Keep
ing-on Kristie!”
I love how they turn out, very clever!
I am loving the tables. I love that you used gold and silver both making the colors play off of each other. The lamp is beautiful as well. Another home run!
As usual, you just blow me away! You also give me courage to try different things. Thank you!
I. LOVE. IT. Cannot wait to try it. It looks stunning! Love the look with the glass lamps!
I love the marble look of these tables. Great!
That method would be a great way to waterproof the wooden top of your vanity table. So elegant and classic.
I really love the look of this back-painted glass…..when I first saw the picture of it, I thought it was marble. Well done, you did an excellent job and the table looks amazing and paired with the new gorgeous lamp, together it looks very elegant and stylish. As always Kristi, you are such an inspiration!!
Absolutely gorgeous! Fantastic job. Chalk another one up for Kristi!
The tables look so much better. You did an amazing job of transforming them from blah to gorgeous! (Now that you’ve rearranged your living room, what if you use that lovely table you showed us the other day between your chairs. 😉
BTW: how is your plan to widen doorways for Matt coming along? That hallway will be a charming destination once you’re done with it.
So many projects, so little time, right?!
Wow, how clever and beautiful. You continue to amaze me how you persevere when most of us, especially me, would have given up. Kudos!
Totally freaks me out thAt you can chage the look of a table like that!!! I liked it black, and I liked it gold with the plain glassand I like it with the marble, I am feeling a bit like Sam I Am, liking my green eggs and ham every which way!!! They certainly fit with the look you want, and looks great next to the sofa. I might reconsider that leather sofa you want. I think your look is screaming for a velvet sofa. You are one very talanted chick!!! Blessings
Magnificent!
So funny… when I read your previous post about the tables my immediate reaction was to think of resurrecting your backsplash method for the tables. They look awesome! I know you didn’t ask for our thoughts, but appears Mary Ann and I are on the same wave-length of using velvet for the sofa.
you can get a small rubber brayer at Michaels and a small spritz bottle for water and do some wonderful designs like this also.
I love it! It looks just like marble and goes great with the gold!
Kristi, my goodness, you’ve done it again!!! 🙂
Great look, Kristi. Much nicer than the clear glass. Another technique I like to use for glass is gold leafing, again on the under-side of the glass. And it’s very versatile. It can be aged, used with other metallic leafs or paint. Use a stencil, “age” the design then add you leaf. Hey that just gave me an idea for a piece of glass I have for practice.
I like this table much better! The size and color works!
Fun process and great result! ~:0)
Kristi- Wow! You did it…..AGAIN! And you were right on – as usual! As I looked at the first renditions (with the blue and green paint) I realized that’s the exact treatment the glass topped table in my “beach room” needs. How many colors have you done this treatment with?
Linda
Love the tables. Lot more elegance. The gold was the best choice. The glass lamps let the table show & have their own pazzii . Can you do a full pic of the room -furniture placements? One thing you may want to think about is changing out your blinds in the windiows on each side of the fireplace. Seem too blah with your new tables & ottoman.
OMG! I love, love, love them! That table is absolutely gorgeous and the lamp compliments it perfectly. Please post a pic of the whole room with the tables soon!
Just more proof that you’re a GENIUS Kristi! Just brilliant! These tables were beautiful out of the box, but you elevated them to the stratosphere. There are just gorgeous now!
That is amazing!! Doesn’t even look like the same table. Great job!
Well…..now you’re just showing off!
(Just kidding!) They just look beautiful! What a good idea!
Really pretty! Thanks for the detailed instructions and once again thanks for blazing new trails for the rest of us!
I bought that same brand of sofa table from Overstock over a year ago (!!!!) and haven’t assembled it yet. I bought it to spray paint it gold (when I saw you had also gotten the end tables I figured we had to have been channeling minds!) but I never thought to make the glass look like marble. So another project goes on the list!
Holy crap. Without reading this, I genuinely thought that this was either marble or marble contact paper. amazing job!