The Wallpaper Is Up! (DIY Walk-In Closet Progress)
Last night was the moment I’ve been waiting for. I generally don’t have a lot of time to get projects done on Wednesdays, but I was determined to get the wallpaper installed in the one closet section before I went to bed last night. And I did it!
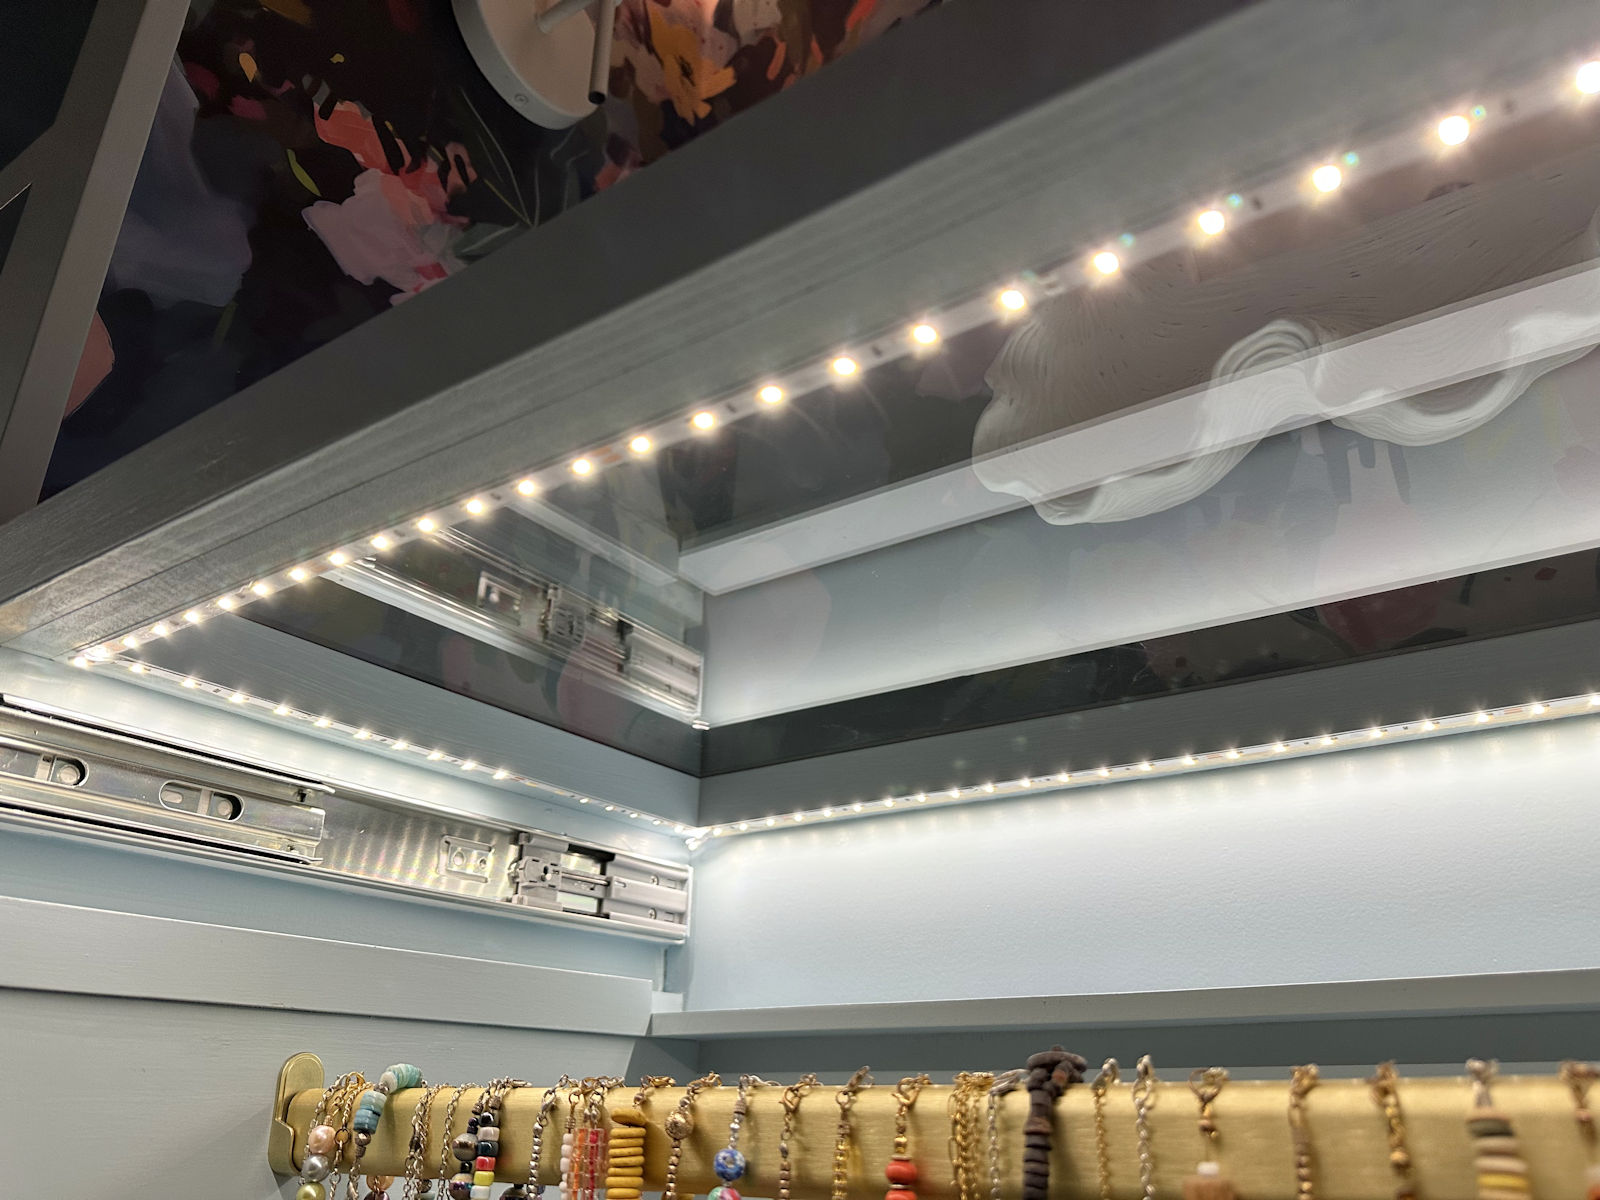
I had to take all of the pictures last night, and I won’t be able to include any pictures taken this morning after the sun comes up because I have an appointment this morning and I’m writing this update in the pitch dark at 6:30am. So the lighting in these pictures is terrible. It’s a mix of the yellow-ish light from the ceiling fan (which makes the paint color look dingy) and the daylight bulb from my work light. But even with the funky lighting, I still wanted to show y’all this gorgeous wallpaper installed in this cabinet section. I’ll get better pictures today after I completely finish this section, and I’ll show you those tomorrow.
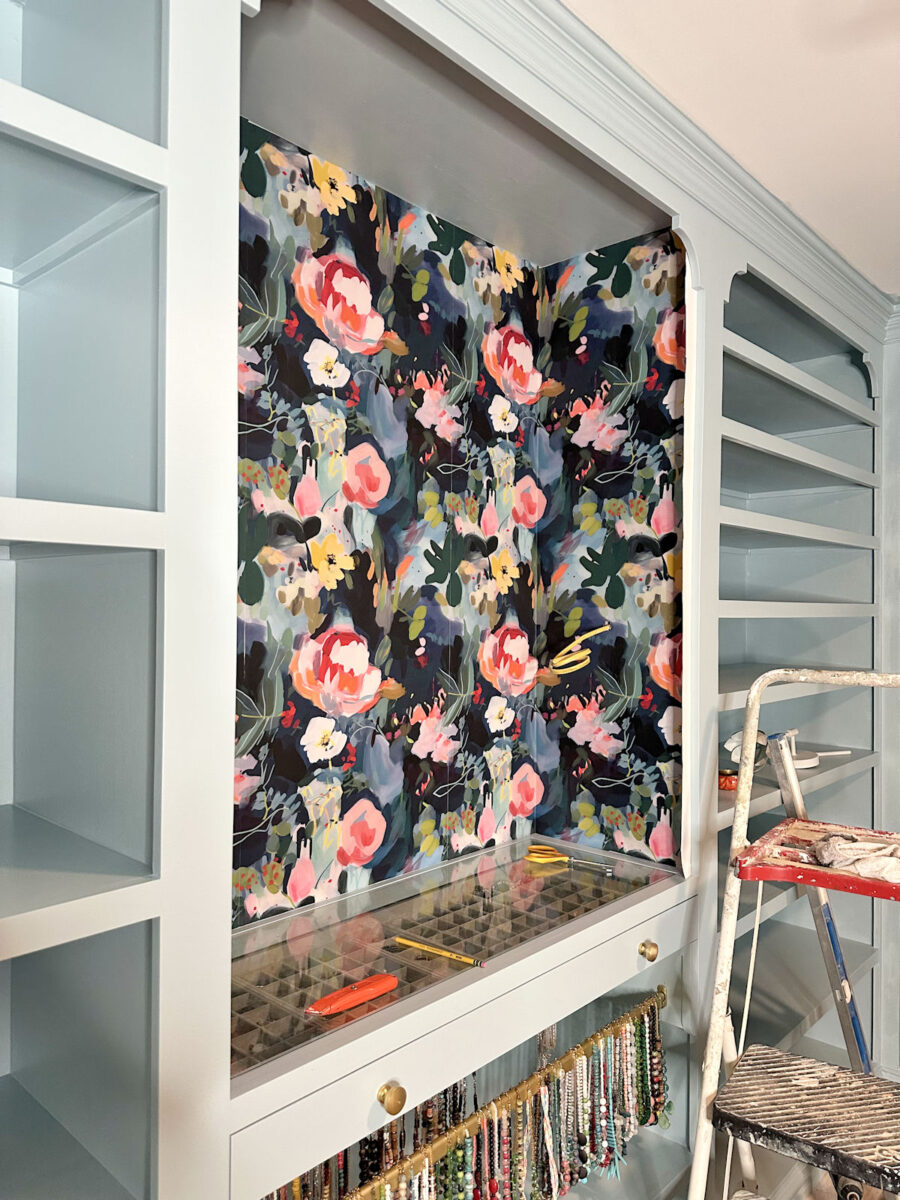
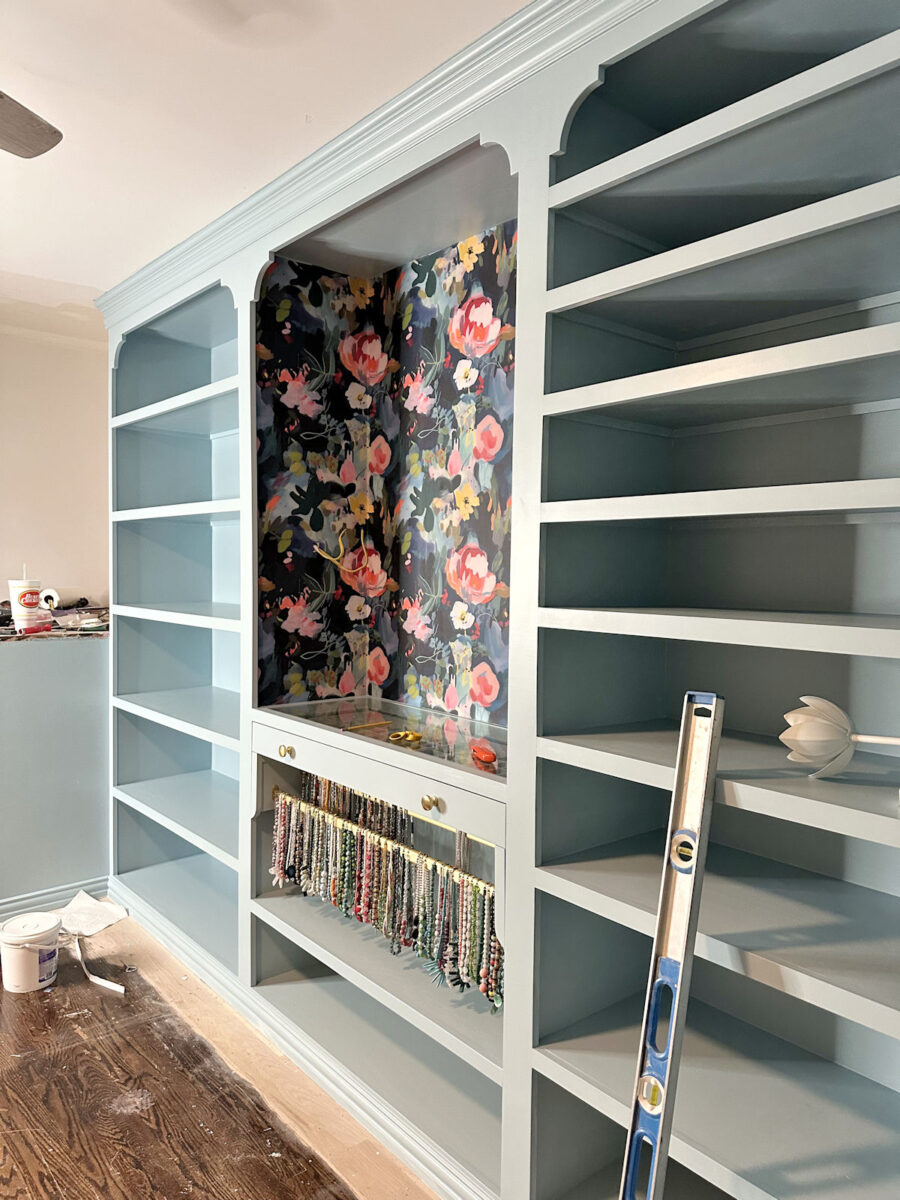
In the meantime, check out this wallpapered section!
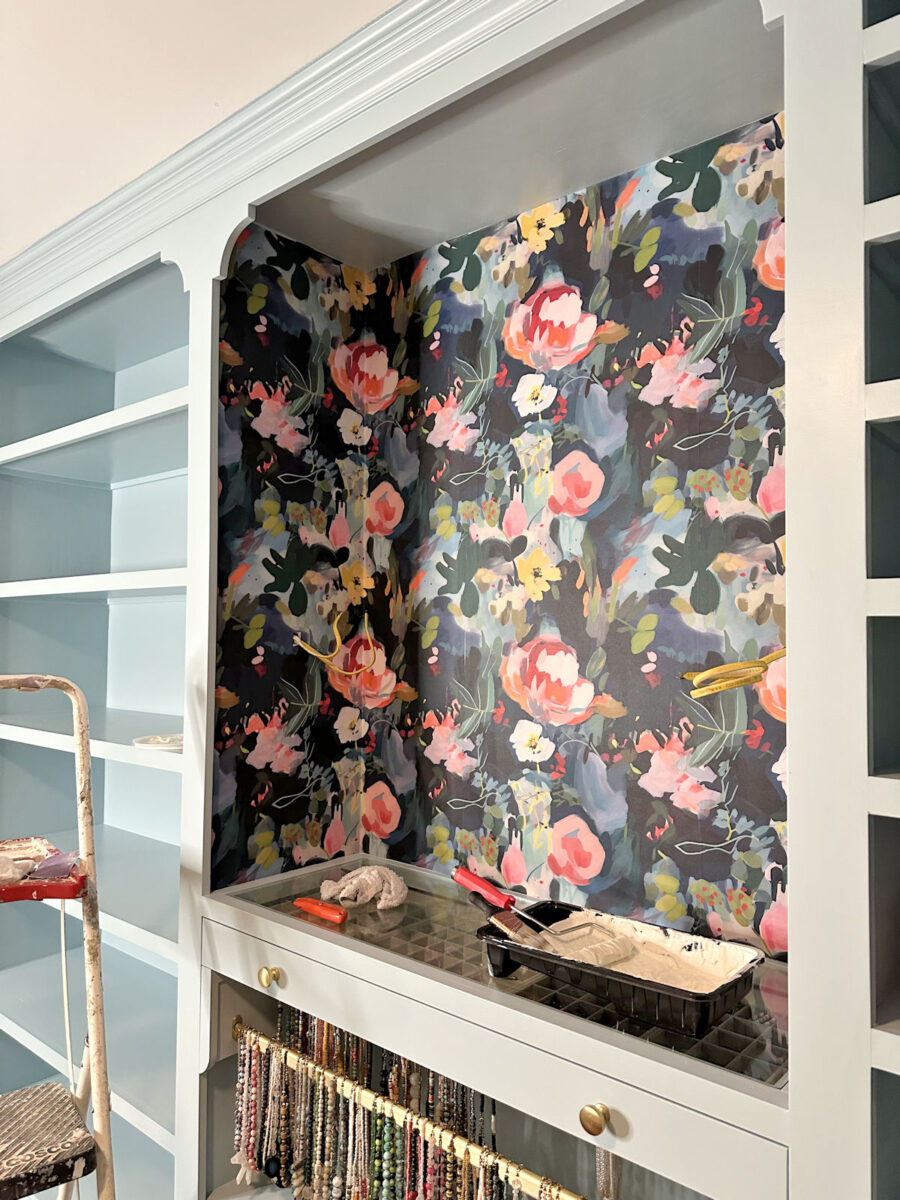
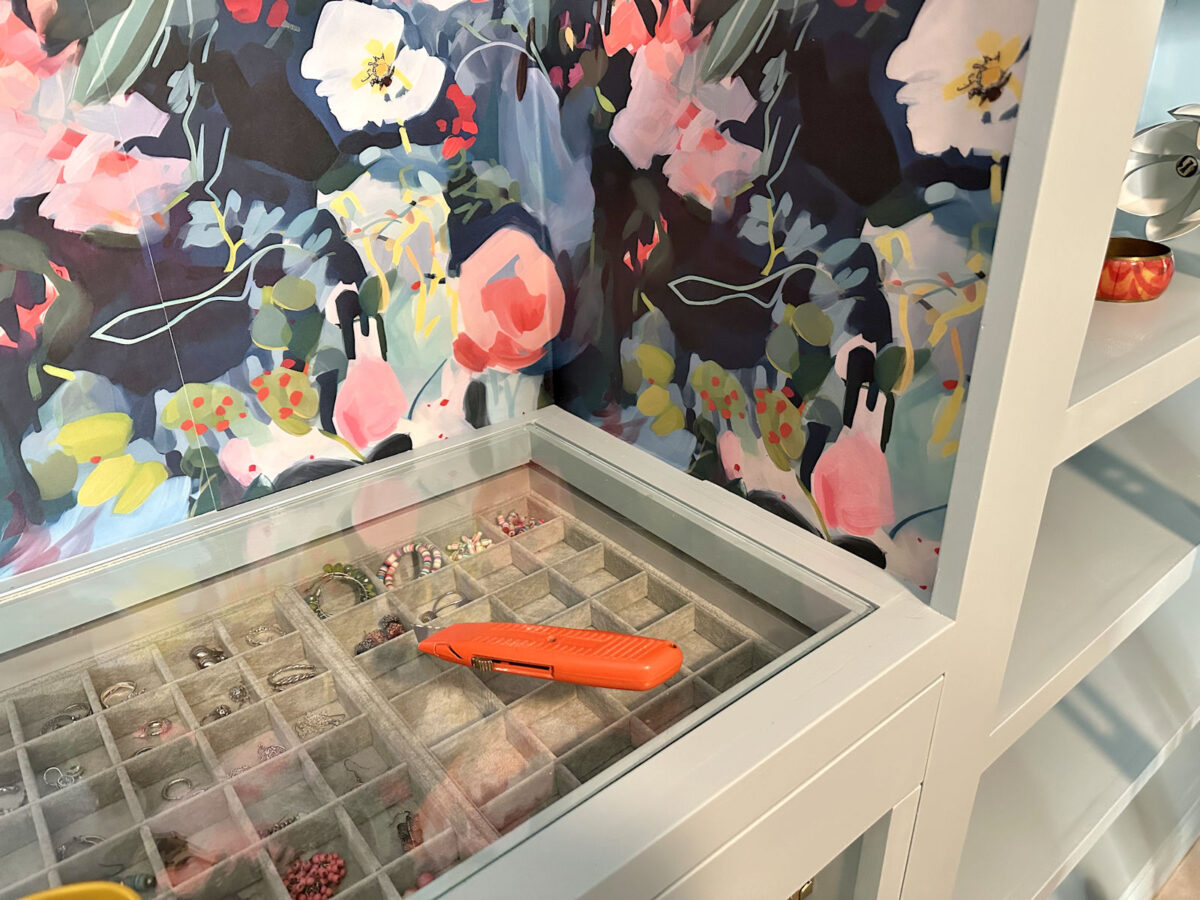
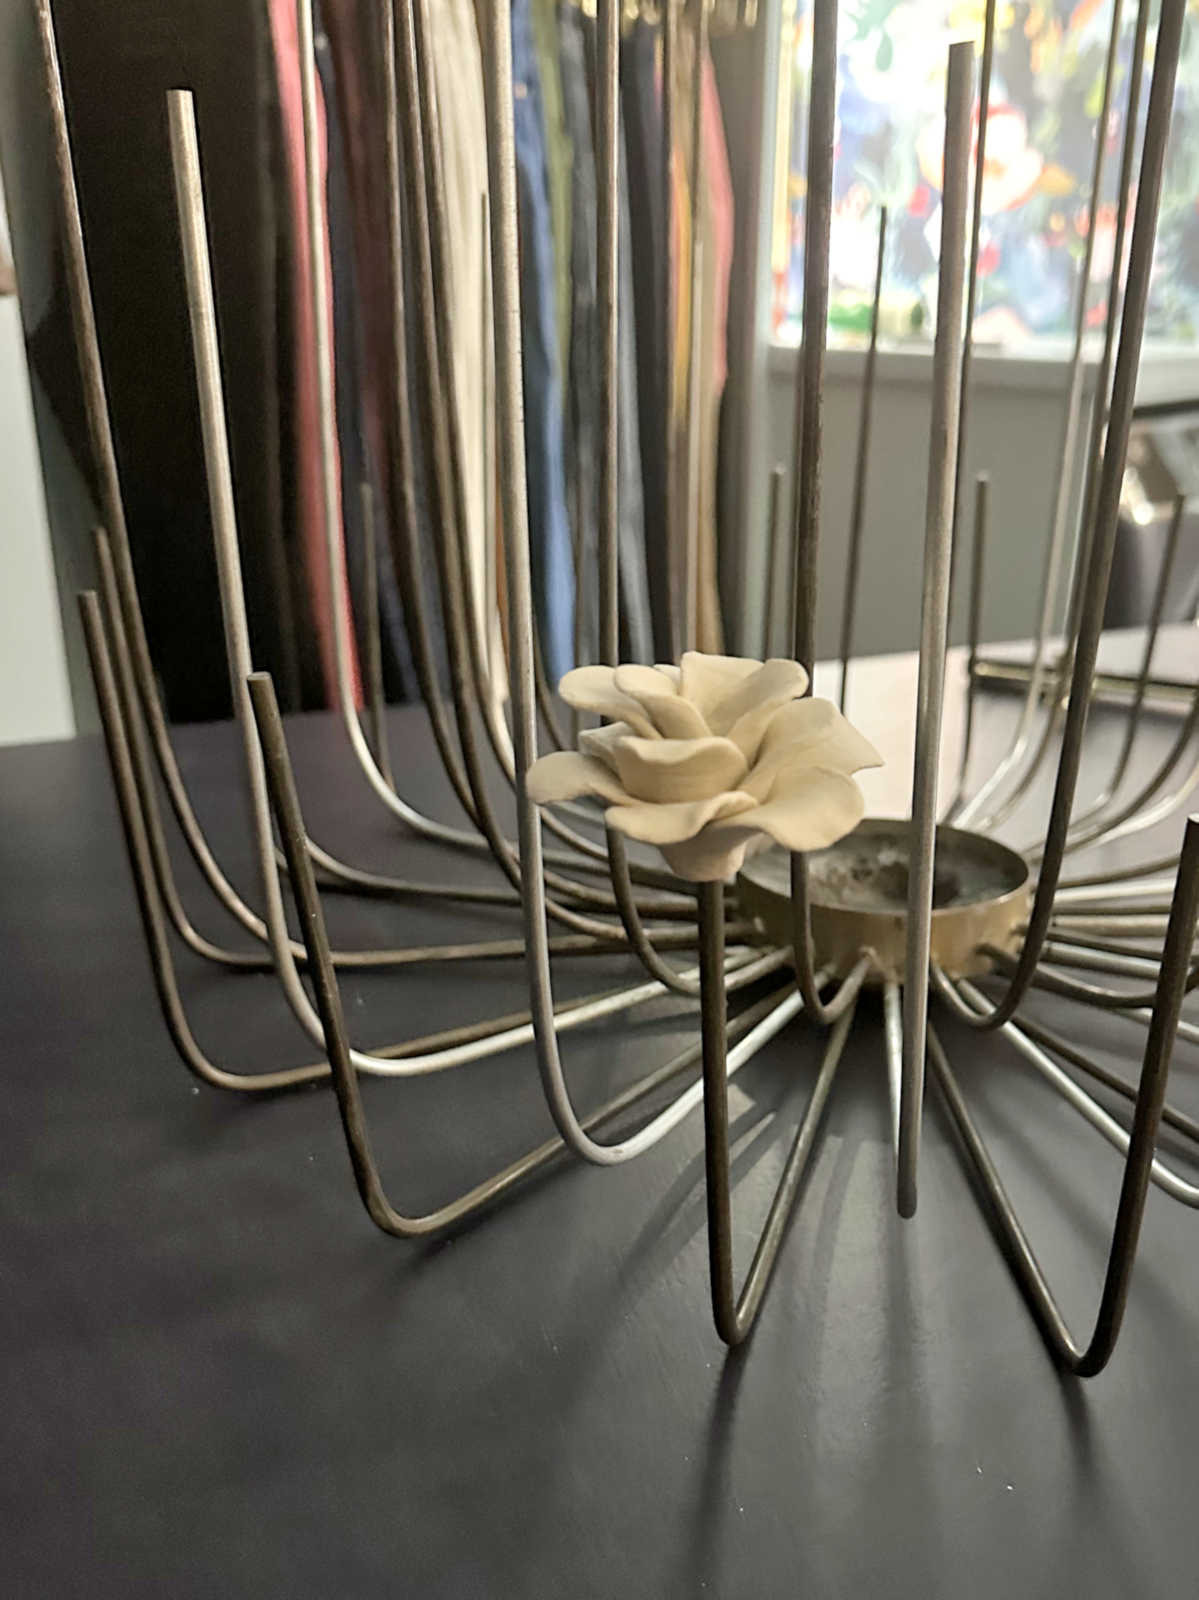
This is the Taylor wallpaper from Jupiter10. It’s not pre-pasted, and the directions say to paste the wall instead of the back of the wallpaper. I used Roman Pro-555 Extreme Tack wallpaper paste (affiliate link), which I applied to the cabinet using a 6-inch roller for smooth surfaces, as well as a paint brush to get into the corners and edges. After using my tape measure and straight edge to mark the placement of the first piece, which I centered on the back of the cabinet, I painted the paste on with a brush along the top and bottom edges, and then rolled the rest of the paste on as smoothly as possible, enough for one width of wallpaper at a time, and then immediately hung the first piece of wallpaper. After the paste was rolled on, I worked as quickly as possible while the paste was still very wet.
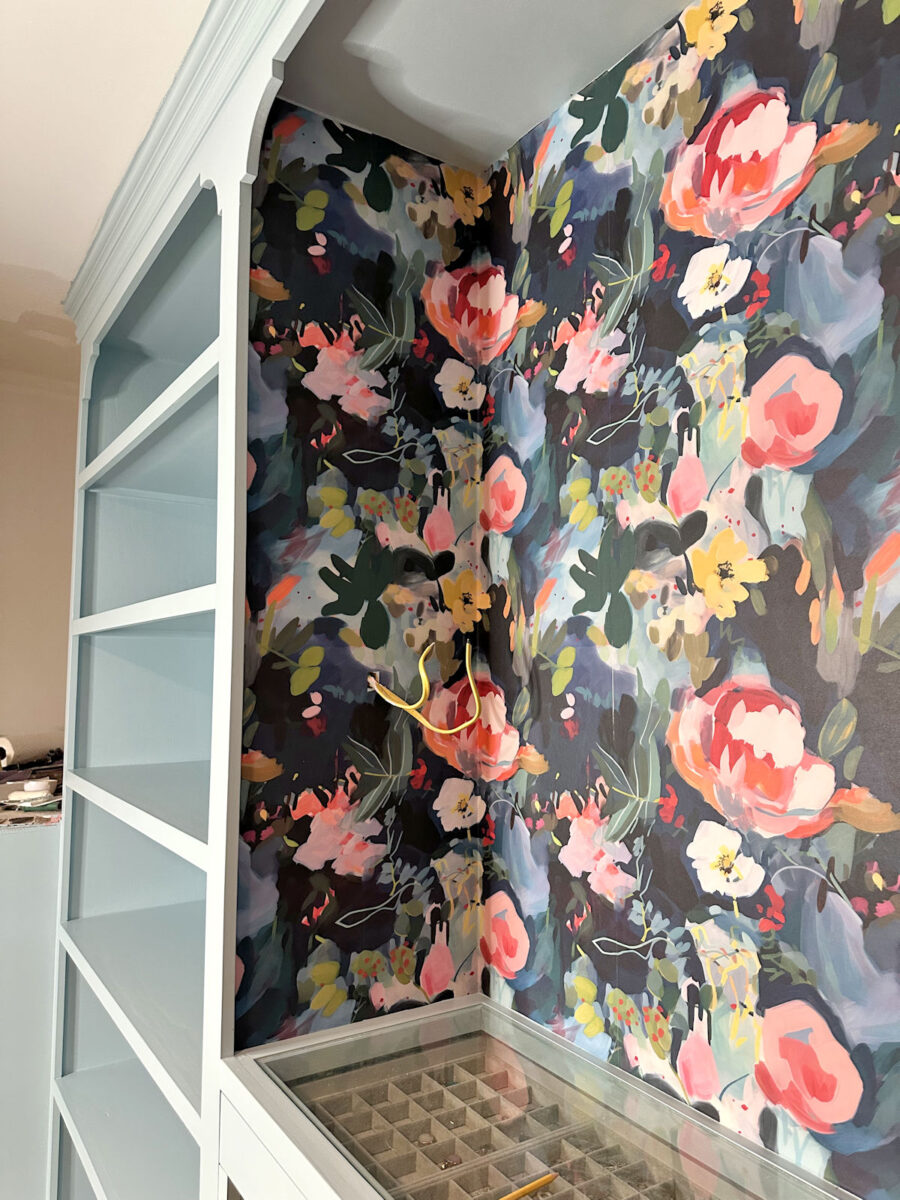
I’ve done quite a bit of wallpapering in my life, and this was, without a doubt, the hardest wallpapering job I’ve ever done. I’m so glad I started with this section instead of the back (window) wall in the washer and dryer area, because I really didn’t do a great job on this section. Fortunately, I finally got the hang of it when I got to the side sections, which will be the areas that show the most. The areas where I really messed up will mostly be hidden behind the mirror…hopefully.
I started with the piece in the center of the back section and then worked out from there. That second piece to the right of the first piece was a real beast. This wallpaper is much thicker than what I’m used to working with, so getting that seam perfectly lined up and then keeping the seam perfectly lined up while also trying to wrap that second piece of wallpaper around the corner and to side of the cabinet section was such a struggle because I hadn’t cut the piece to the exact length first. I learned that lesson the hard way. Any piece that wraps around a corner has to be cut to the exact length, especially with this thick wallpaper.
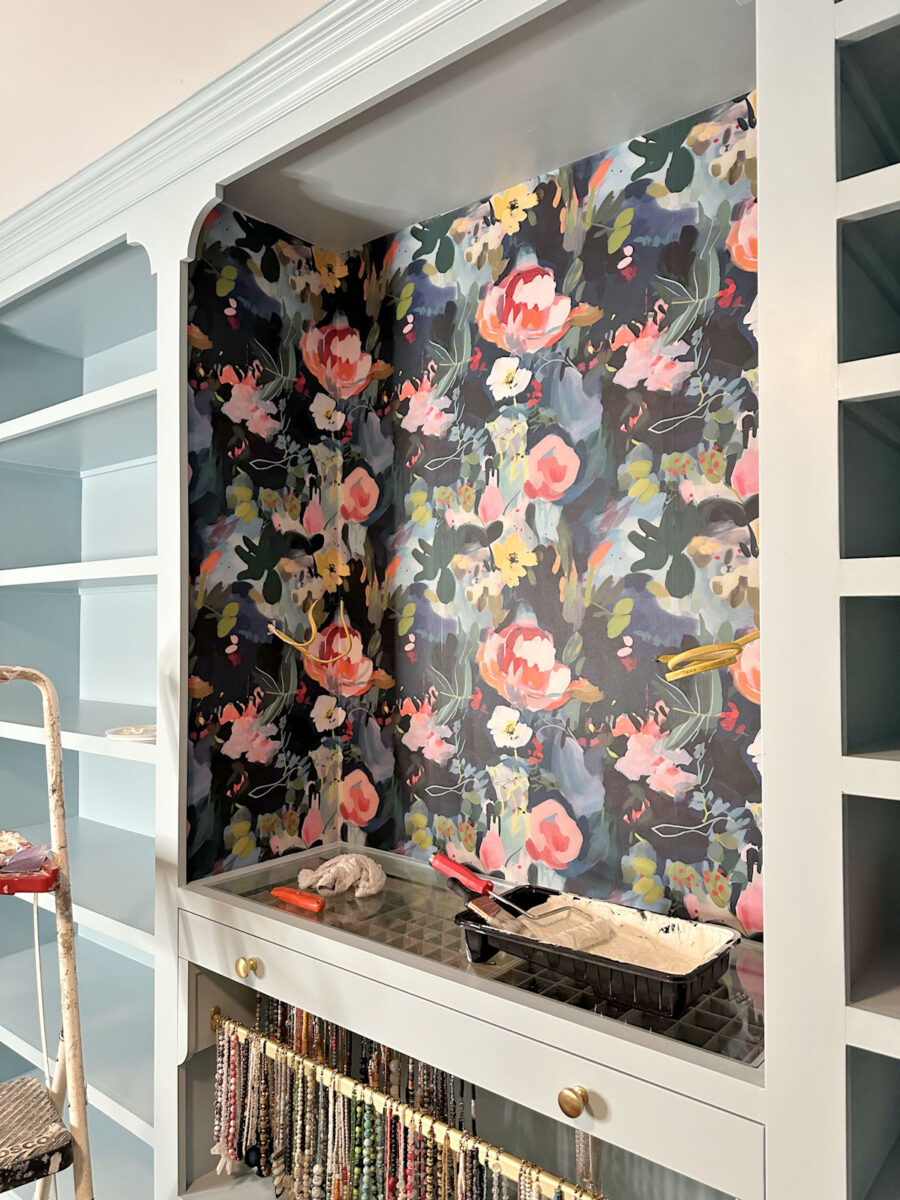
So that resulted in a less-than-perfect seam, which you can probably clearly see in this photo below. That awful seam is about 12 inches to the left of the corner…
But thankfully, most of that will be hidden behind the mirror. And from a distance, it’s not very noticeable.
So as I was working the opposite direction, and attaching the other piece that had to wrap around the other corner, I did much better on that seam because I cut the piece to the exact length first. But then I stood back and noticed that I had somehow managed to scrape the edge of the first piece. So it has this white area along the edge.
Had I been doing this kind of wallpapering job on the back wall of the walk-in closet, I would have been in tears at that point. But again, that area will be covered by the mirror in this closet section. So I just chalked it up to “live and learn” and tried not to let it dampen my excitement over finally seeing the wallpaper installed.
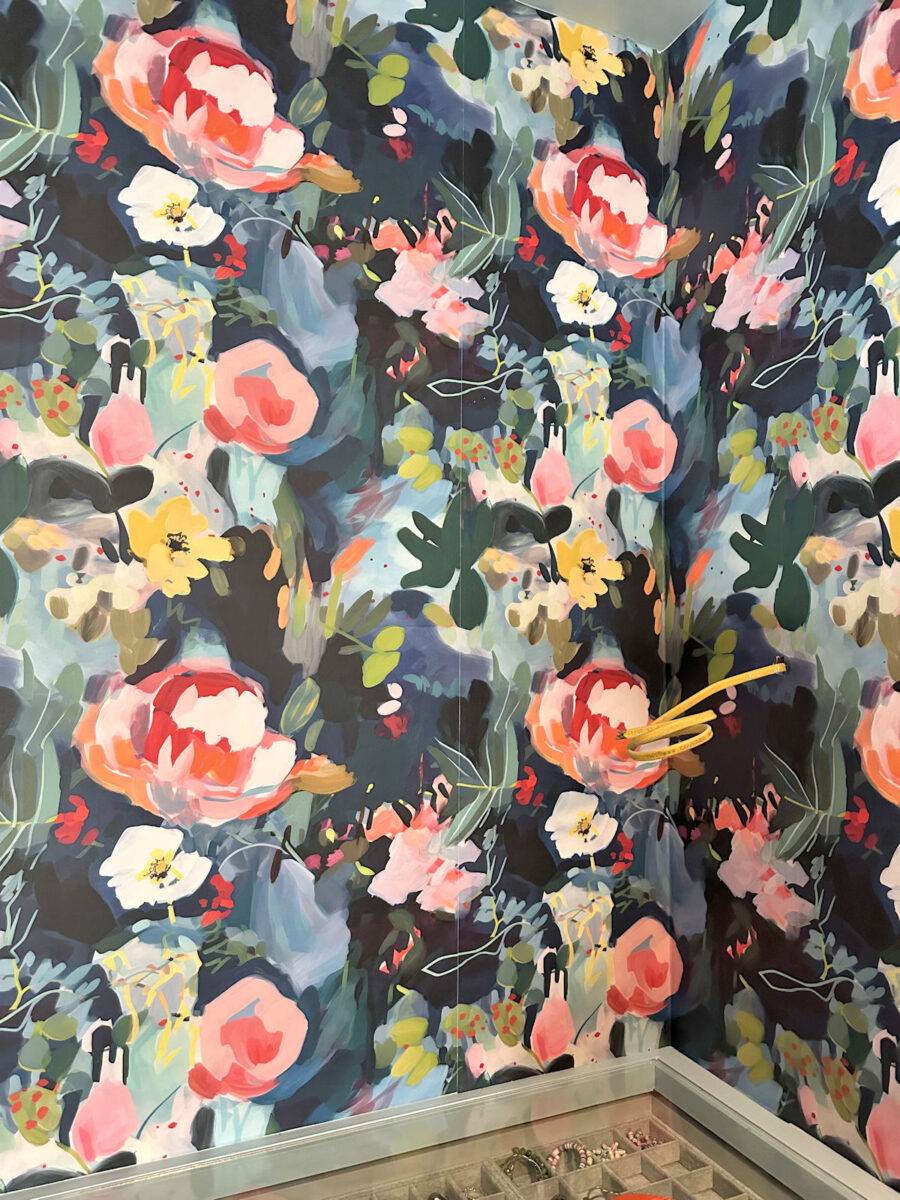
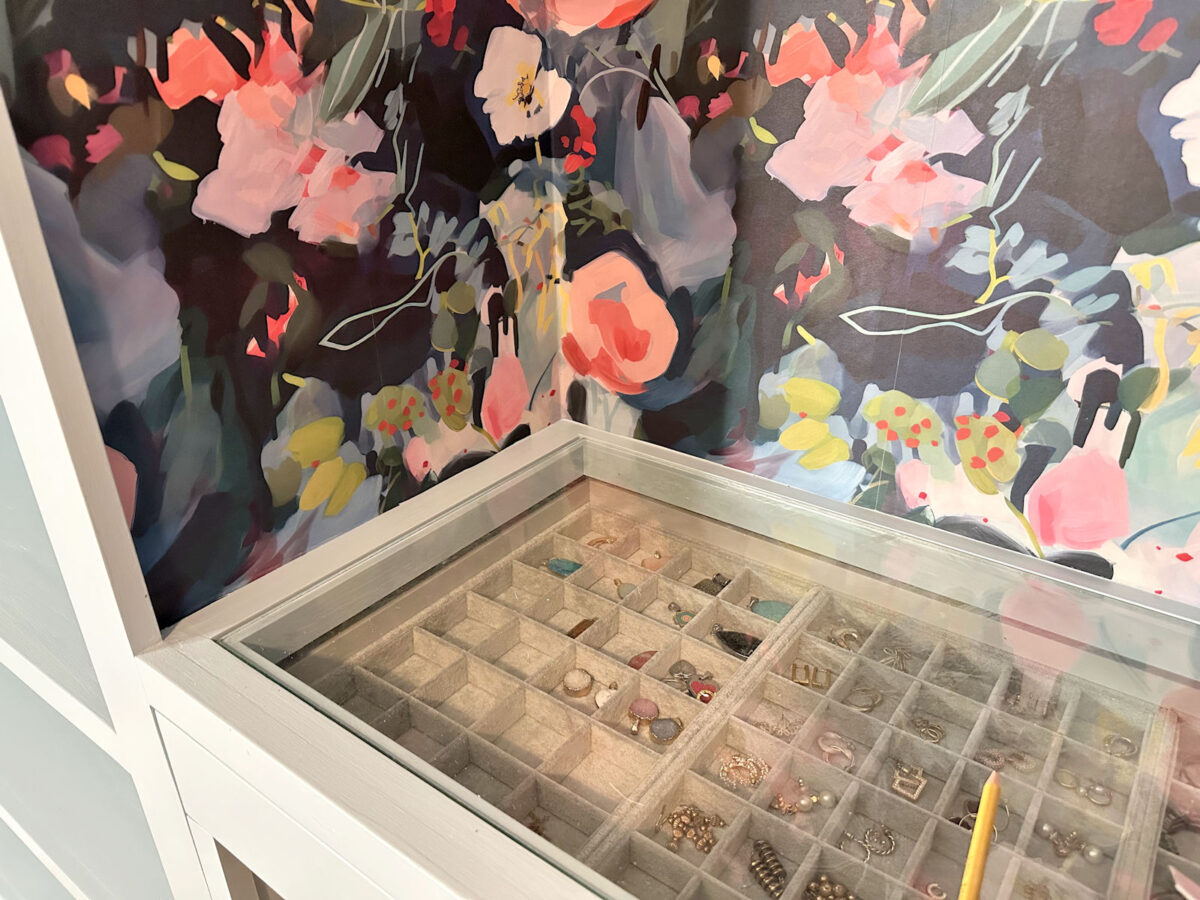
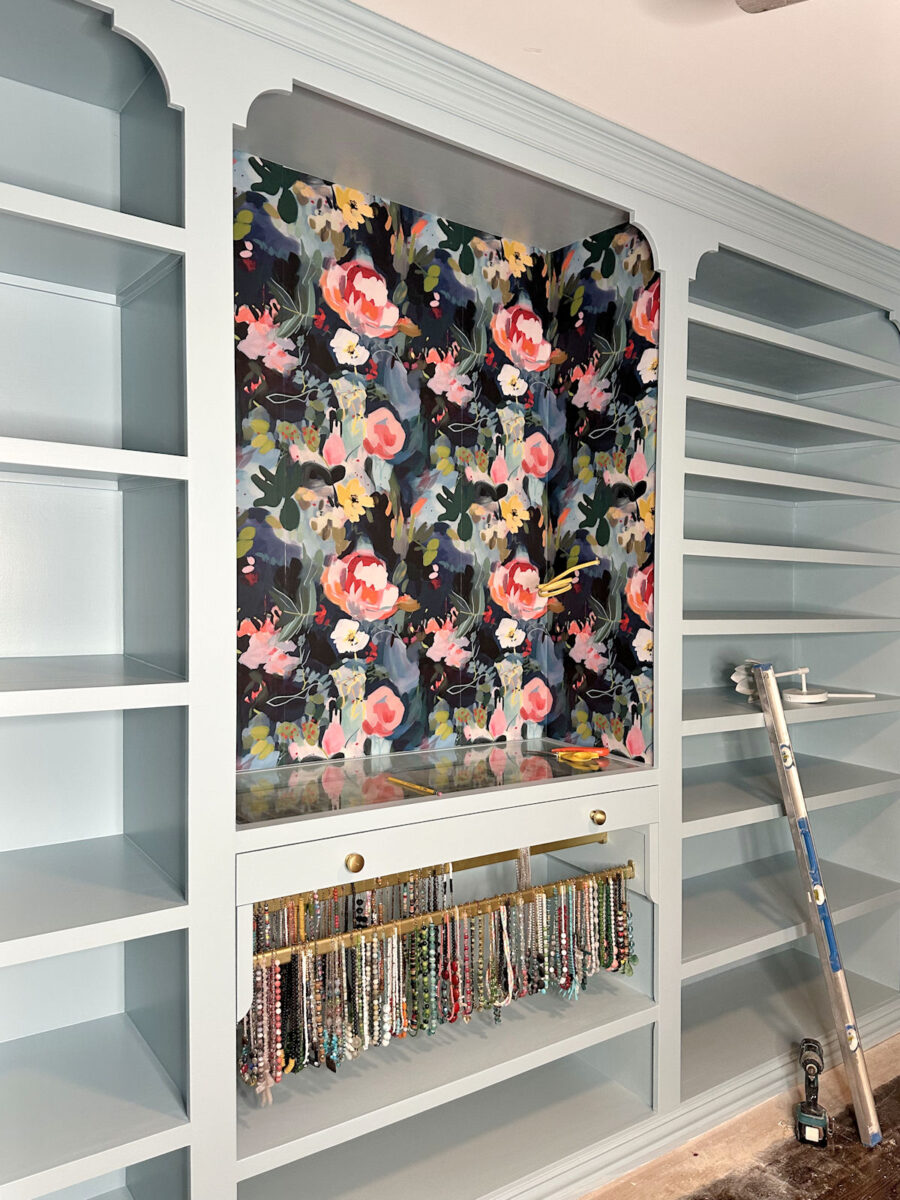
By the time I got to those final two side pieces, which seam right down the middle of the sides of the cabinet, I had gotten a much better feel for the wallpaper, and I was able to do a much better job on those seams. I was so relieved because those are the seams that will actually show.
Here’s a look at the other side…
And because I had to pre-cut the length, it’s not perfect along the top or the bottom. But I had already planned to put tiny trim around the top and the bottom (probably shoe molding) after the wallpaper was installed, so I wasn’t too concerned about that.
Anyway, it’s done! And even in the poor lighting, and even with my mistakes, I love how it looks.
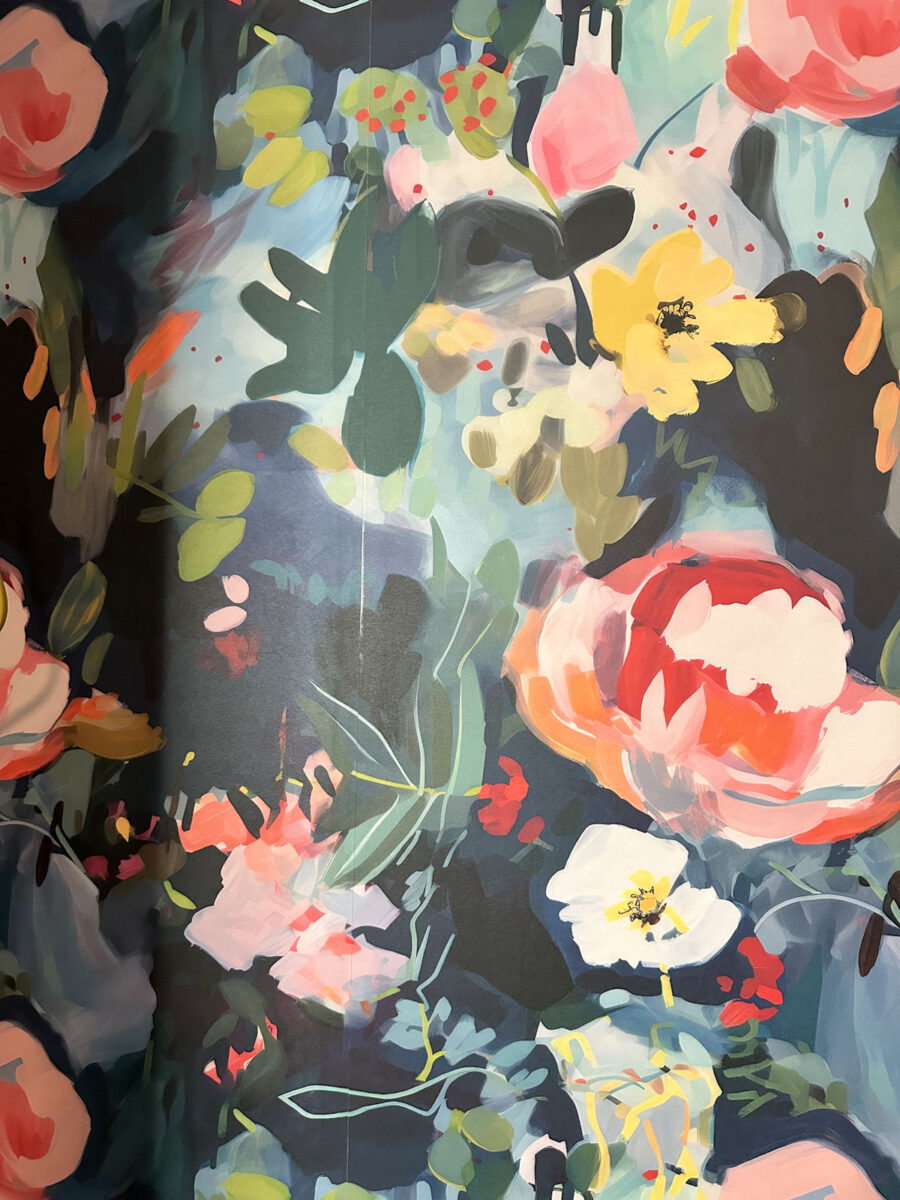
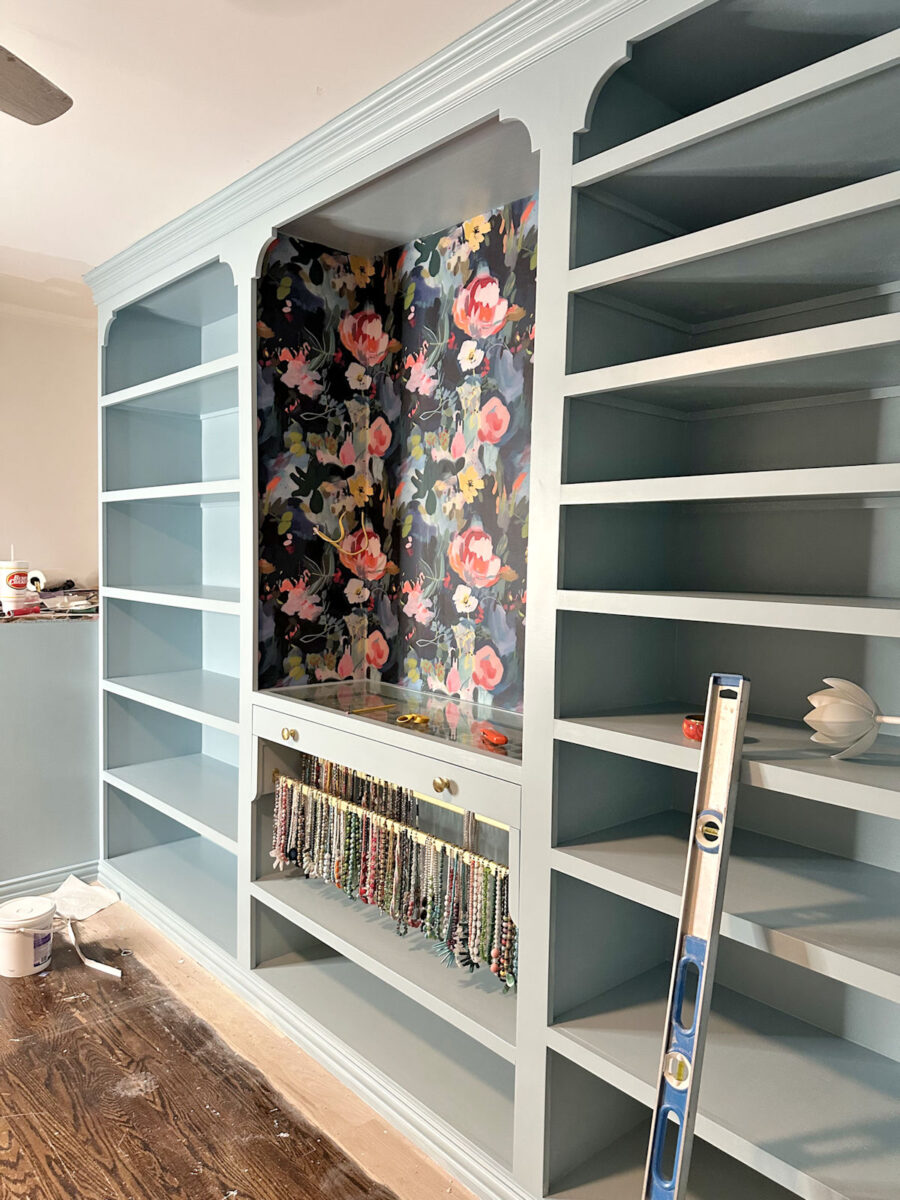
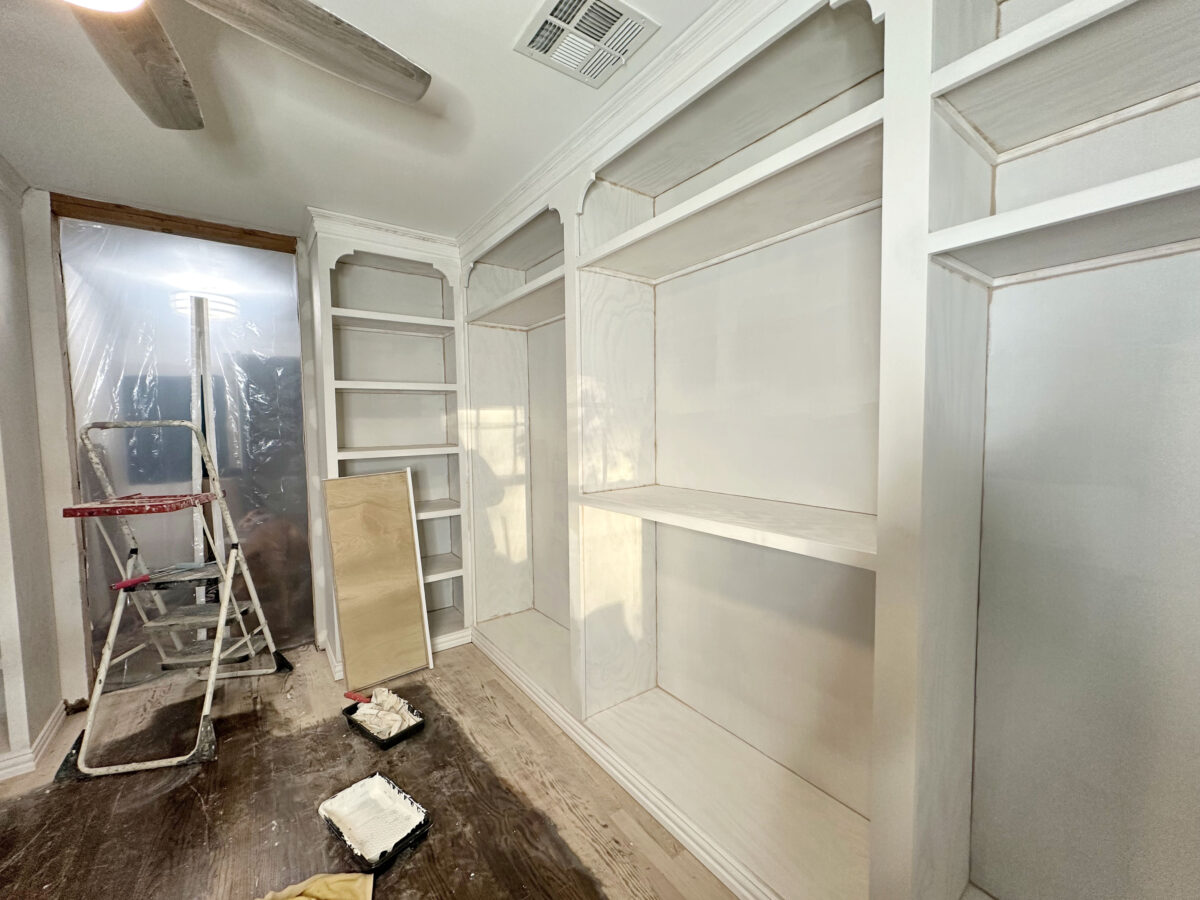
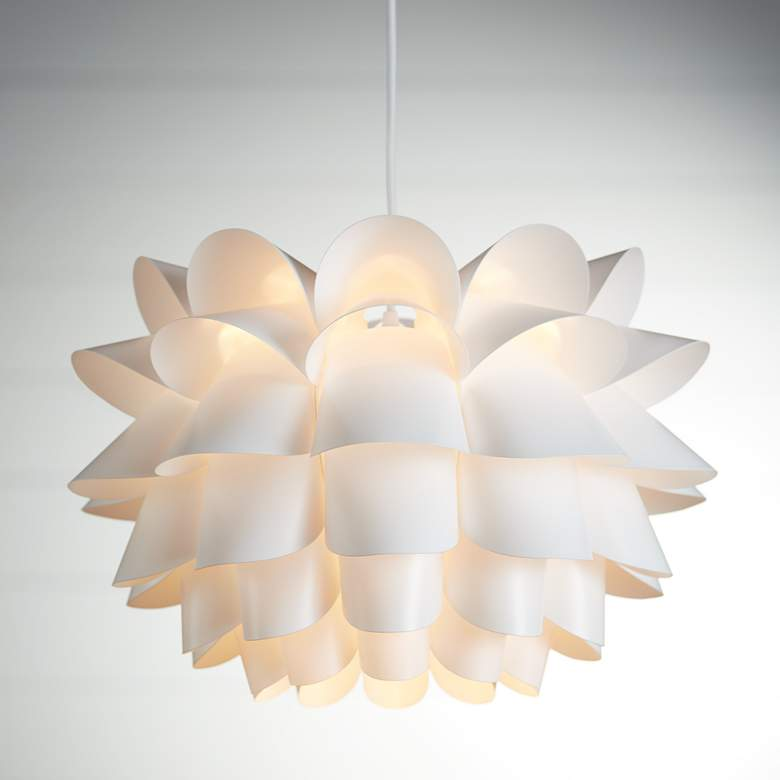
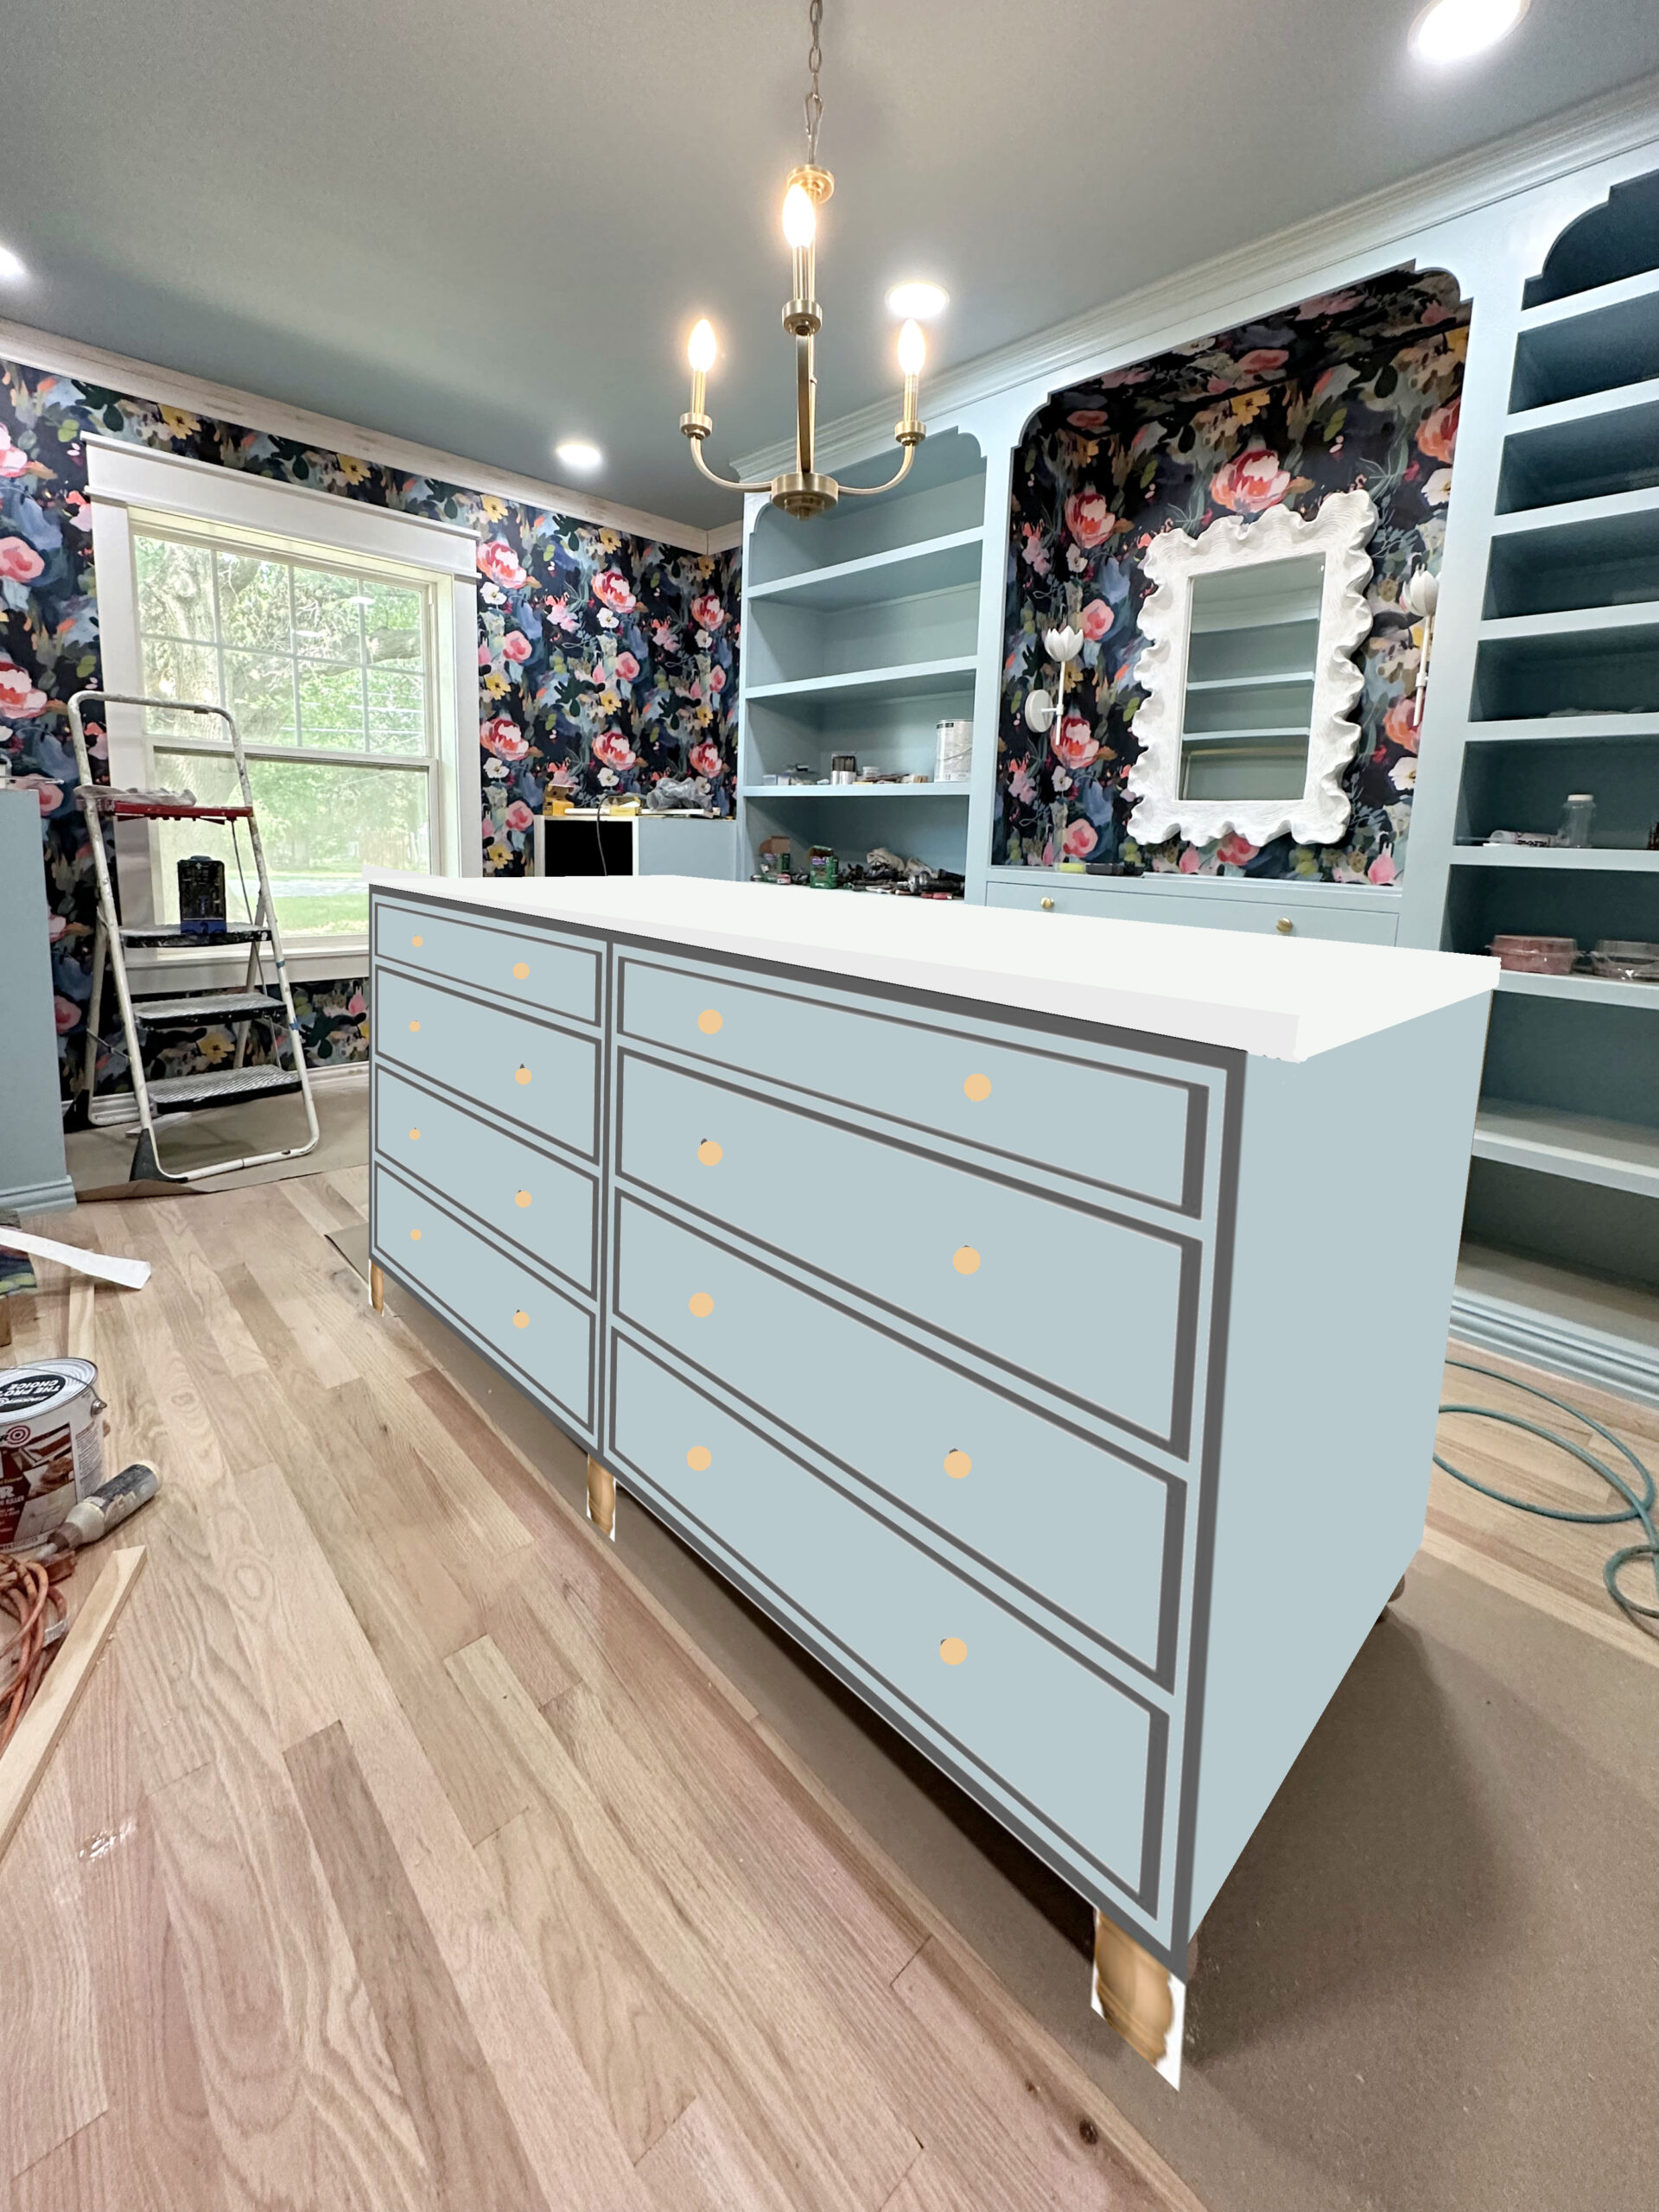
It’s always so fun to go from concept…

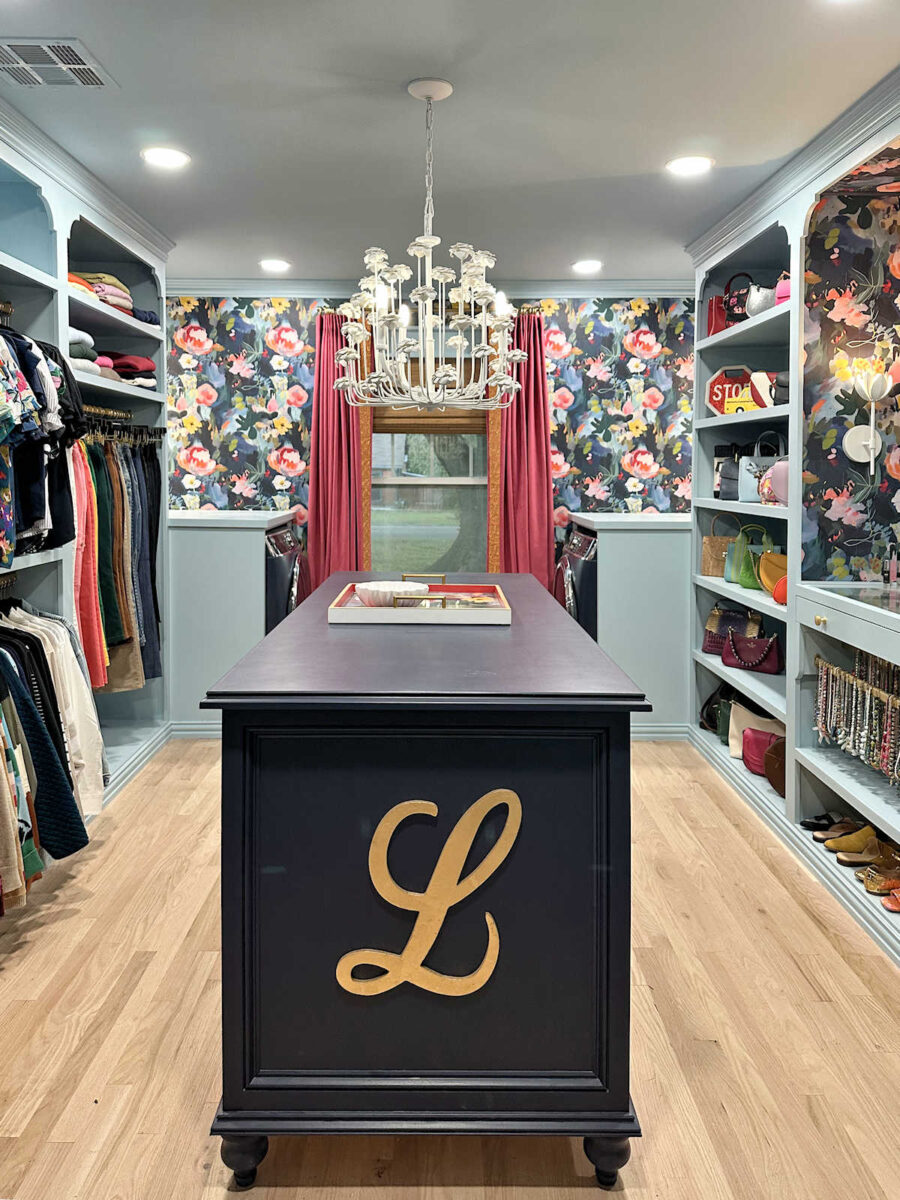
…to reality, and to see a design plan start to take shape…
I’ll be adding the shoe molding not only around the top, but also around the bottom. So these uneven areas around the bottom don’t concern me. And I’ll wait until the mirror is hung to see how much of a problem that one seam is going to be. If any of that shows, I’m going to have to figure out a solution. Because if I can see any of that seam, especially close to the bottom where it’s closer to my line of sight, it will absolutely drive me bonkers. I have a feeling that I’ll be using a tiny art brush and painted in several custom-mixed colors to hide at least part of that seam. But again, I’ll wait until the mirror is hung to see just how much of that will be necessary.
I did much better on the other side, but that left seam on the back might also need some touchup as well. I’m confident that if I have to do any touchups, it won’t be much because the mirror will cover most of it. That’s the only reason I was able to remain super excited about this wallpaper job rather than lying in a puddle of tears of disappointment. 😀
Before I wallpaper the back wall of the closet, I think I’m going to paint the whole wall that darkest navy blue from the wallpaper. It needs to be painted first anyway, and it’s on the darkest part of the wallpaper where the seams are the most visible.
Anyway, overall, I’m super excited about how this looks. Today, my goal is to get the tiny trim painted and attached around the top and bottom of the wallpapered section, and then get the sconces installed and the mirror hung. And then I’ll be putting the second coat of paint on the last two closet sections on this right side of the room.
So if things go as planned, by the end of my day today, the cabinets on the right side of the room should be completely finished.
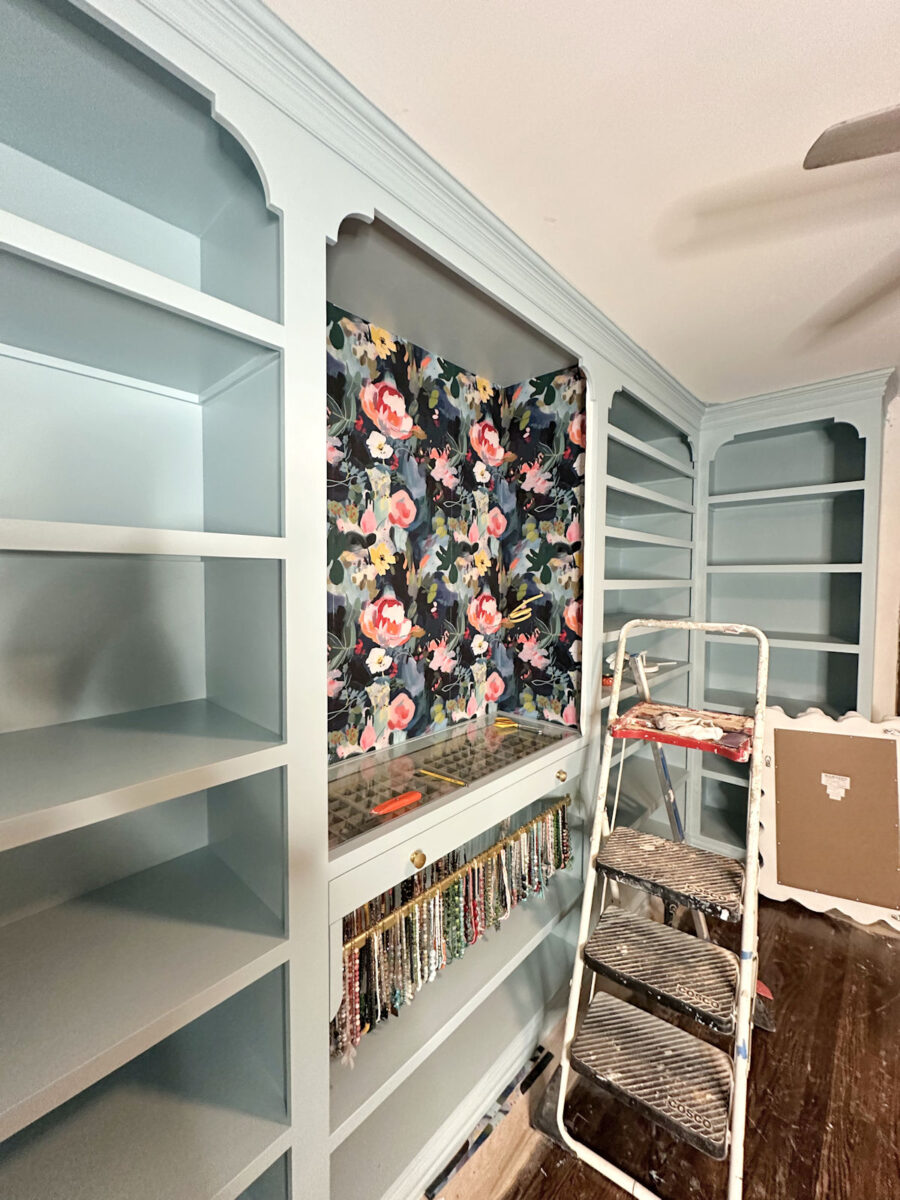
And then I can start caulking and paint the cabinets on the left side of the room. The good news is that the left side shouldn’t take nearly as long as this side because (1) there are far fewer shelves on that side, and (2) there are no wallpapered sections, no sconces, no mirrors, no drawers, no necklace bars, no specialty anything on that side.
That side of the room just has a few shelves and lots of wide-open spaces, which will be much easier and much faster to caulk and paint.
The side of the room with the most detail is almost finished!
And y’all have no idea how much self-control it will take me not to start loading up these shelves with shoes and handbags. 😀 Last night, I almost convinced myself that it would be okay for me to start doing that this weekend since all of the building phase is finished, and I’ll be covering all of the cabinets with plastic before I sand the floor. But the practical side of my brain (which I do have, but which generally isn’t the strongest part of my brain) realizes that would still be putting the cart before the horse. So I’m mustering all of the self-control I have to keep myself from loading up these shelves until everything is finished. We’ll see how long that self-control will hold out. 😀
More About My Walk-In Closet/Laundry Room

see all walk-in closet/laundry
room diy projects
read all walk-in closet/laundry
room blog posts

Addicted 2 Decorating is where I share my DIY and decorating journey as I remodel and decorate the 1948 fixer upper that my husband, Matt, and I bought in 2013. Matt has M.S. and is unable to do physical work, so I do the majority of the work on the house by myself. You can learn more about me here.


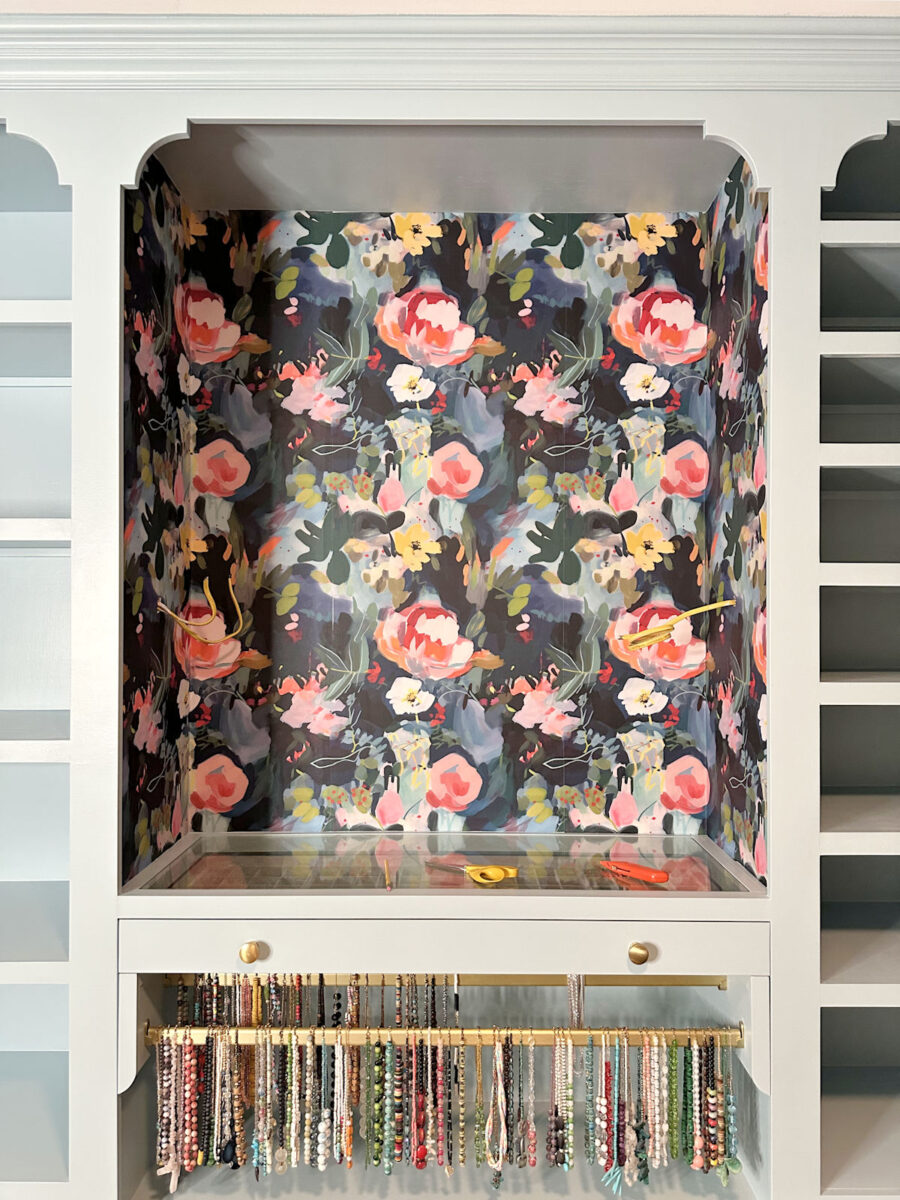
ooooh! It is all SO SO SO GOOD! I know it was a late game decision, but the necklaces underneath that wallpaper is one of my very favorite parts.
Hi Kristi: SO BEAUTIFUL!!! And the paint color is perfect. I also like the look that the necklaces add. The necklace colors look intentionally made to go with the wallpaper. You have really made a lot of progress quickly!! But I cringe when I think about the dust that the floor sanding will bring so please try to hold off on adding your items. I don’t want to see you have to do a ton of dusting or washing of your added items.
After you get the finishing trim, painting, and remaining wallpaper up, consider sanding all of the floors in your closet, foyer, and bedroom. That way when the Bona arrives, you will be able to start finishing the floor right away and let it cure.
Way to go!! You rock!!!
Oh wow, it’s looking SO good; the paint colour, the wallpaper, your necklaces, it’s gorgeous Kristi.
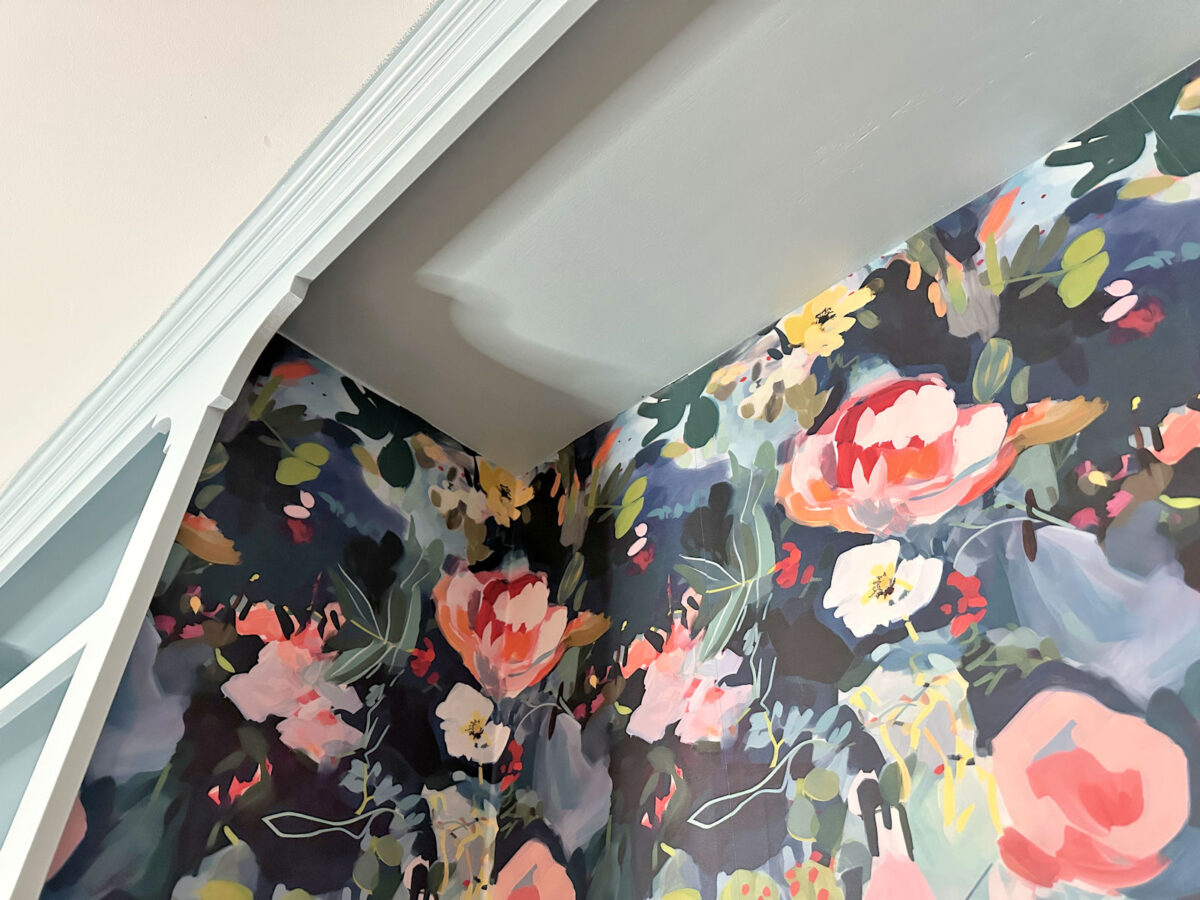
Just IMO, after looking at the niche/jewelry area, would you consider carrying the wallpaper onto the ceiling part of the niche?
That’s exactly what I thought Sharon. I think carrying the wallpaper onto the ceiling will finish it off beautifully (it is beautiful now). I can’t believe the amount of work you have accomplished, goodness knows what this would have cost having it contracted out and would not be so well done.
Umm, you’re what’s known as simply amazing! I look forward to your daily updates. Genius move to paint the wall, dark blue, so the seams would be less visible; however, I’m certain that you don’t have any visible seams!
Soooo beautiful! The colors in the necklaces coordinate so nicely with the wallpaper. A wallpapering tip (for the future) gleaned from watching a professional do a repair for us with a dark background wallpaper: use an artist’s pastel (oil-based) the color of the dark background to run on the edges of the wallpaper before installing. So hold the pastel “tube” perpendicular to the wallpaper and run it on the edge to color it. That way the light color of the edge is disguised and seams are much less obvious.
This is brilliant! I’ve hung a lot of wallpaper and never thought of this.
Hi Kristi! If you take a Sharpie marker that is close to the background of the wallpaper and run it along the light exposed areas where the seams meet, you will not notice the gaps. Hope this helps.
Just a note to anyone who loved the paint color and is considering for a project or actually any paint….
Sherwin Williams paint will be on sale this week at a decent discount.
That is when I usually buy my project paint. Right now I am attempting to decide what color to paint a shed so I can get my paint now.
Kristi, this is truley a beautiful jewel box of a room. When your colorful clothing comes in it is going to be glorious!
Sheila F.
Kristi,
Have you considered putting wallpaper on the “ceiling” of the mirror section? IMO it would give it just that special finishing touch.
That’s a good idea. I had to go look at the picture to see why you were suggesting this and then I agreed with you. It’s okay the way it is but I think this would be better. Or maybe just paint it a darker coordinating color?
That was my first thought as well.
I came here to say this. I think it almost looks unfinished to have the wallpaper on the back and sides and *not* the top of the nook.
I thought this as well. Or paint the ceiling navy maybe.
OH, GREAT idea! I totally see what you mean!
I agree with this. To my eye, it looks unfinished.
I love this! This blue is very similar to the color of the walls in my closet. I really want to paint my entire closet. I may do it this fall when I have time.
I’d say OK on loading up the shelves. Only after the paint is fully cured according to the can. Do a test with some tape in a less conspicuous spot if masking the cabinets. Paint can pull off – you dislike the paint finishing steps involved more than cleaning.
If its not cured wait or here’s what I’d do. The easier dopamine lift- Instead of covering the shelves is bag what’s stored on each. Then clean after. Bring it in, style each shelf, take pictures enjoy, find any missed details. If you find a BIGG need (ex: move a shelf) you can fix it now then tape/drape, you’ll be doing the finish repair dance. If no Big changes Sort what you’ll want readily available in the near future and stored. Remove the available items from the closet – back where they were. Bag all the to store items in bags roughly. Then store the bags on the shelves tightly closed/tied. After sanding is a methodical clean of smooth shelves. Remove the bags outside, clean the shelves with no paint repair, unbag outside to bring each in again. You like the styling part just not the rest. Unbagging outside does increase steps but is less detailed. It is less meticulous than finish repair work which seems to be an unwanted as much as cleaning.
It’s so beautiful! I absolutely LOVE how the necklaces look displayed below the wallpaper. I think it was THE BEST decision to move them where they are!
So so so pretty!!! Watercolor pencils/pens also work for touching up those seams.
I agree with others about the ceiling. As great as the wallpaper looks on the back and sides, without it extending to the ceiling area it looks incomplete and, to me, jarring.
I really think the “ceiling” of that wallpaper section needs to be papered too. It’s screaming at me loudly. I know you wouldn’t normally wallpaper the ceiling of a room with wallpaper, but this “feels” like a jewel box and that empty section is begging to be included. Also, if you’re drenching the closet in blue, drench that section in that beautiful paper.
I agree it is a very good idea to prime that back wall with navy. The seams will definitely disappear.
You do such beautiful work!
When you mentioned the mirror that will be hung it made me think, are you going to have a full length mirror anywhere? I always like to see my whole “look” when I get dressed.
She has said numerous times, she’ll have a full length mirror and bench in the foyer area.
Absolutely brilliant. Well done 🙂
I love it! Would you consider wallpapering the ceiling in that little nook too? I feel like that would look more complete.
GORRRGEOUS!!! Seams don’t show much at all. You did a wonderful job Kristi. Blessings to you, Matt, and your fur babies.
Gorgeous! Well done!
Love the detail around necklaces that was all it needed. I suggest permanent markers around seam , paper touch up. You would have more control than a brush.
A tip for future corners: Cut your paper at the corners. I resisted doing this when I began papering thinking it would result in a loss of continuity of pattern. BUT. #1 corners are rarely perfect, so wrapping is difficult. #2 the corner will look crisper and will never shift and buckle. #3 it’s much easier to handle. #4 you really don’t lose your pattern.
I measure from the previous piece to the corner in several places and add an 1/8 of an inch. Then cut the paper from top to bottom. This results in one piece to complete the wall and one piece to start the new wall. You can then start a new and perfect plumb line. It’s especially important in a large room where you continue to hang many pieces on one wall. I hope this helps for future projects.
Wow what a difference the lighting makes. I love you using you self control. You go girl.
So very, very pretty. I was going to say something else but I don’t rember what,
Have a good day.
This closet is INCREDIBLE! It will be a favorite of so many who follow you, and beyond. I thought your studio was GREAT…This is thrilling to me!
WOWZA!!!!!
It looks super amazing. I really like how it is all coming together. I know you will be able to use your artistic talents to cover any flaws from the seams.
Cheers to you and Matt!
I really love the paper and how it’s all coming together. I think once the mirror is up and you do some tiny touchups, you’ll stop noticing tiny flaws. You’re focusing on them because it’s still an empty space and your eyes are fresh to the subject. After you’ve filled the space with clothing and accessories and used the beautiful space for a month, you won’t notice anymore.
It is beautiful. So fancy…….! I agree that painting the laundry area the background color will help hide seams on the wall paper. I’ve been thinking about your pendants. The ones you posted with the metal shade will force all the light down so if using those you may want a small dimmable can light or perhaps select pendants with a milk glass or opaque shade. More for you to think about! Thank you for sharing your journey with us!
Any boo-boo on any project like wallpaper where another unwanted color is showing, is why colored pencils and Sharpies were invented!
Actually, since you already know how wide your wallpaper is and where you’re going to start hanging, using the Navy, roll a 6″ line down the wall where the seams will land. Then you don’t have to paint the whole wall Navy. Don’t mind me, I’m lazy and cheap!
It’s beautiful! (however insert blush here) the top part is screaming for attention. Maybe extend the wallpaper or paint navy blue?
I guess you could wallpaper the top of the shelf but I think it’s noticeable to others because you are looking at it from an angle. It most likely won’t be an issue when the mirror is up
I love the finished look of the wallpaper
Your vision is coming to life! Good luck in holding back and being patient in NOT loading up the shelves!
It looks wonderful! A small paintbrush and some custom mixed paint will hide those seams, no problem. I had the same issue when I wallpapered my laundry room, except those seams weren’t being hidden by anything, and it was a wallpaper with varying tones in the background. 🙂 I went around and gently repainted and blended the seams in the background (as well as the flowers in the wallpaper!) in every spot there was a small tear or seam. Then I invited my mom over – she has an incredible eye for detail like you do – and asked her to tell me if she could find the seams. She couldn’t!! It wasn’t until I made her sit about an inch away from a few spots with a flashlight that she actually noticed that the sheen was a bit different, lol. So I’m certain you can do this. 😉
Oh my! That really makes the whole closet I think. It made me feel it was finished, lol. Anyway, so close! Bravo!
just love the cabinet color! So rich and supple for a blue. And the wallpaper looks lovely next to it. I do have to be a naysayer about papering the ceiling. There is no possible way to match the pattern on the ceiling to all three walls and I think that would drive you nuts. I would rather see only the wall papered and leave the cabinet sides unpapered (along with an unpapered ceiling). It looks weird to me to see cabinet sides papered. But that’s me. If it brings you joy, that’s the way to go.
I didn’t think papering the ceiling was an option, rather using the blue and “drenching” the whole room top to bottom.
I guess I’m the odd man out here. I’d prefer the side walls of the niche to be painted the cabinetry color. I think the pretty flower sconces would stand out better against a solid color. I would also prefer having wood painted blue in place of the glass over the jewelry drawer and a door/drawer in front of the necklaces. Having the jewelry viable looks cluttered to me. I have issues with clutter making me feel anxious.
You chose the perfect color of blue from the wallpaper for the shelves.
It’s looking good.
It looks very nice. (Not my favorite wallpaper, but not my house also! ) I was always taught when hanging paper around corners, you should only wrap about one inch wide onto the 2nd wall, then run a second sheet to the corner matching the pattern (overlapping the one inch) and then do a double-cut down the length. This results in a perfect matched seam. This is done because walls are never square or plumb, and that one inch allows for slight correction, so paper doesn’t “climb the wall.” It probably doesn’t matter on that short width of wall, but it would on a full wall. It may need a touch up as you said, but I doubt you will notice, with the mirror in place – it will look great! Good idea to paint the walls in the laundry area a dark color.
Fabulous!
When I use wallpaper and it says paste the wall,I make the paste thiner paste the paper then paste the wall. This makes it easier to move the paper around on the wall.
LUXE is the only word for this! It is truly amazing what you are able to create, Kristi. So so so good.