Master Bathroom Crown Molding Installed!
My master bathroom crown molding is installed! The long wait for an answer to all of the roadblocks I was facing has come to an end. But I did things a little differently than I had planned.
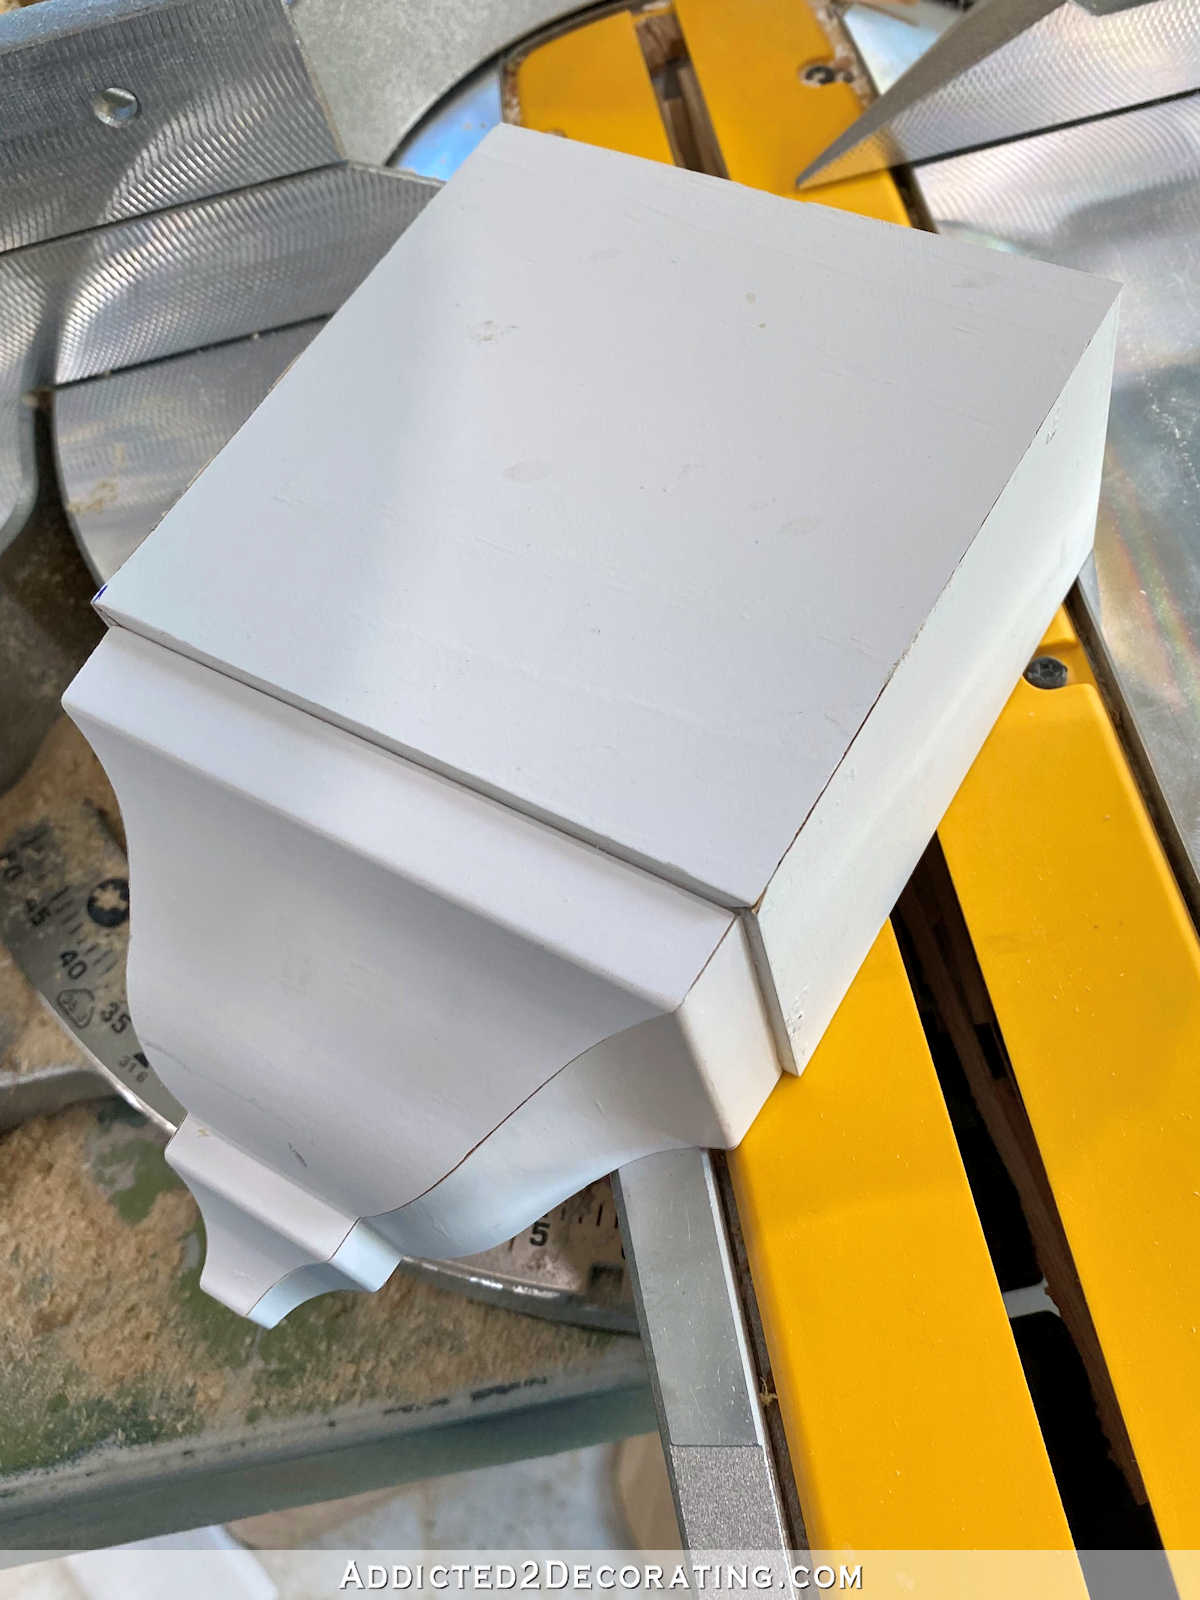
On Friday, I showed you these mid molding blocks that I had made so that the crown molding could dead end into these blocks at the entrance to the shower and the toilet area.
If you missed those discussions about the roadblocks I was hitting with the crown molding installation, you can read about them here and here.
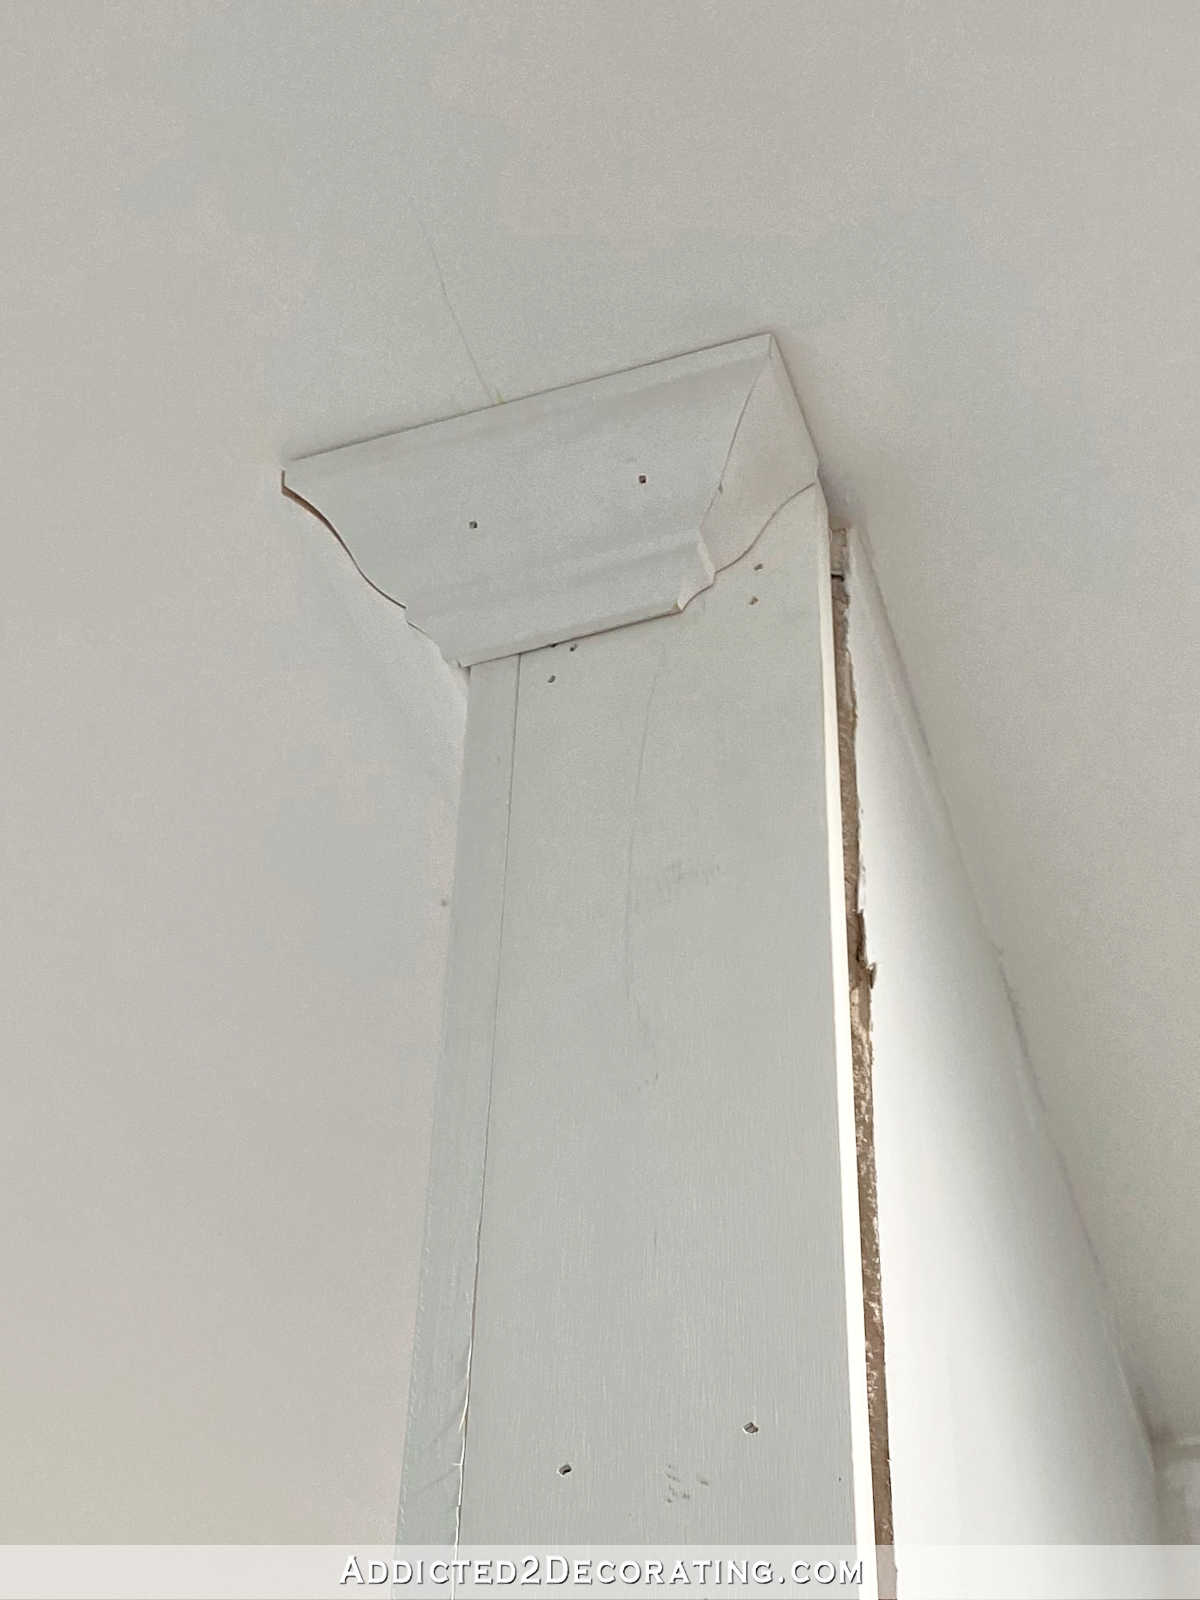
So I had a plan. I liked the plan. But I still wanted to tweak the design of those mid molding blocks. They seemed too big and bulky, and also still too ornate for my taste. So on Friday night when I was supposed to be taking Cooper (our dog) out and getting ready for bed, I was at my miter saw messing around with the blocks I had made to see if they could be cut down. (I knew I wouldn’t be able to sleep unless I tried this first.)
And sure enough, I was able to make them smaller and simpler in design. I cut a little more than an inch off of the depth of the top block. That cut into the decorative pointy bottom of the crown molding, but I was okay with that, because I wanted a simpler design anyway. So I just cut what was left of that point off and was left with this…

So I went to bed satisfied that I’d be able to make mid molding blocks that were smaller and less ornate to fit my personal taste. And then as I do with all big projects, I began to envision the process of installing all of the crown molding from start to finish.
I do this with every big project I take on, especially building projects like furniture or cabinets. I envision the entire process, start to finish, with each and every step, to make sure I’m not overlooking something. This very exercise is the reason the bathroom trim has been stalled for so long, because every time I’d think of a solution, I’d envision the process starting at the beginning again, and run into yet another issue.
So as I was lying in bed on Friday night, satisfied with my new smaller, less bulky, and less ornate mid molding blocks, I started envisioning the process of installing the crown molding from start to finish once again, and yet again I realized that I had solved one problem with the mid molding blocks, but I had created another. Let me explain.
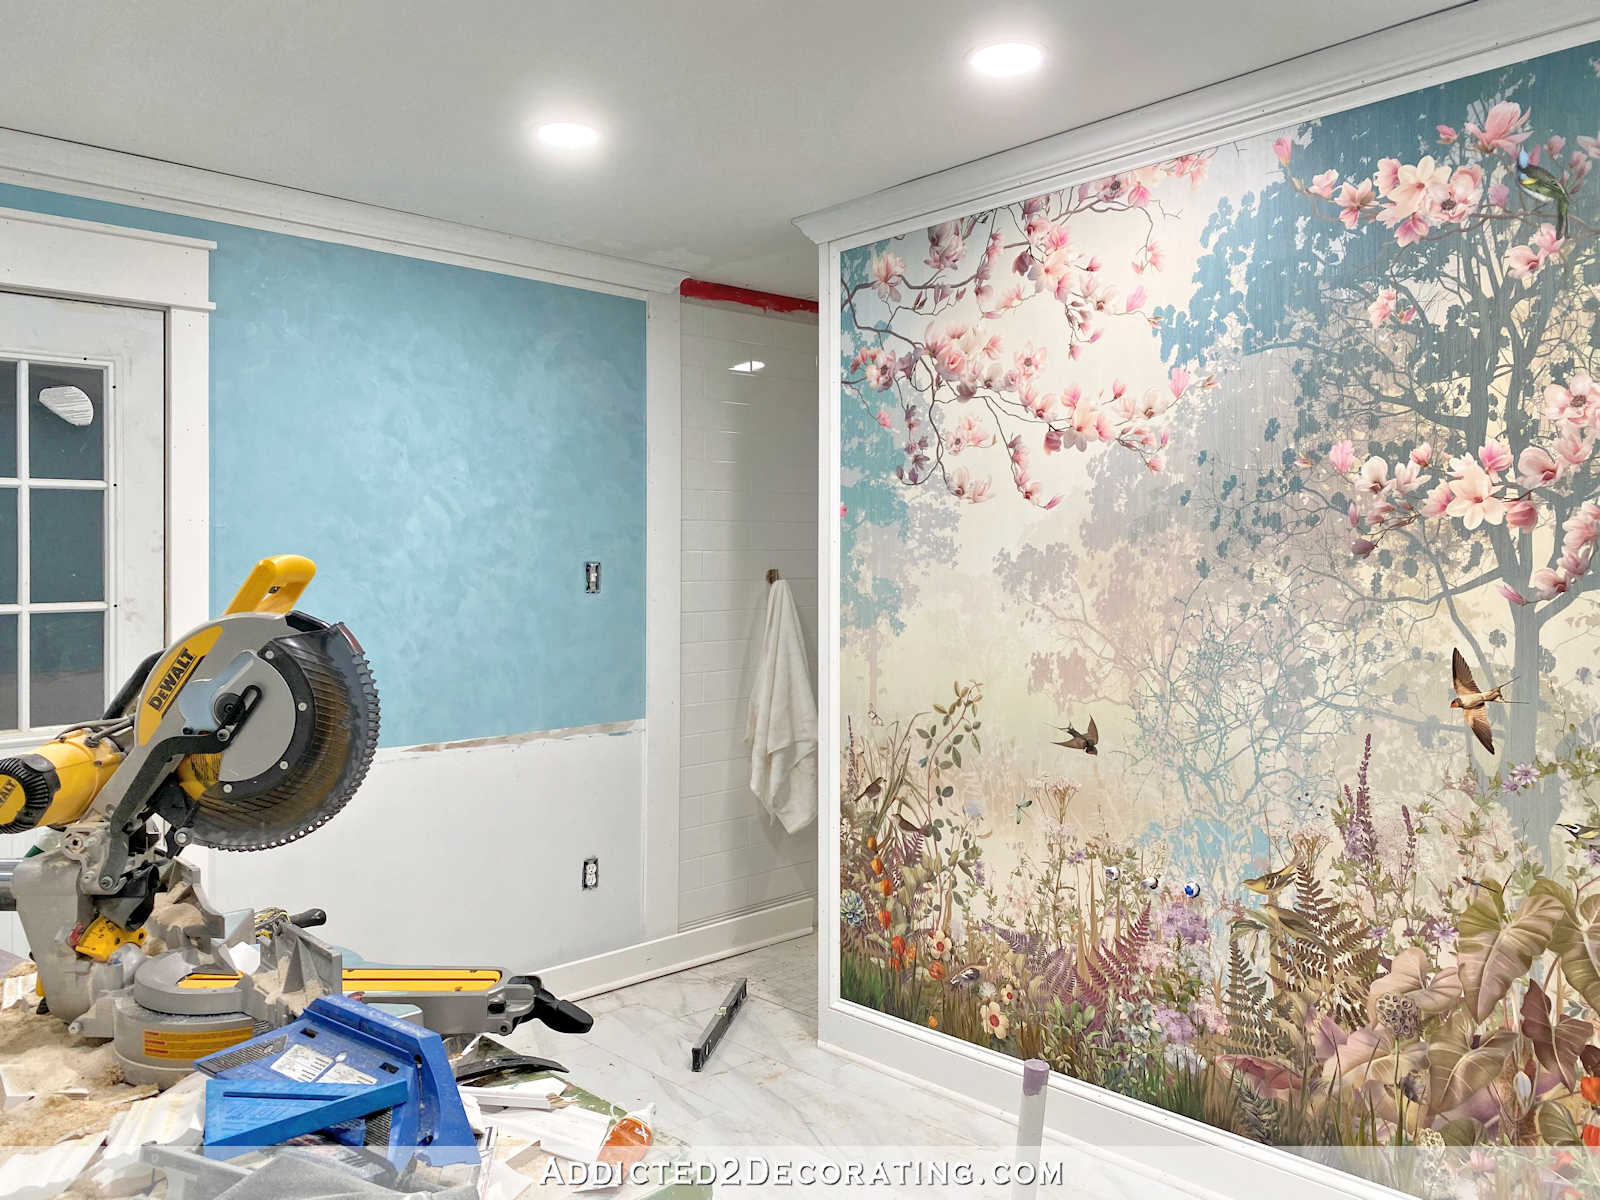
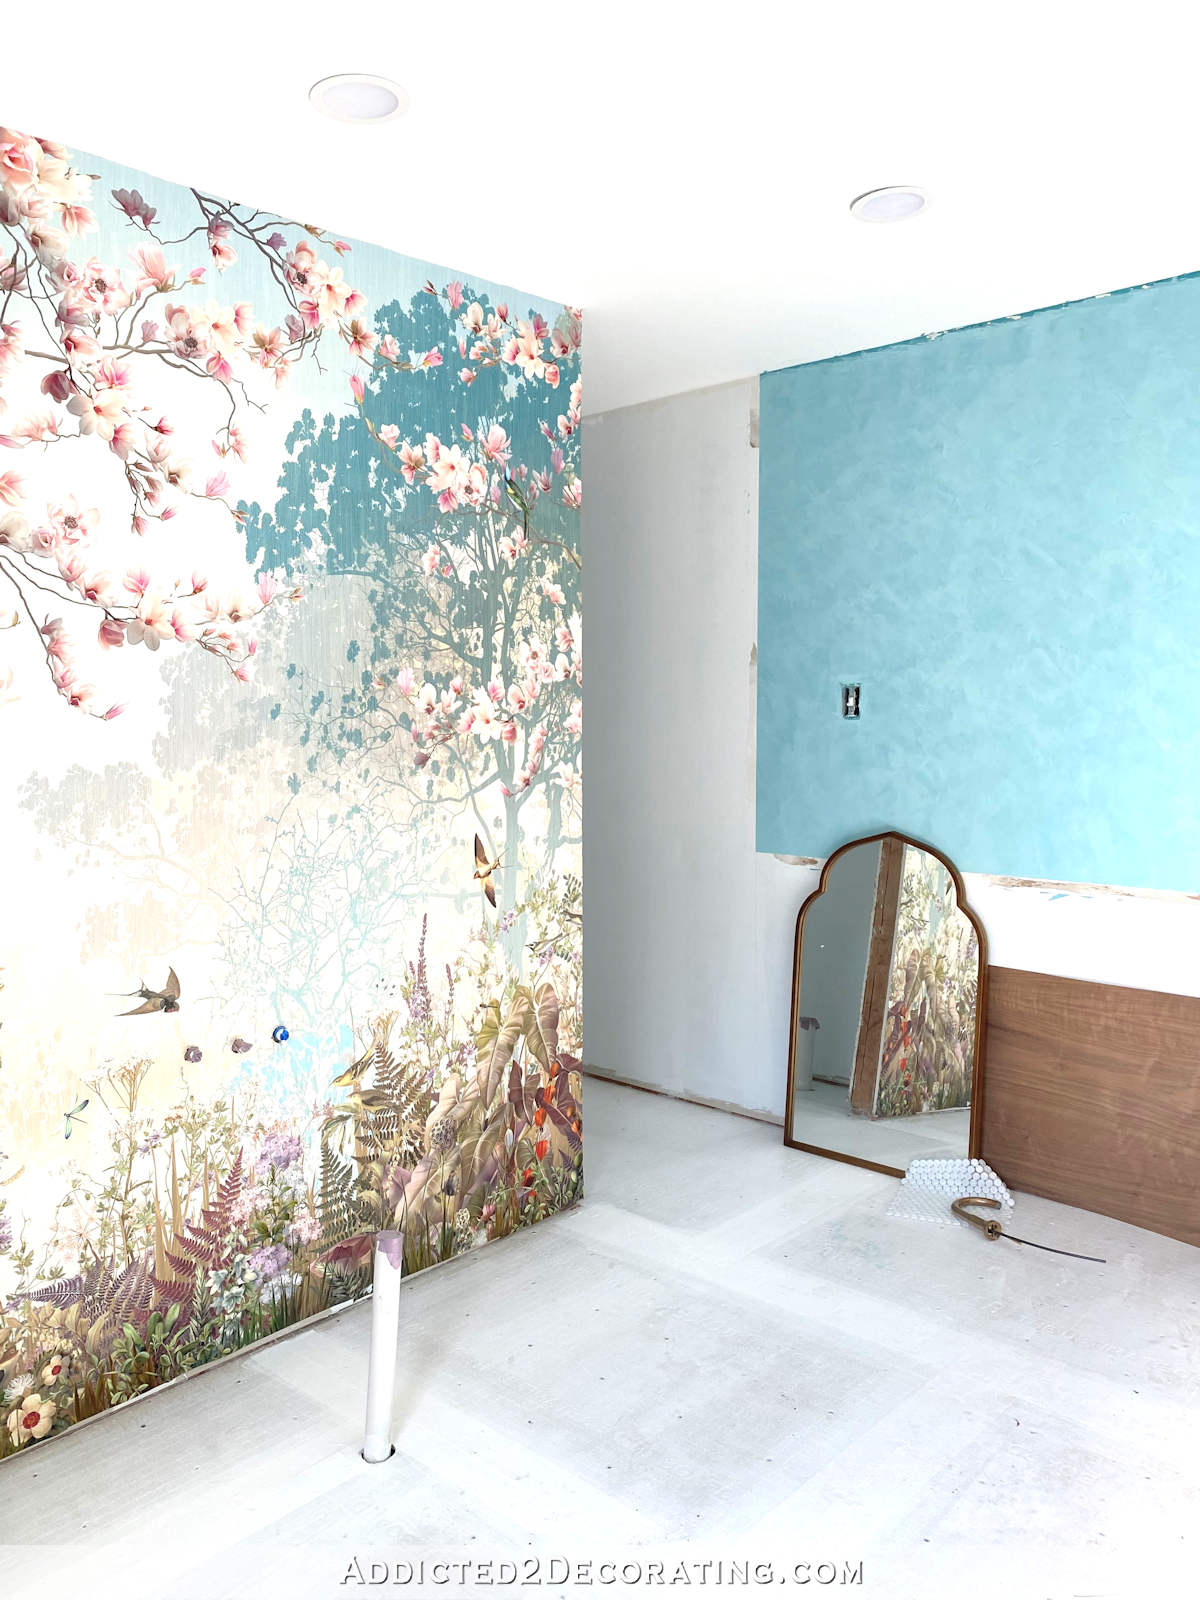
My plan for the mural wall has never changed. It has looked like this for a while now…
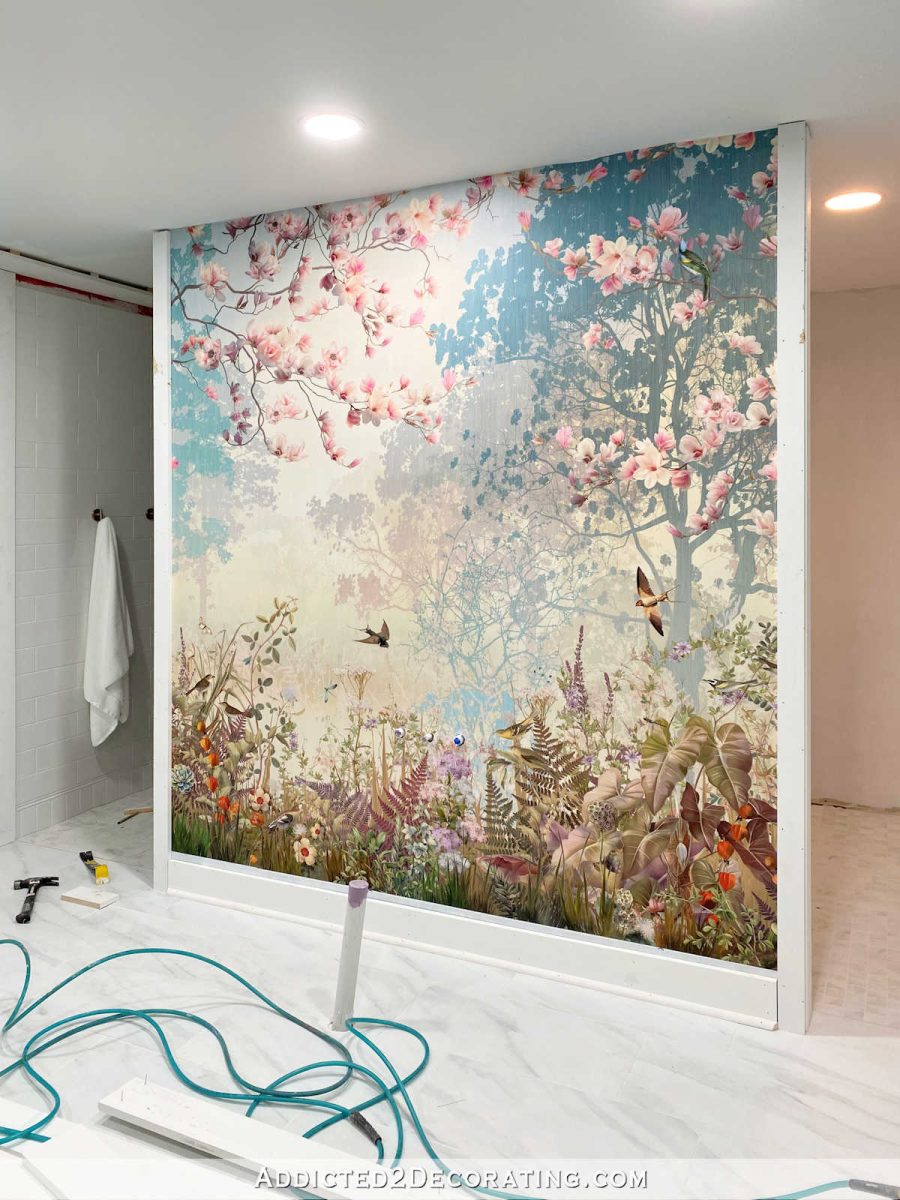
To finish that wall, I planned to add another 1″ piece of lumber across the top to match the trim pieces on the sides and the baseboard on the bottom (all of which are 1″ lumber), and then install the crown on top of that. And then I would “frame” the mural inside all of those 1″ lumber pieces with base cap molding.
The crown, which would be installed on top of that top 1″ piece of lumber, would then wrap around the sides of that wall seamlessly.
The problem? If I used those mid molding blocks, that means that the crown wrapping around the mural wall would dead end into the side of the mid molding block on the same plane (i.e., the back of the crown molding and the back of the mid molding block would be resting against the same board), whereas the crown molding on the side wall would be against the wall and would dead end not only into the side of the mid molding block, but also into the side of the 1″ x 5″ vertical transition board like this…
So the side wall crown molding would be set back 3/4-inch (the actual thickness of 1″ lumber) on the side of the mid molding block, where the crown molding wrapping around the mural wall would be brought forward on the mid molding block because the back of that crown molding and the back of that mid molding block would be installed on the same plane.
Phew! I hope that makes sense! All that to say that I had created yet another problem. And the solution seemed easy. I’d just need to install the crown around the room the same way I install it on the mural wall — by attaching 1″ boards all the way around the room before installing the crown molding. That way, both the side wall crown molding and the mural wall crown molding would dead end into the mid molding blocks on the same plane. That would eliminate that 3/4-inch variation.
That seemed like a reasonable solution, and then I realized that I was making things WAY too complicated!!
If I was going to the trouble of installing 1″ boards all the way around the room before installing the crown molding, then that kind of eliminates the need for the mid molding blocks. I could just end the crown molding with hanging returns.
I know you’re saying, “But Kristi! You HATE hanging returns! You’ve said it over and over again!“
I have said it. Over and over again. But here’s the deal. It’s not really the hanging return itself that I couldn’t fathom in my bathroom. It was the idea of white crown molding with a white hanging return against my blue wall. It’s just way too stark of a contrast (white against blue), plus it would have left those vertical transition boards dead ending into the ceiling.
But white crown molding ending on a white vertical transition trim board with a hanging return? I could do that! White molding against a white trim board up against a white ceiling — there’s nothing about that that would draw attention to a hanging return. And I wouldn’t be left with an awkward white crown hanging return against a blue wall
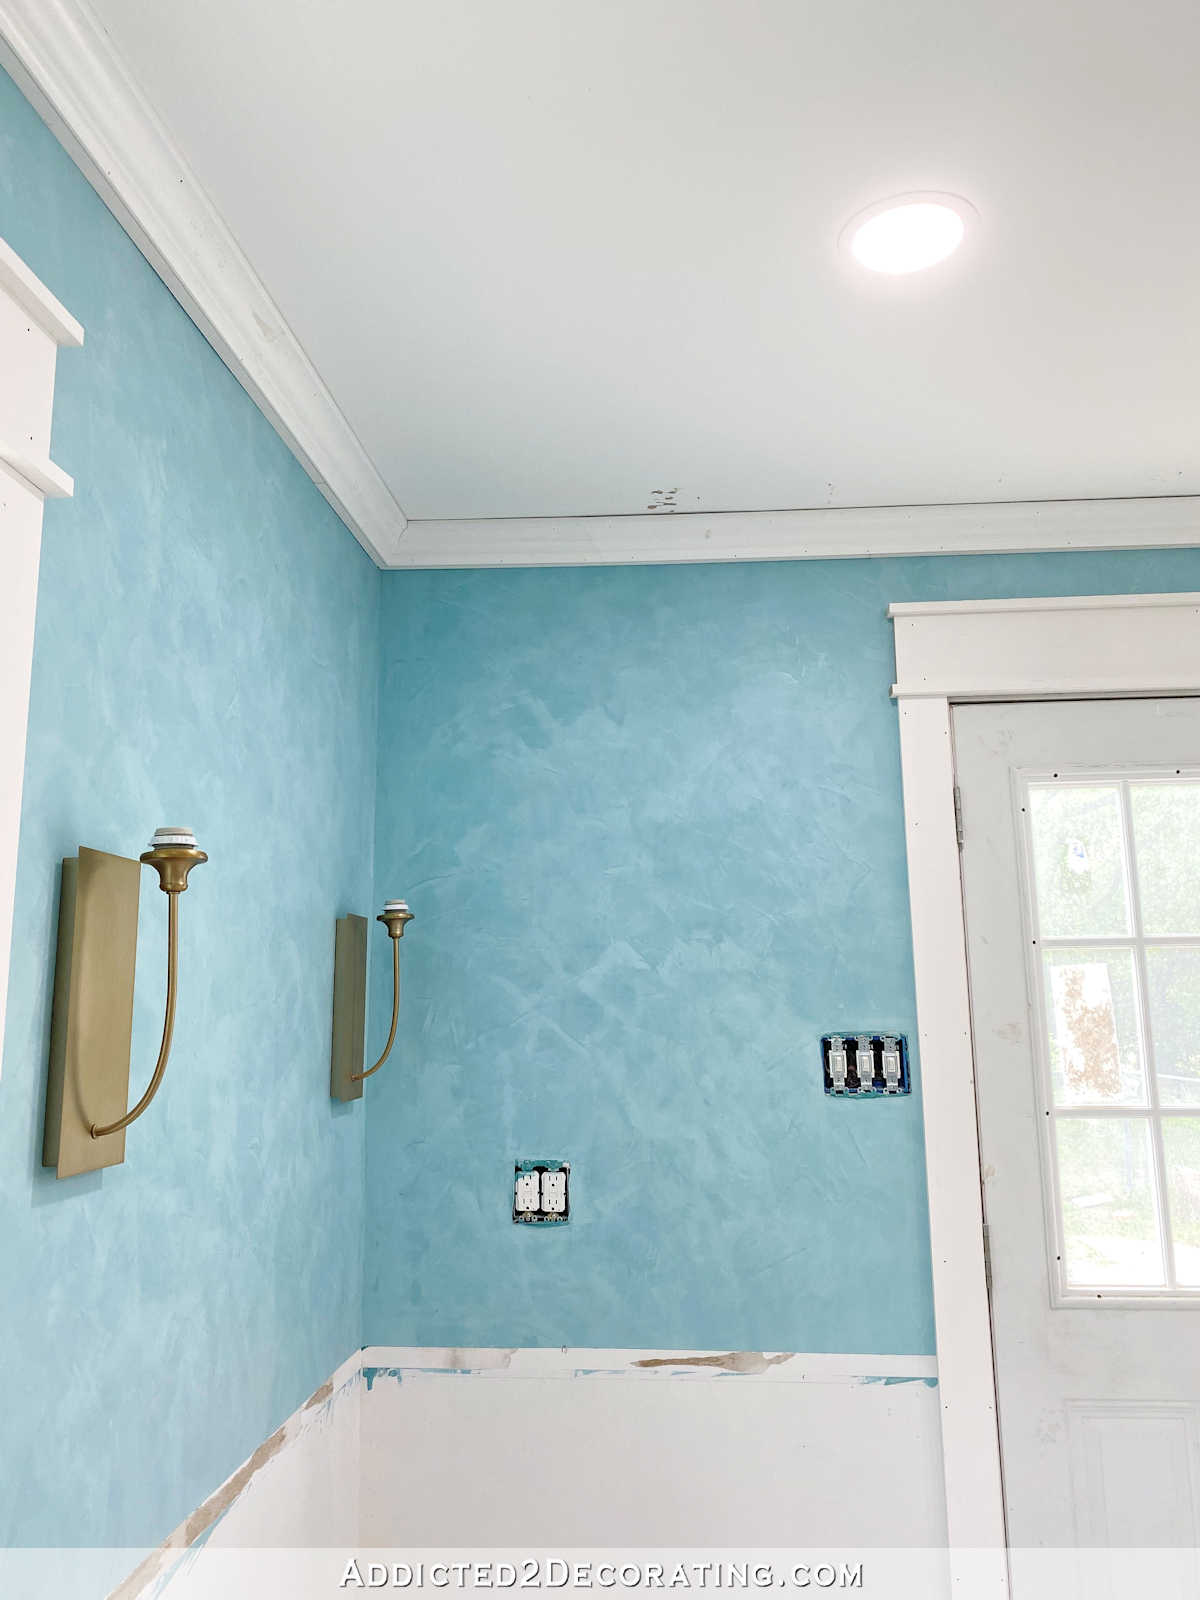
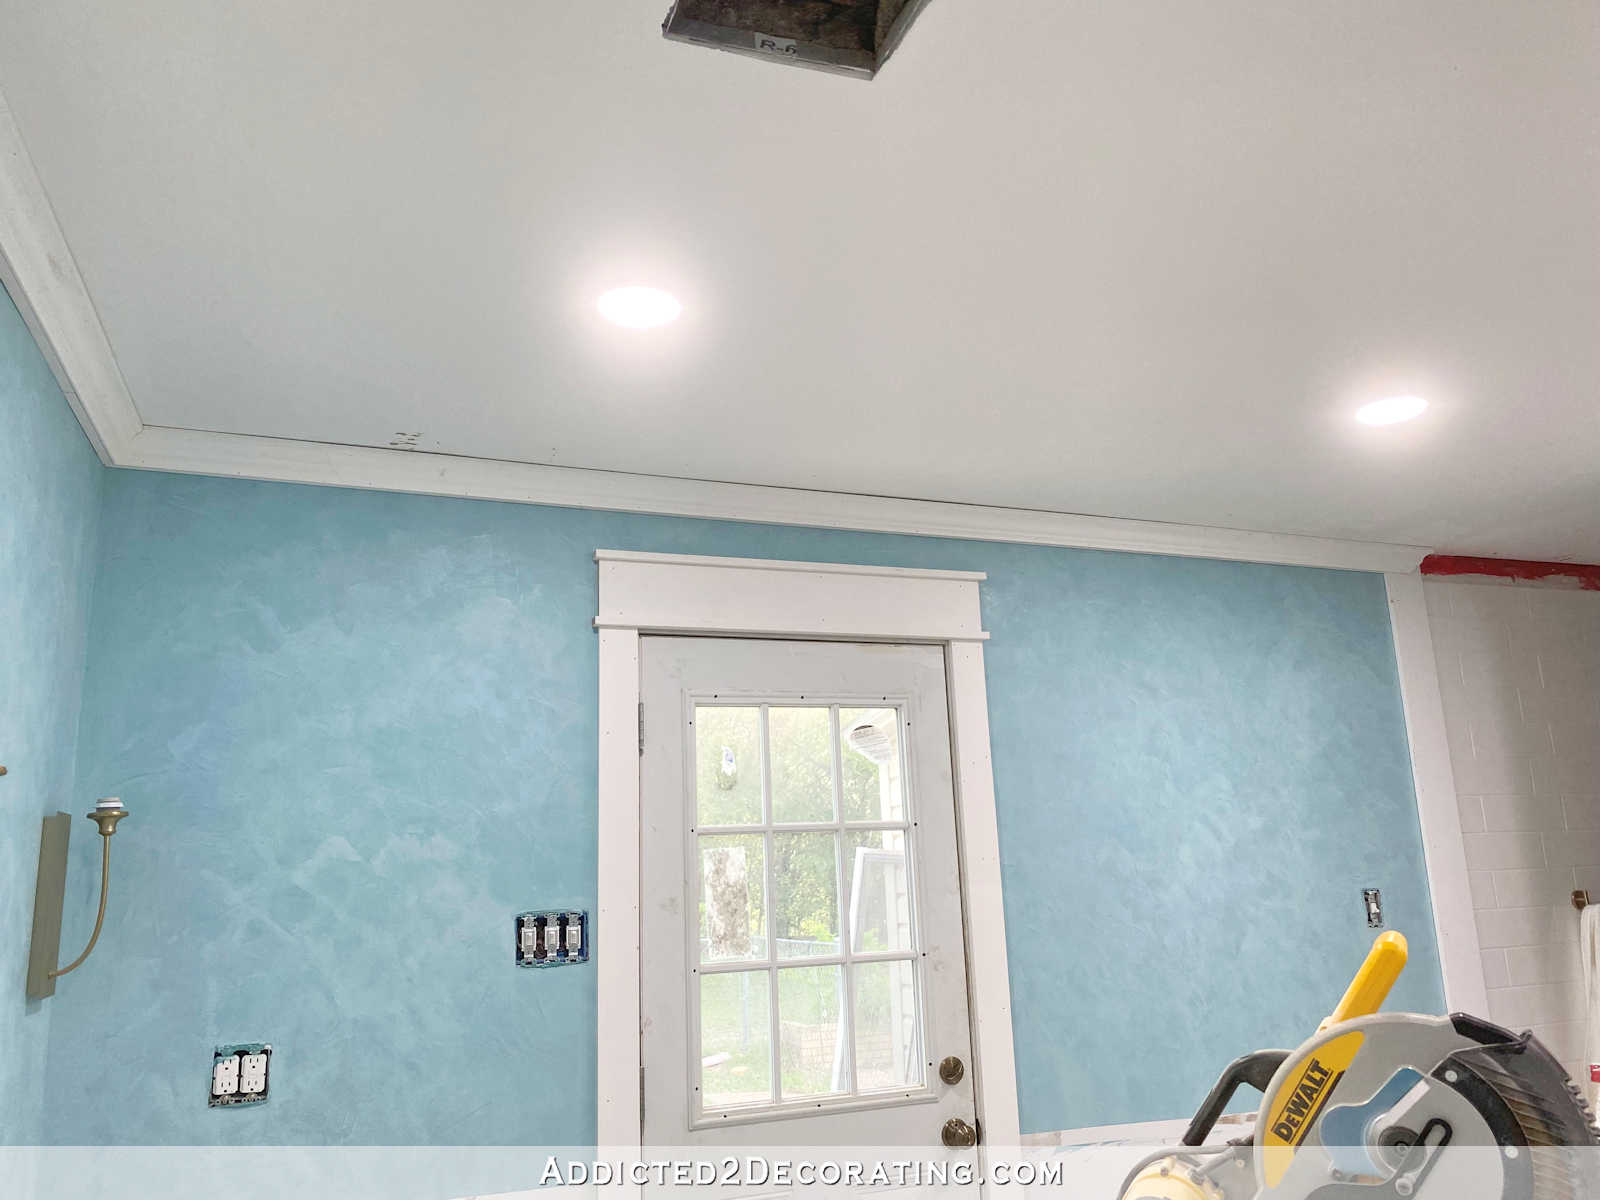
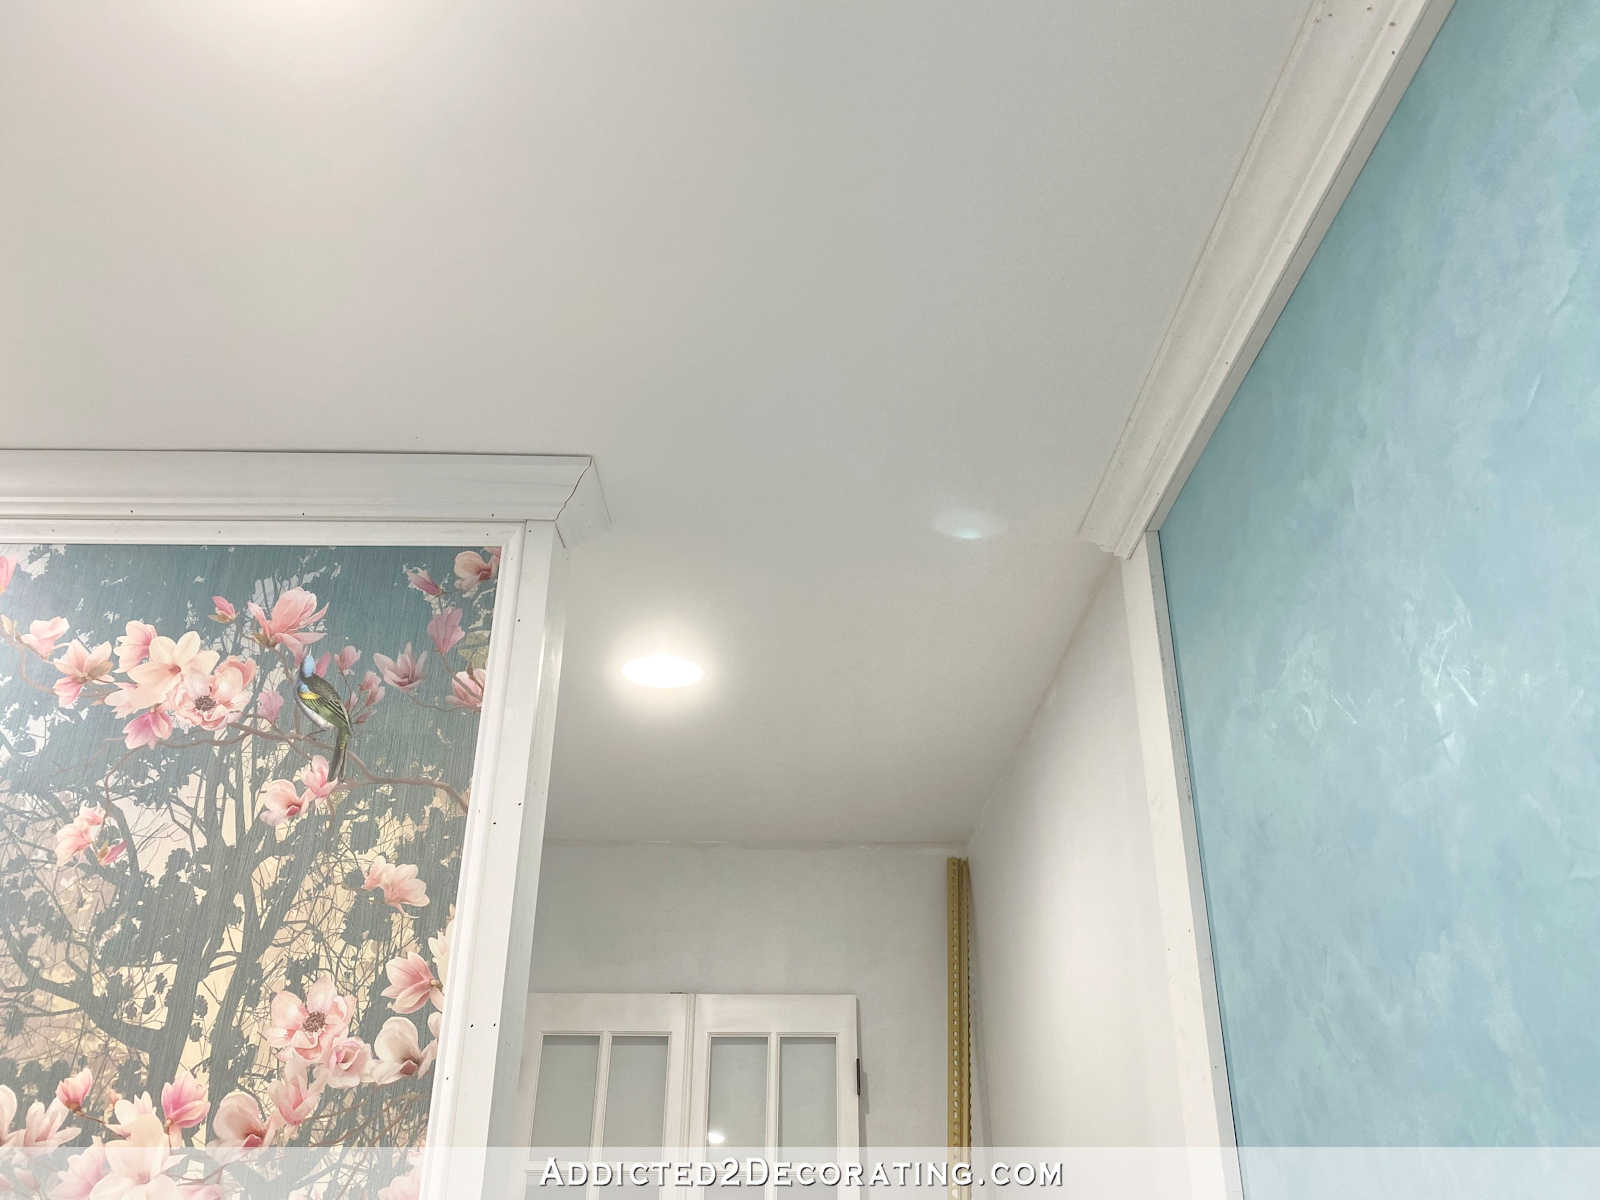
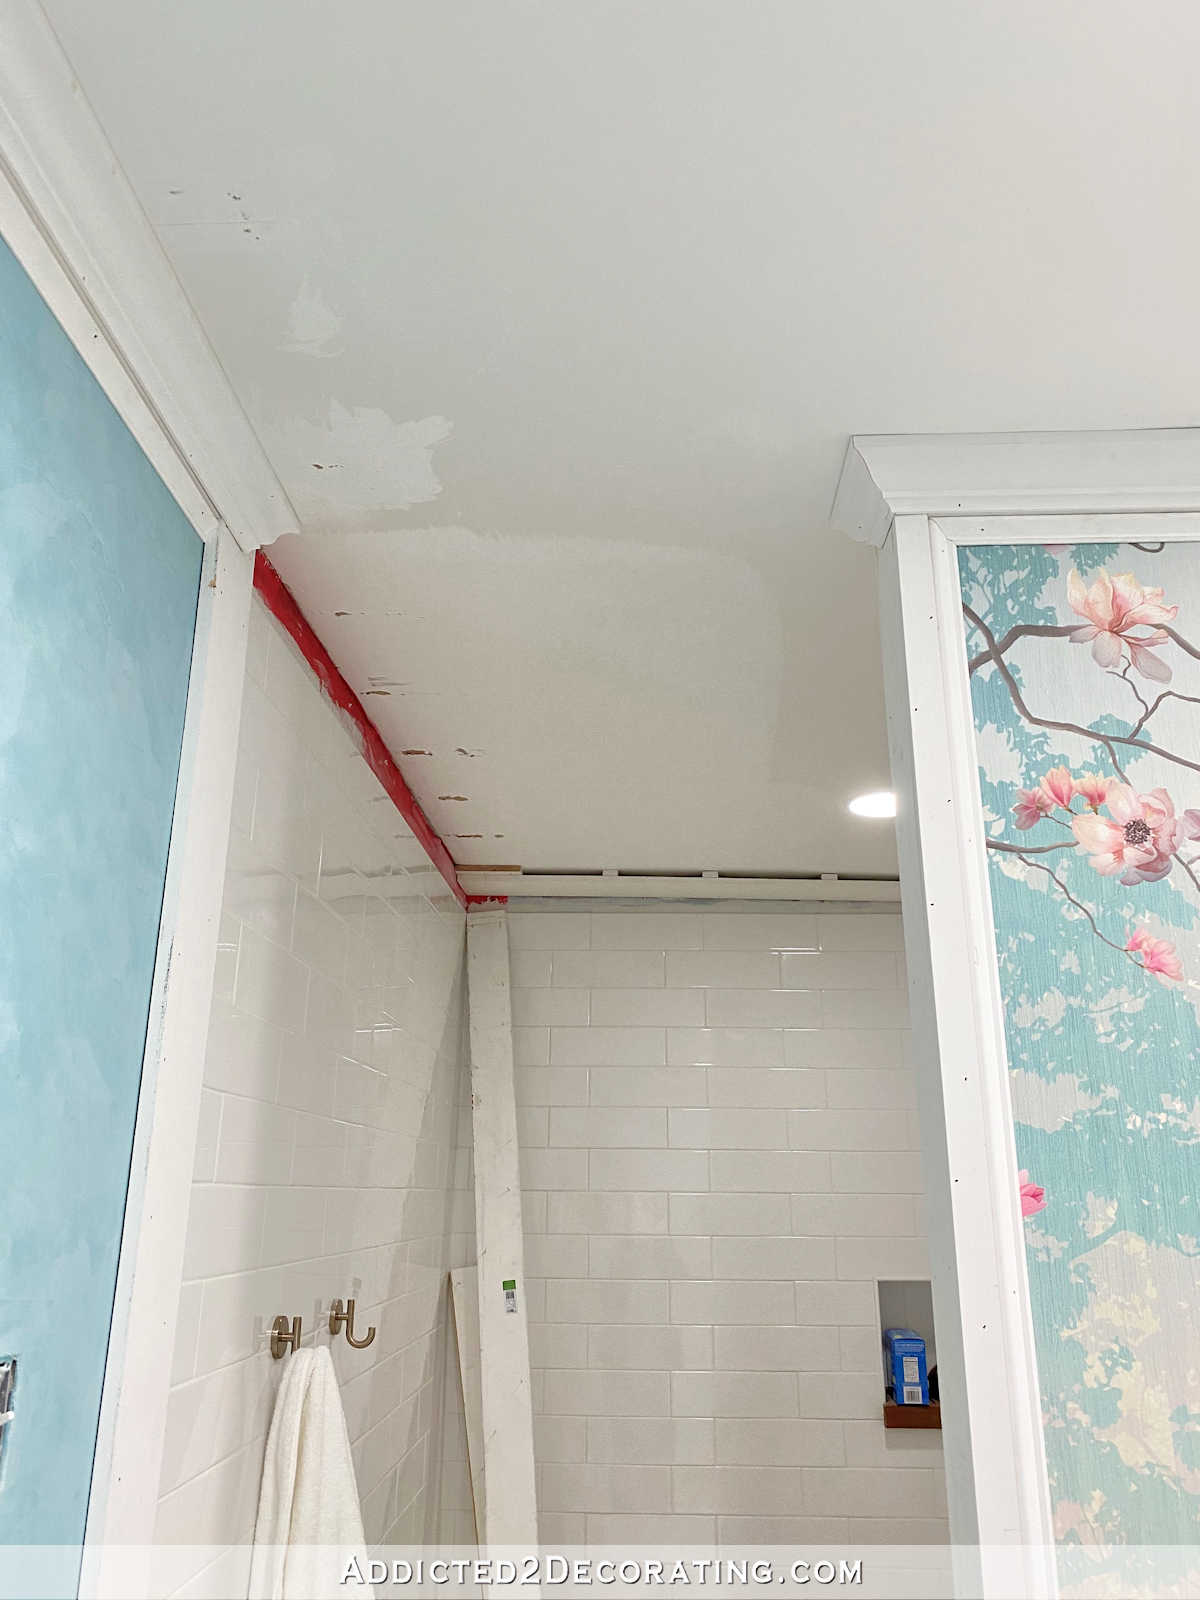
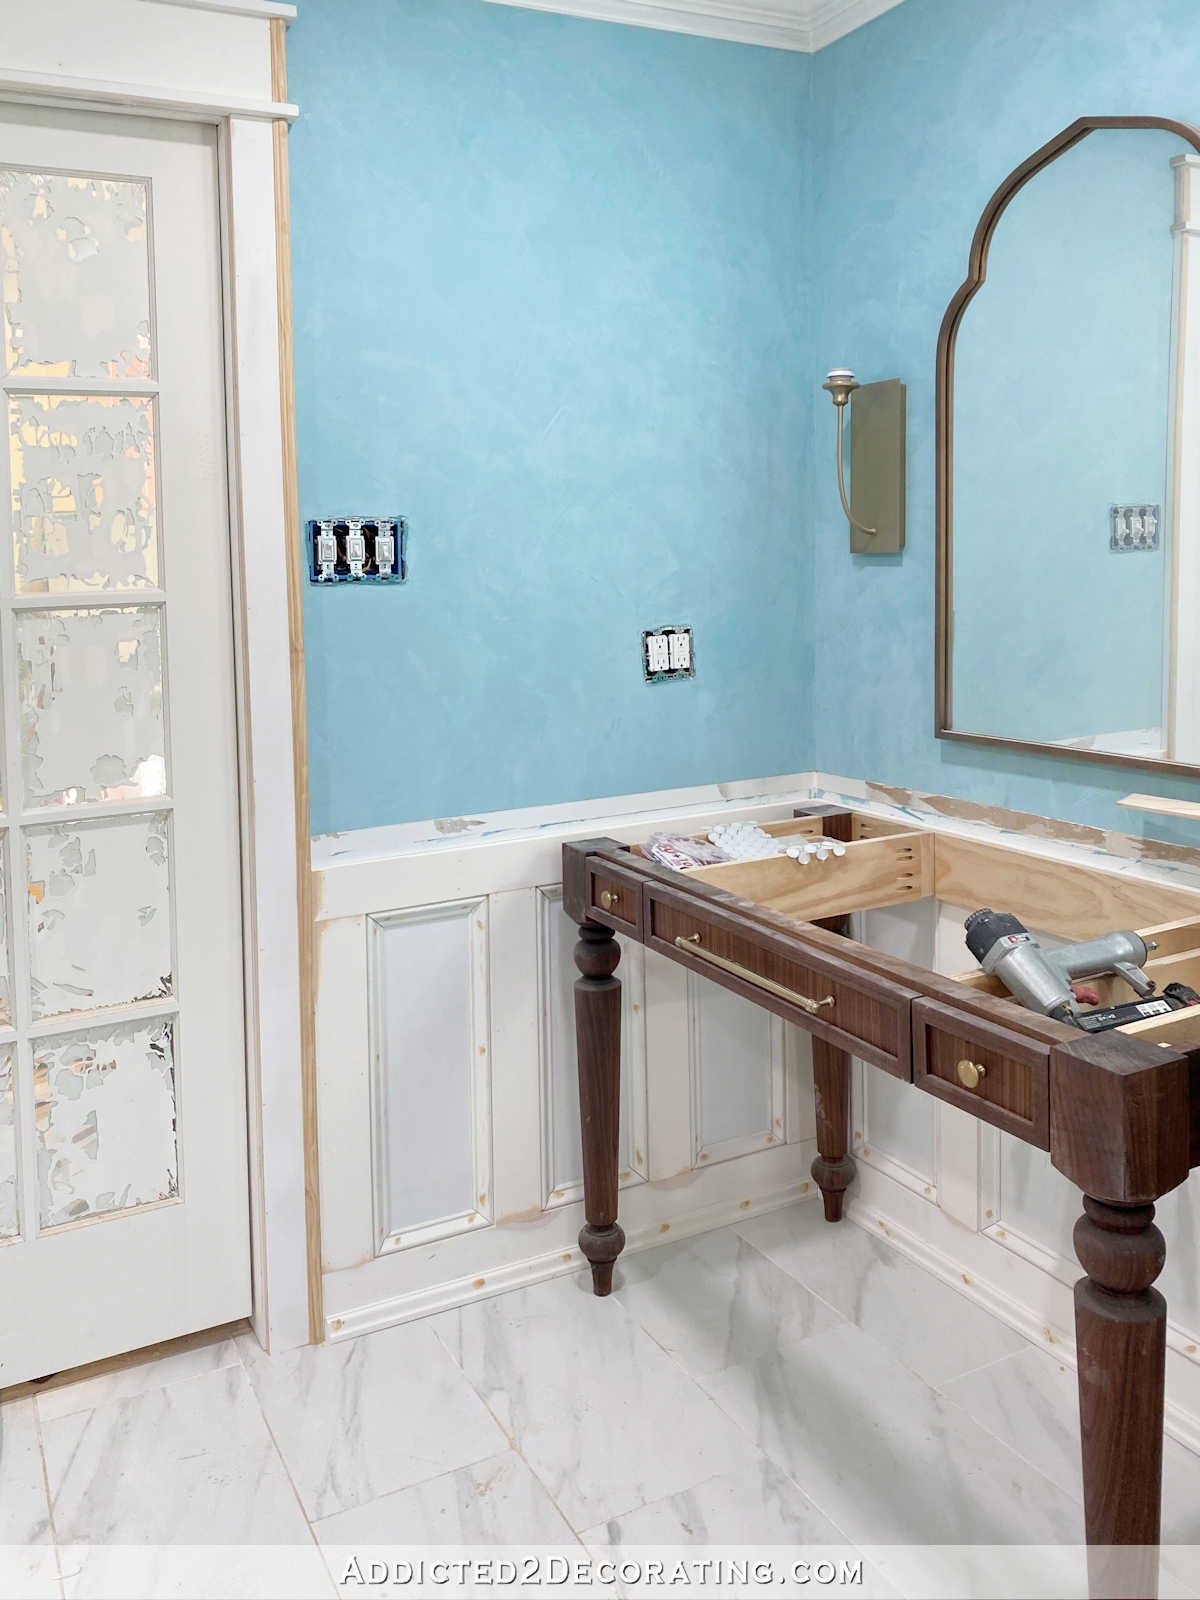
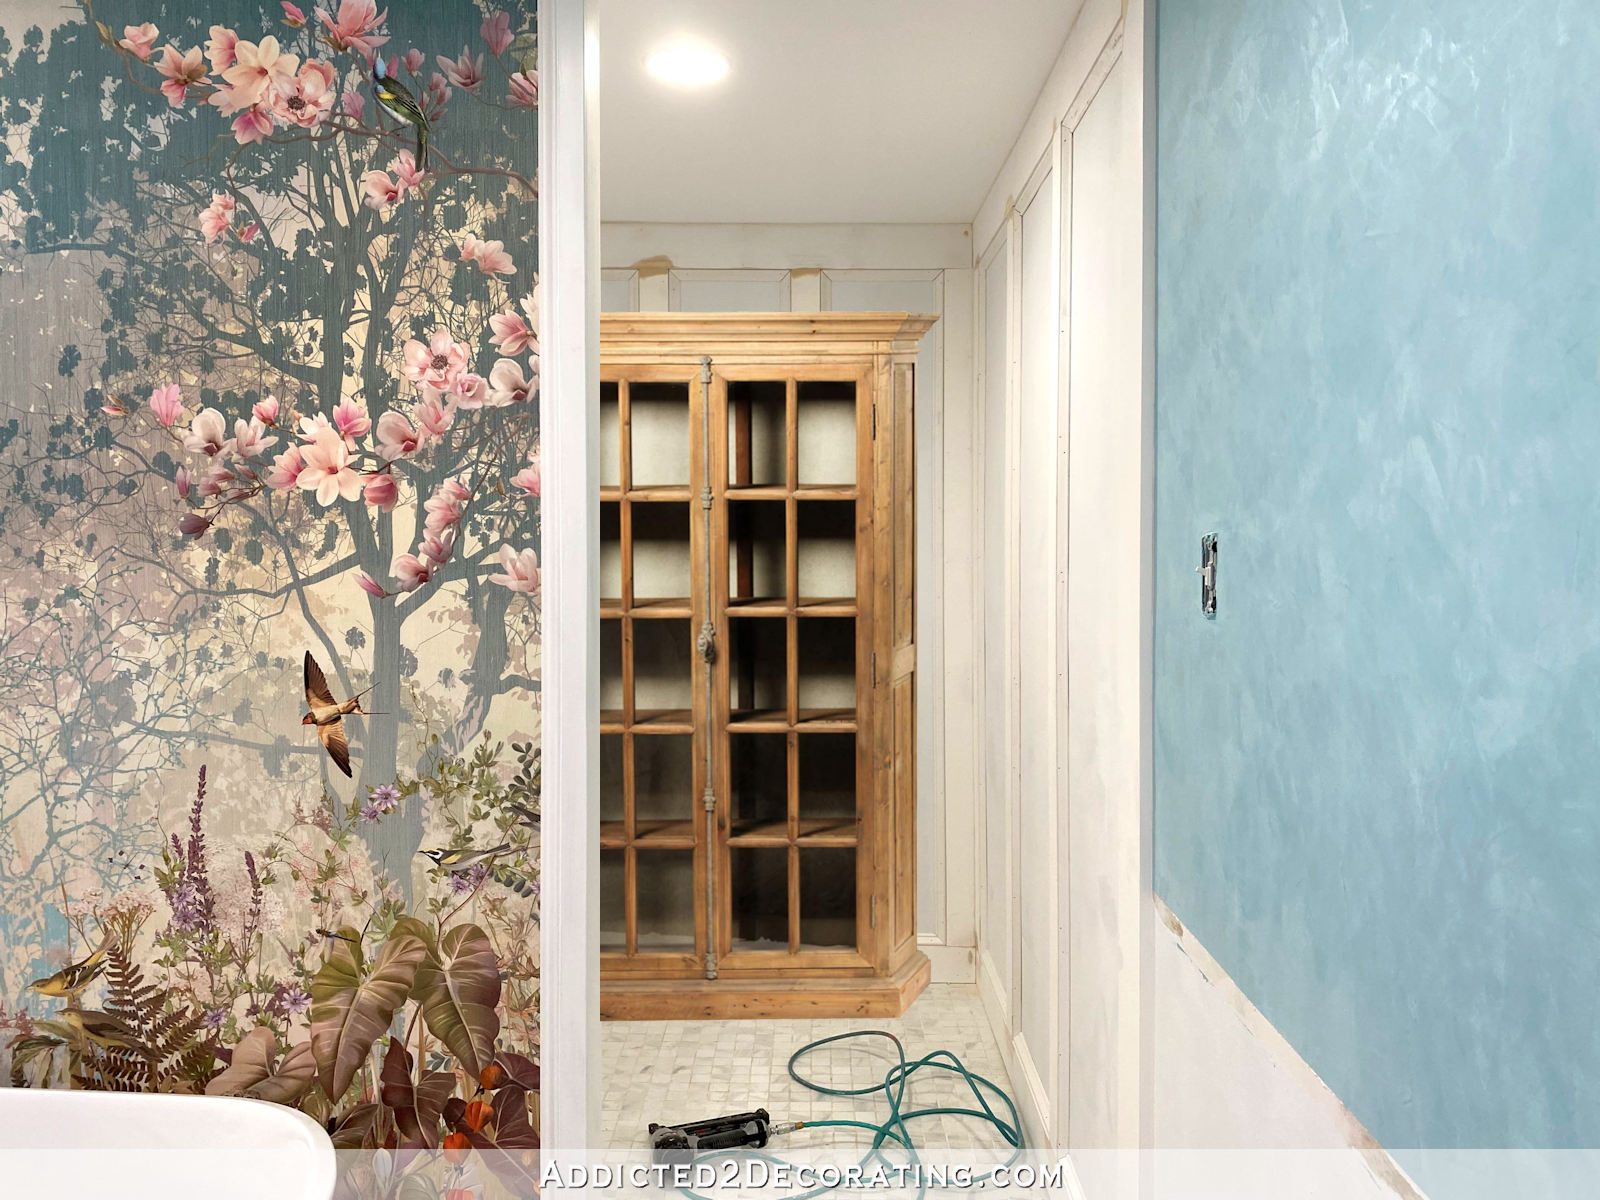
So that’s the plan I went with! I started by installing 1″ x 2″ boards all around the room where the crown molding would be installed, which you can see here on the left…

And then I did a hanging return with the crown ending right at the edge of the vertical transition boards. White on white against a white ceiling. It’s understated, and yet has a finished look (or will once it’s actually finished), and it doesn’t draw attention like a mid molding block would have.

*This post contains affiliate links.
By the way, if you install your own crown molding, and haven’t yet discovered the wonder of crown molding hangers (the black thing you see two photos up that’s holding my crown molding into place), let me encourage you to get these immediately. They come two to a package, and they are amazing. I always install crown molding by myself, but this was my first time ever using crown molding hangers. I can’t believe how easy these things made the job, and I also have no idea how I’ve installed crown by myself all these years without them! You can find them here, and there’s no learning curve. They’re so simple to use! Anyway, back to the crown molding…
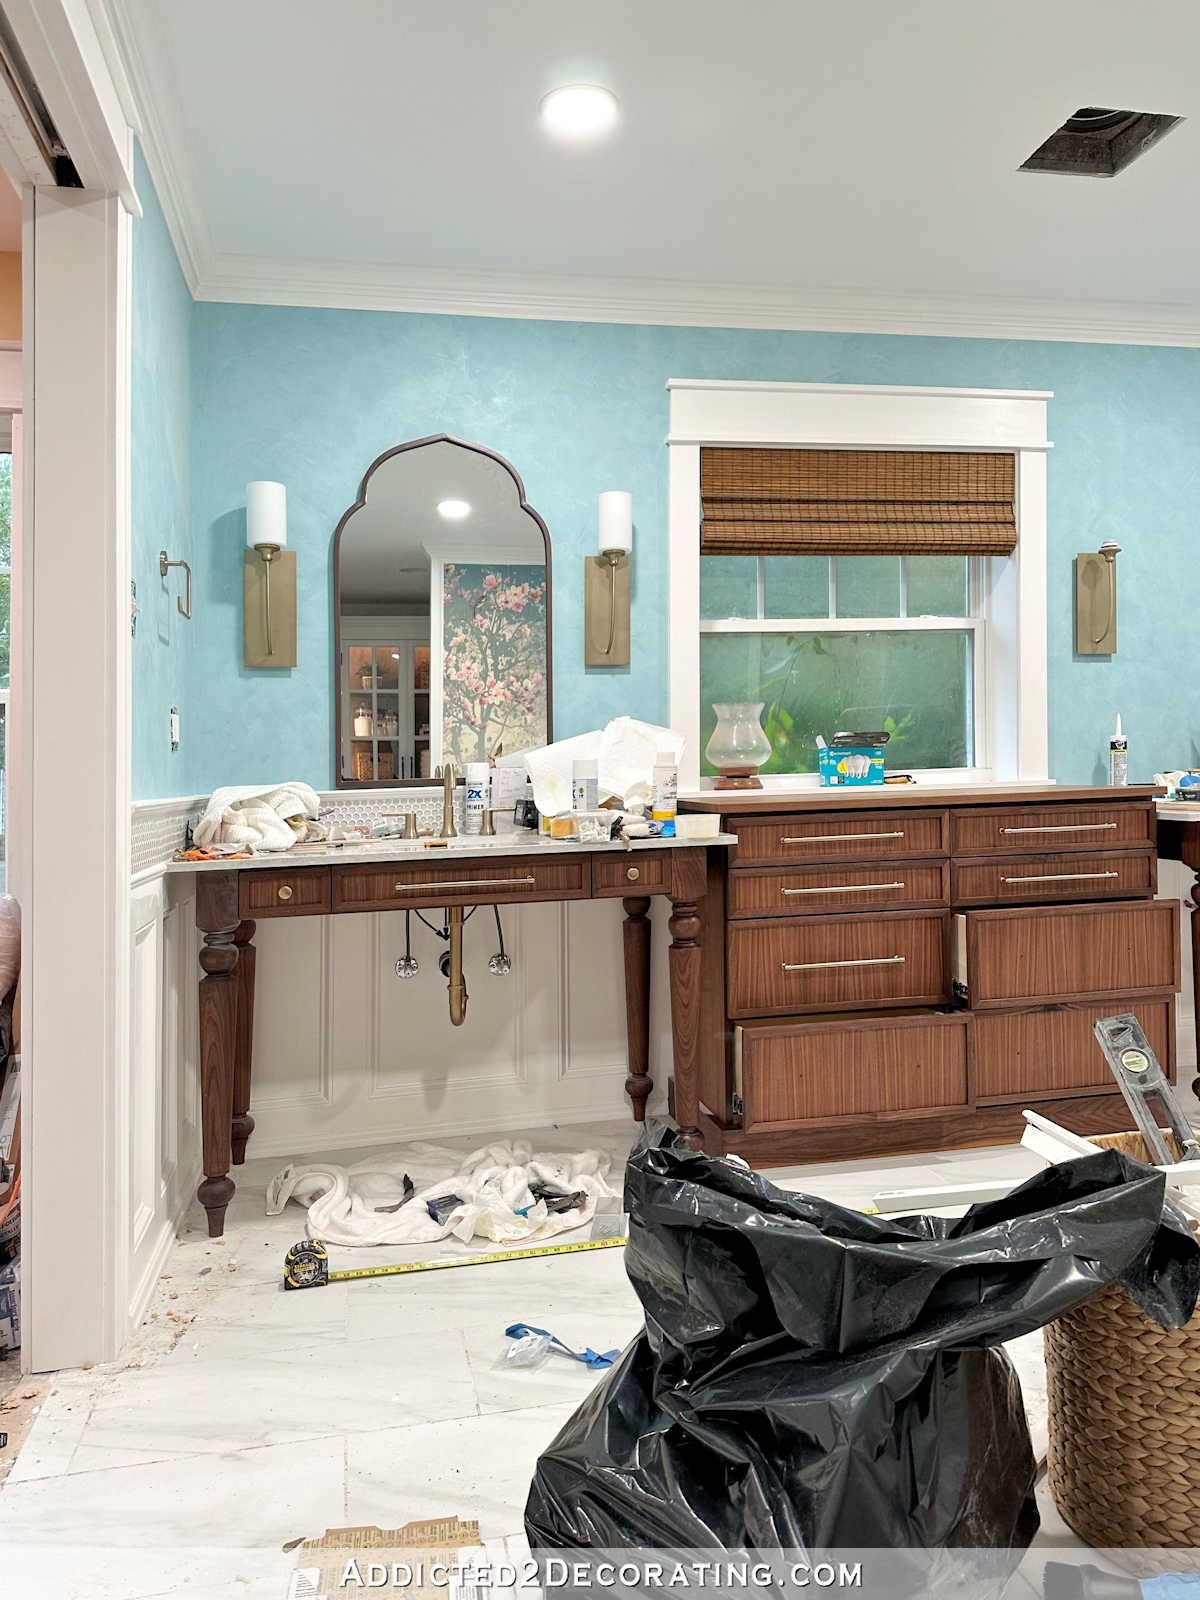
Here’s what the crown looked like once it was installed on the 1″ x 2″ pieces that I had attached to the wall…
And here’s the view of that entire wall with the hanging return on the right end at the entrance to the shower.
I made some adjustments on the mural wall before installing the crown. Originally, I had trimmed out the ends of these walls as if I were trimming out a door, thinking of the end pieces as door jambs, and the side pieces (i.e., the pieces installed on the mural side) as door facings. So I installed those facings with a small reveal like I do with all of my door and window trim. You can kind of see it in this picture…
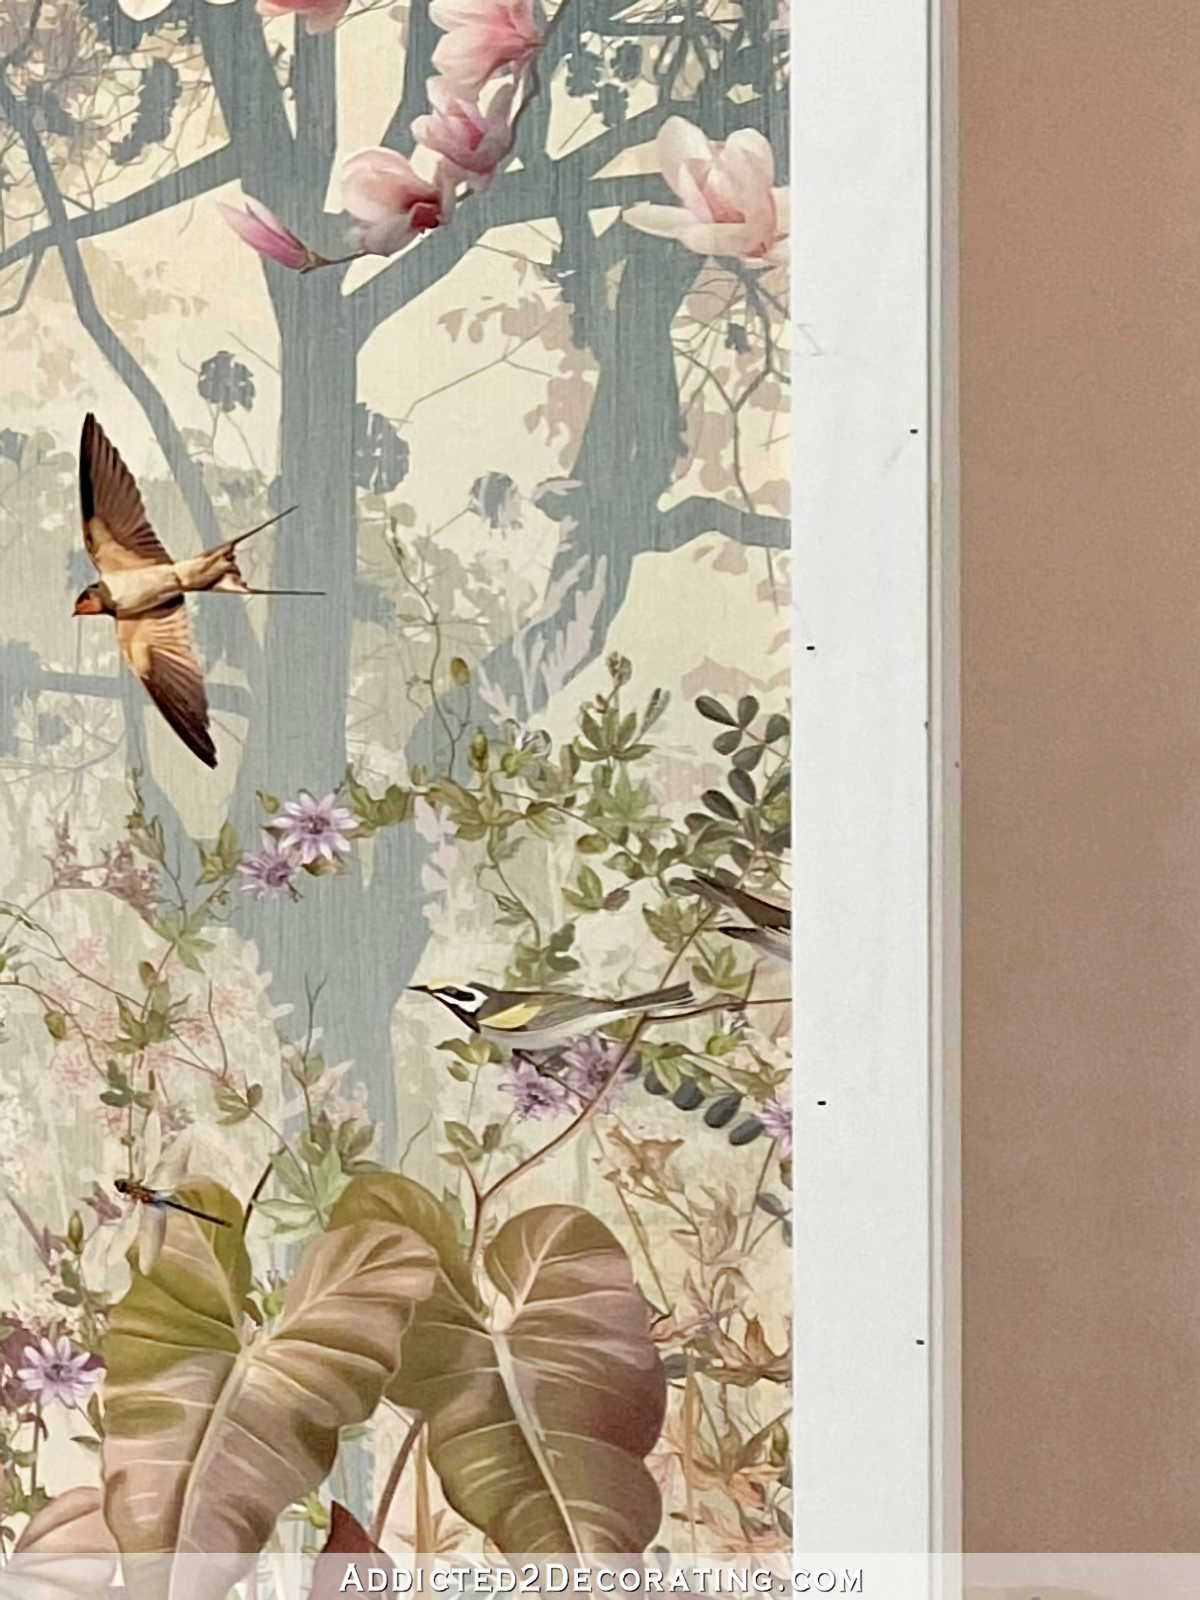
So before I began installing the crown molding on the mural wall, I removed those 1″ x 3″ “casing” pieces, swapped them out for 1″ x 2″ pieces, and installed the new pieces so that they were perfectly square with the boards on the end. In other words, I got rid of the small 1/4″ reveal. Squaring up those two pieces, and using narrower pieces on the mural side, gave it such a cleaner look. And then once the crown was installed, I added the base cap molding all the way around to frame the mural. Obviously it still needs all of the finish work (wood filling, sanding, caulking, painting), but here’s what it looks like right now…
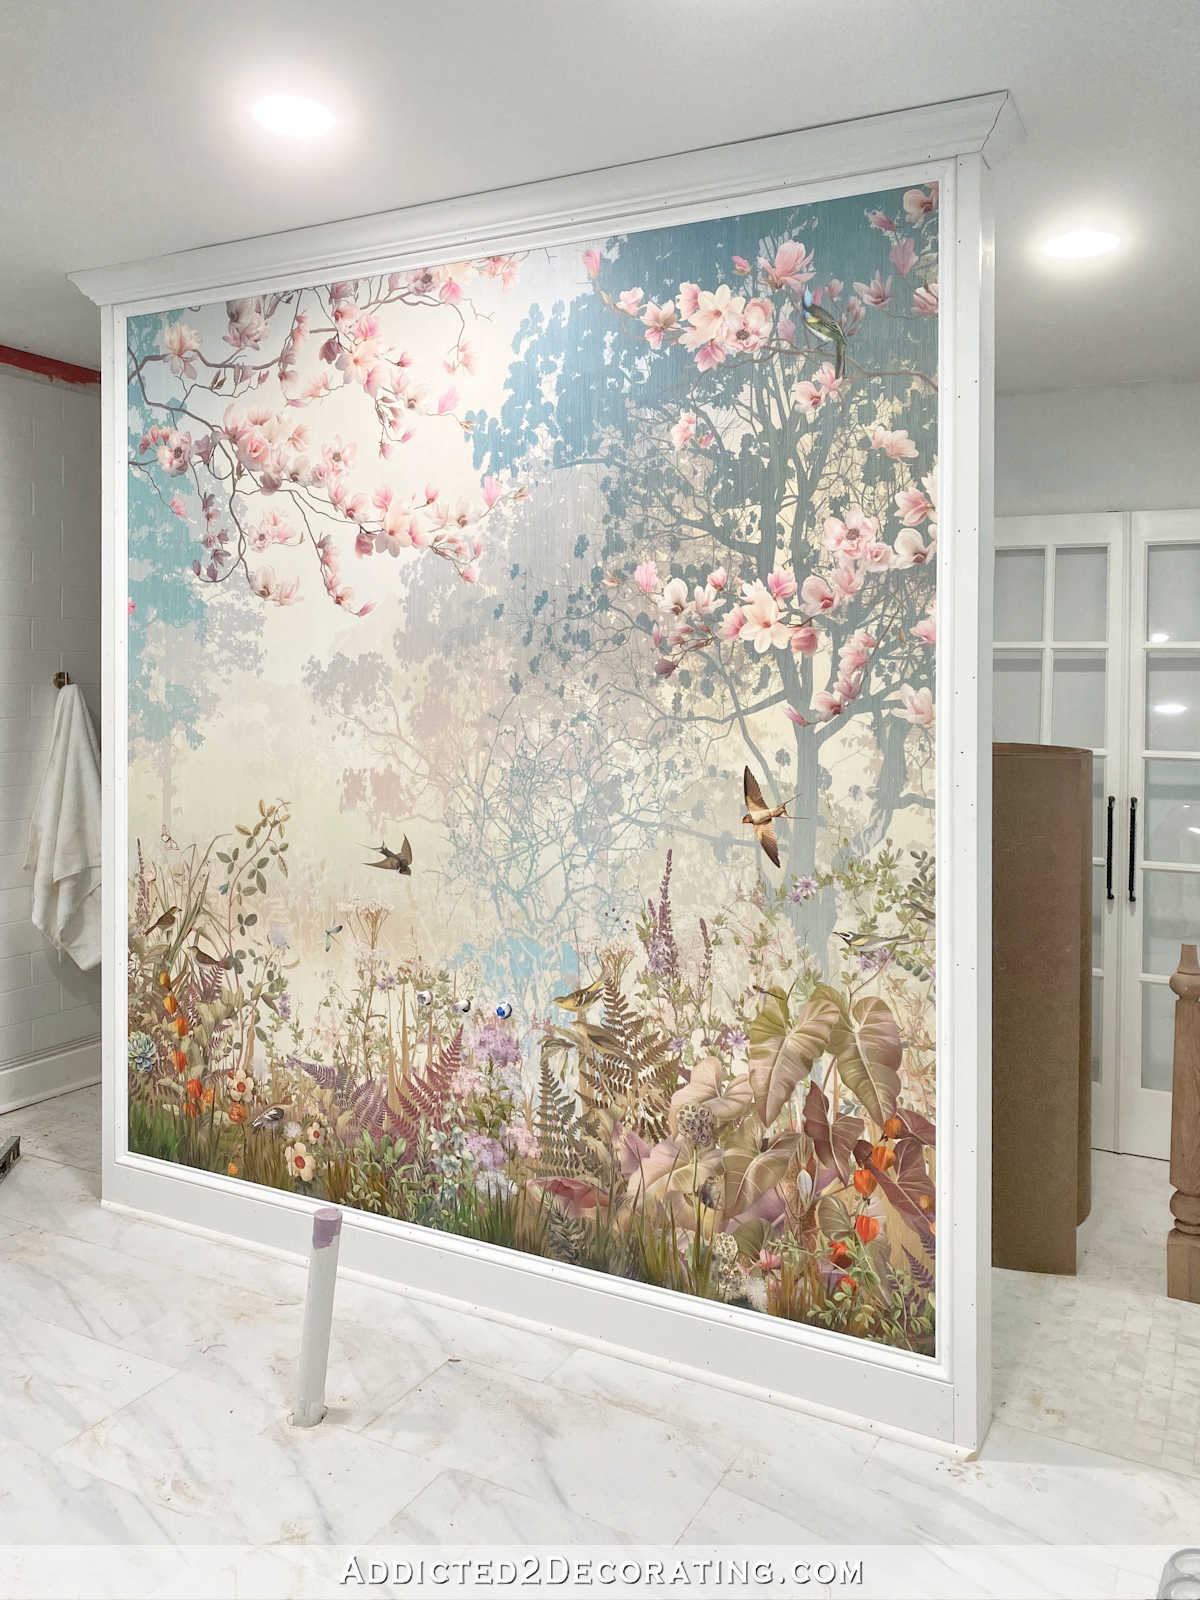
Caulk will make a huge difference, but I already love the way it looks.
Then I added the same base cap molding under the crown around the perimeter of the room. Here’s how this area right at the entrance to the shower looks, but of course, it will look so much cleaner once all of the finish work has been done.
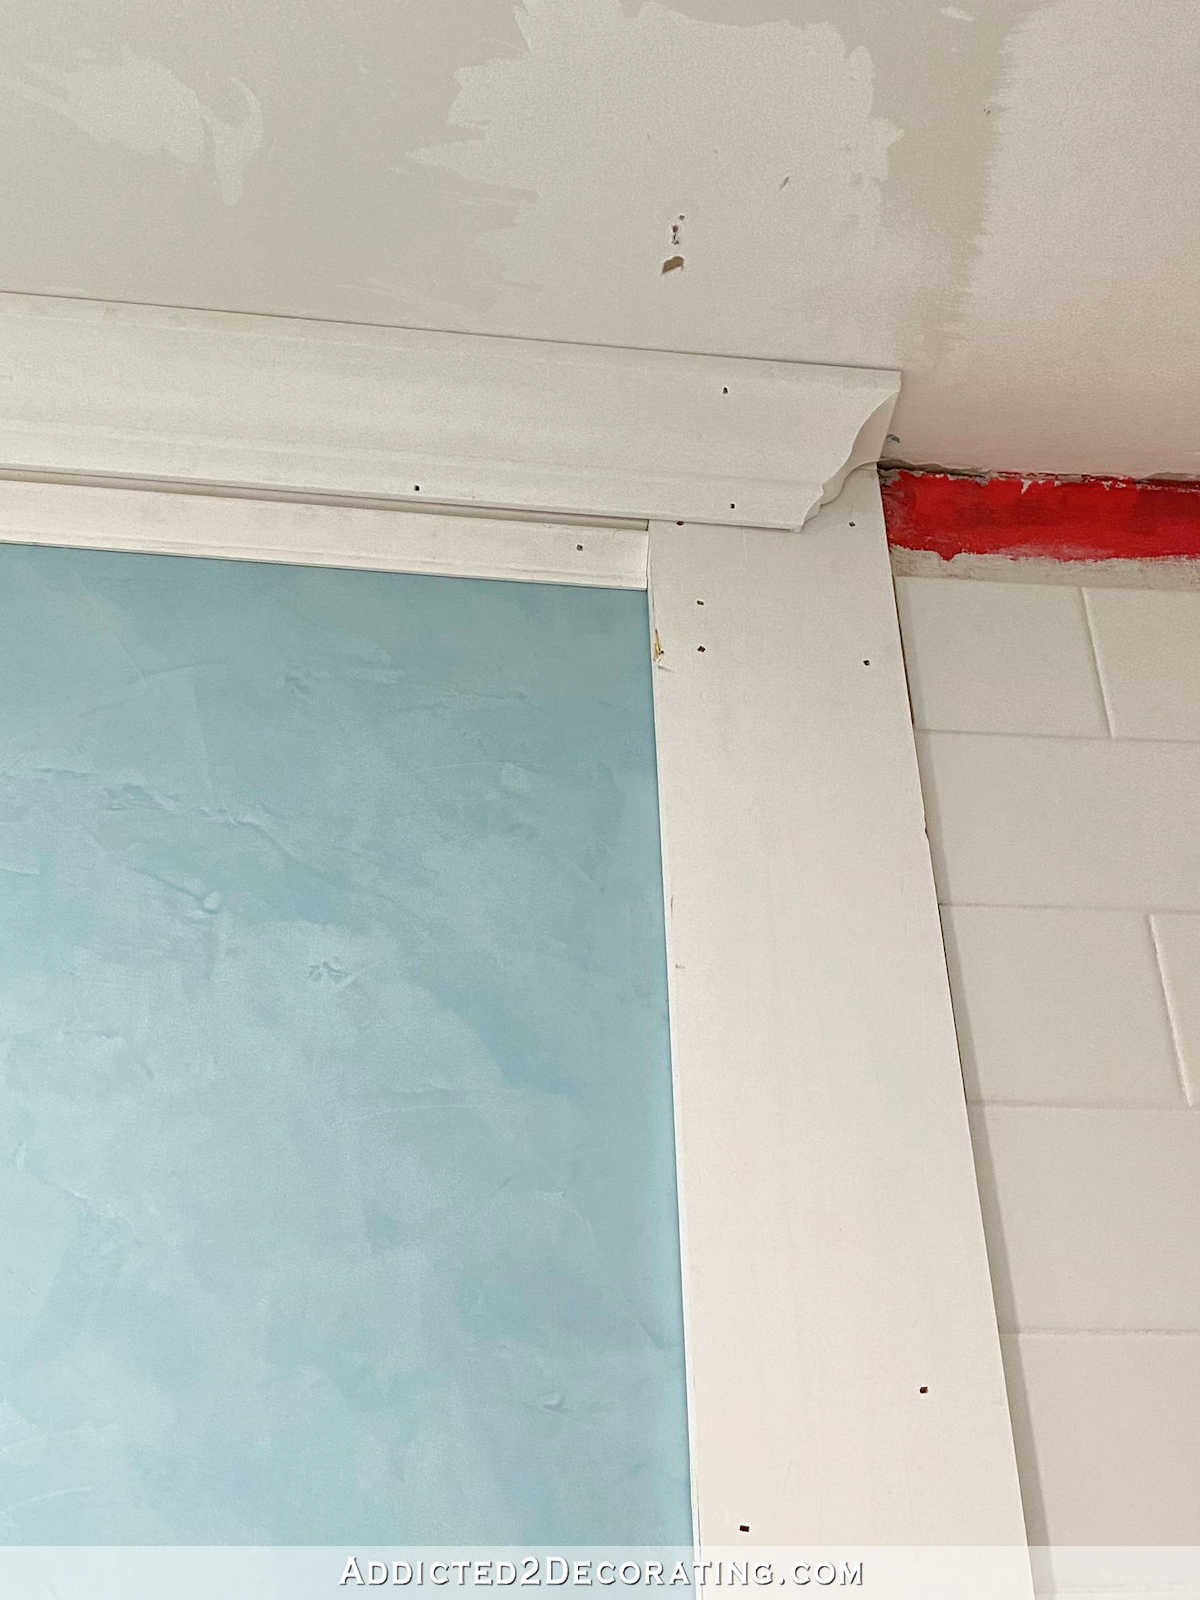
Right now, there’s quite a shadow between the bottom of the crown and the top of the base cap molding, but once it’s caulked, that dark shadow will disappear. Unfortunately, Home Depot didn’t have enough base cap molding for me to make it all the way around the room, but here are these two walls with the base cap installed…
(Ignore the loose baseboard leaning against the wall in the photo above. I should have moved it so it wouldn’t cause confusion. I’m not installing wood baseboards in my shower. 😀 )
And here’s what it looks like going into the toilet area. I know it’s kind of hard to see, but that’s the point! White crown molding ending with a hanging return on white trim boards against a white ceiling is completely acceptable to me because they pretty much disappear!
And then here’s the shower side (with my very dusty ceiling). Again, those dark shadows under the crown will soon be filled with caulk so they’ll disappear.
Here’s another look at the entrance to the toilet area from a distance.

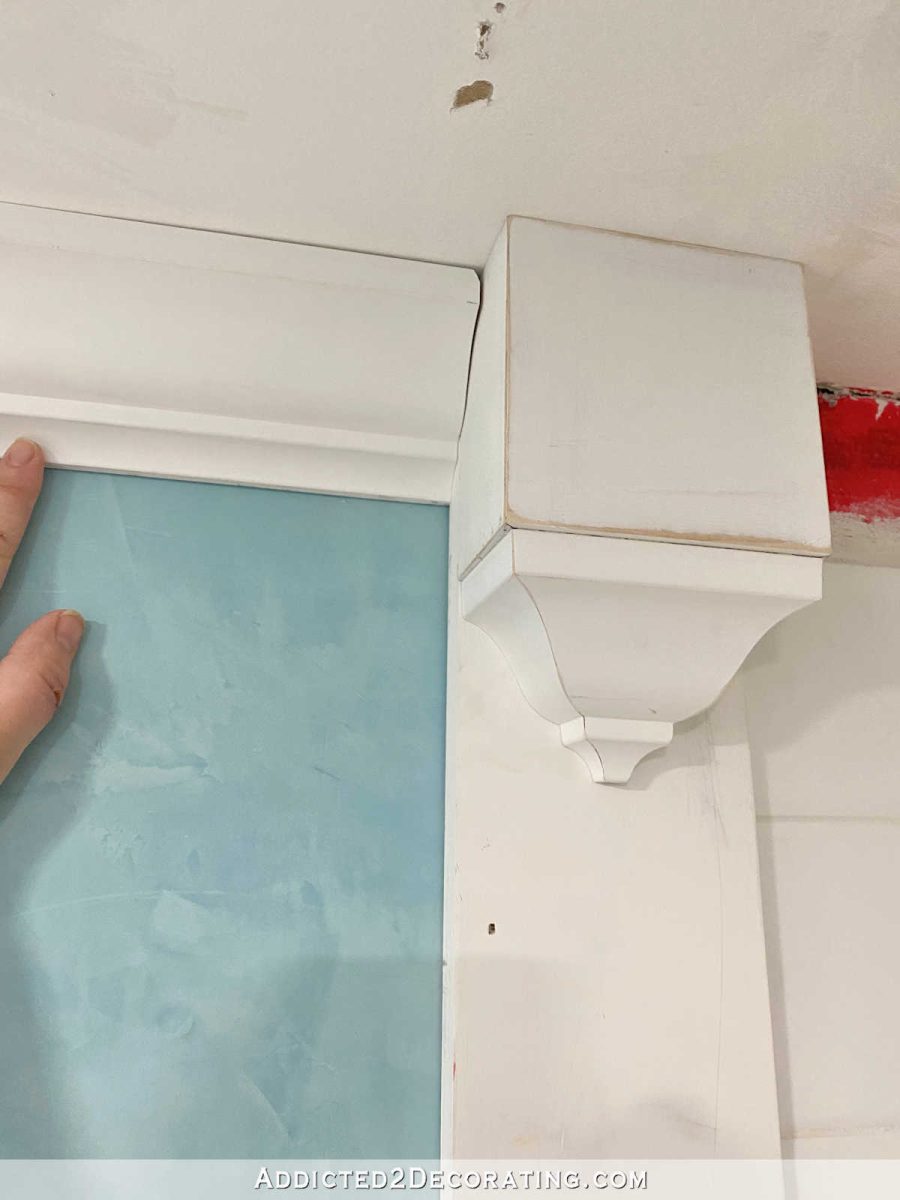
Here’s a close up of the hanging return on the side that doesn’t yet have the base cap installed under the crown molding…

And here’s what the back side of this hanging return looks like.
I still need a piece of trim to cover that vertical space between the end trim board and the drywall on the toilet area side of the wall. I’ll get something understated, and won’t be trimming it out like I did the mural side of the wall. So we can just ignore that for now. 🙂
I didn’t quite install that end board at a perfect 90-degree angle, so I’m left with a little gap in the crown on the mural side. But that’s what caulk is for! It’ll look great once it’s all finished.

So the crown molding issues have all been solved in our master bathroom, and I couldn’t be happier. I still have a whole lot of finishing work to do on it, but I’m already pretty thrilled with how it all worked out.

Addicted 2 Decorating is where I share my DIY and decorating journey as I remodel and decorate the 1948 fixer upper that my husband, Matt, and I bought in 2013. Matt has M.S. and is unable to do physical work, so I do the majority of the work on the house by myself. You can learn more about me here.

Looks great! Yay for simple(r) solutions!
You are amazing with your thought process. I feel as if I was inside your head and brain while I was reading this. Such attention to detail. The results are wonderful! That mural knocks me out every time I see it. So beautiful!!
I’m glad you were able to come up with a solution that will make you and Matt happy. 🙂 I love seeing your project go from concept to finish and this is no exception.
I’m always excited to see your posts. Love the way your mind works and how your translate it to your home. So glad you’ve found your happy solution!
This is wonderful, just right. It is only because of your experience, your persistence, and your visualization skills that this worked out so beautifully. I am in awe, again.
Well done, Kristi! I have followed your posts throughout this process and I’m glad you ended up solving these issues in a simple way. I loved the mid-molding blocks, but they were adding a lot of work to your process. Now, I hope you do a full tile as a last row in the shower! I think that will look fanstastic, as well as keeping it simple. Full tiles are best, or as close as you can get to a full tile and still fool the eye looking to the connection between the ceiling and the wall. No slivers! Happy Easter!
Looks soooooo great!
Looks so nice and I really like the addition of the base cap under the crown. I’m trying to remember what is happening in the shower area at the ceiling? Will it be the same as the bathroom?
I’m going to tile right up to the ceiling.
Although I liked the mid molding block (especially when you simplified it), this is much better. Beautiful and doesn’t call too much attention to itself. I totally understand what you mean about the return when it’s featured against a strong color. Sometimes it’s the only solution but I’m so happy you find your perfect solution.
My oh my, you’re brilliant girl. I love looking and reading about your ideas. Thank you so much for sharing. You have made my COVID home staying so much more bearable. Thank you, thank you.
I cannot wait to see the tub installed. I was inspired to update my bathroom to remove a jetted corner tub and replacing it with a freestanding one. Hopefully it will be completed soon.
this is just stunning! every time you do something to the mural I think it’s perfect and then you go and improve on perfect. I have this vision of homeowners showing their contractor photos from your blog and saying, I want it just like Kristi’s. I did that when it was time to frame out my new windows. you are so inspiring.
It looks great! You sure had a lot to figure out but success!! The mural is stunning!!
you probably lull yourself to sleep working through your dilemma’s, don’t you? I just have one question: Surely you’re not installing wood crown in the shower area, are you? I’d be concerned the heat and humidity (Heat rises) is not the best environment for wood. But what do I know? Not to open yet ANOTHER can of worms, but…
Never the less, you continue to be an inspiration to the rest of us. I love how you just patiently (or maybe NOT so patiently? !!!) work it all out in your head until you come up with a solution! How do you not get discouraged by your own HIGH STANDARDS? It’s going to be beautiful when you complete it all. Im seeing you locking ourself in there for your first alone time bubble bath with a glass of champagne in hand. Here’s another idea: Make a bath tub shelf you can rest on top of the tub to hold that glass of champagne!
I made the mistake of just reaching into my stack of crown molding and pulling out the first piece to use for the crown around the mural wall, and once I finished it, I realized I had used wood crown (that I had purchased for the home gym) instead of the plastic crown that I had purchased for the bathroom. Thankfully the two are the same size and same profile, so I used the correct one on the perimeter of the room. I don’t think it will be a problem since the crown won’t actually be inside the shower area, but if a problem arises, I can replace it. I don’t think it’ll be a problem, though.
I do look forward to that first bubble bath! And I also plan to build a tub shelf. 🙂
I’m a little confused. Why is the dead end return cut at a 45 degree angle? If the crown ended straight, then the return could end straight. This would leave the wall/ceiling totally covered. With the 45 degree cut, the corner is exposed.
These are the most beautiful walls I’ve seen!
I love how you framed the mural! It’s all coming together now. 🙂
You’re my hero, Kristi..