How To Dead End Crown Molding — DIY Mid Molding Block
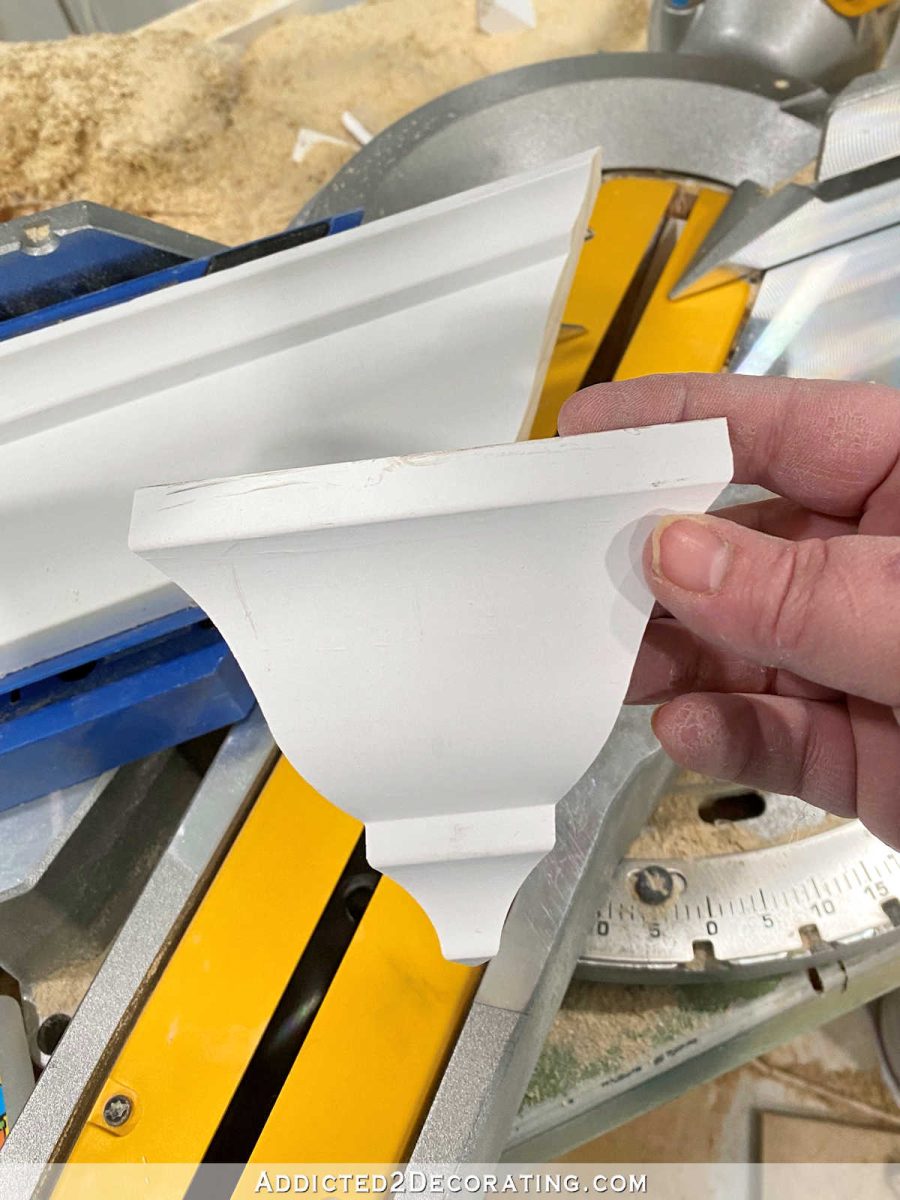
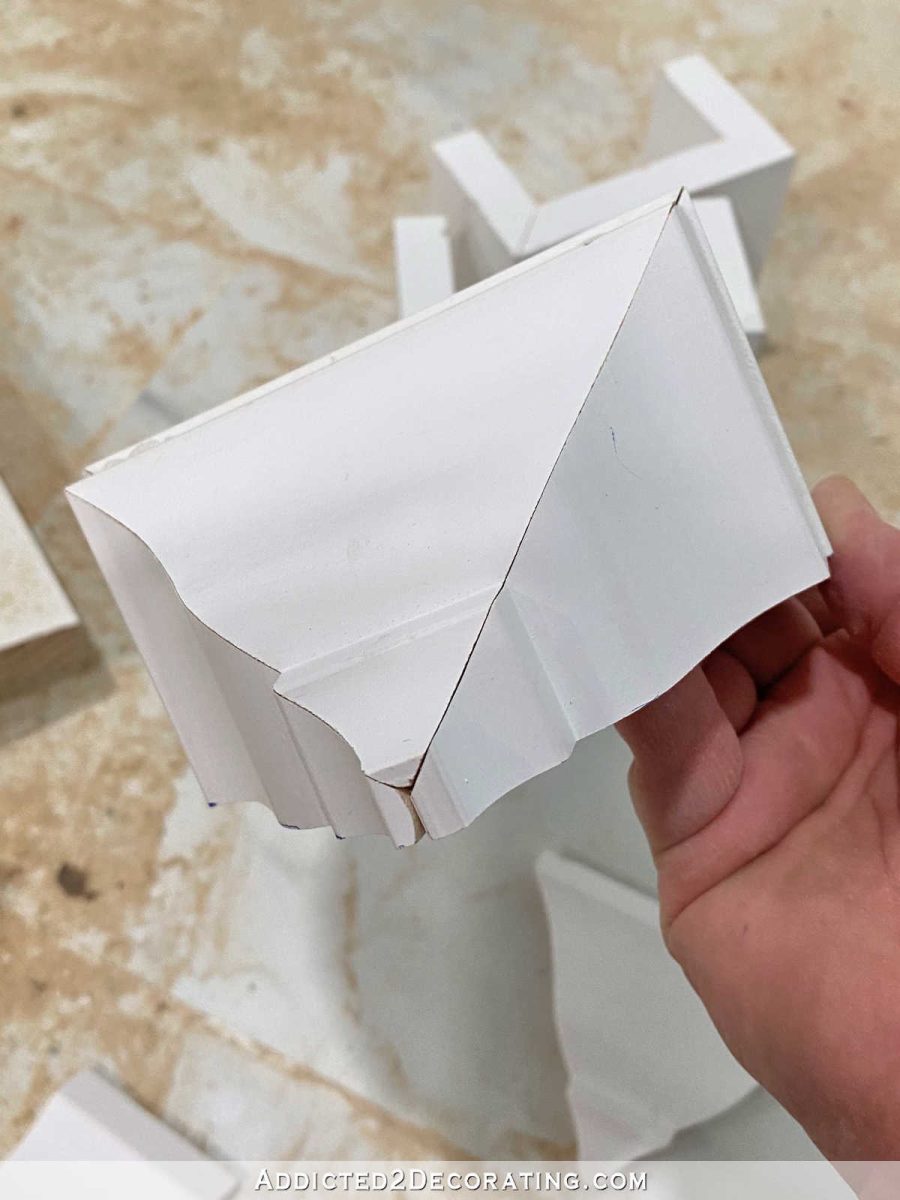
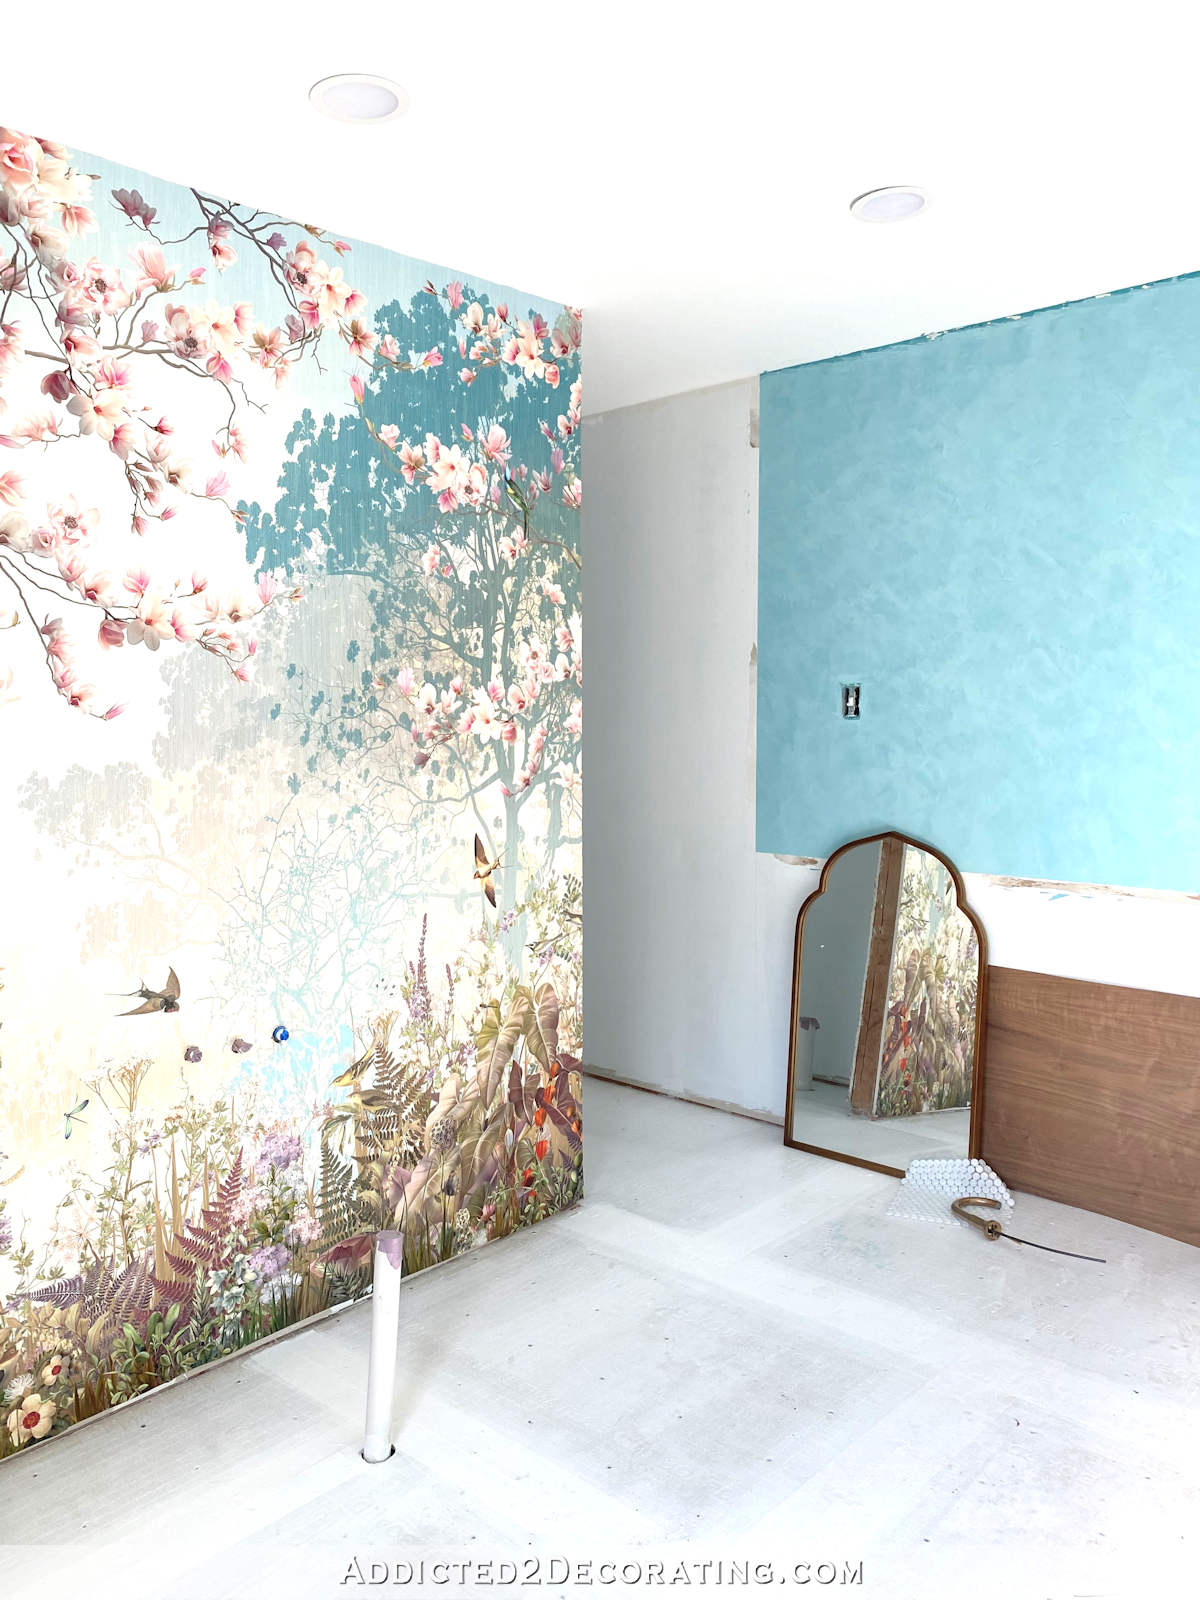
I spent yesterday afternoon working on my ideas for how to dead end crown molding in our master bathroom so that I’m not stuck with awkward hanging returns or plain boards dead ending into the ceiling. If you missed that whole discussion about the trim issues I was dealing with in this bathroom remodel, you can read about that here. One of my ideas was to make a DIY mid molding block out of the crown molding that I’m using in the rest of the room, so yesterday I got to work figuring out how to make these myself, and here’s the first one I got finished…
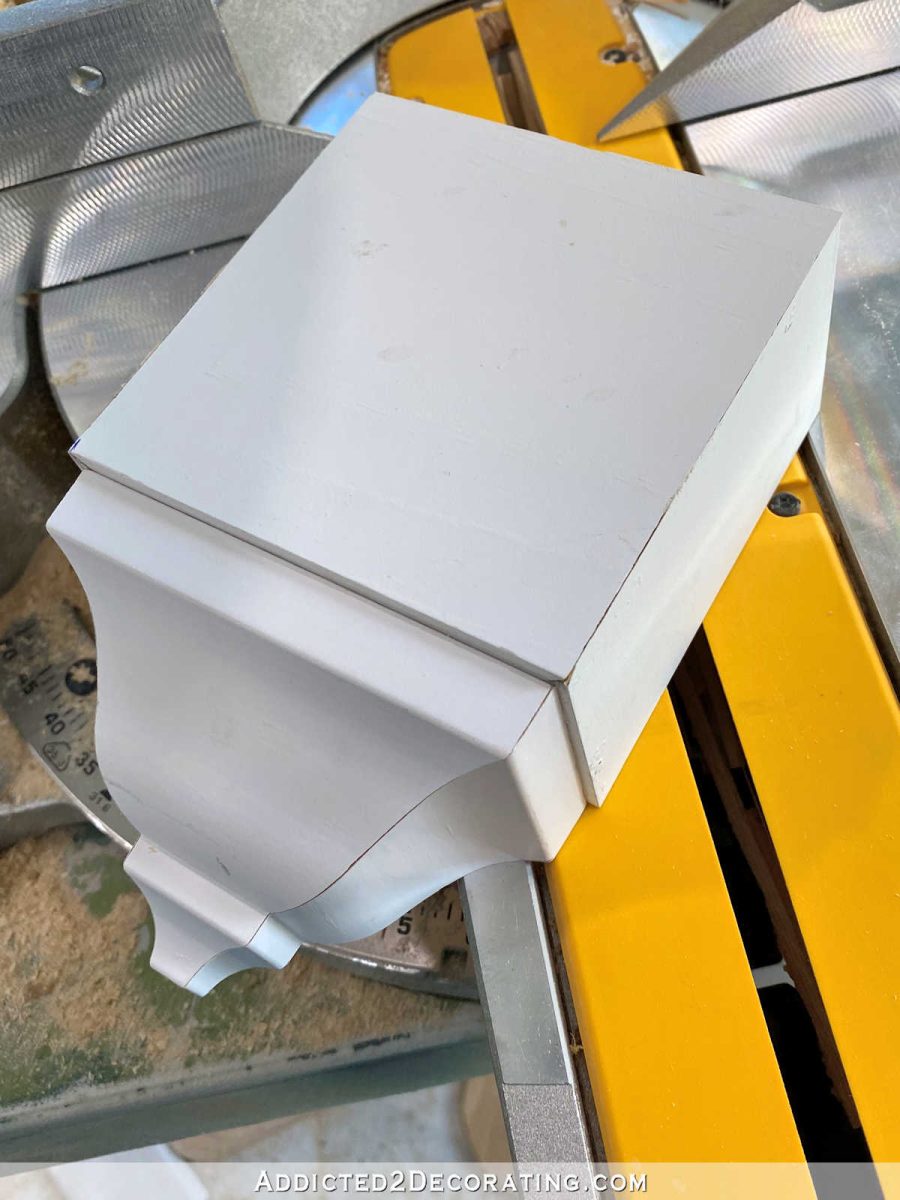
Doesn’t that look good?! I was so proud! But let’s not discuss how much crown molding I wasted in order to figure this thing out. 😀 It’s a good thing I happened to have lots of crown molding on hand that I had bought for our home gym (which I’ve decided not to use in there), so I could have lots to practice on, because this took a ton of trial and error.
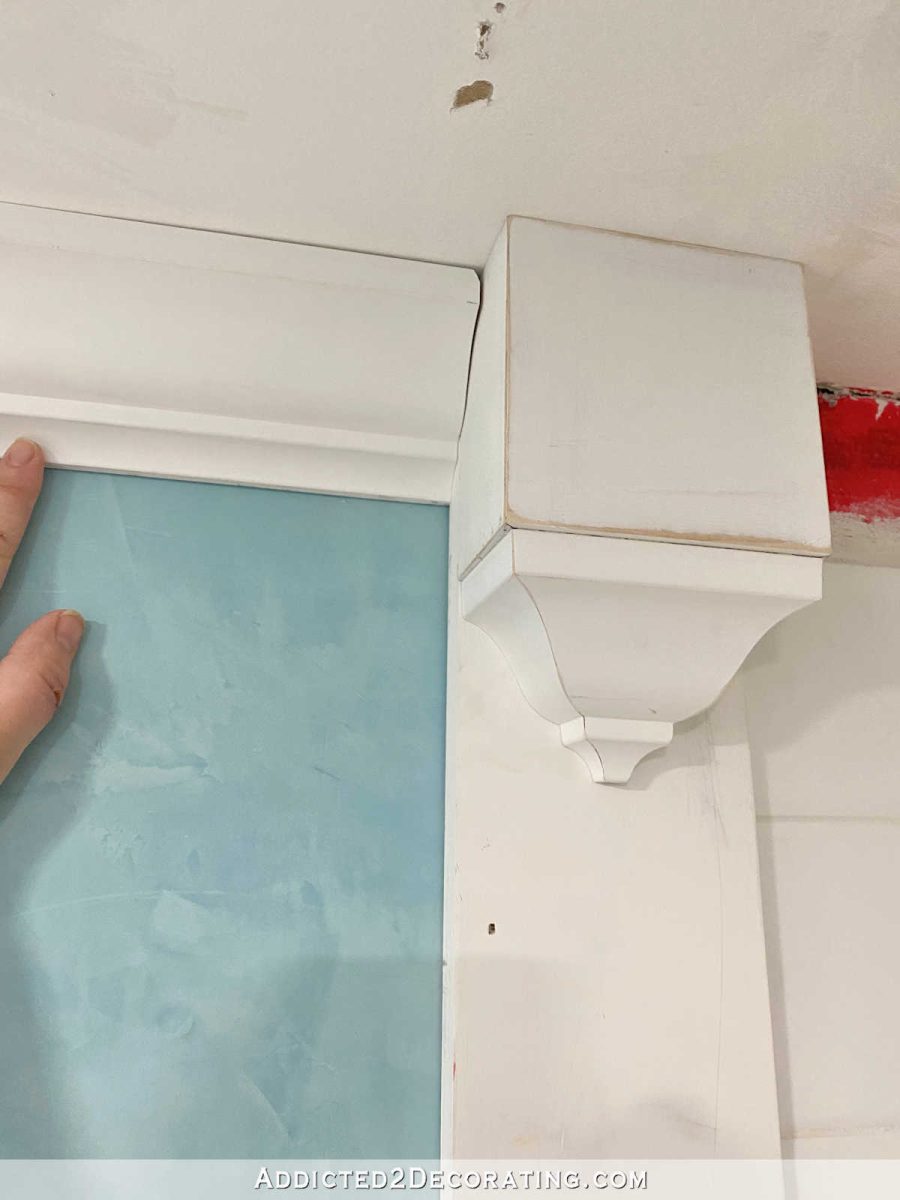
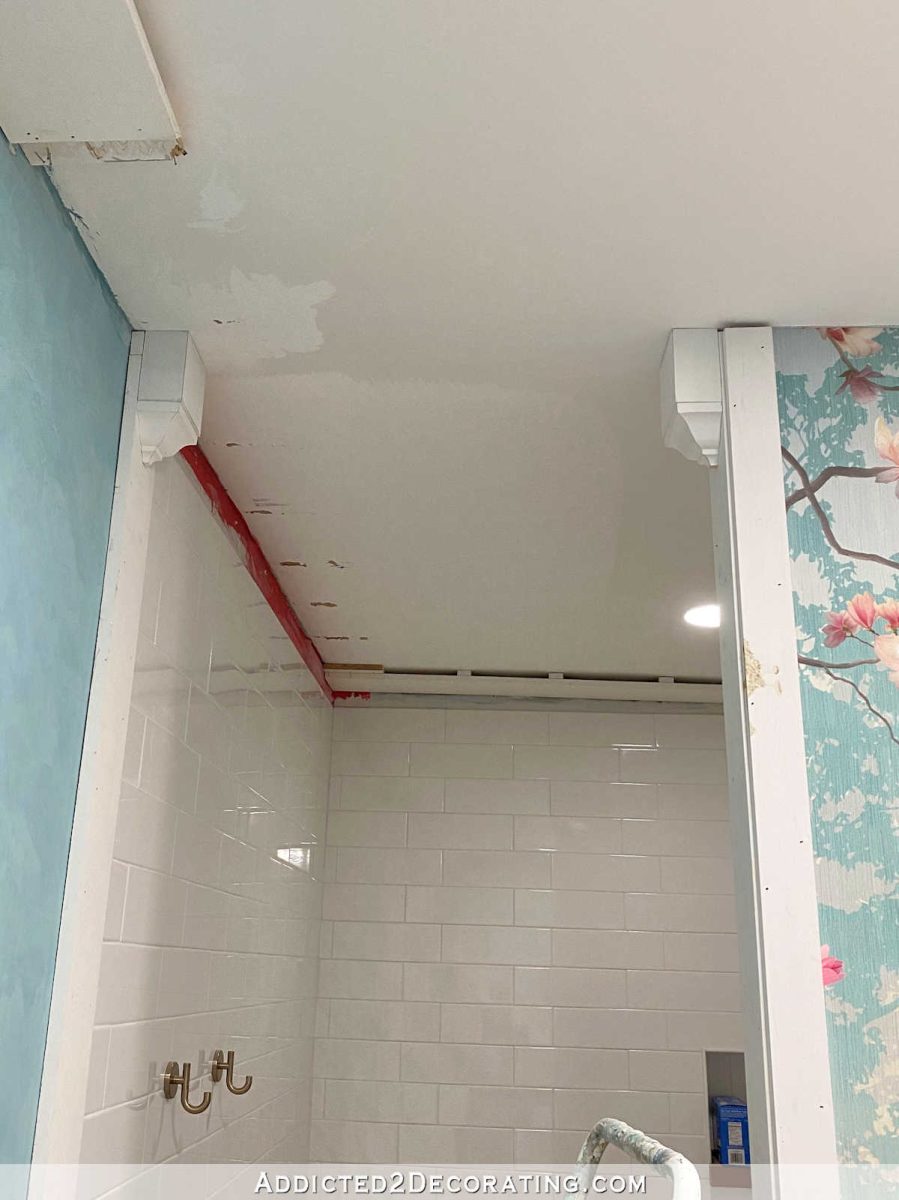
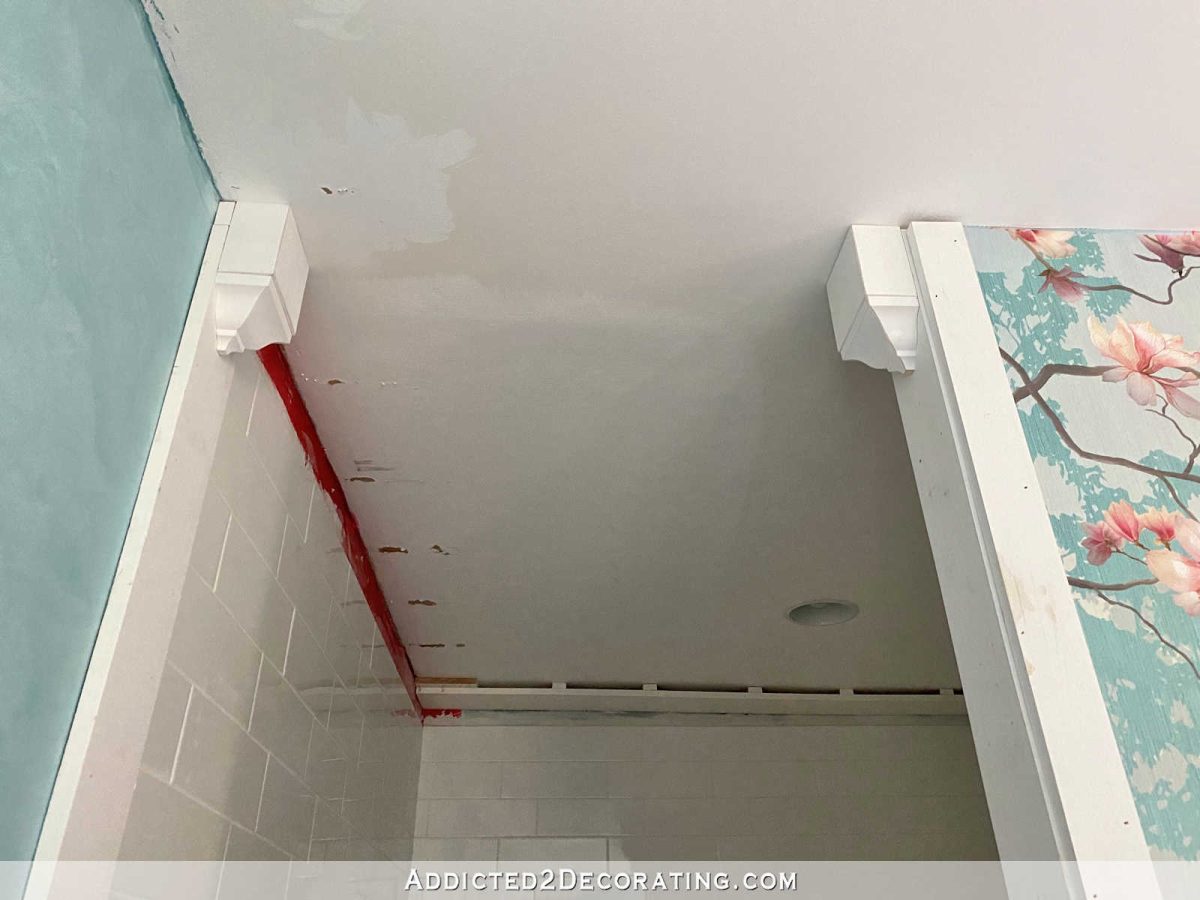
But here’s the first mid molding block attached to the top of the left transition board.
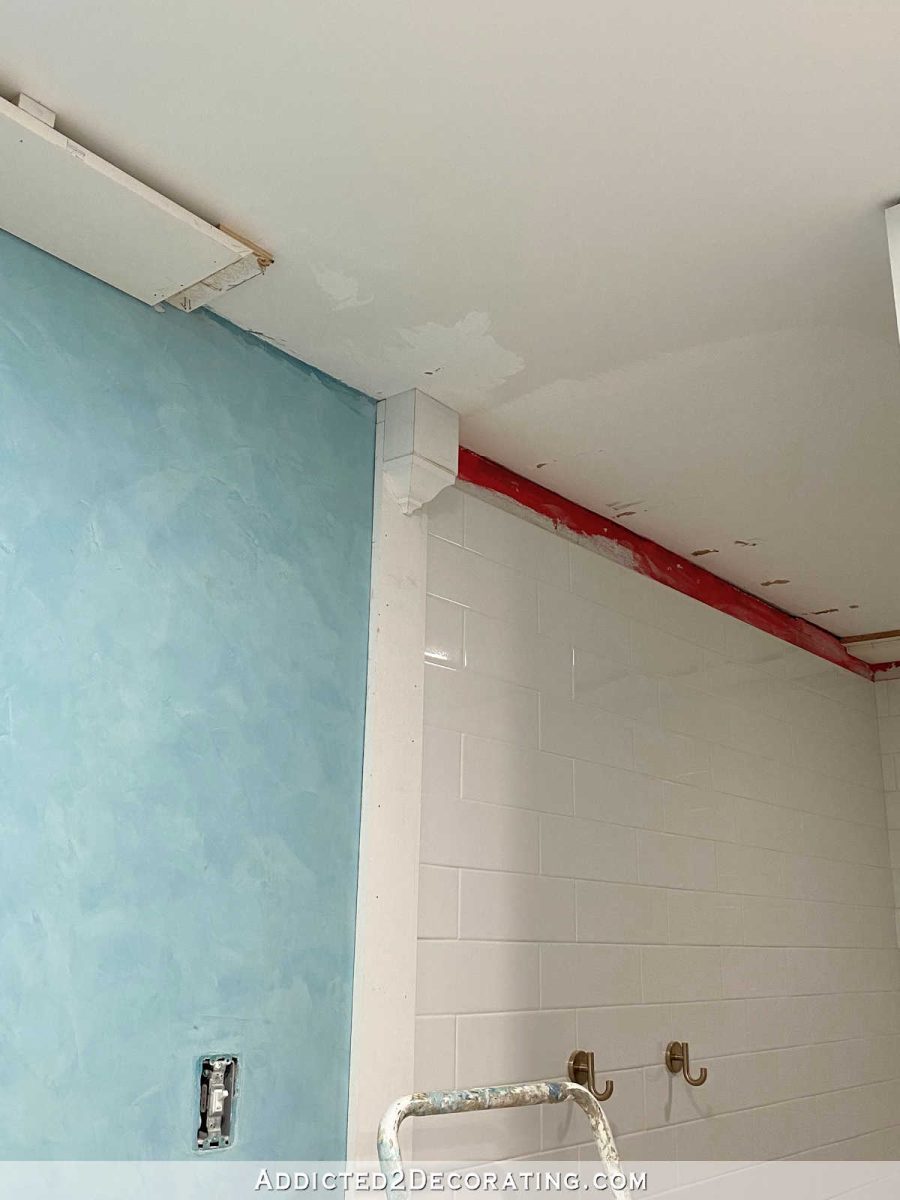
And then you can see how the crown molding will dead end into this mid molding block.
I made all four of them, but as it turns out, I’m going to have to make all four all over again because of an issue that I didn’t foresee, which I’ll explain down below. But at least now I know how to make mid molding blocks, so these were really good practice. My final four will be even better!
So let me show you how I made these mid molding blocks.
*This post contains affiliate links.
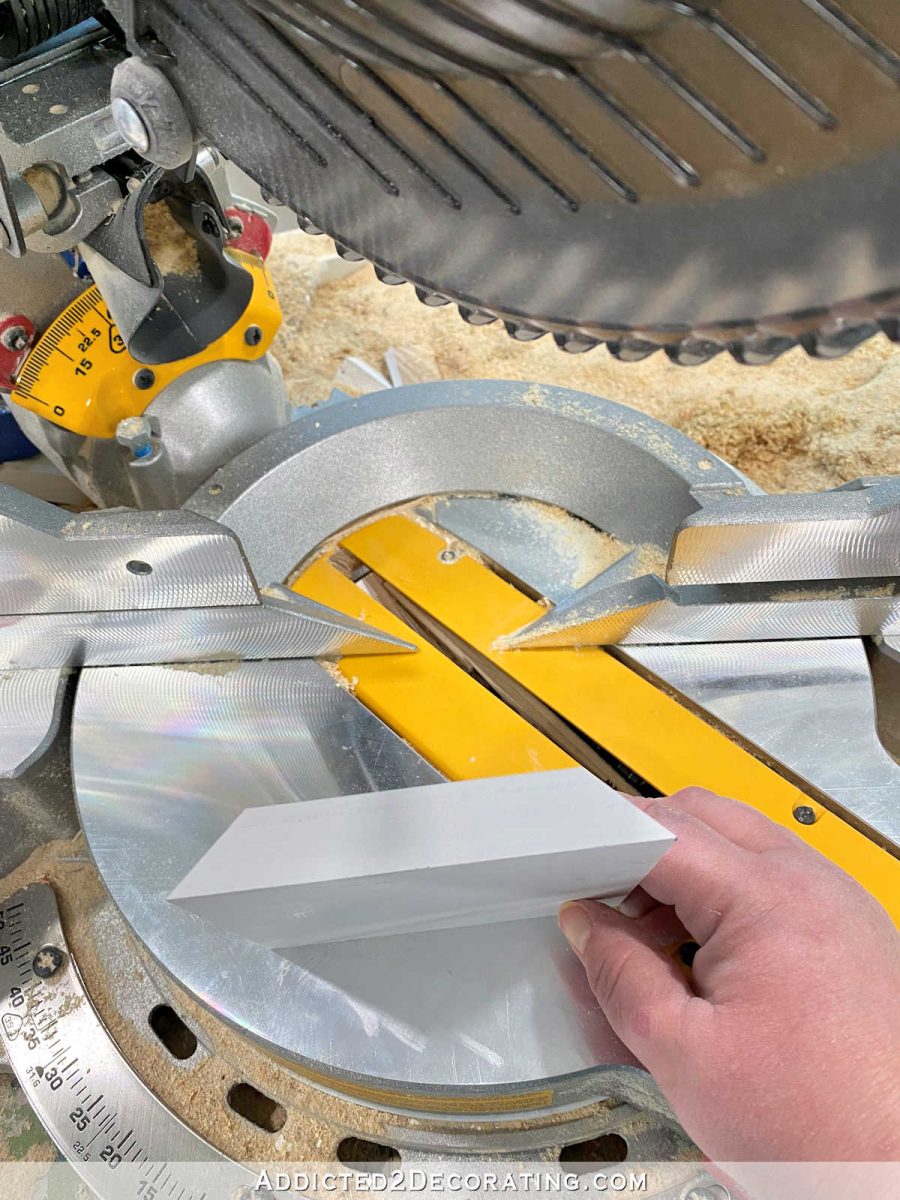
First, I cut the pieces for the box that forms the block at the the top. I used 1″ x 4″ pre-primed lumber, and stood it up on end so that I could cut the edge at a 45-degree angle.


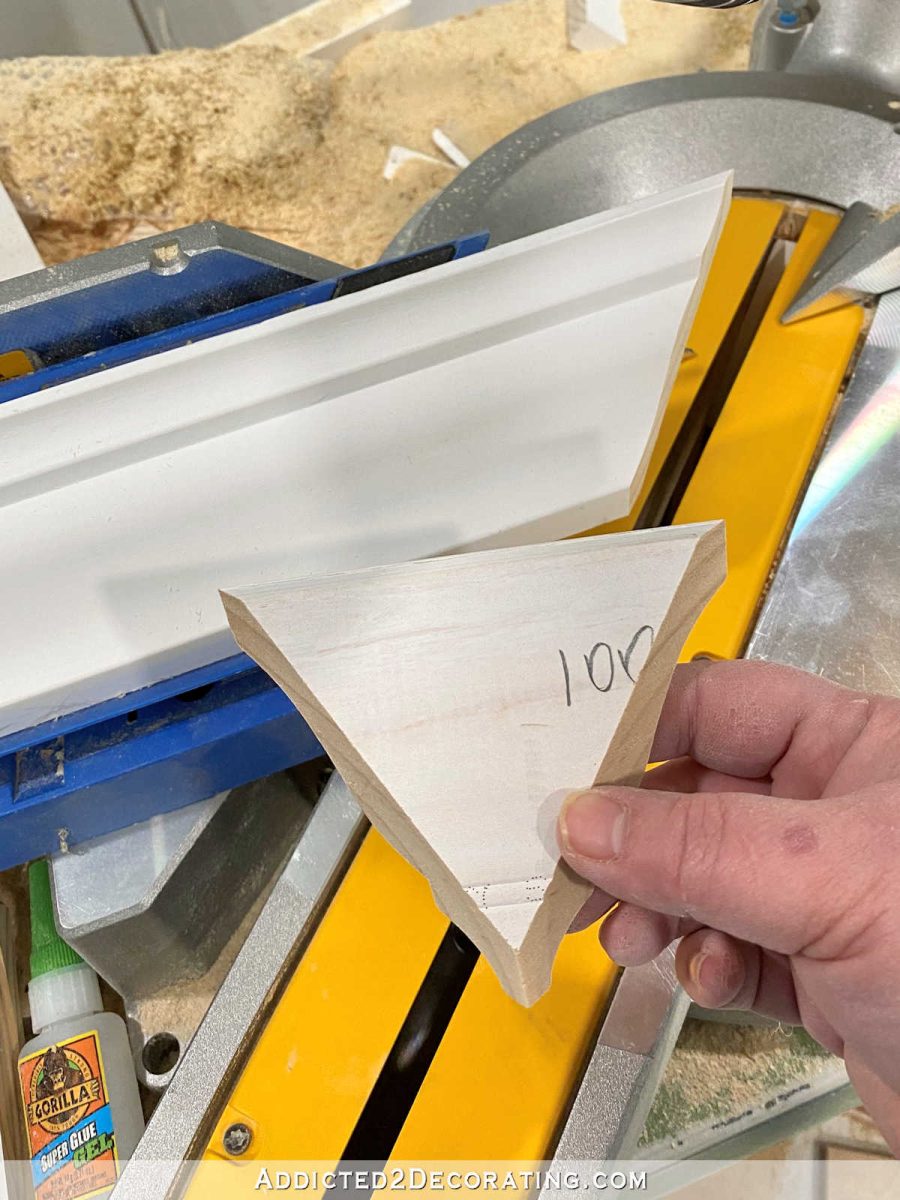
And since I wanted my mid molding block to fit perfectly at the top of a 1″ x 5″ board (which is actually only 4.5 inches wide), I measured over 4.5 inches and made a mark.
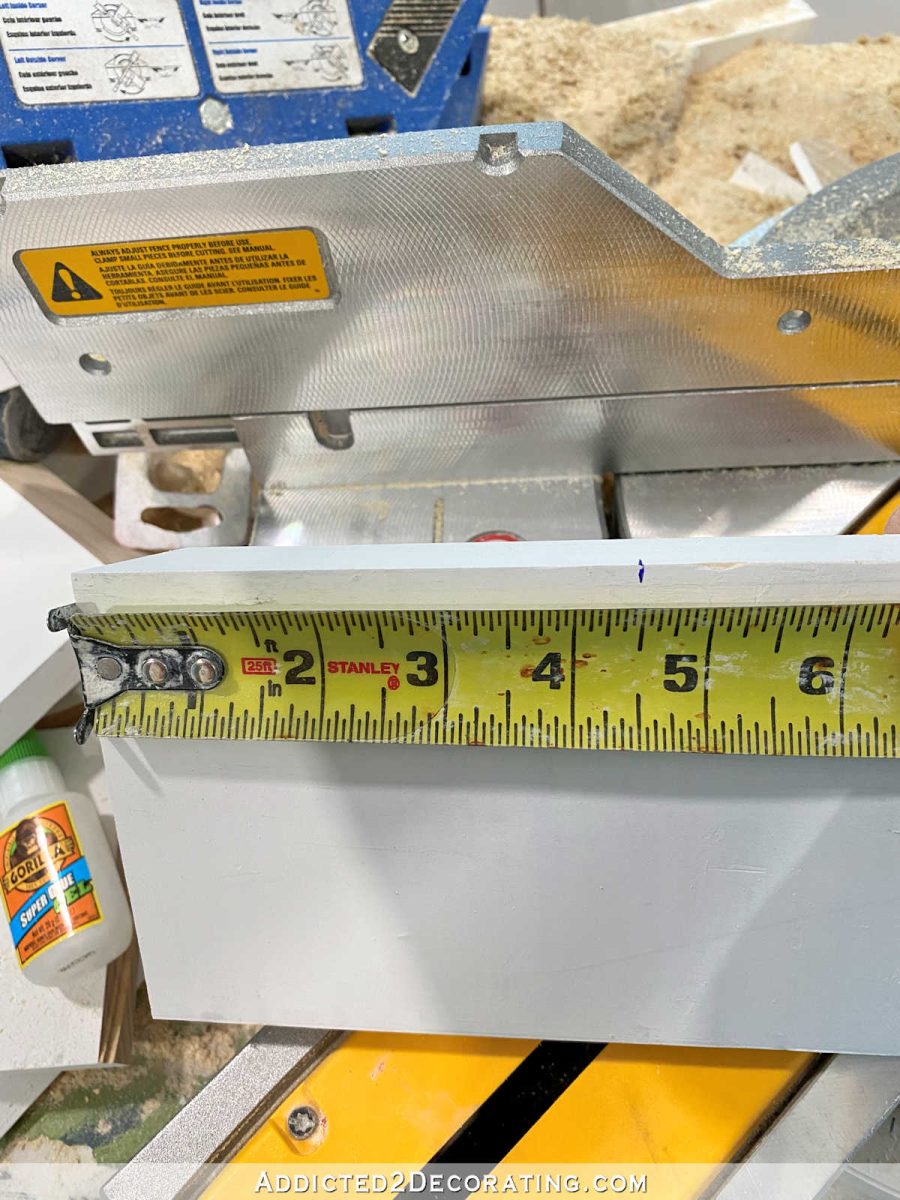
And then moved my blade to the other side and cut that side at a 45-degree angle. This gave me the front piece for the top box/block.
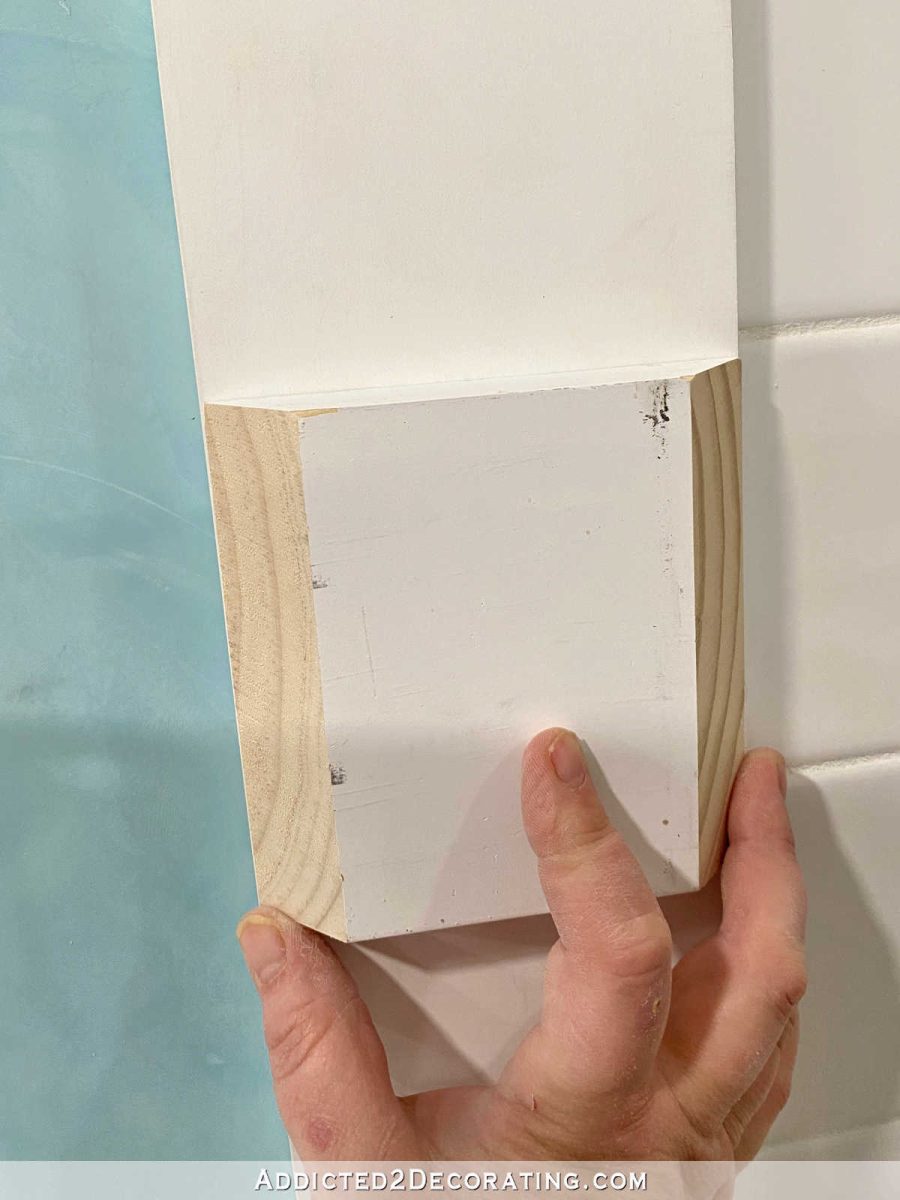
To make sure that it was the right width, I placed it against the transition board. It’s best to check at this stage before moving on.
Then I cut the side pieces to form the top block. The side pieces had a 45-degree angle on one side, and a straight cut on the other side. I made these 2.5 inches wide.
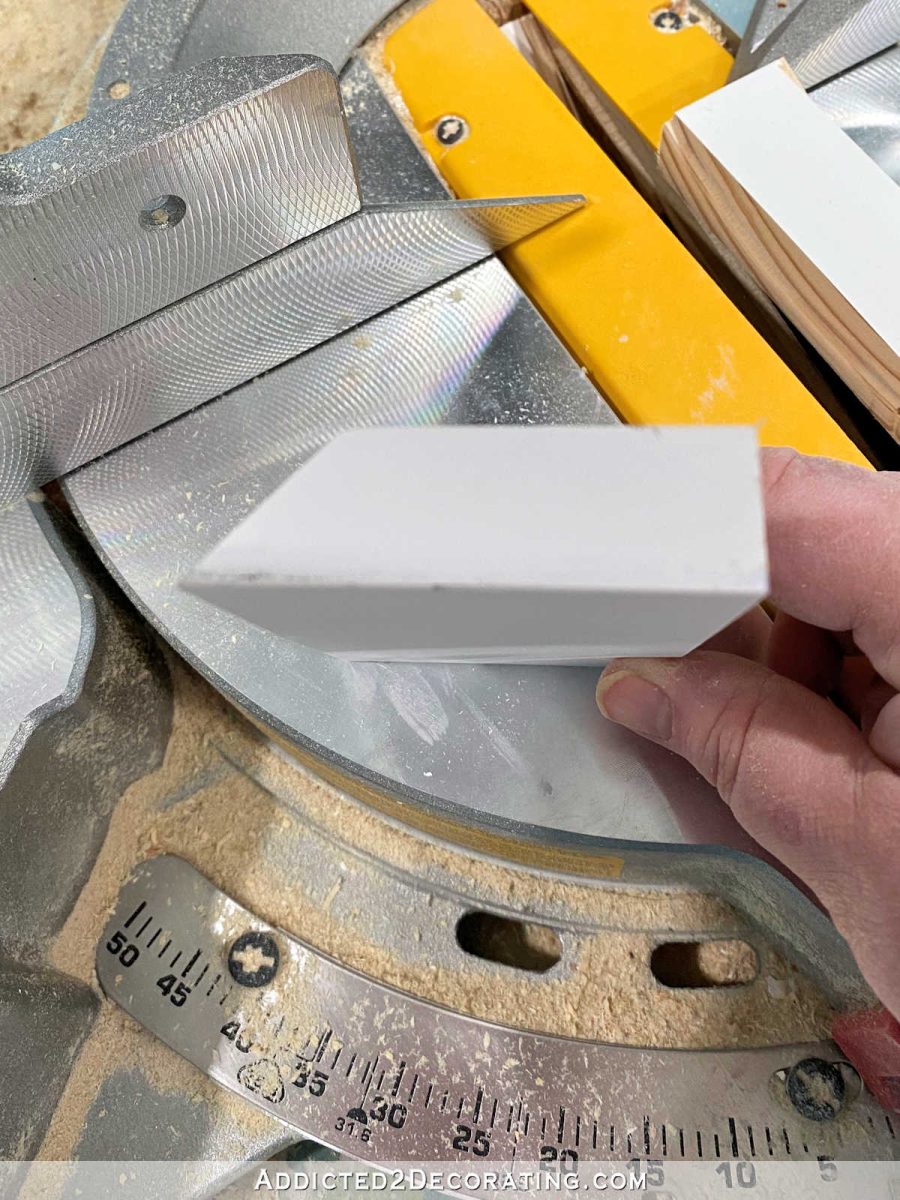
And I needed one for each side of the front piece, so one side had the angle on the left and the straight cut on the right. The other piece had the angle on the right and the straight cut on the left.
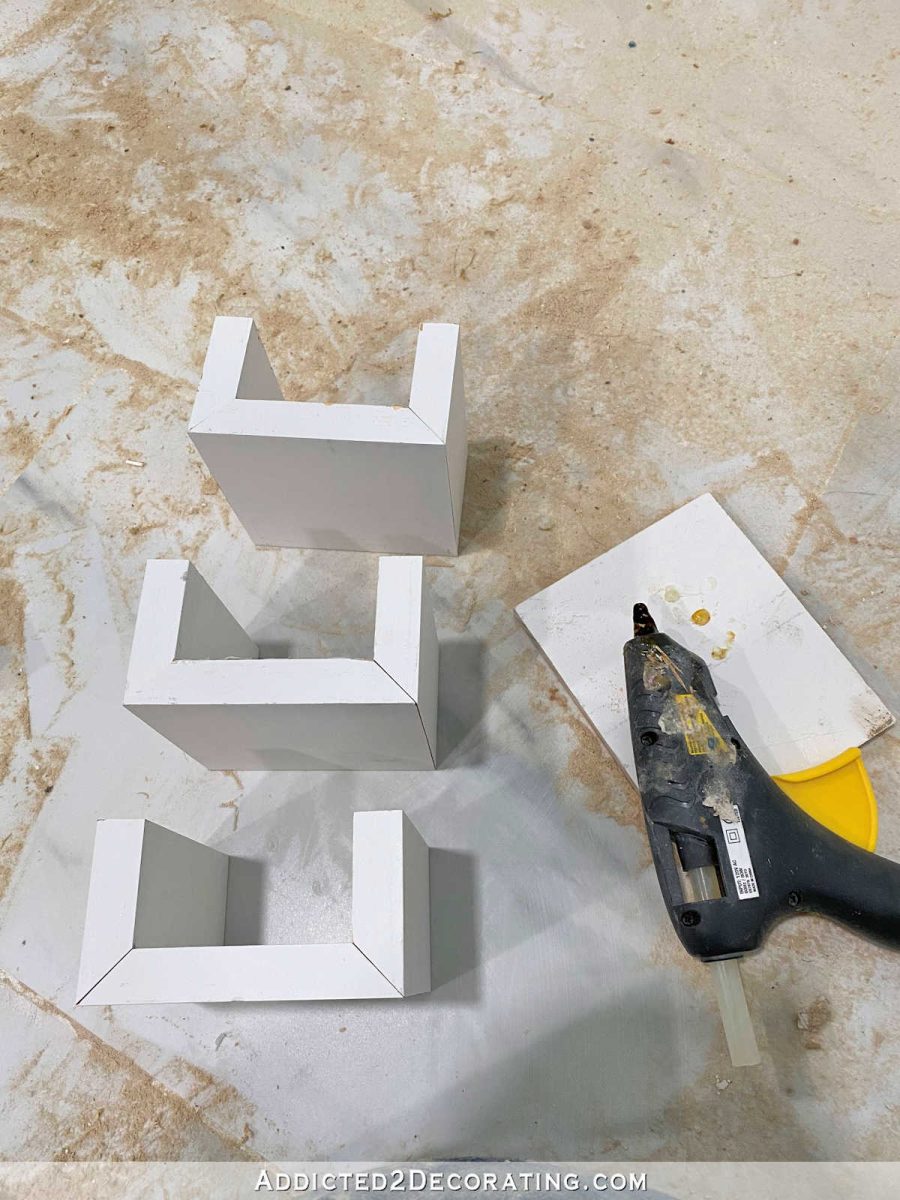
With those pieces cut, I was ready to assemble. I assembled my pieces using a hot glue gun. Every woodworker should have a big, high temp hot glue gun in their tool box. Nothing is better for quick assembly on things like this.
Next I was ready to cut the crown molding pieces. I thought this was going to be so easy to do! I was wrong. 😀 It took me forever to figure this out, but I was determined. I finally did figure it out, so here’s what I did.
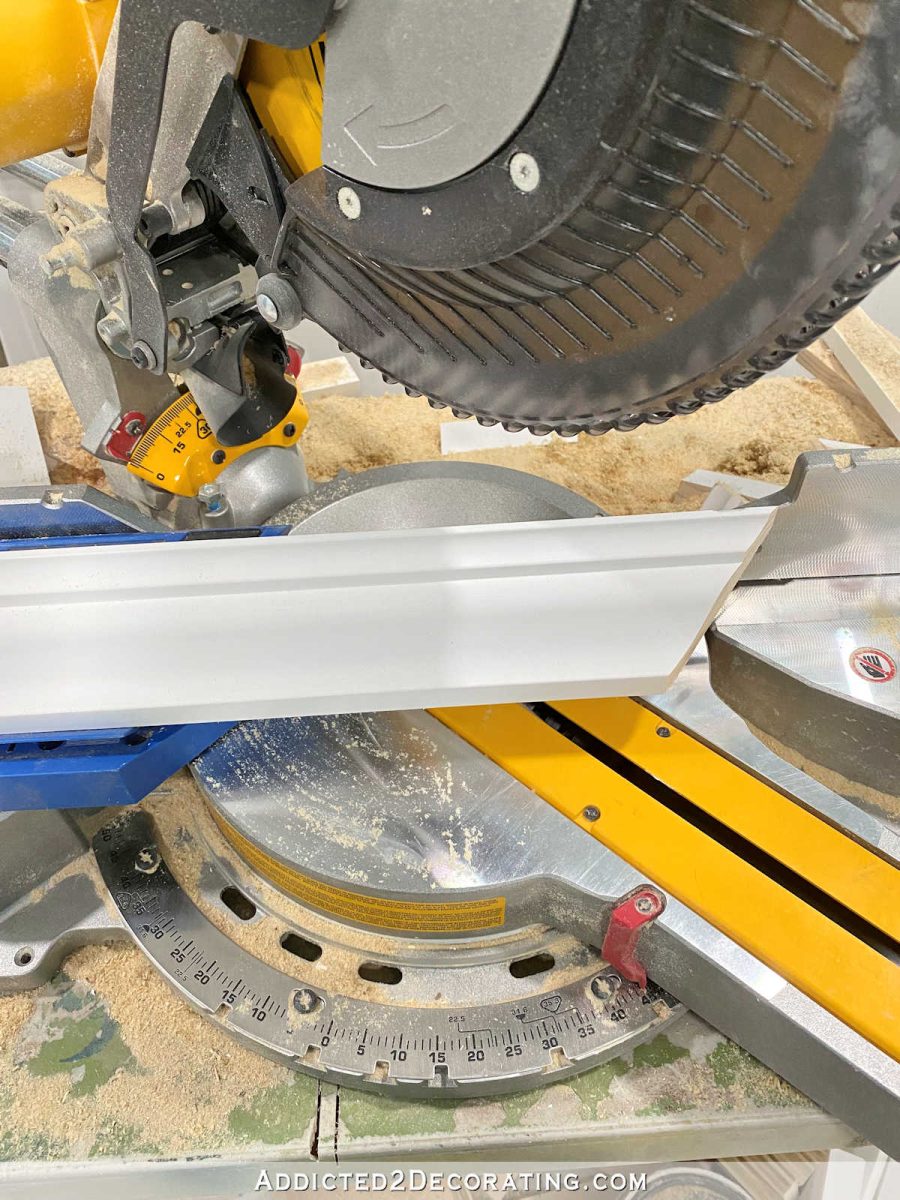
To cut the front piece, I set the blade at 45 degrees to the right. Then I set my Kreg Crown Molding jig to the left of the blade, placed the crown molding upside down on the jig, and made a cut on the end of a long piece of crown.
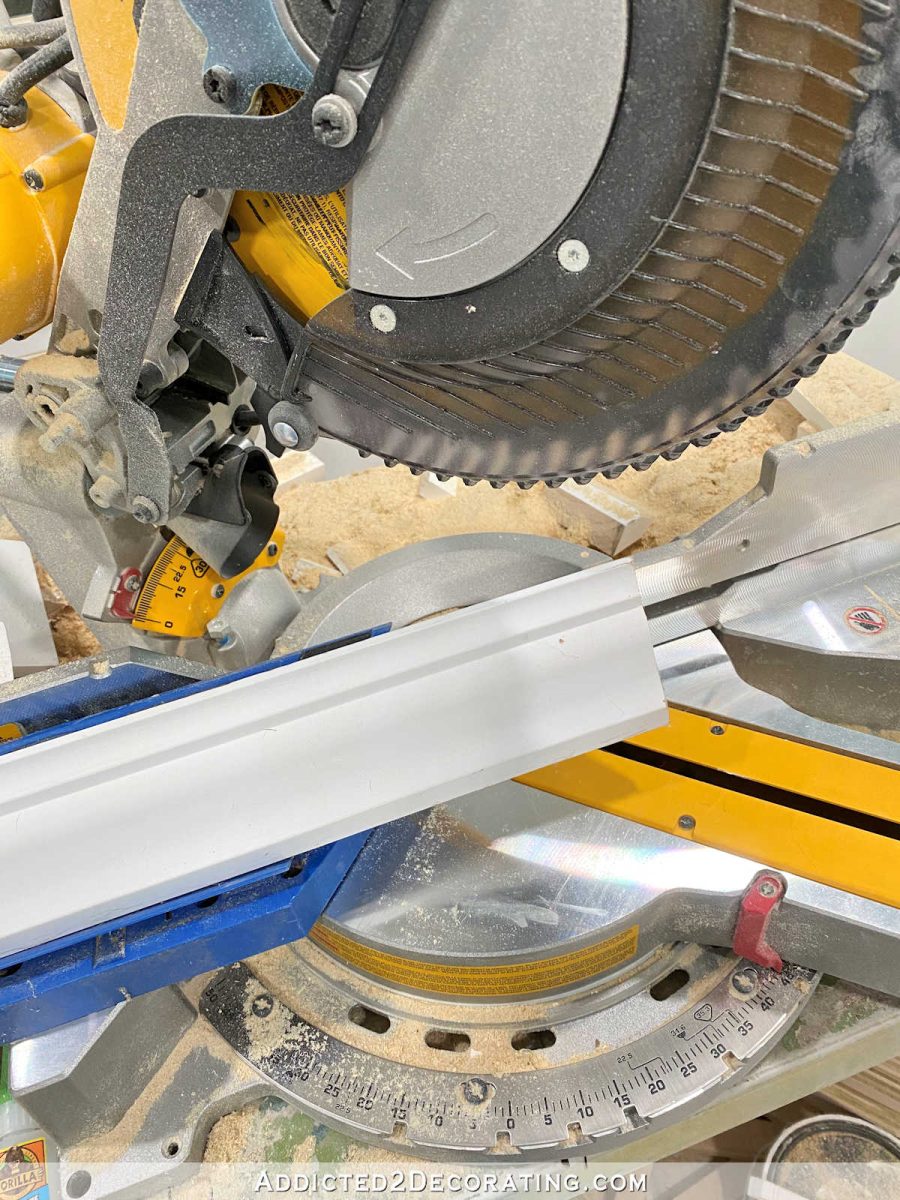
Here’s what that cut looked like…
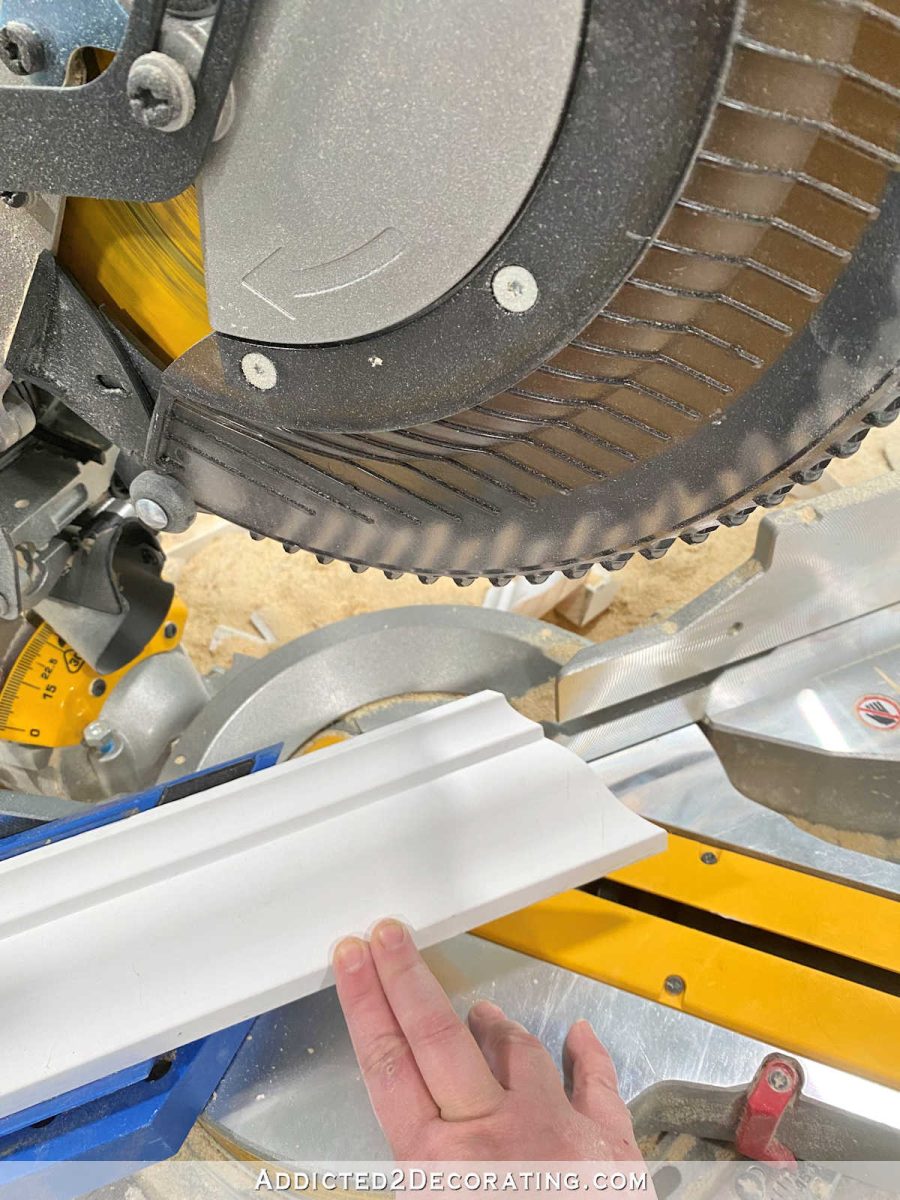
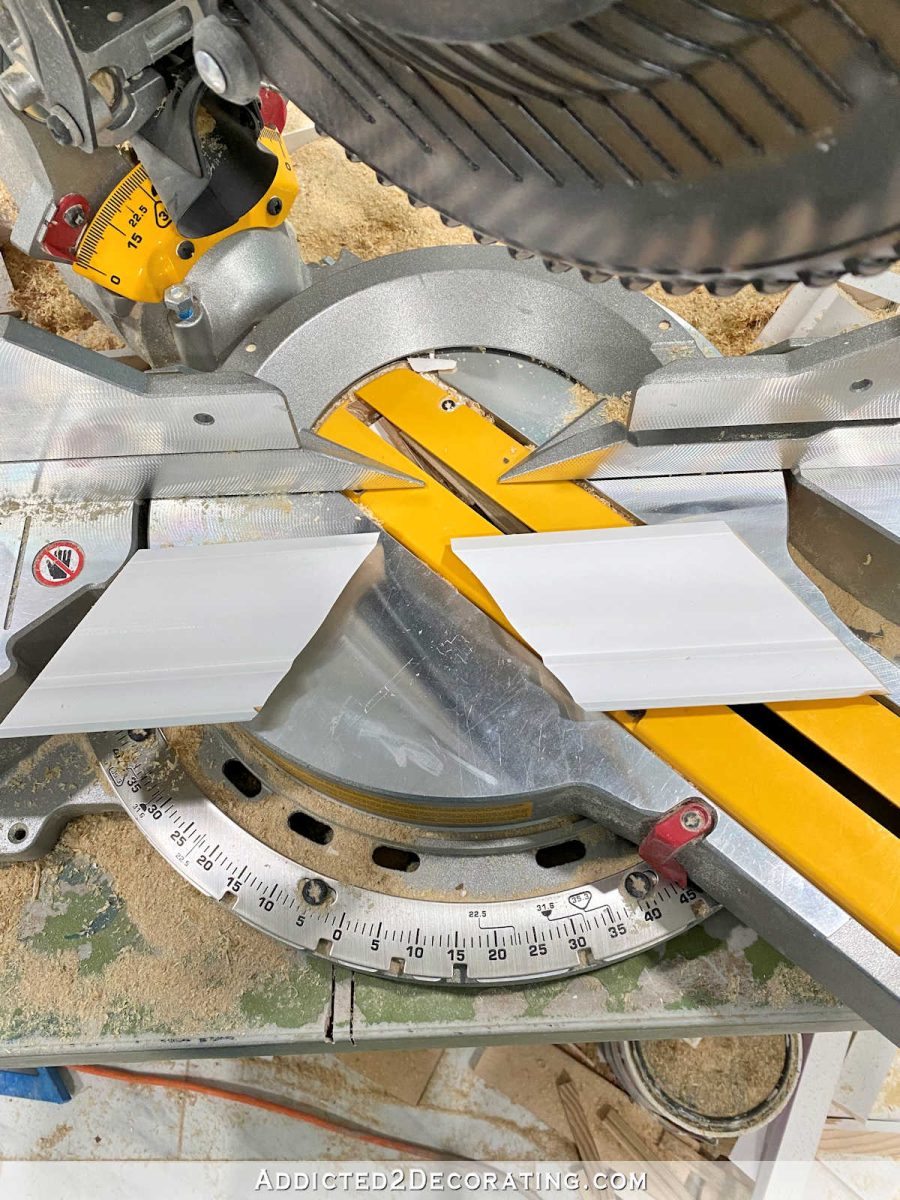
Then I set my blade at 45 degrees to the left, and kept the crown molding jig on the left, and cut so that the new cut would be right up against where the previous cut was on the very bottom of the trim (with the crown molding being upside down in the jig).
And here’s what that cut looked like…
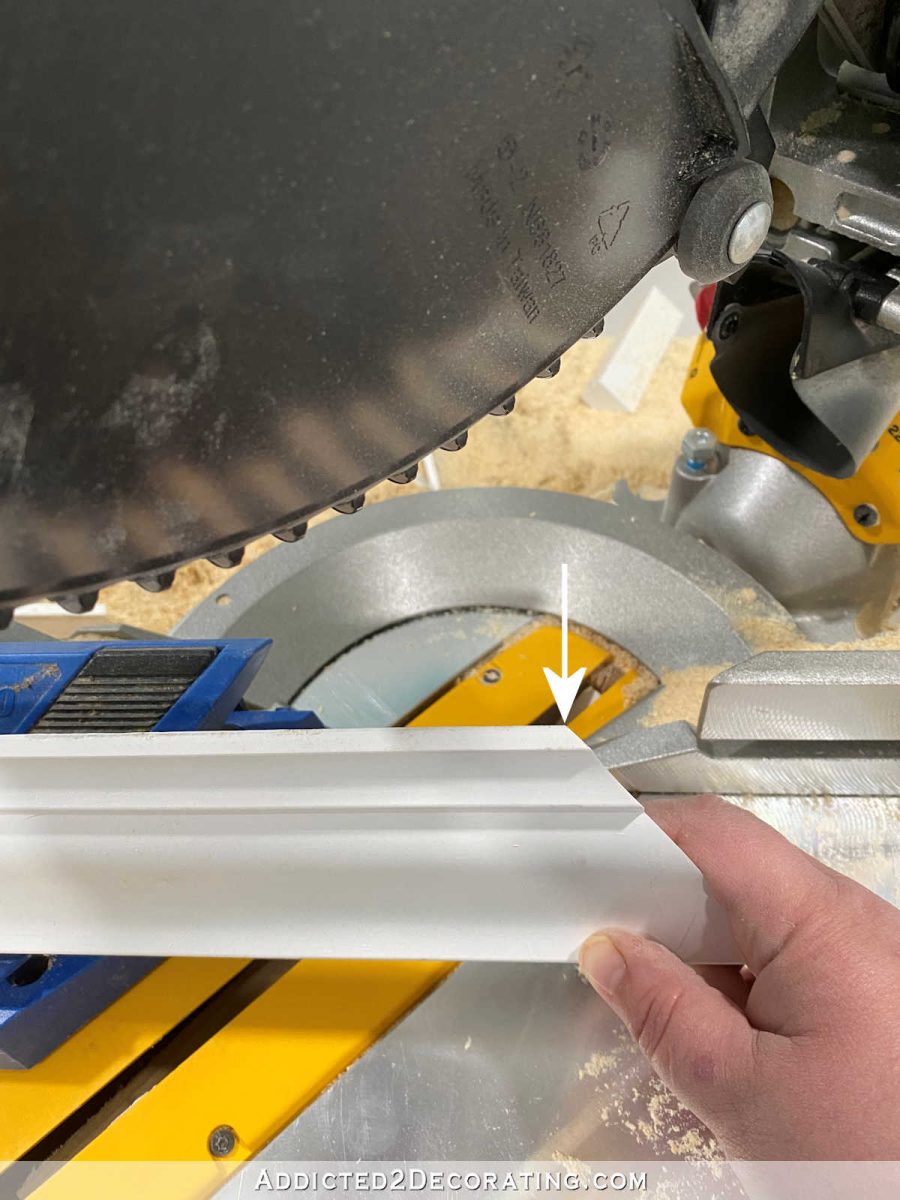
And here’s what it looked like on the back…
Now if you’re making a box that’s wider than 4.5 inches, you probably won’t have that perfect point on the bottom of your crown. I honestly don’t know because literally none of this math (algebra, geometry, trigonometry, or whatever calculations go into figuring this out) make any sense to my brain. I literally just cut and cut and cut and cut until I figured out what works for my particular molding. I wish I could give you some formula like, “If your crown molding is this wide, and has this spring angle, and your top block/box is this wide, this is where you need to cut,” but my brain doesn’t work that way. I just cut and cut and cut again until I end up with a heap of crown molding scraps, and one that finally works that I can replicate.
But I did know that I wanted my crown molding pyramid to be 1/8 inch smaller than the top box on three sides, so while my top box was 4.5 inches wide, I wanted the crown molding that fit against the box to be 4.25 inches wide, and cutting it like this gave me the perfect width at the top. So you might have to play around with some various cuts, depending on the size of your crown molding, the spring angle of your crown, and the size of your top box, to figure out exactly where to cut the front crown molding piece.
Next I needed to cut the sides, and just like the top box, the side pieces needed an angle on one side, and a straight cut on the other.
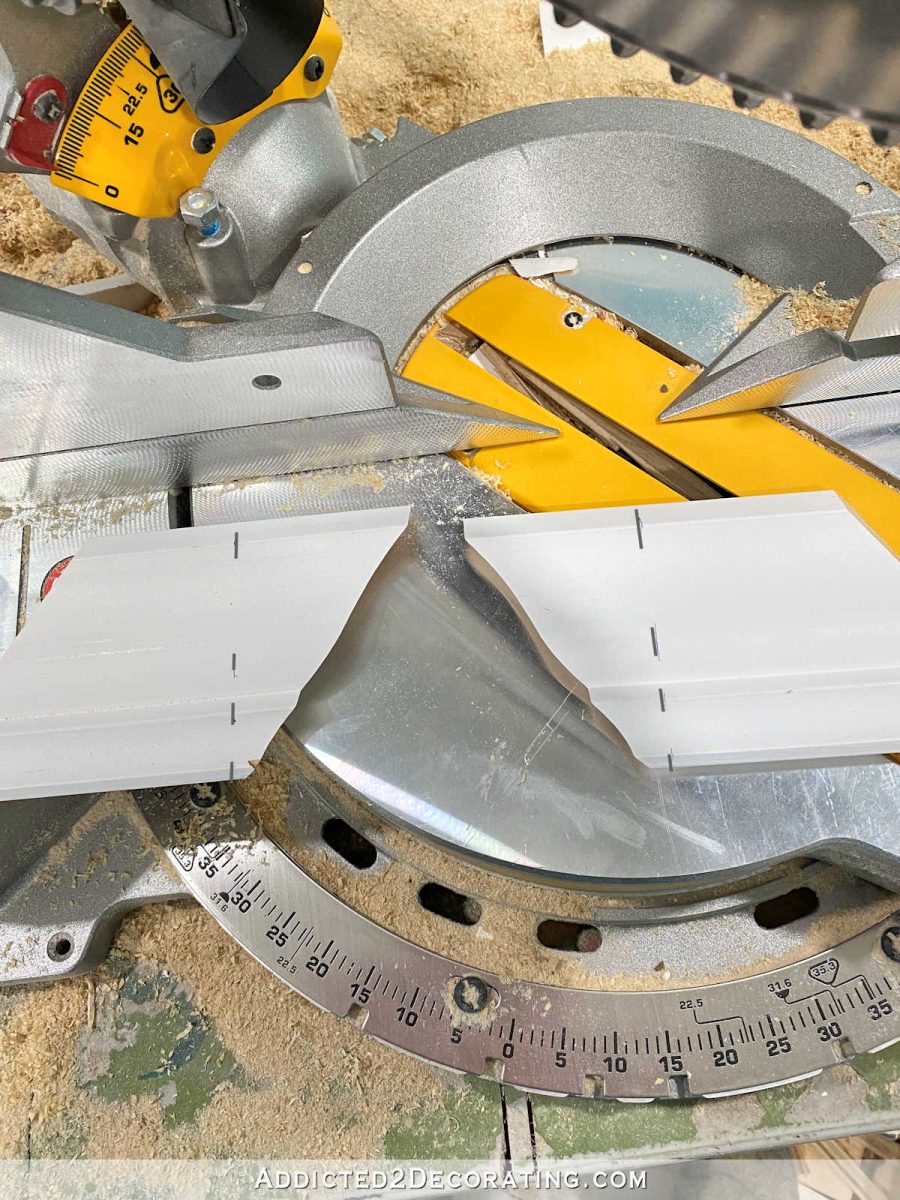
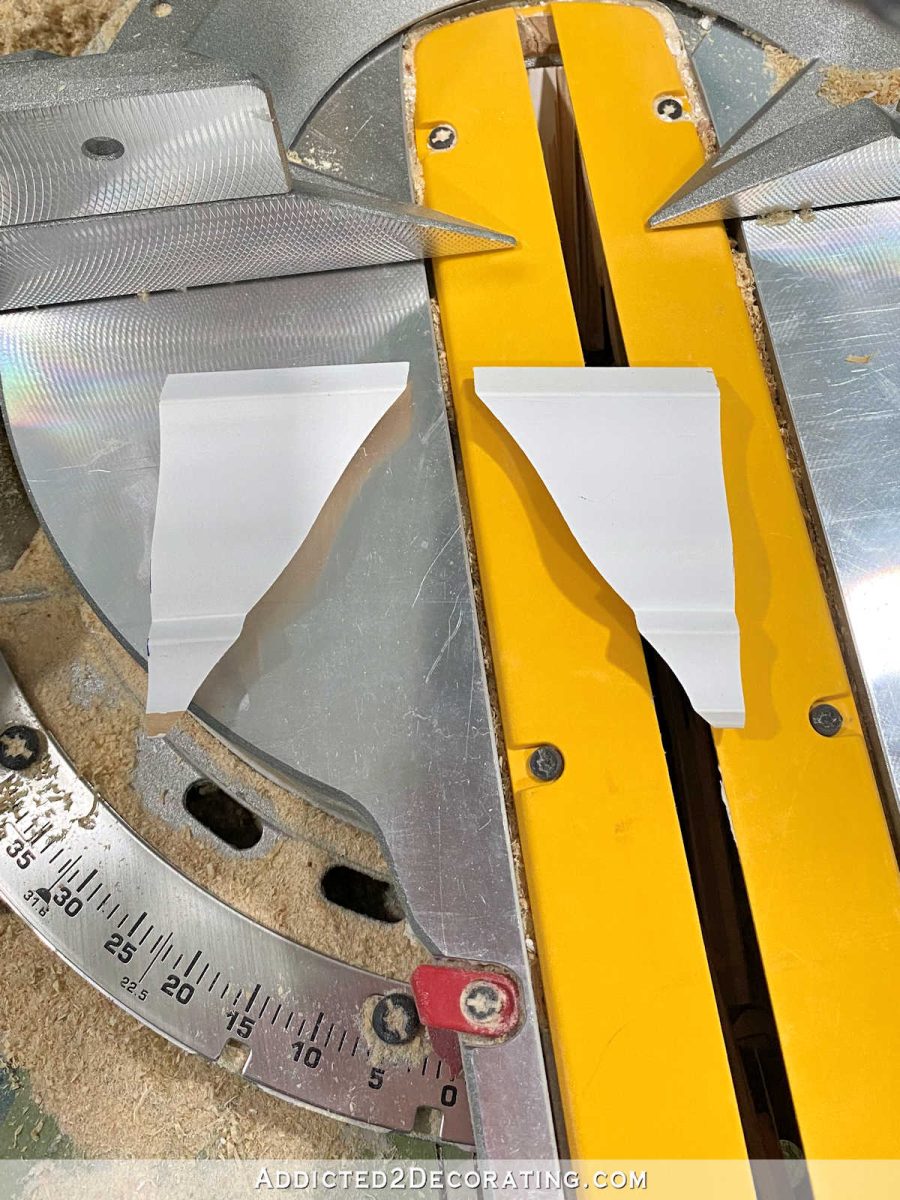
So I set up my saw with the blade to the right at a 45-degree angle, the crown molding jig on the left, and my crown upside down in the jig, and I made a cut on the end of the crown.
Here’s what that cut looked like…

Then I moved the crown over about 4 inches just to give myself enough room to work with and cut. Then I set my blade to the other side and cut the piece for the other side. Here’s what I ended up with…
In the photo above, the angles I needed to keep are the two inside angles. The two outside angles on these pieces were just junk cuts to cut off the excess crown molding so that I wouldn’t have such large pieces to work with.
Next I needed to cut the straight cuts on each piece. And because I wanted these pieces set in 1/8 inch from the top box, and the side pieces of the top box was 2.5 inches, I measured and marked these side pieces at 2 3/8 inches.

I used my speed square to mark the straight line on these pieces (I enhanced the marks with my photo editor) so that I could have more than just one tiny mark as a guide.
And then I set my saw to 0 degrees and cut a straight cut along those marks. Here’s what the side pieces looked like…
Then I was ready to assemble using my hot glue gun, angle against angle, and straight cut to the back.
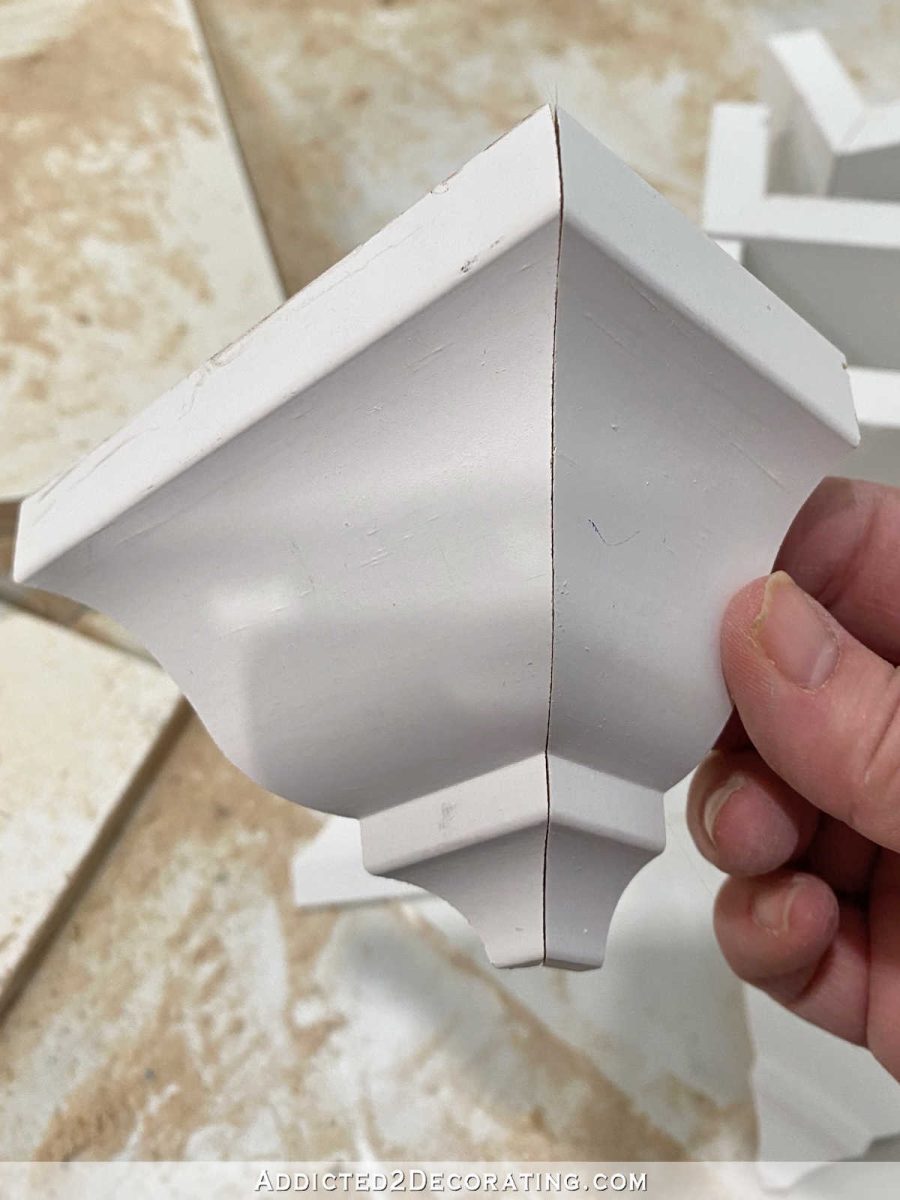
And here’s all three pieces assembled…
Then it was just a matter of gluing the assembled crown molding piece to the assembled top block piece.
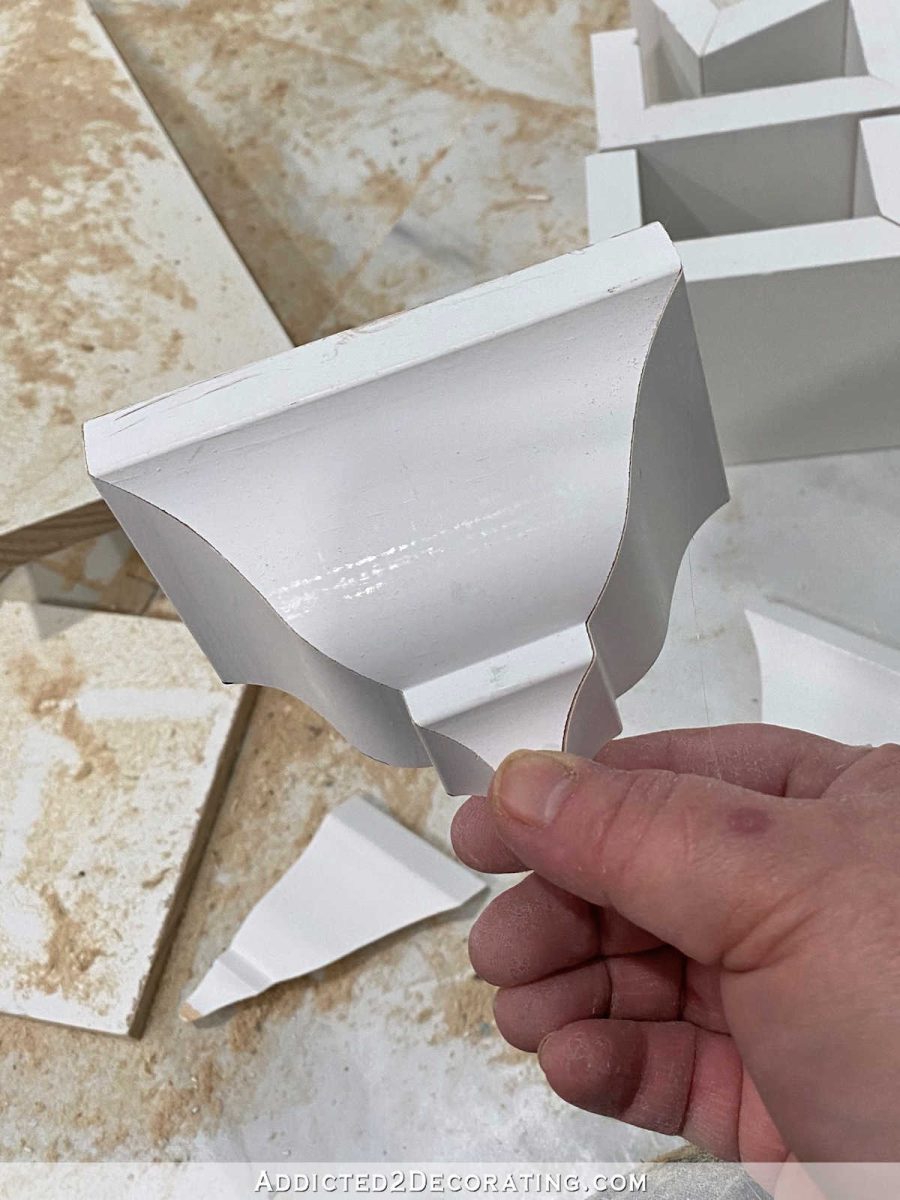
After that, the whole piece needed to be cleaned up with some sanding, and this little point at the bottom needed some wood filler and sanding to make it look clean and even.
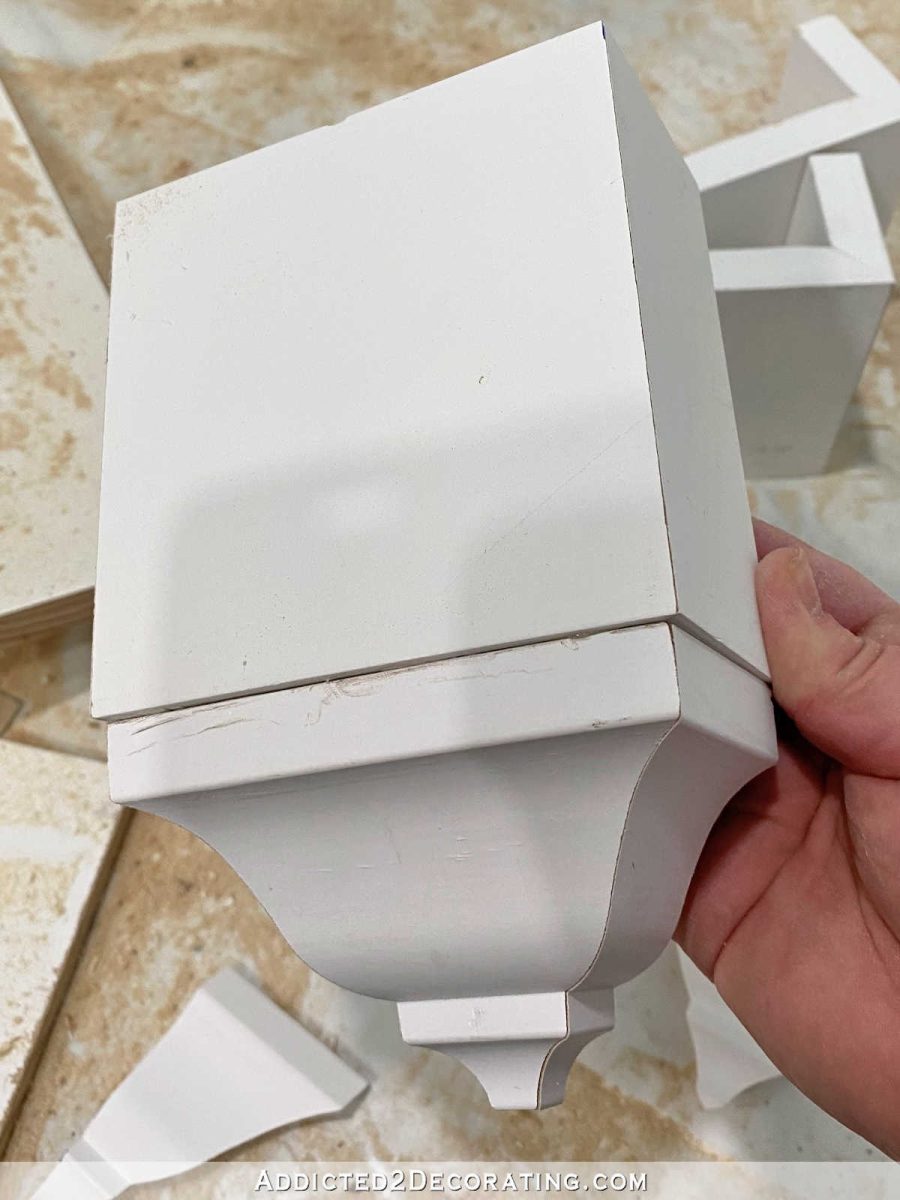
And here’s how the whole assembled mid molding block looks from the back.

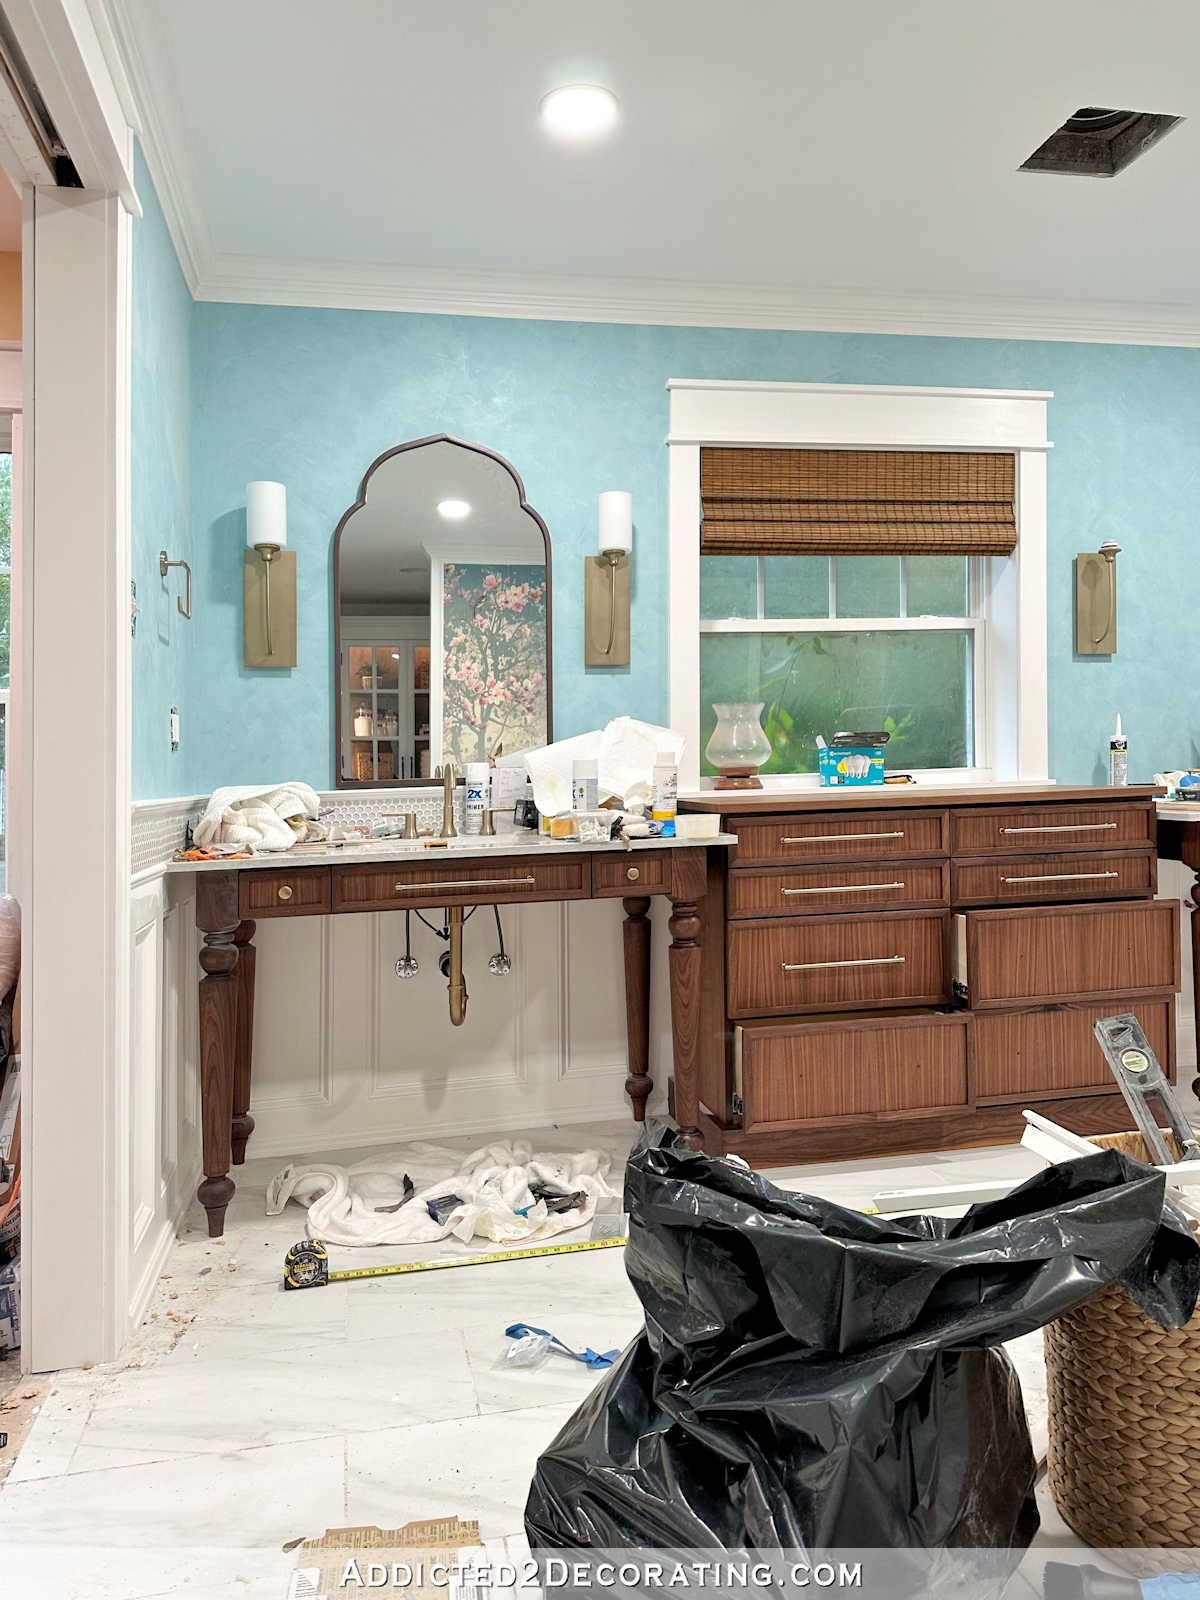
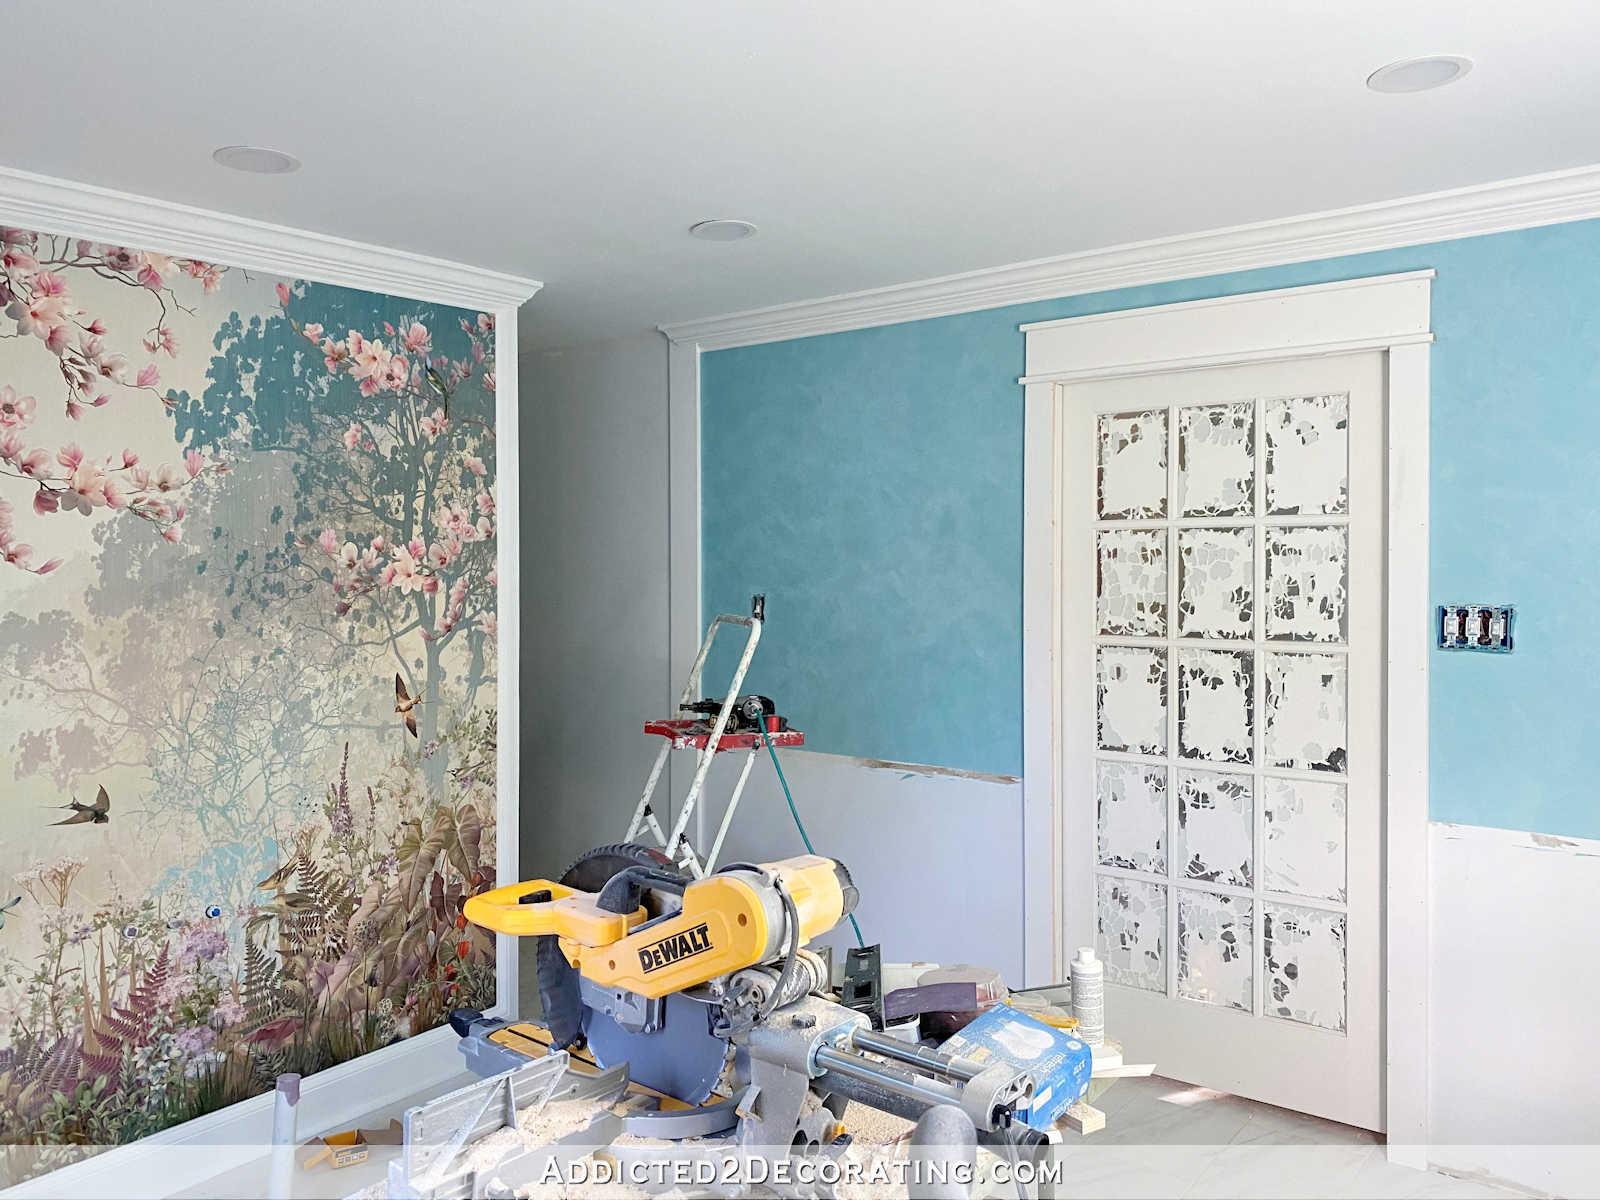
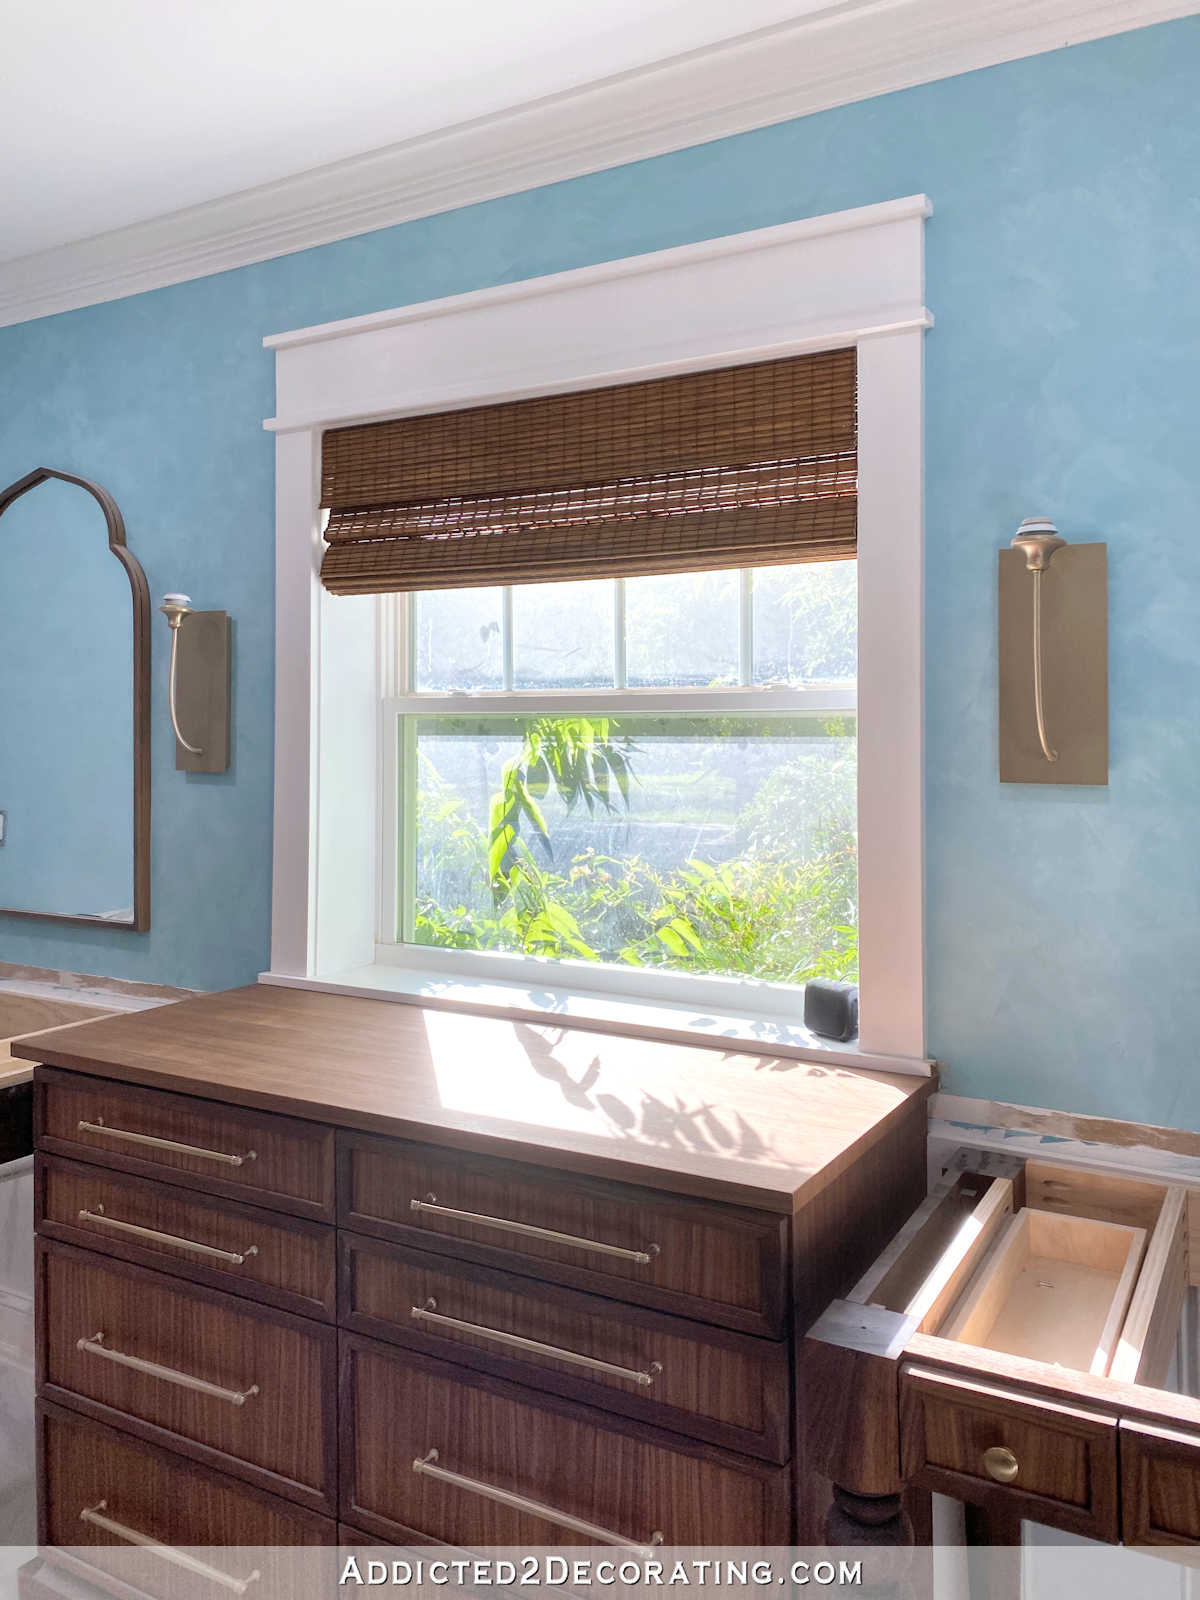
I put two of them in place temporarily with a dab of hot glue just to see what they look like, and while I love the look, and I’m so proud of how the turned out, I noticed a problem right off.
The left vertical transition board is a 1″ x 5″ board standing all alone. The right vertical transition board is a 1″ x 5″ that has been treated more like an actual door jamb, with a door facing attached to it on the mural side of the wall. And that door facing piece has been installed like I install all of my door and window casings with a 1/8-inch reveal of the edge of the door jamb. With one vertical board standing alone, and one being treated like a door jamb with a casing, the two sides are different widths and don’t look symmetrical. And the addition of the mid molding blocks accentuates that quite a bit.
So that’s a new problem that I didn’t foresee. It’s all an easy fix, but it’s a time-consuming fix. Unfortunately, it will require me to make all new mid molding blocks, and it will require some reworking of the vertical boards and other trim that’s already installed, but I’m okay with that. I have to get this right. The good news is that I think I’m heading in the right direction, and making these four mid molding blocks was really good practice. I learned something new, and that’s always a good thing. So once I iron out these details, I think they’ll look great!

Addicted 2 Decorating is where I share my DIY and decorating journey as I remodel and decorate the 1948 fixer upper that my husband, Matt, and I bought in 2013. Matt has M.S. and is unable to do physical work, so I do the majority of the work on the house by myself. You can learn more about me here.
Great idea, but how will your crown dead into the block on the mural wall?
It’ll basically be a standard crown molding return that dead ends into the block. So it’ll look like the crown on in the picture below, except that instead of the crown just stopping randomly on a wall, or instead of that weird exposed wall area that you get with a hanging return, mine will be cut as if it’s a standard outside angle that wraps around a corner, and the little return will dead end into the side of the block.
Crown molding return to the wall
I’m glad you figured it out. It’s going to look great!
Hi Kristi! I so, so admire your attitude of “I learned something new, and that’s always a good thing” instead of beating yourself up and saying “Why didn’t I think of this? Now I’ve wasted all this time!” Truly, nothing is ever wasted, and it’s great to be reminded of this truth on many different levels and in many different areas of endeavor.
You continue to surprise us all with your talent and hard work. They look great. Kudos to you!!!
Kristi,
I have followed you for many years and I continue to do so because of your can do attitude and your willingness to start over when you believe you need to. You have and will keep inspiring me! Go Girl!
Oh my stars! That is awesome. You are becoming a master carpenter craftsman artisan. You always figure out your dilemmas. Bravo!!!! I know that is a fabulous feeling and I agree that it is inspiring when you have to redo something, you look at it as something you learned new and move on. I struggle to have that good attitude☹️
You amaze me! Your persistence and work ethic, and your willingness to share it all with us.
Wow!
Amazing talent!
Oh, wow. Master “crafts lady” you are. I have a headache just trying to understand how you could even figure this stuff out! Absolutely amazing.
OMG! Kristi, That looks fantastic! I had to scroll past the saw cuts. Made my head hurt!
I have just canceled the crown molding in my new build. Labor was horrendous! Going to do it myself! Fortunately, mine are all rectangular rooms! I can handle 45 degree cuts and I don’t mind a hanging return in the bathrooms.
Also canceled the door jambs. I’m going to do mine like that fabulous designer/decorator Kristi Linauer did hers! I do have a bit of an edge on her! I’m 5’9″! LOL
Baseboards are a piece of cake! So no paying for the expensive trim guy!
Can’t wait to see this all finished.
IDK, for me, it all seems a bit much. I could get with it if the ceilings were higher, but I think crown in 8 ft. tall rooms just shrink the room. Just my opinion though, I know you probably don’t agree.
I have crown molding in every single finished room of my house, except the kitchen. But even there, the cabinets are topped with crown molding. 🙂 I think crown molding looks great with 8-foot ceilings.
I love the creativity & that you figured out all those angles (crown can be so tricky), but wondering if it wouldn’t be easier (and look more symmetrical) to just built out headers over both openings. You could trim down the vertical pieces & run the crown continuous around the room. Love watching the process. Keep up the great work!
I have considered that many times, but I’d love to keep the ceiling continuous throughout if at all possible.
Hi Krissy.
I think this is a great solution. I have two questions though. The mural wall has crown, right? How are you terminating that crown?
On the other side, have you considered having the crown wrap these boxes and terminate into the exterior wall in the shower. That was you’d have the crown on the box and below it. I think that would look fantastic. It’s hard to say for sure without seeing it though
Beautiful job making the molding blocks!
Instead of glue gun, carpenters use CA glue, composed of cyanoacrylate glue and an activator. Glad to see the bathroom progress.