Master Bathroom Trim Progress (And Why My Idea Won’t Work)
This weekend, I started installing the trim in our master bathroom. And unfortunately, I realized pretty quickly that my plan for the trim around the ceiling wasn’t going to work.
I had planned to do something very similar to what I did in the music room, where I added wide pieces of MDF around the perimeter before adding crown molding along the wall and base cap molding along the inside edge of the MDF.
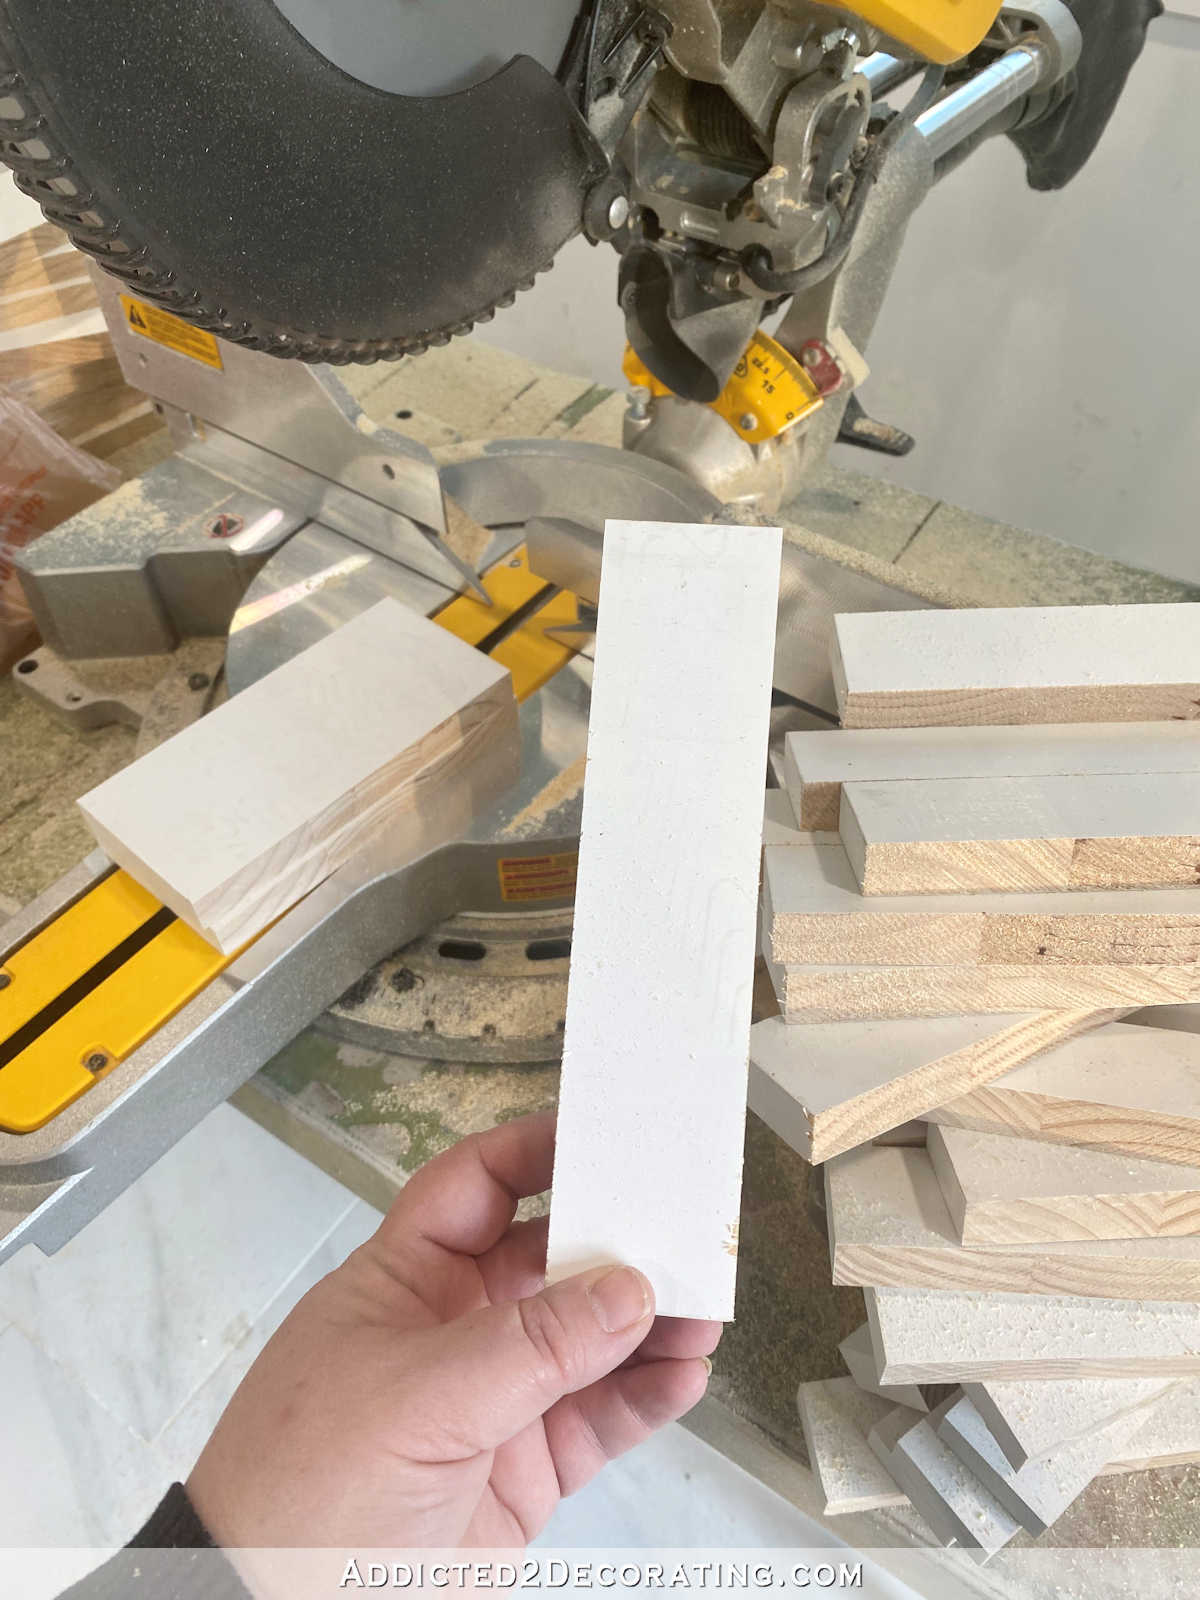
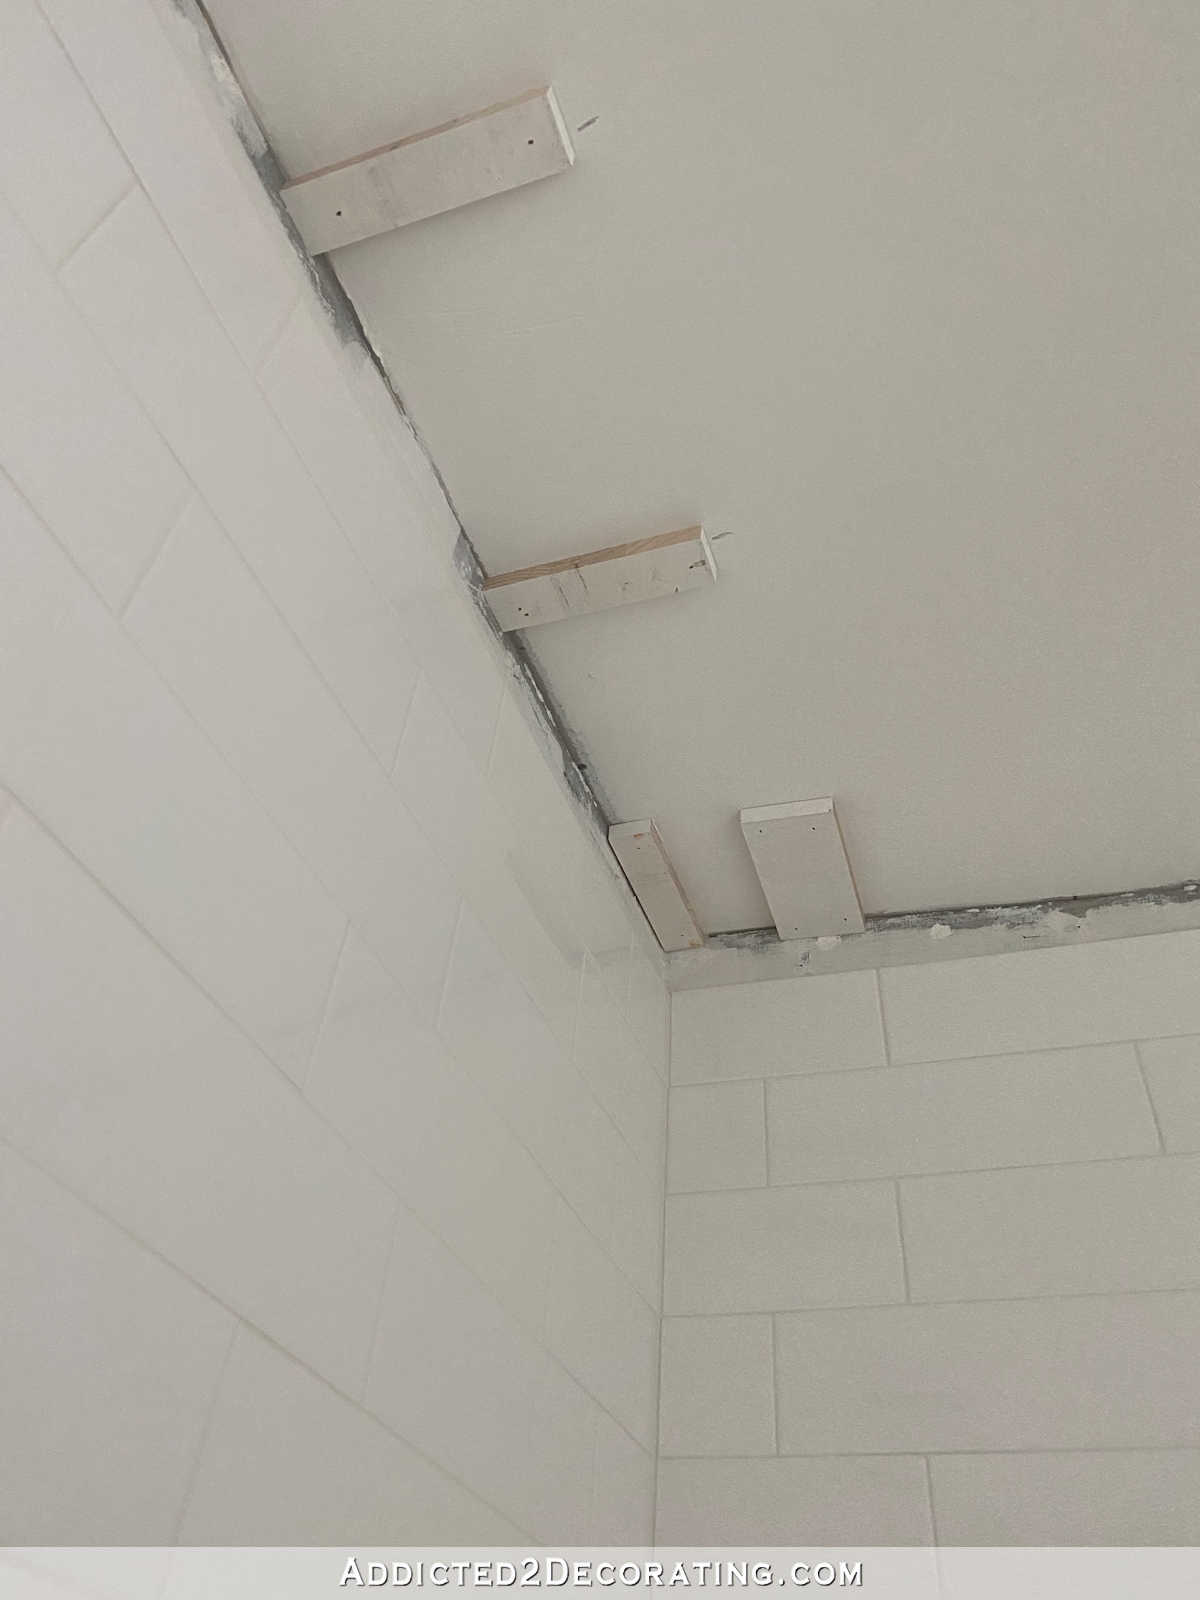
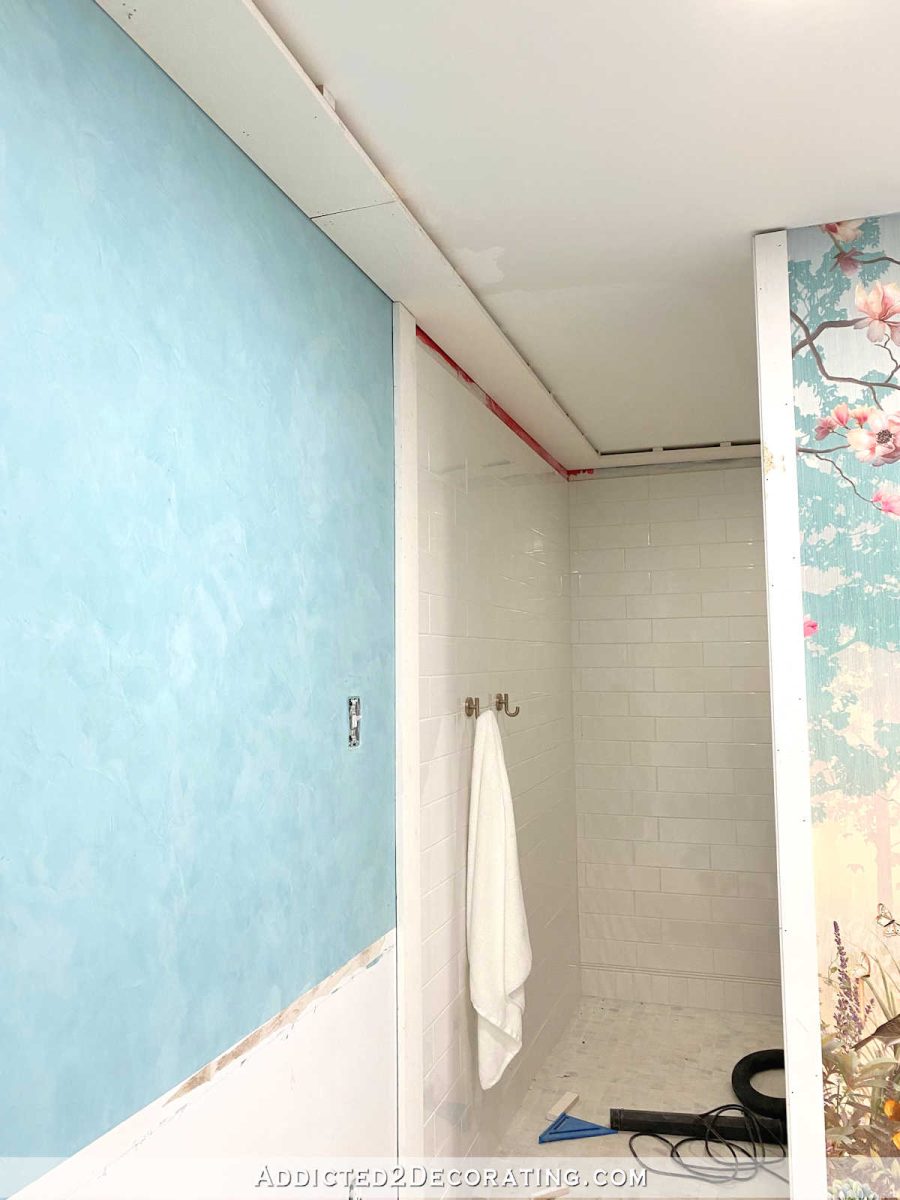
But to accommodate for an uneven ceiling in the shower, I was needing to add spacers before attaching the boards along the perimeter. So I cut spacers out of a scrap piece of 1″ x 8″ primed lumber.

Most of the spacers were about 1.5 inches wide…
I attached them along the perimeter using Loctite construction adhesive and 1.5″ 16-gauge nails.
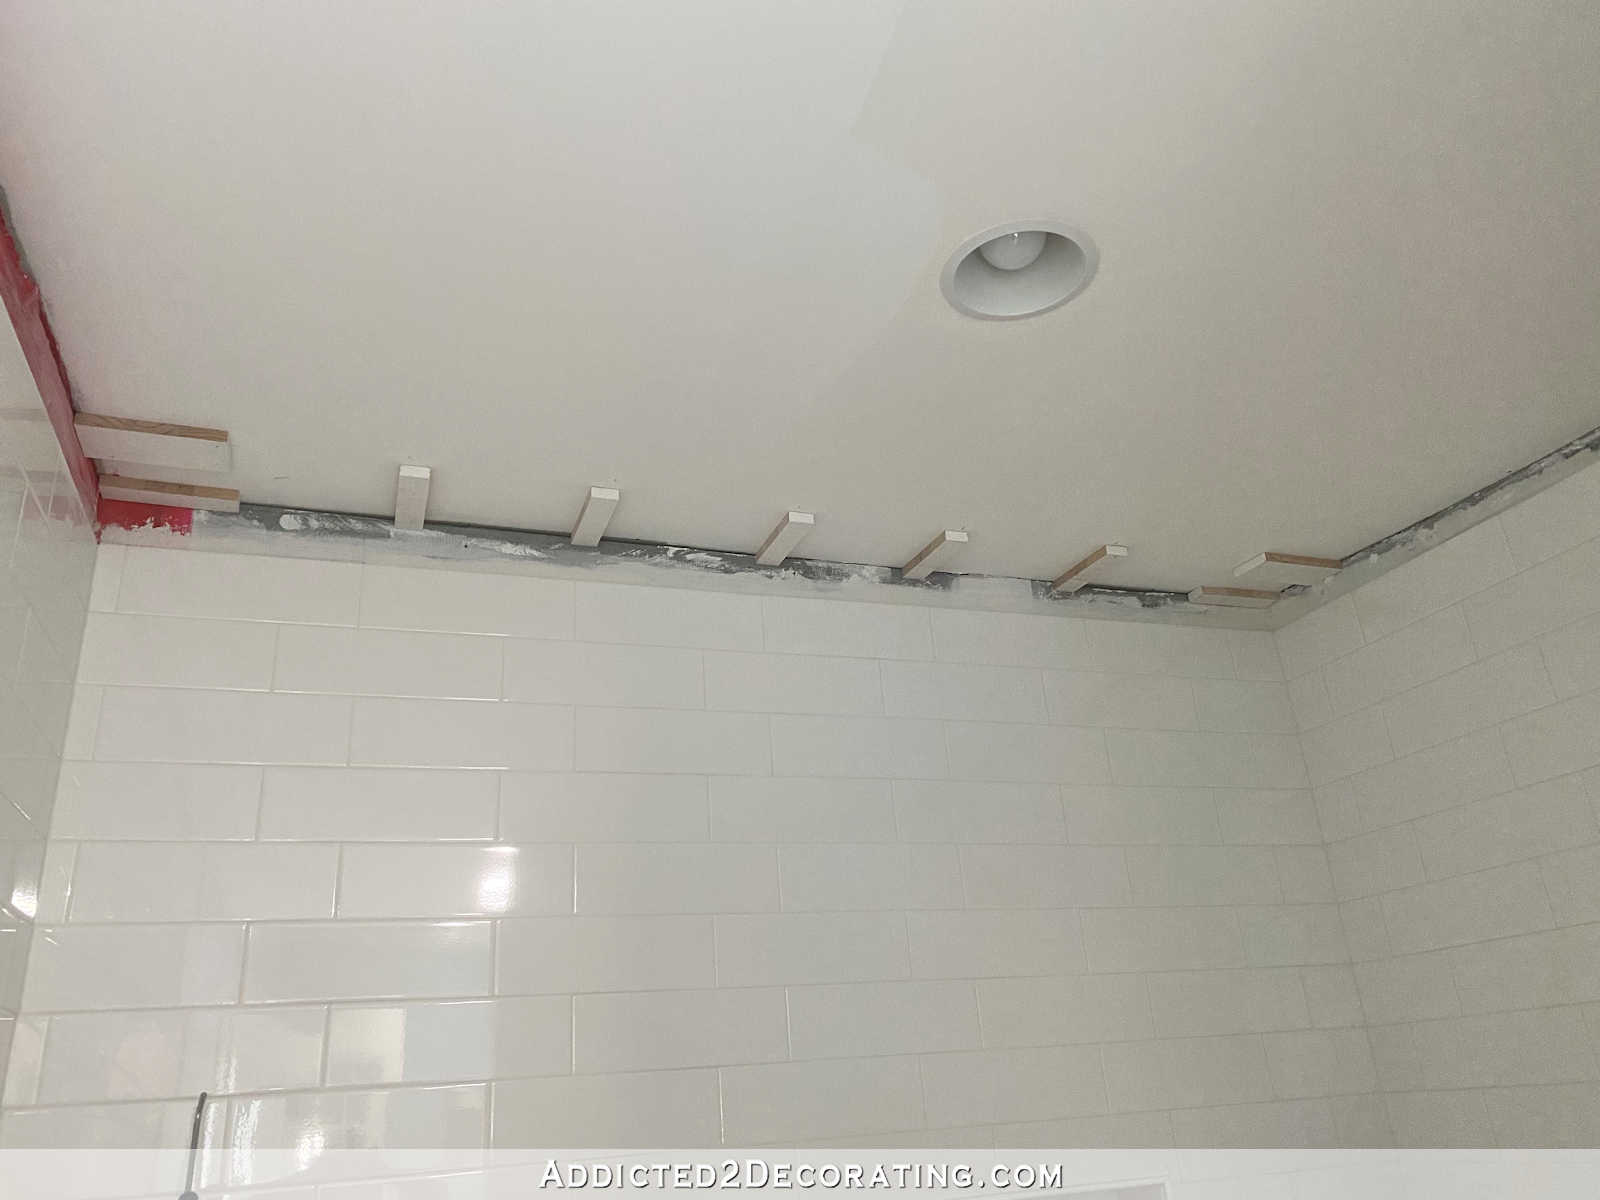
On the corners where I’d have two boards butting up against each other, I cut double-width spacers and attached them so that two boards could be attached to the same spacer.

And after attaching the spacers and giving the adhesive a little time to set, I went back and attached the 1″ x 8″ boards around the perimeter.

In all, I got three of the boards attached before I realized that I was going to have problems with this plan.
It all looked fine until I got over the newly trimmed door, where I ran into another problem. This is an old house on a pier and beam foundation, built on soil that’s constantly moving. So I can never count on anything being perfectly square, level, or plumb. And the ceiling above the door is definitely not level. So having the crown molding drop down an additional 1.5 inches makes it too close to the door trim, and accentuates how unlevel the ceiling is (the door trim on the top is level).
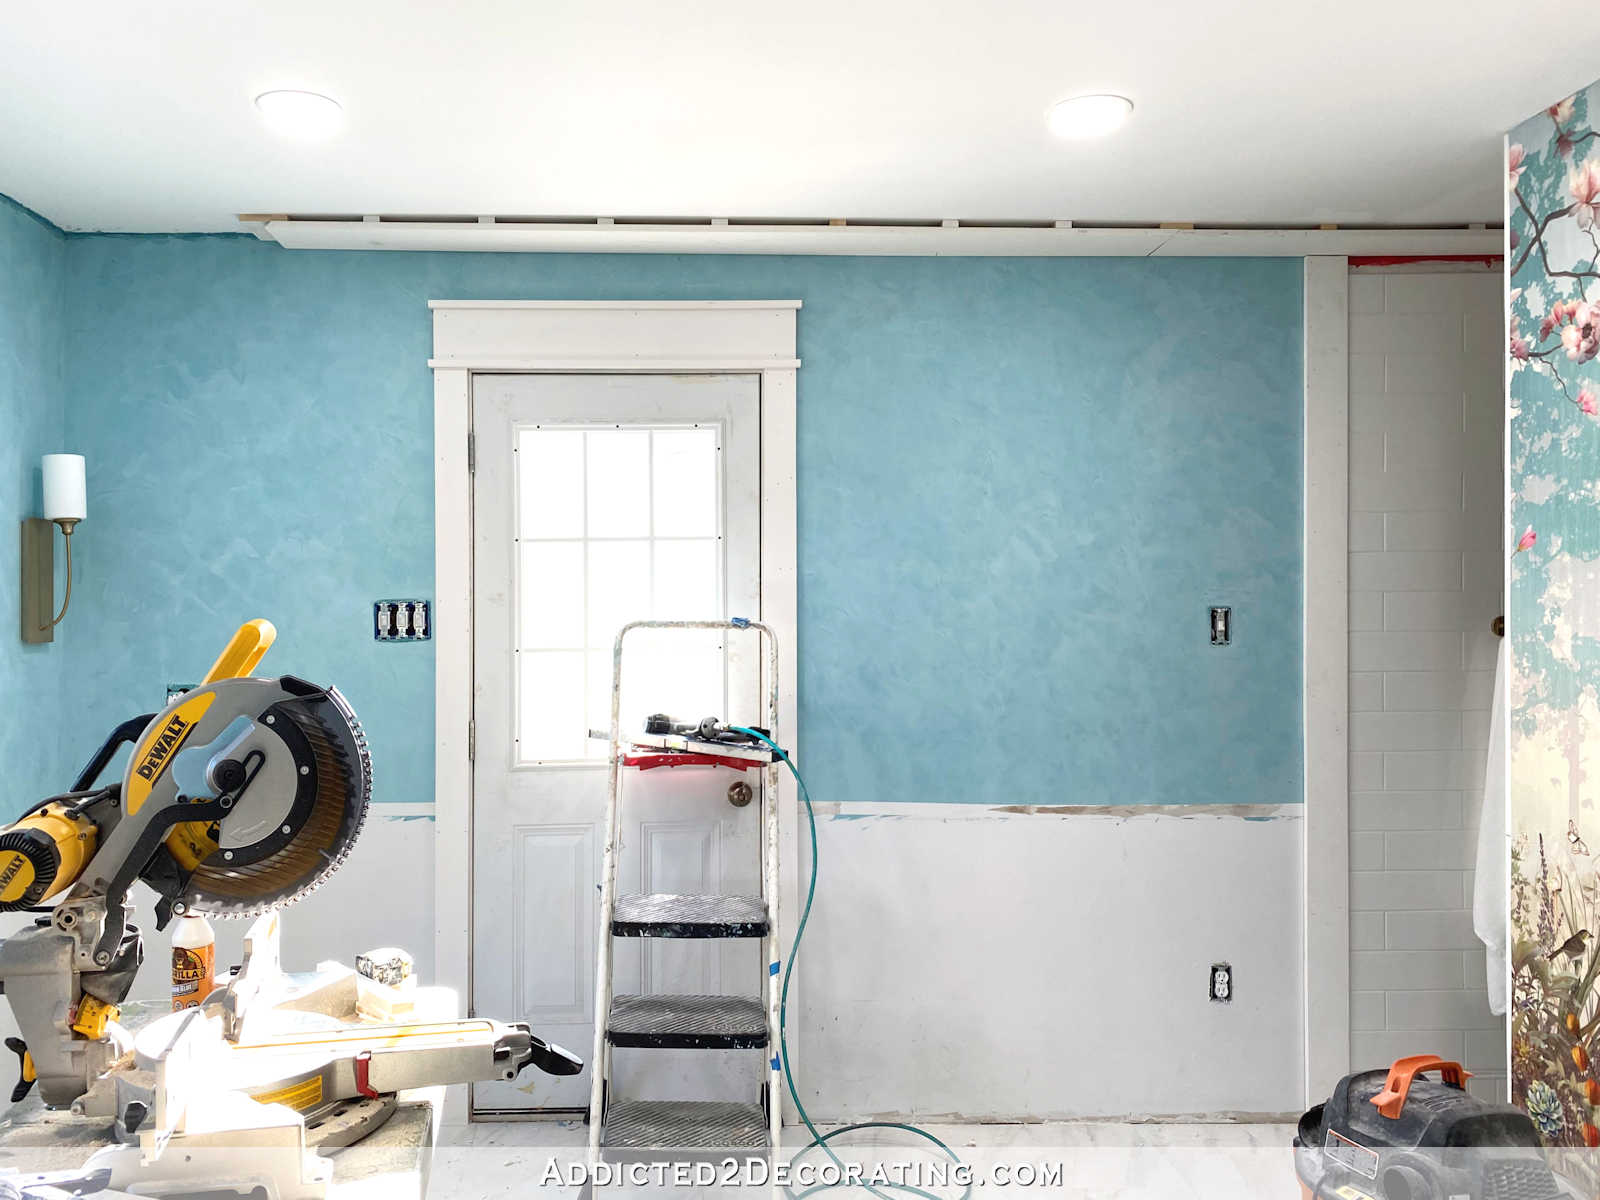
So now I’m kind of back to the drawing board on how to handle the trim around the ceiling. I’ll be taking this down and considering other options, but I’ve thought through and contemplated so many options for so long that I’m really tired of thinking about it. Quite honestly, I’ll probably just make something up as I go along.
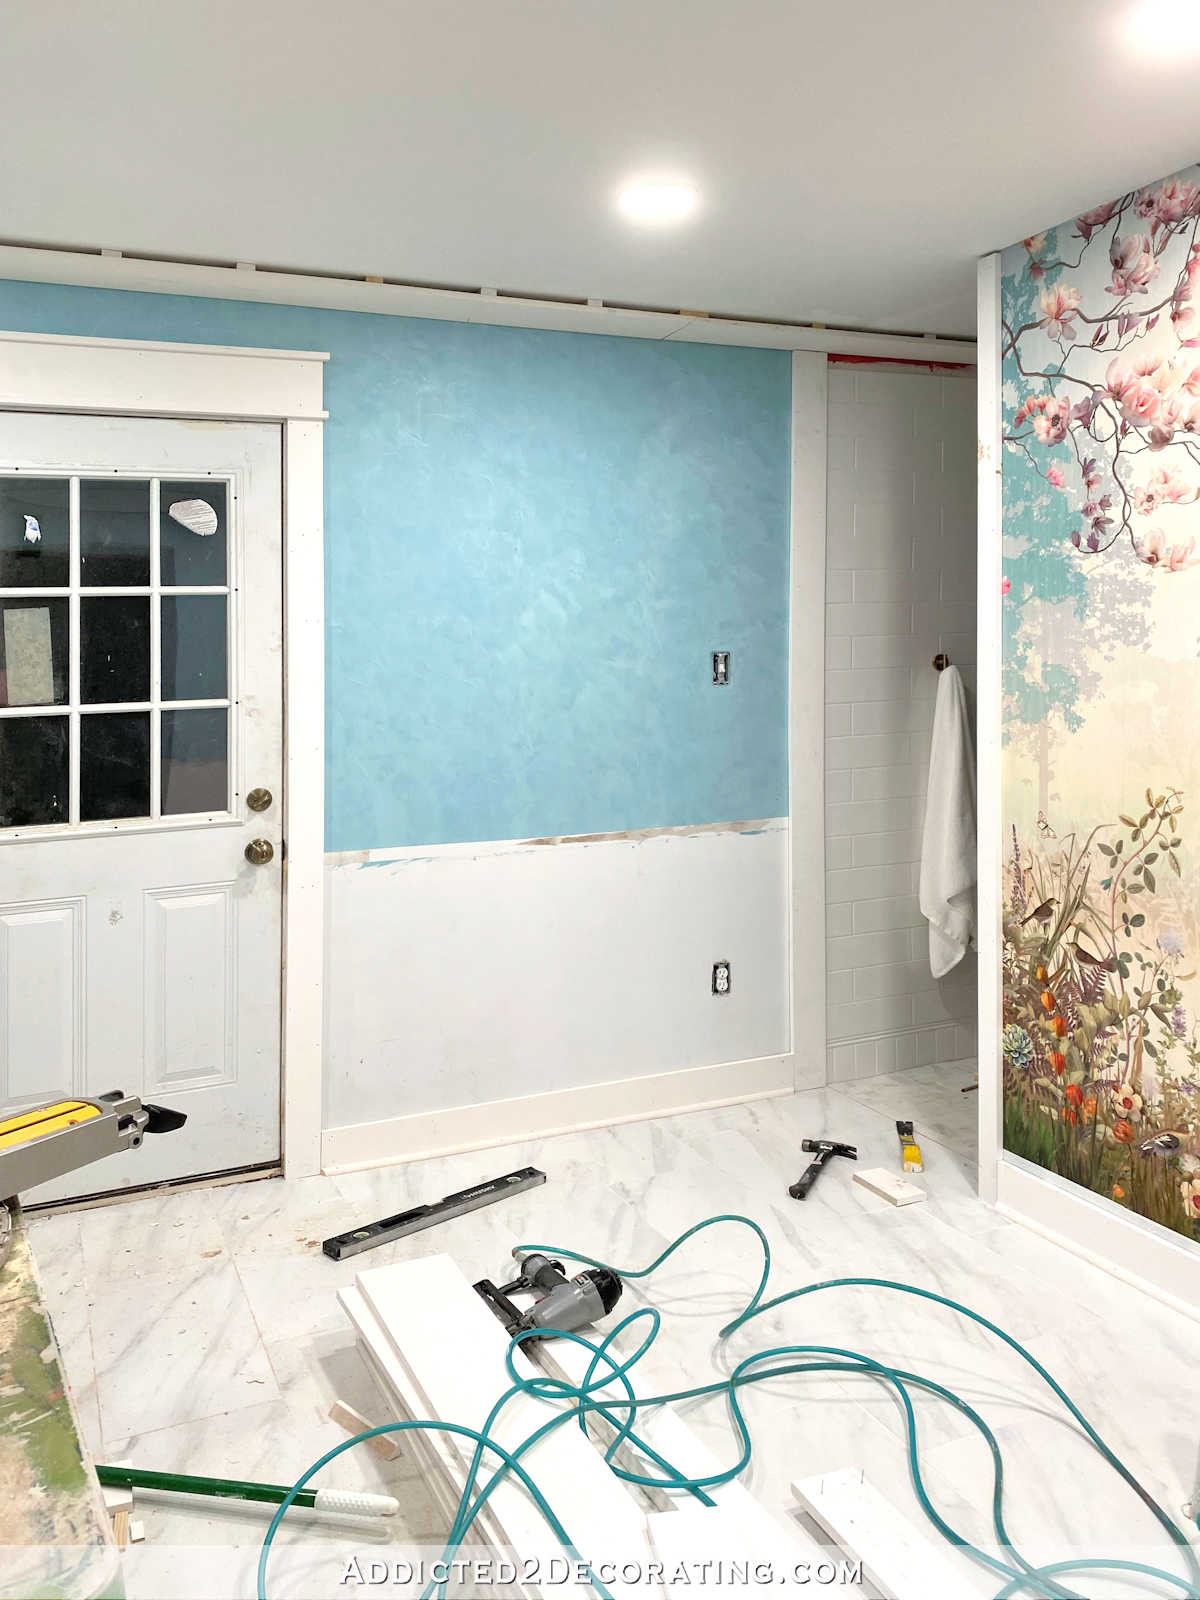
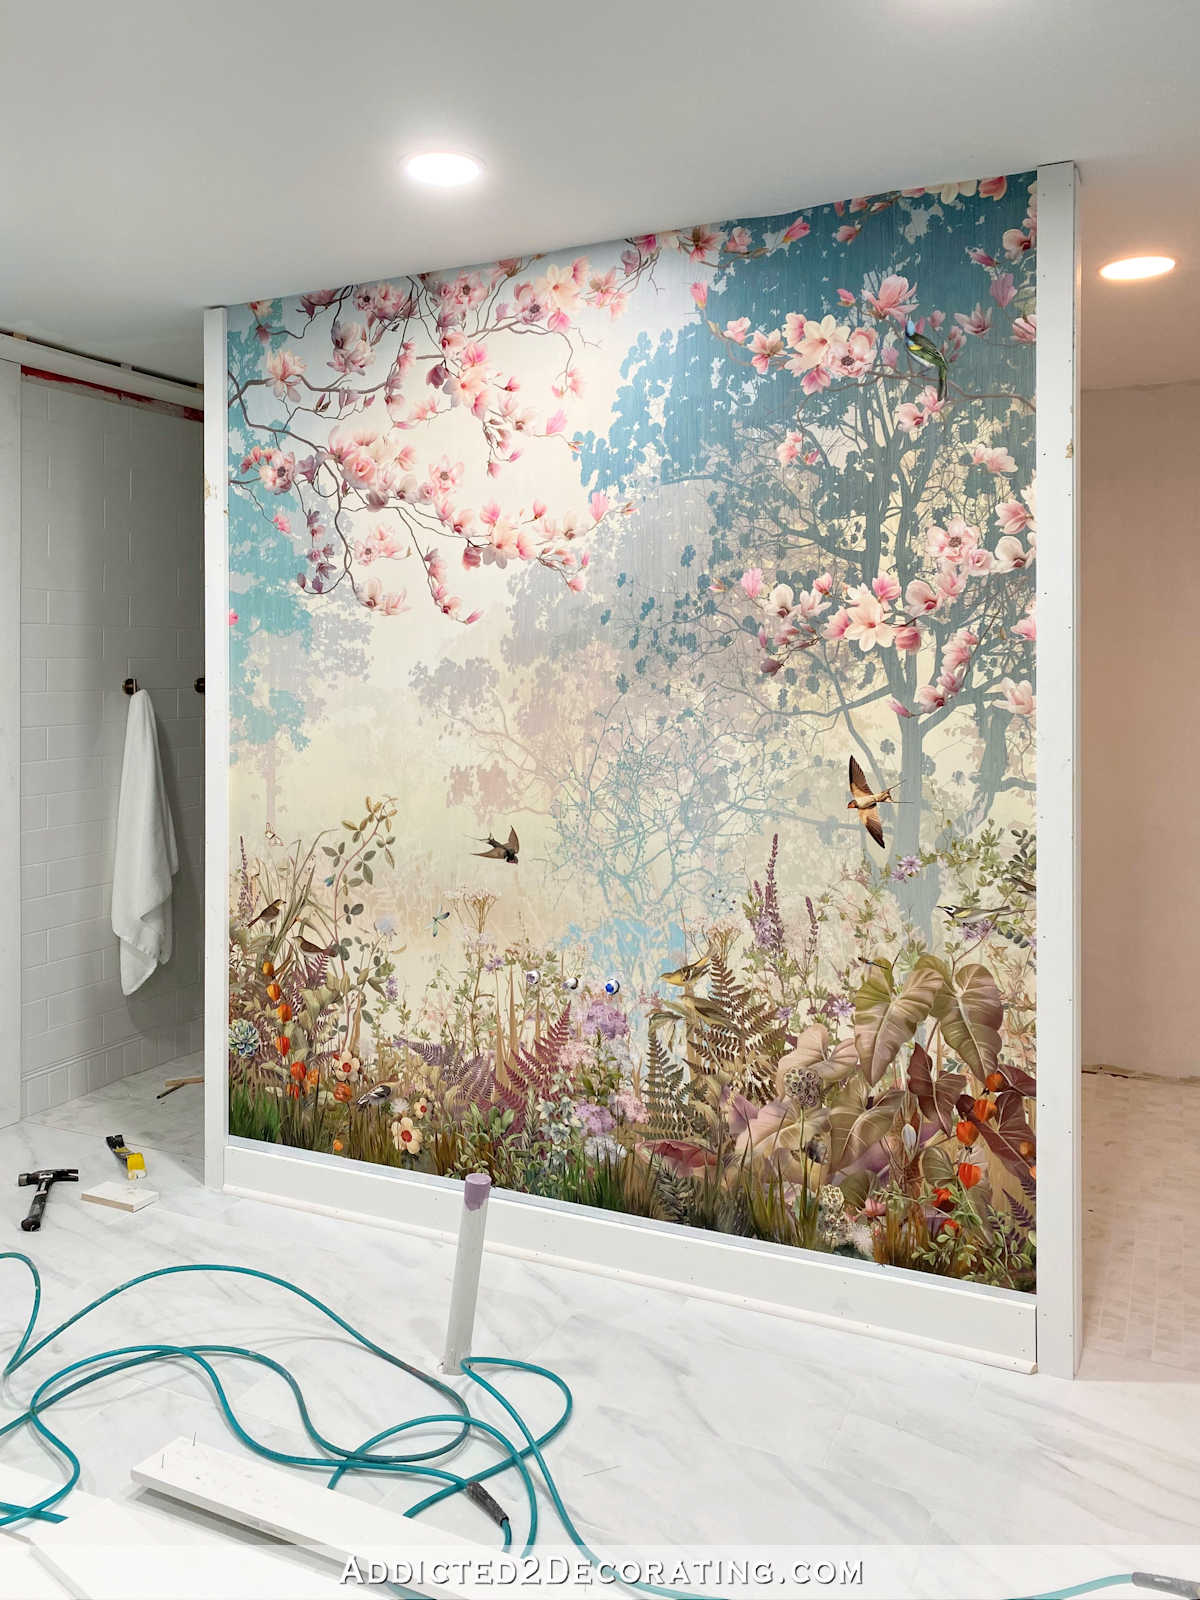
I did make progress on trimming out the mural wall, but I realized that I forgot to purchase any base cap trim, which I use on all of my baseboards. And of course, nothing is wood filled, caulked, or painted at this point. I’m still very early in the installation phase of the trim right now.
So this weekend has been two steps forward, and one step back. I’m not disappointed that I tried out my idea, though. I love trying new ideas, and if they don’t work, at least I know! I’d rather try and realize something won’t work than always wonder if I missed out on a great idea.

Addicted 2 Decorating is where I share my DIY and decorating journey as I remodel and decorate the 1948 fixer upper that my husband, Matt, and I bought in 2013. Matt has M.S. and is unable to do physical work, so I do the majority of the work on the house by myself. You can learn more about me here.

You might consult this post from Old Town Home: https://www.oldtownhome.com/2014/2/7/How-To-Hang-Cranky-Crown-In-Spite-of-Wonky-Walls/
@DWF….that shim job was a great solution and it truly does work! My Mr. is a master at this ! Kristi should give this some thought before ripping down all her progress! It may well work in her situation?
I betcha Kristi can figure something from this article/book and make it work! What about re-sizing the crown molding for the whole room (so it won’t be too close to the door framing) and then scribing the molding for the dip? I know this is just an idea from the pictures and probably won’t work, but maybe something will poke at that creative bent Kristi has!
Can you shorten the door header to make room for the crown?
You are fearless. Unless it’s uneven trim🤣😂😆😅.
I love your dedication to a project.
You might want to look into how to scribe molding to solve the uneven issues.
Could you, perhaps, change your door trim design from the top of the doors to the ceiling molding to somehow morph them into one and paint all of it in trim color? Maybe even a sliver of mirror up there like a pseudo transom look might distract from the inequities? Even a custom made transom like mirror mounted as if it is pulled open would reflect light and add height to the door’s column of trim color…okay you can run with this! That way, you can continue with what you have already accomplished – creating something wonderful as you go!
Can you cut your spacers each differently as you get to areas that aren’t even to cause them to look more level? I’ll look forward to seeing how you deal with this.
good morning from Idaho… i love the ceilings you do. But I always thought MDF would warp around moisture; won’t that happen in your shower?
I’m not using MDF. This is pre-primed lumber.
Just a thought: Is there anyway you could beef up the trim over the door, and just eliminate the blue color between the door trim and the crown? Seems like this might camouflage the slight disparity in that area anyway.
I like the ideas I’m reading about extending the door trim up and morphing it in with the crown mounding. I’m picturing it much like extending your kitchen cabinets up to make them appear taller. Eliminating the blue between door and trim would hide any height difference
Your spacers are all the same height now, right? Would it make any sense to shave them down (or beef them up) corresponding to whatever distance is needed to level the crown according to the lowest point on the wall. Make them more like shims? Not sure I’m explaining how it looks in my head. LOL
I did consider that, but then when I install the trim that goes on the inside of the boards to cover up the space, I’d be forced to scribe that trim, and that’s just way more than I want to do. If I thought it would all be worth it in the end, I’d do it in a heartbeat. But I’m just not convinced that it’s worth it.
Not specific to this post at all, just a random note to say thank you for being a constant source of inspiration and providing unknown assistance to my own home improvement efforts.
That door is not permanent. It doesn’t make sense to change your molding plan to accommodate a door that isn’t going to stay there, even if it’s “not esthetically pleasing” right now. Even if you can’t get to doing your addition of the master suite for some time, you’re willing to live with an exterior entrance straight into your bathroom from outside-not perfection. Until you’re finished all your renovations, you will always have something “not quite right” I’d remove the trim at the top of the door and make it less substantial and hopefully it would make the unevenness of the floors/ceilings/walls less obvious “for now” It’s temporary until you do your master suite.
I have fashioned trey ceilings in almost every room in my Historic Bungalow Kit home, (during its restoration). The house was built in 1928 on the site of an Amusement Park known as ‘Luna Park’. Facebook page: Charleston WV Luna Park. There were Luna’s (franchised) all over the world (Coney Island is one). Our Luna burned to the ground in 1923 and was not rebuilt. The ground under my house is on fill. Some homes have places where the trails of the original park vendors are still present under driveways and decks. Riverlets coming off the hills to reach the Kanawha river, create much movement. In the master bedroom the windows were on the level, but the ceiling dropped in one corner about an inch and a half. Using graduated spacers ( 1/8th” in that corner and gradually working to 1 1/8″ in the 3 corresponding corners) and sheet rock instead of MDF on the vertical and horizontal (with corner bead at the resulting junction), it made the impression of a wood trey. I then added crown to the wall and decorative door stop to the ceiling. Blue board could be used in a shower. Cheaper, but a little more work. The rock (9 inches wide) I could manipulate over the ceiling span to make the junction corner look like it was 1 1/8. It worked, although I think your readers will be saying, “What the —–“. Forgive please, I am in my 80th decade and don’t know how to send a picture.
I’m so sorry that your plan didn’t work the way you hoped! What if you tiled the shower ceiling ? You could still have the wood trim you wanted, it would just start outside of the shower area. I know you will come up with a beautiful solution. I can’t wait to see!