Music Room Bookcase Design Change And Ceiling Progress
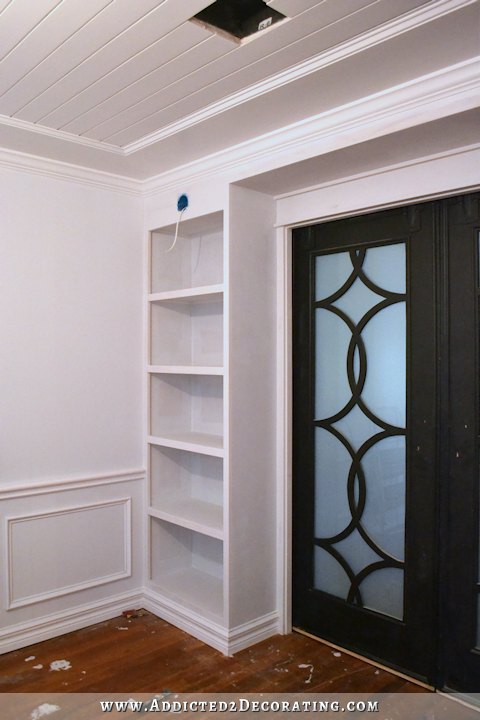
On Tuesday night, I thought I had finished my bookcases in the music room, other than crown molding and baseboards. They looked like this…
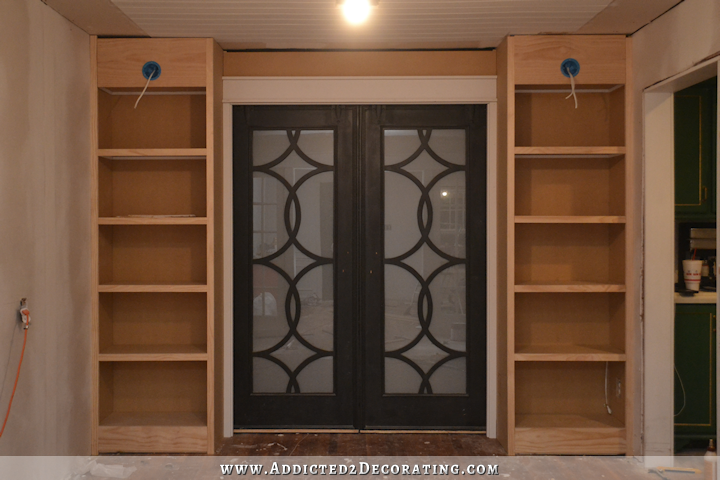
But I realized that with this design, I had created two problems for myself. The first problem was my ceiling. The design that I had in mind (wood slats in the center with the area around the perimeter dropped slightly) works much better with a square/rectangular room. But with the bookcase design, I had create an area around the bookcases and doors where the ceiling design wouldn’t be square. Instead, it would jog back about 12 inches over the door. I was afraid that would look really strange with my planked design.
But that wasn’t the biggest issue I had. The biggest issue was that the area over the door was technically wall, and would need to be treated as such. That means that once the dropped perimeter of the ceiling was in place, and the crown molding was installed, there would be about two or three inches of wall between crown molding and the door casing. And the walls in this room are going to be painted black.
So if I treated that area as wall, which is what it is, then I’d have a three-inch strip of black wall above the doors, while everything else on that wall (except for my doors) would be white. It would look like this (just imagine the bookcases white).

That would look ridiculous and distracting, so I took inspiration once again from this room…
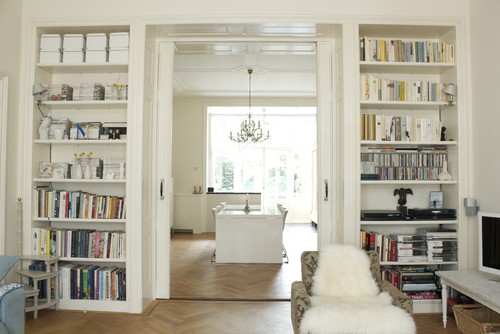
Contemporary Living Room by Amsterdam Media & Bloggers Iris
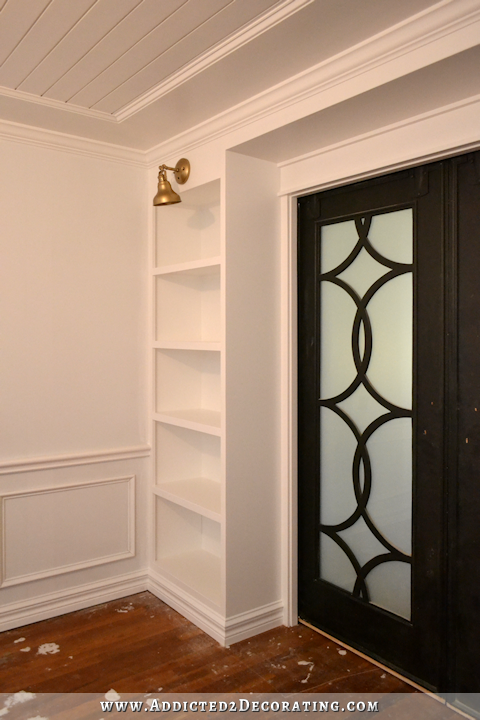
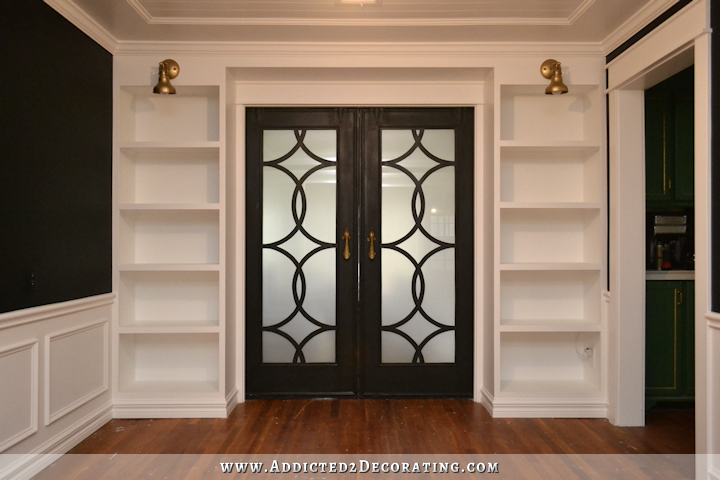
…and decided to build a boxed header between the two bookcases. I had ruled out this option earlier because I pictured it being right above the door, like in the picture above. I thought that would make that area feel way too short and boxed in. But then I realized that if I kept the taller top door casing in place, and put the boxed header above it, it would only drop down from the ceiling seven inches. That’s not much, but it would be just enough to solve my two design issues.
The fix was very quick and easy. I simply glued and nailed a brace to the side of each bookcase, leaving just enough room below for the 5/8-inch MDF panel to slip between the brace and the top of the door casing.

And then I nailed the MDF panel to the braces and attached a 1″ x 6″ piece of lumber to the front.
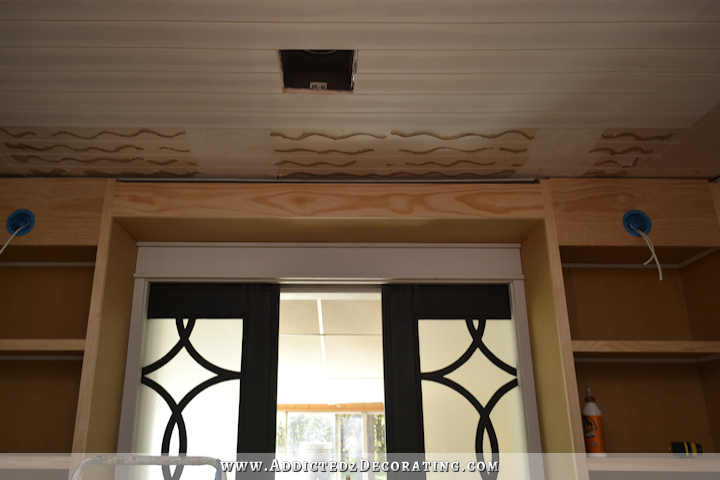
Quick and simple, and within about 30 minutes, both of my design issues were resolved.
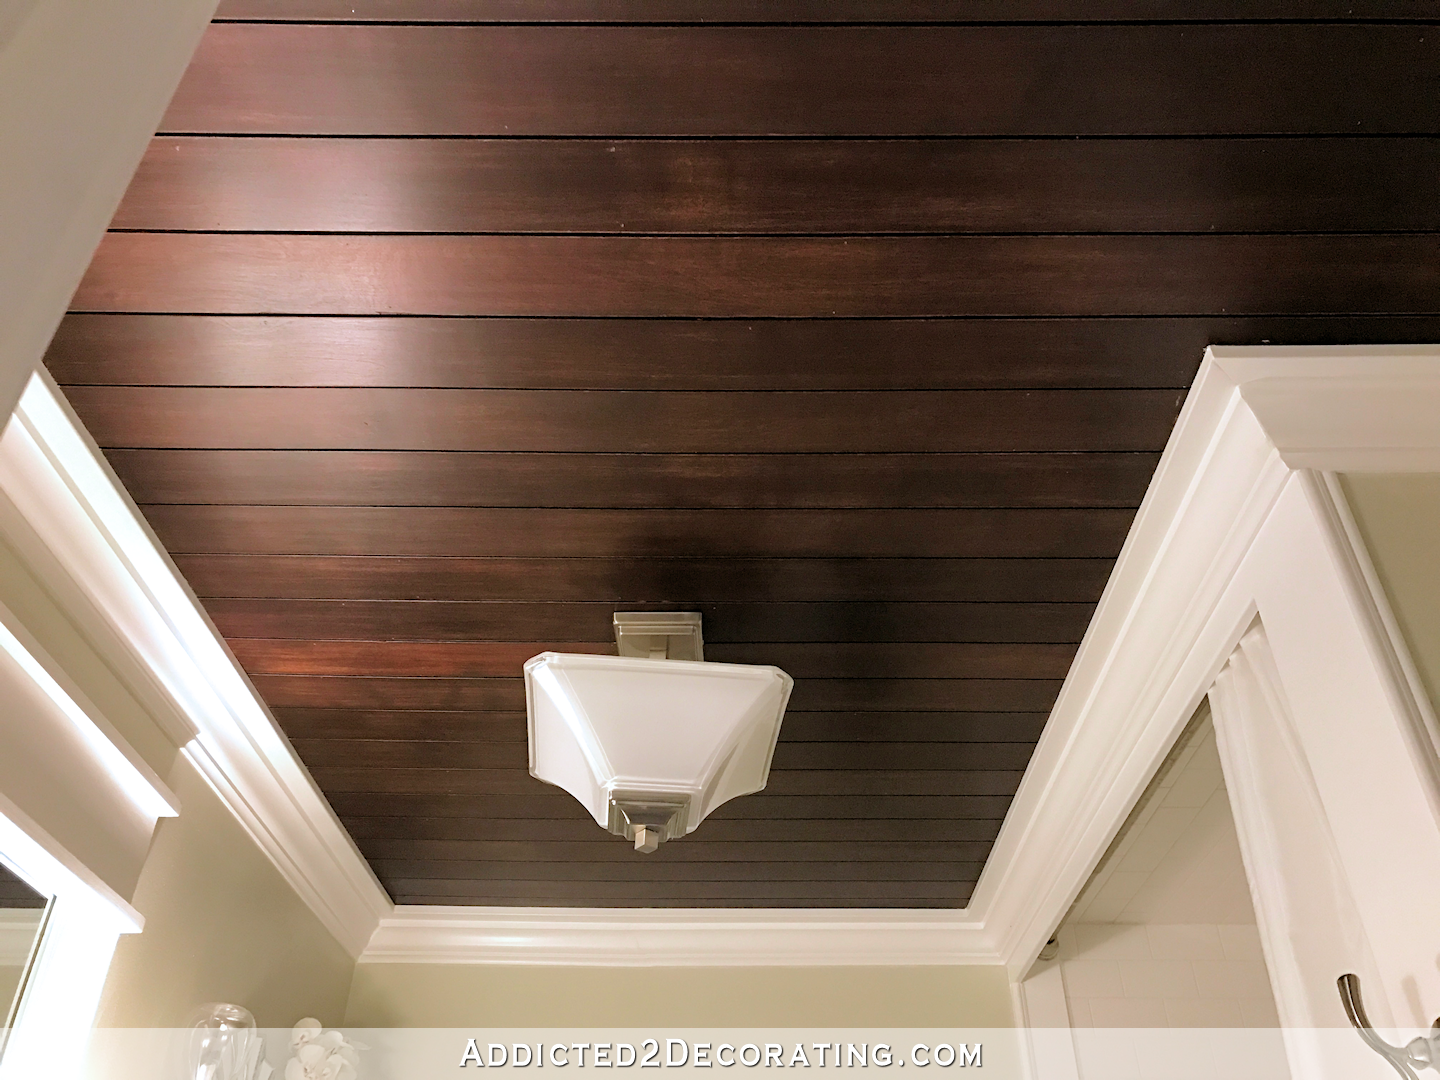
With the ceiling squared up again, I could finally work on finishing my ceiling. I had planned to drop the perimeter down about two or two-and-a-half inches to create a kind of tray ceiling. But in the end, I decided that two or two-and-a-half inches was too much. When you have eight-foot ceilings, every inch counts! So in the end, I decided to only do one inch.
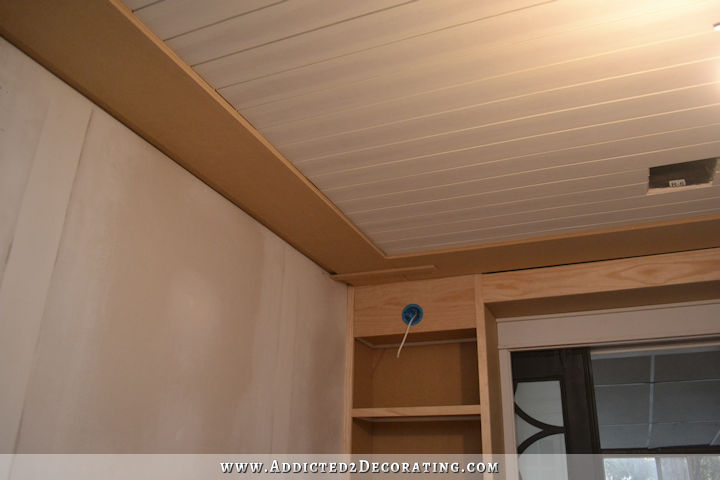
To do this, I started by attaching 1/2-inch MDF strips around the perimeter of the room, and around the edge of the planked wood design. I used construction adhesive and a lot of 16-gauge 1.75-inch nails to do this, and I made sure to nail the strips into ceiling joists at every point where they crossed over ceiling joists.
And then I attached 1/2-inch MDF to those strips, making sure to line them up as perfectly as possible long the inside edge (i.e., the planked wood edge).
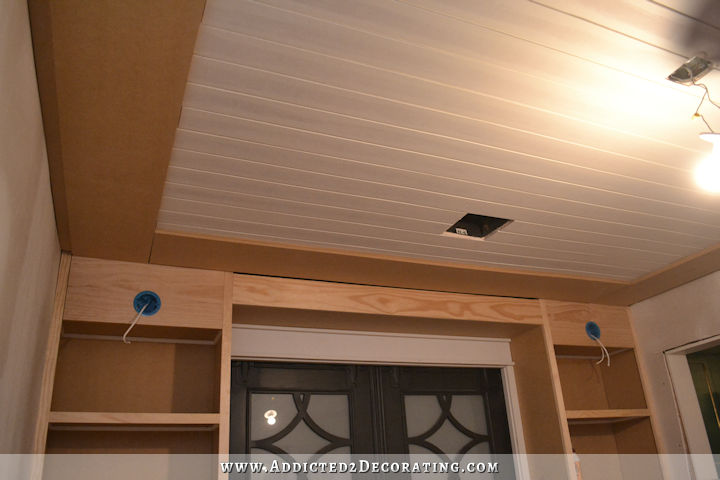
And again, because I was doing this by myself, I had to come up with a way to hold one end up to the ceiling while I was at the other end with my ladder and nail gun. You can see in the picture above how I did this. I used a scrap piece of MDF, and nailed it into the piece of MDF that I had already installed going parallel to the bookcases. This brace extended into the section that I was installing (the piece perpendicular to the bookcases, against the wall). So I put my ladder on the left side of that MDF piece, slid the piece between the brace and the ceiling, and it held that end in place while I nailed the left side into place. Then I could easily get down, move my ladder, and nail the rest of the MDF board into place before removing the brace.
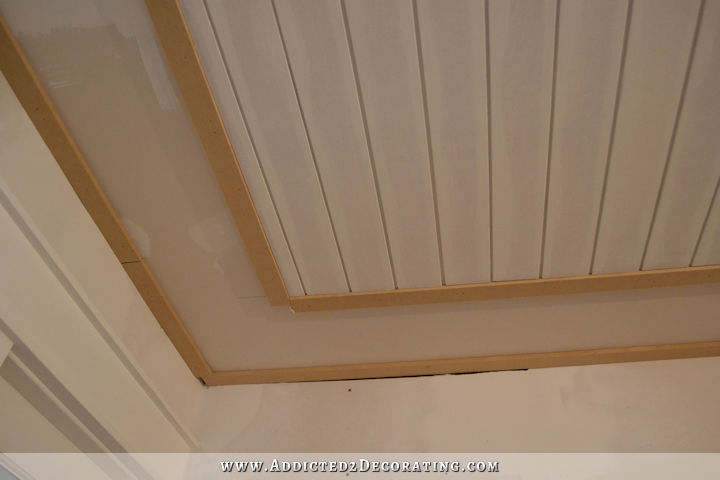
Here’s how that corner looked once the brace was removed.
I didn’t quite get all of the perimeter pieces in place, but I think you can tell where I’m going with this, right? 🙂
I will attach decorative molding along the inside edge of the perimeter pieces (i.e., on top of the wood slats, right up against the perimeter pieces), and then the wall edges will have crown molding. And of course, the bookcases, ceiling, and trim will all be painted white. Right now it looks very dark (MDF has a way of sucking light right out of a room), but it’ll brighten up considerably once it’s all painted white.
I’m so excited that things are finally moving along on this room! I felt stalled for so long, and I just had such a hard time having a vision for the room. That bookcase wall changed everything for me.

Addicted 2 Decorating is where I share my DIY and decorating journey as I remodel and decorate the 1948 fixer upper that my husband, Matt, and I bought in 2013. Matt has M.S. and is unable to do physical work, so I do the majority of the work on the house by myself. You can learn more about me here.
It looks great!
I agree.
Kristi, I am loving the way the book shelves showcase your doors like a fine piece of art. Way to go…and very cleaver design work fixing the header. So let’s talk about that ceiling…amazing…
Oh my!!! This is going to be such a glam room 🙂 Can’t wait to see it all painted up! Nice job dearie!
I have a question…WHEN do you sleep ????LOL Amazing work as usual, I love the way you fixed the “problem”.
Also wanted to ask if you might know why I am not getting this in my emails any longer, I am only getting you on facebook so don’t know if you’re not emailing or if I have a glitch. Anyway have a beautiful, blessed day lady.
I switched my blog to a new server last weekend, and I’ve stopped getting all emails since then, also. I used to get all new comments in my inbox, and now I don’t get any. 🙁 I’ll have to check into it and see what settings were changed in the transfer.
I’m still getting updates in my email.
Ok I see. thanks for responding I thought it was on my end and if so I’m up a creek as I am about as illiterate for these kind of things as a bug. LOL Have a beautiful blessed day and get some rest. 🙂
Looks great! My only thought is that if you do end up changing your door casings to a look that more closely aligns with your other moldings, aren’t you making it very challenging to do that after you’ve installed all this wood around it?
I think I’ve decided not to make any changes. But if I do make a change, it’ll be a quick and easy change by adding a decorative molding around the top, rather than removing/replacing any existing molding.
Loving it!
A very elegant solution!
Great solution to the problem! I have a question about this – “to nail the strips into ceiling joists at every point where they crossed over ceiling joists”. Are there strips that a parallel to the ceiling joists and don’t cross any of them? How do you fix such strips? Are drywall plugs good enough or you had to add pieces of wood between the joists?
Thanks for your posts Kristi, I really enjoy reading them!
On the two long sides, at least one strip is nailed into a ceiling joist all the way down the strip. In other words, the strip is lined up right under a ceiling joist. I figured with one entire strip lined up with and nailed into a ceiling joist, it was okay for the other one to just be nailed into drywall. After attaching those strips (the ones not nailed into ceiling joists), I tested the strength by pulling it, and it wouldn’t even budge, especially after the construction adhesive was dry. Thankfully, 12-inch-wide strips of 1/2-inch MDF doesn’t weigh very much, so I’m confident that it’ll hold just fine. Plus, I’ll have crown molding around the edges that will also carry the weight of the perimeter if needed (but I don’t think it is).
On the two short walls, both strips on each side crossed over ceiling joists, so both of those are nailed into ceiling joists.
This is starting to look amazing, love it and the ceiling treatment. My only concern, girl, I hope you never have problems(or have to work on) those hanging doors.
I hope so, too! 🙂
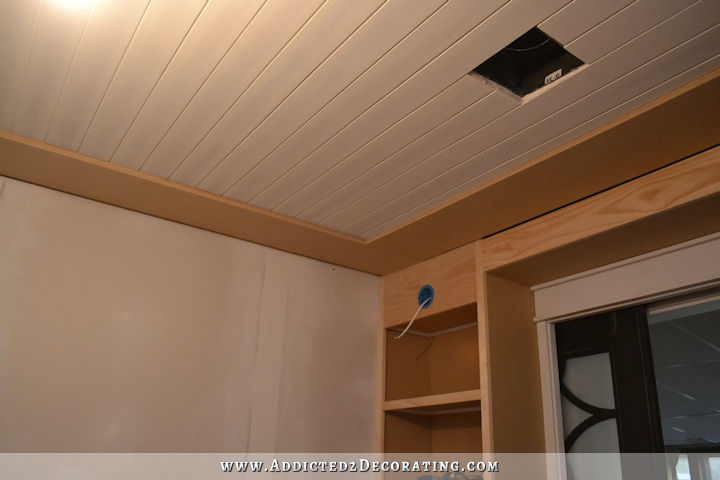
This is just the finishing look that the book cases and doors need. Love it! I have a question about what is that opening in the ceiling by the book cases?
That’s the HVAC vent for the room. I just removed the vent cover to work on the ceiling.
I noticed that yesterday and was wondering if it was intentional. 🙂 Love the fix.
I really like the header and LOVE the ceiling. I would love to do this but all of that work over my head I feel would do me in.
This is very exciting. The music room will look as gorgeous as the kitchen. It’s intriguing how you are able to give each room an individual look, all the while maintaining a common thread of style…as you work through challenges and changes as you go. Truly inspiring. Cheers, Ardith
Great solution over the door – love the wall to wall built-in look especially when white. So excited about the ceiling treatment! I have to find a room (or two) to do in my house which only has 8 ft. ceilings.
Dear Kriti,
I have got to say that I really admire the way you refine each area that you work on until it is right. It makes interior design seem less ‘magical’ if you will. The before and after that is shown in projects would seem more real an doable if everyone realized that there are a ‘million’ roadblocks to getting a room not just OK or good, but just right.
Thanks for sharing all the solvable angst and making real instead of throwing a lot of money at a problem and saying it is solved with the first go round. As a person who has done a lot of house remodeling I appreciate it very much!
The room is finally perfect and I hope it gives you a great deal of satisfaction.
On another note, have you finished your niece’s bedroom yet? I am so curious to see the result!
Love your posts and all your effort.
Susan
‘
This is going to be a truly amazing room when you are done.
Lovely work! Really inspiring. Thanks Kristi
Wow!
You continue to do great work… and explain it very well. I, too, hope your doors don’t come off the rails. My 100 year old pocket door was off a broken wheel when we bought the house and we had to cut into the wall to fix it. You can read about it here:
http://followyourheartwoodworking.blogspot.ca/2015/08/living-room-part-4-pocket-door.html
I imagine IF she has to work o these doors ever, she from the other side of the wall instead of having to remove the bookcases. She “could” cut into the drywall into the room on the other side of the doors, make repairs then rehang, mud, sand and paint drywall…*I think*.
Kristi- on the subject of your website. I have been getting a lot of errors when visiting your site. My internet will spontaneously shut down and leave me a little dialog box (that I can’t talk back to…grrr!) saying it has encountered an error on your site. Just fyi…I just wait a few minutes and pull it back up!
UGH-
Apparently I also have trouble with typing messages! That should say “she could access the doors from the other side of the wall!!!”
Do you know when the errors started? I ask because I switched my blog to a new server last weekend, and I’m wondering if that has anything to do with it.
I feel like I should send a massage therapist to your house as a Christmas gift to work on your shoulders 😉 Seriously though, looking really good in your Music Room 🙂
Hi Kristi!
I was wondering if you had ever considered getting one of these. (I hope the URL works!) Since you do some much work by yourself, it seems to me you could use the “helping hand”. There are other manufacturers of these and I know they have one at HD (probably Lowe’s too) but I can tell you from experience that this one is really good. You may be able to find it locally.
http://www.performancetoolcenter.com/fastcap-3h-hand-hd-5-3rd-hand-support-pole/
Love, love, love your work!!!!!!!
Kristi, I wasn’t too sure where you were going with this yesterday – I felt that the door space was too cramped but after looking at the inspiring picture of the white room and looking at today’s work, I bet you were right all along. I’m excited to see how it looks in black instead of white, though. I wonder if the black will make the door space between the bookcases look cramped and narrow? well, time will tell……
I continue to be wowed by this! Reading about your struggles on the way to a fabulous solution reminds me of a chapter from one of my favorite books as a child: Little Women. There’s a chapter where they compare their struggles to “A Pilgrim’s Progress.” I only remember that they had to work their way through the slough of despair before they reached the celestial city. 🙂 When this room is done it will be so beautiful that no one will ever imagine that you had a hard time finding your way to it.
I noticed it yesterday, but knowing you to be a perfectionist, I figured it would be today’s blog entry! See? My trust was justified! Well done!
Alright , that is AMAZING how your mind works. Thanks for all the detailed information. You make me feel like I can do anything. I’m so impressed😃
At last. You are on a roll girl, looking good. Should be done by next week, unless you switch room, lol. Blessings.
Such a great idea, love the sliding doors!
I love what you did with the header, it completes it perfectly. I’m happy you are painting your bookcases all white. Like you said, the back can always be repainted. I think painting the backs black would give too much of a checkerboard look and clash with your gorgeous doors.
I’m always impressed so impressed with your designs and work. Love the new box joining the bookcases and the ceiling. This room is going to look really stunning. Great work Kristi.
But how is the opposite side going to look?
The opposite side of what?
The door frame on the sunroof side?
Right now it looks awful. That room hasn’t been touched, and the walls are lined with fake stone panels. But it’ll eventually be framed out just like all of the other doorways in the house. From the sunroom side, it’ll just look like a regular cased opening.
Are you worried that, as a whole, the doorway will look funny with one side that is ‘basic’ and another that’s elaborate? I’m asking out of genuine curiosity. We have a doorway in our house that has been unfinished for 2 years, it’s from my kitchen to our family room addition on an exterior wall. It’s not finished because I haven’t made up my mind how to do it. I was thinking this faux pocket door situation is just what we need but I just can’t picture it working from the opposite side.
No, I’m not worried about that at all. I looked at lots of pictures of bookcases surrounding doorways on Houzz, and you can tell that the majority of them are bookcases on one side and regular cased doorways on the other side. I think it’ll look just fine.
http://www.houzz.com/photos/query/bookcase-around-doorway
Hmm…well that makes sense. Doesn’t entirely solve my conundrum though. I’m thinking the faux pocket doors would work on my kitchen side but the opposite side is still an issue for me. The doorway enters on steps, the family room drops down so the doorway from the family room side is all the way to the ceiling. And to complicate matters, the family room side has stone work halfway up the walls with a 4 inch cap….sigh…I wish you still did Ask Kristi. I’m having trouble finding any pictures of a doorway that requires partial framing or framing up to the ceiling. And I can’t picture a way to fix it that won’t look dumb.
No pressure Kristi, (is it a coincidence that your name is Kris, like in Kris Kringle?????) but this is seriously like waiting for Christmas to see this finished. I CAN’T HARDLY WAIT!! This will be my gift to myself, to enjoy seeing what will happen next, and I know it will be like that novel you don’t want to ever end. Thanks for making my day, I love everything about your work, even when its not what I would pick, or that you change your mind, I just enjoy YOU and YOUR JOY. You inspire me!!! xo Kathy
I can’t agree more. I follow you from Turkey and I can hardly wait 5 pm every day. Reading your posts makes me so happy.
I’ve started a DIY project of ripping out my coat closet and turning it into a “drop zone”. I have courage because of you. I also have allowed myself to change my mind and not be bothered by that. I selected a counter top I loved in the store but just didn’t sit quite right with me once I got it home. (It was my bird wall paper) point being, your blog has taught me to go with my gut…. even if I’ve taken 2 steps forward and one step back, it’s OK just keep pressing on!
Thanks Kristi
I like the new header before the doors and framed ceiling in the area before it much better, yes. Otherwise, it sort of felt like a whole lot of in-congruent areas that needed to be resolved, and this appears a lot more cohesive. It feels and looks more like the other rooms you’ve done. Speaking of, the work you’ve done is truly mind boggling. I don’t know how you have the energy to push through like you have, but you certainly have vision and a commitment that is inspiring. A team of contractors probably could not have done what you have, as capably.
You know how one little thing always kind of bothers you though? Well, in this case it’s probably just me, but my eye is drawn to it, so… Anyway, I understand the sliding door, and why you chose the hardware, etc., but the hardware itself, the hangers on top that were painted black, draws my eye. Everything else is so clean and tidy and balanced looking, and the doors themselves are super chic, but the hardware interrupts that… for me. Kind of like really thick athletic socks with dress shoes? No doubt, when the rest of the room is done, it won’t even be a blip on the radar.
Good job, and soldier on! I look forward to every new post.