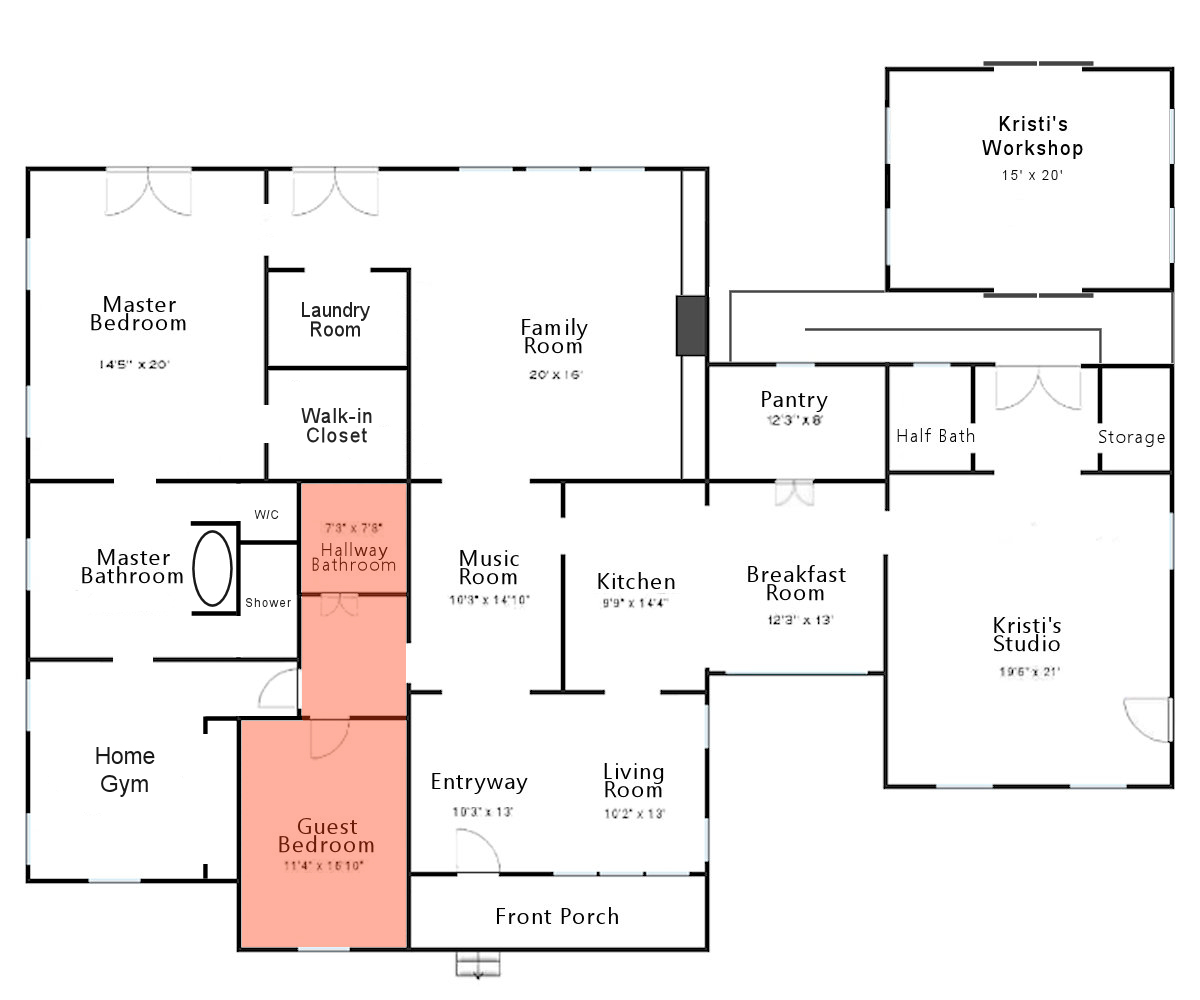
Bedroom and Hallway Remodel Progress!
Things are moving right along on the bedroom and hallway remodel, so I thought I’d show y’all the progress so far.
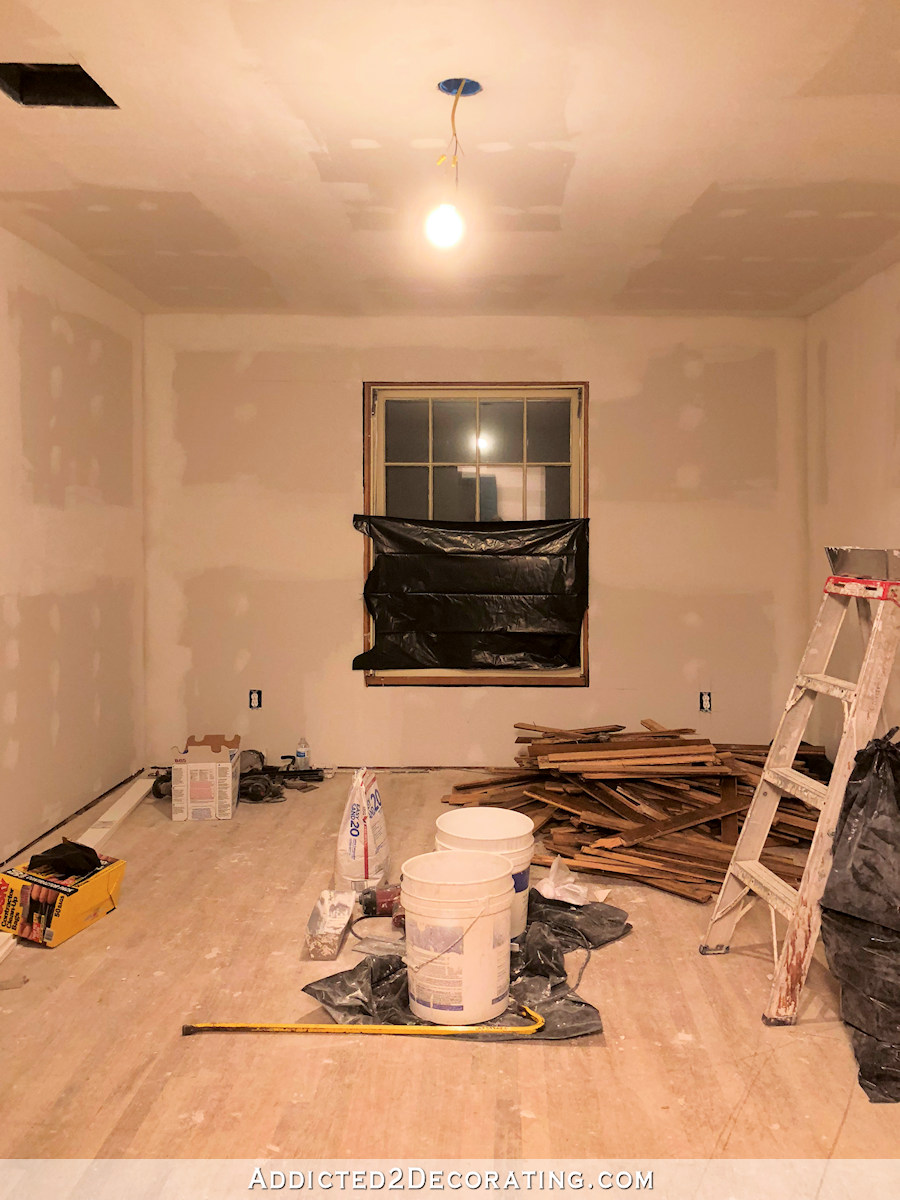
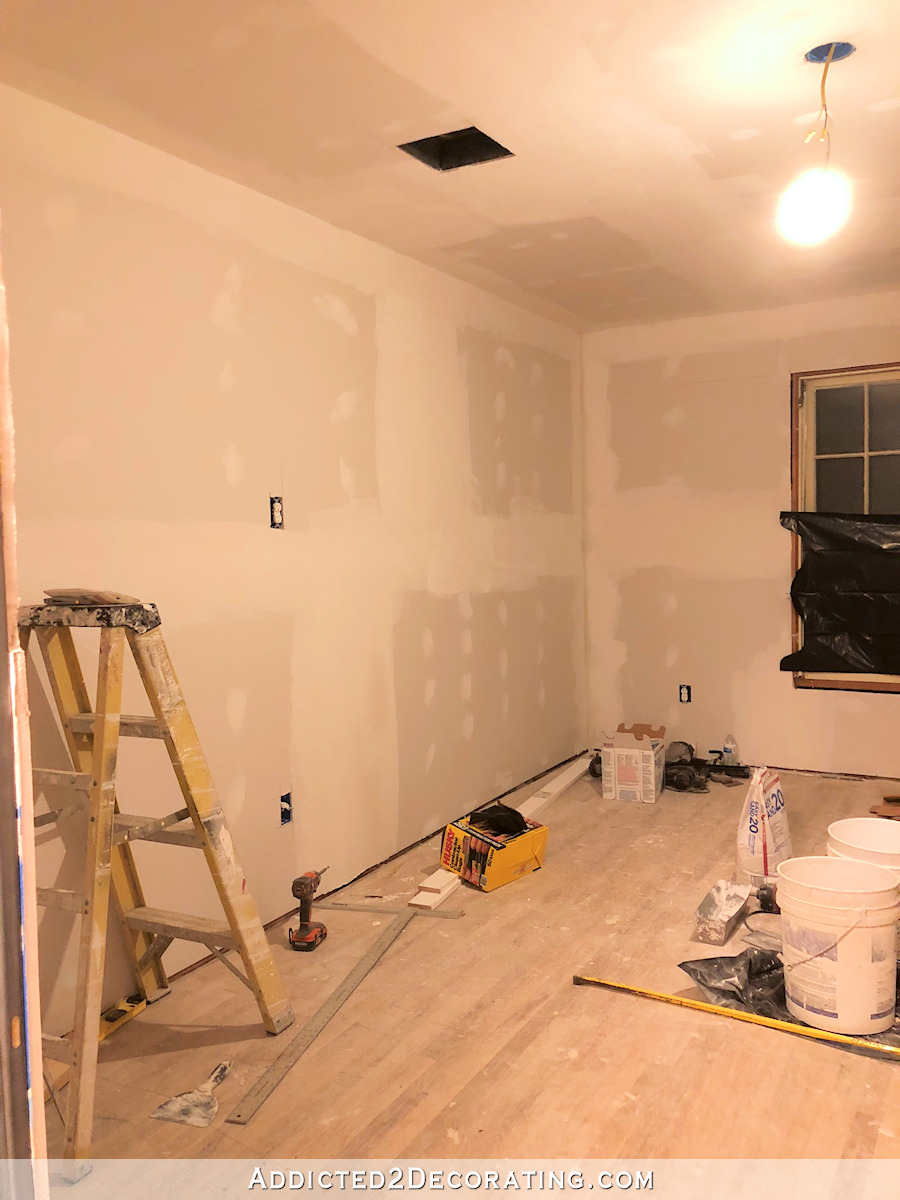
First, the bedroom has all new electrical wiring, insulation, and drywall. The new window still needs to be installed, but all of the windows will be installed next week.
As a reminder, this is how this room started out when we bought the house…
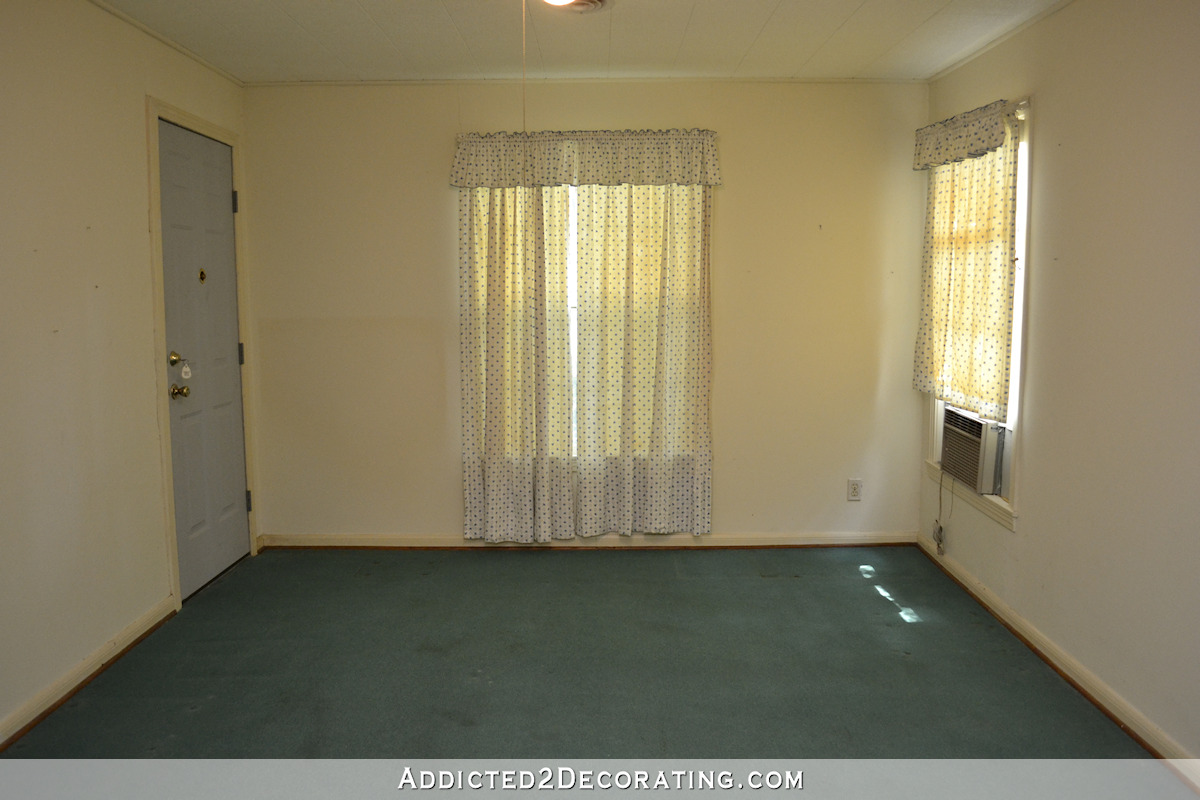
The door on the left went to the front porch, which was right there by the front door of the house. I felt like it was very confusing and pointless to have a door there, so I had it removed when we had the siding installed. But for two years now, there was still just 2 x 4 framing visible from the inside of the room. So I’m glad to finally have that covered over with drywall, like there was never a door there at all.
And the window on the right was in the way of my plans for this room, so I had it removed as well. It was drywalled over on the interior…
…but the exterior still needs to be taken care of because now I have a big hole in the stone.
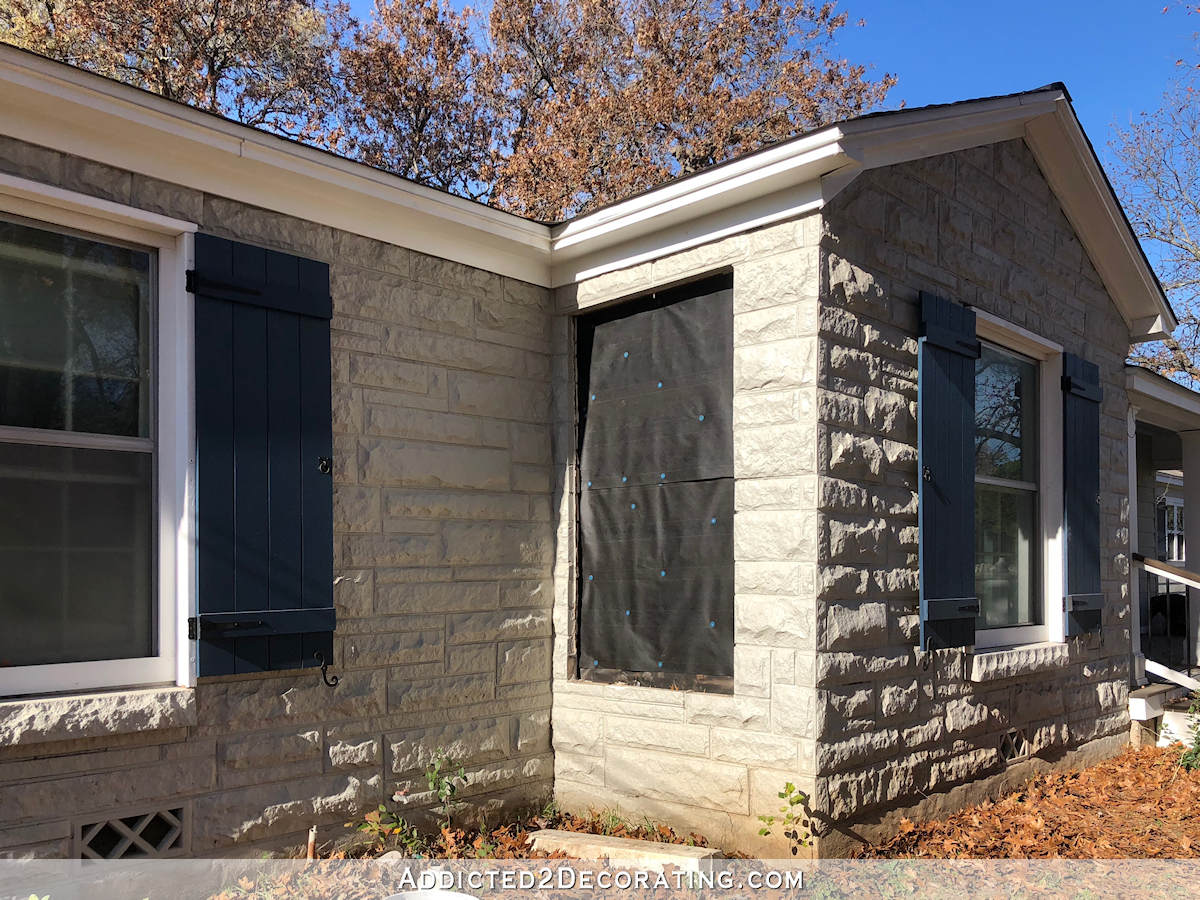
Fortunately, I kept all of the stone that was removed from the side of the living room exterior wall, so that can be used to fill in this hole.
The room looks so small now…
…but I’m hoping that this will be one of those situations where the empty room looks small, but the finished room with the cabinets and furniture somehow looks much larger.
And speaking of cabinets, I’ve had this picture open in my browser for days now, and I just stare at it and dream of my guest bedroom looking similar. 😀
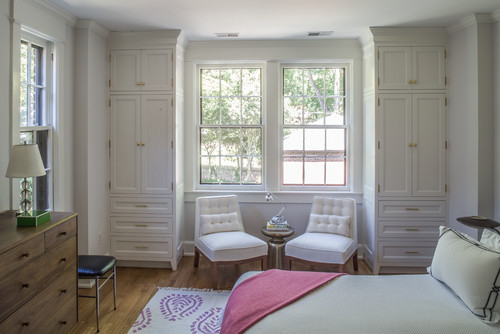
My closets won’t be arranged quite like that, but I love the overall look.
In addition to the bedroom, they also made some progress on the hallway. I have to admit that this was hard to watch. And hear. The sound of them ripping up the 70-year-old hardwood flooring in the hallway was a bit heartbreaking, especially after I spent so much time refinishing the floor, painting the walls, installing trim, building the cabinet, etc., in that hallway.

Because now it looks like this…
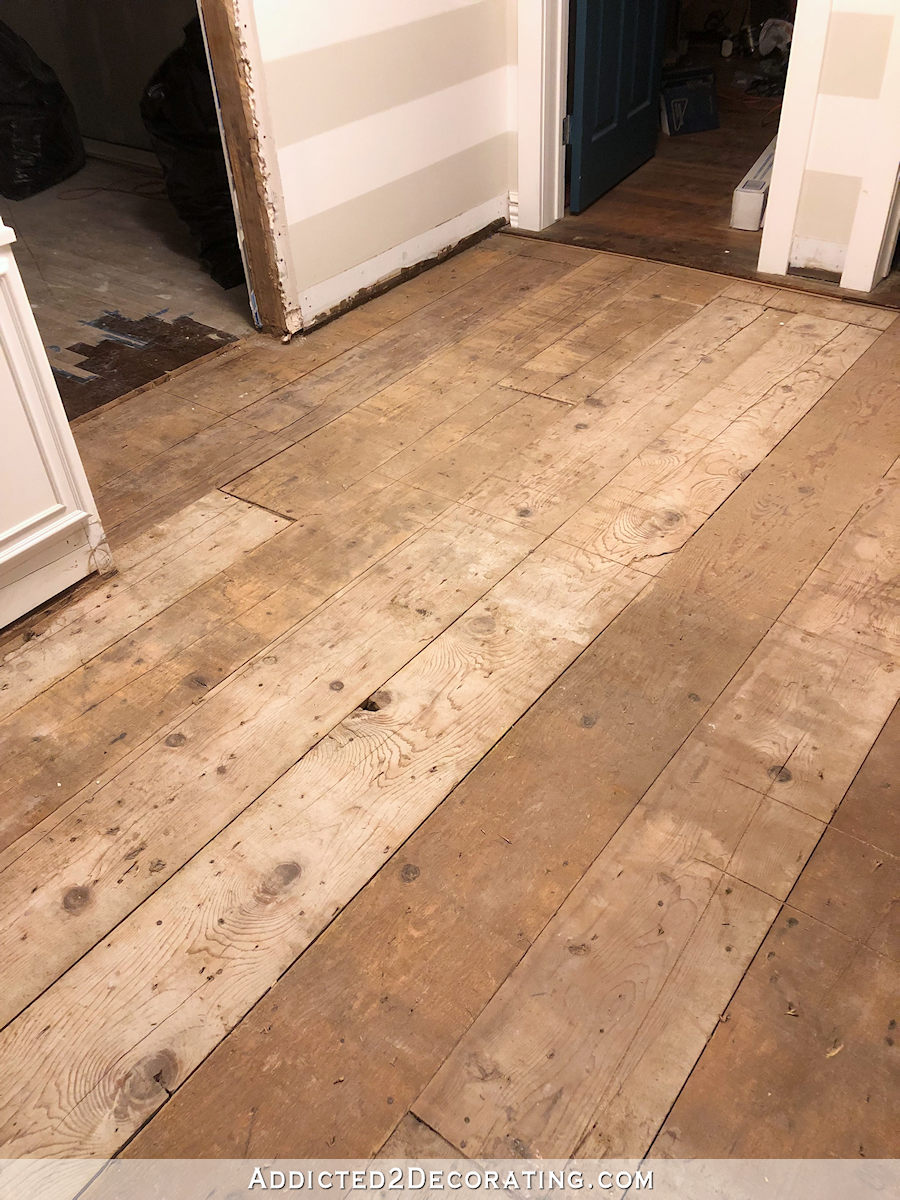
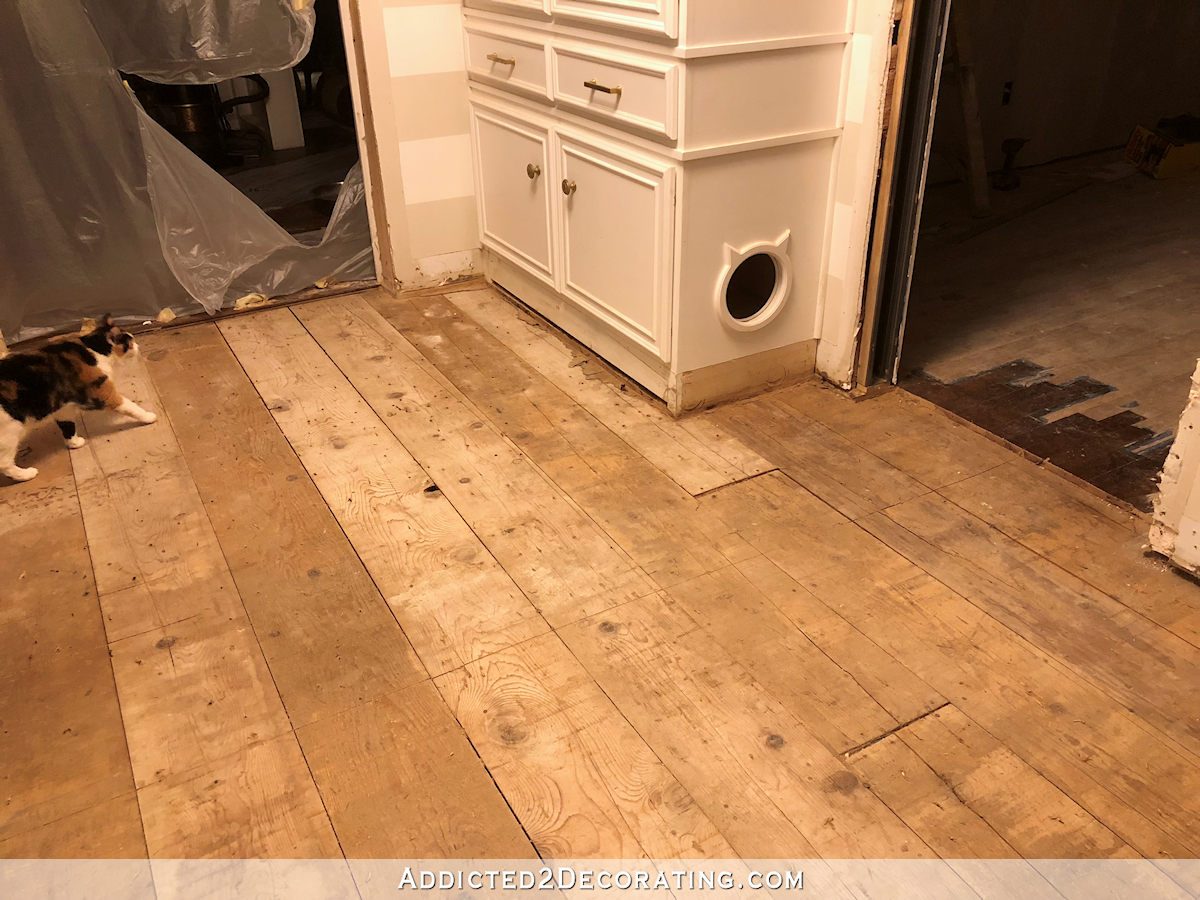
But I’m so glad I decided to go ahead with this. I came so close to changing my mind and just living with the floor like it was, but after they took up the flooring and I could see and walk on the subfloor, I realized what a good decision this was. The builder didn’t use any kind of vapor barrier (not even tar paper) between the subfloor and the hardwood flooring. And as you can see, the subfloor is 1″ x 10″ lumber, which isn’t how we do subfloors today. And after 70 years, some of these 1 x 10’s are pretty bouncy and squishy, so it’s no wonder that my floor was starting to develop some hills and valleys.
It’s heartbreaking to see this, but in the end, I know I’ll appreciate having a sturdy plywood subfloor with straight and level hardwood flooring on top with no hills and valleys. And also, a vapor barrier between them.
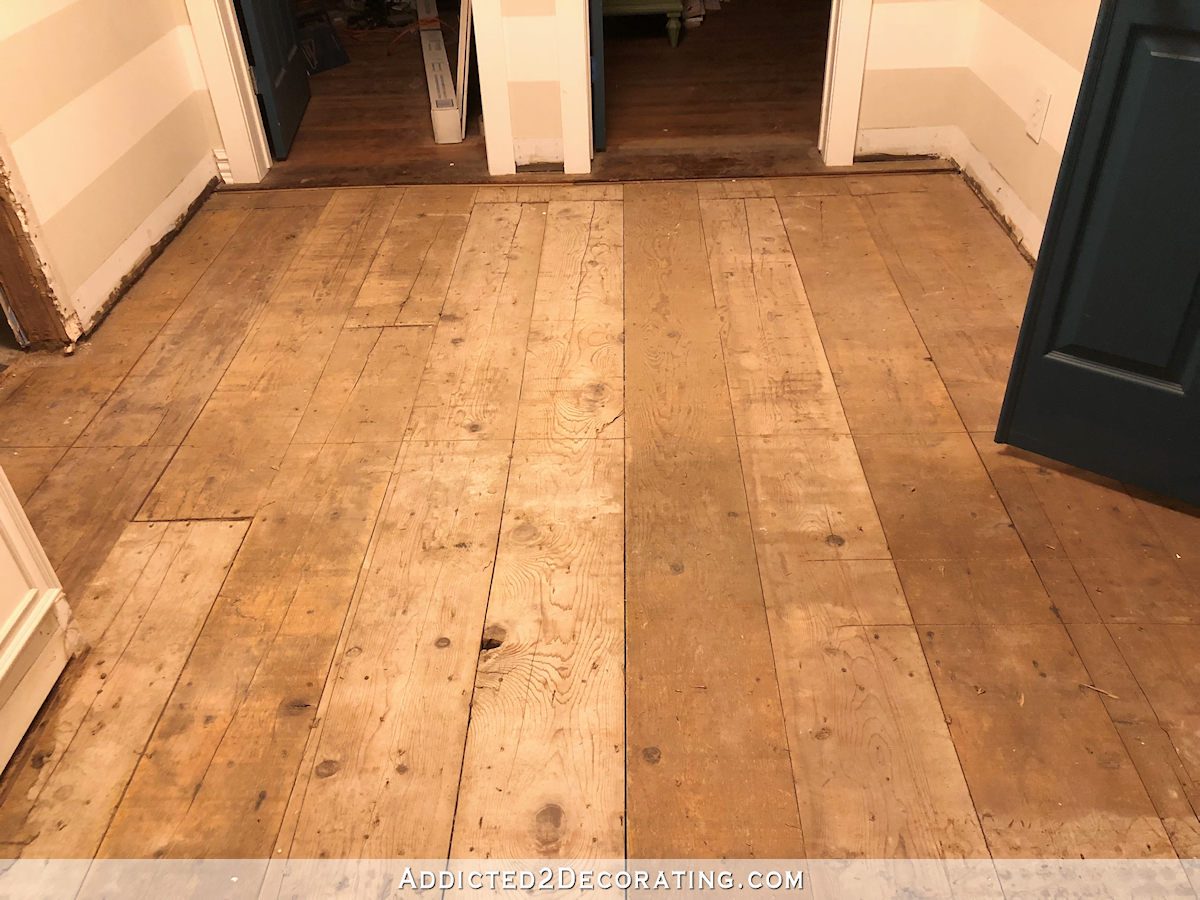
So next week, they’ll take up this subfloor and replace it with plywood. I had originally wanted them to install the new hardwood flooring, but I think I’ve changed my mind about that. I just don’t trust anyone (not even myself) with the process of installing new flooring in such a way that it will blend seamlessly with the existing flooring in the guest bedroom, which you can see on the right in this picture…
So instead of trying to piece that flooring together, I decided to have them cut a straight line at that door, and they’ll do the same thing in the new doorway leading to what will be our home gym. Then in the doorway, I’ll add two pieces of wood flooring to act as a threshold/transition, and then I’ll lay the flooring in the hallway in a totally different pattern.
I’m not sure what pattern I’ll use, but my obvious go-to is a herringbone pattern.
But I have no idea how to install tongue and groove nail-down hardwood flooring in that pattern. Do you strategically cut off part of the tongue on every piece? Cut off the whole tongue and glue it down? I have no idea, so this will require some research and YouTube watching, but I’m pretty sure that’s the design I’ll go with in the hallway.
Anyway, I love seeing progress! And I’m so excited that they’re almost ready to hand the guest bedroom over to me to finish. I love decorating bedrooms.

Addicted 2 Decorating is where I share my DIY and decorating journey as I remodel and decorate the 1948 fixer upper that my husband, Matt, and I bought in 2013. Matt has M.S. and is unable to do physical work, so I do the majority of the work on the house by myself. You can learn more about me here.

I am so excited to see you might be bringing us a herringbone tutorial! I love this look but have hesitated because I wasn’t sure I could pull it off. Can’t wait to see what you come up with!
I love the closets on either side of the window. Can’t wait to see it finished.
Will you show us how to build the closets?
Of course! 🙂
I can’t wit to see you take over. I am in the process of redoing my son’s bedroom (recently moved out). Decided to remove the popcorn ceiling oh what fun it is.
You are so incredibly talented!
Just wanted to say great progress on the house and you look wonderful!
It broke my heart to see that beautiful hallaway the way is now. But sometimes you have to lose to gain.
Your dog looks beautiful and healthy.
He is a very lucky guy to have you as his mom.❤️
That hallway was so good, but the new one will be even better! Progress!
Remodels always have the bit of regrets and sadness, but you have to overcome that so you can enjoy the newness! As for the guest room, I love the picture you swooned over – so pretty! But I have found that unless you have long term guests, you really don’t need a lot of storage for them to use. I am an “unpack and move in” kind of traveler, but my kids just live out of their suitcases when they visit. Makes me crazy that I provided a huge closet and dressers for them and they never use them! Suitcases lay open on the floor with clothing spilling out, even if they are staying for a week or more! So if you should find that the room will not hold a dresser, I think those double closets with the drawers below will be adequate for most guests. And if you use small dressers as nightstands, that provides a bit more, which you can use for extra bedding etc. I also provide a keurig, coffee, teas, et.al. for their enjoyment along with fresh water and small snacks. Almost as good as a hotel with the mini shampoos and soaps also!
Almost as good as a hotel??! Sounds way better! Shoot, I want to come stay there now. 🙂
Great ideas! I try to be the most efficient and provide my guest and adult transitioning children with the best accommodations but you hit the nail on the head. My bedrooms are small and although the kids fit fine when they lived hear year round, while home from school in the summer and holidays – they tend to not want to unpack into the drawers and closet and live out of duffel bags on the floor. It makes a small room messy and cluttered in no time! I resorted to a utility type rack in the laundry room -because they do become a part of the laundry – I wash and fold their things and store them there with their duffel bags. Keeps their things separate from ours so packing up is easy and the bedrooms stay neat and tidy.
I am so excited for you. I have been remodeling a house (not living there) for 6 months and I am so over it. Windows and then we are done except trying to do something better with the master closet.
I have been along for your entire ride and my hat goes off to you.
Your house will be beautiful when everything is complete. You have the magic touch. Hang in there!!!
So exciting to see you starting to work on these other areas of your house!
I love the inspiration bedroom! That will be gorgeous!
Re: the herringbone. I love it, but I wonder if the hallway is enough space to really embrace the effect? Seems like a longer run (like the hallway shown), gives the eye more time to take in the impact.
Exciting!
Great progress. Could you save any of the old flooring? I have a thing about vintage wood. You are so creative, I’m sure you could find a use for it.
I looked through it very quickly earlier today to see if it was salvageable. The problem is that there are SO many nails in it, and those nails have been in that wood for 70 years, so getting them out might be almost impossible. But I might see if I can, because I hate to see that much gorgeous oak being thrown out. It’s definitely not reusable as flooring, but I could make something with it if I can get those nails out.
you can always shave the nails off flush with the wood. Old wood is so hard and it really holds onto those nails!
Love your ideas and gumption!
Will they be removing your cabinet in the hallway?
Nope, they’re working around it. They did have to remove the baseboards, and they’ll cut the subfloor around the cabinet.
How is your husband managing with the hallway work? I’m sure you’re going to be glad when the master bathroom stage starts!
Peave is like, “What are these guys doing to my litter box!”