Peninsula Cabinet Installation — Almost Finished!
Y’all, I am so close to being ready to move on to the next step of this kitchen remodel that I can taste it. And it tastes like concrete. Concrete countertops, that is. 😀
After eight days of not working on my kitchen, it felt good to get back in there yesterday and get some stuff done. I got all of the cabinets on the sink wall installed, and got all but two of the cabinets installed on the other side (the breakfast room side) of the peninsula.
Until now, you’ve only seen the cabinets sitting there, with the sink cabinet sticking out because of the plumbing in the way.
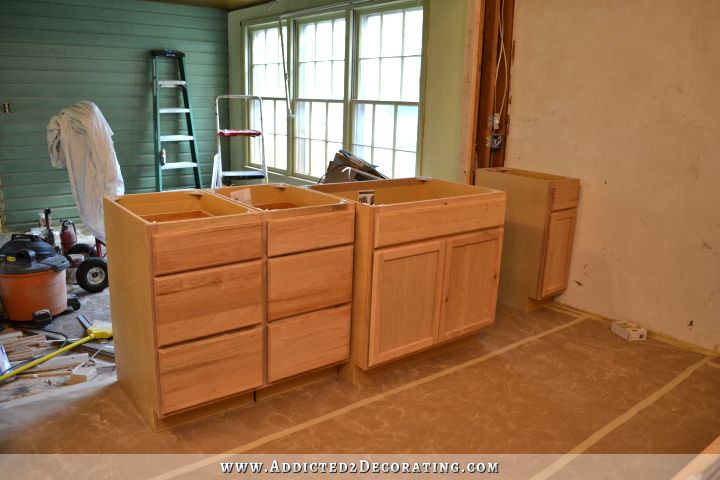
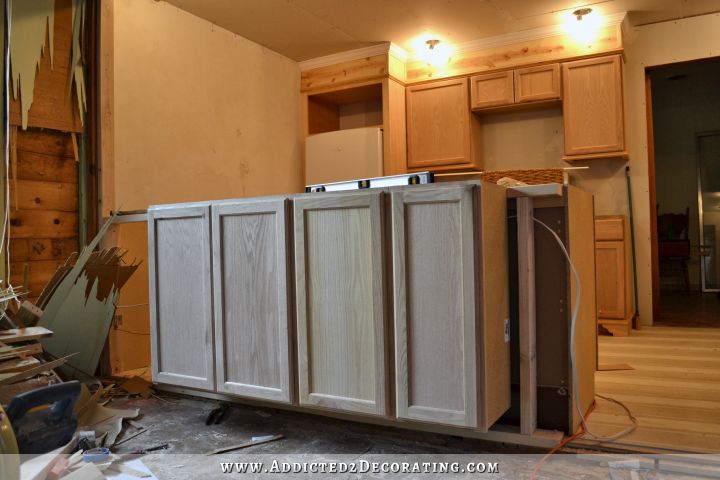
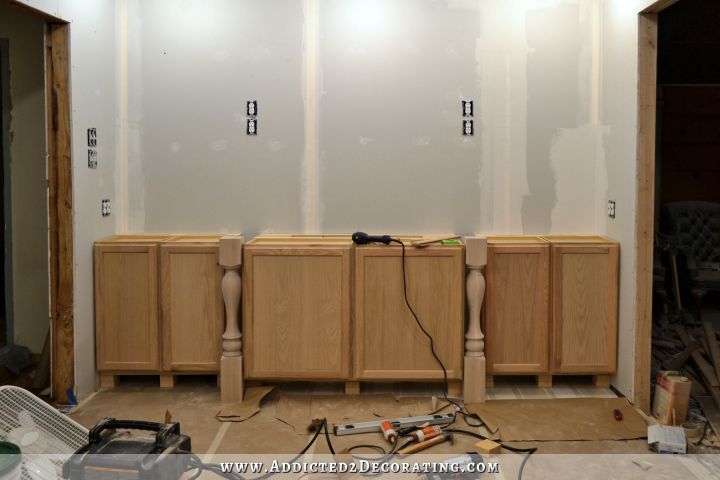
But now you can finally see them all installed and even on the front.
The space is where the dishwasher will go. And yes, I know exactly what dishwasher I’ll be getting (the GE Artistry dishwasher that matches my refrigerator and stove), and I made certain I left enough room for it. 🙂
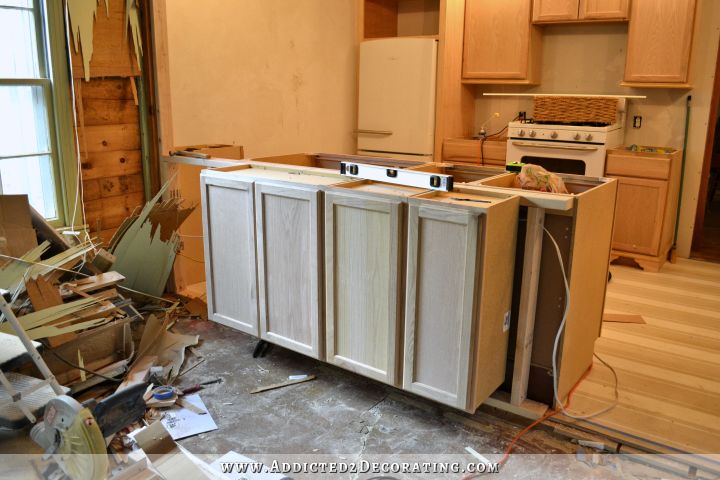
By the way, the peninsula always looks so small to me in pictures. It’s actually quite a good size. On the kitchen side, it’s 110 inches wide, and once the countertop is finished, it’ll be right at 40 inches deep.
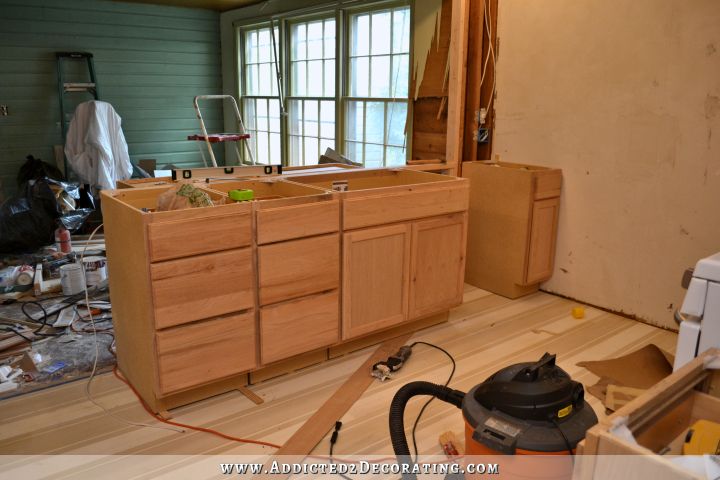
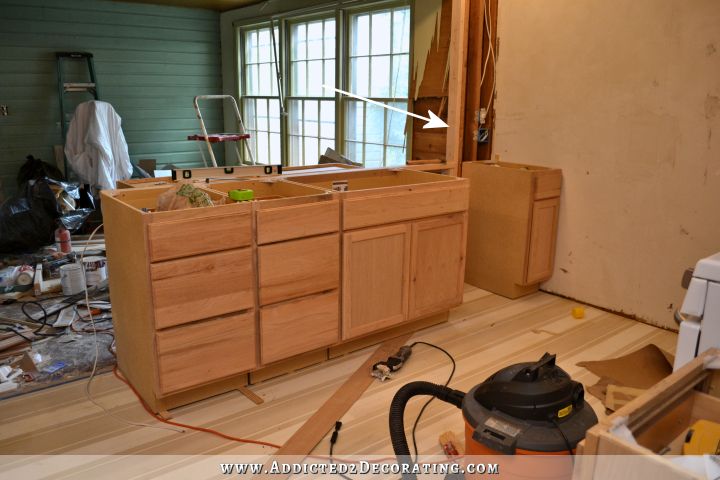
On the other side, I got all but two of the cabinets installed. I’m using 12-inch-deep wall cabinets on this side, just like I did on the wall of cabinets.
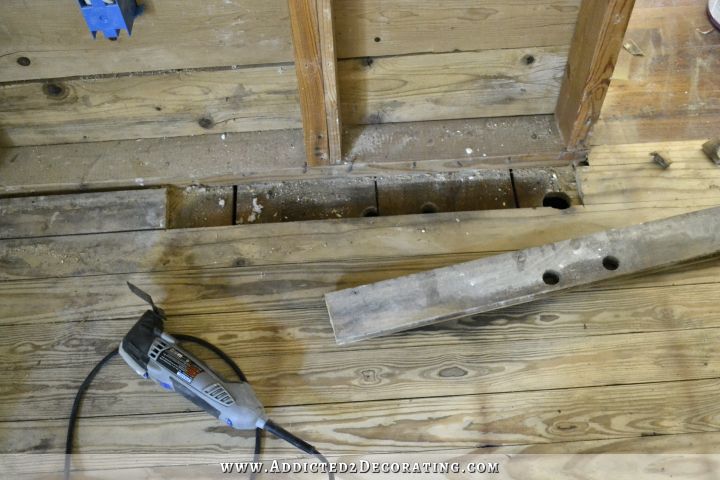
I ran into a bit of a snafu on the end wall, which is why I wasn’t able to get the other two cabinets installed last night. I realized that this side of the peninsula was going to go right up to the side wall, which meant that all of that old wall covering (the thin plywood and the old pine paneling) needed to come down and drywall needed to be installed on at least that section before I can install the cabinets.
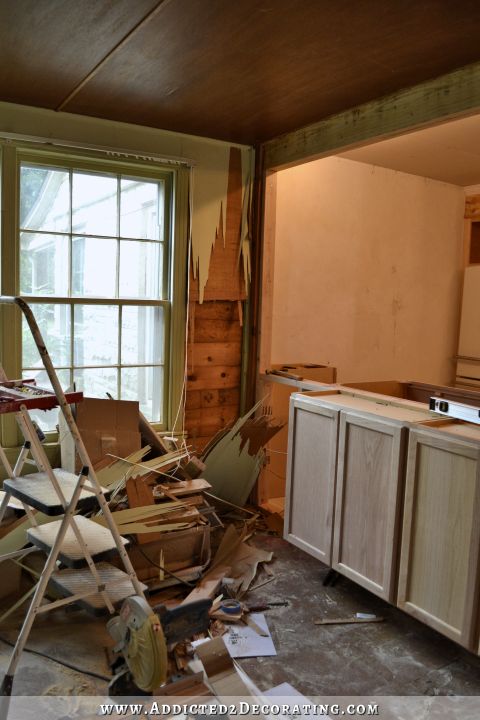
So I’m going to have to take care of that today, but I’m going to do the absolute bare minimum needed in order to get those cabinets installed. I have zero intention of drywalling this room myself. I’ve already said that after the kitchen, I’m going to hire out any drywalling that needs to be done, and that includes the breakfast room. But I just need to do whatever is necessary for now to get those cabinets installed.
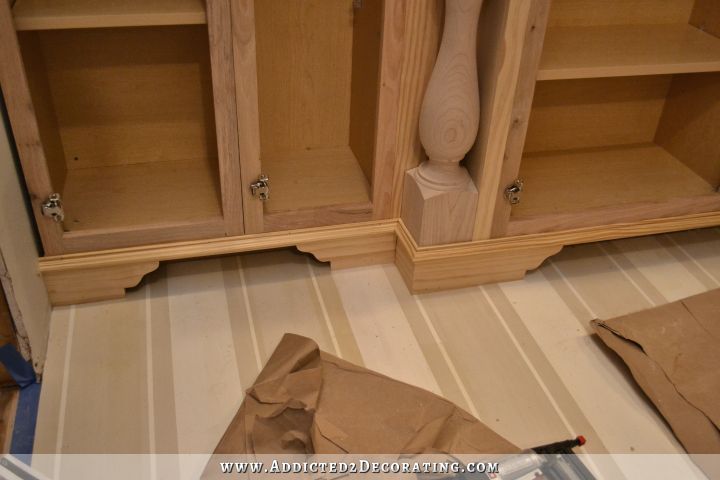
You can also see that I did these cabinets a little differently than I did the wall of cabinets. On the wall of cabinets, I built bases to set the cabinets on, and then placed spacers and braces on the wall that simply gave me something to screw the cabinets into but didn’t actually carry any weight.
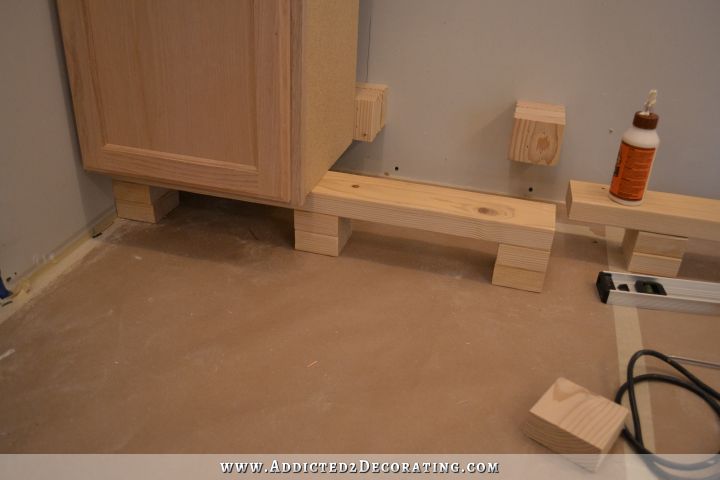
But on this side of the peninsula, I installed them just like upper cabinets by screwing them into the wall. There’s nothing underneath supporting them.
The reason I did it like this is because the breakfast room floor still isn’t level, and quite honestly, I still haven’t figured out what I want to do about that. I do want it level (obviously) but I’m not sure if I want to DIY it or hire the floor leveling company to do it at the cost of $1500. So for now, the cabinets will be floating, but they’ll eventually have a base that extends all the way down to the (level) floor, just like the rest of the cabinets.
The “empty” corner to the right of the 12-inch cabinet is where one of the remaining two decorative wood columns will go. The other one will go on the other end of this bank of cabinets, next to the wall.
Now about that half wall…
I’ve had quite a few people ask me why a half wall was needed since it won’t show at all once all of the cabinets are installed and the countertop is finished. The main reason it was needed was to provide the proper spacing so that the cabinets on either side of that half wall would clear the wall on this end.
That little portion of wall sticks out about 14 inches on the kitchen side, and about 7 inches on the breakfast room side, and I have a cabinet that has to clear that wall on each side. Without the half wall maintaining that spacing all the way down (i.e., if I had attached cabinets backed up to cabinets without the half wall there), the last cabinet on the breakfast room side wouldn’t have cleared that wall.
But also, that half wall provides some much needed structural support and stability to these cabinets. Cabinets are generally screwed into studs in the wall so that they can’t shift around at all. So by creating this half wall, I gave myself some studs to screw the base cabinets into. Now they’re screwed into the wall, and screwed to each other through the stiles, so there’s no way they’re going to shift.
And finally, the half wall provided the needed spacing for electrical outlet boxes. I have one electrical outlet box inside the wall behind the sink cabinet so that I can plug in the dishwasher and garbage disposal, and I’ll have another electrical outlet box on the end of the peninsula.
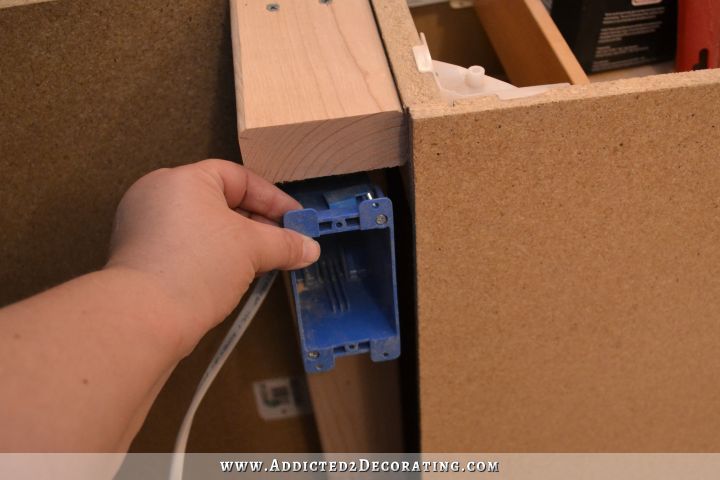
Without that half wall there, I wouldn’t have had any spacing to place the electrical outlet boxes.
I am determined to start on the prep work for my countertops today. Oh, how I hope and pray that everything goes smoothly so that that can happen! If so, a kitchen sink may very well be in my near future!! 🙂

Addicted 2 Decorating is where I share my DIY and decorating journey as I remodel and decorate the 1948 fixer upper that my husband, Matt, and I bought in 2013. Matt has M.S. and is unable to do physical work, so I do the majority of the work on the house by myself. You can learn more about me here.
Wow, the view from the breakfast room is awesome! I am in love with your appliances! This kitchen is looking EPIC! LOL Now I can visualize the entire kitchen and the wall O cabinets to the right. I just love it! And as much as I would love your tips on floor leveling…. I vote for you to hire it out. Then you can continue on making it all pretty. LOL Just fabulous Kristi!
Looking good! Excited to get to see the whole layout coming together now!
And I also read about the plan to go with white subway tiles – love it! The other options you looked at sounded neat but this is the one I can most appreciate personally so kind of selfishly happy to see that direction! LOL
Hope this week is off to a better start for you and yours. 🙂
Kristi, your bravery overwhelms me. This would have scared me to death, but you are pushing forward, and it looks really, REALLY, good! Need a step by step on those concrete countertops!
Kristi,
When you install the outlet for the dishwasher and disposal, remember you need the disposal on a switch, meaning you turn it on and off with a switch, and the dishwasher needs continuous power. We made that mistake when we built out house many years ago. I had to buy some plug adapter to plug the dishwasher into the outlet that is controlled by the disposer switch. I don’t remember what it was, but I know it was a mistake that could have easily been avoided had we been thinking. Your work is amazing and I will be looking forward to seeing your next steps.
I hope you are planning to post a pic of you handwashing some dishes when you get that sink in?
You have done a beautiful job with everything! I can’t wait to see how your concrete counter tops turn out!
Really great job, Kristi! I love the view into the kitchen from the breakfast room and am imagining the rich, green cabinets. So looking forward to the countertops and how you do them.
Hi Kristi! Sounds like your spirits are back up and you are ready to rock and roll! Doesn’t the picture looking into the breakfast room give you goosebumps! Of course you have been looking at it so you are probably used to it. I just think it willbesuch an amazing space. Are you at all concerned about the weight of the concrete on the floating cabinets? I guess the feet are really just decorative, so it should be ok, no? Hope the floor isholding up. From some of the pics it looks like it is taking a beating LOL. Hope you cover it up good before the concrete work begins. You are getting there…Rome wasn’t built in a day. Looking forward to the next post..Blessings~
What a lot of work! Great job Kristi!
I guess we all got so caught up in the process that we almost forgot how hard it is to survive without a kitchen sink. LOL. You are doing such a great job. And that beautiful sink you purchased will be in operation soon.
And God said, “Let there be light.” Do you even remember that dark dungeon that you could hardly take pictures in. Love your light, bright kitchen. It will handle your green cabinets very well now.
Yayyyy! Glad you and yours are doing better, and you’re making progress on your kitchen!
You may know about this already, but when you are ready to level the floor in the breakfast room, there is something called ‘floor leveling compound’. I’ve seen a couple of YouTube videos about it, and while my back and knees would not be able to take it, you probably could, if you wanted to.
https://www.youtube.com/watch?v=1OTFDI7hMeE
Onward and Upward!
I’m loving your new cabinets! Great job. The views into your kitchen from the breakfast room are amazing AND I love the view from the kitchen into the breakfast room. When these two rooms are completed you will have a beautiful place to enjoy your meals and to sit and glow with pride that you did them all by yourself!
Your mind amazes me! How you figure out all the math and “temporary” fixes is way beyond me. You can see and think in so many dimensions. Creative AND a genius conceptual mind!! I am so happy to know a woman who can outshine many men in this area. Go WOMAN!
I have been watching the progress in awe. And believe me I have done some rehab myself but you are an amazing woman!!! I see the end project in my mind and can make things come together but do not have your carpentry skills. You just tackle everything and maybe make a few mistakes along the way but the end result is always blowing your readers away.
I would love you to use the subway tile in a herringbone pattern….why you think that would let your readers down is beyond me. I at one time told you to put your big girl pants on, that was a saying many of my friends say to each other when we want to razz the other one about something they are missing. You took it the wrong way I am sure. But again, put those big girl pants on and do your tiling with the sub way tile!!! Not that you don’t already wear them every day!
The kitchen is looking Fab and you work like a dog, just saying, don’t kill yourself…………but I sure enjoy seeing your amazing work.
June
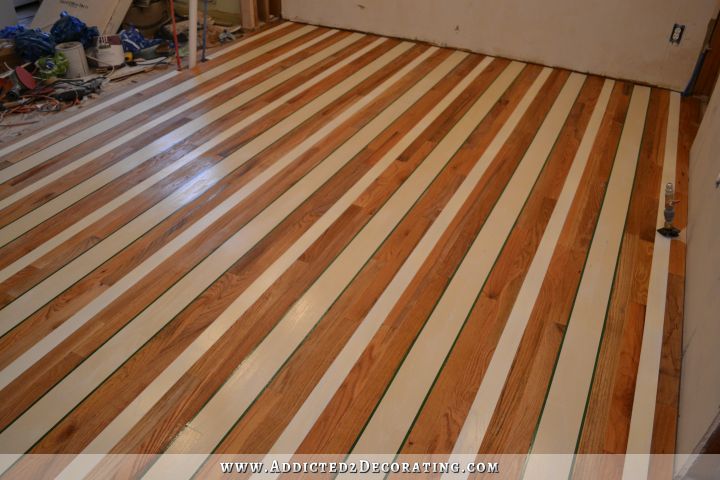
It’s looking AWESOME!!! Love the cabinets and the floor.Love reading your blog each and everyday. I love the subway tile in the last picture of yesterdays blog. Sure think it would go super with your green cabinets and painted floor. What do you think? So glad kitty is doing better.
Opps I screwed up, it’s the picture from (designed by Kishani Perera) on friday’s blog. I love the different colors of the tiles. They make me think of your floor.
I’m so curious how the concrete countertops are going to turn out. I looked up some pics online today because I just can’t get the image of the ugly gray concrete I see all around. I saw some that kept the concrete look while others were colors and had a shiny sealer or something on them. I didn’t look up the process but I imagine it’s a special concrete you use. Does it come in the color you want or do you have to color it?
Are there any benefits to doing a concrete countertop versus another solid surface?
Everything is looking so great. I look forward to seeing what you do next.
On my new build in 2010, I was surprised to find out the code now requires that a dishwasher be on a switched outlet. On the wall of light switches, there is one additional switch which controls the power to the outlet where the dishwasher is plugged in. I found this out the hard way!
So I have two duplex outlet boxes in the kitchen sink cabinet in the island. One for the dishwasher, controlled by a wall switch. Another one for the disposer, controlled by a switch in the cabinet.
Now I understand about the half wall. Thank you for explaining it. I had pictured it going perpendicular to the actual half wall. I couldn’t understand why you would need a half wall there. Your kitchen is going to look amazing. You should be (and hopefully are) so proud of it and yourself!
I am so impressed with what you are doing with these cabinets. Your projects are giving me a lot of ideas I don’t think your guests will ever leave! You are amazingly creative! I absolutely LOVE all of your ideas!
Hi Kristi –
I’m about to embark on a kitchen remodel and like you, will be using unfinished stock cabinetry and painting to my tastes. I’ve been following your blog for quite awhile and I’ve looked back through your posts but I can’t seem to find where you might of written about finishing off the end of peninsula (so the press board doesn’t show). Did you talk about that anywhere or show photos of what you did to disguise the side? Only two unfinished sides of your cabinetry show in your kitchen – but I know you had a plan! Thanks for responding when you get a chance. (By the way: your blog has given me the confidence to try this…THANK YOU…and I’m excited!)
I don’t know if I showed it specifically anywhere, but all I did was cover the end with a piece of plywood (1/4-inch, perhaps?), and then I covered the edges with trim.
Thank you! That’s simple enough. 😉