My Finished DIY Concrete Countertops (Finishing Steps, Total Cost & Final Thoughts)
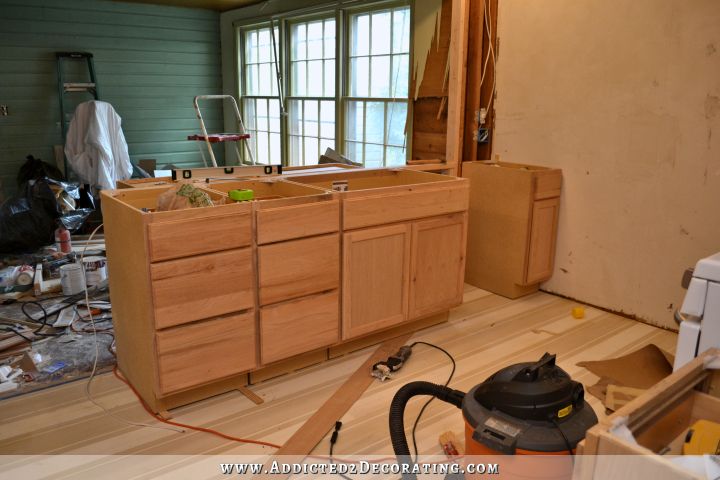
My DIY concrete countertops are finished! If you missed the previous posts on this countertop project, you can see those links below.. The first post shows how I prepped the countertop areas with concrete backerboard, the plastic edge forms, and the fiberglass mesh reinforcement. You can see that here…
And the second part is about how I actually poured, screeded, and floated the concrete. You can see that here…
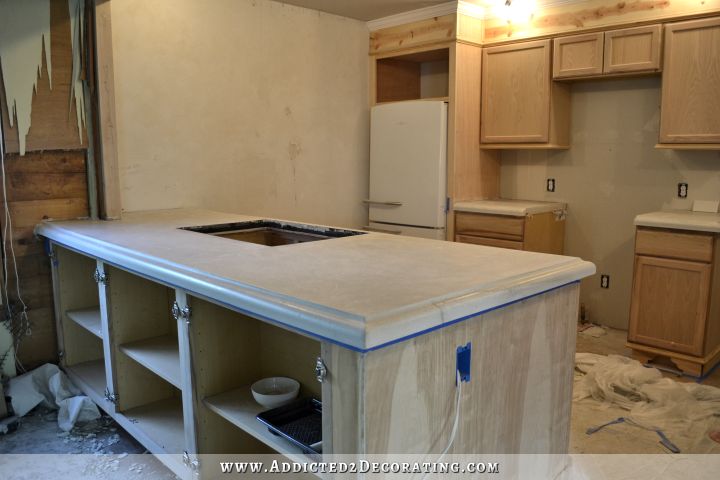
I sealed my new concrete countertops yesterday, and that means they are now completely finished! And y’all, I absolutely love the way they turned out! I honestly don’t think I could have been any more pleased had I gone with my original idea of using marble.
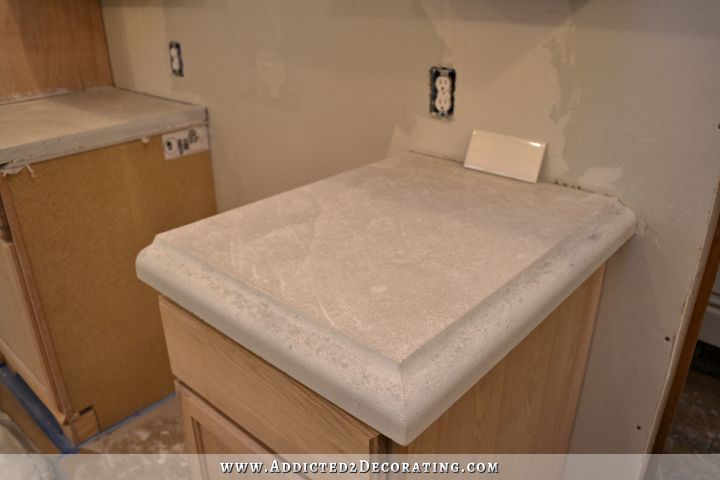
The subtle “movement” in the color is just gorgeous and looks like some sort of stone. And the Z SiAcryl 14 sealer I used gave it a very nice satin finish. (They have a glossy finish available, but I’m not really a high gloss kind of person.) 🙂
So let me back up just a second and go over all of the finishing steps.
Steps to finish my DIY concrete countertops:
1. Snap the edge forms off of the concrete countertops.
After screeding, floating and troweling the countertops, I let it sit and harden for about 24 hours. Then I snapped off the plastic edge forms. This was fairly easy to do. I just pried it away from the concrete carefully, then bent it down towards the floor and it eventually snapped off.
2. Sand the concrete countertops.
I sanded the concrete countertops using my rotary sander and regular sanding discs from Home Depot. For the edges, I used regular sandpaper and sanded those by hand. I started with 60-grit, and then moved to 100-grit, then 150-grit, and finally 220-grit.
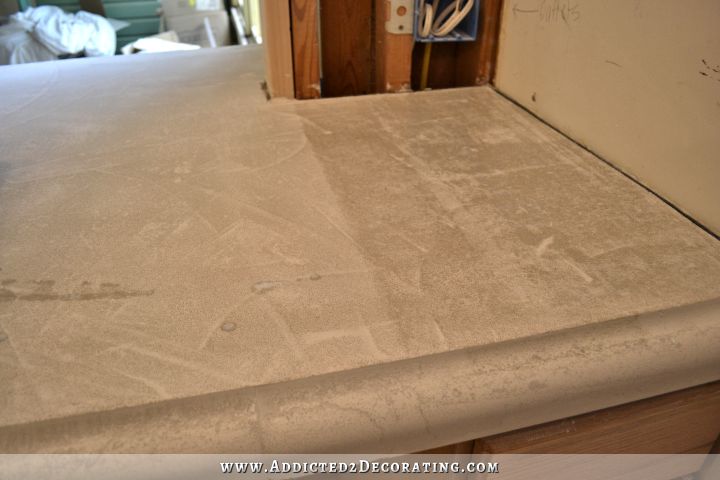
*Note: In some of these pictures, you’ll notice that everything is covered with dust from the sanding. If you have a regular 5-inch rotary sander (like most DIYers do), you can hook up your Shop Vac to the spout on your sander where the dust bag attaches, and your Shop Vac will suck up almost all of the dust. That’s what I did when I refinished the butcherblock countertop at the condo, and the dust in the room was very minimal. The reason I didn’t do that this time is because my 5-inch sander stopped working a few months back, so I was using my big 6-inch Rigid sander (which I hate, by the way), and my Shop Vac hose won’t stay connected to it because of the design. Just one more thing I hate about that sander. It’s definitely time to get another 5-inch sander.
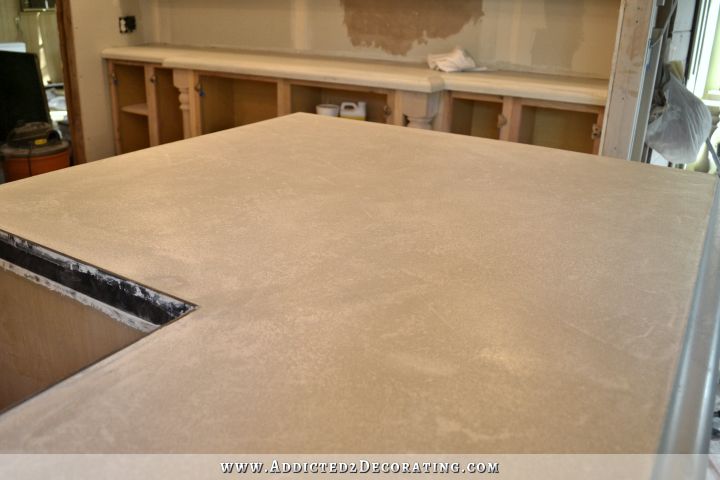
With the 60-grit, I could tell that it was really making a difference because it was removing all of the film that has risen to the top, and was exposing the aggregate in the concrete. But with the rest of the sanding, the difference it was making was minimal. I mean, I could feel a difference between the concrete sanded with just the 60-grit and the concrete sanded all the way to 220-grit, but the difference wasn’t huge.
After all, I was sanding concrete, so regular sandpaper isn’t going to do much to concrete. But it’s enough of a difference that I would still highly recommend doing all of the steps, and taking your time with each one. The finished sanded countertops were very smooth.
3. Apply the sealer to the concrete countertops.
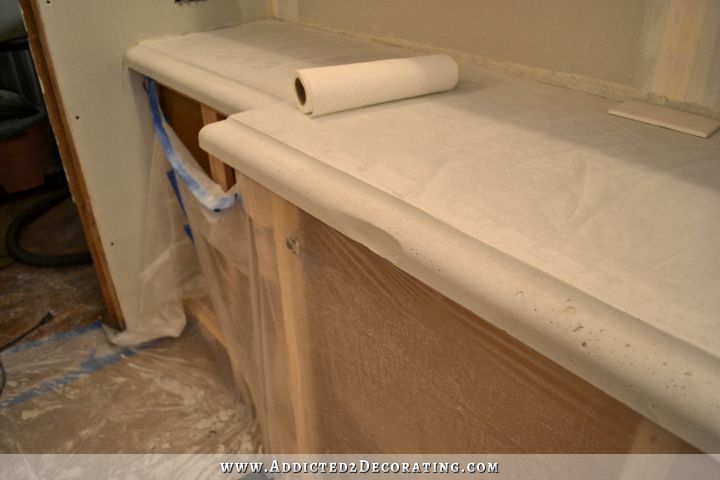
Next I used a small 1/4-inch nap roller to apply the SiAcryl 14 sealer from Concrete Countertop Solutions.
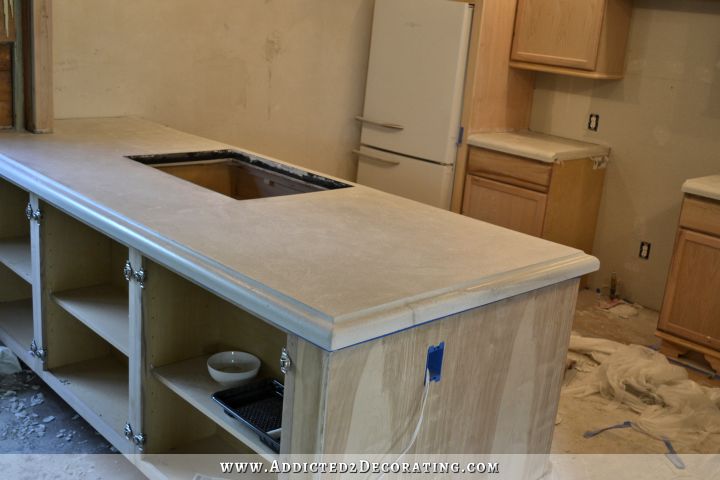
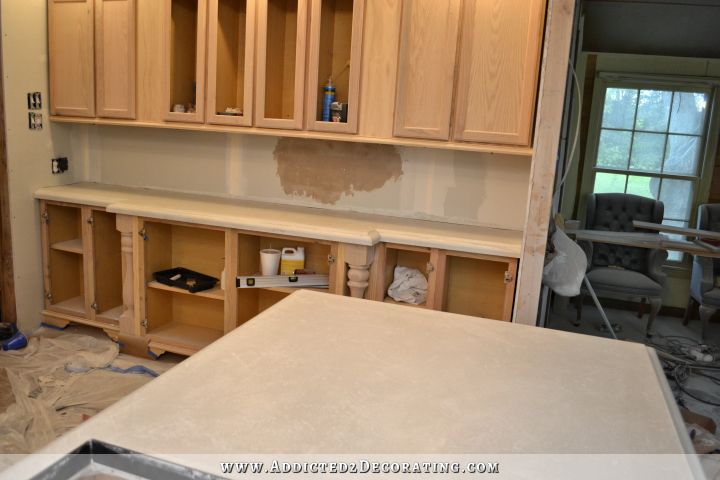
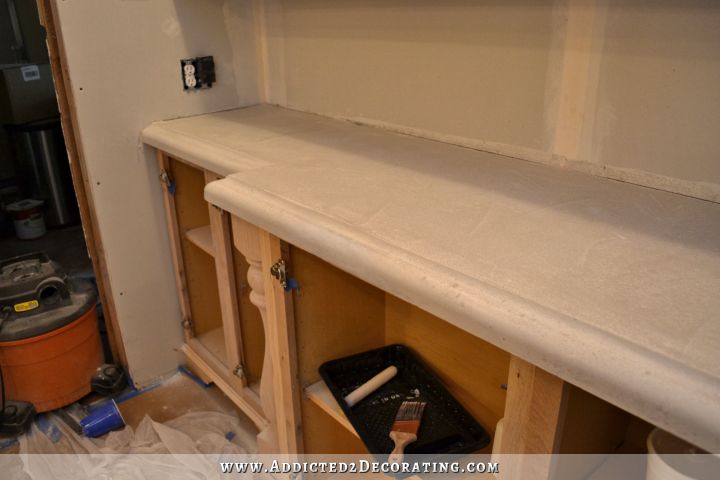
The first coat really absorbed into the concrete and initially it changed the color considerably. You can see the right section (as well as a couple of spills on the left) that have the first coat of sealer on them and how it darkened the concrete.
That was just temporary. It lightened back up to its original color once it was dry.
The second coat changed the color only slightly, and the third coat didn’t change the color at all. I used a total of three coats of sealer on the countertops. They recommended that I do four (presumably since I’m not planning on using the Z Counter-Shine that is the final shiny sealer), but I ran out of product at three coats so I’ll have to get another bottle to do the fourth coat.
After the third coat had dried, I was a bit disappointed in the finish because it was much shinier than I had expected…and than I wanted. Then I decided to read the directions on the bottle.
(When all else fails, read the directions. That’s my motto.) 😀
The directions said it could be buffed with a buffing cloth or a buffer after it’s dry. Since I don’t have a buffer, I got out my fancy buffing cloth (a.k.a., a soft white pillowcase) and buffed the countertop by hand. That process removed the shiny film on the surface (which almost felt like some kind of a wax-like substance), and I was left with a gorgeous, smooth satin finish on the countertops. Just what I wanted!!

I really could not be more pleased with the final product. It was a lot of hard work, but none of it was especially difficult.
So let’s talk about cost. Just a reminder that Concrete Countertop Solutions provided me with all of the products from their company free of charge. I did still have to purchase the additional products and supplies that I needed from Home Depot on my own.
DIY Concrete Countertop Cost:
DIY concrete countertops are a great option if you want a solid surface countertop, but don’t want to pay the high price of stone (granite or marble) or an engineered material (like quartz). Here’s the breakdown of the costs of my DIY concrete countertops…
Products & supplies from Concrete Countertop Solutions:
- Z Counterform White Countertop Mix – 19 bags: $551 ($29 per 50-pound bag)
- Ogee Edge Package – 1 package: $199
- FG50 Fiber Mesh Reinforcement – 1 roll: $49.99
- Z-Clips – 2 boxes: $39.98 ($19.99 per box)
- SiAcryl 14 Sealer – 1 bottle: $39.00
- Freight (for 1400 pounds of product): $425
Products & supplies from Home Depot:
- Hardiebacker concrete board – 5 sheets: $57.35 ($11.47 each)
- Screws – $20
- Steel finishing trowel: $12.28
- Magnesium float: $21.99
- Sandpaper: $75
- Small roller, replacement roller covers and trays: $10
- 5-gallon bucket: $2.85
- Mixer paddle for drill: $9.97
TOTAL COST: $1,523.41
That’s for my kitchen with 55 square feet of countertop.
Cost of DIY concrete countertops per square foot: $27.70
That’s not too bad compared to other solid surface countertop options! In fact, let do a quick comparison…
Price of concrete countertops compared to granite and marble:
Since I haven’t worked with granite or marble in about two years (when I stopped working with clients), I wasn’t sure what the prices were like now. So this morning, I called a local granite and marble supplier that I used to use in my city for client projects, and they gave me some general info. So how much would it cost to have granite or marble installed in my kitchen?
- Granite (common granite like New Venetian Gold): $50 per square foot, for a total of $2,750 (an undermount sink cutout would cost extra)
- Marble (carrara marble): $60 per square foot, for a total of $3,300 (an undermount sink cutout costing extra)
So you can see that while DIY concrete countertops aren’t cheap, there’s a considerable cost savings over granite or marble. And you end up with a very durable, solid surface countertop with a natural, stone-like appearance.
Final thoughts on my DIY Concrete Countertops:
- There’s nothing particularly difficult about pouring your own concrete countertops, especially using the Liqui-Crete system from Concrete Countertop Solutions. It’s a lot of physical work, mixing, lifting, carrying, and pouring out 56-pound buckets of concrete. But there’s not really any specialized skill required. Now that all is said and done, I still maintain that the most skill required is in cutting the mitered corners for the edge forms.
- I don’t think I would ever use standard concrete to pour kitchen countertops. The Liqui-Crete system, with it’s really liquidy consistency, just makes it so simple and really takes the guesswork out of working with concrete, especially if you’re like me and you’ve never worked with concrete before.
- Pour in place concrete countertops are the only way I’d ever go for a kitchen. I’m a pretty daring DIYer, and generally not afraid to tackle projects, but I honestly can’t imagine building a form for that peninsula or the wall of cabinets to make a pre-cast countertop and then carrying those and putting them into place, hoping and praying that I made the form correctly and got all of the measurements correct. Just…no. I would never attempt that.
- I prefer a more natural look, but if you prefer a more perfect finish (like a polished granite), concrete can be smoothed and shined to a super smooth, glass-like finish using a wet grinder.
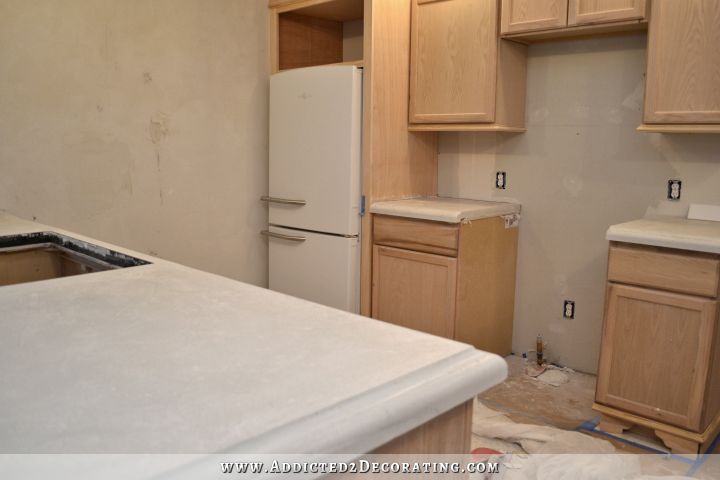
- The natural finished color of the Z Counterforms White Countertop Mix that I used is very interesting. It definitely reads as white, but it’s most certainly not a bright white. It’s more of what I would call a bone white. It does have kind of gray undertones, but it’s a very warm gray…almost a light taupe undertone. In other words, if you’re looking for something to blend with a cool gray, like those in carrara marble or something like that, this probably isn’t what you’re looking for. But I do think it blends very nicely with bright white. You can see in the photos above how it looks with my bright white refrigerator, as well as with the slightly warm white of the subway tile from Home Depot.
- I wanted to stick with the natural white color of the concrete mix, but concrete can be stained before it’s sealed. So really, the end result is up to your imagination. you can stain it all one color, or you can use several different colors to produce a final result that looks like marble, granite, or anything else your imagination can come up with.
- Ladies, y’all know I’m a fiercely independent woman, and I take great pride in doing as much as I can on my own. But this is NOT something you can do on your own. Don’t even try it. Find a strong man who can help with the mixing, lifting, carrying, and pouring of the concrete. (There’s no shame in that!) There’s no way I could have done this project without my brother.
One final thing…the patch that I did on the dent did turn much darker when I added sealer. It turned very gray. So I ended up having to do a little faux painting over it with some acrylic paints before I did the final two coats of sealer. It’s not perfect, but I honestly don’t think that a person who doesn’t know about the dent and my repair would ever notice it.
And I think it looks far better than a dent.
And just one more point about the final color of the countertops…
The paint colors that I used to patch that area were bright white mixed with a little bit of a light warm gray, as well as an antique white that had quite a bit of yellow in it. And you can see that the patched area still looks a bit “cool gray” compared to the rest of the countertops. So again, the final color of this concrete is very hard to describe, and very difficult to show accurately in a photo. But it’s a very warm white with warm gray/taupe undertones.
I think that pretty much covers everything! If I’ve left anything out, or if your questions still remains unanswered, feel free to ask and I’ll do my best to answer.
Update:
Want to see how my DIY concrete countertops held up two years later? (Hint: It’s not great…but I fixed them, and they’re amazing!) You can see how they looked before I fixed them here…
And then you can see how I fixed them. Here’s the first part of the process…
And you can find the second part here…
And my final refinished concrete countertops are here…

Addicted 2 Decorating is where I share my DIY and decorating journey as I remodel and decorate the 1948 fixer upper that my husband, Matt, and I bought in 2013. Matt has M.S. and is unable to do physical work, so I do the majority of the work on the house by myself. You can learn more about me here.


They look BEAUTIFUL!!!! I’m so amazed at what you can do!
So. Freaking. Awesome.
Bravo! Beautiful!!!
I am in awe of you!
I like the rest, am in awe of your handiwork! Great job.
Just beautiful!
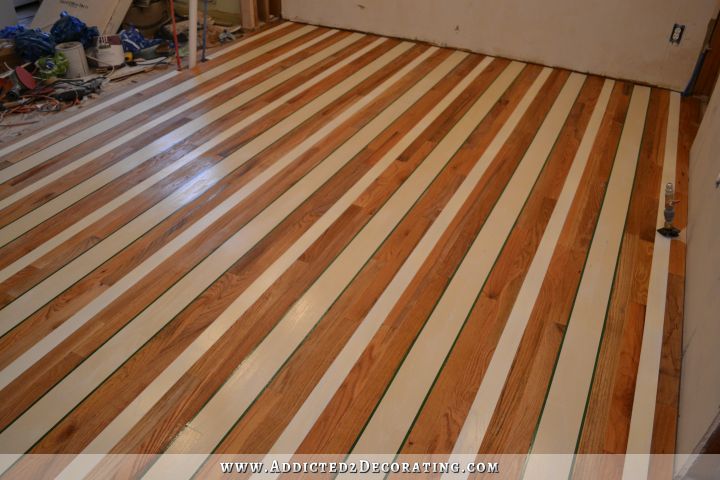
congratulations, that is an awesome result! i cannot wait to see what it’ll look like with the floor covers removed (simply love that striped floor!!), but I guess that’ll take a while until you’ve painted the cabinets?!
one question: what do you do with the sink – because now one can still see the black edge from the pouring and I thought that you will eventually have a concrete edge there??
It was actually my goal yesterday to get everything cleaned up and the floors uncovered before taking the final pictures of the countertops, but I just ran out of time. I will have to take up all of the plastic and paper, and then put down all new covering before painting, though. I wouldn’t want to take the chance of getting any of that dry concrete dust mixed in with my wet paint.
I’m using a drop in sink, so I used the back edge forms to create the sink opening. The black forms will stay in place, but they’ll be completely covered by the sink once it’s in place. Had I been using an undermount sink, I would have used one of their flexible sink forms to create the opening. Those are removable once the countertops are finished, leaving a smooth concrete edge around the sink opening.
thanks for clarifying about the sink – I couldn’t imagine how to get rid of the edges, but now it makes sense. what a pain to have to renew the covering on the floor, though!
hope you’ll have a great weekend without too much work – but if you’ll work, I’m already looking forward to the outcome 😉
Amazing Kristi. It looks fabulous.
Phew, you did it! I love it, love reading your blog and progress. As a huge green fan, I cannot wait to see your painted cabinets. But by all means, take a break once in awhile! You deserve it!
Wow!!! Toooo impressive! Love them!
Great job Kristi! One question. How do you maintain these counter tops now? Do they need to be resealed periodically? Any cautions about spilling red wine or staining liquid? Would love to know what you found out.
They’ll need to be resealed every year or two, kind of like granite. The frequency of resealing depends on the amount of usage the countertops get.
As far as the durability of the sealer I used, you can check that out here:
Looks amazing! I’m very impressed, you did a fantastic job. You must have some serious muscles too! That is a lot of lifting heavy bags of concrete.
Thank you for your blog, I look forward to every post.
I couldn’t have done it without my brother. 🙂 He did all of the mixing, and then we both lifted, carried, and poured each bucket of concrete.
That’s what brothers are for!
this process has been amazing to watch – thank you so much for your tutorials…we have purchased a “new to us” house that we take possession of at the end of summer…the kitchen in that house needs a tremendous amount of work including a countertop…you have opened my eyes to some new possibilities – Bravo on a job well done!! I had no doubt you would find a solution for the dent and if I didn’t know it was there, I would have no idea…
Well, that turned out nicely.
All the concrete counters I’ve seen prior to this were rather clunky and sad. This sounds like a good system.
Simply gorgeous!!! You can’t even tell where the dent in the edge is. Kristi– you’re a genius and a Master DIY’r!!!
They look just so beautiful!! The cost seemed kind of high at first, but, when you consider how much counter you have, it is a very good price!! The patience you had in doing this is amazing and the end product seems to be well worth all of the work!! Beautiful work, may I add!! Now lady, get the paint on, I can’t wait!!!
Hi Kristi, I have a question……WHAT’S NEXT!!!! Just kidding. Take a rest you deserve it, everything looks great. You have done an amazing job. As always, Blessings
Kristi – amazing! You are a DIY inspiration. I am curious about the final condition of your BlendTec container. I live a couple of minutes from their headquarters. If you took pictures or a video of grinding up the concrete I bet we could get them to give you a new jar.
The Blendtec actually survived just fine. 🙂 Had I added water to the mix before blending, that might be another story. But because I was just blending/grinding the dry powder, the blender is just fine. But even if something had happened to it, I have another container. We bought the package that has the small and large container, and I find that we almost always use the large container. So I used the small one for my concrete. 😀
I love this idea. It looks gorgeous. I cannot wait to see it with the painted cabinets!
WOW. Just…WOW. They are BREATHTAKING! The results are well worth the effort! Once your kitchen is finished, I’ll be surprised if the company doesn’t want to feature them on their website.
Dent? what dent?
Now, for some paint! 😀
What a fabulous and amazing transformation of your kitchen. And may I just add that you are an inspiration and totally rock……….HGTV should give you your own show! I can’t wait to see what else you have in store for your home.
They are beautiful !!! I am so proud of you !!!
I love love this!
Kristi…Great job on the countertops. I’ve been stalking your blog lately..eagerly anticipating your blog posts. You are truly an inspiration. Can’t wait to see the cabinets painted.
AWESOME – you did a heck of a job! So glad to see that the patch ended up working out! Concrete is almost like a natural stone anyway – and as time goes on, it may absorb a bit of oils and colors here and there JUST like Granite & Marble does. So the slight color change of the bump,,,is probably almost going to blend even more as you get color added to the rest of the kitchen and start using it
Can’t wait for you to have a SINK installed soon!!! Are you still going with the white sink you got at Habitat? We went with a BEAUTIFUL Red Sink in our kitchen and it is my MOST favorite thing that we did (even though I got MASSIVE backlash from family members — “Eww you got a RED sink” – “What happens when you get tired of the red in a year?”
Well first of all, it isn’t their sink or kitchen – second – its a sink if I get tired of it an five years I can replace it – I only paid $200. for it anyway,,, not a thousand!
So, I was just wondering if you thought of a different color sink now that you have ‘white’ counters! And will have white subway tile in the back splashes.
http://www.homedepot.com/p/Thermocast-Hartford-Drop-in-Acrylic-33x22x9-in-3-Hole-Double-Bowl-Kitchen-Sink-in-Timberline-44343/100524849
Keep it up – you are gonna be “cooking with gas” before you know it! LOL
Have you thought about a “first cooked meal”? (I know how you feel about cooking – but I didn’t know if you have a wild fantasy of cooking a meal after it gets finished!) 😀
I’m sticking with the white sink since it’ll go with the white refrigerator, range, and dishwasher. Plus, I don’t want anything competing with my green cabinets. 🙂
I’m not much of one for thinking and dreaming about cooking. It would be more like me to think and dream of what excuse I’ll use so that I don’t have to cook once I have a fully functional kitchen and no more excuses. 😀
Kristi, thank you for a beautiful job, both in your kitchen and on your blog! I predict that scores if not hundreds of spouses will be shown this post. i know my spouse will see it! I look forward to your next “whole kitchen” pics!
I am one of those women who will b showing this to my hubby!! I’ve seen different styles an types an colors of concrete counters this is my fav! ! Cheers…here’s to a gorgeous job!!
You are amazing!
Amazing! They look so great! Love them.
They look gorgeous and you did a great job! I’m just wondering though, for those of us who would not be given free products (because we aren’t bloggers) how much would the total cost be? And, would there be any significant savings over a medium grade granite?
All of that info is in the post under the headings “Final cost for concrete countertops” and “Price comparison to granite and marble”.
Interesting. I wonder how often the counters will have to be sealed and how stain resistant they will be.
They’ll need to be resealed about once very year or two, depending on the amount of use they get.
As far as the stain resistance of the sealer I used, you can check out this video:
Fantastic! We are seriously considering doing this in our kitchen!
Beautiful job. As always, you did not disappoint!
Looks amAzing!!!! But since I don’t have a brother, father, uncle or nephew who could do this for free (!) I think I’m going to have to cross this off my DIY counter list. But seriously, I think these are the best DIY concrete counters I’ve ever seen!!!
Don’t cross it off just yet! I know there are handymen in my area (retired men who don’t want to just do nothing in their retirement) who are incredibly inexpensive, and who could help with something like this. Like I said, mixing, pouring, and screeding the ten bags of concrete for the peninsula took my brother and me one hour. Even if I was paying a handyman an hourly rate to help me, I’d only be out about $100 at the most for all four countertops.
Wow – what a great solution. And thanks for sharing all the trials, tribulations and successes with us. You rock!
Your countertops are gorgeous! I’ve never seen concrete countertops before and am amazed something that beautiful could be made with concrete. After looking at the cost, plus factoring in how much I’d have to pay someone else to do the labor, though, I’m glad I’m okay with formica, lol!
If you pay someone else to do it, you’re definitely getting up there towards the cost of granite or marble. But that’s the beauty of the products I used…they make it so easy for a DIYer to do it themselves! 🙂
So true, and I’m so glad you’re able to do it. Unfortunately, I’m disabled so I would have to pay for labor. Still, I love your countertops, they look so luxurious! At the same time, I really am okay with formica. For my purposes, it’s inexpensive so I can change it out if I choose, but it’s pretty durable so I don’t have to worry about damage either. So, it’s all good. 🙂
Kristi, you have changed my mind about concrete counter tops. All the ones I have seen previously looked like a sidewalk on the cabinets. Yours is beautiful and elegant.
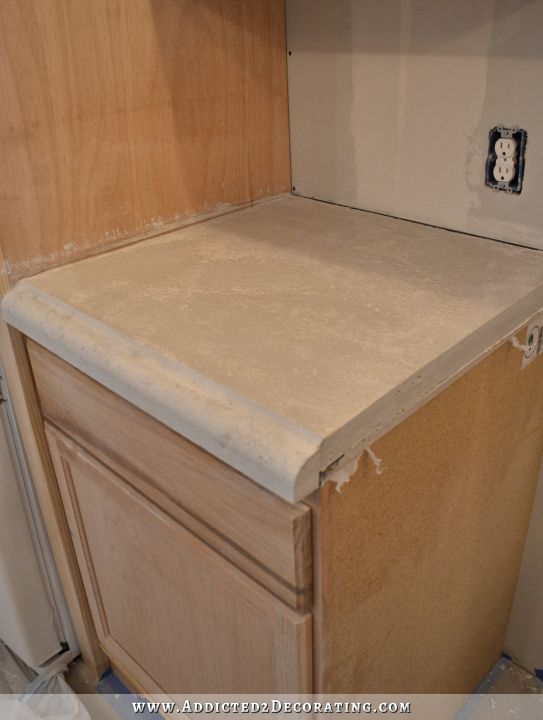
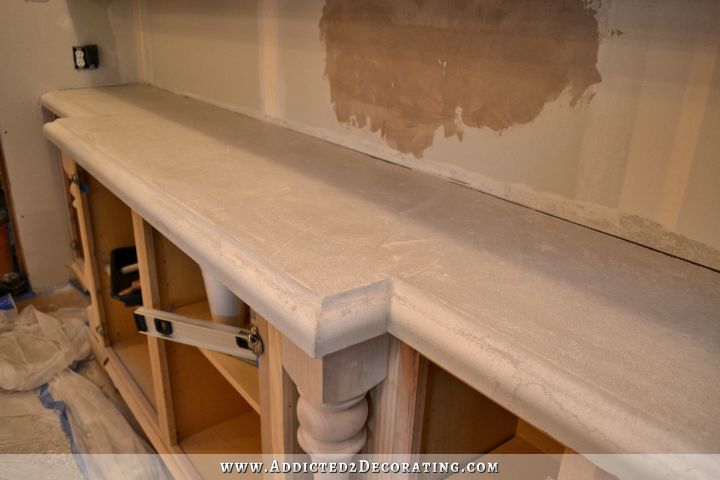
I think a lot of people (most people?) have preconceived notions about concrete countertops because for so long, we only saw them pop up in very modern interiors, and they always had very square edges to them. And they just looked so hard and cold and gray…like concrete. But I really think the edge profiles that this particular company offers make all the difference in the world. When you can put an ogee edge or another type of more traditional edge on the countertops, it really changes the look and makes it more fitting for other styles of interiors. So, yeah…concrete countertops aren’t just for modern interiors anymore. 🙂
Since I’m living vicariously through you, I can’t wait to get the cabinets painted! So excited!! Oh, and the appliances in and the dishes back where they should be!
My dishwasher was delivered just this morning, and the plumber will be here Monday or Tuesday! YAYYY!!! After three months without a kitchen sink and nine months without a dishwasher, I’m gonna want to stand there all day and wash dishes, run water (just because I can) and run the dishwasher over and over. 😀 There will be absolutely no thoughts of water conservation on that day in the Linauer household. LOL
Terrific, Kristi! Be very proud. You’ve made something you’ll always love and that makes your home more valuable to anyone (not that you want to move). .
I had no idea there were DIY-friendly concrete counter products! Thanks for detailing your experience. I am sorry if I missed it, but did you have to do any additional engineering of the base cabinets before installing the hardiebacker? I am wondering how I could ensure that my existing cabs would be strong enough to hold the concrete, and prevent them from cracking later on.
Concrete counteretops actually don’t require any additional reinforcement. A 1.5-inch slab of concrete (which is what you have when you use these products) weighs 18.75 pounds per square foot. Any cabinets should be able to hold that. Concrete actually weights just a bit less than a piece of granite of the same size and thickness.
Kristi, as always, I am impressed with another job well done! You are my DIY hero! I know everyone is telling you to take some time off, but I think I would be so disappointed to NOT find another exciting blog reminder in my email every day! I always scroll through my emails to find YOURS first to see the progress you’ve made! So…. if you must take time off, I suppose I can make it but will be anxiously awaiting your return! 😀
You truly are an inspiration to women everywhere!
Blessings to you!
Vickie
P.S.
I will forever refrain from sharing my opinion of what style you should use in YOUR home… I’ve been proven wrong every single time I had conflicting thoughts from yours. Besides what YOU desire for your home is a reflection of your personality and style. As is mine and any others. Best wishes as you continue your renovations! ~ Vickie
You did a wonderful job on a lengthy and (I think) difficult DIY project. I really appreciated the posts from start to finish so I could see all that was involved.
Will you be taking a break this weekend so you can relax for your next challenge?
Thank you again.
I took a break yesterday, so I’m rested and ready to get stuff done today. The plumber will be here Monday or Tuesday, and there’s so much that needs to be done by then! 🙂
You are…I…I…My jaw is on the floor in awe. I wish I lived near you so I could watch the master and learn.
Just, WoW! You are such a ROCK STAR of all things house! Is there anything you can’t do?! I can not wait till
your kitchen is done, I have heart palpitations just thinking about it…I’d better do some heart strengthening
exercises so I don’t drop dead when I see it. Gorgeous work Kristi!
Always looking forward to what you do….Co 😀
Wow they turned out so nice!! Good job!
BEAUTIFUL!!! I love them.Pat yourself on your back and go get a massage! You deserve it.
Beautiful, Kristi. You did an amazing job and I always appreciate your honesty and sharing all the details about your projects.
Beautiful! Your counters look sophisticated and sexy compared to most concrete countertops. You did a great job! 🙂
Your counters look amazing! I laughed out loud at your comment about running water “just because you can” — we say that a lot at my house 😉 Kitchen is looking fab!
I have always loved concrete counters, and with this edge I like them even more. What I can’t figure out from the photos, how smooth are they to the touch and how “satin” are they? I couldn’t see a “big” difference after the sealer, but maybe that’s just in photos?
The dent repair looks really good. When things are on the counter I don’t think anyone will see it at all.
They’re not as smooth as a polished granite (although they can be if you use a wet grinder on them and polish them to 3000-grit). As you run your hand over it, you can feel a slight texture to it (which is the aggregate — sand — in the concrete), but it’s a smooth texture. Meaning that it’s not a texture that might trap dirt or grime or make it difficult to wipe down the countertops at all. It feels very similar to the very slight texture that some laminate countertops have.
The sealer took it from a very dull, matte finish to a satin finish that has a very subtle sheen to it when the light (like the natural light coming from my three windows in the breakfast room) shines on it. When there’s not light shining directly on it like that, the sheen isn’t noticeable at all.
Despite the sarcasm, I know Matt is proud as a peacock with your work. It must be hard to live with a perfectionist. Love what you do, and that you also share it with us.
He’s definitely proud. Yesterday morning he said, “You know, after eleven-and-a-half years, you still amaze me.” I said, “What are you talking about?” And he said, “Those concrete countertops.” 🙂
Awww, that’s sweet and makes it all worth it, right? Beautiful job!
Kristi, I still say that the company got off cheap by providing the materials. They got much more than the money they ” spent” on you. Your blog and the instructions, and photos on this were excellent. Nothing beats a satisfied customer and I am sure their business will take off as a result.
I also like the way the edges filled in– all those little holes are gone!
Strong work, Kristi!!!
Wow! I am in awe. I love the subtle variation in tone and I endorse the choice of the satin finish. Now I can’t wait to see how the painted cabinets turn out next to the lovely counter surface. You must have felt sick at heart when that dent appeared, but what a great save! Kristi, you are my hero!
Great job! You must feel so relieved to have it done.
you made it! And what a good cost savings at a very classy finish.
It sure has been an adventure watching your kitchen inch towards the finish line. Everything you’ve done is remarkable.
Question about your subway tile…You stated your tile is a warm white while your appliances are a bright white. I’m wondering why you didn’t chose a bright white tile. I’m not a designer so I don’t understand the process of selecting colors. But my first thought was your tile might look dingy in comparison to the appliances.
Can you help an amateur understand the reason behind your decision? Thanks.
I’m interested to hear this too! I often have questions about how people mix shades of white….I trust what Kristi says!
Well, I can’t say that other decorators/designers would have the same thought process that I have, but here’s my thinking on that…
Of all of the finishes I’ve selected for my kitchen that include white (ceiling and trim paint, walls/tile, floor paint, countertops), everything is a warm white to varying degrees. The subway tile is the brightest of all of those warm whites, but it’s still a slightly warm white. The only things that are bright white are my appliances — dishwasher, fridge, and range. And those are all a matching set.
So in my mind, it makes sense that if anything is going to “stand alone” in color, it should be the appliances. As long as they all match, it’s okay if they’re all three a bright white. But then the rest of the finish selections for the kitchen should all blend (i.e., warm white).
The subway tile, because it’s still so bright, even if it is slightly warm, is kind of the “bridge” between the bright whites of the appliances and the warmer whites of the paint and countertops.
Anyway, I have no idea if that makes sense to anyone else, but for some reason it makes sense in my brain. 😀 The the “appliances stand alone” concept can be seen in lots of kitchen, especially those that use stainless steel or black appliances. A lot of times, the only stainless steel you’ll see in a kitchen are the three main appliances. Or the only black that you’ll see in a kitchen are the three main appliances. Those kind of stand alone, while all of the other finishes in the room are selected without consideration of the appliances.
Thanks for the explanation. You are very articulate because I understood completely.
The counter tops are AWESOME! I will never look at concrete the same again. Your kitchen will be
great when done. The greens will be bold and gorgeous. Thanks for so much inspiration and simple
advice or solutions or “have you thought about this”.
Wow Kristi, just … WOW! The countertops look AMAZING! Just gorgeous. I agree they look like an authentic stone product, and the “movement’ in the finished product is just beautiful. I about had a heart attack when you showed us the dent, and another one when you said you fixed the dent and it cost $500. Then there was the stroke I almost had when I saw that used your Blend-Tec to grind down the component to powder. JEEZ!
You are one cool lady, I have to say that, because you reacted with so much grace and aplomb under pressure, when I’d probably still be screaming at the top of my lungs about the dent. There are just some things that send me around the bend, and that would’ve done it. You are such an amazing problem solver, and really the dent just disappears with the rest of the counter, I doubt anyone would notice it IRL. Glad you “keep it real” and show us the entire process, including any bumps in the road. It’s helpful because the solutions give people something to consider before resorting first to pure panic, which is what I would’ve done!
The kitchen is coming along swimmingly, and I am just in awe of your talent and abilities, and willingness to try something like concrete countertops and make them amazing. I cannot wait to see the entire kitchen when it is finished, it is going to be spectacular!
Wow! Gorgeous!
My first thought was “Wow, she is amazing!” Looks great.
Don’t laugh at my question, k? Here goes… is it cold? I’ve always been of the opinion that stone and concrete are cold- figuratively and literally. I know we don’t sleep or walk on our countertops, but still. Your thoughts? I know you’ve used butcher block in the past.
I actually do know what you mean, because that’s one of the things that I dislike the most about granite (especially polished granite). It just looks so hard and cold. My countertops definitely don’t give the same warmth to the kitchen that the butcherblock did (when it comes to hard, non-fabric materials, nothing compares to wood in giving warmth to a room, IMO), but they also don’t look or feel hard and cold like polished granite does. I mean, they do feel hard, as in, they’re durable and substantial. But visually, they don’t appear overly hard and cold. I was actually a bit concerned about that (especially since I think that’s one of the main things that I’ve always hated about granite), so I’m very pleased that they don’t look like that. Now if I were to use a wet grinder on them, and grind/polish them up to 3000-grit (like some people do with their concrete countertops), I do think they would start to take on that cold, hard look because they would become very polished, smooth, and super shiny like polished granite. Needless to say, I won’t be doing that with mine. 🙂
I have been in love with concrete countertops ever since I saw them in a designhouse kitchen 25 years ago, and I have to say that yours are the prettiest ones I have ever seen! Great job! I am so going to do that in my dream kitchen, and maybe even in the bathrooms, too!
THANK YOU for posting your experience and your specific how to tips. I have been wanting to do this for 7+years and have been holding back as most things I dream up ‘seemed like a good idea at the time, but in retrospect…’ My husband is NEVER on board and is the ‘why do it?’ voice, I am the ‘WHY NOT?’
Your blog post is very encouraging and the insider tips are extremely helpful and valuable! I predict this project will be sooner than later thanks to you! I too, prefer REAL makeover stories as opposed to splashy designer photos, I always wonder why we don’t hear that even home improvement photos can be photoshopped.
I love what you did. Like you, I’m a figure it out kind of girl. When we built our center island out of grayed reclaimed lumber and I started looking for counter tops I was like we’re going to make our own. We laid a 3/4 inch piece of plywood down and clipped the corners(because it was counter height I didn’t want to always be hitting my hip on it) then took 1/4’s and made a frame that allowed for a lip so you wouldn’t see the plywood. I did by just regular cement(because I didn’t know of this product you used) mixed it up and poured it in. It looked really great. I wish I would have sealed it or used cement paint on it. I have since made that my craft table and am making a new center island and considering my options for tops. I still love the cement!
Did you document the pouring of the countertops? Did you do it in place? Did you use a specific kit? Where did you get the molds?
Your site is impressive and your work is excellent.
The links are in the post, underneath where it says, “If you’re looking for the first two parts of this project, you can find them here:”
Hi Kristi. I am remodeling my bathroom and just found this article about concrete countertops. How is yours holding up? Have you had any issues?
Thanks in advance. By the way your articles are so thorough and honest. I also like the DETAILS.
Sorry for the late reply! Mine are holding up great. I have had a few stains (I’m not so good at cleaning my kitchen), but I’ve found that they can be bleached out. I use a gel bleach when I need to remove a stain. You just have to keep in mind that those areas have to be re-sealed. I’ve also had some problems with oil/grease stains. Again, my fault, because I’m a horrible housekeeper and I let my messes pile up. Someone who keeps a clean kitchen wouldn’t have the issues I do. But I’ve purchased some concrete oil/grease remover from Home Depot, and I’m going to try that out. But seriously, most people who keep their kitchens clean wouldn’t have these issues. I readily admit that I’m horrible at the housekeeping stuff. I can decorate, DIY, and remodel, but housekeeping just isn’t my thing. 😉
I have the exact question you did and was hoping there was an update. =) We are also redoing our bathroom and wanting to pour a small countertop. Hope yours goes well.
Kristi,
Thank you for all the details, tips and photos! It was very helpful.
A little over a year later, how are your counters holding up? Are they still stain and scratch free?
I came across you project and I have to say that they are the best I’ve ever seen. I loved the rich elegant look.
We are planning on having concrete counter tops in our outdoor kitchen.
I was wondering if you had an article showing the process of forming and pooring the counter tops?
Thank
Jason
Here’s the post on building the forms: https://www.addicted2decorating.com/diy-pour-in-place-concrete-countertops-part-1.html
And the post on pouring the concrete: https://www.addicted2decorating.com/diy-pour-in-place-concrete-countertops-part-2.html
How soon after pouring the concrete did you seal?
I honestly can’t remember now, but I think it might have been a few days.
I was wondering how you feel about the Z SiAcryl after use? We just finished pouring our concrete countertops last weekend and after reading several blogs I am wondering if purchasing this sealer may have been a mistake. Seems everyone recommends V Seal. Your thoughts?
I would not use this sealer again. I plan to strip, stain, and reseal my countertops in the next few month, and after doing some extensive research, I’ve decided to use this one next time. It has the highest durability rating of any non-glossy finish. As far as I know, there’s only one with a higher durability, and it’s super glossy, which isn’t quite my style.
http://www.vseal.com/products/stonelok-e3-2k-countertop-kits
So funny yesterday my instincts told me not to use the sealer I already purchased so I ordered the v seal kit based on a few different blogs. Good thing I did! Thanks for your response it just confirms I made a good choice. Guess I can use the z siacryl for my bathroom when I do those countertops.
Thanks again