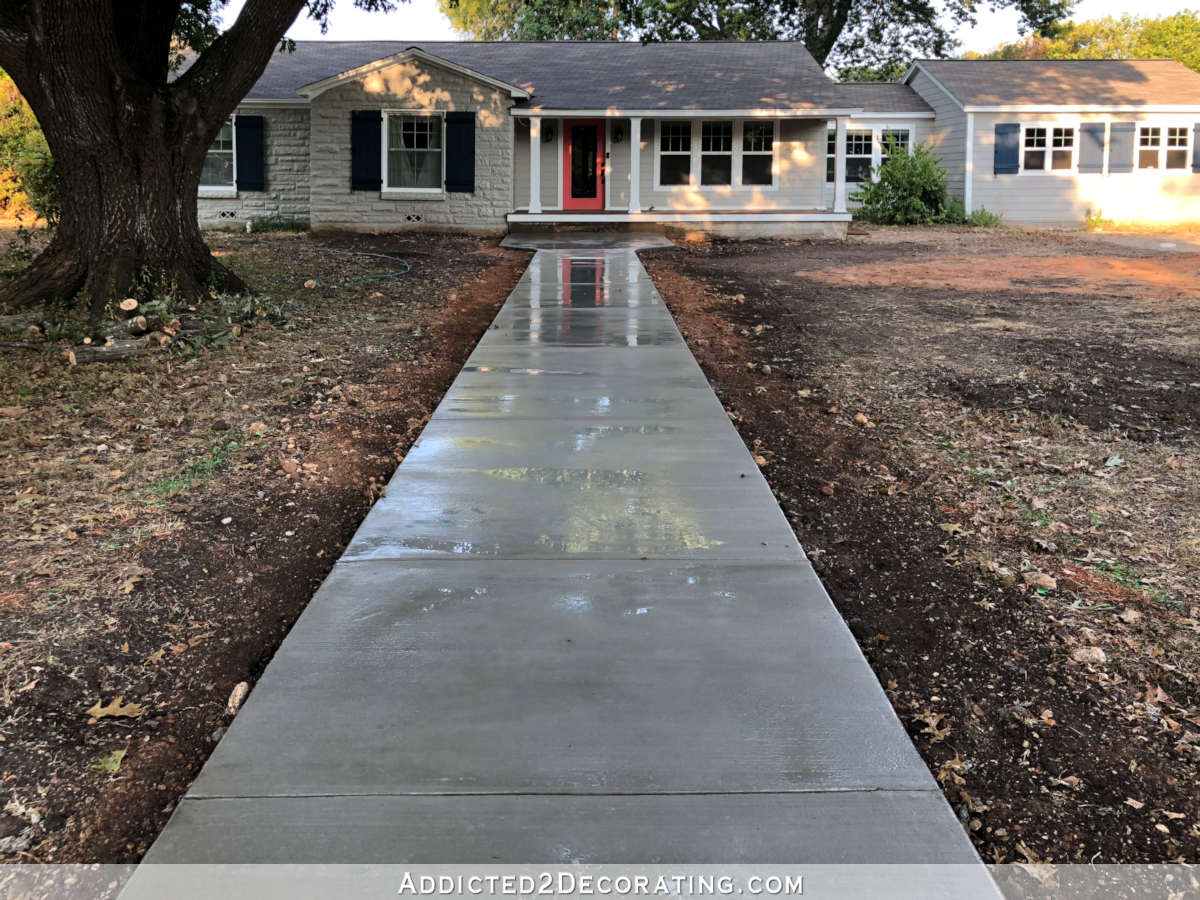
Porch Skirting Progress (The Hardest Part — Tackling The Corner Of The Porch)
Well, I didn’t quite finish attaching all of the faux concrete stones to the concrete skirting facade of the front porch over the weekend, but I’m still very excited about the progress.
Note: This is a multi-post project. You can see all of the posts about this project here: DIY Concrete Faux Stone Facade
Or you can see the last post about this project here: Front Porch Skirting Progress – Attaching Faux Concrete Stones To A Concrete Porch
I got all of the full stones attached to the front, but I still need to cut and attach the small stone pieces to fill in those five small spaces.
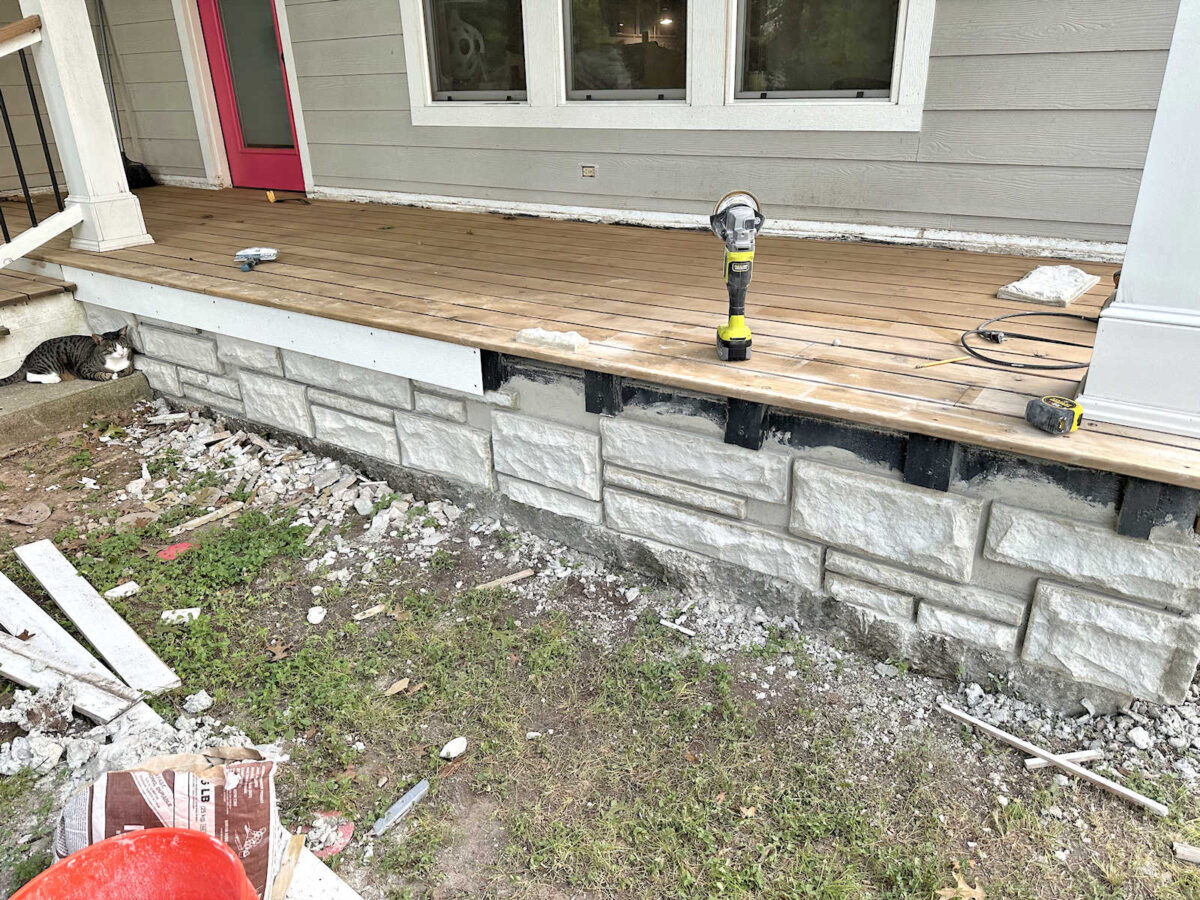
And then I got this far on the side. I know the rotted skirting board is distracting. Obviously, that will be replaced. I’ll replace that as soon as I’m finished with the stone skirting.
But the reason I’m so excited about my progress, even though I didn’t finish, is because I got past the hardest part — the corner. It didn’t quite work out the way I expected it to, so I had to come up with a Plan B. And that Plan B worked out way better than I expected it to.

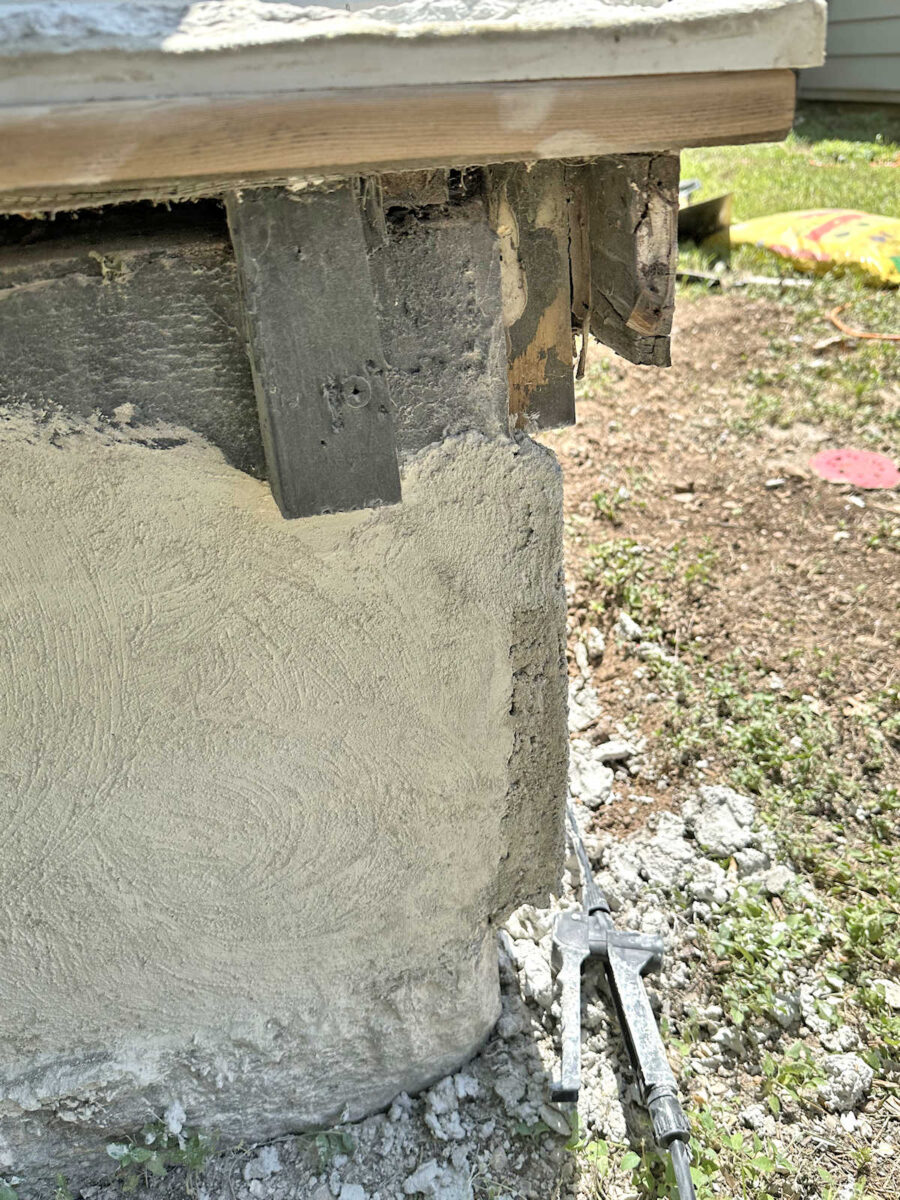
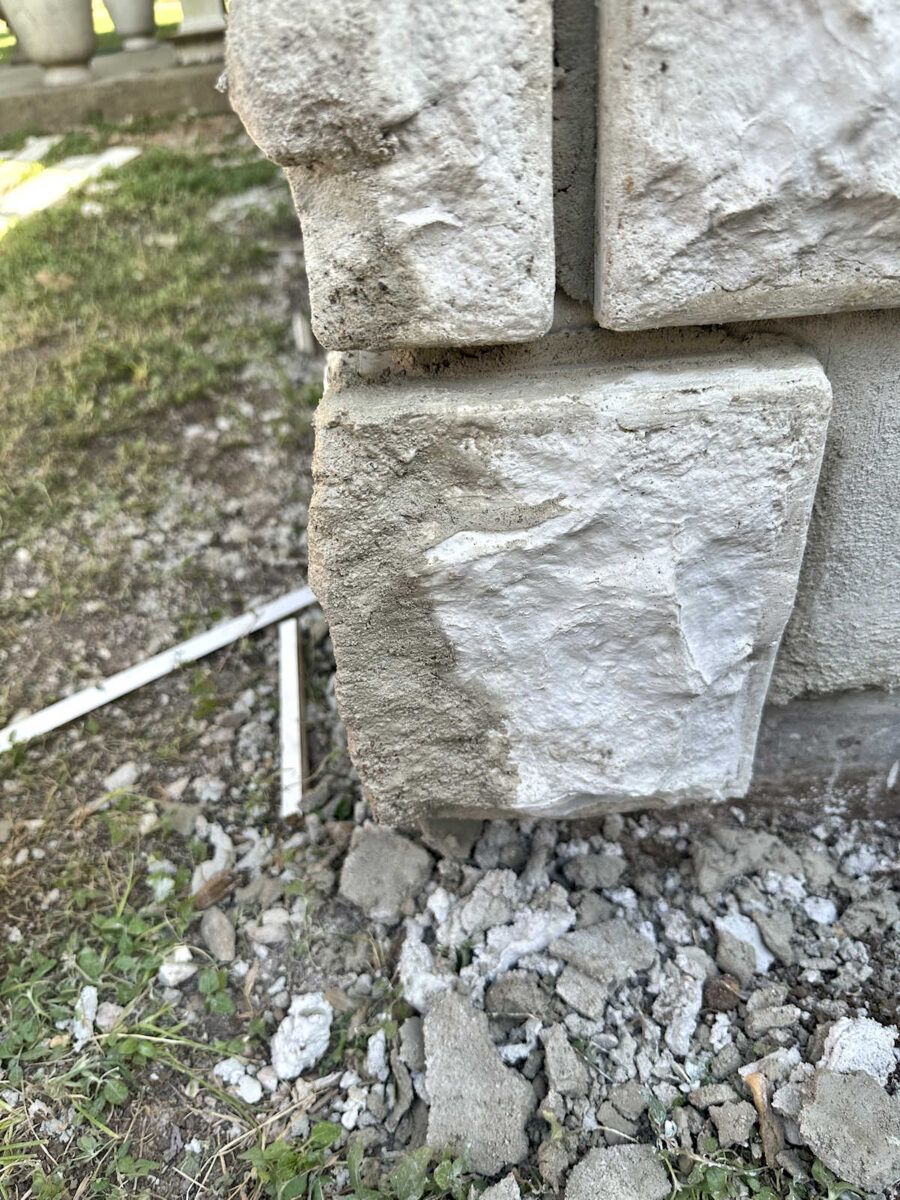
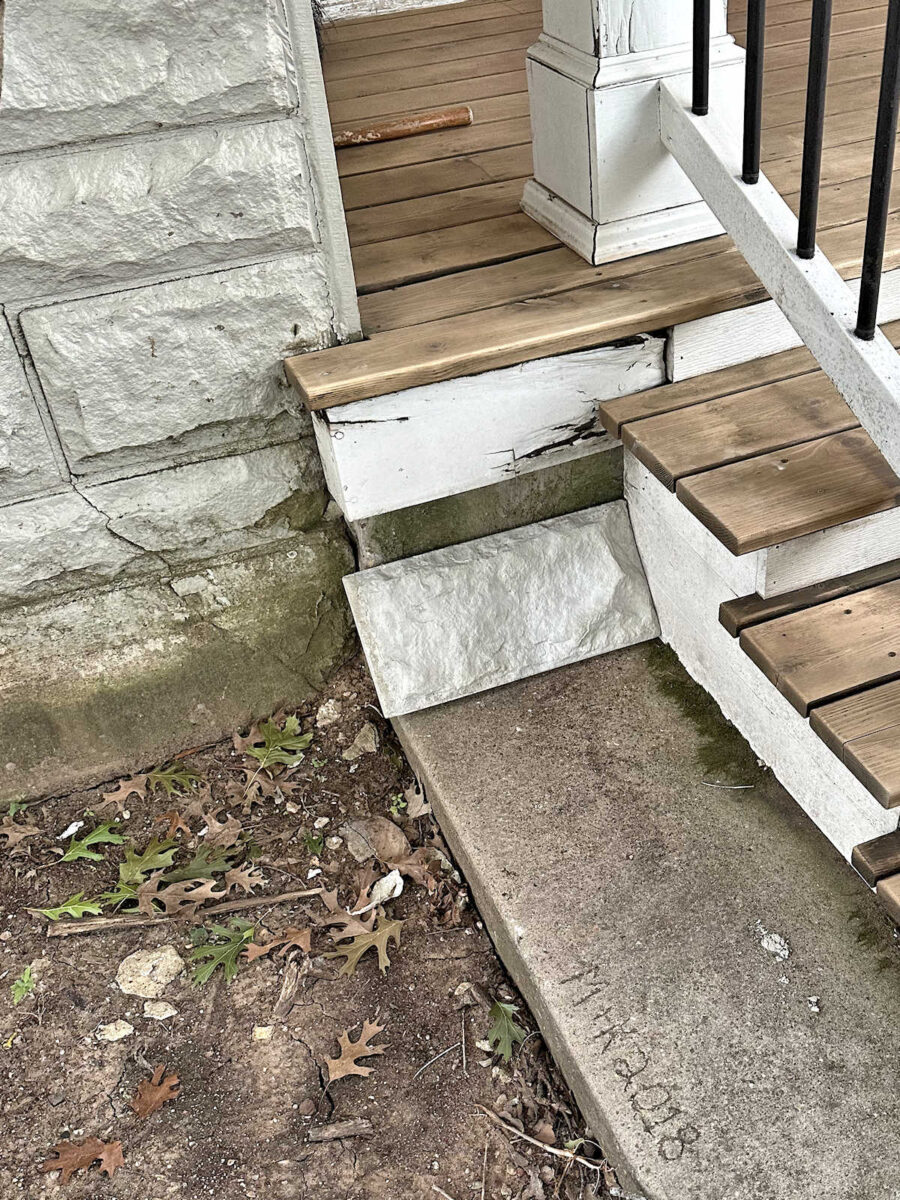
So let me back up a bit and start from the beginning on this corner. I don’t know if you can tell from this “before” picture, but the corner of this porch was a complete mess.
It wasn’t square or plumb. It was chipped and uneven. This corner is what made my previous attempts at attaching any kind of facade to the skirting area a failure. So I knew I would have to address it and fix it this time around before I could even attempt attaching the stones to it.
But this time, now that I’m a concrete expert 😀 , the corner didn’t intimidate me. I knew I could just build out the corner using the mortar mix. I didn’t get pictures during the process because, I’ll remind you, the mortar mix dries so quickly that stopping to get pictures during this process would have been too risky and I may have ended up with an unfixable mess. But I’ll describe the process.
The process was fairly easy. After using my handheld grinder to grind down the side of the concrete to remove the ridges, bumps, dirt, and any previous coatings that may have been added by previous owners, and making sure that I was down to bare concrete, I sprayed the concrete with water and then slathered on a thick coat of mortar mix on the concrete using my trowel. And then I used my steel carpenter’s square, with the shorter (16″) side flat along the front of the porch and the long (24″) side on the side of the porch, and starting at the bottom, I slid it up towards the top to remove any excess mortar mix, leaving a square corner.
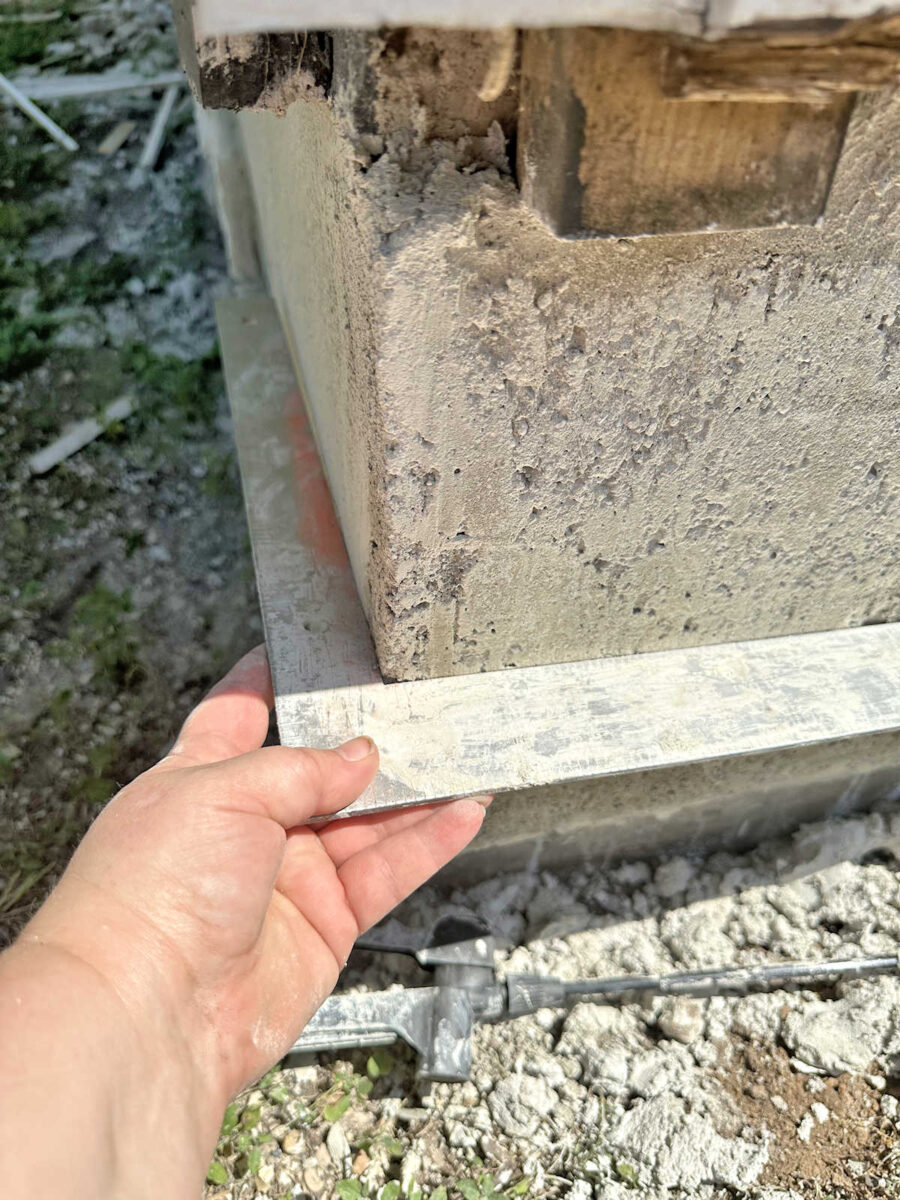
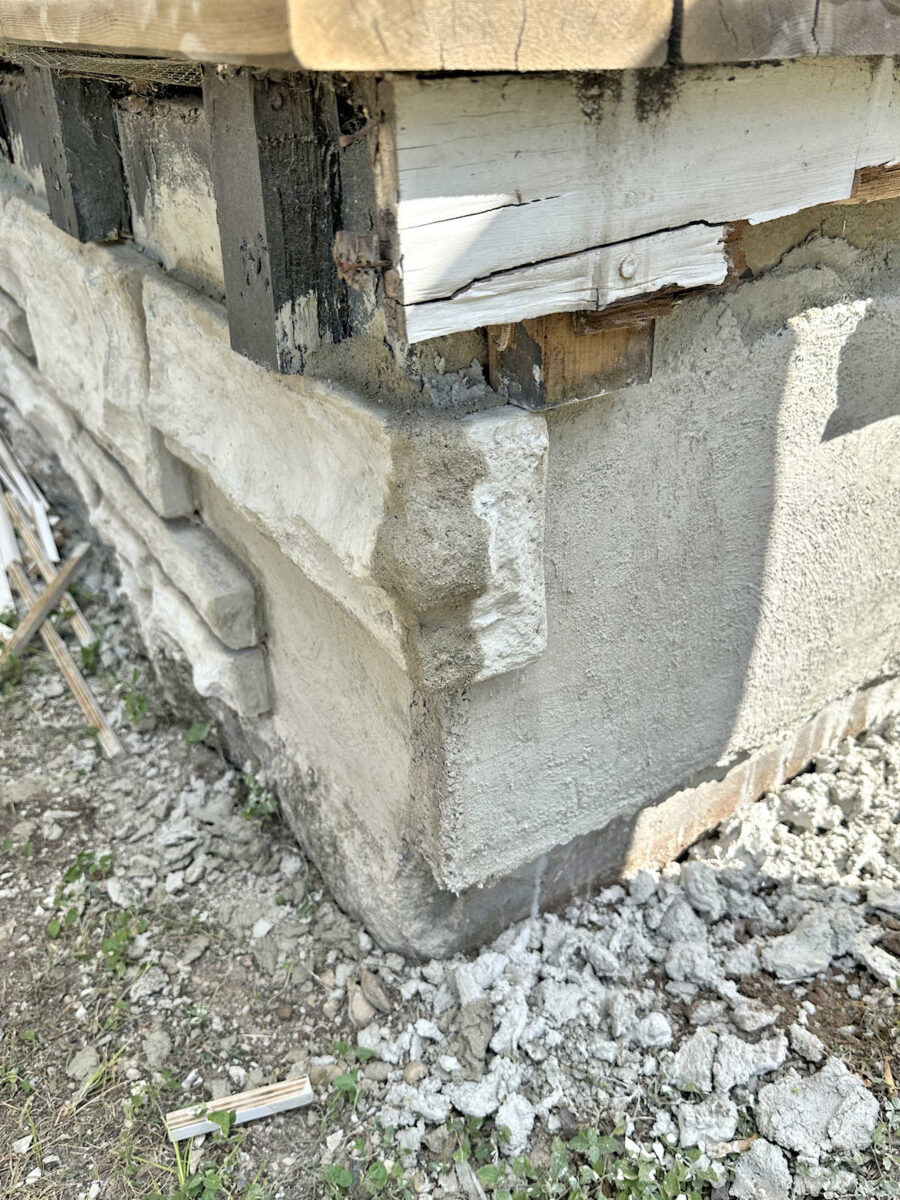
The first time I did it, the edge of the steel square on the side didn’t even come close to touching the mortar, so I had to add more. In fact, I had to do that about four times before the carpenter’s square was removing a significant amount of mortar on the side and smoothing out the mortar. But finally, I got enough mortar on the side so that the mortar was touching the carpenter’s square across the full 24-inch width of the square and the square was smoothing out the mortar the whole way from bottom to top.
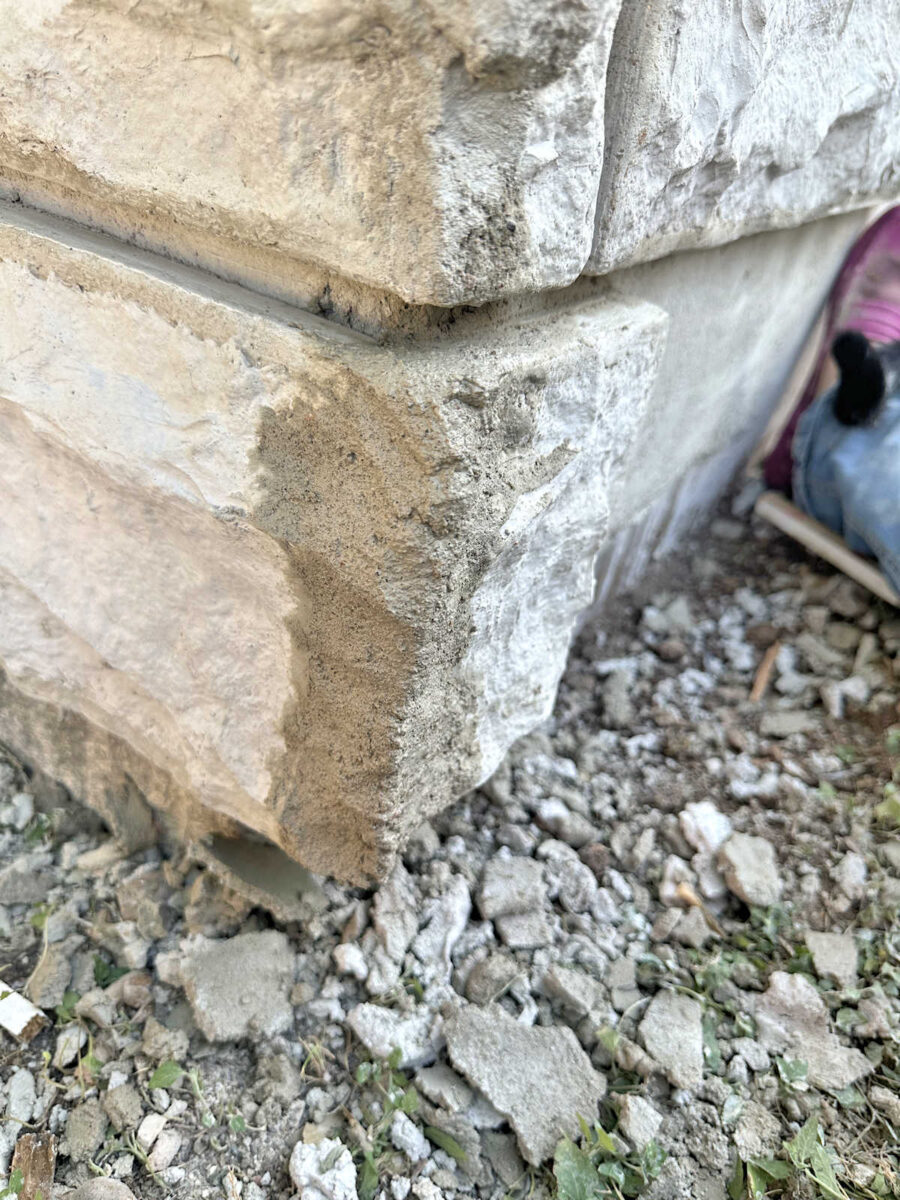
Here’s a view from the front to show you just how much mortar I had to add to build out that corner and make it square.
But that thickness tapered off as it got to that 24-inch mark on my carpenter’s square on the side so that the new mortar feathered into the existing concrete.
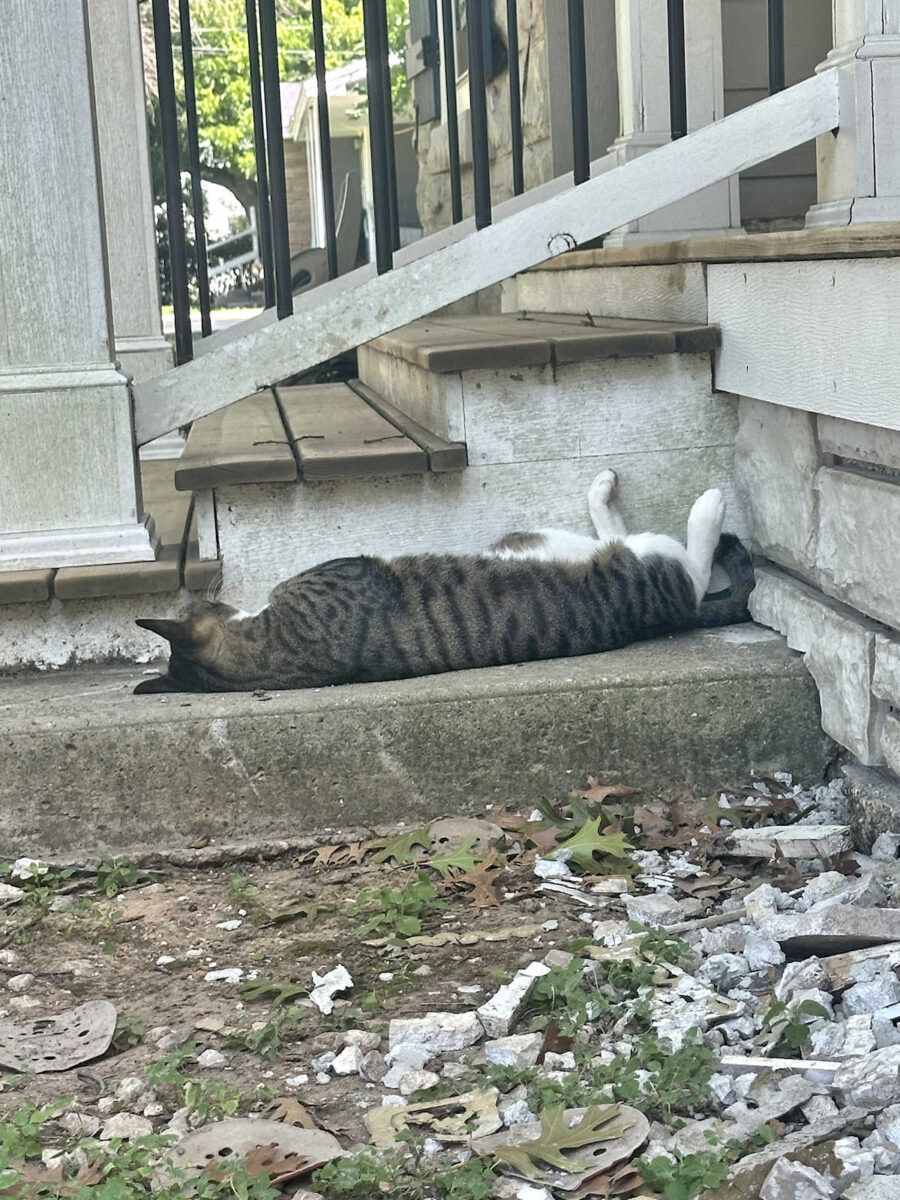
Side note: When I’m working outside, Tiger is always close by. This is his favorite corner to sleep, so he kept me company and kept me entertained the whole time I was working.

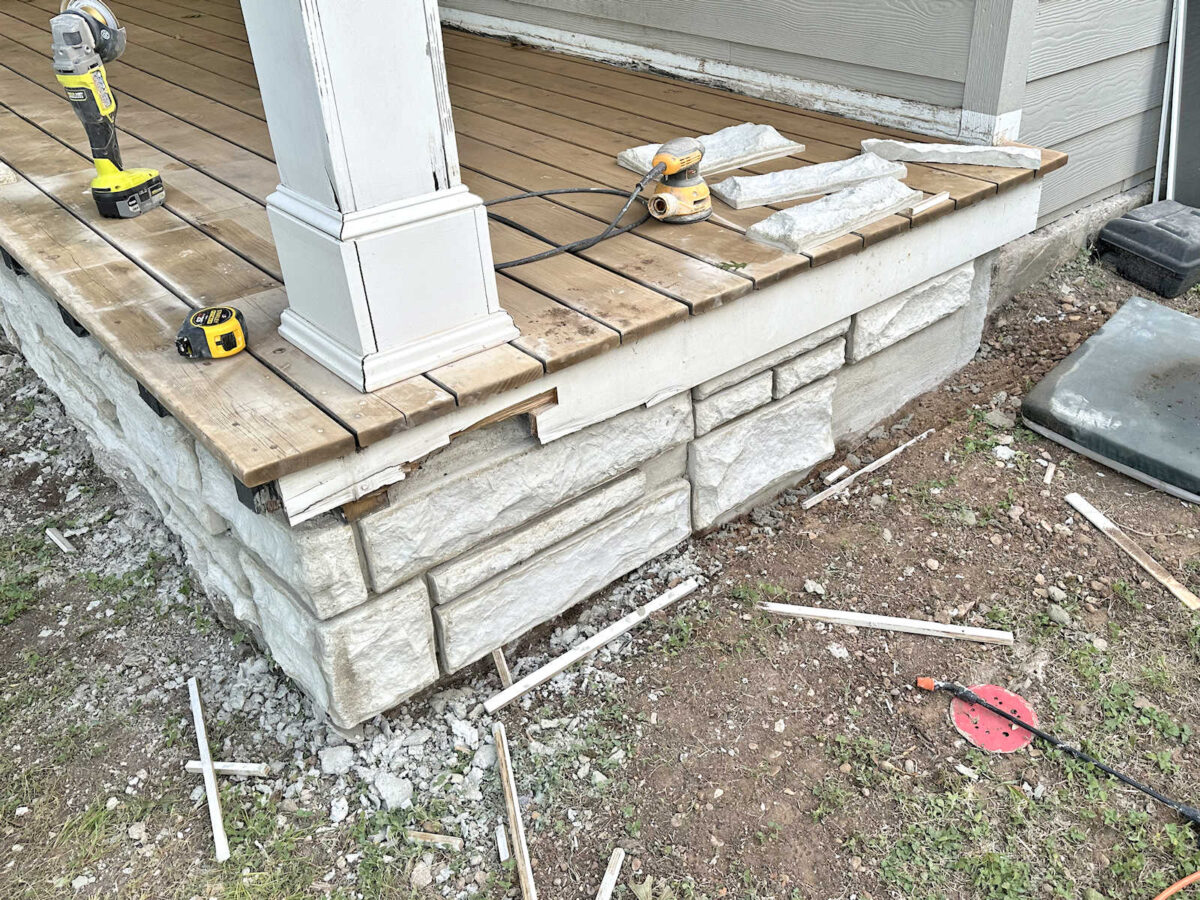
Anyway, once that mortar was dry, I was then able to wrap the stones around the corner and continue on the sides.
The stones on the corner didn’t work out like I had planned. I had planned to cut them at a 45-degree angle to wrap around the corner just like I would if I were wrapping wood trim around a corner. The idea seemed simple right up until I realized I’m actually not a mason and cutting a faux concrete stone with a very unlevel front at a perfect 45-degree angle, when the stone would have to be placed with the front side down to get the angle right using my wet saw, is way harder than cutting wood trim at a 45-degree angle with a miter saw. So I went about this another way.
I measured and marked how much of the stone I would need to cover the front of the porch, and then I made a straight cut using my wet tile saw.

And then I placed the stone around the corner like this…
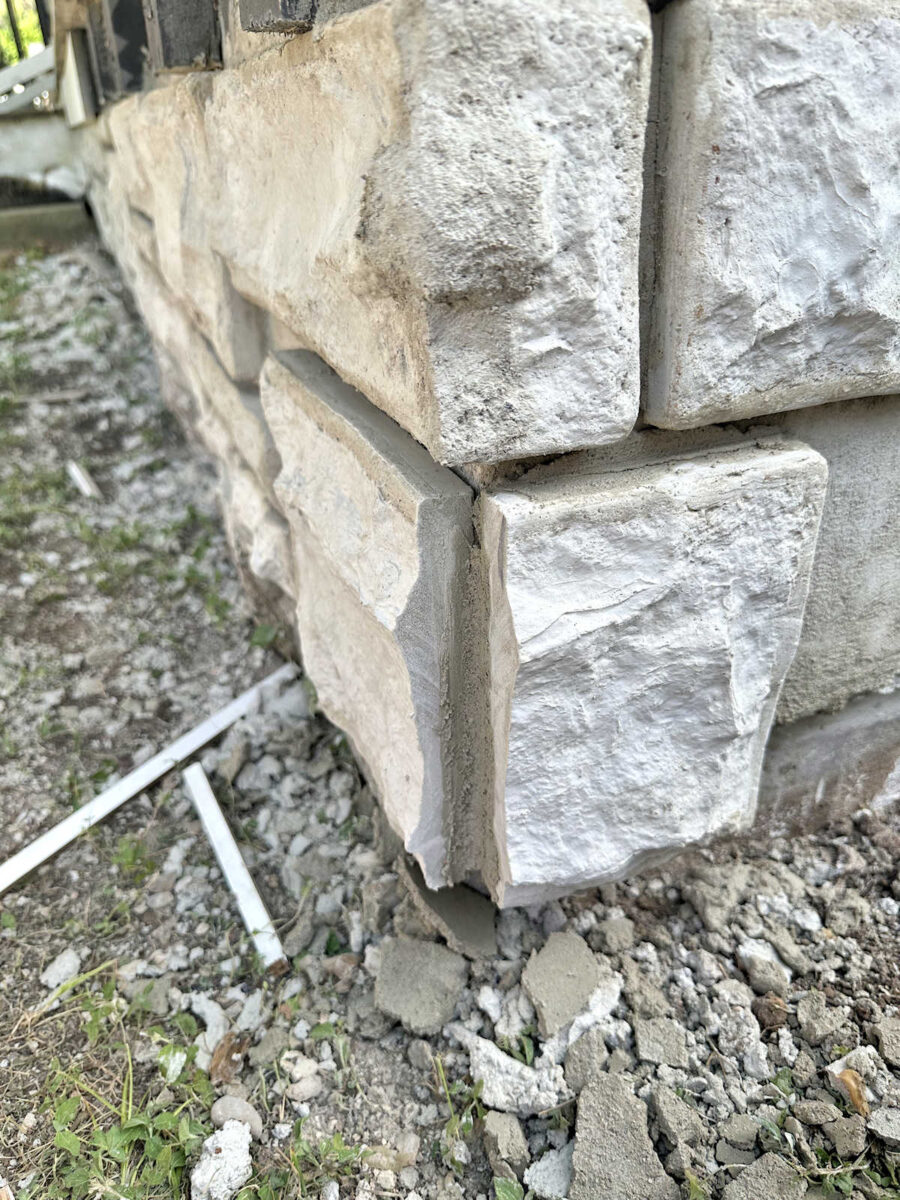
By that time, the mortar that was left in my bucket had a firmer, workable consistency, but it wasn’t dried out. It was still wet, but it was just firm enough that I could use my hands and mold it. So I packed that corner with mortar and used my hands to shape and blend it in with the stones on either side to form a corner. I had to keep reminding myself that it needed to look like chiseled stone, so I wasn’t aiming for a perfect, sharp corner.
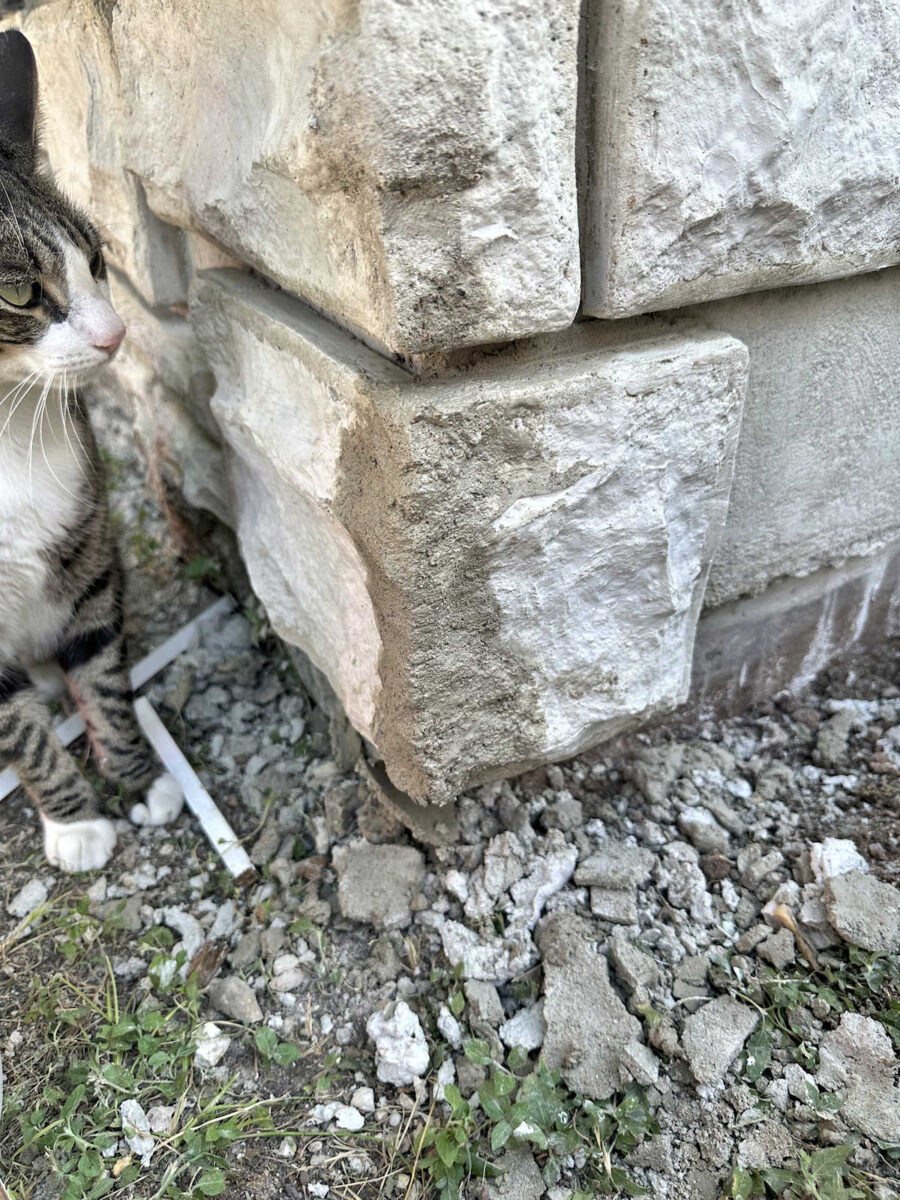
Here’s what it looked like from the side with the mortar still wet.
And here’s the corner view showing the front…
I’m pretty proud of how this turned out. In hindsight, I probably should have used the concrete mix instead of the mortar mix for this. The concrete mix that I used for the stones uses a very fine sand as the aggregate, so it has a much smoother look to it. The aggregate in the mortar mix isn’t big at all, but it’s much larger than the fine sand, so it has a rougher look to it. But I don’t think anyone is going to be inspecting these corners as closely as I do. And once it’s all primed and painted to match the stone on the rest of the house, I think it’ll look great.
As you can see, Tiger was very impressed with my solution for the corner stones as well. 😀
Okay, well, he may not have been impressed, but I was. 😀 I’m so close to being finished with this portion of the project (i.e., attaching the stones), and then I just need to mortar the spaces between the stones, let that dry, and then prime and paint. I can’t believe that after all these years, I’m finally going to have a finished skirting on our front porch.
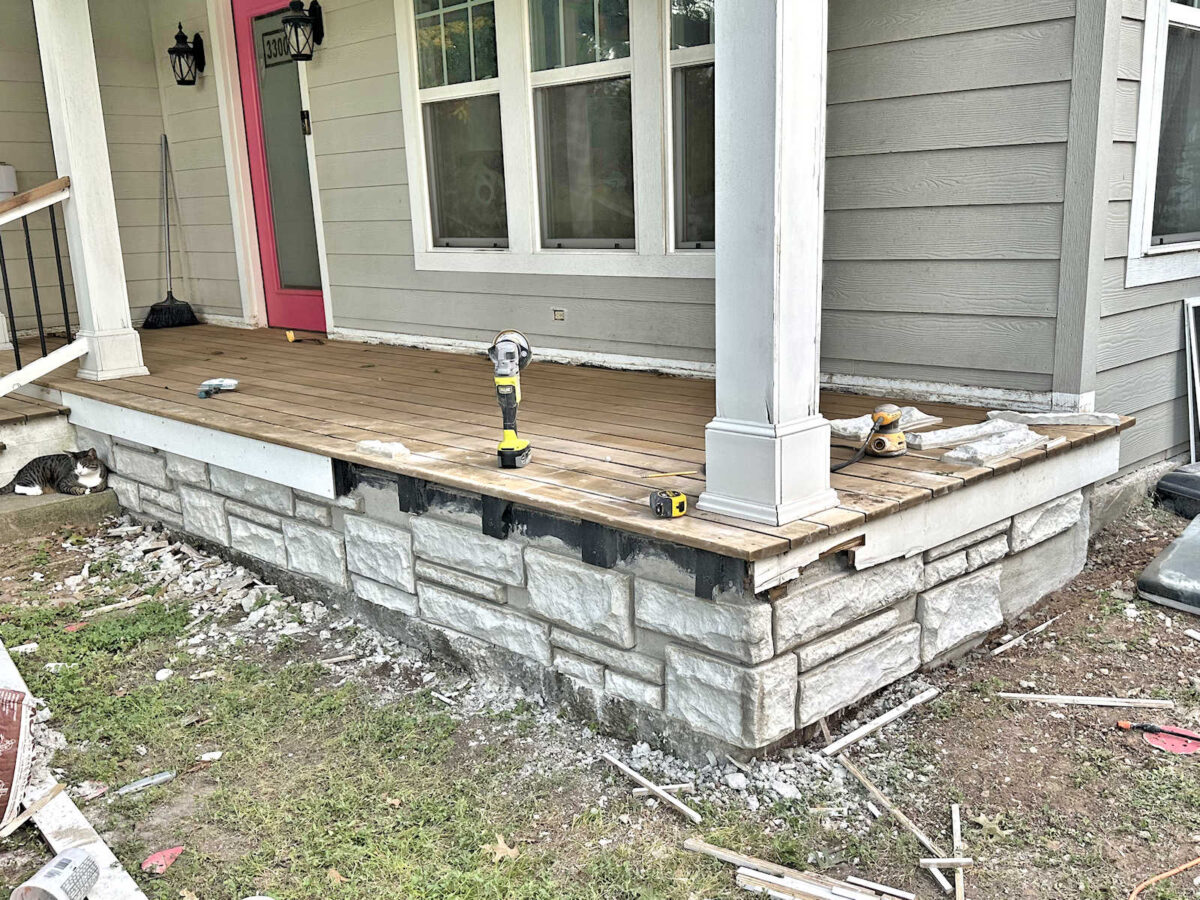
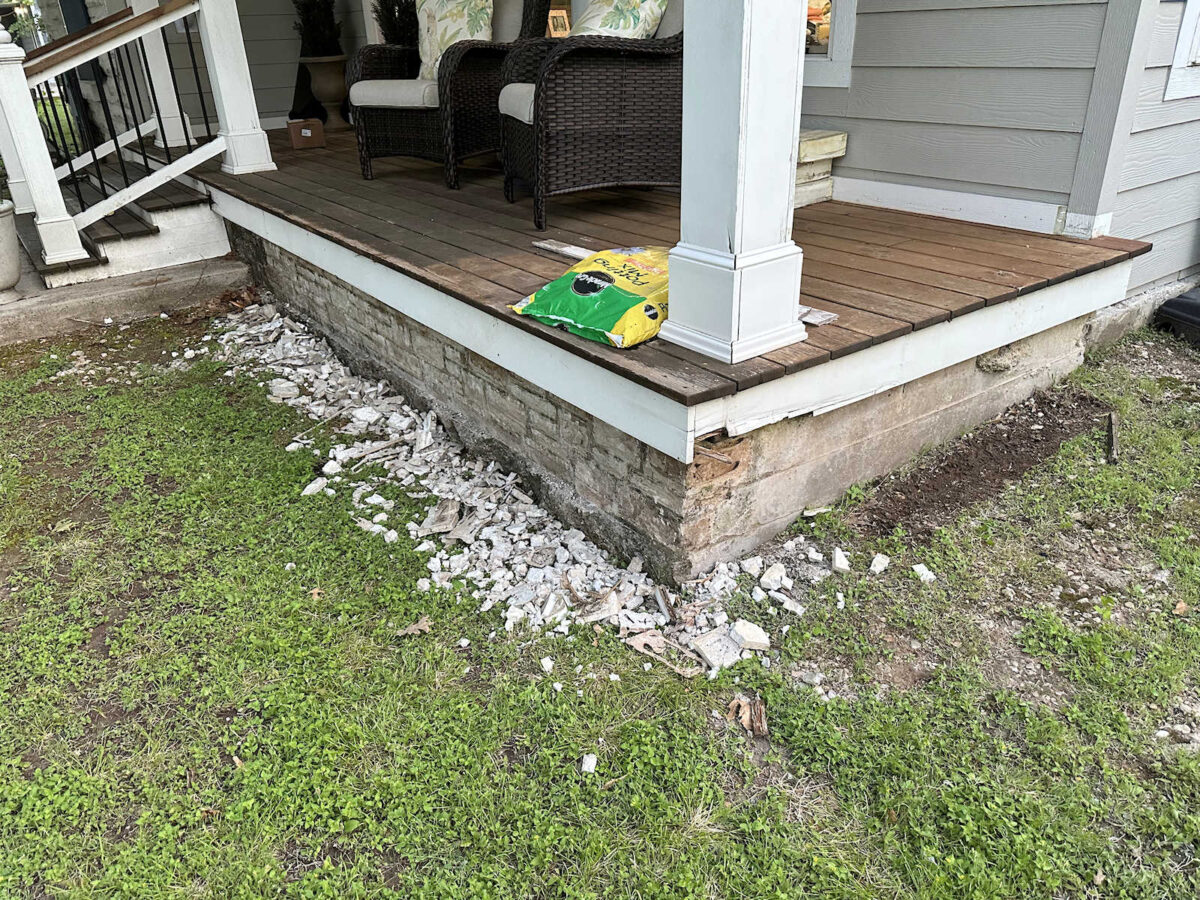
I also still need to do this little area on the other side of the front steps. I can’t forget that! It’s not finished until the whole thing is covered.
Let’s see what Tiger thinks about that…
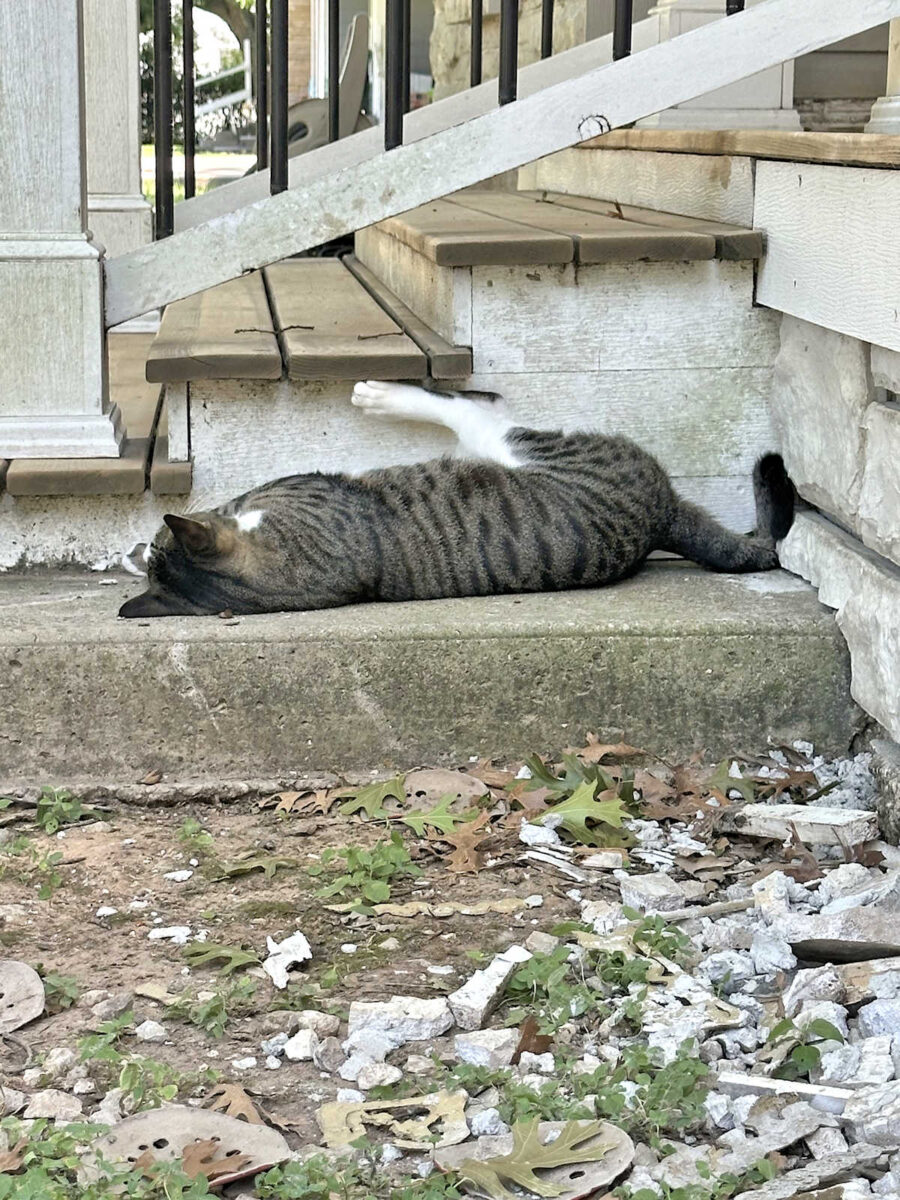
I’m pretty sure he agrees. 😀 This cat seriously cracks me up. Every time I’d look over at him, he was in a new position. Some of his positions were so funny, but when I’d reach for my phone to get a picture, he’d hear me and sit up to see what I was doing before I could get a picture. He’s quite entertaining, though.
So that’s the weekend progress, and while I didn’t get as far as I had hoped, I’m okay with that because the hardest part (the corner) is done. With the hardest part out of the way, everything else should be smooth sailing.
More About Our House Exterior & Yard

see all exterior &
yard diy projects

read all exterior &
yard blog posts

Addicted 2 Decorating is where I share my DIY and decorating journey as I remodel and decorate the 1948 fixer upper that my husband, Matt, and I bought in 2013. Matt has M.S. and is unable to do physical work, so I do the majority of the work on the house by myself. You can learn more about me here.

Well done, Kristi! Who could have a more congenial little helper! Love Tiger!
Great job!!! Tiger content is always a huge bonus!!
Your corner looks PHENOMENAL!!! WELL. DONE!
You did a fantastic job, can’t wait to see the final result, by the way i loved the picture where Tiger was sitting right on the corner seeing your work inspecting to make sure everything is coming to plan. It was awesome the he was right there with you making sure you were safe.
Great job on that corner. Nice that Tiger likes to be with you.
WOW!!! Again, you are just amazing. I love your solution for the corner. It looks fabulous now, and you aren’t even finished. I can’t wait to see how seamless this will be once painted; it’s looking pretty seamless now actually. I love the Fur Inspection & Fur Comedy Tour that accompanies you, we have a Tuxedo cat that has shown up on the farm for the last month or so. He/She is taking care of the mice/rat problems near the chicken coop and the I have noticed a decided lack of mice in the large pole barn, I keep hoping to get introduced to this kitty, but since it is an outdoor kitty, I will have to wait until it feels safe enough to approach me.
Cheers to you, Matt and the Fur Babies!
I keep meaning to say I like the new bio picture of yourself, you look like you’ve lost more weight, so way to go girl!
Tiger may not have been impressed, but I truly am.😁 Great job. Kristi! Looks fantastic!
On Sunday morning I watch Tia Weston rehab an abandon house in ND. She was tossing around ideas for her foundation. I commented to her and shared your skirting and faux stone making prowess!
I’m in awe of you right now😬😳. Those stones are so bang-on perfect and to think you made them yourself!! I think mason Mark McCullough from This Old House would give you 5 stars⭐️ ⭐️⭐️⭐️⭐️!!