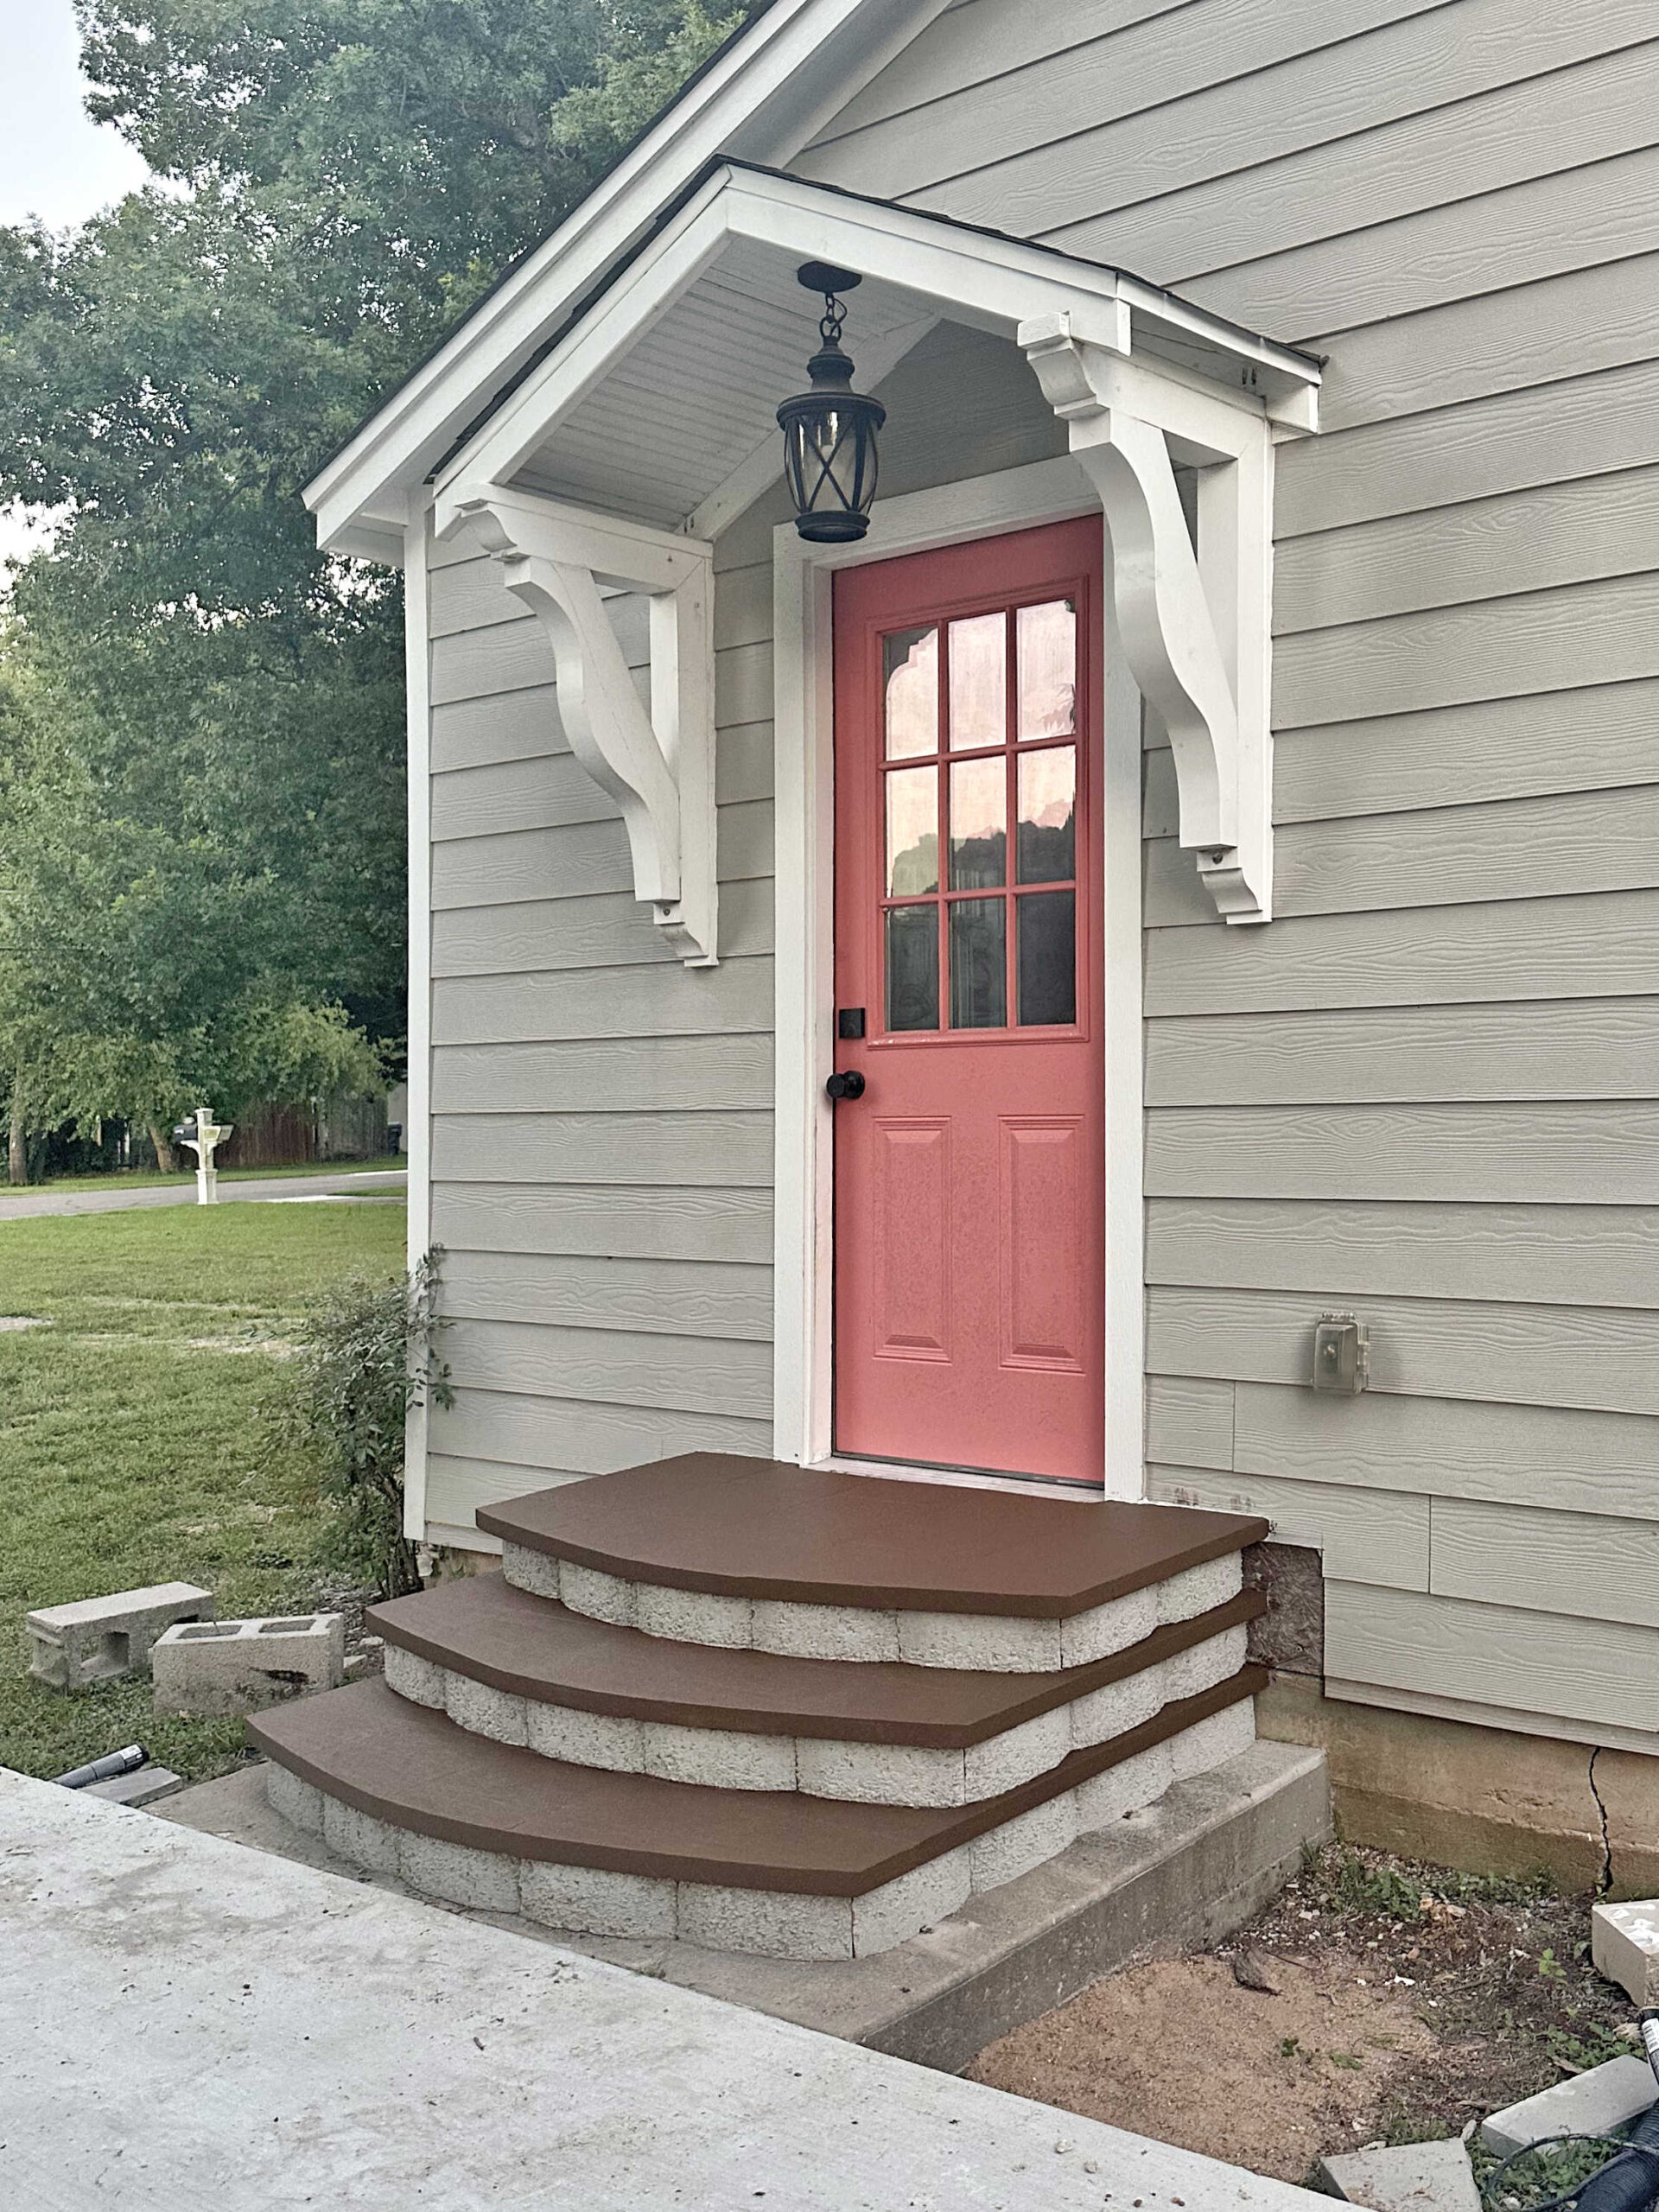
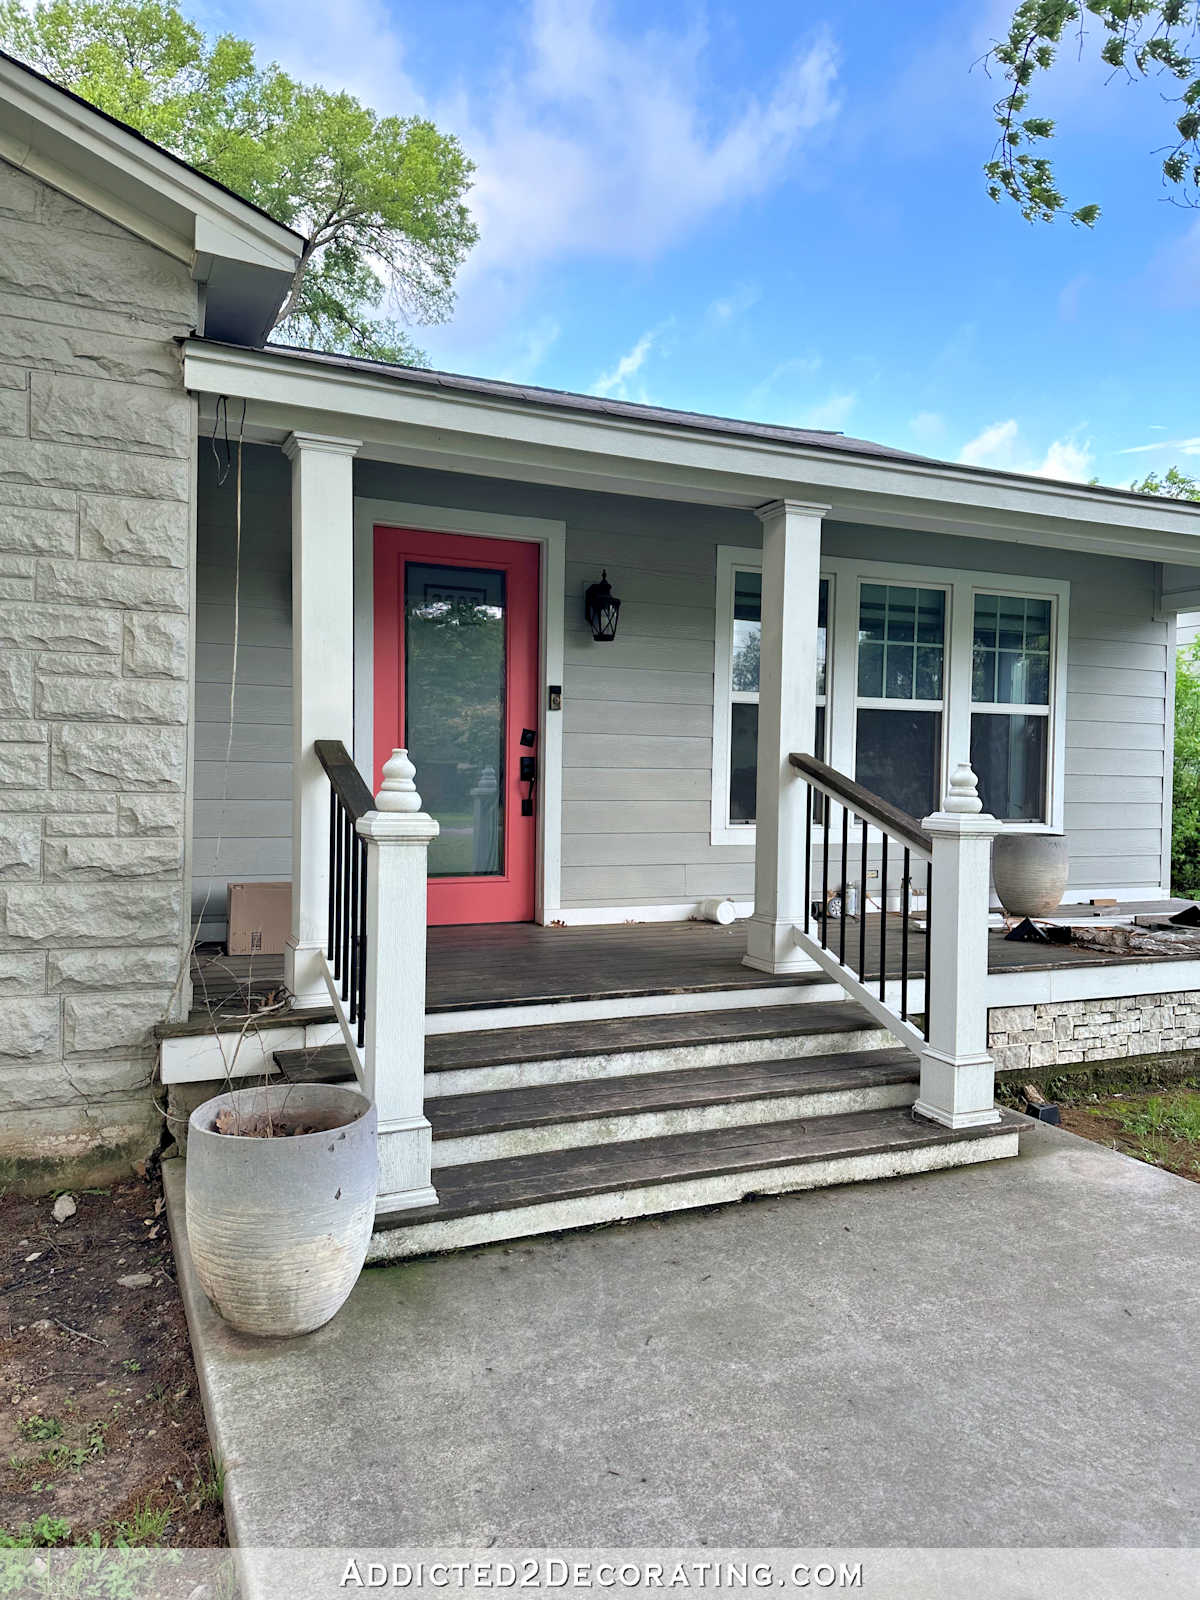
Front Porch Skirting Progress — Attaching Faux Concrete Stones To A Concrete Porch
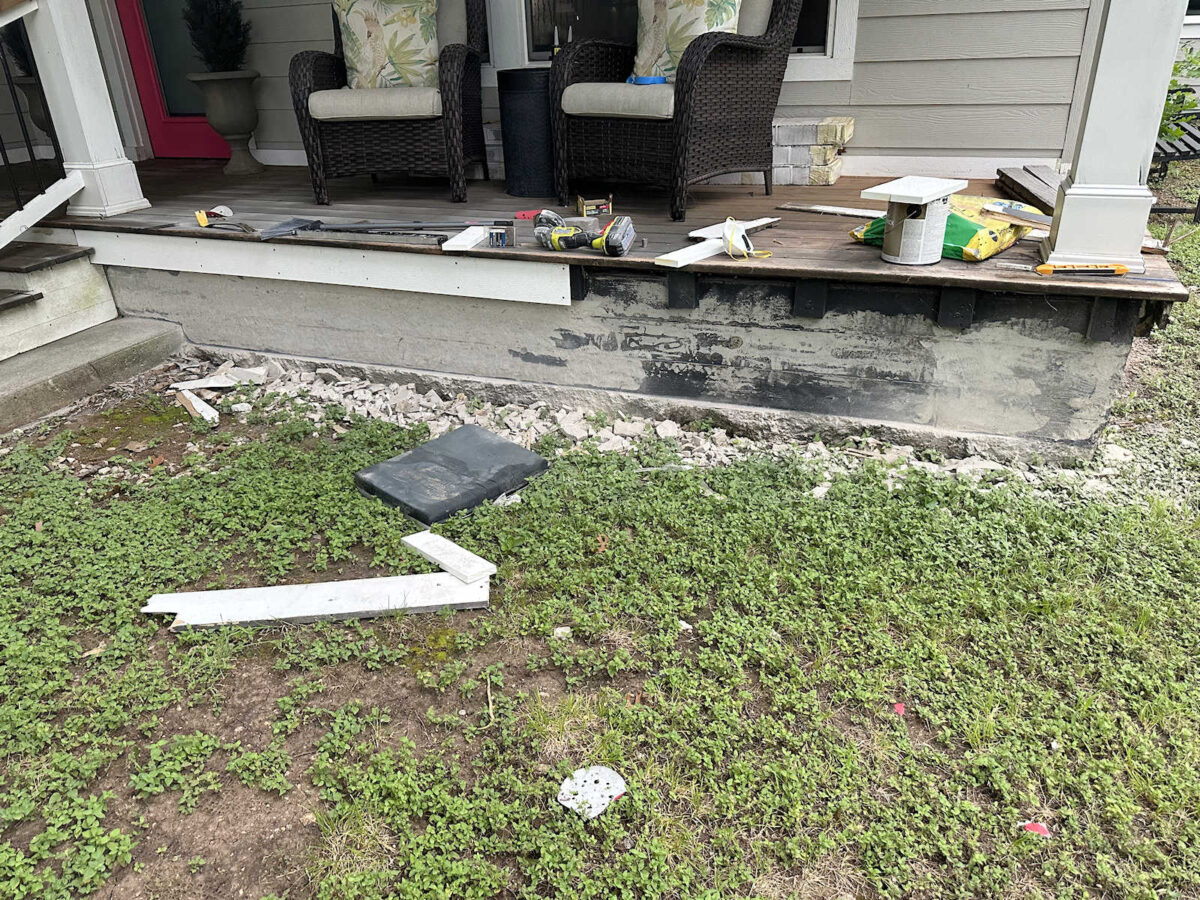
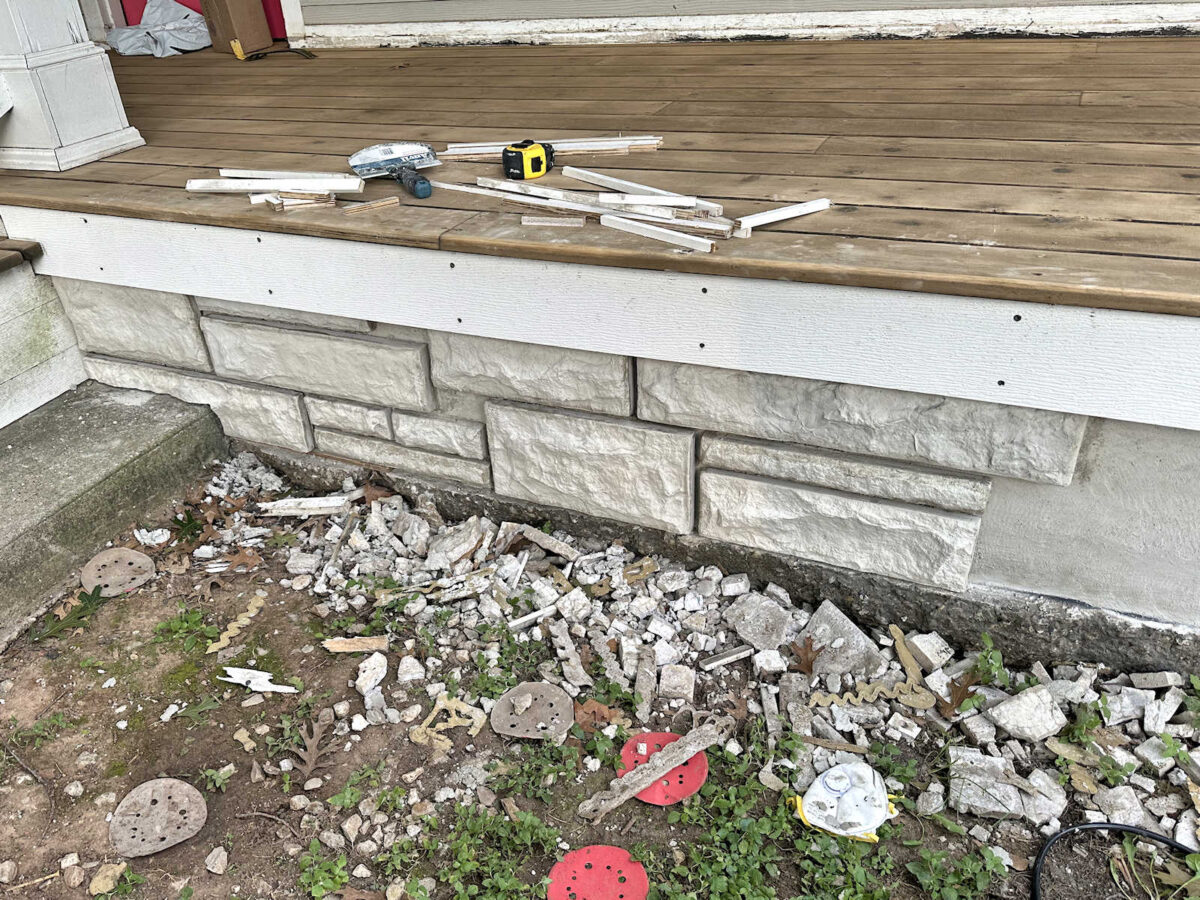
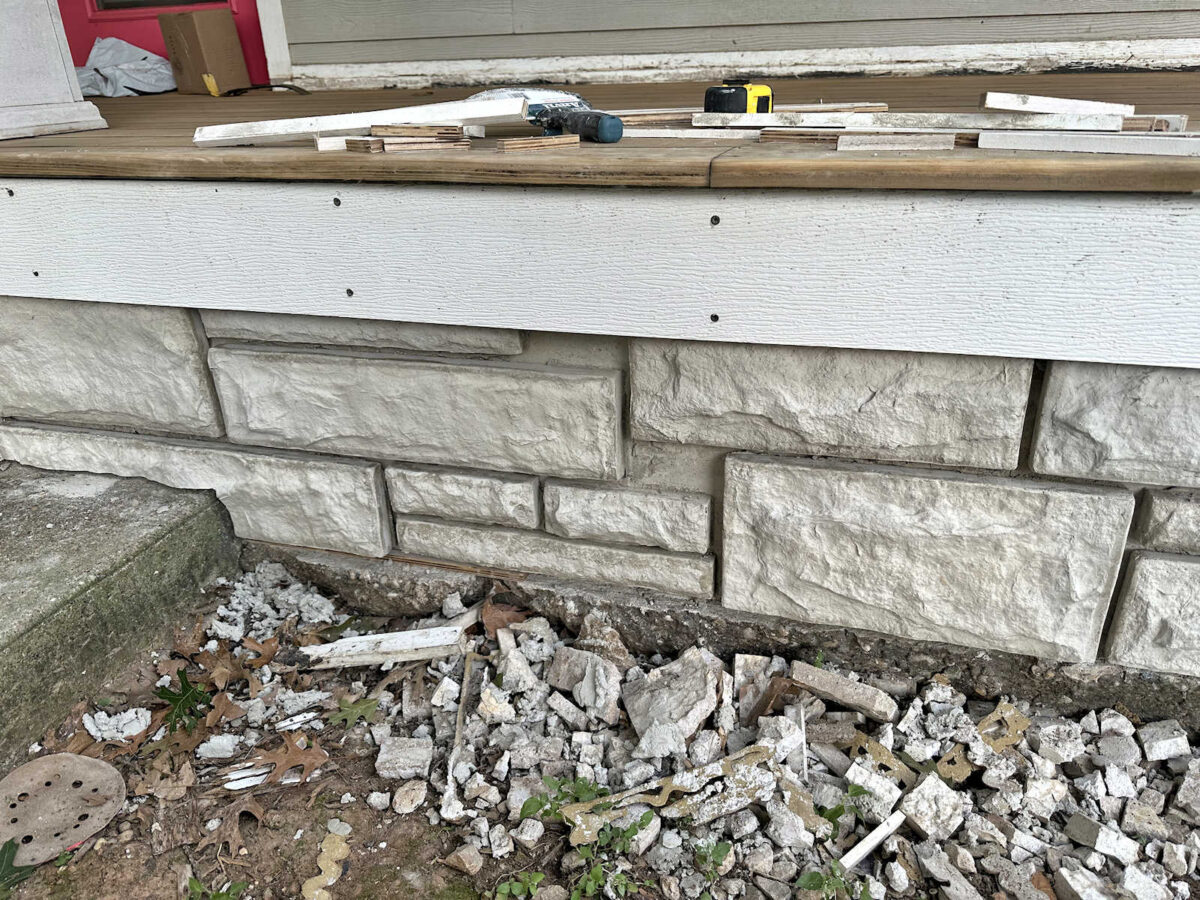
This front porch skirting project has been a long process, but yesterday, I finally got to the point of attaching the faux concrete stones that I made to the skirting area of the porch. I didn’t quite get halfway on the front, but I got pretty close to halfway. Here’s how it’s looking so far…
Note: This is a multi-post project. You can see all of the posts for this project here: DIY Concrete Faux Stone Facade
Or you can see the previous post here: A Major (And Much Improved) Design Change To My Silicone Faux Stone Molds (Plus, A Progress Status Update)
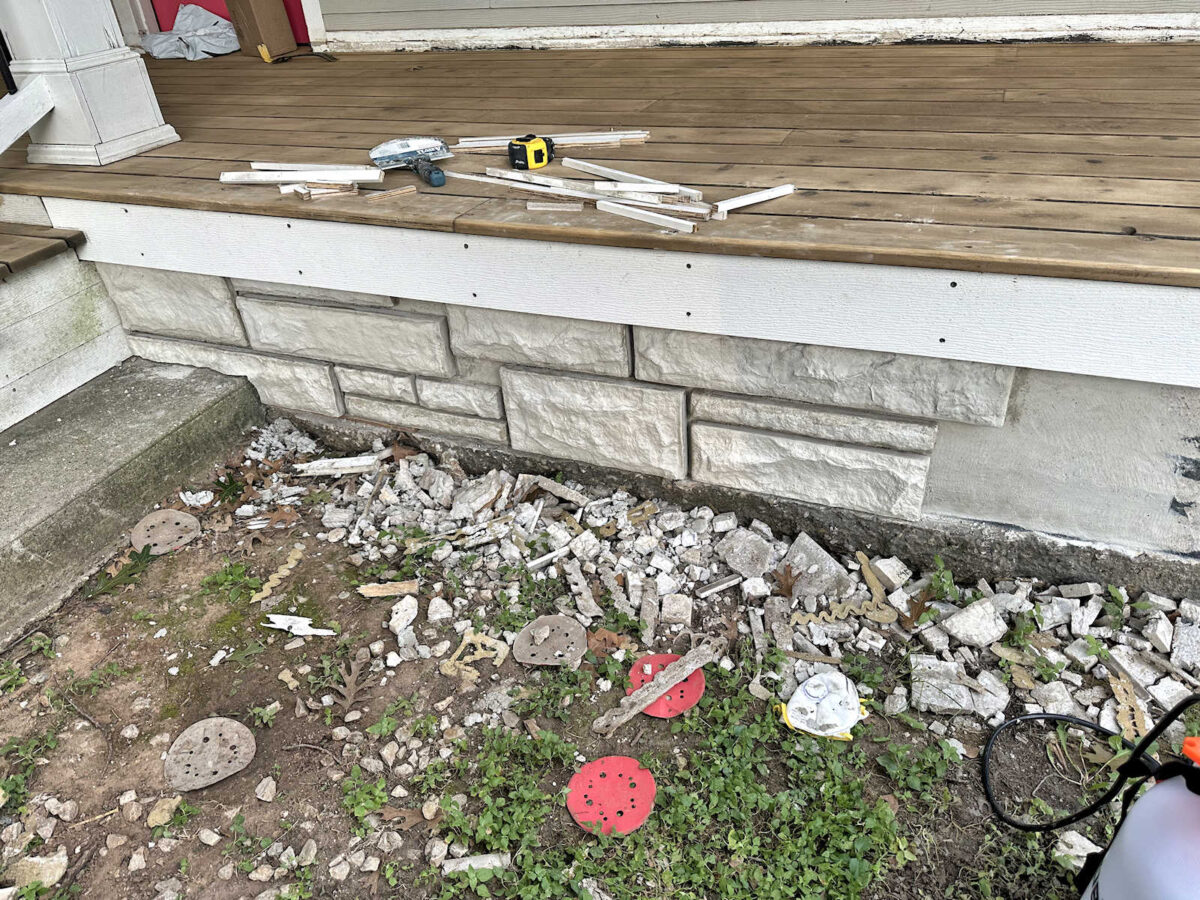
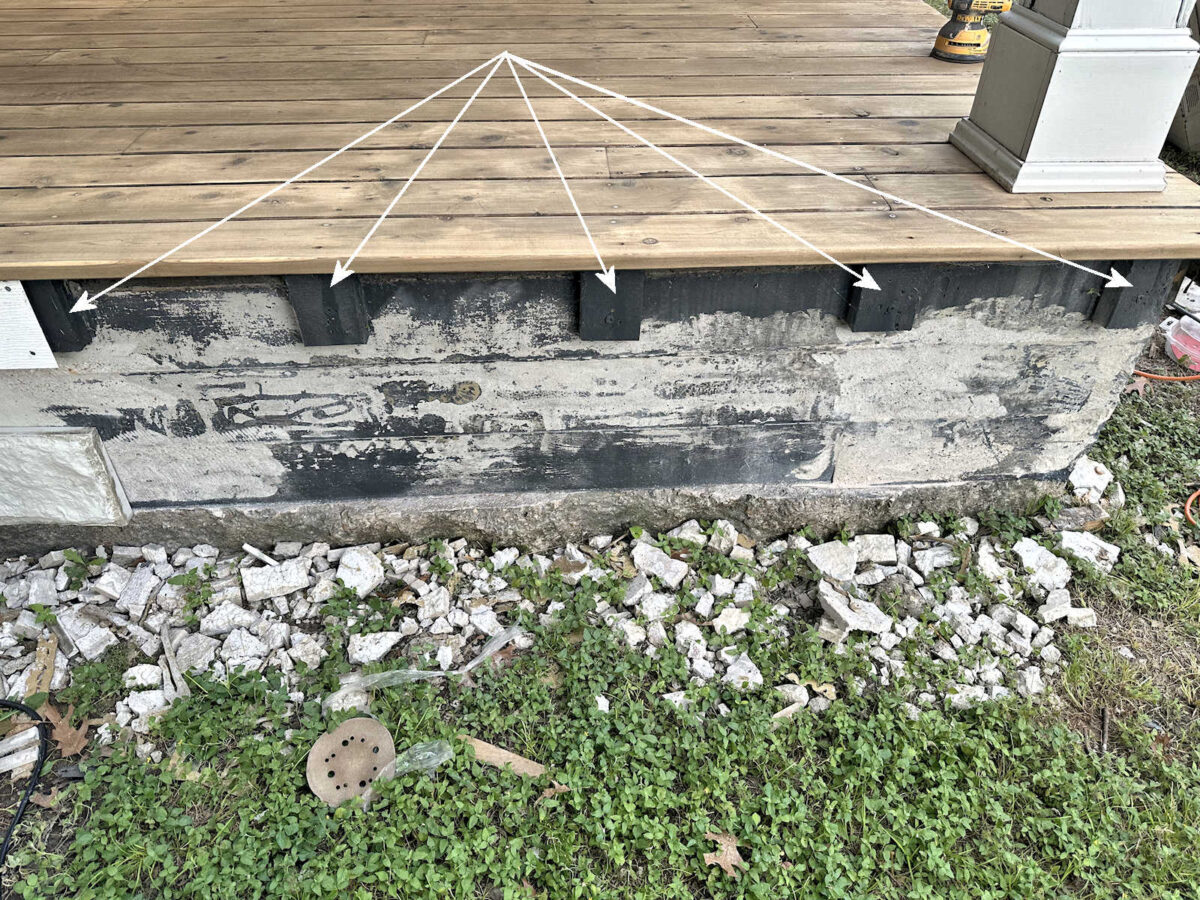
This is what the skirting area looked like when I started my work yesterday. I had used my handheld grinder to grind the concrete on the skirting area about halfway across the front. I still needed to grind the rest, but I was too anxious to start attaching the faux concrete stones, so I decided to jump right in. But before I attach the rest of the stones, I’ll still have to grind down the rest of the front to make sure that all of that paint is removed and all of the ridges in the concrete are gone.
To attach the faux stone facade, I used Rapid Set Mortar Mix. And let me tell you, the “Rapid Set” name is truth in advertising. This stuff sets up very fast, so I mixed it up in very small batches. Once it starts to set, you can’t add more water and try to thin it down and make it workable again. Once it starts to harden, you just have to throw any leftovers away and start with a new batch.

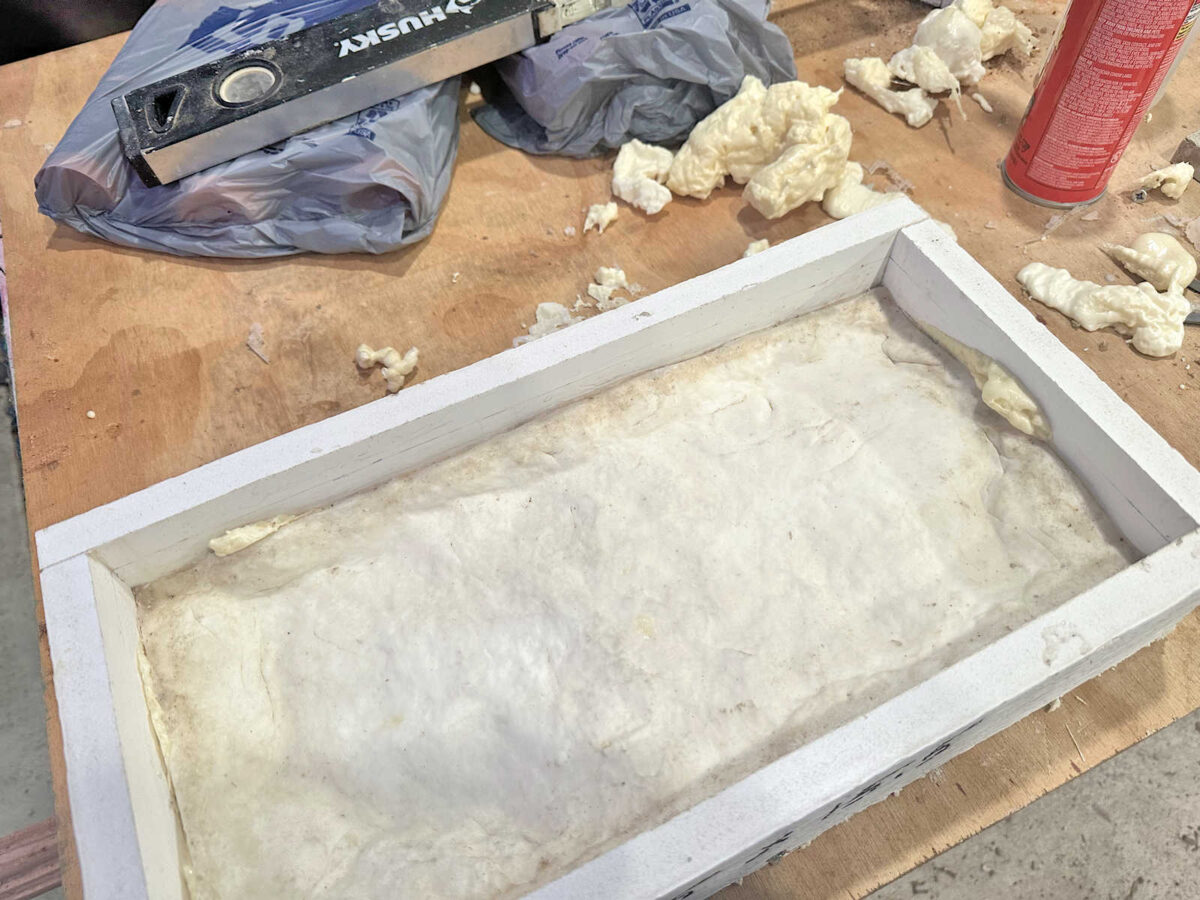
I was mixing such small amounts at a time that I used this 4-liter bucket from Home Depot and mixed the mortar with a handheld kitchen mixer.
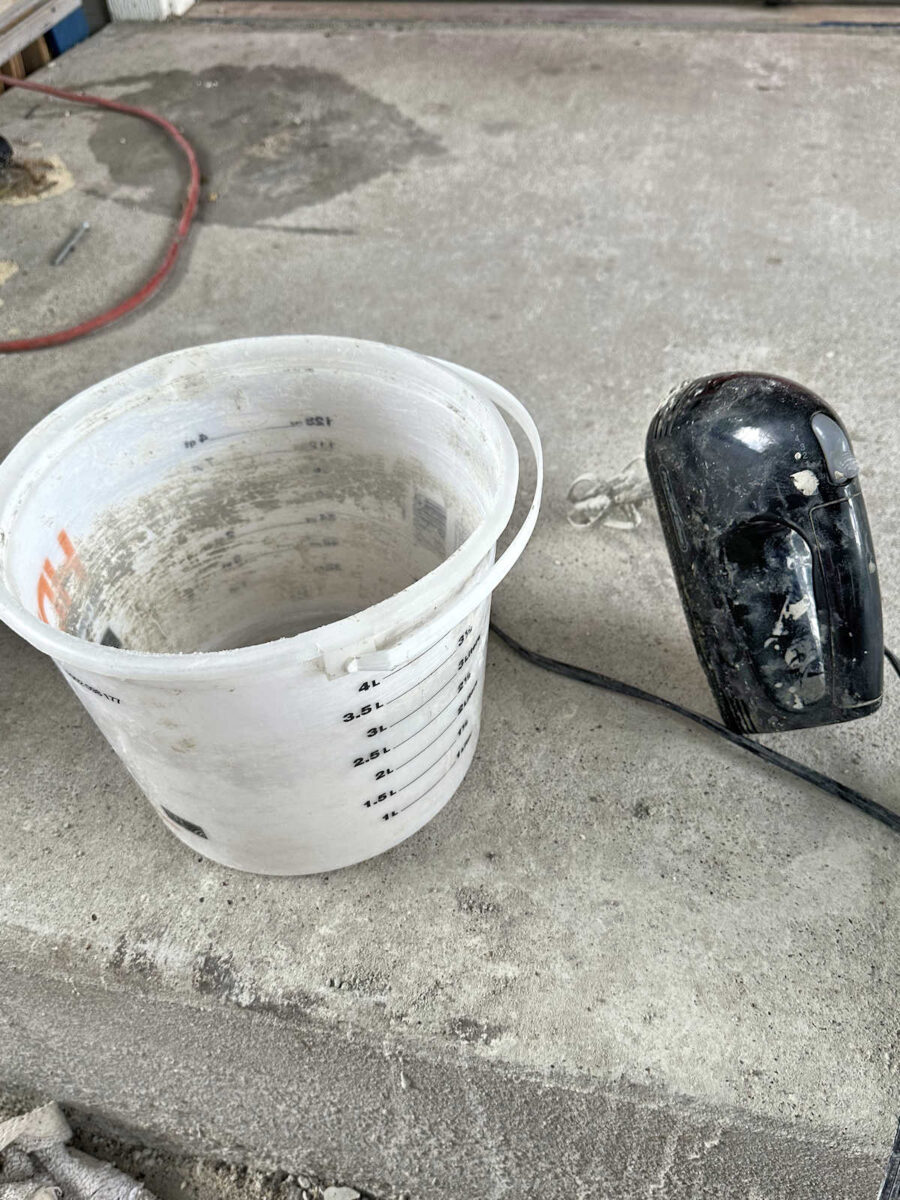
I learned the hard way when I was making the faux stones that it’s imperative to add the water to the bucket first, and then slowly mix in the concrete or mortar mix. The ratio for the mortar mix is about 1 part water to 4 or 5 parts mortar mix. I found that one liter of mortar mix and to one cup (8 ounces) of water worked really well for me. Since I was mixing the mortar in the carport and then carrying it to the front porch each time, by the time I got it mixed, walked to the front porch, prepped the stone and the porch area where the stone would go, and was ready to butter the back of the stone, it was the perfect consistency.
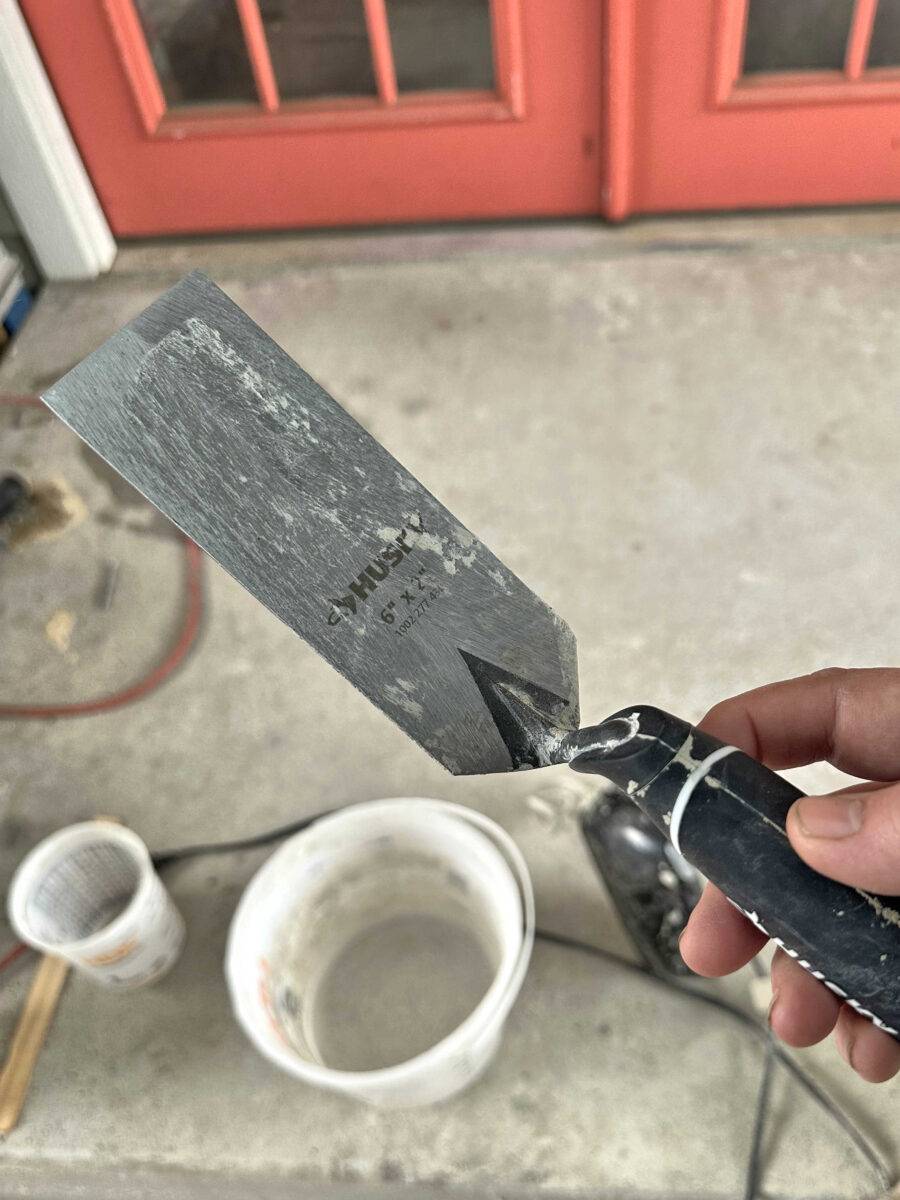
To butter the backs of the faux stones, I used this 6″ x 2″ trowel from Home Depot.
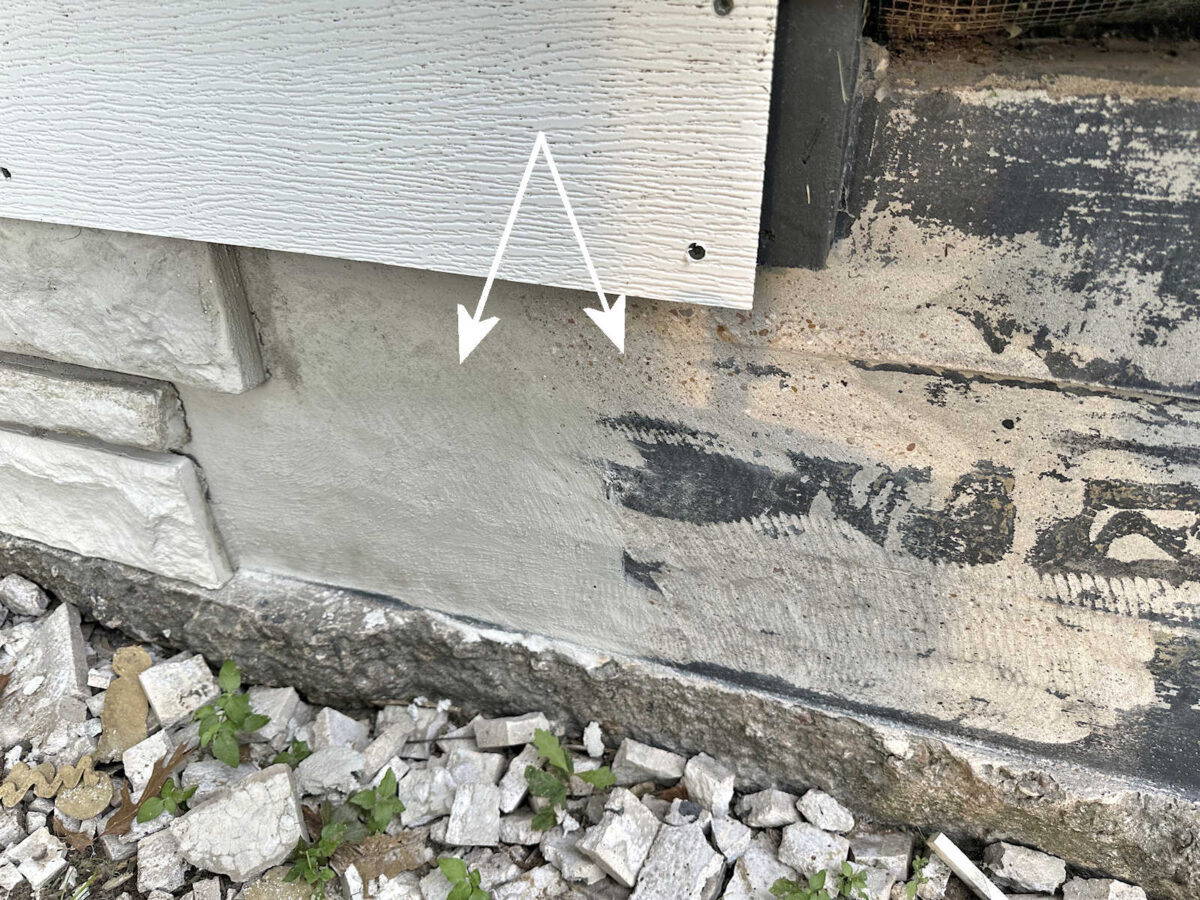
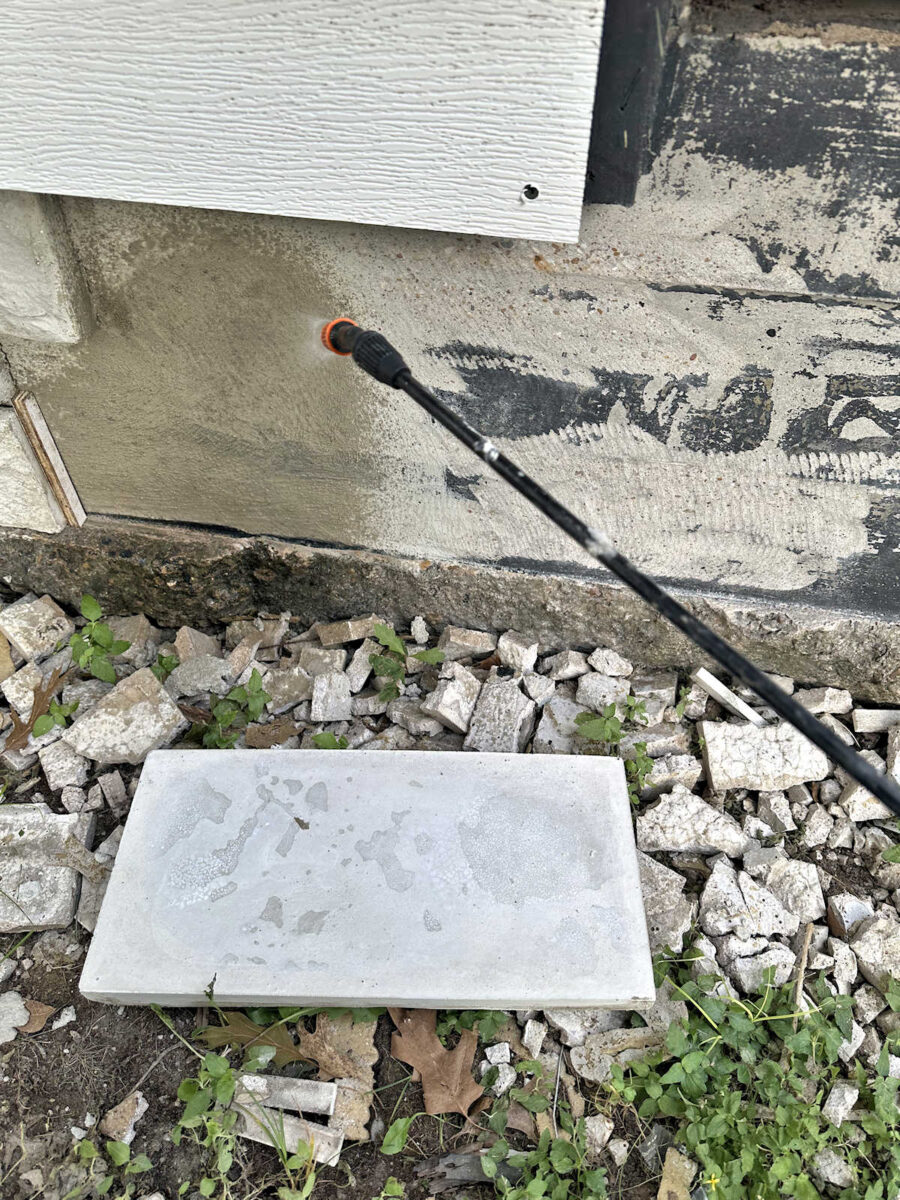
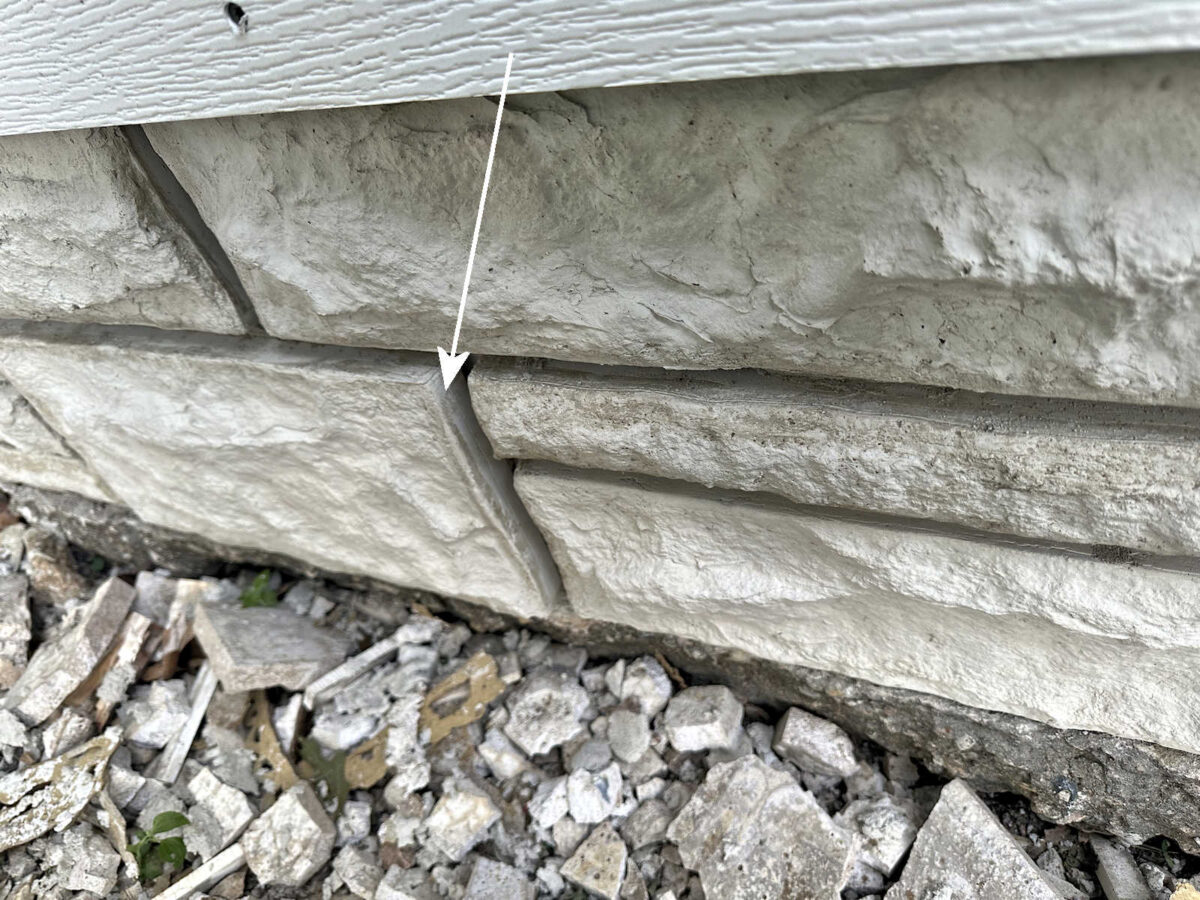
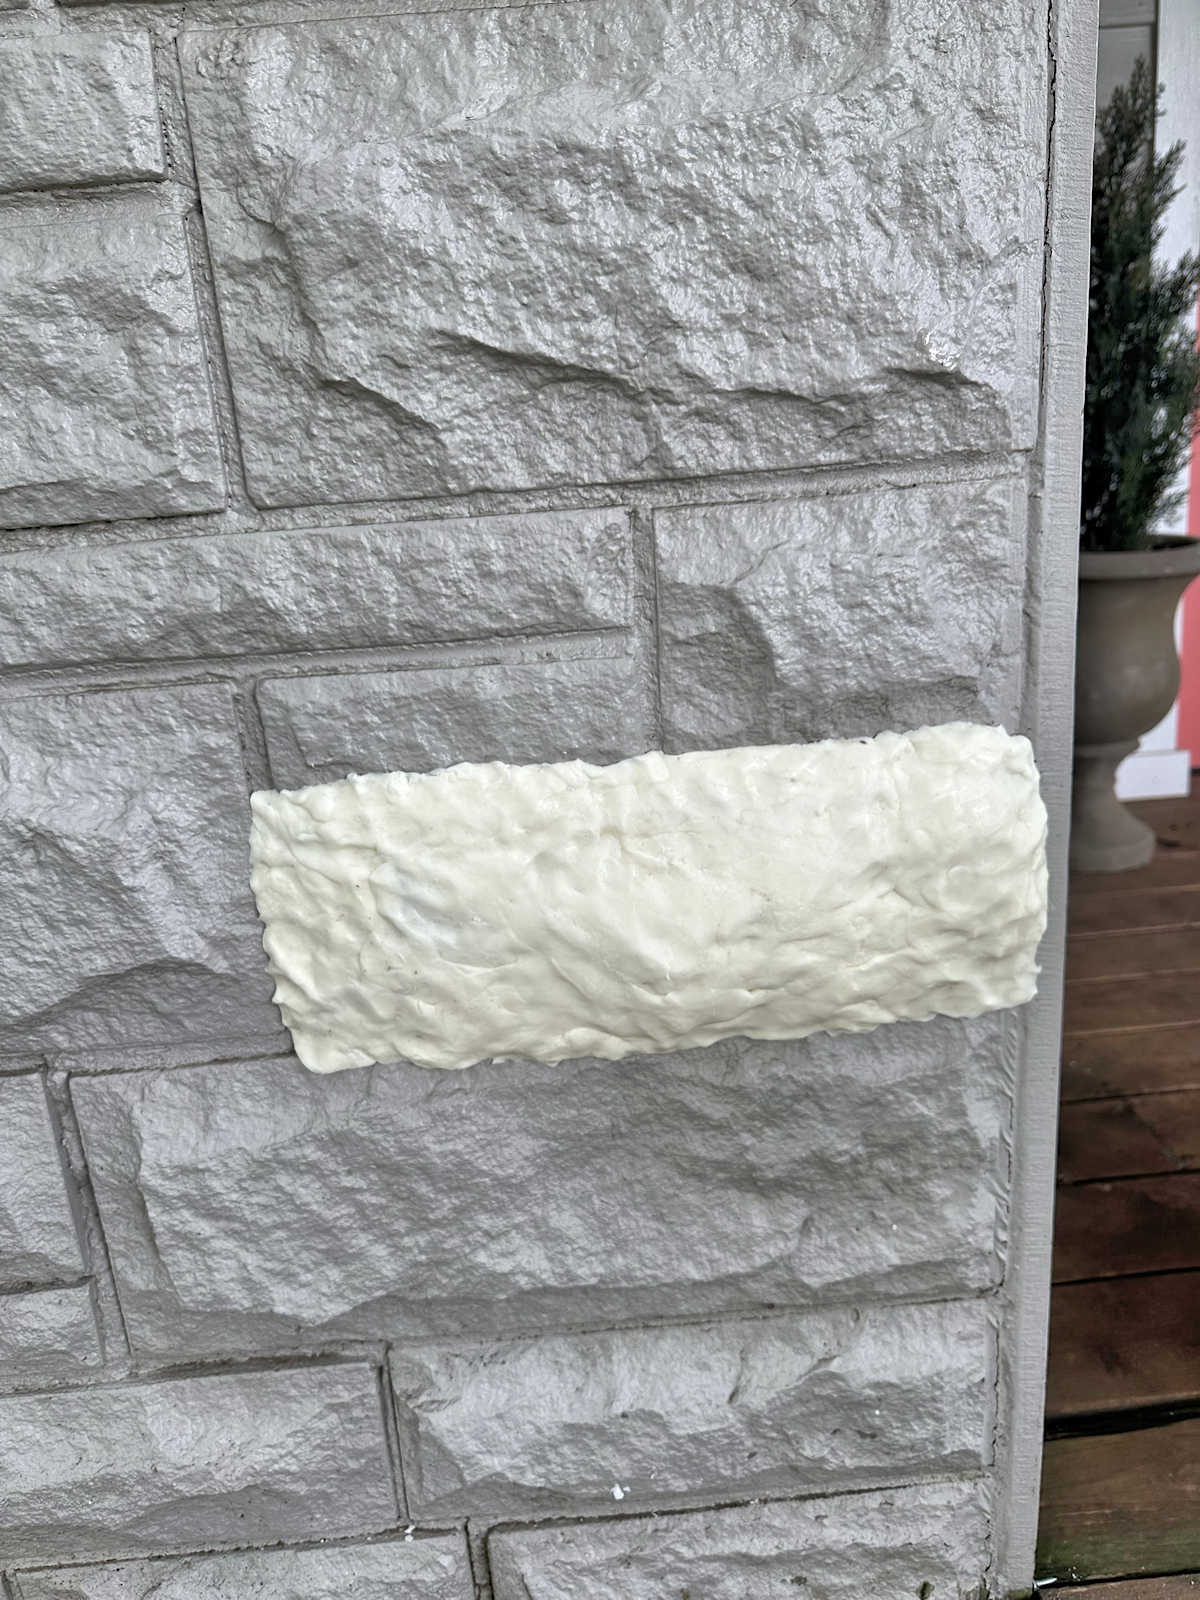
But before I even started mixing the mortar for the stones, I first parged the concrete on the porch. Parging simply means that you’re putting a super thin layer of mortar on top of the concrete. The purpose is to fill in any holes and cracks and to smooth out any problem areas. First, I sprayed the area down with water, and then I actually used my hands (which I found to be much easier and faster than trying to use a trowel in such a small area) to spread a super thin layer of mortar mix over the concrete. You can see the difference below in the area that is parged and the area that is the original concrete. You can still see the aggregate in the area that hasn’t yet been parged, but you can’t see any aggregate on the parged section.
When I was ready to attach the stones, I actually worked from the top down. I know this probably seems counterintuitive, but the reason I did this is because these blocks to which the fascia boards attach are all the same height, and they’re all level. So that made it so much easier to just push the top row of stones up against those blocks as a starting point and then work down from there.
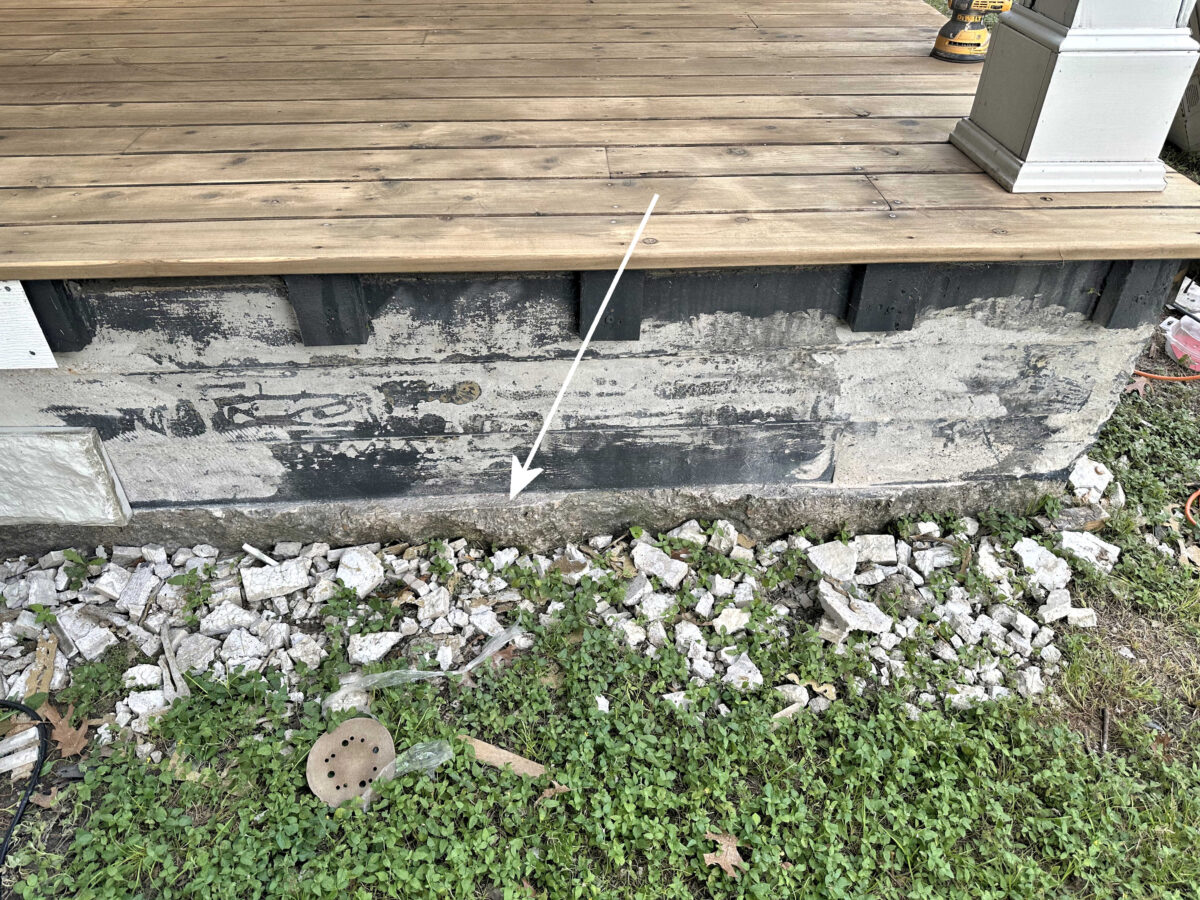
Had I started at the bottom and worked up, it would have been more of a guessing game because this ridge at the bottom isn’t level at all.
But because the mortar sets up so quickly, working from top to bottom wasn’t a problem at all. So here’s the process I used. After parging the section that had been ground and smoothed using my handheld grinder, I mixed up a small batch of mortar. Then I used my handy tank water sprayer…
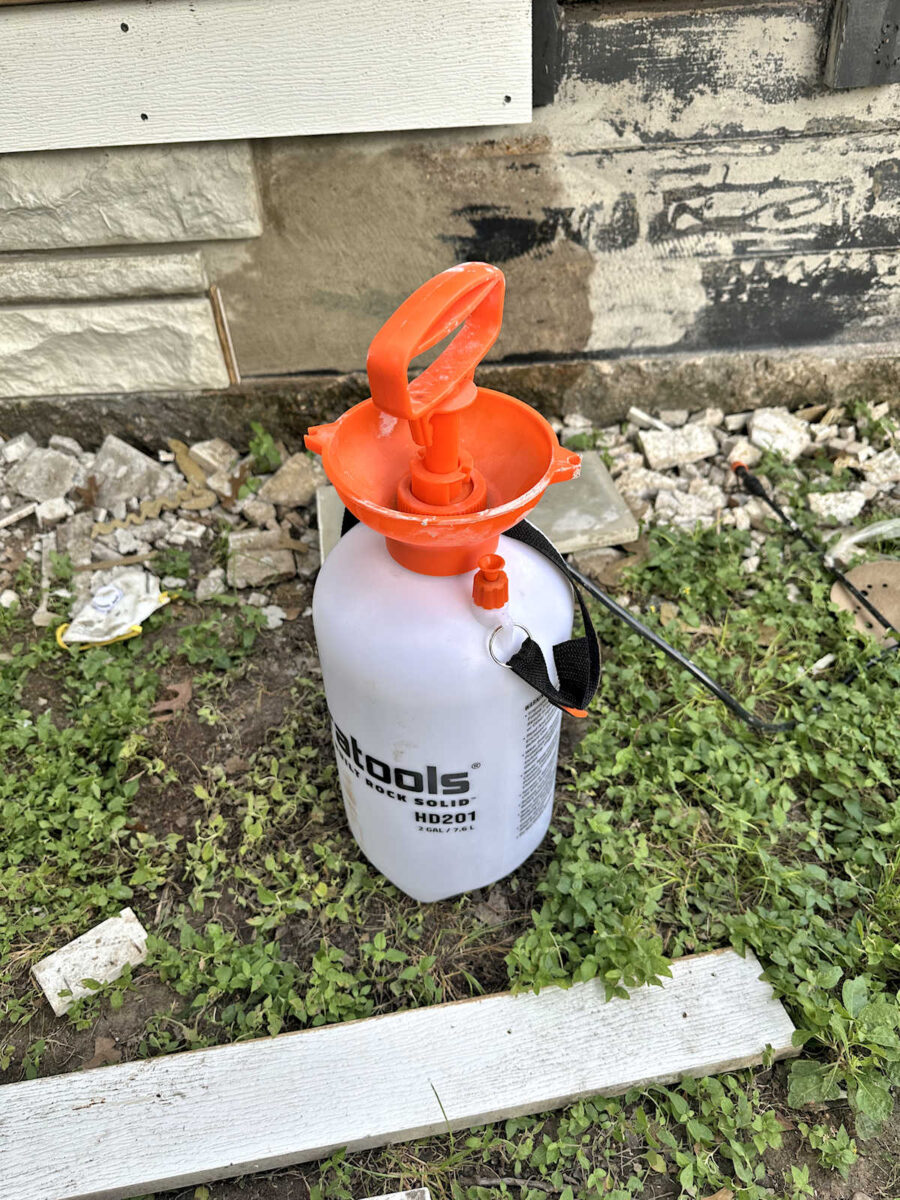
Then I sprayed down just the section for the next stone…
And then I sprayed the back of the stone as well…
Then I used my trowel to butter the back of the stone with the mortar mix. I didn’t get a picture of this because I had to work really quickly, but I made sure that every bit of the back of the stone was covered, and if I had to guess, I’d say I put the mortar was about 1/2-inch thick on the back of the stone, but maybe just a bit less than 1/2-inch. Then I pressed the stone against the skirting and gave it a good wiggle while pressing hard to make sure that the whole thing was making contact. Then I added my spacers (cut from 1/2-inch plywood) and braced the stone in place.

In under ten minutes, I could remove the spacers and the bracing. That’s how fast this mortar mix sets up. I probably could have removed them in less time than that, but I had a pretty good system worked out. By the time I scraped the extra mortar out of the bucket, cleaned off my trowel, and mixed my next batch of mortar, I could remove all of the spacers and bracing on the stone I had just attached and attach the next one.
This is as far as I got yesterday because part of my workday yesterday had to be spent going to Home Depot to pick up all of the materials. I had hoped to do that on Wednesday so that I would have more time to work yesterday, but that didn’t work out.
Throughout the whole process, I had my map pulled up on my phone so that I could make sure the stones were going on in the right order.

You can see that I have two very small sections don’t have stone on them yet, and if you check the map above, you’ll notice that those are two areas with the asterisks, which means that I have to cut stones to fit those areas.
One thing that I learned the hard way is that I can only mix up enough mortar for one stone at a time since it sets so quickly. It’s a little annoying, but once I butter the back of a stone, get it set in place, and get the spacers and braces in place, any mortar left over is already too thick. I tried mixing up a bigger batch so that I could do two stones with one batch, but that resulted in the second stone sitting further away from the concrete than the stones around it.
When the mortar is freshly mixed, it has a very nice, workable consistency that allows you to press the stone in place, and the mortar squishes out from the sides of the stone. Then that mortar that squishes out can be immediately removed before it sets. But once the mortar gets too thick, there’s no mortar squishing out from the sides. So I couldn’t press this stone to the concrete as far in as the ones around it.
It’s not a big deal. Once I get the spaces between the stone mortared, I don’t think it’ll be noticeable. But I learned my lesson the hard way. I mix a new small batch of mortar for every single stone. That makes the process a slower, but the result is much better, and the freshly mixed mortar is so much easier to work with.
So that’s the progress so far. I’m really excited about how it’s turning out! I’m going to keep plugging away on this over the weekend, and we’ll see just how far I can get before Monday. I have high hopes that I can get it finished, but I’m holding that goal very loosely. Once I get to the wonky corner and have to marry the stones on the front with the ones on the side of the porch, I anticipate that I’ll run into a challenge that may slow me down quite a bit. But I’m determined to figure it out. I’m too excited about the progress to let a potential future problem get in my way.
I mean, can we just take a minute and remember that I MADE THOSE! I made those faux stones from scratch. I made the textured silicone mats from the stones on our house…

I built the molds to fit around the silicone mats…
I poured each and every stone from concrete…
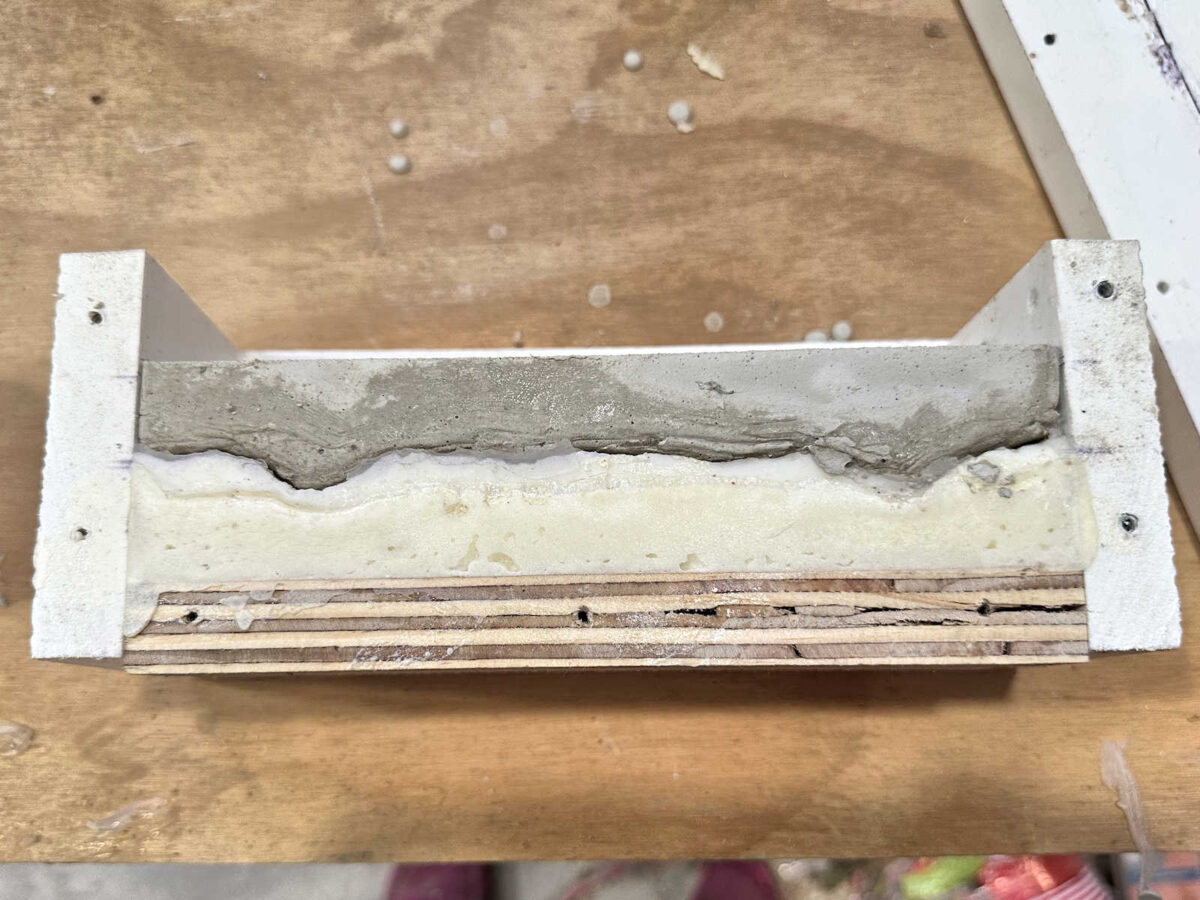
And they turned out looking almost identical to the original stones on our house…
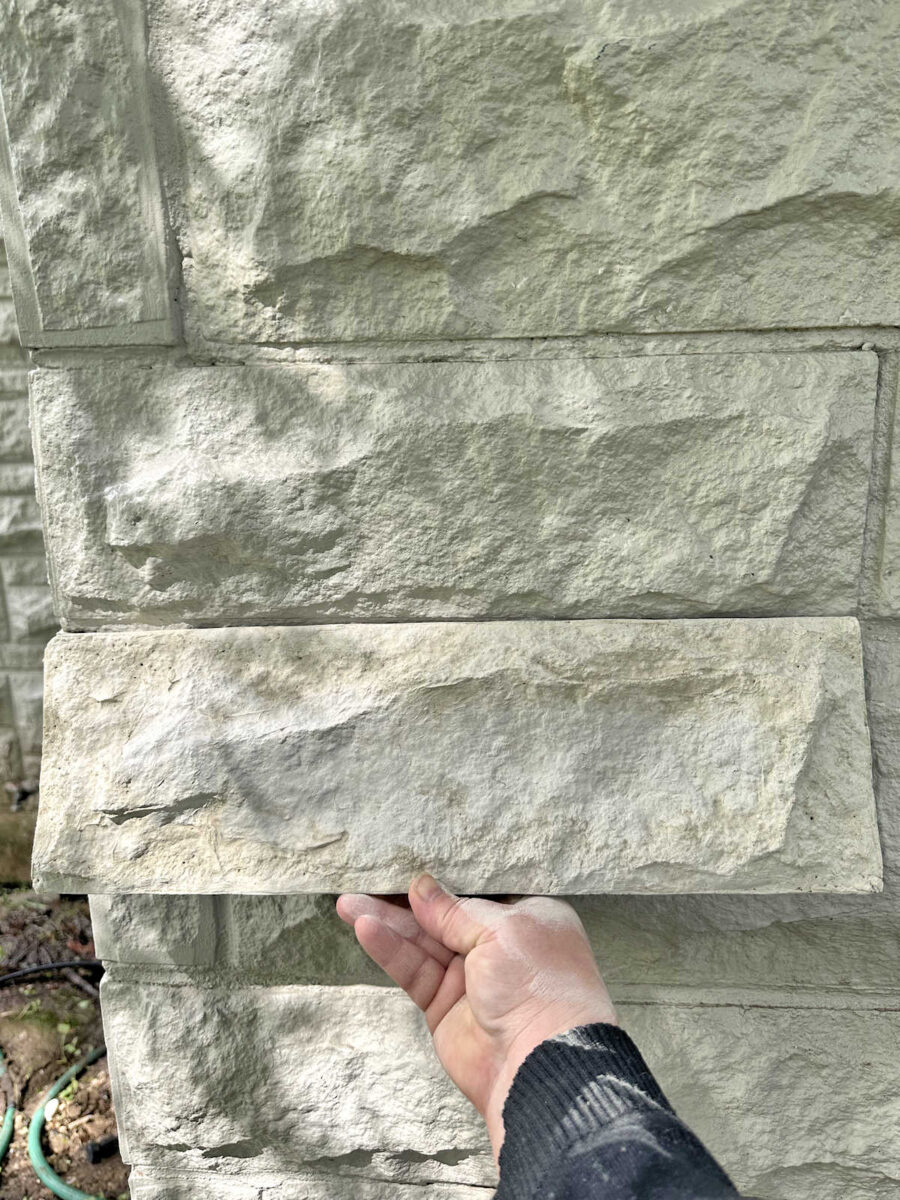
And now, here they are on our front porch…
My whole plan is actually working! Is there anything more satisfying than having a grand plan (and one that probably sounds pretty crazy to most people) and seeing it actually come to fruition? Few things can compare to that feeling of satisfaction.
More About Our House Exterior & Yard

see all exterior &
yard diy projects

read all exterior &
yard blog posts

Addicted 2 Decorating is where I share my DIY and decorating journey as I remodel and decorate the 1948 fixer upper that my husband, Matt, and I bought in 2013. Matt has M.S. and is unable to do physical work, so I do the majority of the work on the house by myself. You can learn more about me here.


I love it…looks GREAT! Can’t wait to see it all finished.
Wow!! Is there anything you cannot do? You’re a seriously amazing, talented, and extremely skilled woman. I admire you so much. Thanks for keeping me on my toes and giving me inspiration to keep working on our home.
This looks so good!! Well Done, Kristi!!
What a labor of love – what craftsmanship! I’m gushing I know, but really, very impressive.
I cannot believe how great that looks! You are amazing! I’d never have the patience for that. I’d plant a bunch of shrubs and hope it hid the porch!
Wow Kristy, it’s amazing what you can do. I’m so happy you figured it out and got exactly what you wanted. It looks wonderful!!
You are amazing. Well done!
Absolutely a great job so far, and you should be so proud of what you went through to accomplish this pretty look. Looking forward to seeing it all done. 👍
I admit I had my doubts when you started this, but the results are very impressive!
Not sure what your plans are for the mortar between the bricks, but I’ve seen it done using a piping bag, like decorating a cake. You can completely control where the mortar goes with little mess.
That’s my plan! I bought the mortar bags yesterday. And for the mortar, I’ll also add a product to the mortar called Set Control, which slows down the curing process and keeps the mortar workable for a longer period of time. I think it adds about 15 minutes to the workable time, so I’ll still have to do small sections at a time, but at least I’ll have those extra 15 minutes.
Brilliant!!
Very impressive and amazing! So excited for you! Is there a way to use the thickened mortar to build up the corner? Maybe snap string lines (like laying out for a foundation) to see how far out you need to build up to be level on each side.
Adding my “amazing!” 😍
One would never know they aren’t full stones? WOW!