Porch Skirting Progress And My Favorite Sidewalk Option
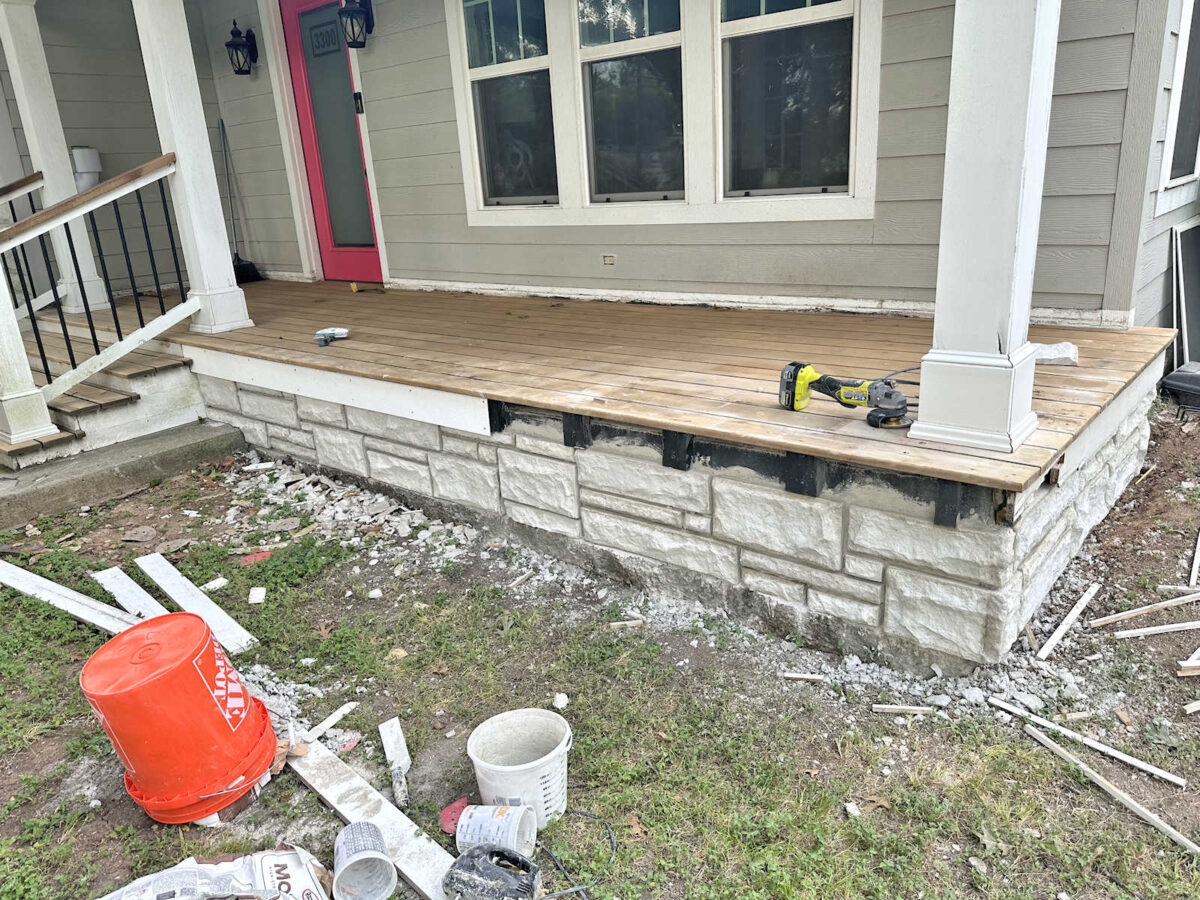
I know this porch skirting project is starting to seem like the never-ending project, but yesterday, I got every last stone in place, including all of the little ones that I had to cut and reshape with my handheld grinder. And for the first time since we’ve lived in this house, every bit of the porch skirting has a pretty facade on it. I am so proud of how this project is shaping up.
I got the very last stone in place at 9:00 last night. I was exhausted, but I was so determined to get that part of the process finished before I went to bed. Here’s the front of the porch with all of those little stones in place…
And here’s the side of the porch with all of it stones in place…
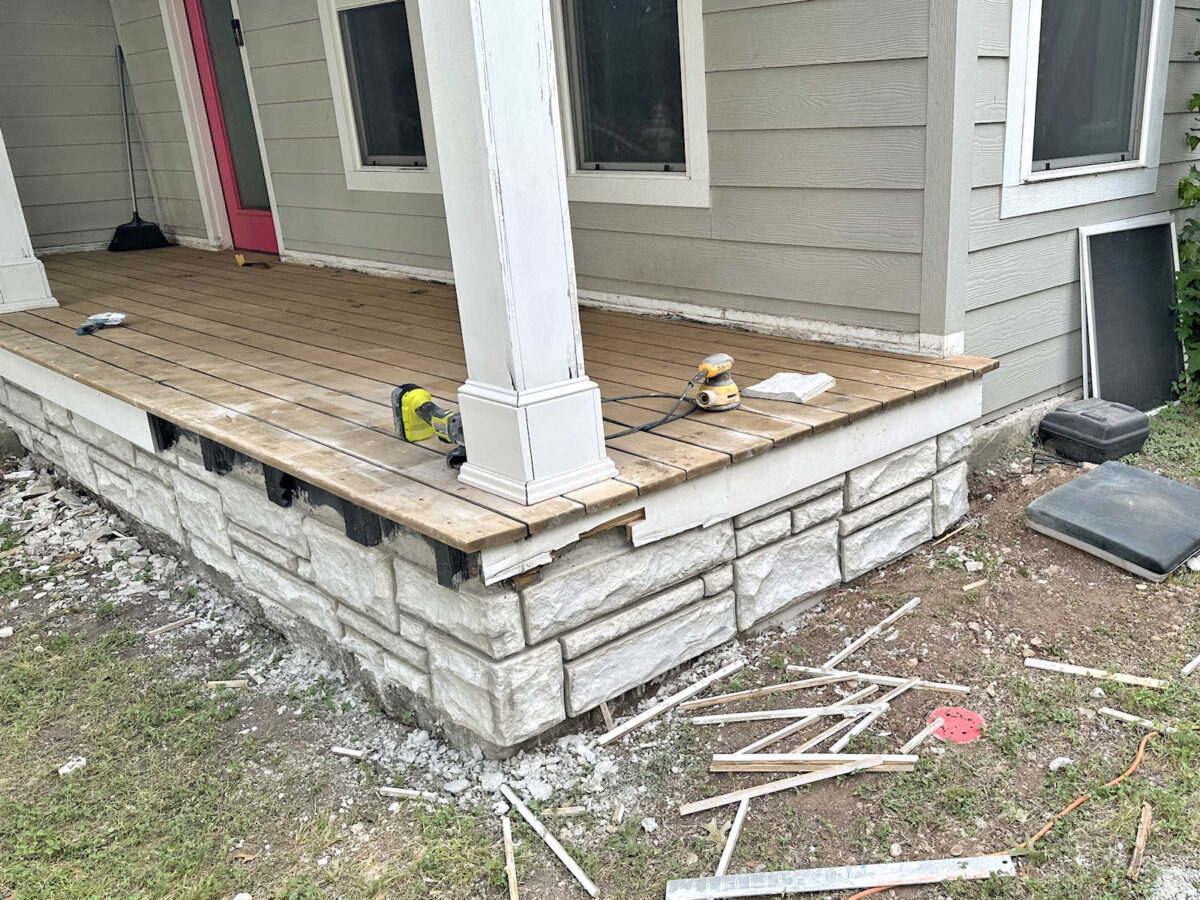
And once again, just like I did on that front corner, I cut those two stones on the end with a straight cut on my wet saw, attached those, and then used the wet but firm grout mix to shape a corner by hand. But this time, I didn’t attach a poured stone to the other side. Everything you see on that back side was just created by hand using the wet grout mix.
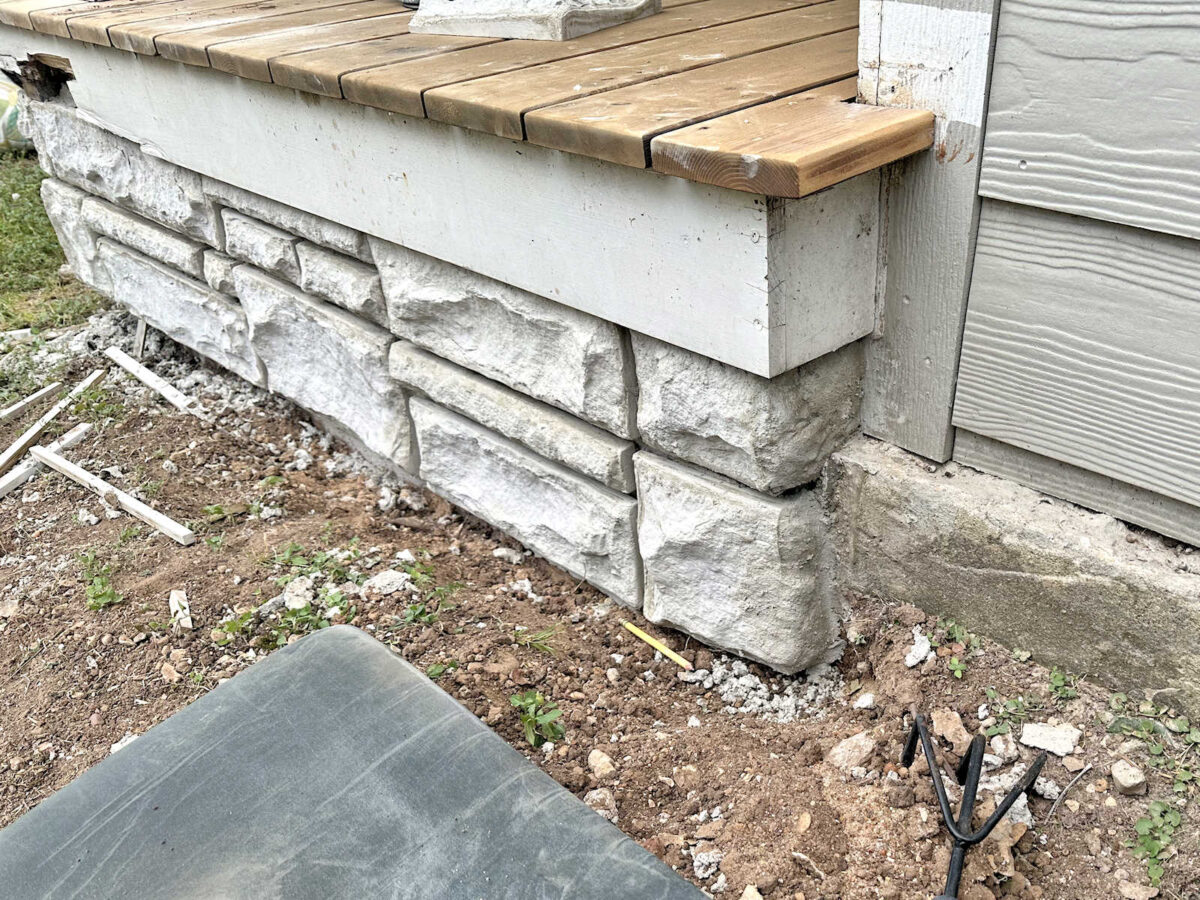
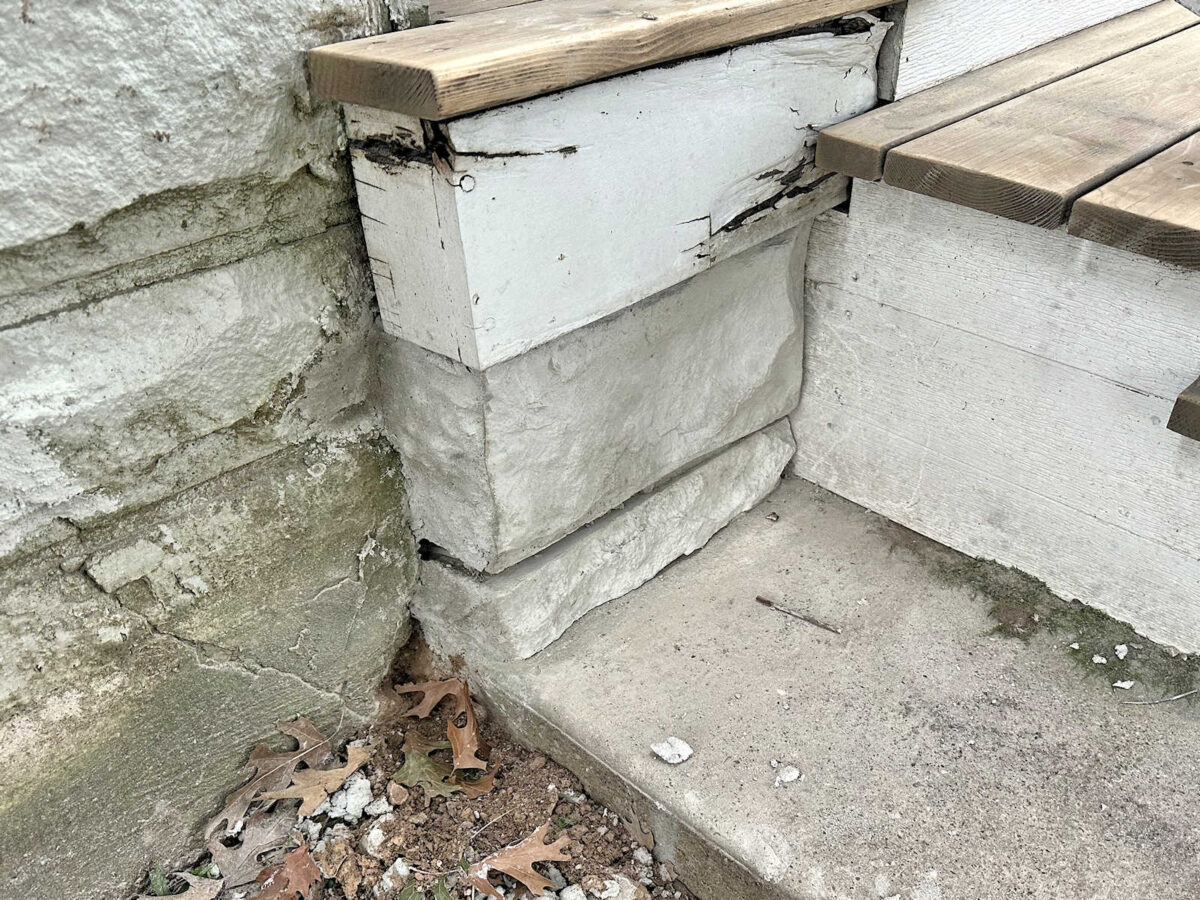
And I didn’t forget the little area to the left of the front steps. Again, please overlook the rotting fascia boards. Those will all soon be replaced. This area was so small that it didn’t even fit one whole stone. I used most of one stone and a scrap piece from another one that I had cut off for the other side of the porch.
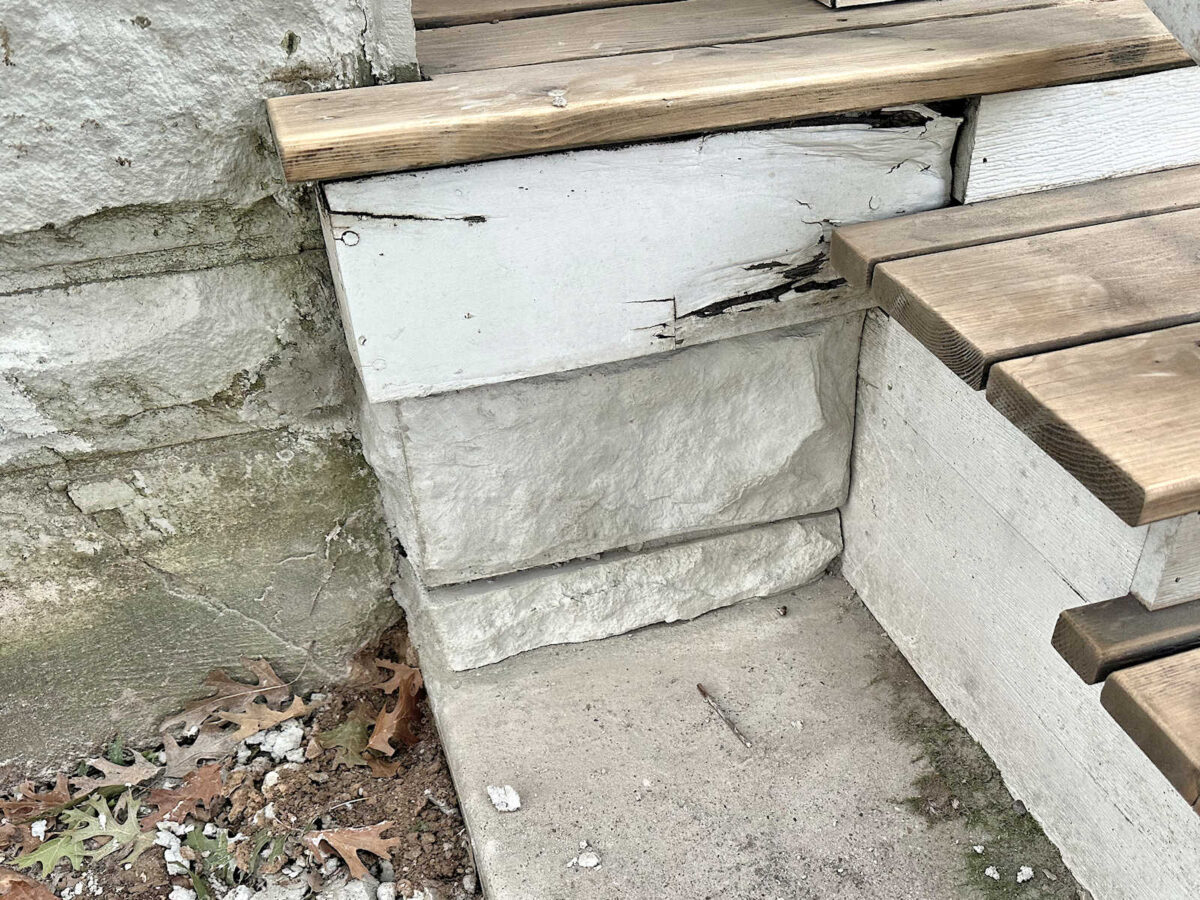
And then I shaped the sides by hand using nothing but the wet mortar mix.
I am so thrilled with how this is looking so far. Of course, it’s not quite finished. I still need to add the mortar between all of the stones, and then I have to wait 16 hours before I can prime and paint the stones so that they match the stones on the rest of the house. But during that waiting time, I can get the fascia boards replaced and painted.
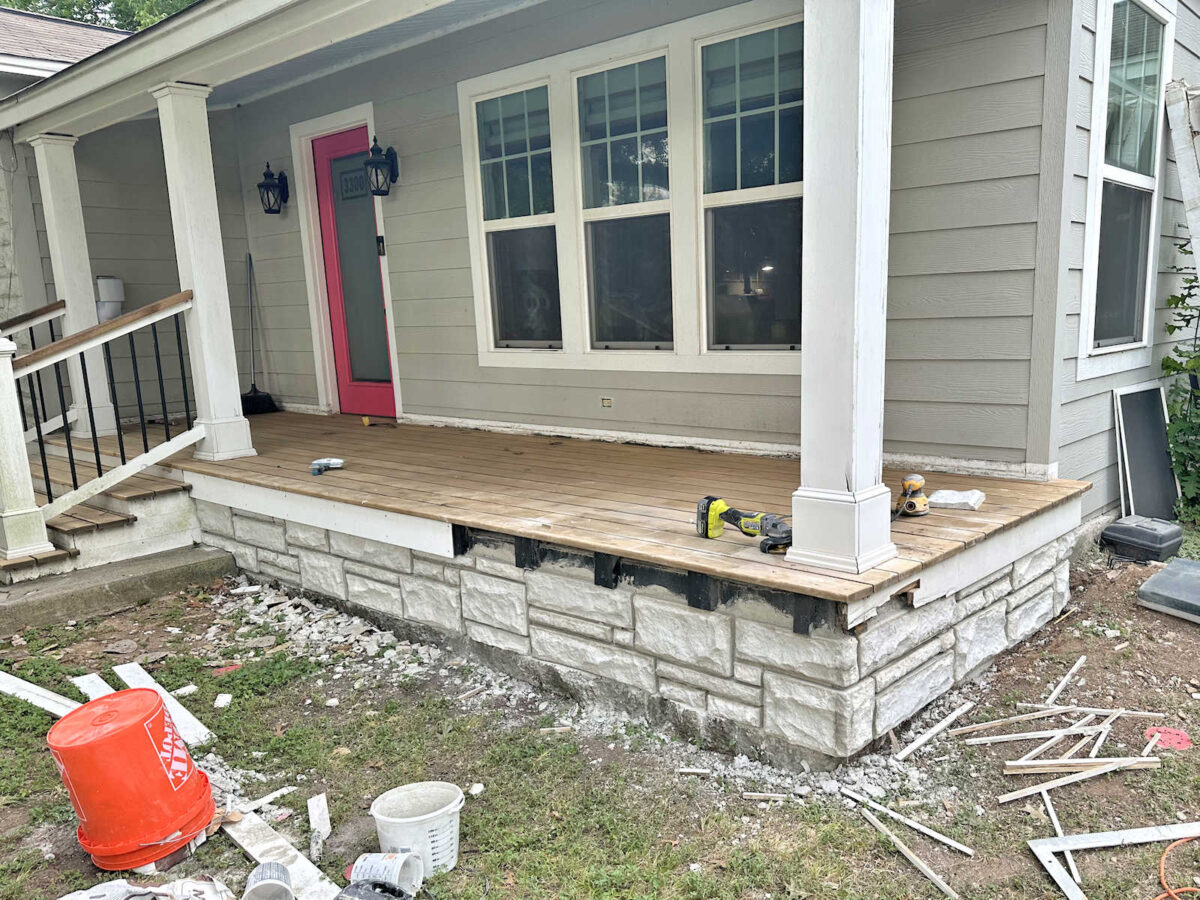
And, of course, I have a whole lot of cleaning up to do. My front yard around the porch looks like a construction zone right now.
During this whole project, I have found myself daydreaming about other outdoor projects — landscaping, hardscaping, etc. I really want to get the walkway done sooner than later. I’m talking about the walkway that will join the front sidewalk to the driveway. I feel like I need to get that in place before I can start on any landscaping around the porch, breakfast room windows, and the front of the studio since that walkway is what separates the planting bed area from the grass (or weeds that we have now 😀 ).

I have looked at all kinds of options for these front walkways, from concrete to decomposed granite. What makes it challenging is that these walkways are part of a walking path that I want to continue as a complete loop around our entire one-acre property…
Concrete is the most obvious option, but it would cost a fortune to have someone else pour that whole thing with concrete. Of course, now that I’m a concrete expert 😀 , I actually think I could pour a concrete path on my own, so that would cut down on the cost considerably. And it wouldn’t all have to be done at the same time. I could do one section at a time between other projects until it’s all finished. That may take ten years to get all the way around our property 😀 , but I do think I could do it one section at a time. Now that I’ve done a pretty big project with concrete, I feel way less intimidated by the idea.
The good thing about concrete is that it’s wheelchair friendly for Matt. But the bad thing about concrete is that it’s really hard on the feet and legs, and since I want this to be a walking track so that I can walk laps around our yard instead of walking in the neighborhood where there are always stray dogs, I don’t really love the idea of doing the whole thing in concrete.
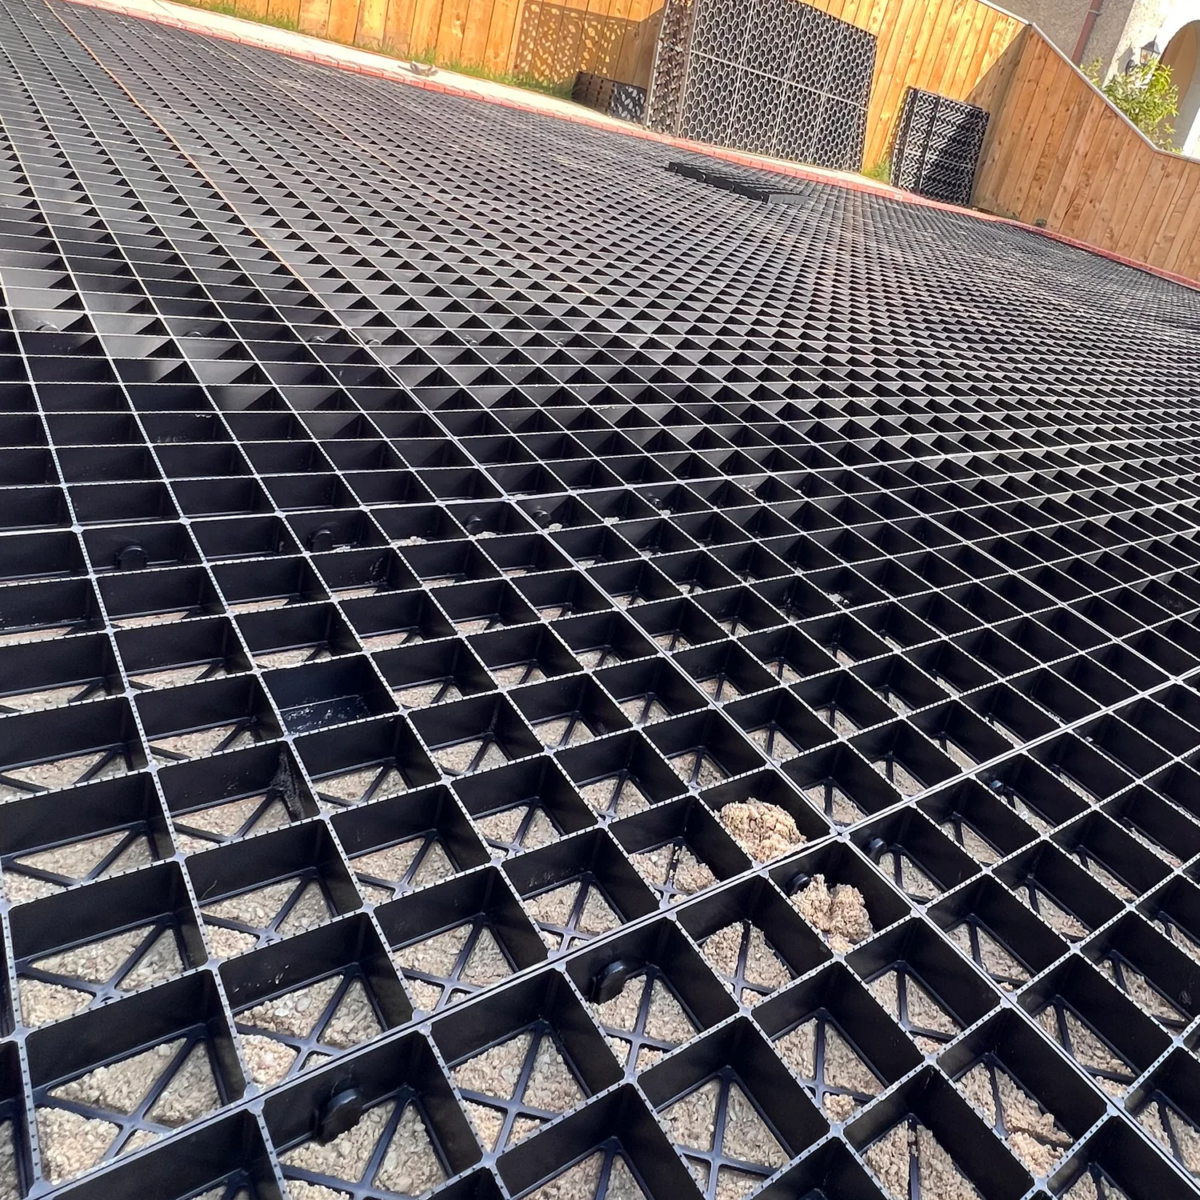
But yesterday, I remembered an option that I had considered when I was looking at options for our driveway. Obviously, we ended up going with concrete for our driveway, and I’m glad we did that. But I think one of the options I looked at for the driveway might be the perfect option for these walkways, and that’s the gravel option using gravel grids. The grids are really rigid plastic that hold the gravel in place creating a firm walkway. They can even be used for a driveway.
This is what the grids look like. They come in different shapes and sizes. This is a brand called Ibran from the U.K.
And once it’s all filled with gravel, it’s even wheelchair friendly. This is a screenshot from their video about the product.
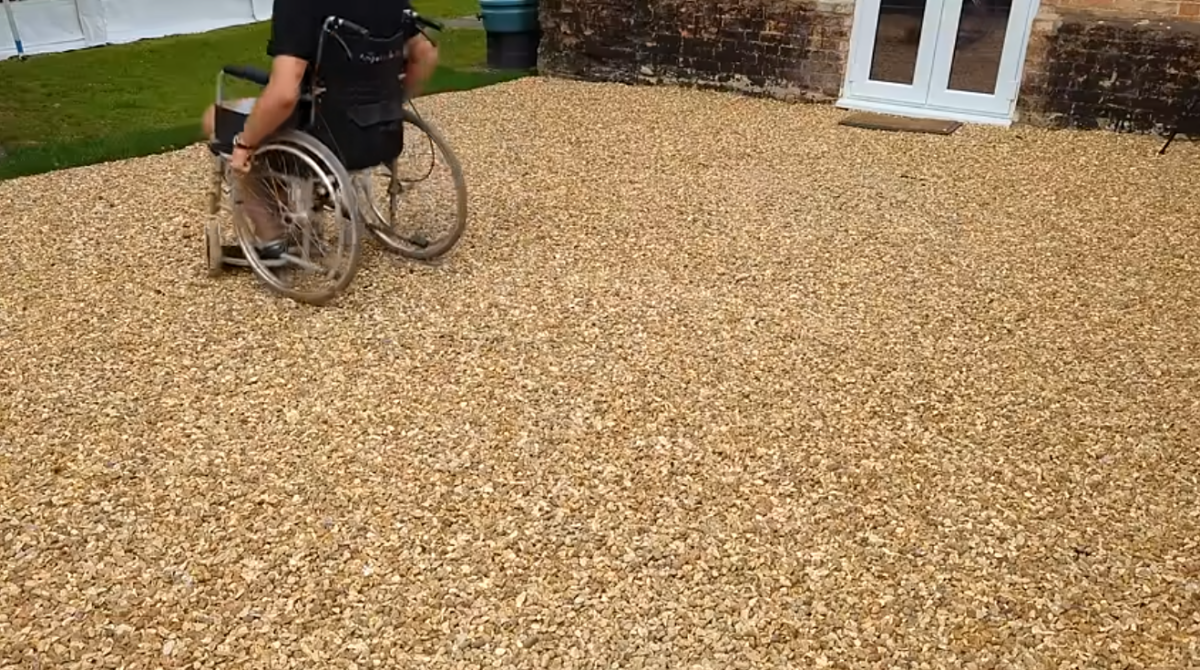
I really like this idea because it can be done one section at a time, it’s DIY friendly, but most of all, I just really love gravel and the added texture, color, and charm that gravel adds. I like the look of gravel much more than I like decomposed granite.
So I think this might be the option that I go with. I’m still looking at options, and I haven’t made up my mind 100% yet, but I can envision this in my mind, and I think it would look so pretty.

Addicted 2 Decorating is where I share my DIY and decorating journey as I remodel and decorate the 1948 fixer upper that my husband, Matt, and I bought in 2013. Matt has M.S. and is unable to do physical work, so I do the majority of the work on the house by myself. You can learn more about me here.


The weeds will eventually come through. 😥
Ooh, Kristi! It turned out so awesome! You should feel very proud 👏. It looks great.
Nice new pic, BTW;-)
That is how we did our back patio. We used Dupont ground grid. It folds like an accordion so the packaging has a small footprint and the product can be cut with a pair of scissors. We leveled the ground, placed a treated wood frame in the size/shape we wanted for the patio then put sand and landscape fabric down. We then spread out the grid and filled. The cells are initially filled with driveway gravel and then topped with the pretty pea gravel. It has held up for about 10 years now with no issues. We do occasionally have weeds pop through but it’s very minimal and they are easily treated with spray or just pulling it up. We absolutely love how it looks and love that we don’t “sink” when we walk on it. It is easy for a wheelchair, bicycle or a wheelbarrow/cart to get across the surface. Good luck!
https://www.dupont.pl/content/dam/dupont/amer/us/en/safety/public/documents/pl/Plantex-PL-groundgrid-installation-guideline.pdf
The stone front looks so awesome — even without paint! A masterful job!
About the gravel grid – I would like to suggest that you find a place that already has the gravel grid installed and try the wheelchair on it. It might not be possible to find a local installation, but better to prove that it works with a wheelchair than to install it and find out it doesn’t work as expected.
The skirting looks great! I am glad you tied it in to the rest of the Austin Stone on the house – it looks like it’s always been there. Excited to see how the gravel grids look, if you go with that option.
I agree about the stone pathway. I didn’t know they made grids. Very smart idea!
The skirting looks fantastic! I’m looking forward to the replacement of the fascia boards to complete the transformation!
For the walkway, I suggest a mixed approach. For the front of the house, create concrete walkways to match the driveway and existing sidewalk for cohesion. Then for the walkway in the back of the house, switch over to the gravel option with the grids. At the left side of the house (where your master bedroom is) you could put a metal arbor over the walkway where it transitions from concrete to gravel to make it “intentional” and a natural place to switch materials.