The Studio Has Lights! (Ultra Thin LED Recessed Lights)
Y’all, the studio finally has lighting!! This area hasn’t had lighting since it was a garage almost two years ago. The lighting all came down before the garage-to-studio conversion started, and it hasn’t had lighting (or electricity, for that matter) since. Any time I’ve needed to use tools or lights in here, I’ve had to run extension cords from the breakfast room.
Well, not anymore!
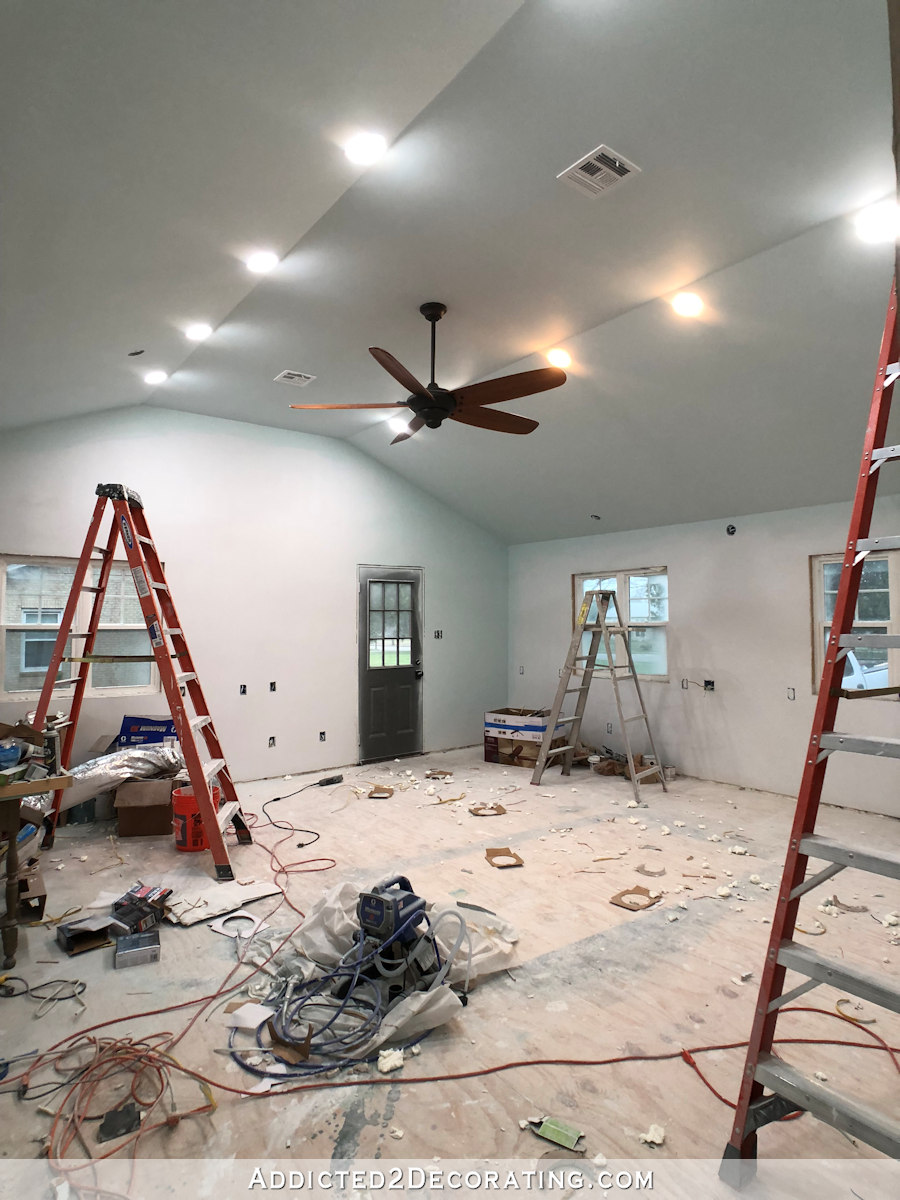
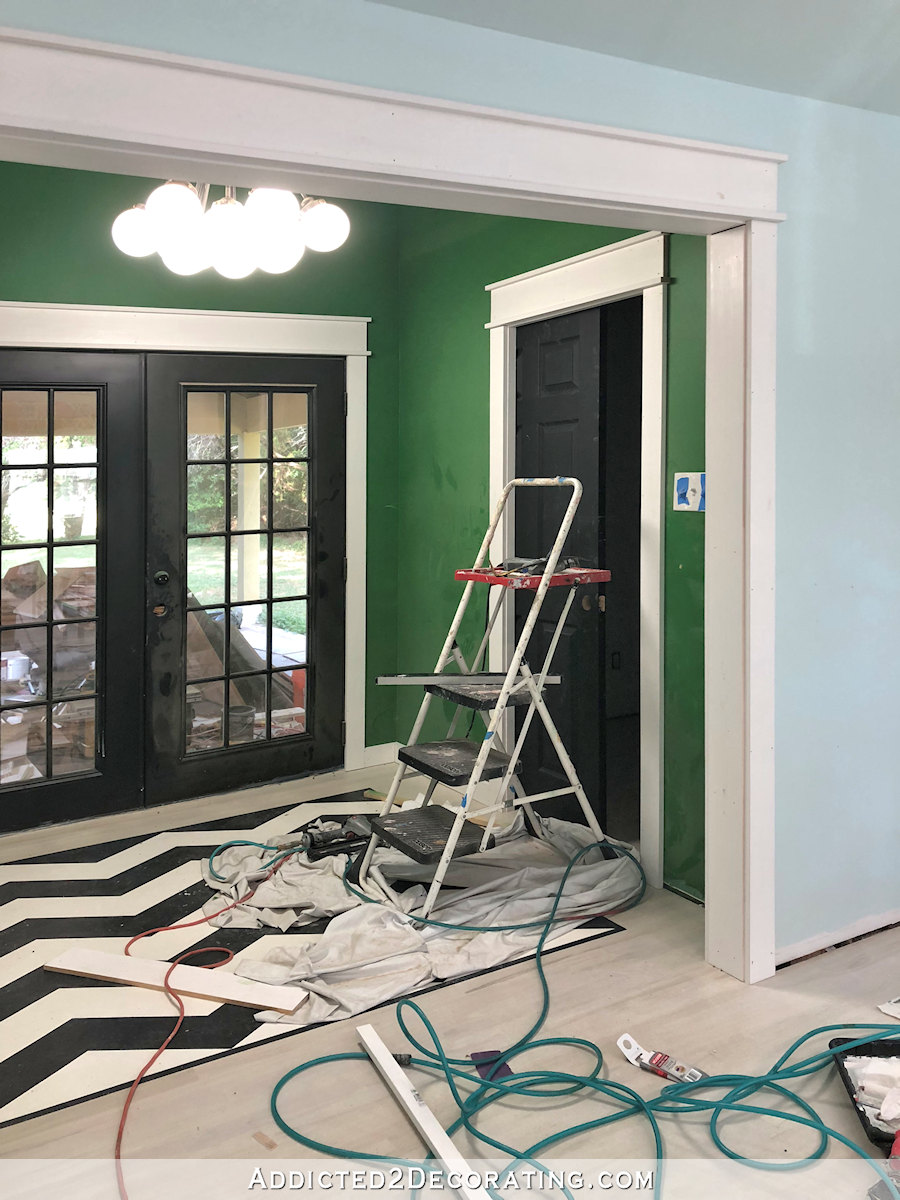
I installed ten of my new favorite lights — these ultra wafer thin LED downlights.
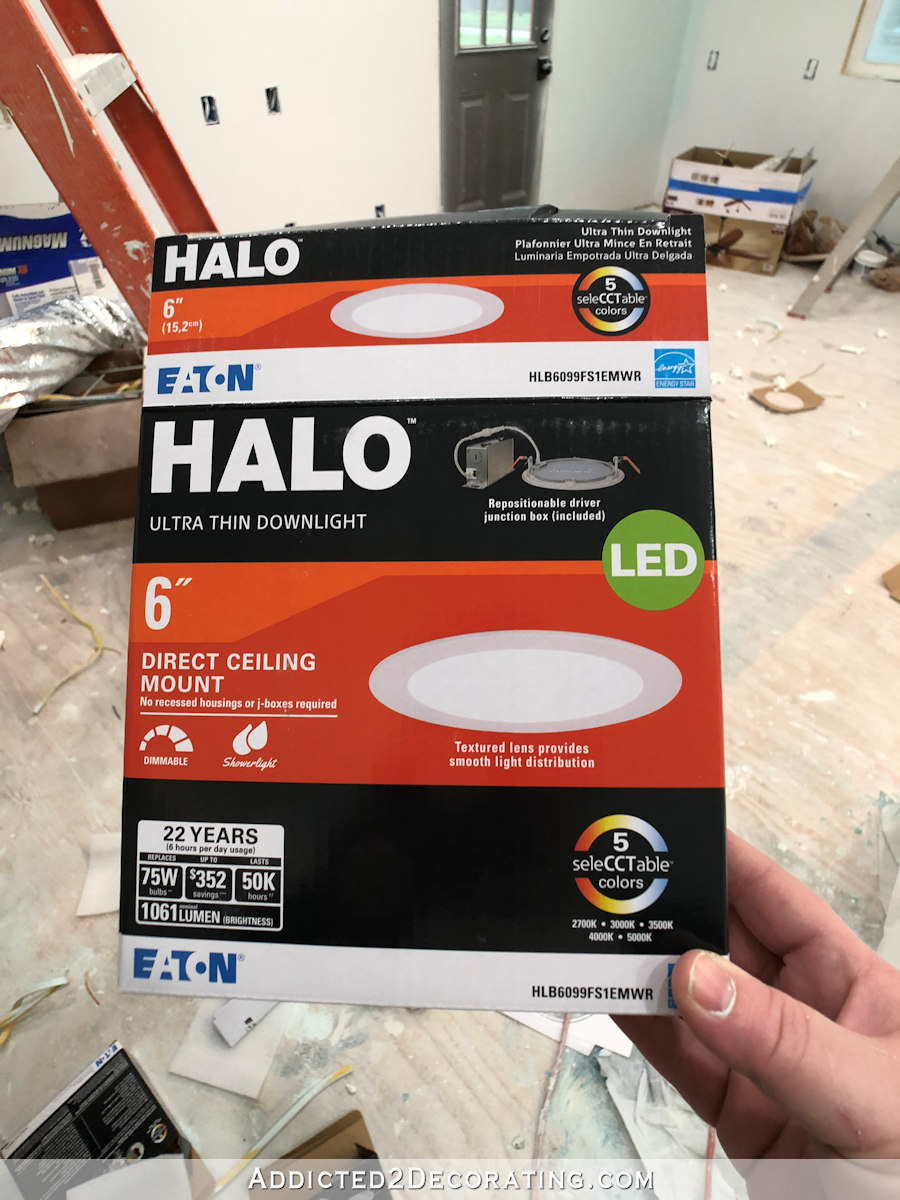
These lights sit flat against the ceiling (you do have to cut a 4.5-inch hole in the drywall) and look like recessed lights. They’re rated for contact with insulation, so you don’t even have to worry about your insulation touching them.
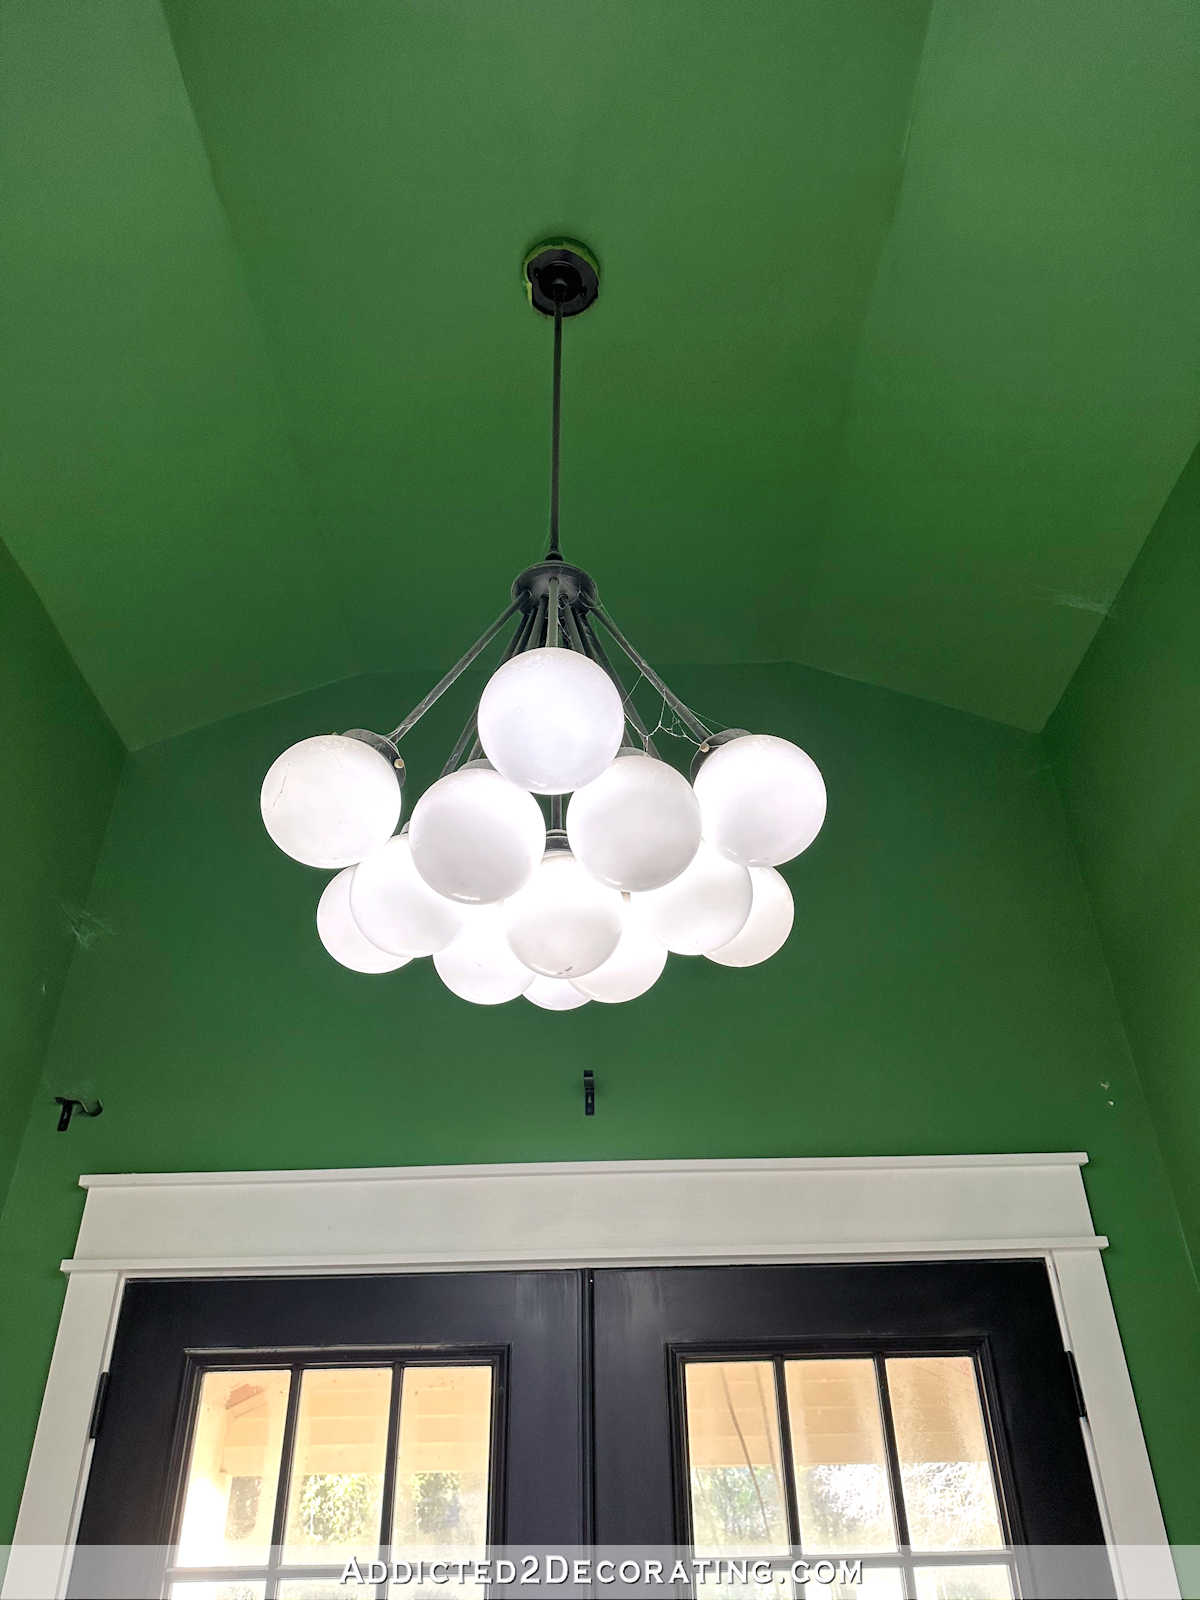
Each light has a little setting control on it so that you can choose the color/brightness you want. I used these in the pantry also, and in there I set them on 3500K, but for the studio, I set them on 5000K, which is the brightest/whitest setting.
These things are amazing and very easy to install. Now that these are available, I don’t know why anyone would use those other big, clunky recessed lights that require those massive metal housings that have to go up into the ceiling.
These things are only about 1/2-inch thick, and have a separate metal box that holds the wiring. Once the wiring is done (which uses simple push-in connectors that are already attached to the lighting wiring — so easy!!), you just slip the metal box up into the ceiling above the drywall, and attach the light. Because they’re so thin, you can easily use them on vaulted ceilings.
I forgot to change the color/brightness setting on the top top lights in the photo below, and you can see how much yellower they are.
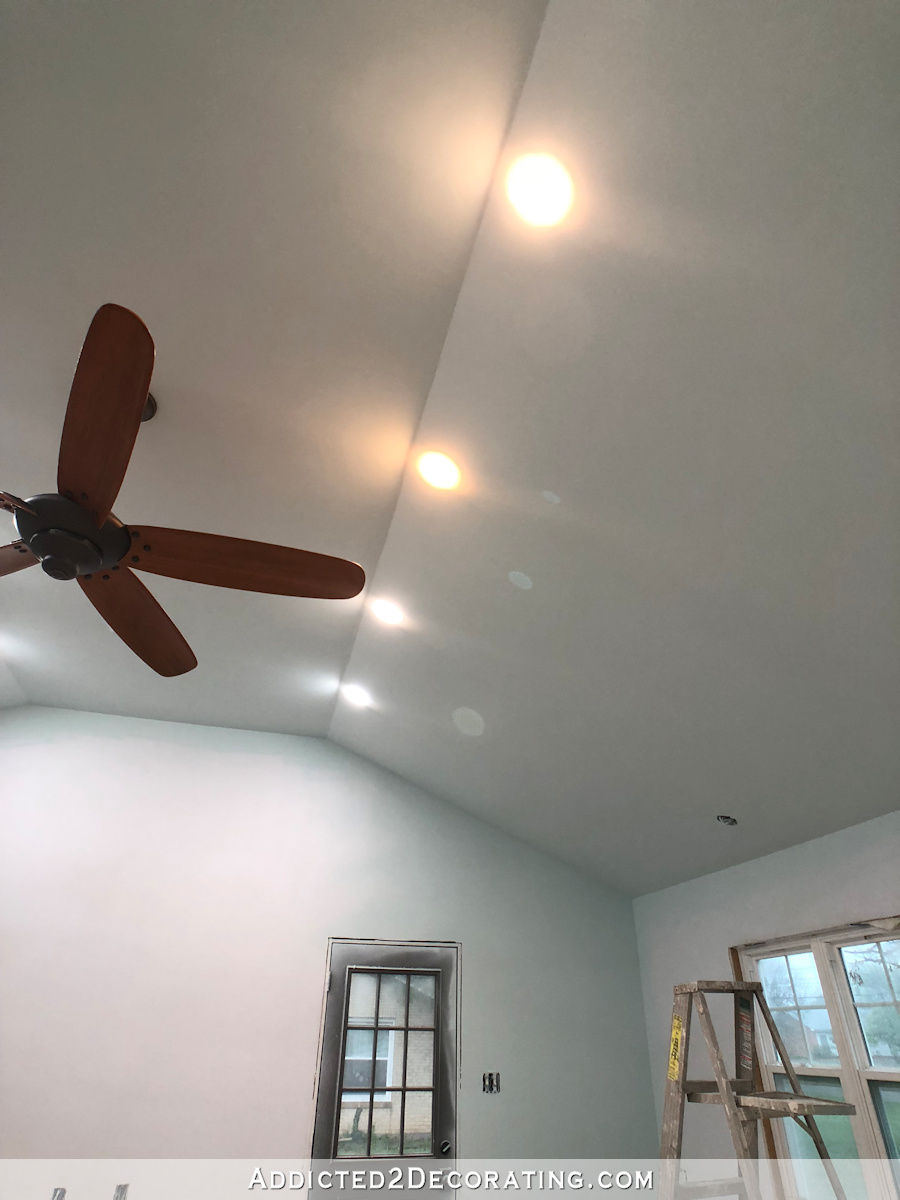
To change them, I just have to pull the light out a bit, and adjust the setting on the metal box.
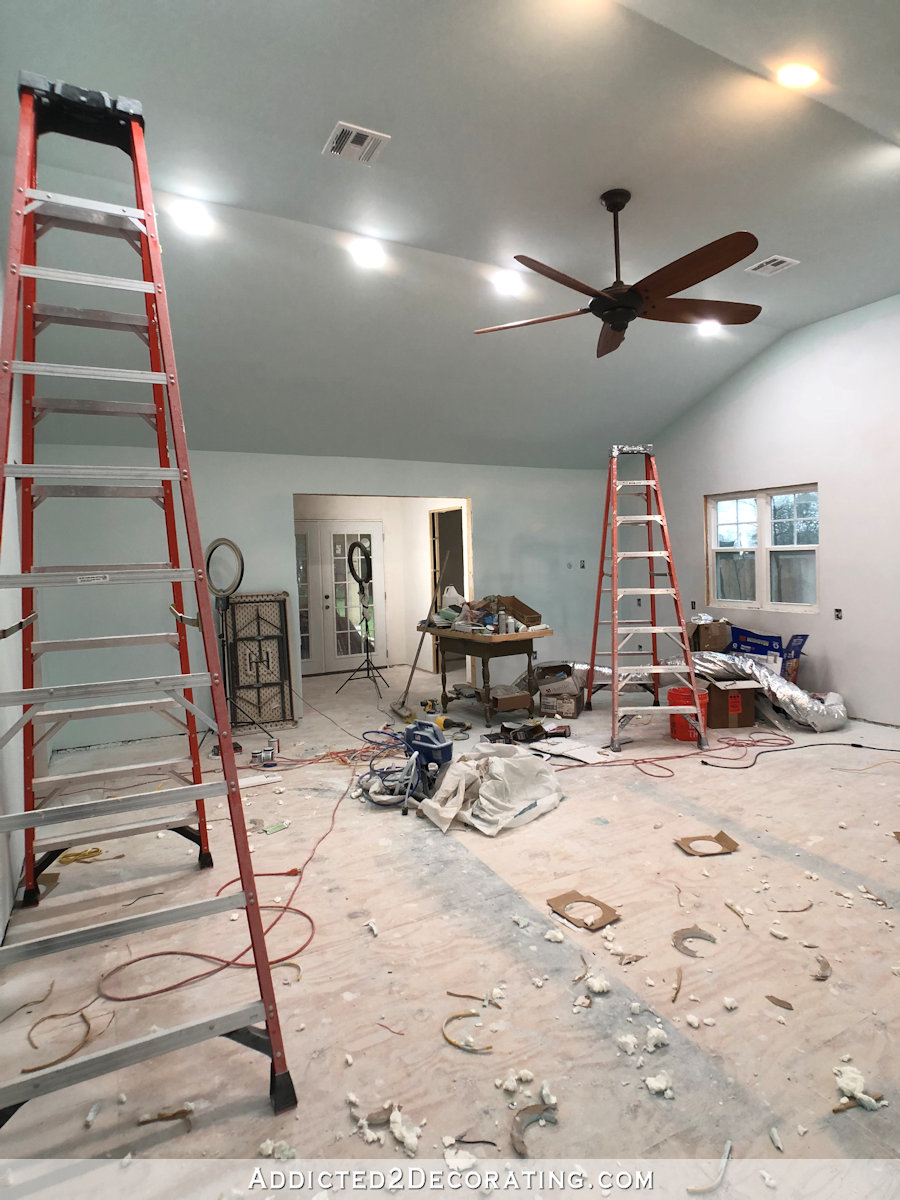
Now with the new lighting, you can see the ceiling and wall color a little better. Everything in the photo below has been painted except for the right wall with the window, which is still white.
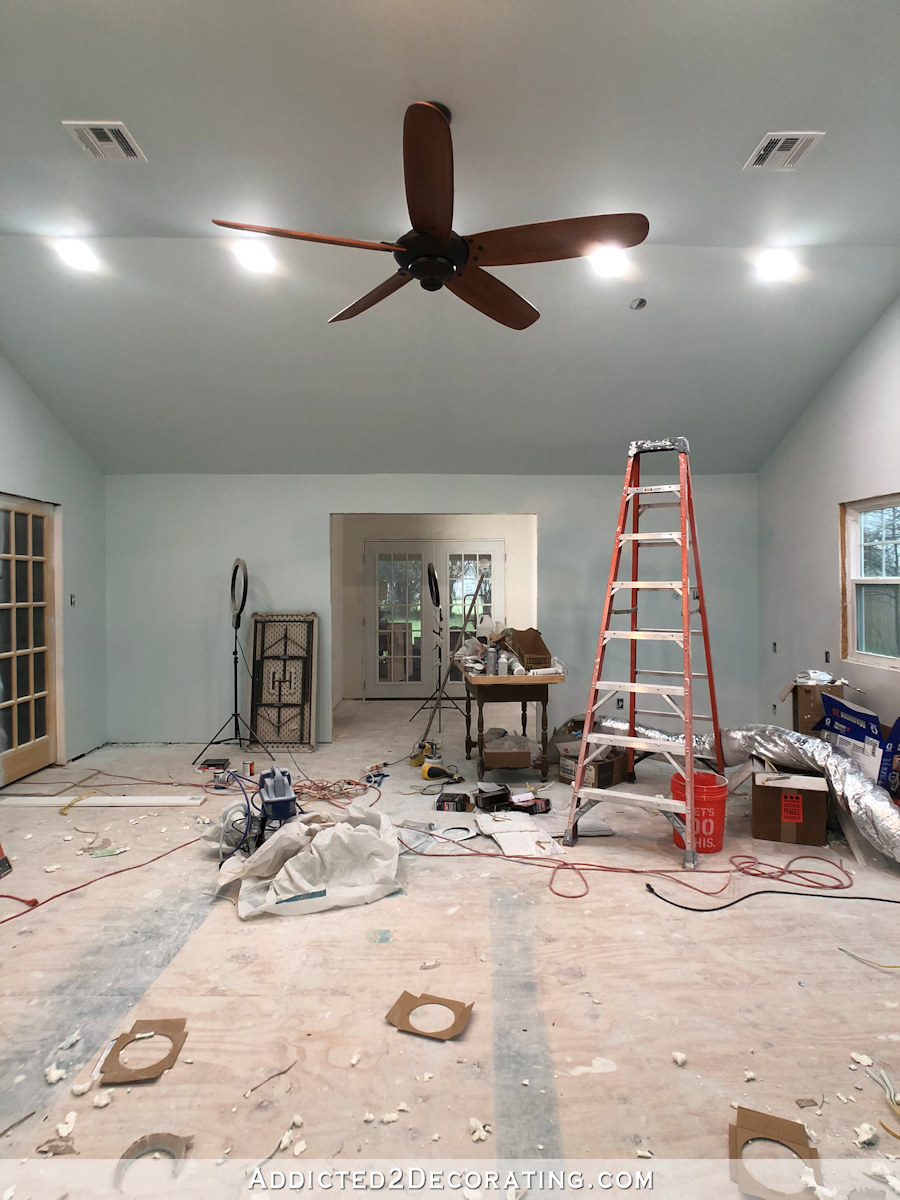
And as you can see, the ceiling fan is also installed. And I hate it. 😀
I don’t actually hate the actual fan. There wasn’t a huge selection of large fans for rooms this size available locally. (Yes, I realize I could have ordered online, but I forgot, and then I needed the fan ASAP. 😀 ) So the fan itself isn’t that bad. I mean, I dislike fans in general, but I do live in Texas, and this is a massive room, and I’m trying to be just a tiny bit practical.
But my goodness, does it have to hang down so far?! That downrod is so ridiculously long! I want it up closer to the ceiling so it’s not so far down in my line of sight, so I’m going to order a shorter down rod and swap it out. I know that the closer to the ceiling you put such a large (68-inch-wide) fan, the less efficient it is, but I don’t care. I just can’t live with it that low.
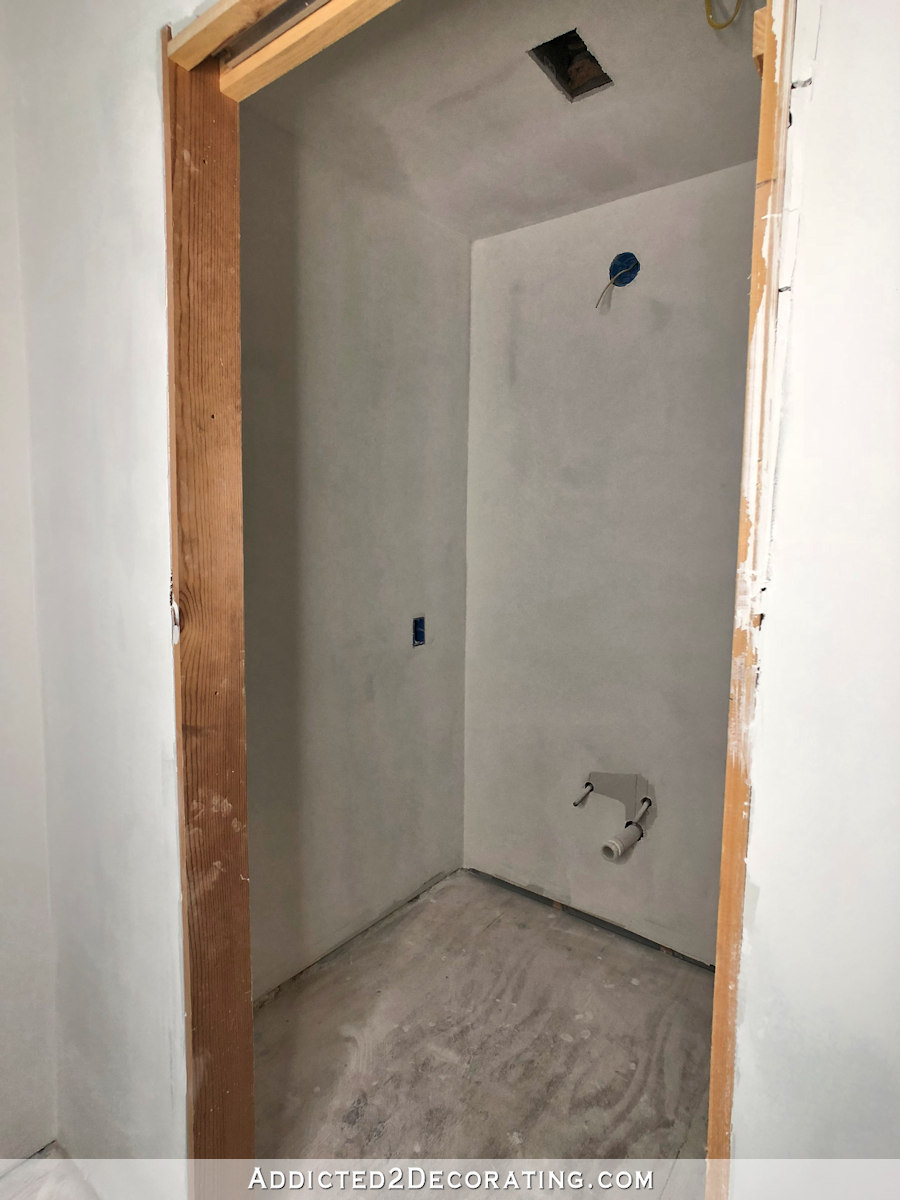
And in other news, they’re officially finished with the drywall! Here’s a peek inside the bathroom…

And the back entry…
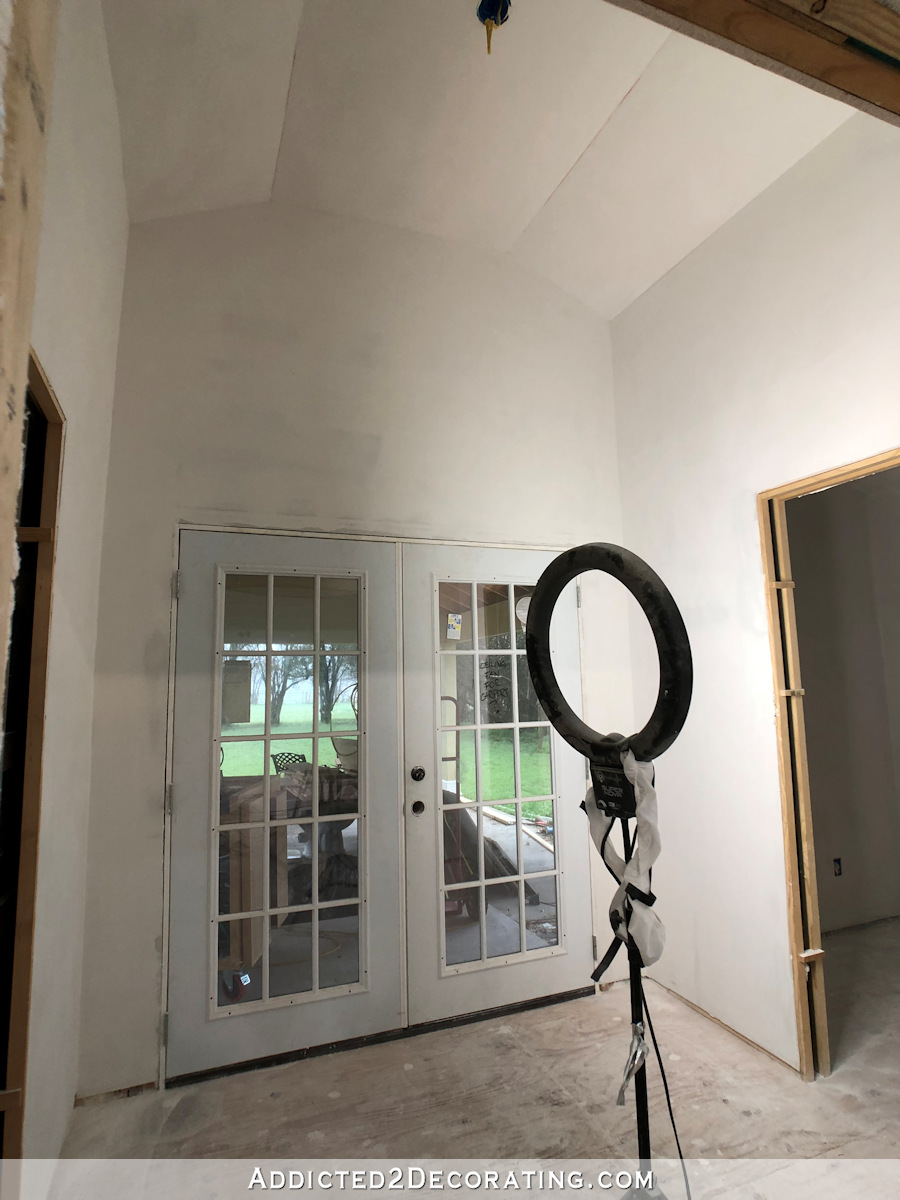
I always request a smooth finish because I can’t stand texture on drywall, and I was nervous to make that request because this was my first time to use these guys for drywall. A smooth finish is more challenging than a textured one, so I wasn’t sure what to expect. But wow! I’ve never seen a smooth finish done this perfectly! They did such an amazing job.
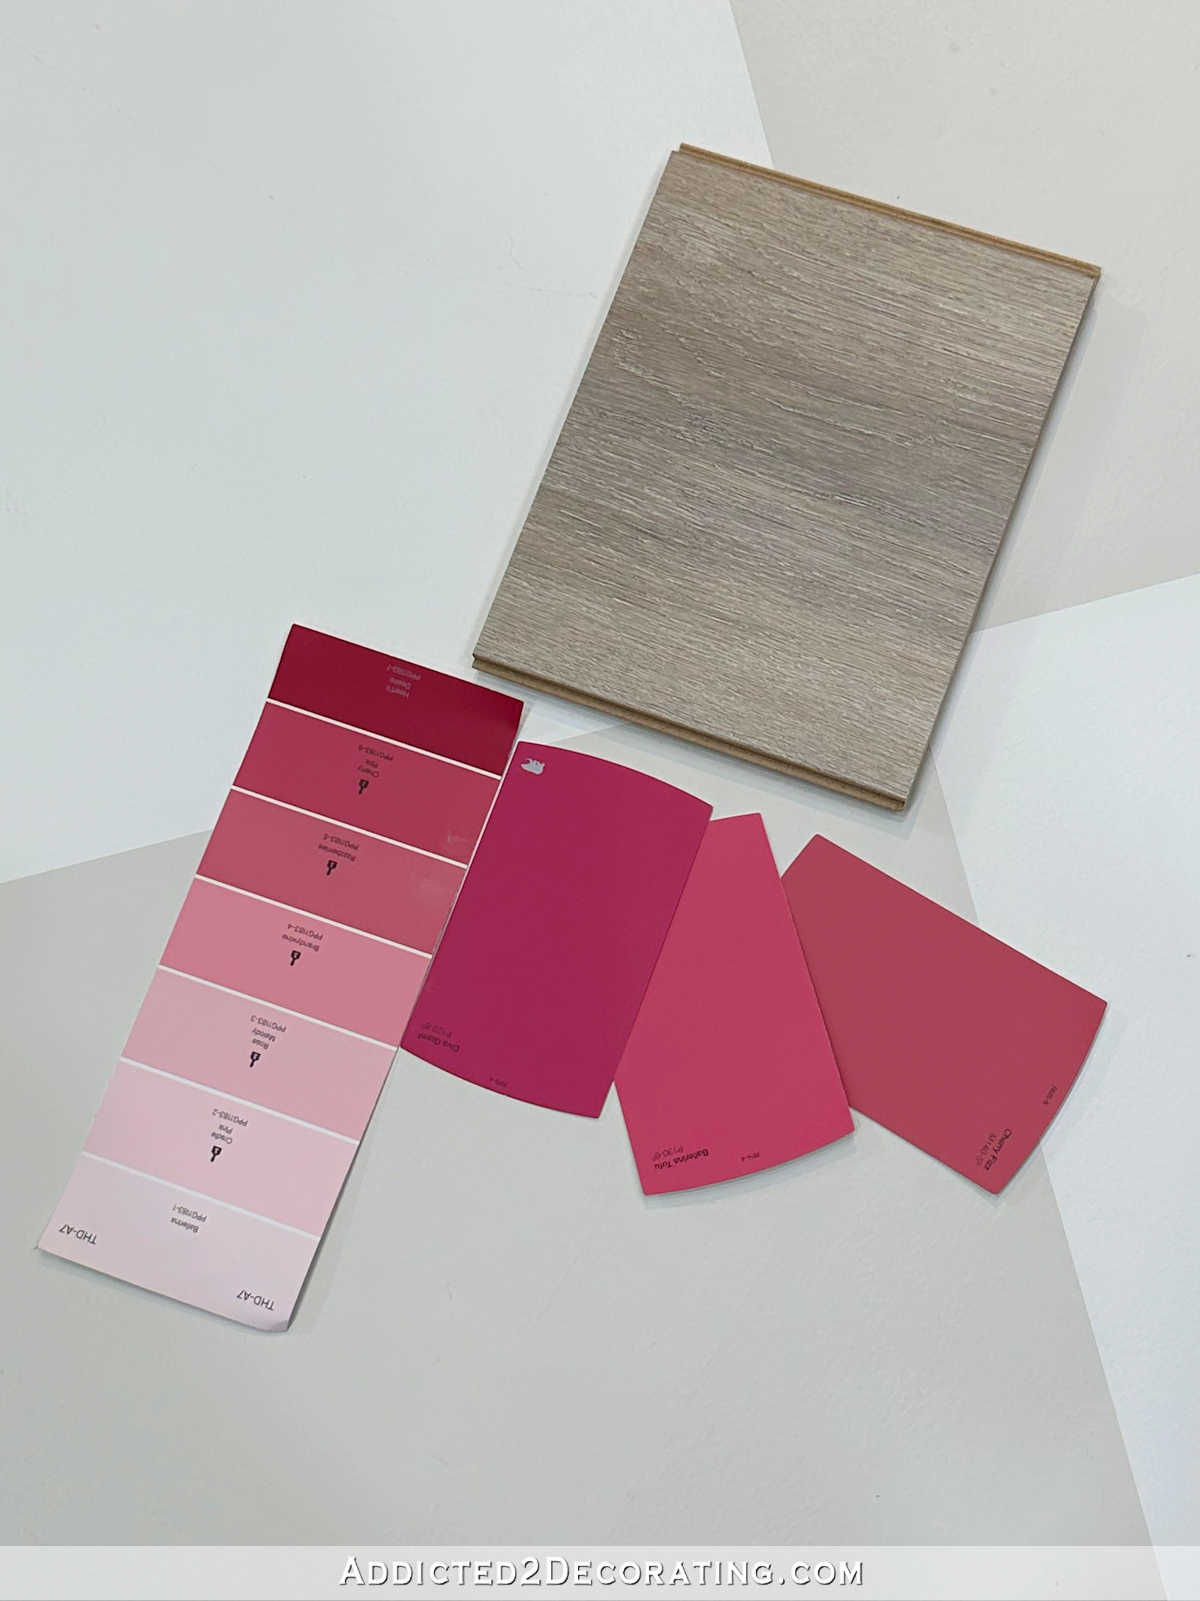
Now I just need to decide on a color for the back entry. I’d like something bold, and obviously it needs to coordinate with the wallpaper, but that still leaves a few options. And I haven’t even begun to think about what I want the bathroom to look like. The only thing I do know (and planned for from the beginning since it requires kitchen-sized plumbing) is that I will have a utility sink in there instead of a standard bathroom sink. Other than that, I have no idea.
But they’re officially done, and now it’s up to me to finish these spaces. Yikes! I’m equal parts excited and overwhelmed right now, but I’m ready!

Addicted 2 Decorating is where I share my DIY and decorating journey as I remodel and decorate the 1948 fixer upper that my husband, Matt, and I bought in 2013. Matt has M.S. and is unable to do physical work, so I do the majority of the work on the house by myself. You can learn more about me here.


That space is HUGE! I mean GINORMOUS HUGE! Think of the things you can make in there! Wow! So exciting!
I know you don’t need my opinion, but I think the 1/2 bath and back entry would be lovely in light, bright colors.
This just makes me soooooo happppy! THIS. ROOM. Makes me wanna dance and run around in there ☺️ Perfect color and lighting Kristi. You will never leave it…..good thing you have a water closet 😉.
I hate the look of a ceiling fan also, but I must sleep under one, almost every single day of the year. The one in my bedroom is solid white. I think that helps it be less noticeable, but that wouldn’t work since your ceiling is a color. :/
Yep, I will always and forever have a ceiling fan in my bedroom. I don’t like the look of it, but I can’t live without it. 😀 I use it every single night, even through the winter. I just need the air movement to sleep.
Same here, must have that air movement. I have a fear of them though, because many years ago I was in one of our rooms sewing, and one of the blades’ arms snapped and flung the blade into my head! I turned because I heard a noise (the arm cracking I guess) so it hit me on the top side of the head. Luckily no harm done, just tender spot for a few hours, but now they scare me!
Ceiling fans + recessed lighting can create a strobe effect. It looks like you are good, but the lens and angle are playing games in the pictures. So I edit to say, just consider the light placement when deciding down rod height.
Also did you have to carve out foam to fit the housing up there? Does the light or housing require a certain clearance for heat?
Lately I’ve become that person over-researching and turn searches into a unicorn hunt. An engineer friend shared that some LED bulbs are not suitable for enclosed fixtures, and have caution on existing recessed fixtures in older homes to reduce a fire risk. In reality, I know bulbs not labeled for enclosures might work, just die faster from heat (and the fancier LED bulb is not as expensive then).
I did have to carve out a little tunnel in the foam for the junction box to fit up in the ceiling, but that wasn’t difficult at all. I just stuck my hand up there, grabbed a handful, and pulled it out. About three times (I have small hands), and I had enough room for the box. If I had fiberglass insulation, I would have just shoved the box up there, but you can’t really do that with foam since it’s much more rigid than fiberglass. The housing doesn’t require any clearance. It’s rated for direct contact with insulation, so no worries about about it getting too hot against the insulation.
Kristi, have you considered painting the fan? We painted our in the bedroom and it blends
I did, but I don’t think that would solve the problem. No matter the color, it still hangs way too low to my eye. I’ll snug it up closer to the ceiling first and then decide about painting it.
This is so exciting! Theresa is right- that room is HUGE.
Had this been my house, I may have turned this into a living/dining/kitchen space. Could you just imagine all three of those in one big room with those wonderful big ceilings? A nice big kitchen island with a built-in bench and table…..I’m planning your space as if it were my own, haha!
It is going to make a fantastic studio and I can’t wait to see all the colorful and bright additions!
It would make such an amazing family room! Believe me, I’ve had a couple of moments of, “Hmm…should we?” But in the end, I think the family room on back, where the French doors open up on to a nice deck rather than a carport, will be a better option. But I’m definitely hoping that a vaulted ceiling will be possible when we do add on the family room on the back.
Love idea of painting fan. Maybe the 1/2 shade so it disappears in ceiling.
You have the best dreams and you get to live them! How cool! I love the color.
It looks AMAZING! What an awesome work space!!! I know what you mean about the fan. I think I have the same one (or one very similar) hanging in my vaulted living room. I was really annoyed by the length of the rod at first but now I barely notice it. It does provide excellent circulation though (south GA heat is brutal). So excited to see what you do with this blank slate!!
The electrician could cut the down rod shorter.. or I’m sure you could too. I’m so jealous of your studio space! Well deserved friend!!!
I really like those lights and you should have plenty of it while you are working. I do like your fan as it is the right proportion for your large room but I understand that you want it closer to the ceiling so it doesn’t get bumped with one of your large projects.
I like the idea of a bold color in your entrance to ‘welcome’ you home!!
Those lights are so awesome. Wish I had known about them three years ago when we finished our basement. I personally don’t see anything wrong with the height of the fan. You want it low enough to feel it and to push/pull the air around it. I think once the room is all set up, you won’t notice it so much. My daughter has the same fan in her living room, with 11 ft. ceilings and the same rod. It’s still high enough that it doesn’t intrude on the room, and cools the space great. As for the back entryway, The purple in the wallpaper would be a statement! And I would do the coral in the bathroom, at least on the wall opposite the door! Wow, that would make me smile! And they all coordinate together with the studio, since they are in the wallpaper. Just a note, you might want to run something around the area where the utility sink will be ( I would do stainless steel sheet or tile) to guard against messy cleanups.
Kristi I put aluminum sheeting around my big sink in laundry room and aluminum thresholds around edge to finish. Can cut sheeting with tin snips and thresholds with hacksaw. I decided against tin tiles bc of patterns and knew it would be difficult to clean paint splatters off. That’s wher I mix and cleanup all paints. Cost $50.
I would love to have a room like that for a sewing room etc. But then, I spent years with my sewing machine on a rolling tv stand. But I still can dream, can’t I?
That’s fantastic! I was able to pass along your LED can light recommendation to my husband too, and he was glad to hear a good review for them. We inherited a couple 80’s ceiling lights with shell shaped covers that need replacing!
I am truly enjoying this journey you’re taking us on.
amazing!
maybe this is the spot for your gorgeous emerald green (of kitchen frame a few years ago). that colour didn’t play nicely with it’s other room mates back in the day – but oh could i see it in your grand back entrance with the floral wallpaper in the far background – swoooon …
I actually bought three samples of green today and tested them out on the back entry wall. 🙂 I’m kind of in love with one of them.
How did you decide on the placement of the recessed lights? We have a similar project coming up for a ceiling that is very similar to this one.
I searched “recessed lighting vaulted ceiling” and other similar search terms on houzz.com to see how people placed and spaced lighting on vaulted ceilings, and then came up with my own plan based on what I saw. 🙂
I have questions about the lights! I’m getting ready to do a bathroom reno with just a 6″ void between ceiling and roof – will these work? And do they need their own electrical or junction boxes?
Yep! That was my exact situation in both the pantry and the studio. These work perfectly. They come with their own junction box. Just open the box, put your wires through the hole in the end of the box and make the connections using the push-in connectors already attached, close the box, slip the box into the hole you cut in the drywall, make the connection between the light and the junction box (the wires on both just push and screw together), and then slip the spring tension thingies on the light into the hole in the drywall and they’ll pull and hold the light close to the ceiling. And done!
Sounds like these lights really are a perfect solution.
Can these lights be connected to each other? I thought they were in your pantry, but I can’t find the post. My kitchen has no natural light and it’s driving me crazy. I’m hoping I can use these lights to help with the cave-like feel of my kitchen.
Yep, I have ten of them daisy chained together in the studio, all controlled by one light switch.
Ohhh, this is getting so exciting! Beautiful paint color on the walls and ceiling, and now awesome lights. You go, Kristi!!!
Well, Kristi, room color is my absolute favorite! It is luscious, delicious, fantabulous!
I have been wanting these in my bathroom for 10 years, but was always to nervous to diy them. Your post gave me the courage I needed to jump in. I now have 4 of these exact lights in my bathroom (finished them last night) and it makes me so happy 🙂 I walk in there just to flip on the lights! I’m so thankful to you for sharing your knowledge and encouragement with the rest of the world. Thank you, Kristi!!!!