A Little Mirror On Mirror Magic (a Quick How To)
Happy Wednesday to you! I worked allllllll daaaaaay yesterday at Gwen’s house, determined to get at least her bathroom completely finished. Then at the end of my long day, I realized that I…forgot…to take…my…CAMERA!! So, I’ll be showing you the finished room tomorrow. I love the way it turned out.
So today, I thought I’d explain how I did this little mirror magic since a few of you have asked me.
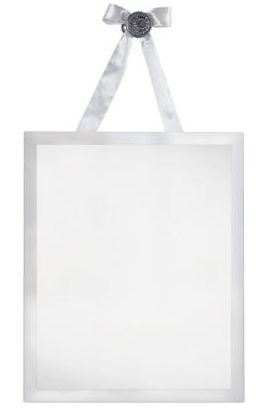
I purchased the mirrors at Home Depot for about $35 each. I couldn’t find the one I used online, but it was this type of mirror, that came complete with the satin ribbon and decorative hardware to hang the mirror.
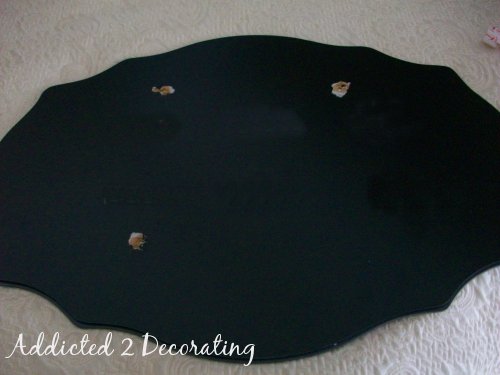
On the back, I had to remove the three metal loops that are used to hang the mirror with the ribbon. I simply used a pair of pliers to pull them out of the dense paper backing.
Next, I used painters tape on the front to mark the middle of the mirror. The closer the tape is to the edge of the top and bottom, the easier it is to place it correctly on the larger mirror.

To hang the mirror, I used Command Picture Hanging Strips, also from Home Depot. These things are amazing. Please note that these ARE NOT the double-sided sticky strips. These are a completely different animal.

I was incredibly skeptical the first time I used them, which was on my hand-painted family name sign a couple of months ago. But it’s still holding strong, so I decided to give it a go on these mirrors. I used six pairs of strips on each mirror, which according to the instructions, is overkill for the weight of the mirrors. But I just really, really, REALLY wanted them to hold strong.

According to the directions, you’re supposed to snap the pairs of strips together (they’re similar to Velcro in how they work), attach them to the back of the picture (or mirror in this case) by applying pressure on each one for about 30 seconds. Then hang the picture (mirror) by applying pressure in each area for 30 seconds. Then you’re supposed to remove the picture (mirror) and allow the strips to “set” for one hour, and then rehang. Well, after hanging the mirror, I couldn’t get the darn thing off to allow the strips to “set” for an hour. I mean, the thing wouldn’t budge, and I was so afraid that I’d end up cracking the mirror. So, I just left it.
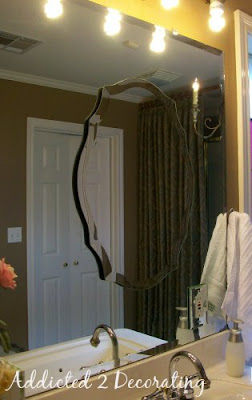
Anyway, I used painters tape on the large mirror to mark where I wanted the bottom edge of the decorative mirror to go, and I also marked the center to be sure that it would line up with the faucet. I also measured up 23 inches (the height of the decorative mirror) and placed another piece of painters tape and used my level to mark the center. That way I had a clear guide for placing the mirror. I simply lined up the middle marks on the painters tape on the decorative mirror with the marks on the painters tape on the main mirror.

No guess work needed. And voila! The result was a perfectly level, straight, and centered decorative mirror.
Okay, I promise I won’t forget to take my camera today, so be sure to come back tomorrow for the completed bathroom…the full before and after tour. Have a great day!

Addicted 2 Decorating is where I share my DIY and decorating journey as I remodel and decorate the 1948 fixer upper that my husband, Matt, and I bought in 2013. Matt has M.S. and is unable to do physical work, so I do the majority of the work on the house by myself. You can learn more about me here.

Love how this looks! I'm impressed with how well those strips held. Wow.
great idea. I have one of those very ordinaty bathroom mirrors. Will have to try this.
love that…nice change from always framing them out.
That is way cool!! Great idea.
I love the shape and subtle definition your new mirrors give. Great look!
new idea… glad to know this 🙂
I love this idea and I will definitely use it in my bathroom. Thanks!
– Sharon from http://www.upstatenyvacationhome.com
I love the shape and subtle definition your new mirrors give. Great look!
Such a wonderful post…thanks for Share…
i have grate ideas about home products which you needs in your daily life…
Thanks for this tutorial! I pinned this to my Pinterest site as an inspiration to my new home!
THANK YOU!!! I have seen this on DIY and people look at me like I am nuts! It is just beautiful, I have purchased my mirror that is wavy all the way around and when I place it on the square nothing mirror in the bathroom it creates a beautiful puddle like look. Just could not figure out how to hang it with out it falling and breaking everywhere. Can’t believe you have done it to and so simply!!!!! Thanks again and again heading to target now to find these hanging items!!!!
Linda
Great idea to layer the mirrors! We’re pinning it to our Small Spaces, Big Impact board on Pinterest. Thanks for sharing! – Whitney, Senior Editor @ Home Depot