Bathroom Makeover Day 7 – Faux Wood Plank Walls, Part 1
Do you have your “I can tell this will look amazing when it’s finished” goggles handy? Because you’re definitely going to need them as you read this post and look at the pictures. 🙂
Here’s my vision for the walls. I’m doing a faux wood plank wall treatment on the lower 55(ish) inches of the wall. Those “wood planks” will be painted a crisp, bright white…or actually, a not-quite-pure-white called Polar Bear. It’s the same white that I’ve used on all of the trim in my condo.
So when I say “wood plank”, imagine something like my kitchen ceiling, except now it’s going on the walls.
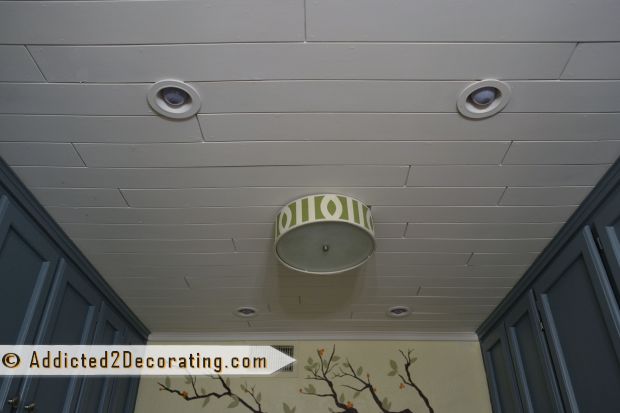
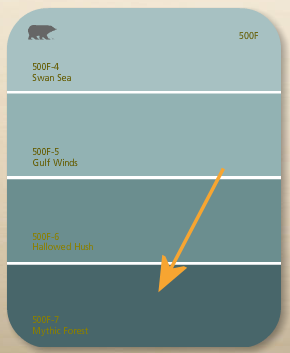
The faux wood plank wall will be topped off with some sort of chair rail moulding, and then above that to the ceiling, the walls will be painted a deep teal color that is one step darker than the teal that’s on my kitchen cabinets.
Can you picture it? Dark teal next to crisp, bright white? Aaahhhhh…I can’t wait!
To do my walls, I purchased a product called hard board. It’s about 3/8-inch thick, and comes in sheets that are 4 feet by 8 feet. It’s located in the section of the home improvement store where all of the plywood is. It’s dark brown, and has a very smooth finish. It’s also called eucaboard, because it’s made from eucalyptus.
The sheets cost about $14 each, and I used two of them for the bathroom walls.
I had the good people at Home Depot cut the sheets into 4-inch strips for me. That took quite a bit of convincing to get them to do it for me because evidently they have some kind of company policy that they can’t cut anything narrower than 12 inches.
Well, phooey on that. In my humble but accurate opinion, that’s just a stupid rule. And of course, when they were explaining the reason for the rule (something about safety, and blah, blah, blah), I think they thought they were talking to some ignorant woman who had never used a power tool in her life. Ha! Little did they know! 🙂
Sorry, Home Depot, but your rule is stupid, and the “safety” argument has no validity whatsoever. In my humble opinion, of course! 😀
So once I finally got my 4-inch strips, I set to work. I started on the sink side, with the piece that goes right behind the countertop.
The reason I started with that particular piece is because I wanted to avoid having to cut pieces lengthwise to fit around the vanity. I also put the board behind the countertop (rather than on top of the countertop), because I wanted to avoid having to notch a piece to fit around the lip of the countertop on the left side.
This way, the project only required straight, 90-degree cuts.
I wanted spaces between the boards, so I had to find something to use that would give me the perfect spacing. I considered washers, but they were too thin. Nickels? Too thin. Then I found that the 3/8-inch tile spacers that I used for my floor tiles were the perfect size.
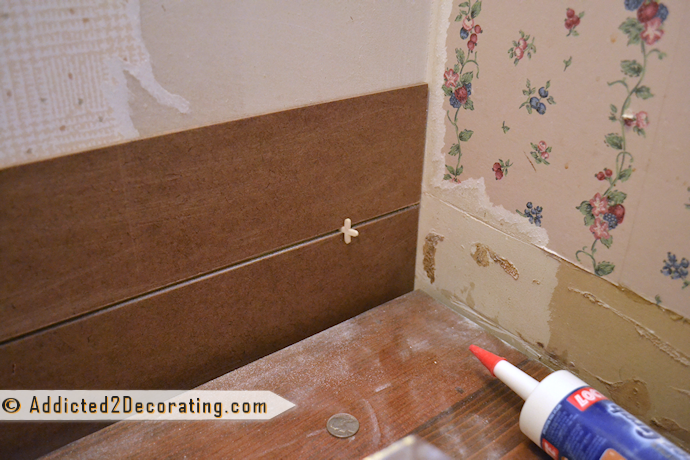
To attach the boards to the wall, I used Loctite paneling adhesive, and then followed up with 3/4-inch finishing nails in my brad nailer. The Loctite adhesive is a must when you’re working on projects like this alone. I’ve come to love my Loctite, and always have some on hand. (And they’re not even paying me to say that!) 🙂
I continued adding the boards up to my 55(ish)-inch mark.

Then I worked on the area behind the toilet. That was such a pain! I considered just remove the toilet completely, but since I’ve already uninstalled and reinstalled the toilet twice during this makeover, I just couldn’t bring myself to do it a third time. So I worked around it.
I also finished out the small wall next to the door.
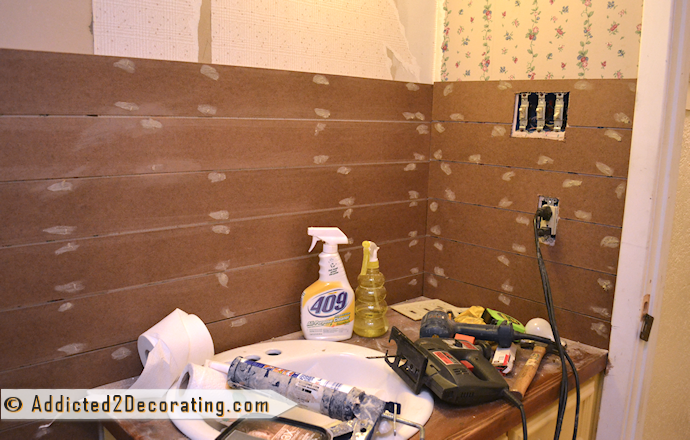
Then I moved on to the other wall. After all of the boards were installed, I used wood filler to fill in all of the nail holes.
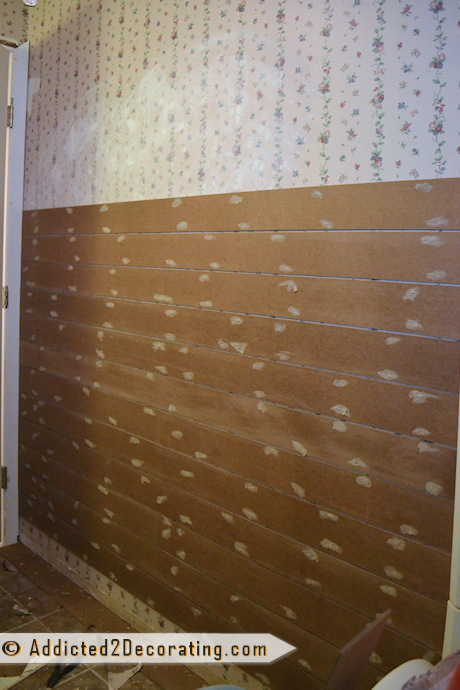
Keep in mind that this will all be sanded smooth and then painted bright white. 🙂 And of course, I’ll use quarter round trim to make the corner by the vanity, and the edges by the wall and the tub look all neat and tidy.
I still haven’t decided what type of moulding I’ll use to top off my faux wood walls. That’s still TBD.
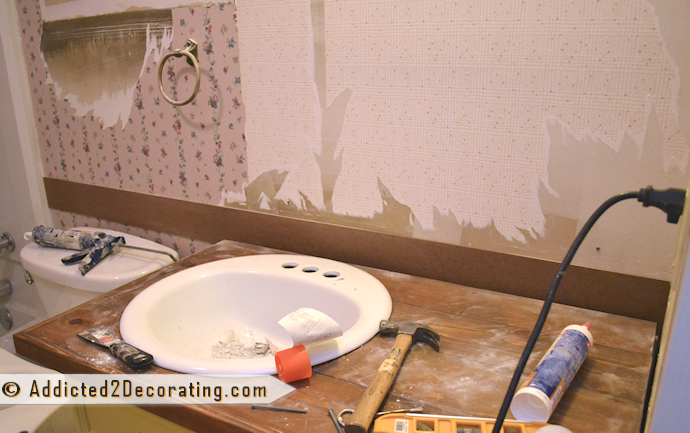
And I know that some of you will be concerned about the wallpaper. No, I didn’t remove the wallpaper, but I did peel any loose edges as I went just to be sure that the 3/8-inch spaces will be smooth after they’re painted. And I’ll use oil-based primer first, so that it won’t loosen any of the wallpaper.
And I’m also not planning on removing the wallpaper on the top portion of the walls either. I hate removing wallpaper, and this stuff is stuck on pretty securely. I just can’t bring myself to do it. But don’t worry…it’ll all turn out just fine. I promise. 🙂

Addicted 2 Decorating is where I share my DIY and decorating journey as I remodel and decorate the 1948 fixer upper that my husband, Matt, and I bought in 2013. Matt has M.S. and is unable to do physical work, so I do the majority of the work on the house by myself. You can learn more about me here.


OK – I know that teal colour will look amazing with the what because I just painted my kitchen a similar colour – YOU ARE GONNA LOVE IT!!!
*** with the white…can’t type today sorry!
I think the wood slat/teal color combo is going to look amazing! I am new to your blog, but I love “watching” the work in progress on this room. As I watch some of the elements being completed, I have “fears” that creep into my mind as far as the practicality. Can you help alleviate some of my fears:
– water and wood. On the counter, splashing and what not seems to go hand-in-hand with brushing teeth, washing faces, washing hands, washing other stuff — pretty much anything you would use a bathroom sink for. How will a wooden counter hold up to that use/abuse? Does the finish protect it well?
– steam and wood. On the walls, what will happen when a smallish bathroom fills with steam? Will it warp the slat pieces? Or are they protected well enough by the paint?
I’m very interested in these two techniques for our own hall bath that is well-used by a 9 yr old boy and 13 yr old girl — that’s the reason I’m askin’.
Thank you!!!
Lisa
Hi Lisa~
The wood countertop will be protected by several coats of polyurethane, which will make it very durable so that it’ll stand up against normal wear in the bathroom, such a toothpaste spills, water splatters, etc. The key is to use the old-fashioned OIL-based polyurethane. I would never, ever use one of the newer water-based products in a bathroom that will get water splashed around. But the oil-based stuff will hold up just fine. I’m not sure how many coats I’ll end up using. Three, at least, but maybe more. And I’ll sand lightly between each coat for better adhesion and a smoother final finish.
As far as the walls go, warping won’t be an issue. Before I paint, I’m going to use (again) an OIL-based primer. I may even use two coats just for good measure, but I’m not sure yet. I’ll have to see how one coat looks and coats. My favorite primer to use is Zinsser Oil-Based Cover Stain. It goes on easily, and although it looks really streaky, it generally dries fairly smooth. But it’s also very easy to sand when it’s thoroughly dry so you can get a really smooth finish.
But I think you can see a theme here. 🙂 Oil-based products in areas that get lots of moisture are always the better choice, and will hold up to very nicely to normal use.
I will add that if the steam is really an issue, you can take it one step further and prime the BACKS of the hard board strips before attaching them to the wall. That way, they’re basically sealed in on all sides with oil-based primer, and there won’t be any worry of water damage.
Love this idea. Excellent way to add some interest and dimension to bare walls! Are you going to caulk between the gaps in the hardboard, or just paint them in?
No caulk, but I will be using a generous amount of oil-based primer. 🙂
Really nice looking..at the moment I took a break from scrapping the popcorn off my 1/2 bath…what a mess that is..but I know I will love it!! can’t wait to see the finished bath..you sure are one heck of a woman!!!! lol
I can’t wait to see what you do!!!! This is so up my alley 🙂
Hugs
What a great idea for wood plank walls! It’s gonna be gorgeous.
But, I gotta say, I’m most impressed with your persuasive mojo! I deployed every trick of persuasion (batting the ol’ lashes, etc. ahem.) and the fellas at Home Depot FLAT REFUSED to cut anything narrower than the 12″.
Sissies. 😉
Can’t wait to see those walls painted!
Sounds like you took the “nice” approach, Amanda. Let’s just say that I took a slightly different approach. 😀 Haha!!
Love it! A fresh, new idea, like always. And I can just picture the colors. Thanks for sharing, Kristi!
I was reading how you use oil base primer, someone once told me to use marine primer or wax, I don’t remember but was wondering if you have ever heard of using it or have tried it in areas that get a lot of moisture? Thanks for taking the time out of your busy day to answer and share with all of us that are just as anxious as you to see the beautiful results.
Hmmm…I’ve never heard of marine primer. Now I have heard of marine VARNISH, but it’s a top coat, kind of like polyurethane. In fact, it might be a great choice for a topcoat for a wood countertop in a bathroom. But as far as primers go, the Zinsser Cover Stain in a oil-base is fantastic.
Kristi, have you ever painted slick shiny tile in a bathroom? If so I would love to know how you did it.
Love the Wood wall., cant wait to see it finished.
I’ve never painted tile before, Vicki, but RustOleum has a product made specifically for that. In fact, it’s the same product that I’ll be using to paint my bathtub. It’s call Tub & Tile Refinisher, and you can use it on porcelain, ceramic and fiberglass.
Maybe that’s what it was then, I know it is used for boats. Now that you say that it was when i had mentioned painting my counter top..so maybe it was varnish. Its was years ago.
This just gets better and better! Planks, dark teal with white, I love what’s inside your head! 🙂 Sharon
Enjoying seeing the in progress images especially since I’m having a hard time imagining the end! LOL Reminds me of Bob Ross painting. Just when he would lose me, he’d splash on a little more paint and I was mesmerized by the end result. I expect to be just as mesmerized by this on, but keep sharing the in between!
Haha!! Hopefully I can pull this one off! At times, I start to doubt, but I think it’ll all work out. 🙂
Sounds great!!!!!!!!!!!! When will we see the end result? Also is this a less exspensive way to go? Please advise. I will be remodling my guest bath in the near future and can what to see the results and cost exspense.
Thank you
Debbie
Not sure when I’ll have the end result, Debra, but I’m working as fast as I can. 🙂 This method is definitely less expensive than using real lumber. I used two pieces of hard board, and the total was $28.
What a beautiful color combo! Can’t wait to see it all painted!
I love reading about the amazing things you do! I have a whole ugly 70’s house to update – redecorate – gut (parts of) – torch (oops! I guess that’s illegal, but that’s how frustrated I have been lately). I love the wood slats! I was just thinking about something like this in my family room, but I just might switch it to one of my bathrooms! Thanks for all your step by step pics and how to’s! You are amazing!
I love your ideas for the bathroom, Kristi. Ours is a heritage blue and white and I love it! We went the cheap route, too and for our moulding used some leftover exterior door brick mould-it turned out great and was free! Looking forward to seeing yours!
It’s looking great, Kristi! I can totally picture it in my mind, and it looks beautiful!!
In our ensuite we did white board and batten to almost 6 feet in height with a VERY similar dark teal… Probably my favourite room in the house right now! A gorgeous combination! Love your horizontal panelling – think we will go with horizontal panelling in our kitchen too! Can’t wait to see your finished project!
Very clever! We moved into this house a little over 2 years ago and EVERY room had wallpaper in it. The bathroom and master bedroom had multiple layers of wallpaper, even on the CEILINGS. I gave up on pulling it all off, we did some removal but mostly just painted over it. We even had FOIL with weird grass over it that was peeling off in strings, it was horrible. You have all my sympathy/empathy in dealing with wallpaper. My walls aren’t perfect but anything was better than the wallpaper. Someday I hope to have a skim coat applied in some areas to fix some of the places it’s not perfect. My hat is off to you for your solution.
Love this look but wont you see the wallpaper & wall through the gaps, as you can see them in your photos ?
Also we too have a hardware store here in the UK called B&Q and they also have this stupid rule about the size of wood they are allowed to cut, I think it’s because it’s a fee service when you buy your wood from them so they really don’t want to be that helpful so out comes the health & safety speak ! Can’t wait to see the end result.
Love this look but wont you see the wallpaper & wall through the gaps, as you can see them in your photos just now ?
Also we too have a hardware store here in the UK called B&Q and they also have this stupid rule about the size of wood they are allowed to cut, I think it’s because it’s a fee service when you buy your wood from them so they really don’t want to be that helpful so out comes the health & safety speak ! Can’t wait to see the end result.
This is going to look great! I love the horizontal lines and I’m sure the white will make the room look much lighter. Teal at the top will be a beautiful color. I’ve painted over wallpaper a couple of times. Don’t worry if the wallpaper looks a bit ‘wrinkled’ when you put the paint on. Once it dries, it should even out. The second coat shouldn’t phase it at all. Looking forward to today’s progress…,
I can see it!! What you have accomplished so far is amazing, it looks fantastic! Wow, you amaze me and wish I had the nerve to tackle something so adventurous!
Debbie 🙂
First, you can’t go wrong with anything teal or coral. Those are my favorite go to colors. Especially next to white. Secondly, I totally agree with the wallpaper, I too hate to remove it and thanks for the tip to get past doing it. I really like the idea of the wood wall. I am looking forward to the final result. I am loving the makeover thus far. It is so inspiring.
Like the use of pictures. It really gives us a feel how the bathroom will look. Thought the choice of wood on the was a great design. It will give it a nice home feel with the wood. Should put up finished pictures of the bathroom! Thanks for the idea.
What size does the hard board come in? How much is it a piece? Thinking this might look
nice in my daughters room but want to get an estimate of how much it is going to cost.
Love your blog!
It comes in 4′ x 8′ sheets, like plywood, and they cost about $14 each.
did you fill in the gaps between the wood with grout or anything?
No, they’re not filled with anything. I did use an oil-based primer (Zinsser Cover Stain), and I made sure to get all of the gaps completely covered with primer so that moisture couldn’t get in there and cause damage.
Omg! I so want to do this in my bathroom! I want to turn one of our spare bedrooms into my “Paint” room and I am thinking this would look great on my accent wall!! Now, how to get Home Depot to cut all the boards
I can do this ! with your great step by step pictures & explainations,, I can do this. thank you and keep up the great job ! love your page & post. <3
Do you have any pics finished bathroom? I am in the middle of a bathroom remodel ……and I think this would be a perfect solution to some of the issues I am encountering.
You can see the finished bathroom here:
https://www.addicted2decorating.com/small-bathroom-makeover.html
I have a question. I have the typical bathroom wall board. I was wondering if you could apply wooden boards over the top of that and if so do I need to prep it in some way.
I applied mine right over drywall. I prepped the wall by priming with an oil-based primer. Then attached the strips of wood, and then primed those with oil-based primer also. As long as everything is covered in the oil-based primer, it should be fine.