A Major (And Much Improved) Design Change To My Silicone Faux Stone Molds (Plus, A Progress Status Update)
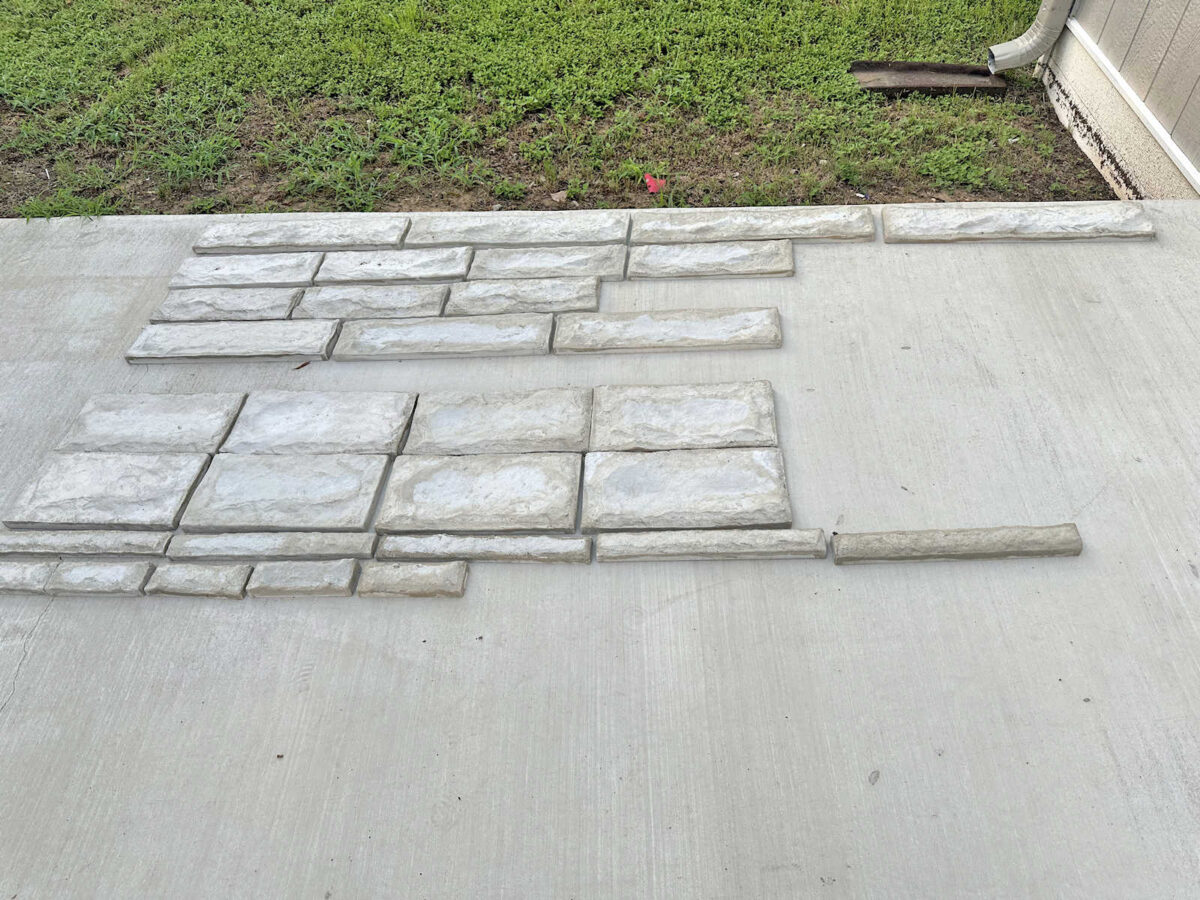
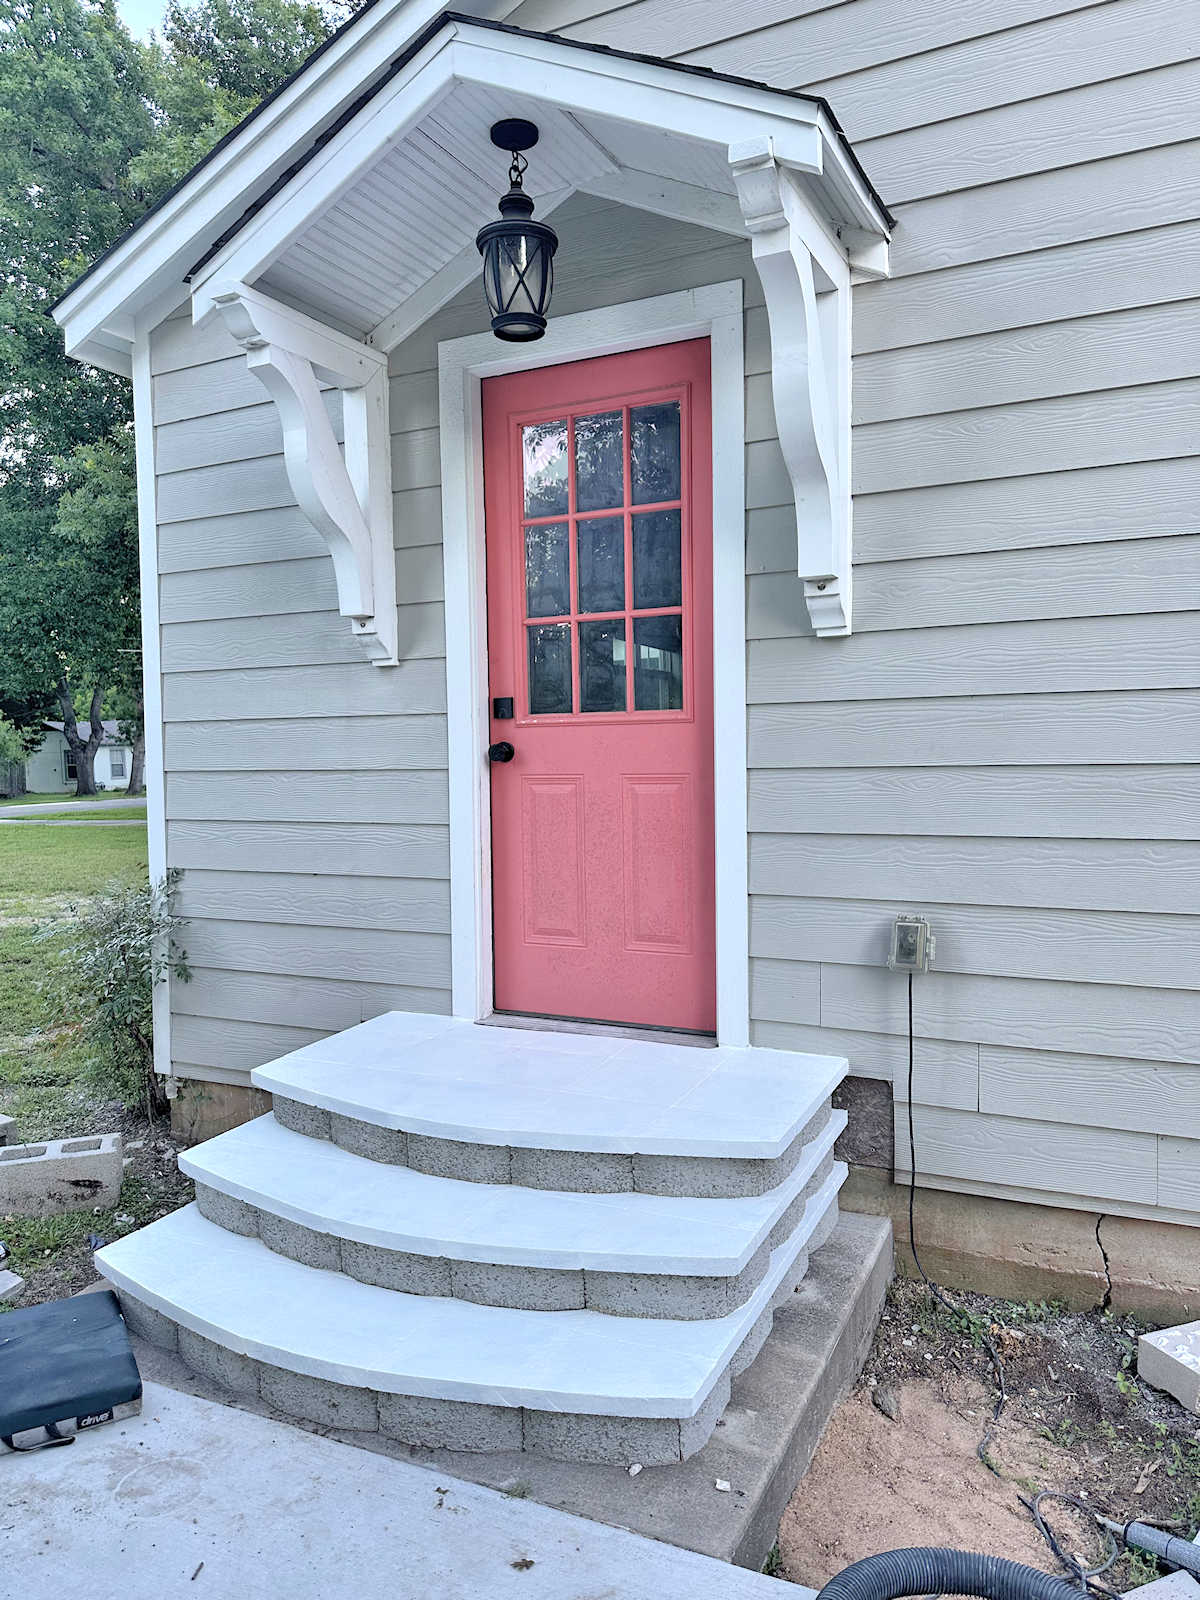
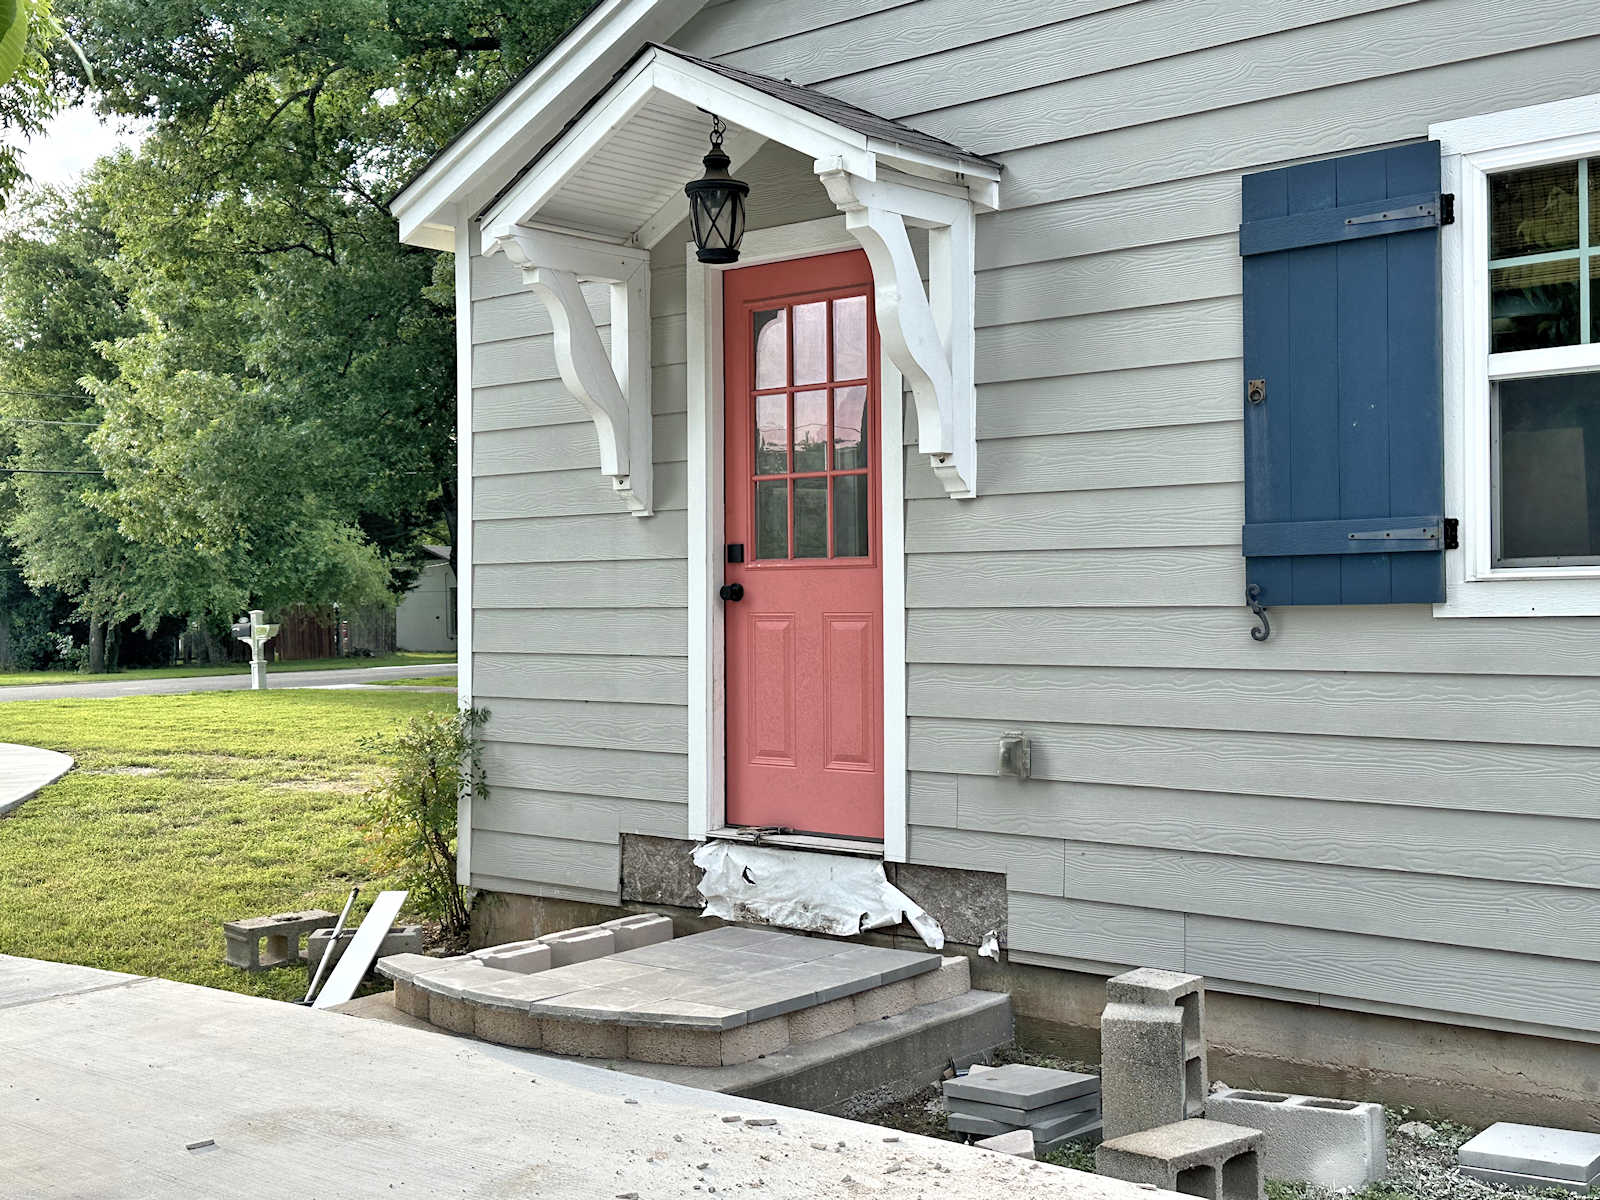
Today is the day, y’all. It’s the day that I’ll finally be able to start attaching my faux Austin stones to the skirting area of the front porch. We’ll be having a beautiful day here in central Texas (hot, but at least no rain in the forecast), and I have all of the big stones ready and waiting, and about half of the small stones ready to go.
Note: This is a multi-post project. You can see all of the posts about this project here: DIY Concrete Faux Stone Facade
Or you can see the last post about this project here: Front Porch Skirting Progress – Mapping Out The Design
I only have half of the small stones so far because I need so many of those two sizes, but I only have one mold of each size. While I only need three or four of each of the large-size stones to complete the porch skirting area, I need many more of the two small size stones — nine of one and ten of the other. And those small stones take just as long to pour, cure, and demold as the big stones. But I at least have enough to get started on the skirting while I continue to pour the rest of the small stones that I’ll need to finish the whole skirting area.
I did want to show you a big problem that I ran into with my silicone mold design, and the change that I made to them to make the job of pouring these stones so much faster and easier.
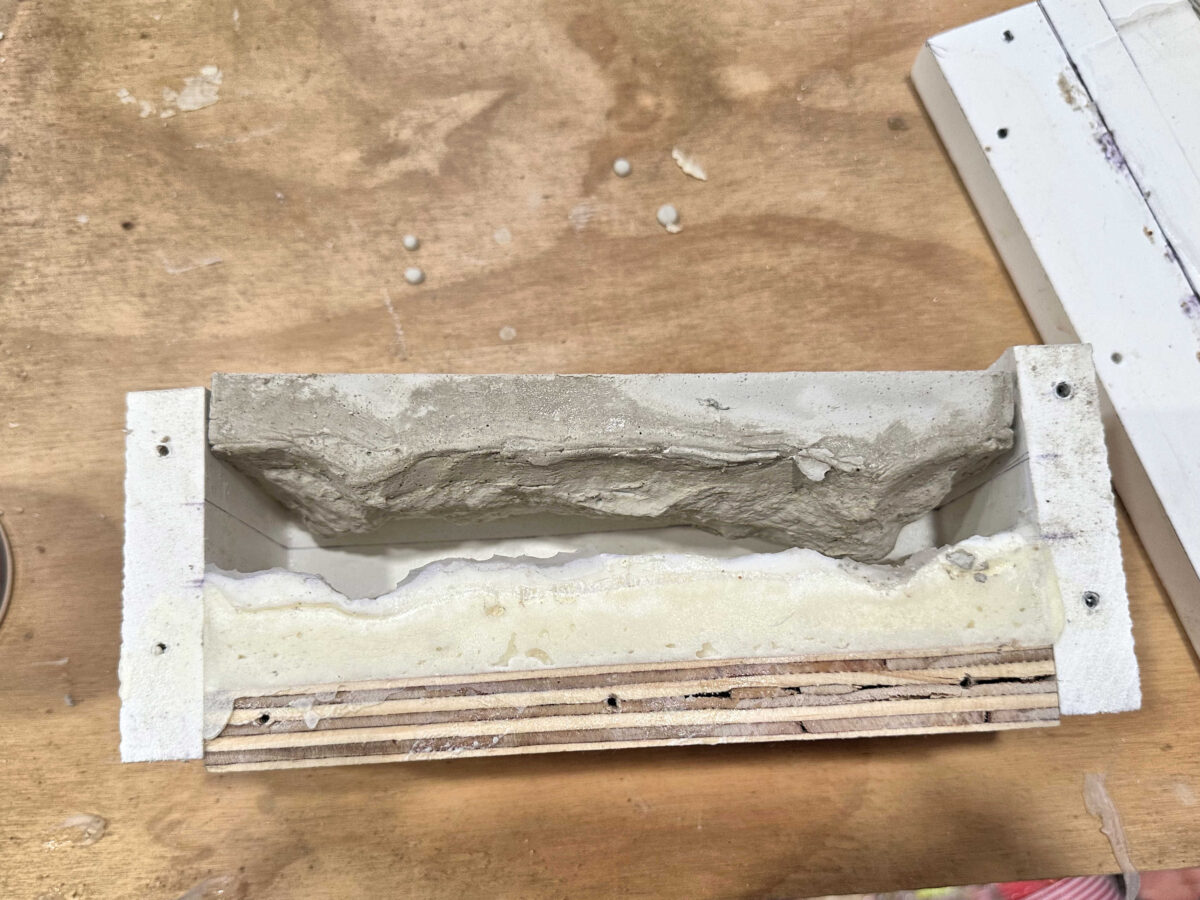
When I originally made the mold forms for the textured silicone mats, I needed something to place under the silicone mats to hold the edges straight and give the mats support underneath. Otherwise, I’d end up with wavy edges on my stones…
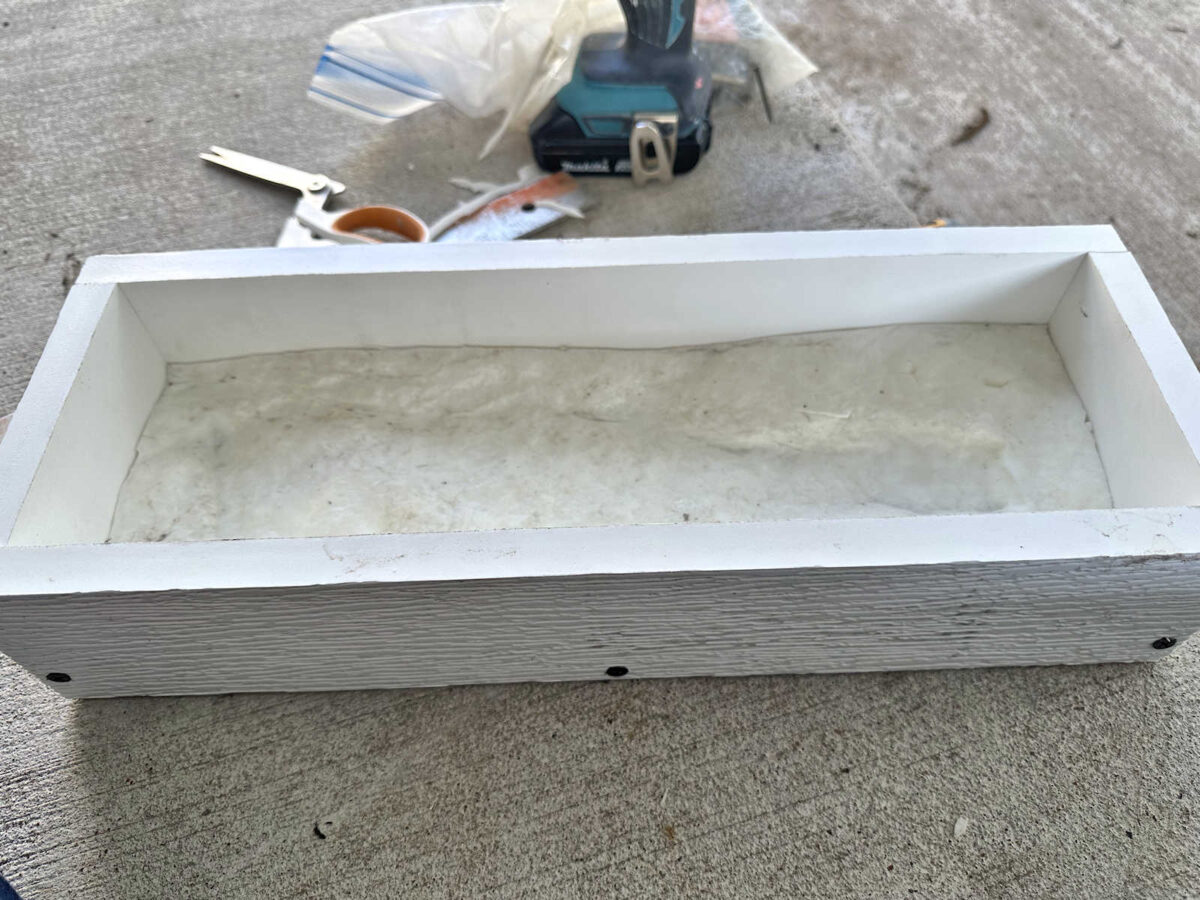
I ended up using the type of sand that you would use underneath paver stones. I already had the sand on hand, and it seemed easy enough to lift the edges of the silicone mat, drop some sand underneath, and then adjust the silicone mat so that the edges were straight.
Once I had the mat at the right height all the way around, and completely supported underneath, I vacuumed away the excess sand and then caulked around the edges of the silicone mat where it met the PVC boards that I used to make the molds.

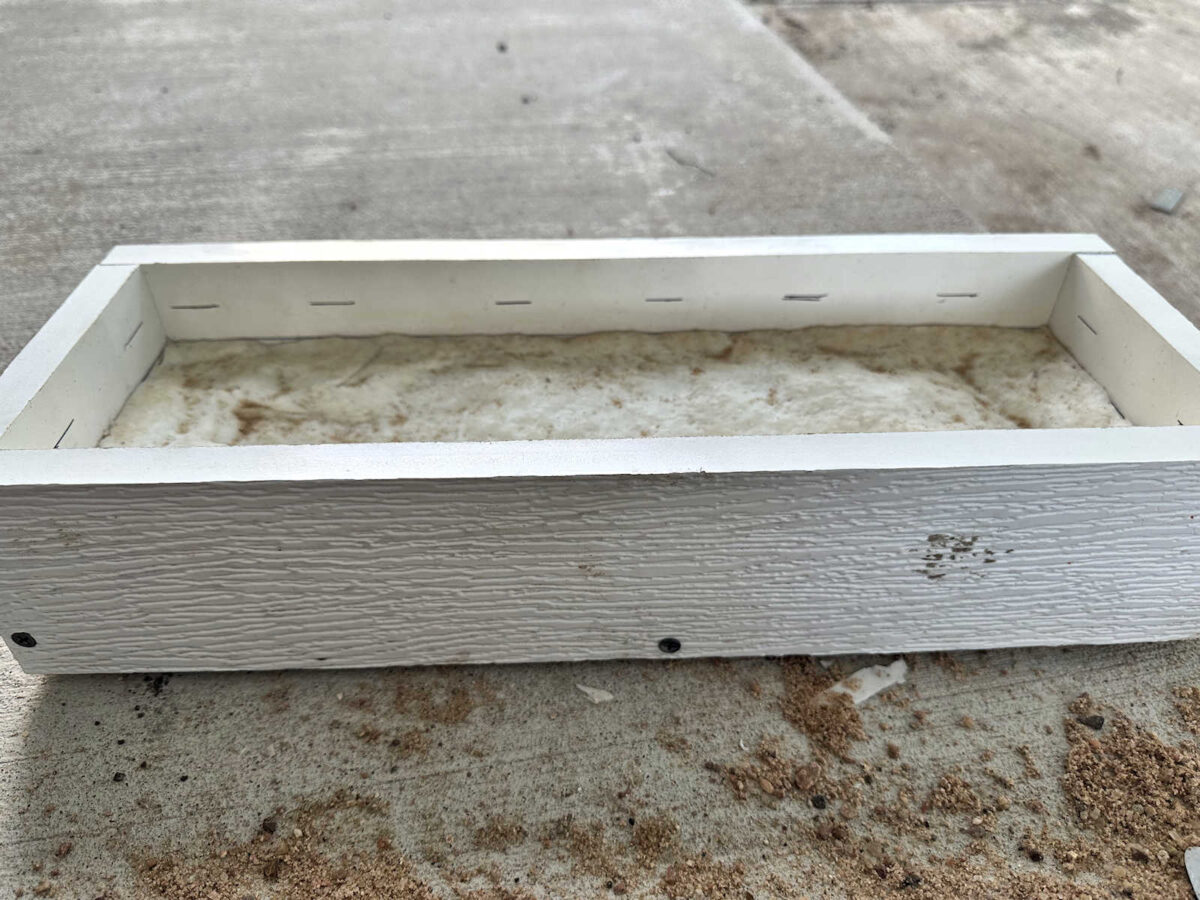
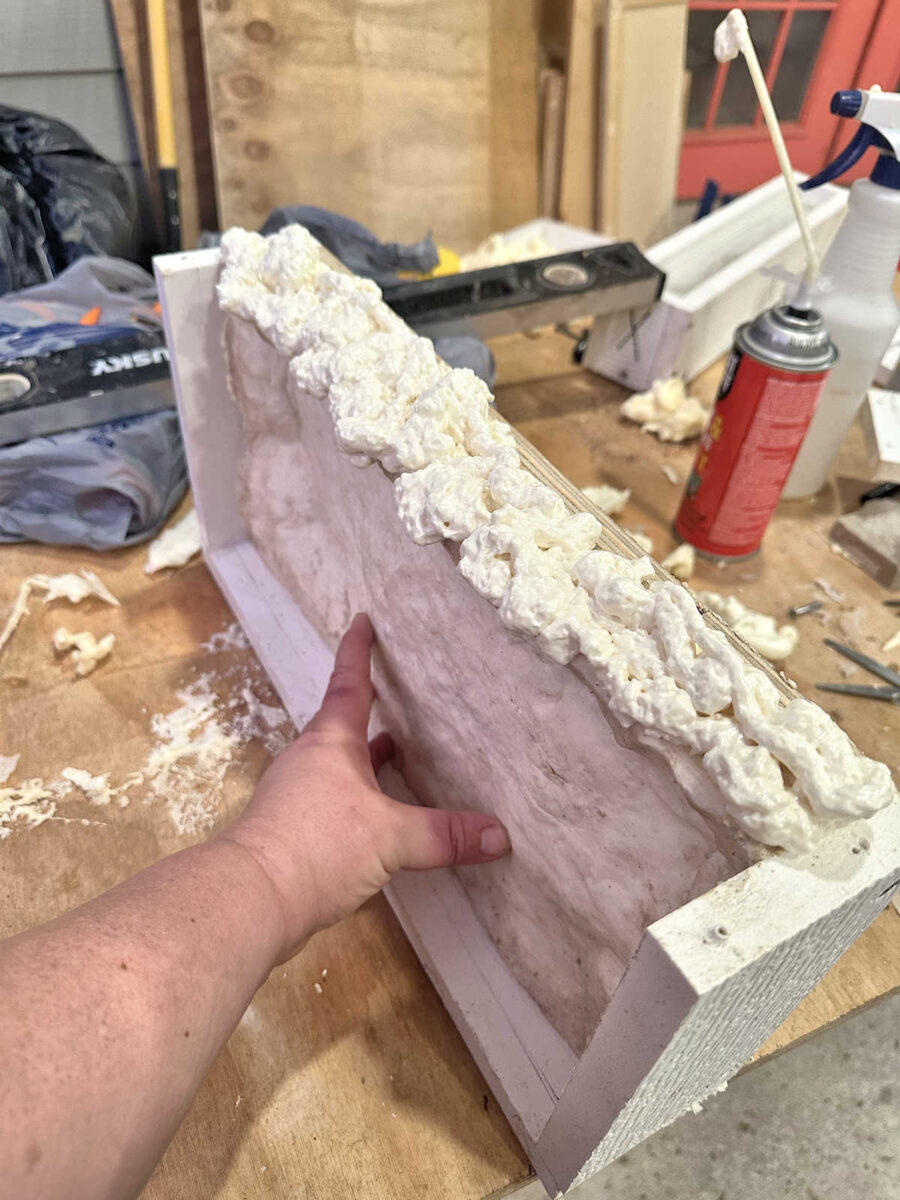
I thought that would be mostly a one-and-done process. I knew that in order to demold each stone, I would have to remove one side of the mold, so I thought that meant I would just have to re-caulk one side of each mold before pouring the next stone. That turned out not to be the case. As I removed each stone, it pulled the silicone mat up a bit along with the stone. And that dislodged other areas of the mat. Once those other areas of the silicone mat were pulled away from the caulk, sand would come out. And because I was using silicone caulk between the silicone mat and the PVC boards, which constantly remained sticky, the sand would get stuck in the caulk and create a huge mess.
So I was basically having to go through half of the mold-building process before each new pour — adding more sand, shifting the sand around, getting the silicone mat just right, clean up the excess sand, and then re-caulk the whole thing. That was so time-consuming!
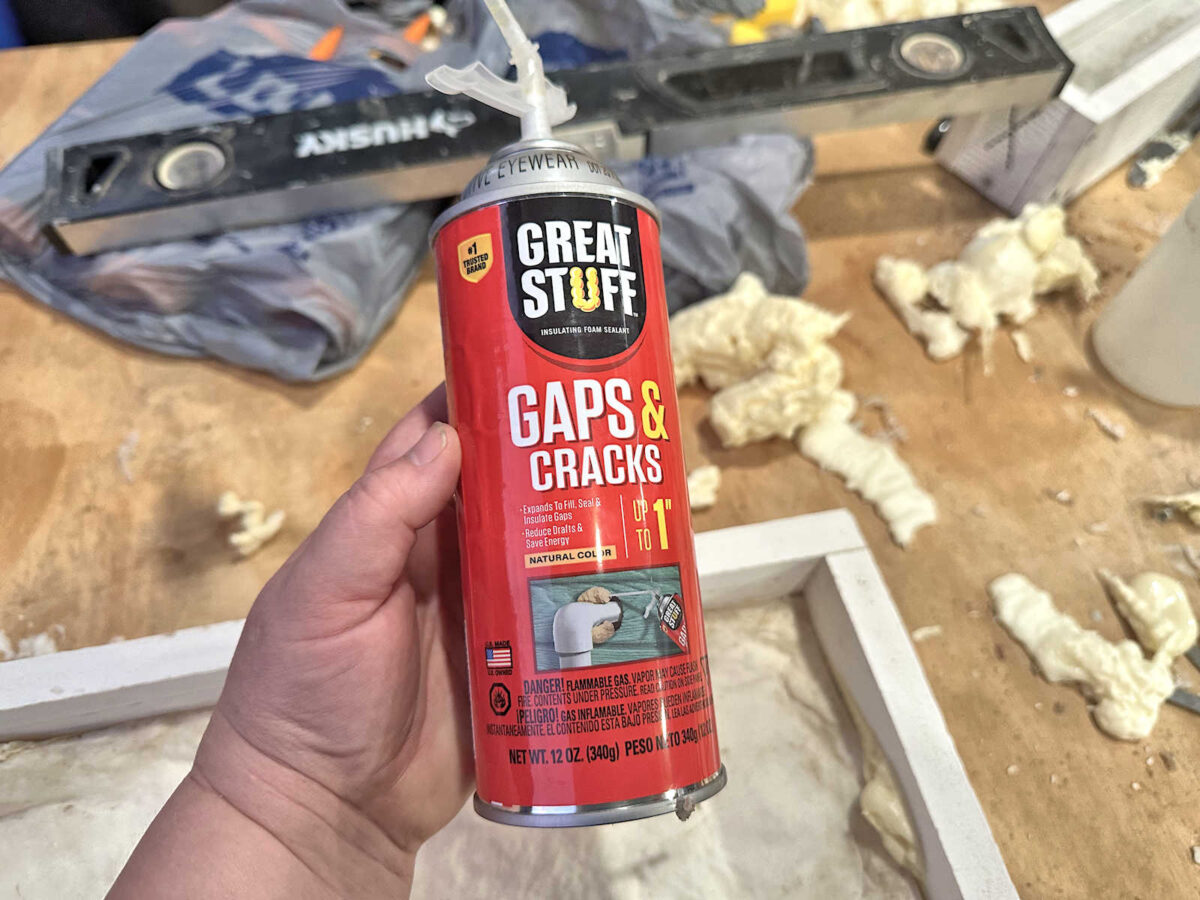
I knew there had to be an easier way, and there had to be a better solution than using sand under the silicone mats. I just needed something to fill in the gaps between the silicone mat and the bottom of the mold box, but it needed to be something that would dry and hold its shape instead of shifting around like the sand did every time I demolded a stone.
I finally decided that the perfect product for that is Great Stuff expanding spray foam. It would fill in those areas, and once it cured, it would hold its shape. I specifically chose this brand because, after a quick google search to find the fastest curing spray foam available at big box stores, this was the one. It sets within about 15 minutes and cures in an hour.
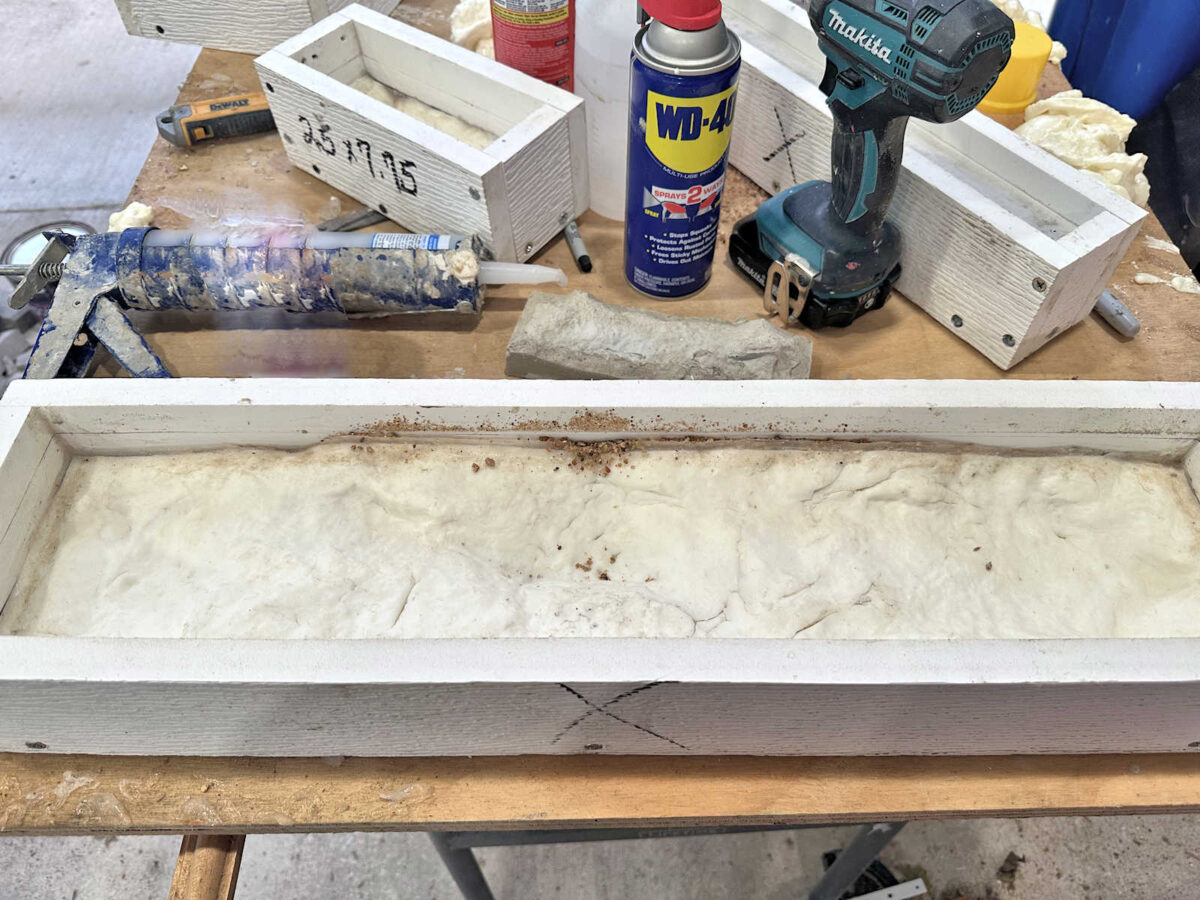
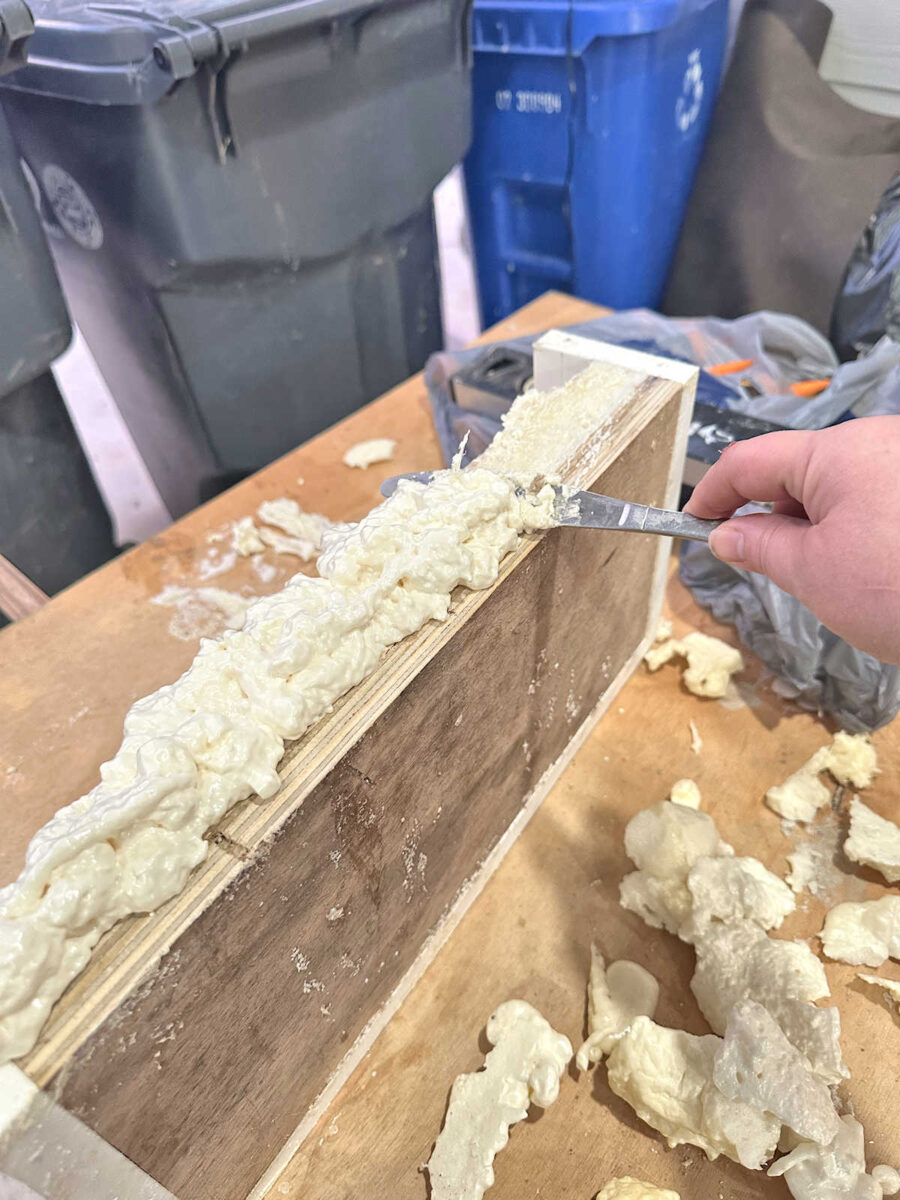
So I took one side of each mold off, emptied the sand, and got each mold cleaned up by removing all of the remaining sticky caulk with sand stuck in it. And then I lined up the silicone mat along the straight guideline that I had drawn on each one indicating where the edges of the silicone mat needed to be. I held it in place with one hand as best as I could, and then I sprayed the spray foam between it and the bottom of the mold box. It did its thing and expanded and came out of the open side. While it expanded, I just kept pushing the silicone mat into place to make sure it stayed lined up on the mold box.
After it stopped expanding, I scraped off the excess that had come out the side…
And then I screwed that side of the box back on and made sure the mat was still lined up on it’s guideline. I had to push it down more in some areas, and that caused the spray foam to come out between the box and the mat. But I just left it and let the foam dry completely. Once it was fully dry, I cut away the excess foam, re-caulked, and was ready to pour the next stone.
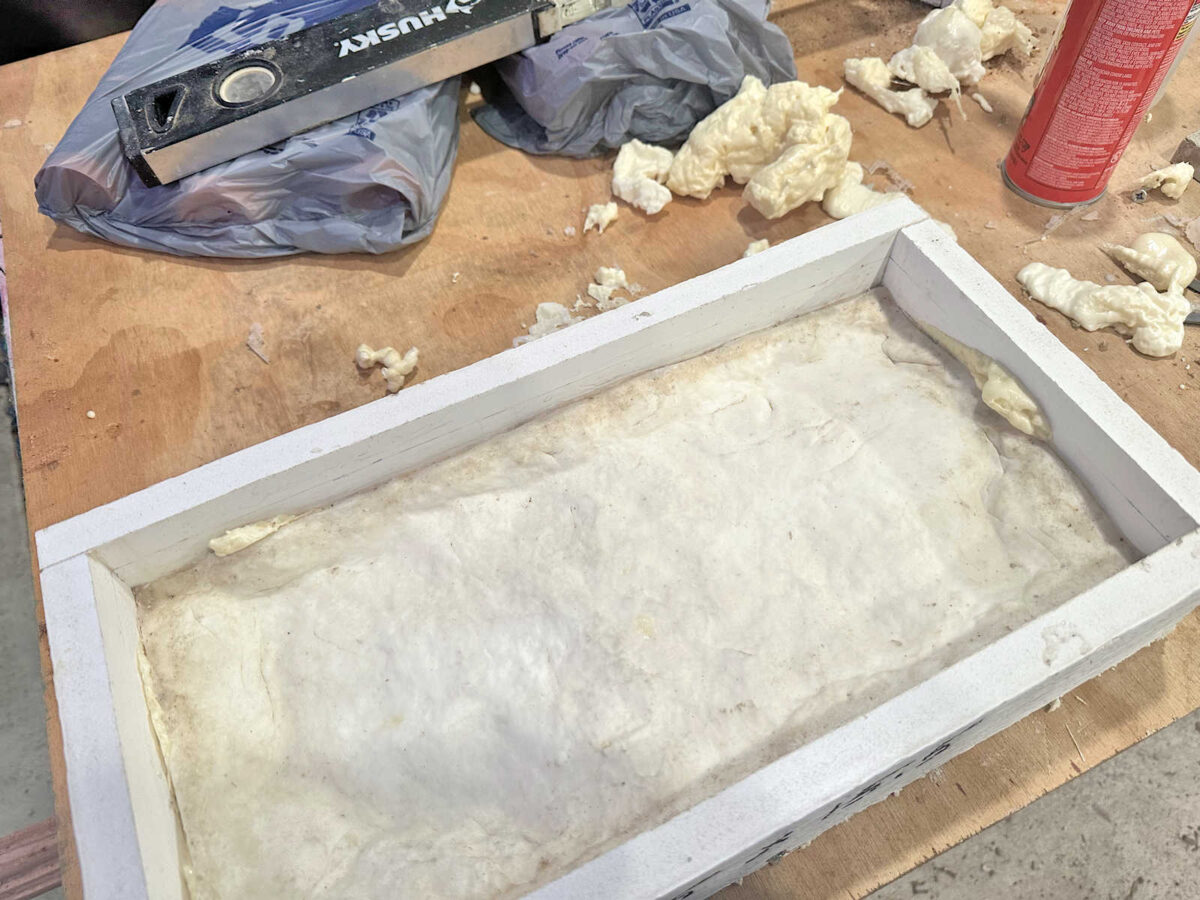
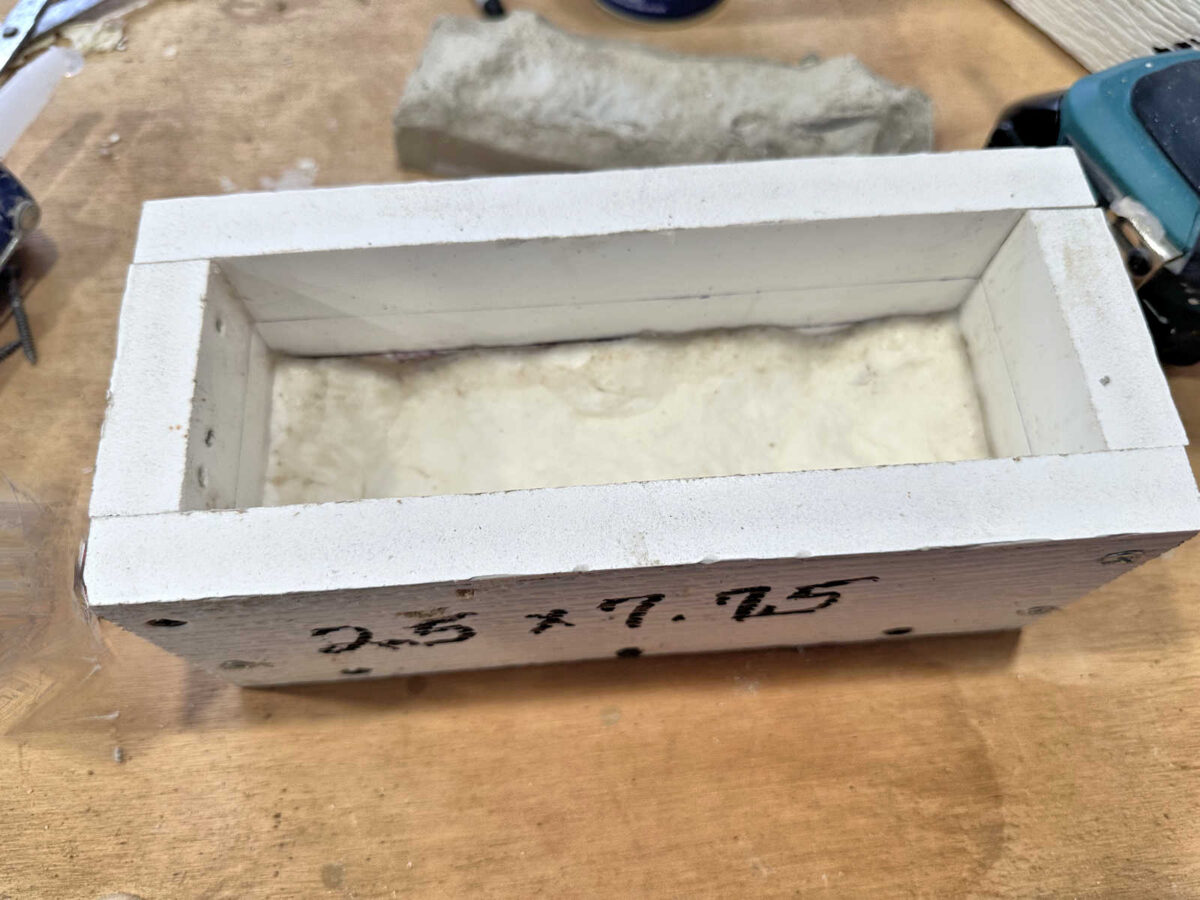
This made the whole process so much easier and cleaner. I no longer had to deal with shifting sand. I no longer had to deal with basically remaking the mold again between pours. The foam held its shape, and because it’s very sticky when it’s wet and had grabbed onto the silicone mold, it also held the silicone mat in place as I demolded the stones.
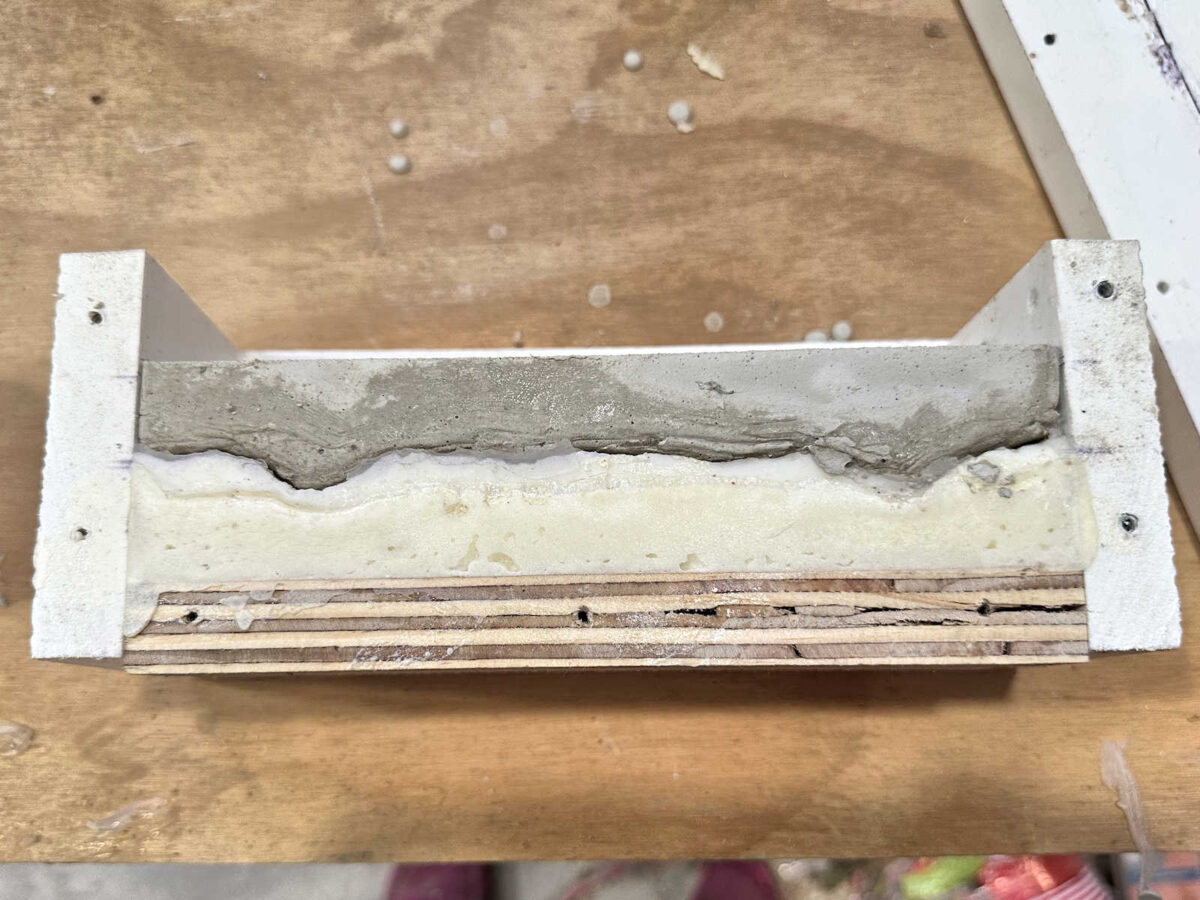
I was able to lift the stones off of the mat while the mat stayed in place on the other three sides.
The stone came out very cleanly and three sides of the mold remained completely intact.

Then I just had to put the side of the mold back on, re-caulk one side and two corners, and I was ready for the next pour.
I wish I had thought to do it this way from the very beginning, but of course, DIY is all about trial and error. And now, if I ever do another project like this, I know the right way (and the much easier way) to build a mold using a silicone textured mat. And who knows? I might be using these molds for another project in the future. I’m definitely going to hang onto them just in case I want to make something else to match the Austin stone on our house.
So while I’m not quite finished pouring stones, I am ready to get started attaching them to the skirting area of the front porch. I hope to have some progress to show you tomorrow!
More About Our House Exterior & Yard

see all exterior &
yard diy projects

read all exterior &
yard blog posts

Addicted 2 Decorating is where I share my DIY and decorating journey as I remodel and decorate the 1948 fixer upper that my husband, Matt, and I bought in 2013. Matt has M.S. and is unable to do physical work, so I do the majority of the work on the house by myself. You can learn more about me here.

Brilliant!
Hi Kirsti – wow. You are truly amazing and resilient. I know that there have been times when you have become discouraged by certain challenges – but you always bounce back. That speaks volumes of your character. This is one of those projects that I thought you were crazy to attempt – but again you proved me wrong with each way you tackled and found a solution (and I again salute you !)
Can I suggest you make a few spares in case you need to replace them for whichever reason -I am sure you will not want to go through this again.
Cannot wait to see the end result.
This is me watching you like I watch cooking reels; love seeing the process, hit the “like’ button, might even save it, but deep in my soul I know I’ll never do it 🙂 😉
I had thought about the expanding foam, but I wasn’t sure how your molds were being formed, so, I thought sand must be the way to go and thank goodness you’re clever enough to figure this out. I love the stones; they look amazing and cannot wait to see them in place.
Cheers to you, Matt and the Fur Babies!
You are the consummate DIYer, always thinking…’what if’….
Here’s an idea, why not pour one each of the stones in case one falls off or cracks, or…that way you don’t have to begin all over again. Always nice to have a backup piece when you need it.
I’m in awe of how realistic these faux stones look. I wish you could capitalize on this. I’m sure a manufacturer somewhere will get wind of this and next thing you know they’ll be in big box stores ready to attach to house skirting!
Why not make more small boxes so you can pour more small stones at once? Glad to see some progress.