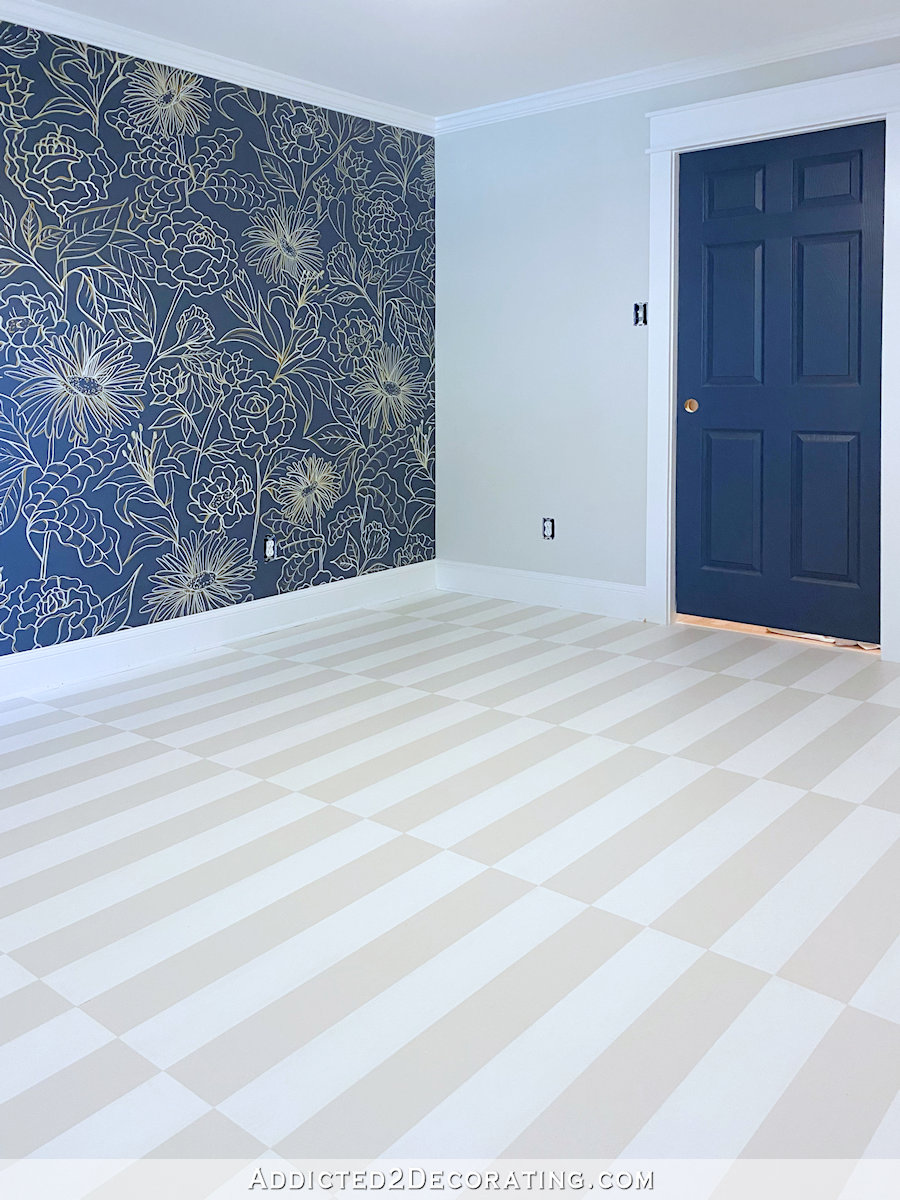
DIY Painted Hardwood Floor – Offset Striped Design – Finished!
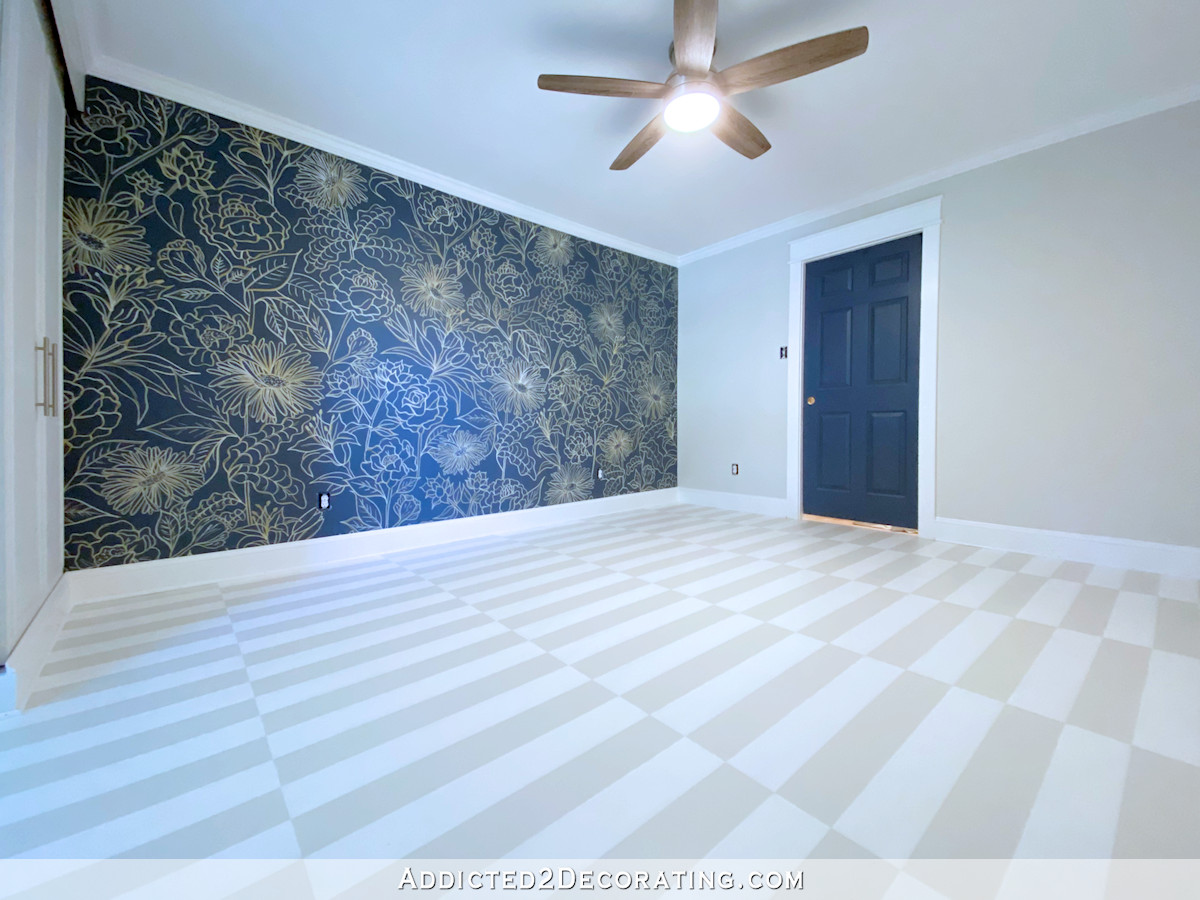
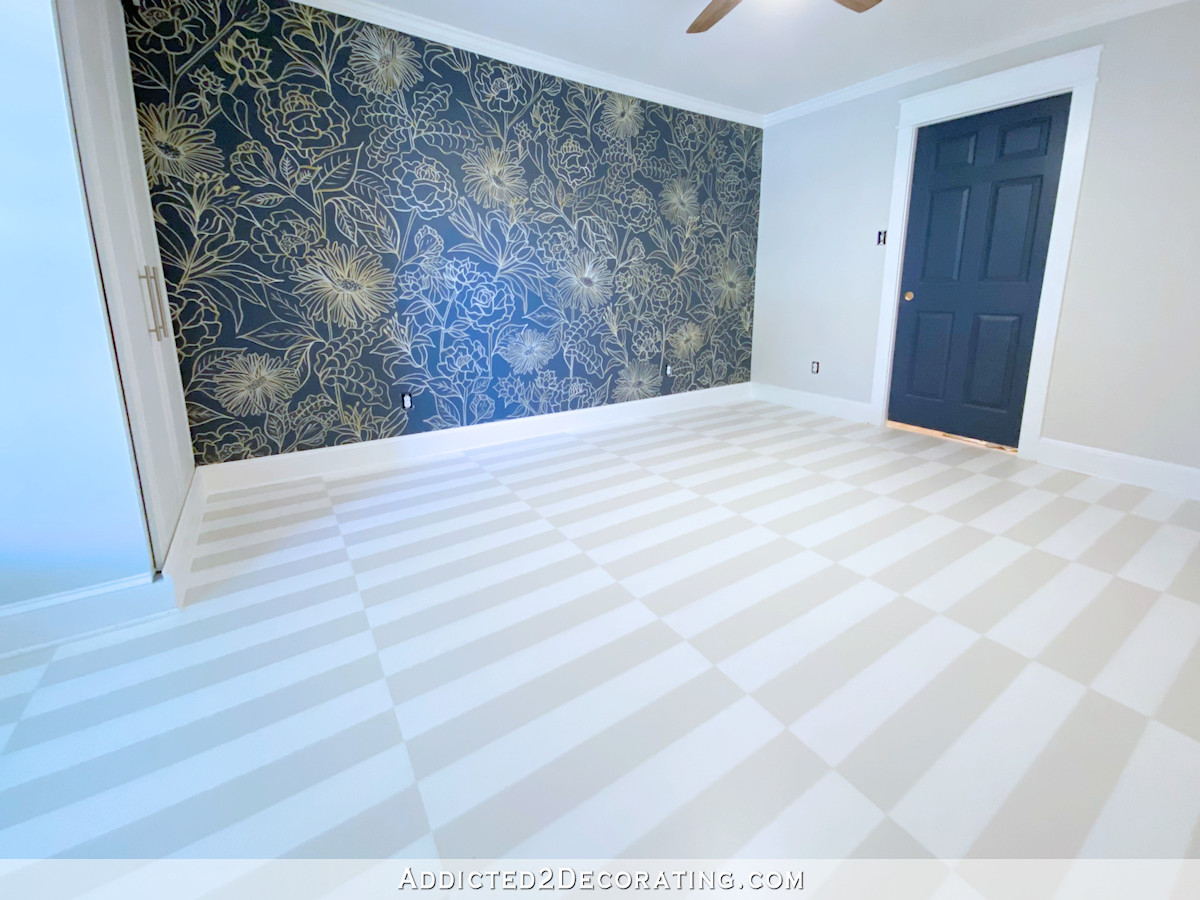
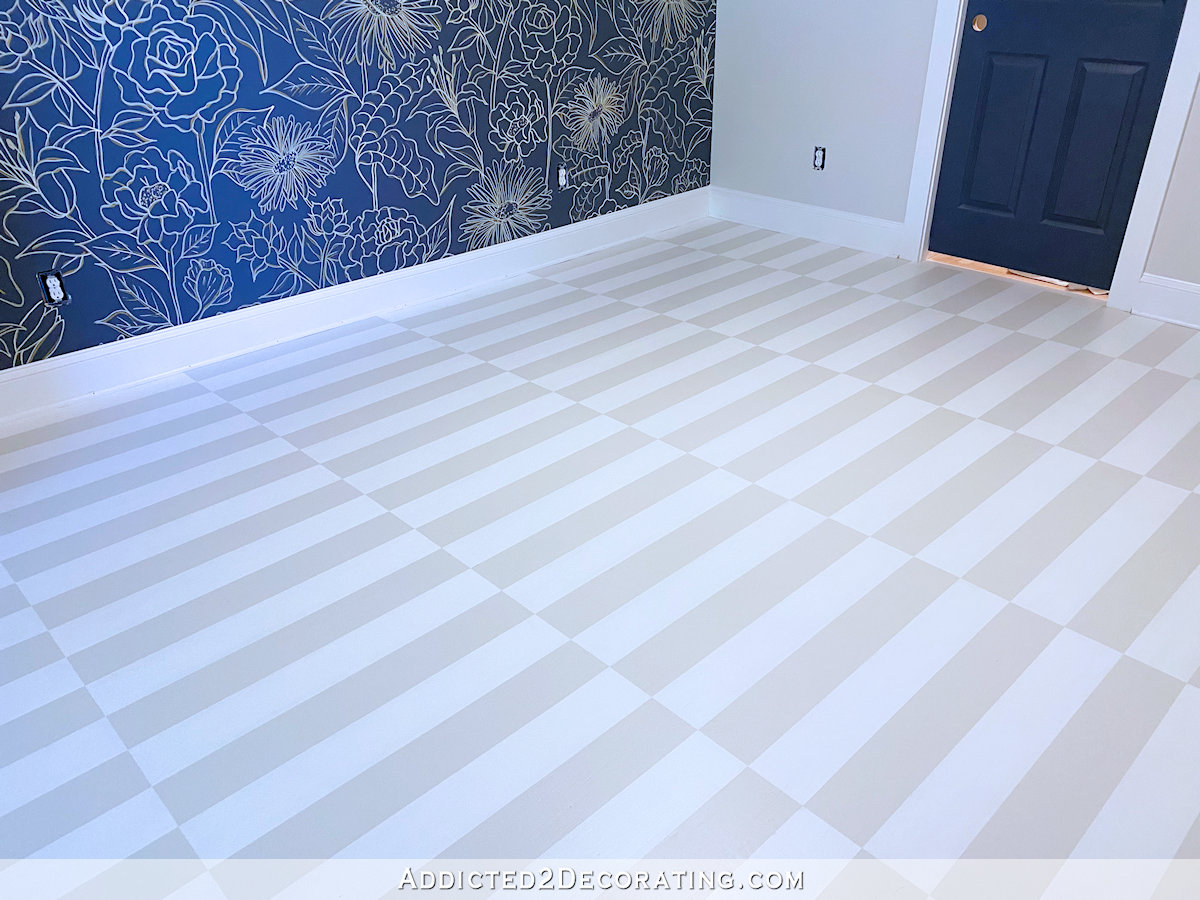
My guest bedroom painted hardwood floor with the offset striped design is finally finished! I got three coats of clear coat on the floor on Tuesday, left it alone to dry for about 24 hours, and then installed the shoe molding yesterday afternoon.
If you missed the first part of this project, you can find that post here: DIY Painted Hardwood Floor – Offset Striped Design – Part 1
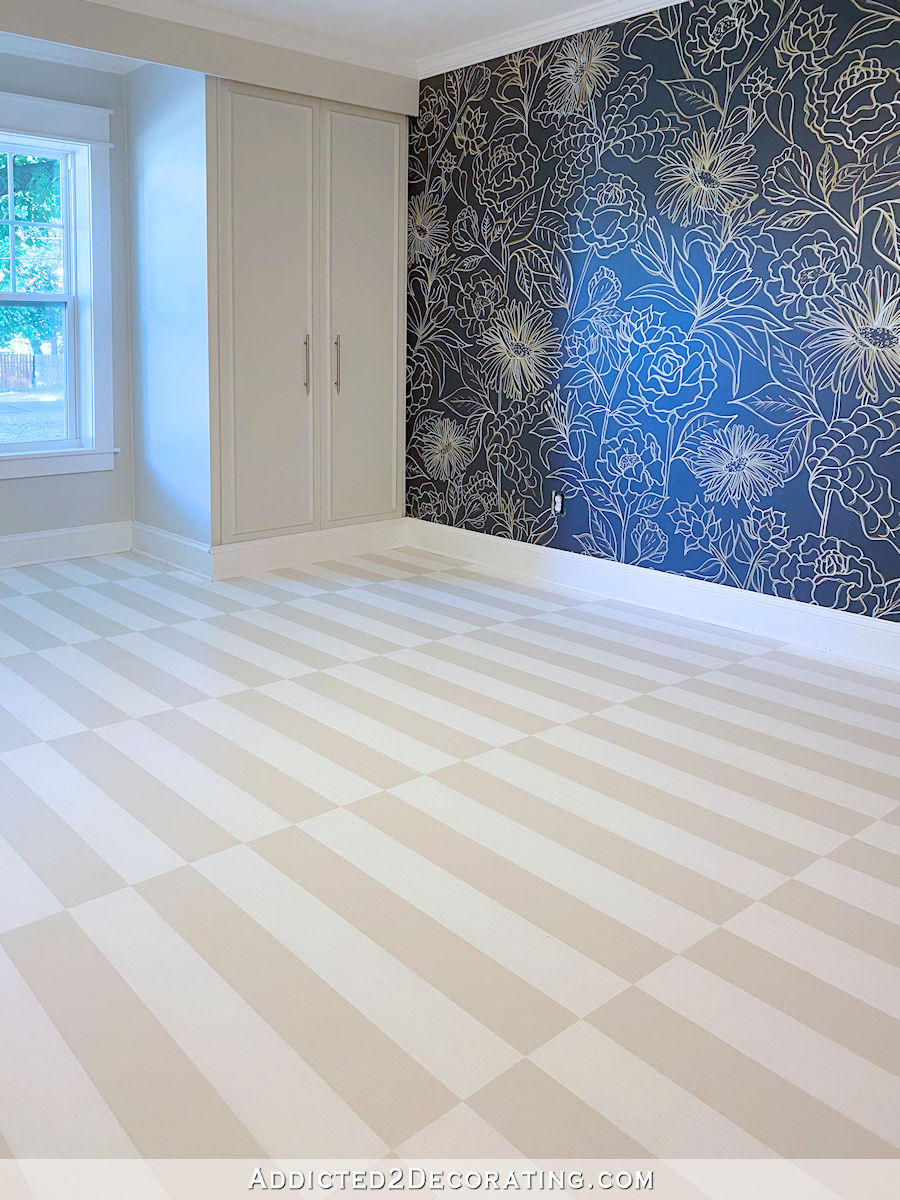
And here’s how it turned out…
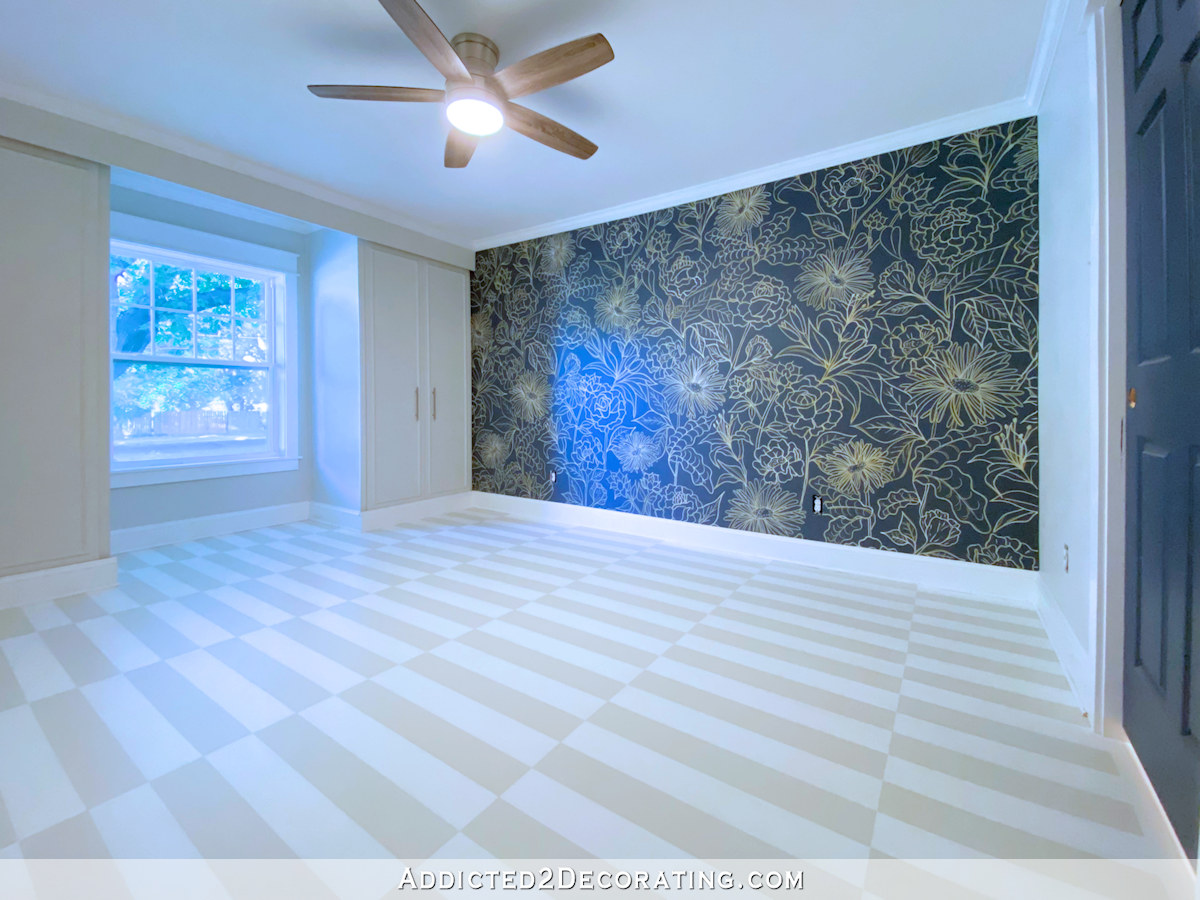
I explained in the previous post how I marked and taped off the stripes, so you can find those details there. (Find the link at the top of this post.) After getting all of the stripes painted, I went back and did any necessary touchups, and then let those dry for a couple of hours. Then I was ready for the clear coat.
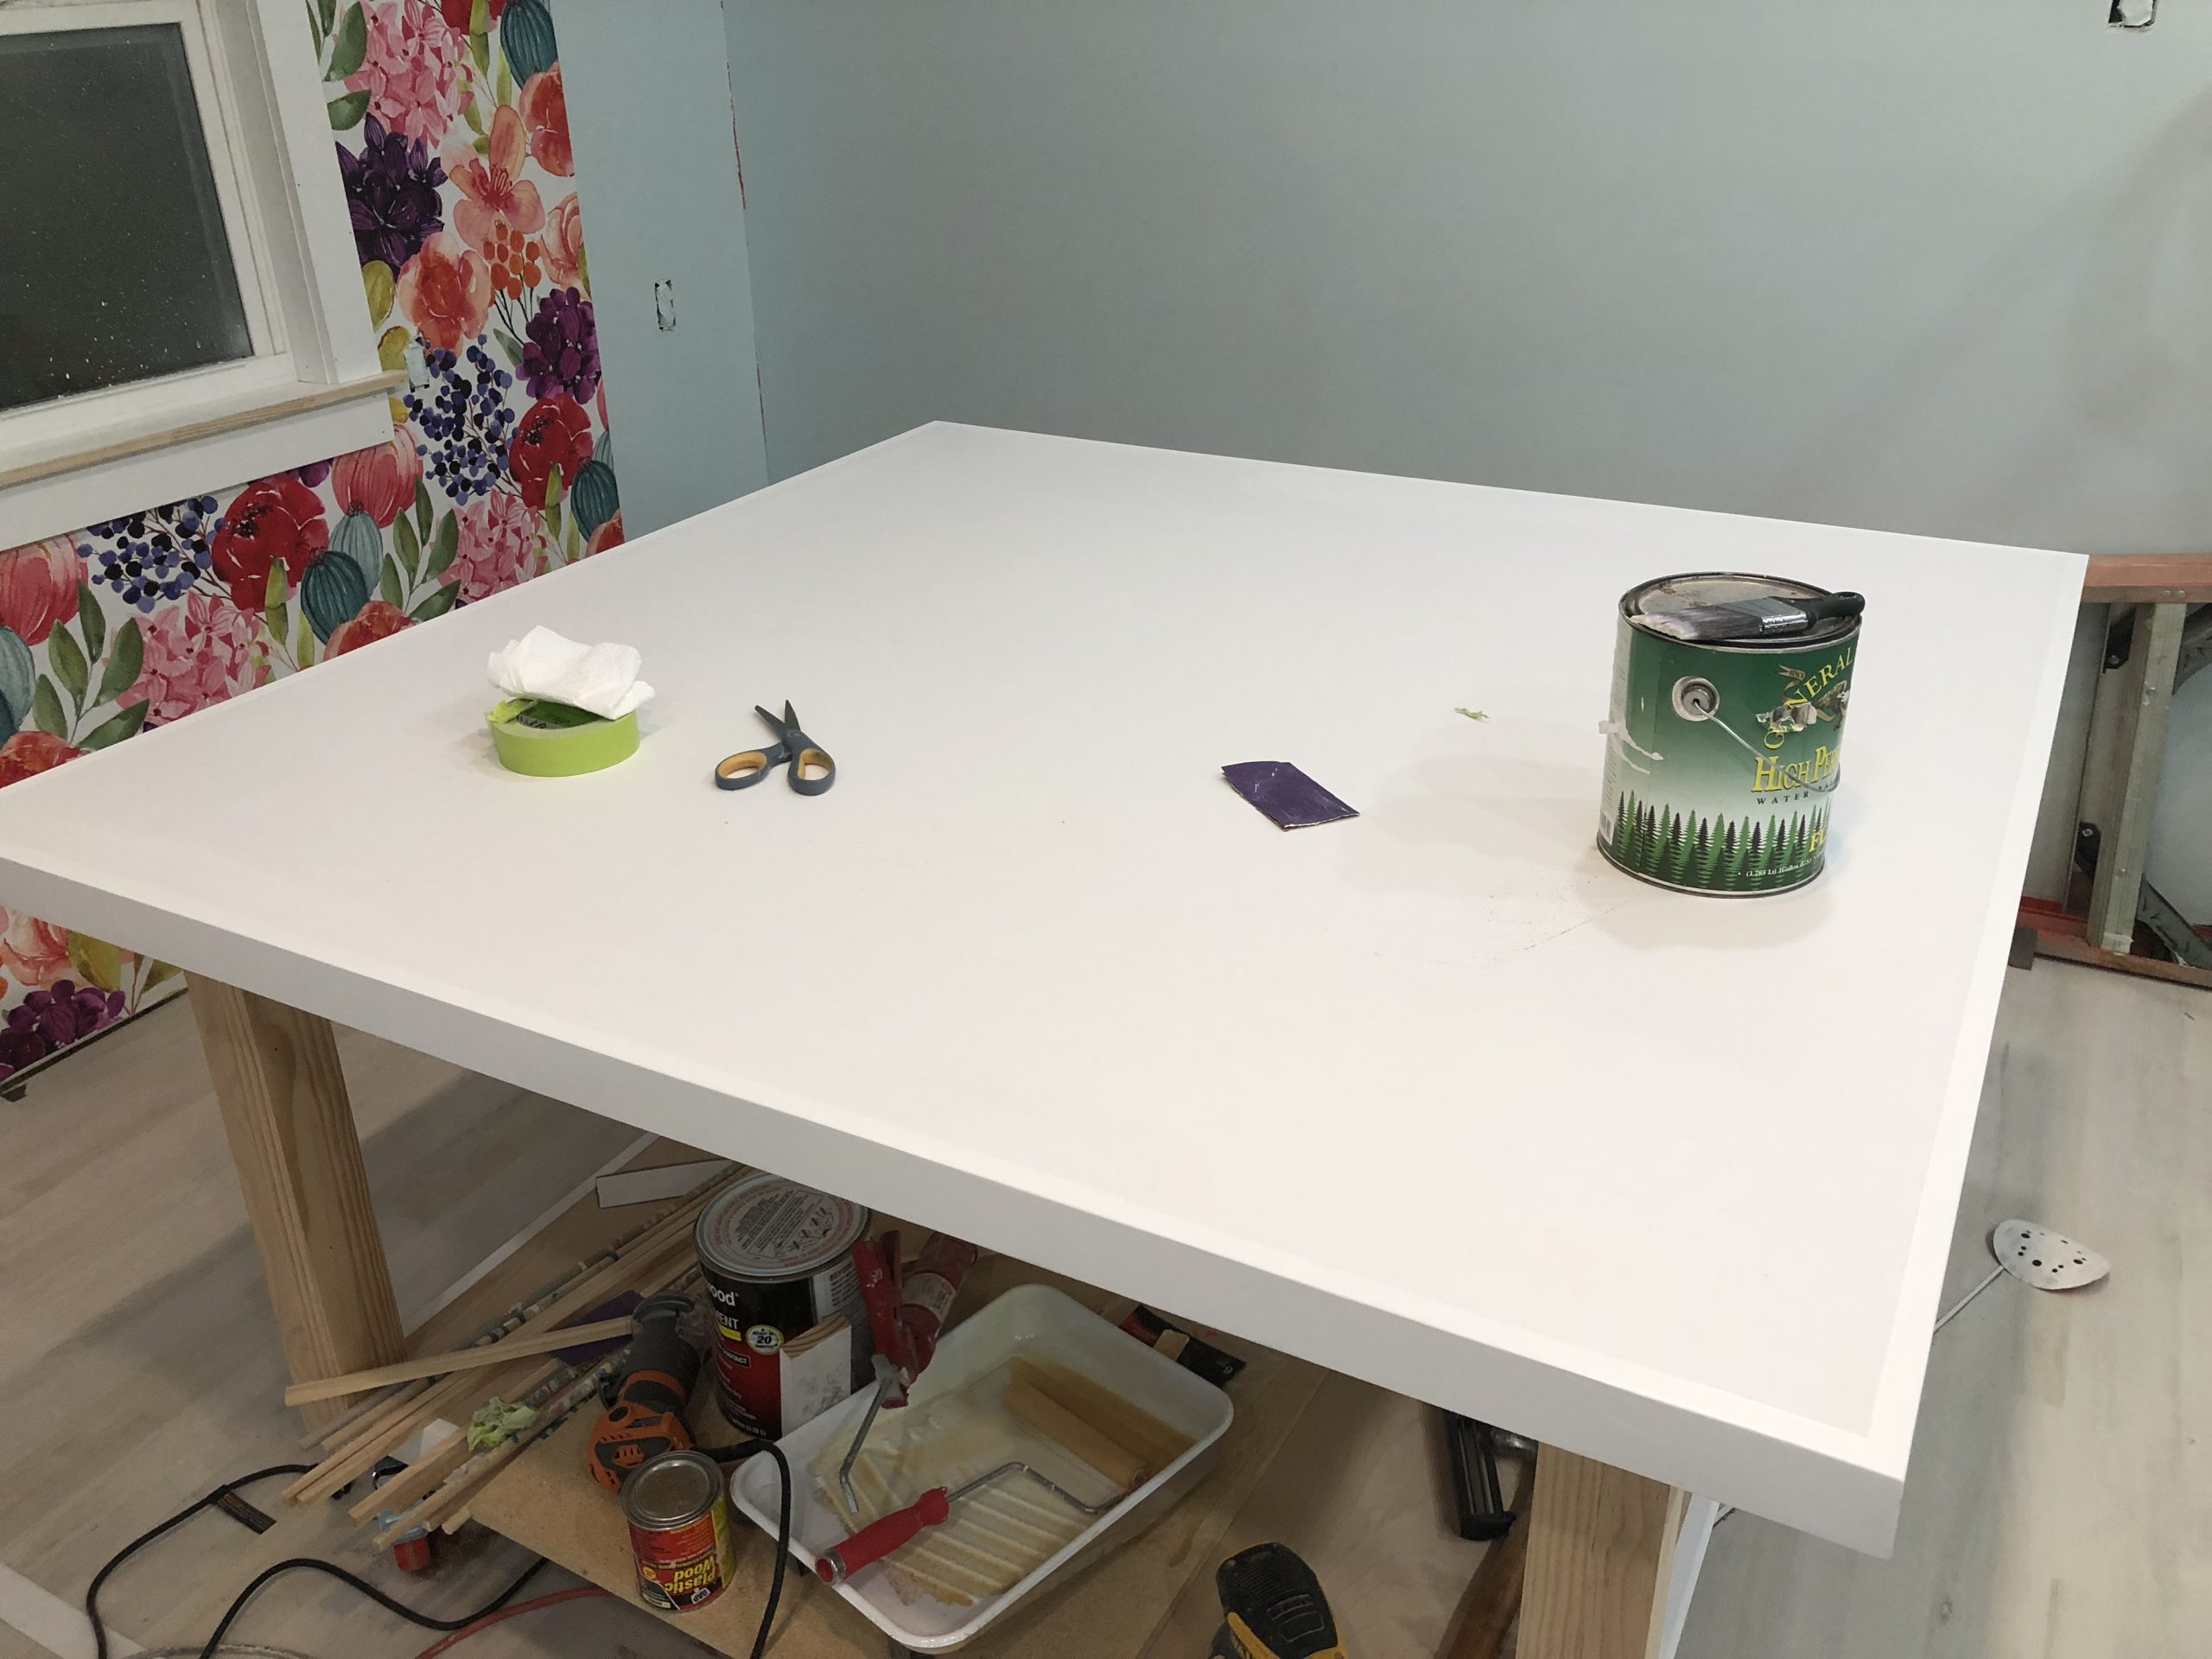
To clear coat this floor, I used Varathane Water-Based Polyurethane Floor Finish in a matte finish. To apply it, I used a 5-inch stain and waterproofing brush, and I attached it to the end of an extension pole.
I simply dipped the brush into the can of polyurethane, and brushed it right on to the floor. There were no other materials or tools needed other than a can of poly, an old towel that I placed the can on (so that it didn’t scratch the floor as I scooted it across the floor), a brush, and an extension pole. I did a total of three coats — two coats the first day, letting the first coat dry for about five or six hours before adding the second coat, and then a third coat the next morning.

The can of polyurethane is labeled “matte”, but in my opinion, the finish is actually more of an eggshell. It has a very slight sheen to it. But it’s such a nice finish, and it’s so easy to apply. This is the exact same clear coat that I used on the studio floor, and it’s still holding up strong even with my 95-pound dog playing in there almost every day.
I’m very pleased with the finished floor, although if I had to do it again, I’d choose to use the Benjamin Moore Classic Gray mixed at 75%, or possibly even 50%, so that it’s not identical to the wall color.
But it’s done, and there’s no way I’m going to go back and redo anything. That’s just something to keep in mind if I ever do another painted floor and use the colors already in the room.
And of course, once the bed, nightstands, dresser, and other items are in the room, the floor will be a whole lot less prominent. It’ll just fade into the background like an area rug would.
I’m going to give the floor a few days to cure. The instructions say to wait three days before subjecting the floor to normal use.
In the meantime, the golden yellow velvet fabric arrived for the upholstered bed, and I’m very anxious to get started on that. Also, I ended up finding some nightstands that I really liked, so when I saw them go on sale, I decided to go ahead and purchase those instead of building my own. Those are arriving today, and I’ll share them with you as soon as I can get them put together.
But I think I’ll be building a dresser because the only one I’ve found that I really like, and that fits all of the specs that I want (number of drawers, measurements, style, color) is a $1600 dresser at Ballard Design. There’s just no way I’d pay that much for a dresser for a guest bedroom, even though we’ll actually be using this as our main bedroom for the foreseeable future. But I think I can make something similar at a fraction of the price. So that will be a fun project coming up soon!
Update: Want to see how this finish held up over time? I compared all five hardwood floor finishes that I’ve used in our house in this post: Comparison Of The Five Hardwood Floor Finishes I’ve Used In Our House (Waterlox, Oil-Based Polyurethane, Whitewashed, And Two Different Painted Floor Finishes)

Addicted 2 Decorating is where I share my DIY and decorating journey as I remodel and decorate the 1948 fixer upper that my husband, Matt, and I bought in 2013. Matt has M.S. and is unable to do physical work, so I do the majority of the work on the house by myself. You can learn more about me here.
OMG! It looks so good! Love it!
I just love. Love, love it
Awesome job.
This room looks lovely. So fresh and clean. Nice job.
Love your paint job – it looks amazing!
As always, beautiful job and so creative.
Gorgeous.
Stunning room! Can’t wait to see it with the furniture and your other decorative touches. Lovely!
Beautiful! I have no idea if this relates to your floors, but when I had my hardwood floors sanded and clear poly (2 coats) put on them, we were out of the house a week and while walking on them was fine, I found later a couple places where we put something heavy, still left a mark.
This is a water based product and has a different (faster) drying cycle. It also has significantly less odor. I was amazed how well it worked for me when I redid some kitchen cabinets. I didn’t use it on a floor, so I will wait to hear how it stands up to traffic, although the dog seems to testing it as we write!
stunning
Pure magic.
Beautiful. Your “can do” attitude is so inspiring. As are all of your DIY projects.
Kristi, check out nadeau @furniturewithasoul.com. I just got an email and the prices are extremely reasonable. They had a navy dresser that would look fabulous with your door. I have not bought from them, but I like the style. Your bedroom looks fabulous.
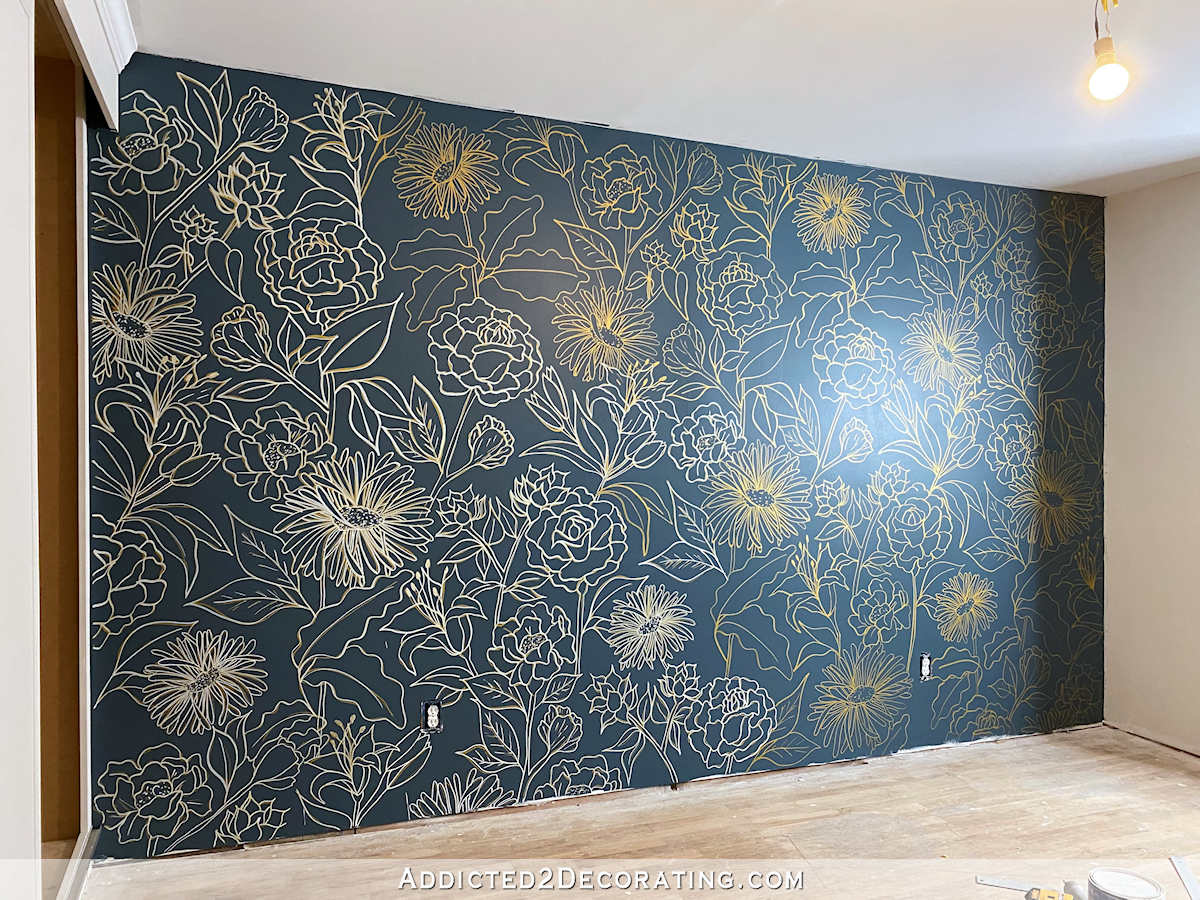
Hi, longtime follower. I cannot believe how amazing this room has turned out. I also really love how the colors of the broken stripe on the floor and the navy in the (gorgeous!) mural call back to and coordinate with the bold stripes on the hallway walls and the navy doors. Just incredible work. You should be so pleased!
What a rewarding effort. It looks amazing! So inspirational.
I’m floored!! Your attention to detail is incredible. I wish I could have even one room in my house to meticulously done! You have an amazing talent.
Wow! Excellent! You go girl! This is coming together beautifully!
Beautiful, can’t wait to see the finished room!
The room looks fabulous! I’m curious why you chose to brush the finish on instead of using a roller.
Bubbles? Texture?
Rolling on the finish with a regular roller (i.e., the kind you’d use on a wall for smooth texture) creates too many bubbles in the finish, and it also leaves behind too much lint for a clear coat. The smaller rollers (i.e., the six-inch rollers made for smooth finishes) apply the clear coat too thin. I prefer the brush method with water-based poly because I can more easily control the quantity of clear coat being applied. It really goes pretty quickly. The first coat took about an hour (the first coat always takes longer), and the other two coats took about 40 minutes each.
Thank you, I knew you had a good reason just wondered what it was.
Fab!Fab!Fab! Another check off the list project done. Always a great feeling.
The room is looking so good. Floor is fabulous. Can’t wait to see it all finished.
Looks fresh and pretty!
Love how clean and fresh it is!
Unbelievable!! I am amazed every time I see a new room post. The idea that one tiny little woman could accomplish all of this is so inspirational! Keep going, you are almost there.
Wow – the before and after for this room must be amazing to see again. Everything looks so fresh and stylish yet peaceful for a lovely bedroom. I am looking forward to seeing your work on the bed – I forget if you are making a bed, or just a headboard? My new desire is a bed frame upholstered with the matching headboard so I can give up on dust ruffles which I hate. Just a nice clean line fabric bed frame and headboard with pretty bedding. No more fighting with those extra linens near the floor! I have found both the bed and the headboards rather expensive when the quality is good, and the cheaper ones VERY fragile and not well made. (I sent one back it was SO BAD.) I KNOW my husband and I can do better. Can’t wait to see yours.
I’ll be upholstering the bed that I built years ago for the original master bedroom, and just upholstering that. But I think making a whole new headboard will be easier than trying to redo the one we have.
WOW! I love the vibe of the room! It seems so much more open and spacious when compared to the just as empty starting point. Its really starting to come together!
I should have pointed out in the post that the spacious look of the room is more from the wide angle setting on my phone, and less about the room looking so much larger now. Although I do think it looks a little bigger than it used to. 🙂
Really beautiful.
It turned out so beautiful!! I l love the combo of floor and flower wall! My SO just looked over my shoulder and was very impressed, too, so applause from both of us 🙂 I’m looking forward to the next steps (as always!)
So do you kind of “sweep/mop” the varnish on? I really need to find something like this… 😀
Didn’t you have a few dressers already? Is none of them good, or did you get rid of them all when you decluttered (that was awesome btw)…
I just brush it on as I would if I were holding the brush in hand and polyurethaning a table top or something like that.
I had two dressers that I gave away during the decluttering, but neither of them would have worked for a bedroom. One was the wrong shape/size. The other one had horrible drawers that stuck, so while it was fine for my entryway where I rarely needed to open the drawers, it wouldn’t have worked for a bedroom where I’ll be opening the drawers every day.
It’s lovely! Can’t wait to see it all furnished!
So, so fresh! Just . . . wow! The yellow headboard against the navy wall will be stunning! Also, thank you for the tips on the painted floor and the poly. Blessings from Birmingham!
I can’t believe I’m saying this, but this looks so much more muted than you usually do. And don’t get me wrong, it’s not that I don’t like it, it just seems not as colorful as you usually make things, and YES I know, it just the the walls and floors. I LOVE the flowered wall, BTW. I have a question about the floor: when you say “mixed at 75%, or possibly even 50%” do you mean 50-75% grey to 25-50% white? Just curious. Thanks.
Don’t forget that I’m bringing in golden yellow. 🙂 But it’s true that this color palette in here will be much more limited than what I usually do. People said that a guest bedroom needed to be more subtle and calmer than my norm, so blue and gray with a big yellow headboard is as subtle and calm as I can go. 😀
Mixed at 75% simply means that when they mix the paint at the store, they will only use 75% of the colorant additives than what the normal “recipe” calls for. I’ve done this at Benjamin Moore, Home Depot, and Sherwin Williams. So you just ask for the color at 75%, or 50%, or even 25%, and they’ll mix it that way for you.
This is beautiful! I want to move into this room! 🙂
I can’t wait to see the completed room!
I am so impressed. It is beautiful. You have opened my eyes to new and creative ways to achieve a look. Terrific work!
That is simply beautiful, Kristi!
oh, it’s so lovely…amazing I can say. I enjoyed all your projects, but this one left me breathless. congratulations !
I just want to say thank you for being so generous with your knowledge and experience. I’ve learned several things from you (I love the General Finishes Top Coat). I just painted a guest room. I may go back and try your wall technique! It’s beautiful. I also like the floor. My husband has bad motion sickness though. I’m afraid it might cause him an issue. He gets sick at theater sometimes, even with no motion and his eyes closed. 🙁