Breakfast Room & Pantry Progress [Video]
It’s always at this point in a project when I start thinking to myself, “I’m so tired of posting ugly pictures! I’m ready to get to the pretty stuff!” And yet, these are the pictures that make the eventual after pictures all the more impressive. 😀
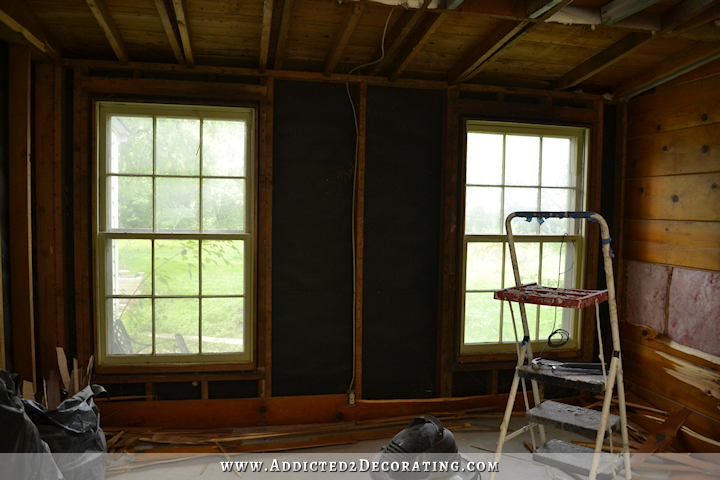
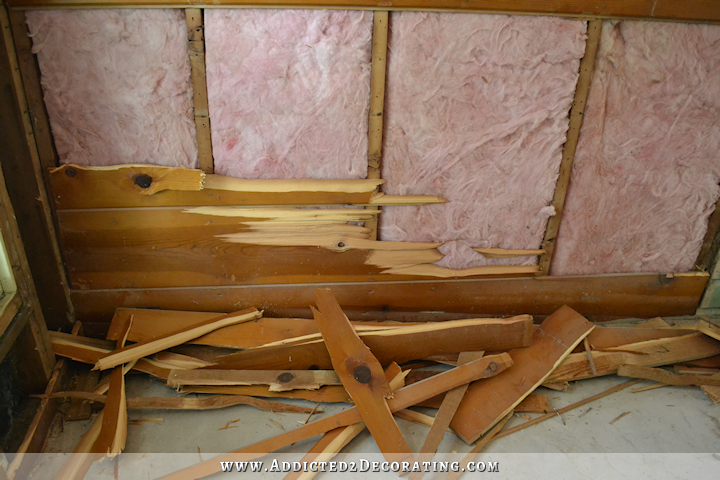
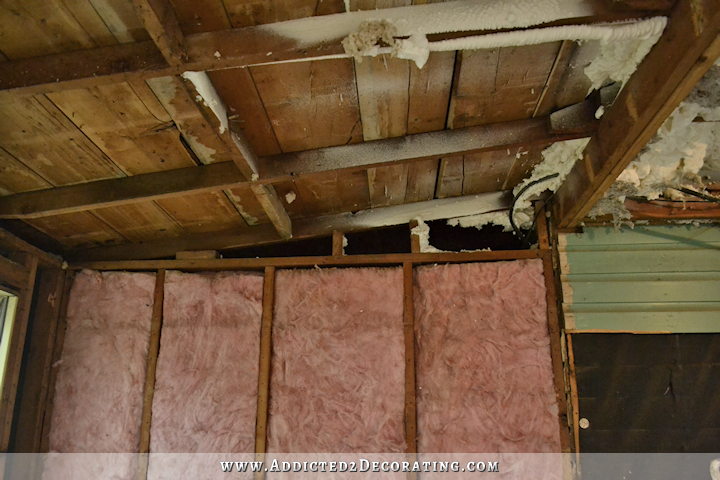
Things are progressing slowly but surely in the breakfast room. I decided to go ahead and remove all of the wood from the walls to make it easier to run electrical wiring. The water damage on the wood on the back wall had me nervous about the condition of the framing boards for that wall, but everything looks to be in pretty good condition. Of course most (probably all) of those studs will be removed/replaced/moved anyway since I’m going from two windows to one center window.
But the reason it’s taking so long is because this wood refuses to come off in whole (or even large) pieces. It’s just splintering off in small pieces, and the huge nails holding that wood onto the walls feel like they’re driven into concrete. After two days of working on this, my hands are so unbelievably sore, and I’m not even halfway finished!
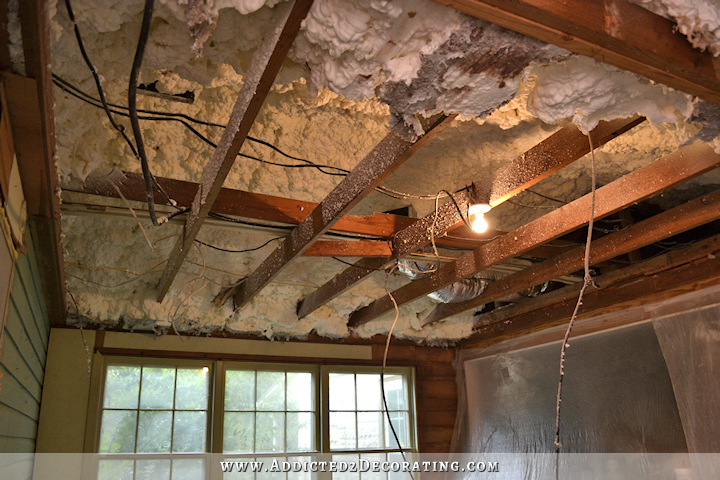
The most exciting thing I’ve done in the last two days is get my ceiling cleaned up, and get all of the extra wood from the drop down ceiling removed. Those 2 x 4’s ran the length of the main part of the room, from the front wall to the load-bearing beam, and they were all secured together along the middle point and then secured to the actual ceiling joists with scrap wood nailed into the ceiling joists and nailed into the drop ceiling framing along the center point.
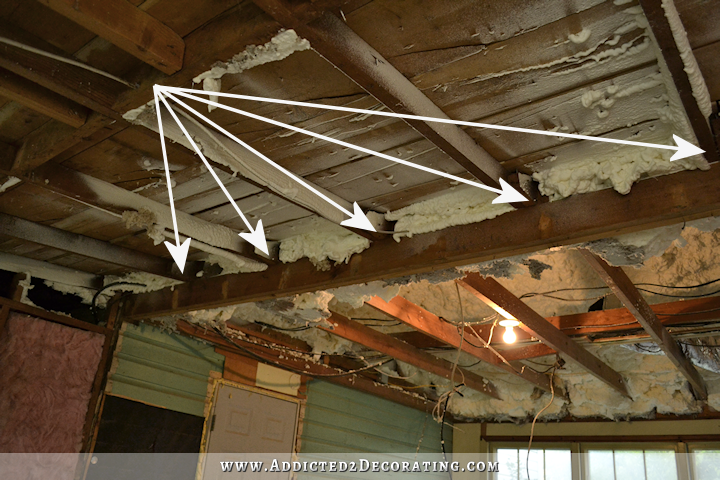
So I started by cutting the long 2 x 4’s in half along the center point using my reciprocating saw, and removing the half of the boards from the center to the load-bearing beam. The arrows below show where I cut to start removing the boards.
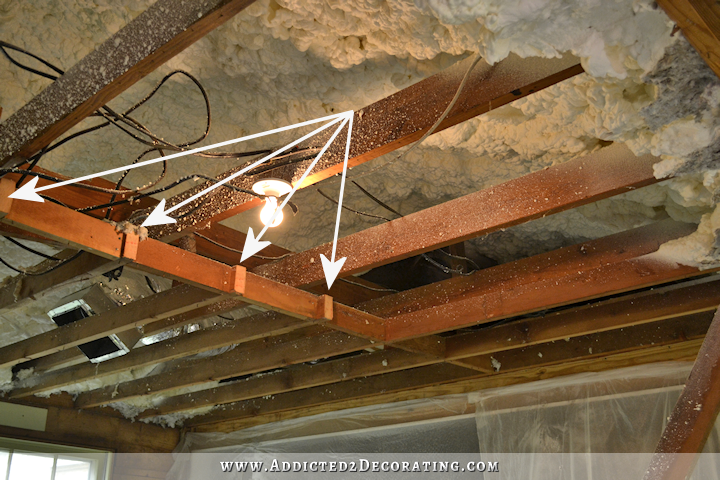
Then I did the same thing on the other side of that middle section, and removed the 2 x 4 sections going from the center to the front wall. And finally, I came back and removed all of the center portion that was secured to the ceiling joists.
I was pleasantly surprised at how quick and easy the removal of the drop ceiling framing actually was. And when all of the extra wood was removed, I was left with just the actual ceiling joists.
Here’s the mess I had before removing the drop down ceiling framing…
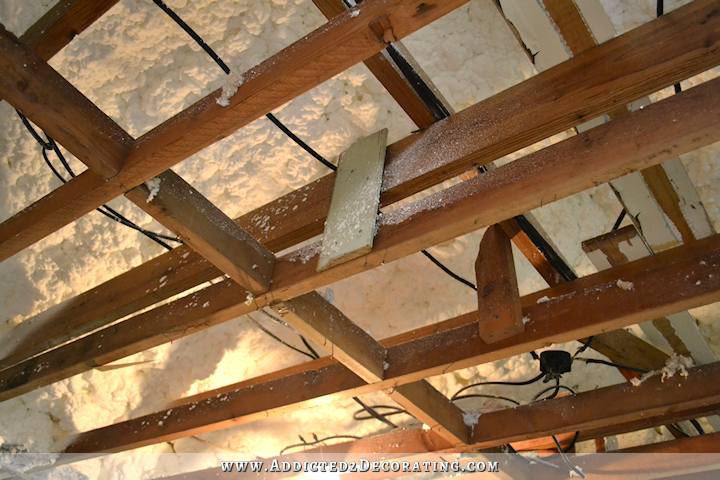

And here’s my new cleaned up ceiling with the drop down ceiling framing removed, and just the actual ceiling joists remaining…
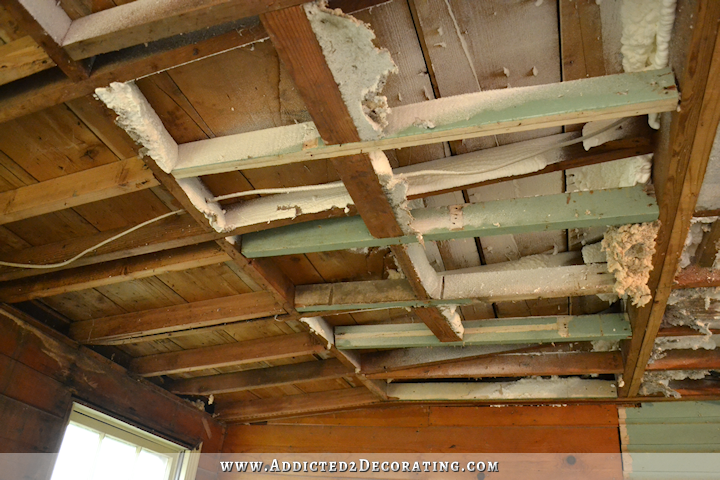
I also got the ceiling in the pantry area cleaned up and the extra wood removed. Before, it looked like this, with extra wood attached so that it was flush with the bottom of that load bearing beam…
And now it looks like this, with just the rafters left.
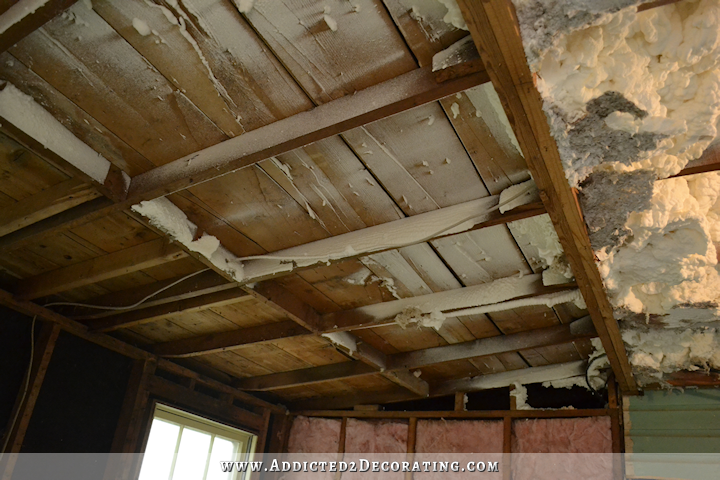
Those rafters sit on top of the load bearing beam…
And you can see the light spots left on the beam (in the picture above as well as the one below) from where I removed the extra wood from the drop down ceiling in the pantry area.
I did have one surprise. I thought that my father-in-law had insulated and drywalled the entire wall in the storage room at the back of the garage, but when I took the wood off towards the ceiling, I found that those angled areas are completely open to the storage area! I used to hear squirrels getting into that storage room, so if they get in there now, they have free passage right into our house. That obviously needs to be closed up ASAP.
So I’m definitely making progress! Here’s a full view of the room looking towards the back of the room where the pantry will go. My mom came over yesterday and bagged up all of the old insulation, and also removed all of the piles of wood that I had removed from the walls and ceiling, so my new concrete floor is looking clean again.
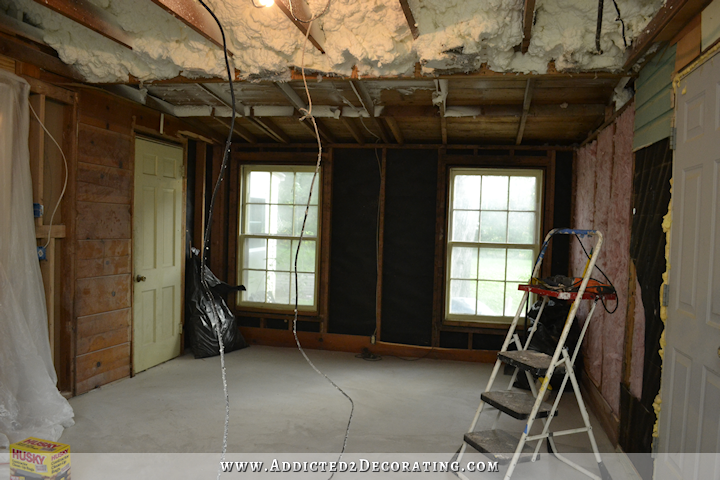
That door on the left in the picture above will be removed since I don’t need a door from my pantry into the sunroom. And the two windows will be exchanged for one single smaller window in the middle.
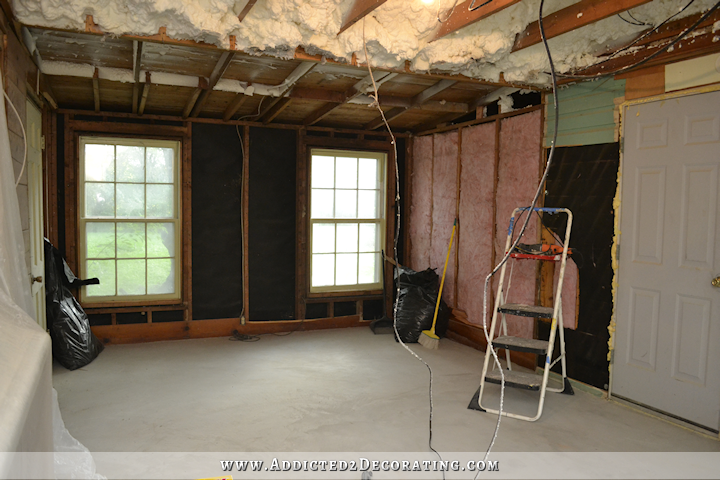
And this is the same future pantry area, just looking more towards the right wall that the pantry shares with the storage room at the back of the garage.
I completely forgot to get a full picture looking towards the front of the room, but I did do another video and I got the whole room in it.
Update:
My pantry is finished! Want to see the entire project from start to finish? You can find every single post about the pantry build right here…
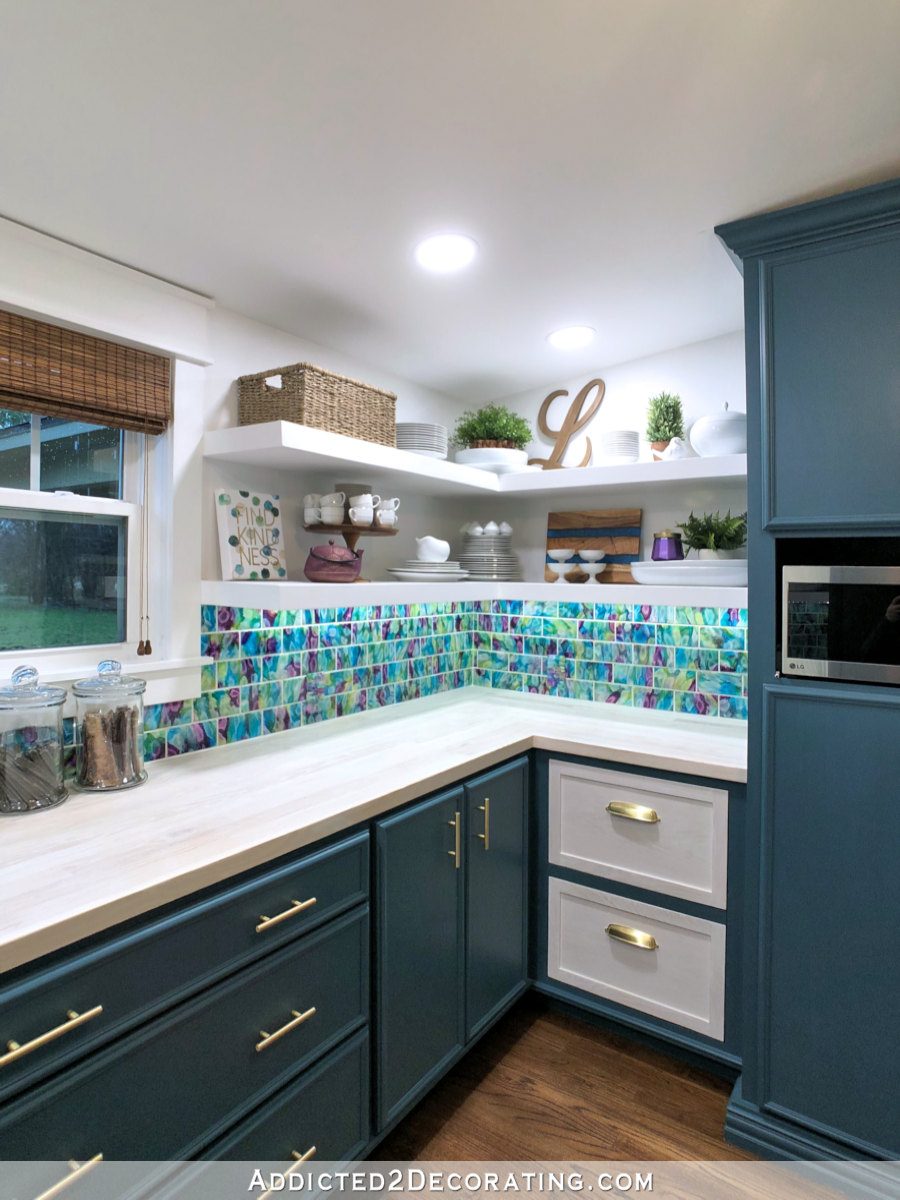
Or you can skip to the end and see how it turned out. Here’s a peek of the finished pantry…
You can see more pictures on the before and after post right here…

Addicted 2 Decorating is where I share my DIY and decorating journey as I remodel and decorate the 1948 fixer upper that my husband, Matt, and I bought in 2013. Matt has M.S. and is unable to do physical work, so I do the majority of the work on the house by myself. You can learn more about me here.


I guess to some people this would look ugly, but to me it looks good! Just to know what’s up there and to have the opportunity to fix the hidden stuff is such a good feeling!
Were you using a long wrecking bar on that wood? I’ve got one that’s about 30″ long and it really gets the job done on that tough stuff.
Oh wow, it’s looking very good! Great job, as always. Exciting times!
I’m actually getting excited about this room! I can almost see your vision. Might I suggest sheet metal for that open space. We had an attic squirrel motel and they had chewed their way in from the outside. We were told to patch it with metal so they couldn’t chew their way back in after we trapped and released (very far away, I might add) over 22 of those tree rats! Their cuteness wears off when you go through something like that.
Ha ha Angela that’s a funny story! (Since I wasnt the one who had to live it) I like your name for squirrels (tree rats.)
Loving the videos. Nice to hear your voice.
Your level concrete floor looks amazing!
I am getting spoiled with the videos! I love that you can show so much! I can understand so much more of your plans for the room. I think you would be fantastic with your own show! Anyway, I was wondering… is the pantry wal going to begin where the ceiling slopes? If so that will be an awesome pantry! Great job Kristi! Soon Matt will be entertain you while you cook dinner! This will become the hub of your house! So excited for you!
Yes, the wall that separates the pantry from the breakfast room will go directly underneath that load-bearing beam, so the whole ceiling in the pantry will be angled, while the ceiling in the breakfast room will be completely flat…AND a standard height so that room will no longer feel like a cave. 🙂
Kristi,
You are an amazing teacher! I have been considering a blog for my field and I am inspired by your clarity and use of images to help people visualize what you’re describing. I fit and manufacture eyeglasses and I know people often have trouble knowing what sort of frame is suitable for their face and RX. If I could do anything near what you do in describing and detailing the information people need, it would be great. Thanks for doing a wonderful job.
The video makes it so much easier to understand where everything is in relation to the room. I would love more videos.
Definitely not looking ugly! It looks cleaned up to me! Yay for progress in the breakfast room!
I know you were feeling a little stalled on the dining and music rooms, since you had a bunch of repetitive tasks ahead (recovering 4,213 chairs, etc. 🙂 ) Have you had a chance to work in there at all? Are you too busy? Just curious.
I actually haven’t had a chance to do anything in there yet. 🙁
I didn’t think so! It’s probably better this way. You’ll be able to get a vision for all these areas at once. They’re so connected now that you’ve opened up walls and expanded doorways.
Dear Kristi,
Please take care of yourself! Make sure you follow all the safety precautions, and wear masks and cover your arms, etc. and don’t inhale any of that stuff! That is one BIG messy job – and dusty and who knows what chemicals are being released when you bring down all the wood, etc. YOU ARE MY FAVORITE!! I want you to be healthy and to flourish, and not to get hurt or to get sick. I’m sure you are super safe, etc. but just wanted to let you know how much I love you and what you do, and I don’t want yo to get injured or get sick or anything. Selfish of me – I’m just looking forward to years of living vicariously and enjoying all your renovations!!! LOVE THIS BLOG!!!!!!!
You’re very kind. 🙂 I made sure to wear a mask all day yesterday as I was working…as much as I hate it. I don’t want to take any chances.
Looks beautiful and like progress. Haven’t touched spray foam myself, but for upholstery foam an electric turkey knife does the trick. Just make sure the black wiring is contained, not easy to catch, and preferably not live prior. I guess you’ve sealed the opening already, but a wire mesh/ chicken wire with small holes will do the trick temporarily.
Are you demoing/replacing/fixing up the electrical or are your guys doing that as well?
I’m doing most of that myself — at least all of the basic stuff, i.e., running new wire to outlets, etc. Now there is one thing that I want in there that I’ve never done before and don’t know how to do, and that’s wire a light with two switches. My main light in the breakfast room will have a switch just inside the garage door, and then another one just on the other side of the wall from the wall of cabinets in the kitchen. Since I’ve never wired a two-pole light, I’ll probably have someone else do that (and watch and learn as they do it).
Also, while I can see where most of those black wires go, and know how to deal with them, there is one really large (about 1″ diameter) black wire that goes into the storage room at the back of the garage. That thing scares the heck out of me, so I’m going to see if my brother-in-law has time in his schedule to come help me deal with that. If he can’t, then I’ll let a pro handle that one as well.
Ah two switches to control one light? There’s some information so you can gauge materials at least: http://www.how-to-wire-it.com/wiring-a-3-way-switch.html
The site’s pretty basic, but looks correct logic-wise, now if that’s correct per local codes ‘n such, who knows, not my area of expertise. Most of the switches are not simple at my home, and I was tring to figure out how to fix how a fan was wired in my not to distant past (when my inlaw came in found it was it was wrong, and needed a diferent solution). Gotta love old homes.
When in doubt bring in help, is always a great idea.
You almost have a clean slate to start your rebuilding process. A lot of work goes into getting to this point. I hope you have a couple of days to take it easy and let your hands return to normal.
Kristi I actually think that the breakfast room looks better now! I dont know why though. Maybe becasue it’s a room with a future and no longer stuck in the past. Out with the old, in with the new…. This is going to be exciting!
Wow, looks better all ready. You doing the demo is definitely saving you money. Are the new Windows being done on a week or is the drywall too ? Are you doing the back wall framing where the old windows and doors are ? That seems like a lot in a week along with the electrical. Maybe go ahead & get the electrical ran to save time. I know you are planing on insulating the front & back walls. Have you figured out about the pantry ceiling yet? Love the videos. Please keep doing them. I don’t care if you don’t have time with the fancy title thing. You can just say it in the intro. Can’t see where you go next.
Love the progress! Take some time to let your hands recoup!
Still can’t get over how great the floor looks! I have a question that I was going to ask last week, but forgot. In one of the ceiling pictures we can see what looks like duct work. Is that your HVAC duct work? I am wondering because I have never seen it like that. Ours is all made out of sheet metal. Is that a local thing, or did you decide to go with the more flexible duct work?
Our old duct work was sheet metal. I don’t think they use that anymore, at least in this area. All of the new stuff is much smaller and flexible.
Thanks mom for helping Kristi clean up her breakfast room😊
I have also really enjoyed listening/watching your videos!
Being from MN, I love your southern accent!
You sound GREAT.
Love your progress.