Breakfast Room Progress – Front Exterior Wall Rebuilt + New Windows Installed
This room is really starting to take shape! I knew once I got all of those old windows out of here, and got the new windows installed, it would drastically change the feel of the room.
My brother came over yesterday for a repeat wall building and window installation project, and this time we worked on the front wall of the breakfast room. That’s the wall that looked like this the day we bought the house…
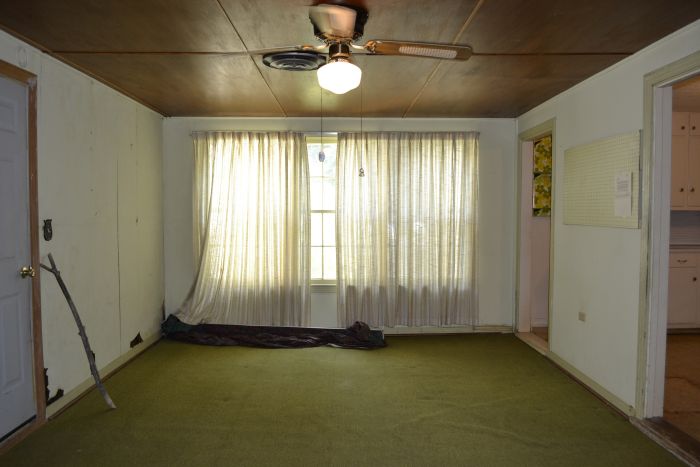
But lately has looked like this…
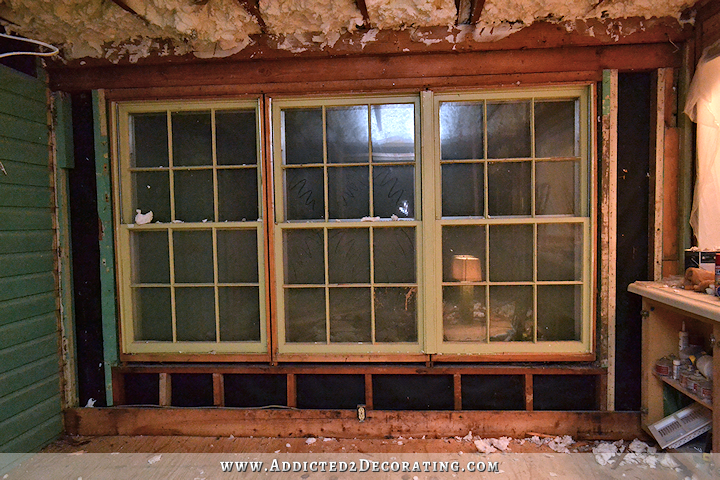
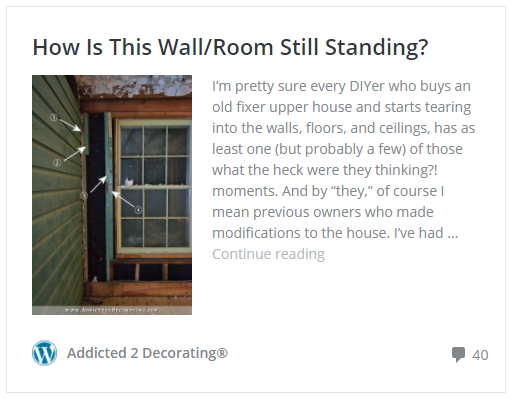
This is also the wall I wrote about in this post, wondering how the heck the wall was even standing…
Interestingly, the mystery deepened as we tore everything out.
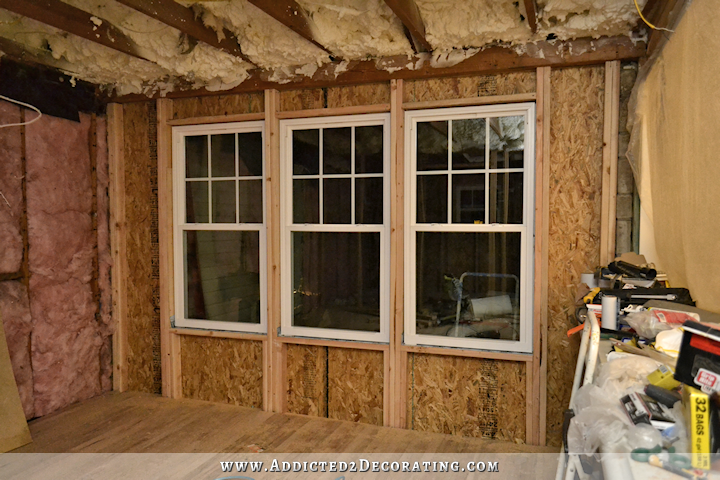
Anyway, after bracing the ceiling joists, we started by taking out the old windows. Those things were literally held in by the trim. Once the trim was gone, the windows fell right out.
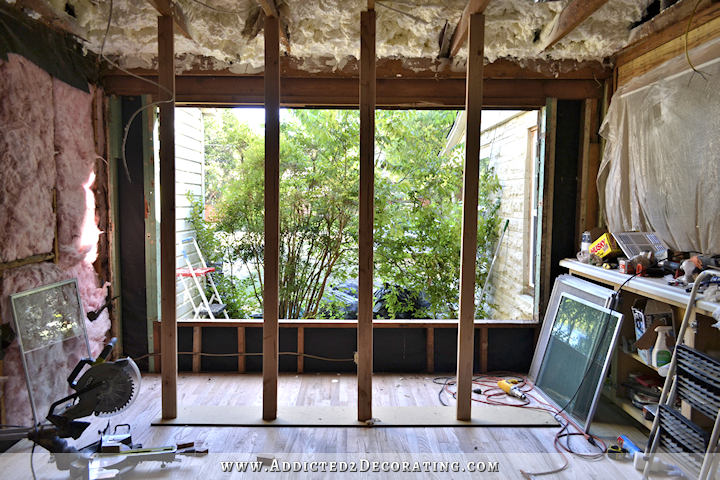
And then we removed the rest of the wall. Everything. Right down to the original garage siding on the left side.
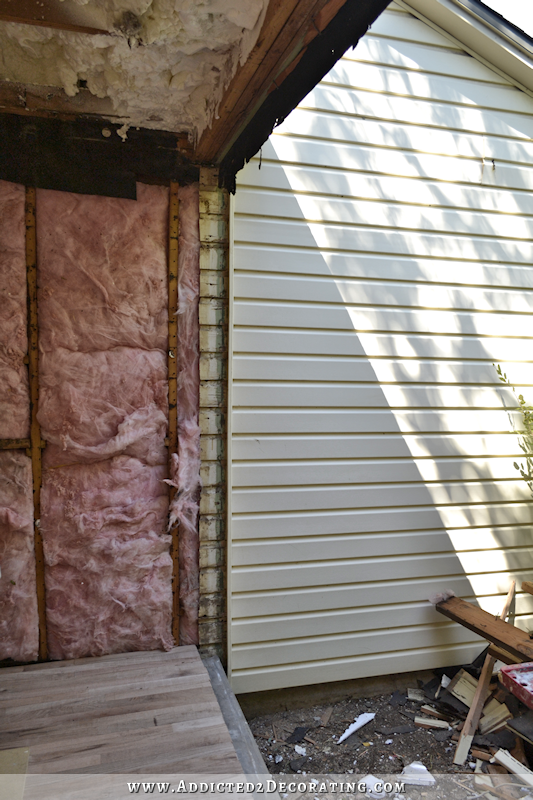
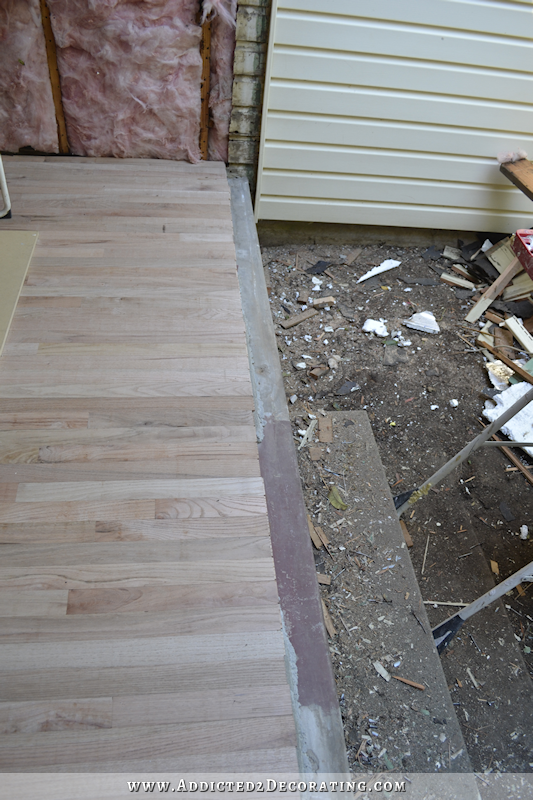
We even took it down to the concrete foundation by removing the old 2 x 4 base plate.
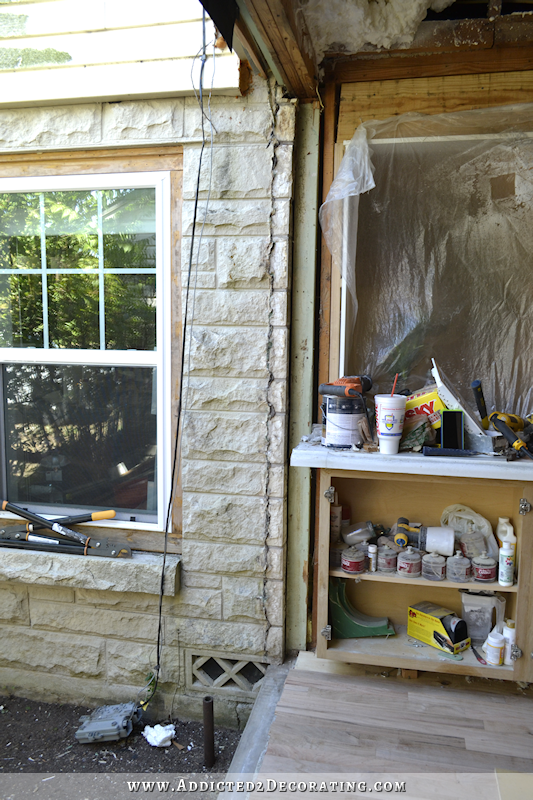
And on the right side, we took it all the way to the stone on the side of the house. This room is obviously a bit different since it was once an open breezeway with a roof on it. Exterior stone wouldn’t normally extend inside a wall like that. I considered cutting it off, but we had a very good reason (which escapes me now) for leaving it.
The only parts we left are the one 2 x 4 stud to the far right (the one painted seafoam green, which you can see above), and the original main beam that supports the trusses. Everything else, from that odd secondary beam, the useless studs and window framing, to the wall base plate, was taken out.

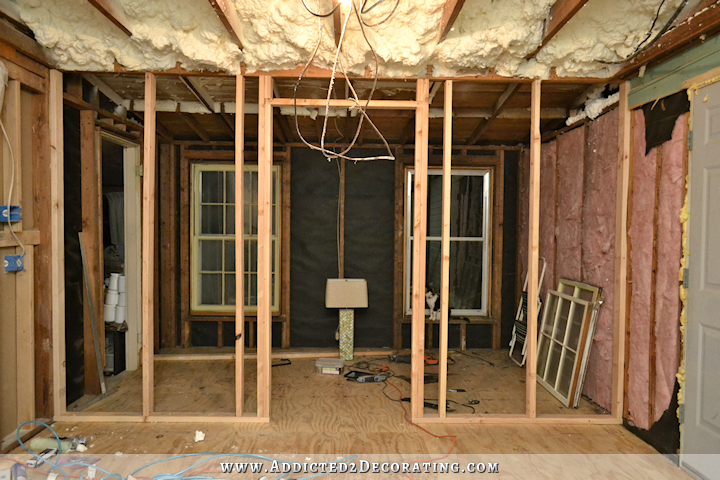
And then we rebuilt. I decided to frame this wall a little differently. Since it was an open breezeway with a roof, and that beam is suspended somehow (we never figured it out), and it’s a triple 2 x 6 beam, AND it’s been standing for almost 70 years, I really felt like the only real studs that actually needed to be in this wall were on the far left and far right of the wall.
But I was determined to get more in there, and I was also determined that I wanted double 2 x 4 studs between and on the outside of each window. Double 2 x 4 studs would not only provide extra support for that beam, but they would also provide the perfect spacing for my windows. So I added all of the 2 x 4 studs first, and then went back and added the horizontal framing for the windows. It’s not standard, but with standard framing, the windows would have been spaced further apart (even if just 1.5 extra inches in between, it’s not what I wanted), and there would have only been one actual stud running from base plate to header beam between the windows. That’s also not what I wanted either.
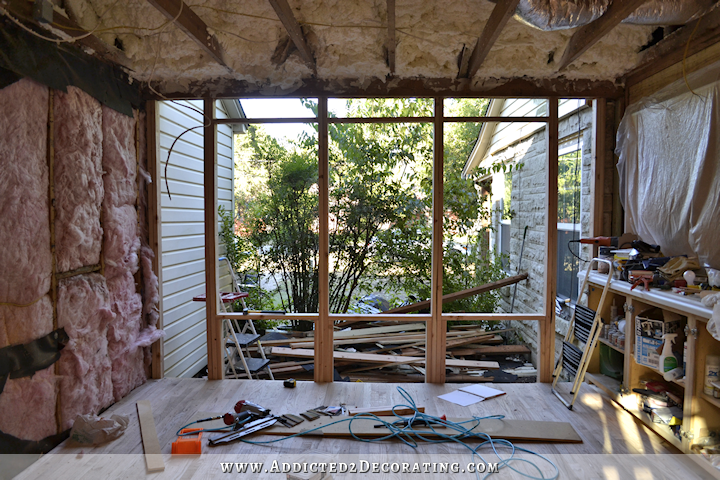
So this wall went from being held up by magic and wishes, to being incredibly sound and held up by 13 actual studs in the span of 12 feet. I’d say it’s secure now!
And then once we got the sheathing (OSB) and the house wrap on, we could finally install the windows. I think we finished around 9:30 last night, so it was a good 12-hour day, with about 45 minutes for lunch, to get the entire wall torn out, rebuilt, and windows installed. Here’s how it looked last night…
And here was the view this morning.
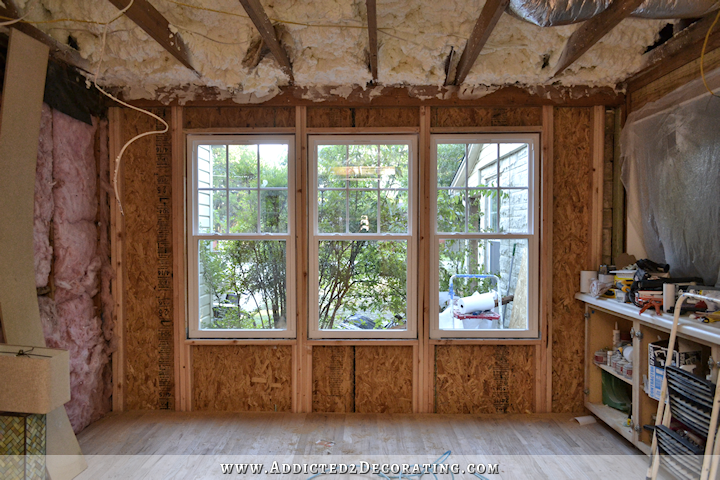
Of course, I’ll have an actual view once I get all of that brush cut down, so for now I’ll just enjoy the sunlight. It’s amazing how much new windows really transform a room (even an unfinished room like this).
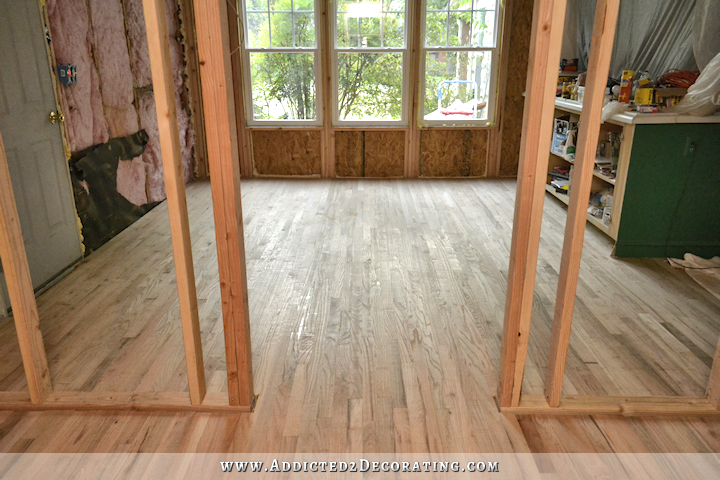
So to recap, I started with this…
…and now I have this…
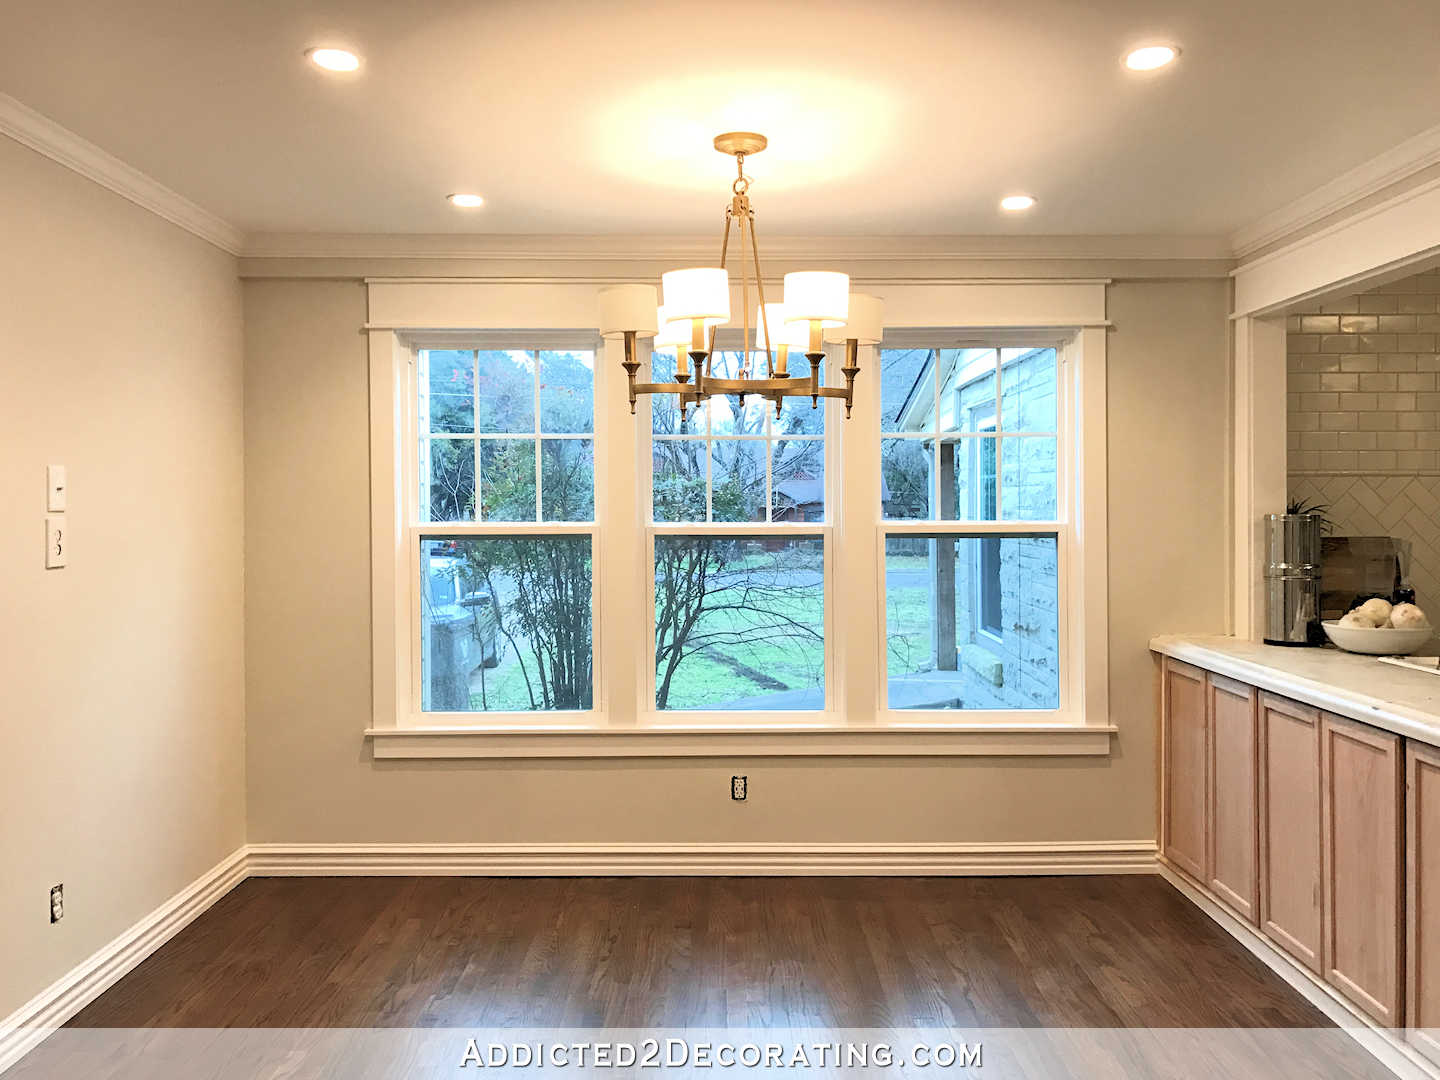
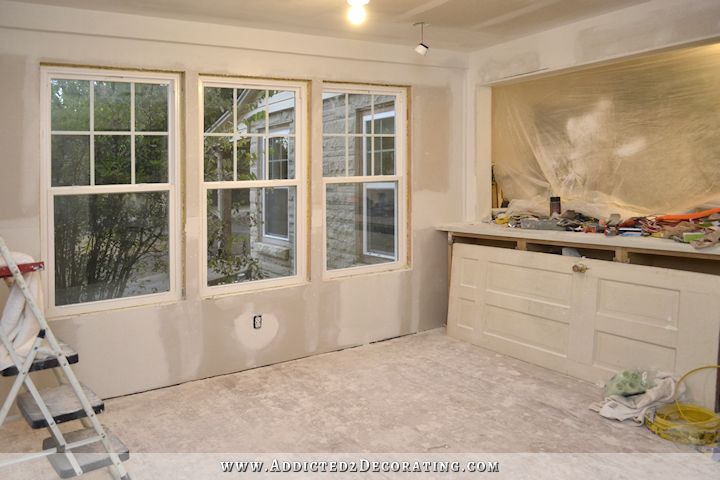
These windows are a bit narrower than the original windows. The original windows were 36 inches wide, and I went with 32-inch windows this time. But since these don’t have those old storm windows with the blue tint glass, they seem to let in way more light, and the room looks so much lighter. I can’t wait to get this wall drywalled so that I can trim out these windows!

Addicted 2 Decorating is where I share my DIY and decorating journey as I remodel and decorate the 1948 fixer upper that my husband, Matt, and I bought in 2013. Matt has M.S. and is unable to do physical work, so I do the majority of the work on the house by myself. You can learn more about me here.
That looks great Kristi just as it is. Can’t wait to see the finished room.
Wow, not only do they let in more light but you can actually see “the light at the end of the tunnel”! Looking way good. Way good.
Hurrah! I’m so glad you’ve made so much progress. What a relief for you to have these two outer walls replaced.
This is wonderful, Kristi! I’m always so amazed at how much you can get done in one day, either with a relative or by yourself!
Great job! Way to go girl!
Kristi, we are complete strangers to one another, but I find myself sharing your posts saying” look at what this woman did!!!” Like you are some kind of surrogate daughter or something. I am so proud of you and wish I had half your determination talent/!!!
Well Done.
That looks great! Now you can really get going and have some fun!
Holy cow, I cannot believe you did all that in just a day! And that you have the courage to actually tear down a wall in your house at all is beyond me! I’m very proud of you and keep telling my husband all the time: “Can you imagine what Kristi did or has written just now?” as if I’d know you in person 🙂
It’s very empowering to watch you accomplish all that and it makes me feel encouraged to try my hand in (albeit much smaller) projects myself. So again: Many thanks for sharing your journey and congrats on yesterday’s fantastic outcome!!
My thoughts exactly! I cannot believe how much you are able to accomplish, Kristi, and how unafraid you are. It sounds like you are really out of that “funk” that you were in with the dining room, now that you have a vision for this room. This house is really going to be alot more structurally sound now.
Kristi, I have been following you for some time, but have never posted before. I am so incredibly impressed with your knowledge and sense of style. I first found your blog when I was searching Pinterest for ideas on bathroom cabinets. I found the photo of your painted hall vanity, and I absolutely loved the way it looks. My husband started our master bath reno on July 26, and it is nearly finished. Meanwhile, I keep sending your blog posts to him, and he has really enjoyed reading about the progress you’ve made on your house. Thanks so much for keeping us so up-to-date–I can’t wait to see what you’ve done each day!
Congratulations on a job WELL done! No more concerns about that poorly constructed wall. And I noticed that you have all the new oak flooring down too! Soon you’ll be getting to the ‘pretty’ stuff, lol.
I’m not quite finished installing the floor, but it’s getting there! About one more day of working on the floor and I’ll have it all installed.
I’ll look forward to seeing it!
Holy cow! That looks amazing! And so much light……I know you can’t wait 🙂
Wow, so much progress, well done on a fantastic job! You must be ecstatic how this room and pantry is taking shape and coming together. I know I’m super excited seeing the transformation from an ugly duckling room and turning it into a real beauty! Your vision, creativity and work ethic never cease to amaze me. Well done Kristi.
Wow! What a difference! I can easily envision a pretty garden with a bird bath or fountain in front of the windows so you and Matt can enjoy a pretty view and nature while you dine!
Job well done!!! Bravo, Kristi!!!
By the way, if you are installing new windows yourself, do you have to inform the building control (or whoever deals with this)?
I was wondering the same thing…especially since you are dealing with structural elements.
It looks amazing Kristi!
Wow, great job!!! Can you share what type /brand windows you purchased? And did you need a permit to change the window/wall structure? I have a “newer” house, and half of the windows are awful, with condensation/drips running down them, between the panes. I have no idea where to even begin looking at windows, and what to consider. Central Ca, lots of heat and sun. And, btw, the view actually looks pretty out the new windows. I would’ve thought that was a type of young maple tree.
Don’t think a “professional” could do better work – looks really good and I can’t wait to see the finished product! Wow, great job.
Wow! Just wow!
To heck with all the pretend “super heroes”, YOU are the real thing.
Congratulations job well done. Kristi I am being bombarded with ads . I had 12 stationary ads and I have a pop up at the bottom as well . This is happening every day now. I was just wondering if this is s change in your blog set up.
I was able to fix this from my end
I also have enjoyed your blog for a few years now but the adds are getting very annoying now they are even over top of your pictures. I had to clear away the same pop up add and restart the blog three times. Getting very discouraged and reluctant to check in on blog.
Without screenshots, it’s hard for me to understand the problem. If you have those, you can email them to me. Otherwise, there’s not a lot I can do. I don’t have ads on my pictures, so if you’re seeing that, there’s a glitch, but again, I need a screenshot to show the people who take care of the ads.
I do have one ad at the bottom of the screen. That’s not a popup. A popup is an ad that covers the entire screen and must be closed before you can scroll up and down. I don’t have any popups on my blog, and never will. The other ads are in the post, on the sidebar, and at the top of the blog. I just counted, and I had three two ads in the post and one at the end of the post. Nothing covered the pictures.
I don’t want my ads to be so annoying that they become a hindrance to people reading. At the same time, these ads provide 98% of my income. If I remove them, I have to stop blogging and find another way to make a living. I’m happy to make some tweaks to it, but I need screenshots to see the problems.
If only real contractors worked as quickly and with such attention to detail as you. WOW, just WOW! I am amazed! And it looks SO MUCH BETTER, even without the drywall yet. I really like the narrower windows.
Well, I’m ‘addicted’ to your blog.
I finally caught up and am reading today in real time!
What great work and what an inspiration you are to me.
Keep up the good work!
Looking Good! I have to ask..how is the new a/c working out? power bills lower?
Love the narrower windows and all the light! What a beautiful room this is turning into!
I am such a slacker. You impress me sooo much.
Kristi, this is looking great! And what a great Brother to help you with this. Looking forward to following as this is going to be amazing.
Hi Kristi, had a quick look over your post yesterday,today looked over again you are doing amazing!Idid laugh out loud tho at your last line.” I can’t wait to get this wall drywalled so that I can trim out these windows!” You must be very excited because we all know how much you love drywalling. Fantastic progress can’t wait to see the updates. Xx
Someday there will be a tornado in Waco (not while you are living there), and when it is all over your house will be on the news with all the talking heads saying “isn’t that the most unbelievable sight.” An entire house gone, with one lone wall still standing”. Just kidding of course, but driving home the point that the wall of shame, will become the wall of fame. As for the “brush”, which we call shrubs outside of TX, for now they are blocking the view of passersby. Amazing work, lucky you to have a great brother.