Now this is a project even for a beginner seamstress!! I assure you, anyone can do this one since most of the detail work is done with an iron…not a sewing machine.
When I was working on the finishing details for John & Alice’s master bedroom, I needed an ottoman to go with the chair I reupolstered. Well, it just so happened that they had an ottoman! But it looked like this…
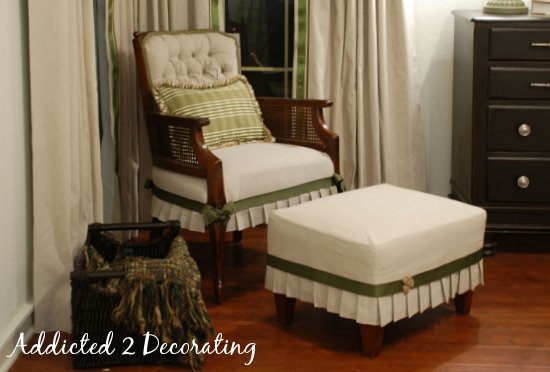
That wasn’t quite the look I was going for, so I decided to use some leftover canvas (from the painters drop cloths that I used to make the draperies and to reupholster the chair), and some leftover ribbon to make a pleated slipcover for the ottoman. When I was finished, it looked like this…
Much improved, don’t you agree?
Here’s how I made this slipcover…
 |
| First, I draped a large piece of fabric over the ottoman, ensuring that it hung down approximately the same length on all four sides. |
|
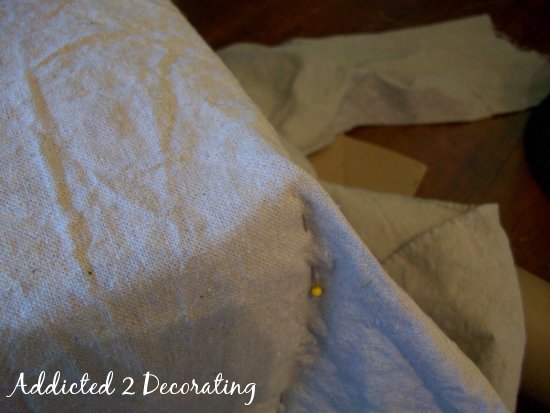
| Then I used pins to fit the fabric to the ottoman on the corners. I did this on all four corners. |
|
| With all four corners pinned, I removed the fabric from the ottoman, and used a straight edge to draw a line using the pins as a guide. (Yes, I used a pin and marked lightly right on the fabric.) |
|
| Then I used the line that I drew as a guide for sewing the seam. I sewed right on top of the line, then cut away the excess fabric. Because I used fabric that had a tendency to unravel, I also put a zigzag stitch right along the edge. |
|
| When I had all four corners sewn and trimmed, I placed the slipcover back onto the ottoman. Then using my ruler, I trimmed the bottom edge of the slipcover to the same length all the way around the ottoman. I trimmed mine 8″ from the floor. |
|
| After I trimmed it all the way around, I added another zigzag stitch all around the bottom to keep the fabric from fraying. You can determine of this is needed based on the fabric you use. Most cotton decorator fabrics won’t need this. |
|
| To make the pleats, I started with about three strips of fabric, cut the width of the fabric, and 8″ high. |
|
| I folded the strip in half along the length of the strip, and used my iron to press in the fold. |
|
| Starting at one end, I used a zigzag stitch along the raw edge, then folded it under about 1/2″ and pressed in the fold. |
|
| Then from that same end, I measured over 3 inches… |
|
| …and then folded the fabric back over to create a 3/4″ pleat. |
|
| I removed my ruler, pinned the fabric, and pressed in the pleat. |
|
| Then from the edge of that pleat, I measured over 3 inches, and repeated the process. I did this the entire length of the folded strip of fabric. |
|
| When I reached the end of the first strip, I cut the fabric in a place where I could add another strip of fabric without the seam being visible. |
|
| Then I unfolded the fabric (and yes, had to take out a couple of pleats, but those were easy to put back in since I had pressed in the folds)… |
|
| …and sewed another strip of fabric to the end. I pressed the seam open, then folded the new strip of fabric in half lengthwise, pressed in the fold, and continued making pleats. I think I ended up having to use about 2 1/2 strips of fabric to go all the way around the ottoman. |
|
| As you can see, the new seam where the two strips meet falls under the pleat, so the seam won’t be seen once the pleat is pressed in. |
|
| When I had enough pleats to go all the way around the ottoman, I placed the slipcover on my work table with the right side of the fabric facing up. |
|
| And I pinned the pleats right on top of the slipcover, with the right side of the pleats facing up. This means that you will have raw edges showing on the slipcover, but those will be covered up later. Continue pinning the pleats all the way around the bottom of the slipcover. |
|
| When you’ve pinned them all the way around, simply cut off any excess fabric, fold the end under about 1/2″, and press in the fold. I also used a zigzag stitch on the raw edge so that my fabric wouldn’t unravel. |
|
| And then lay the end flat and pin. You’ll want to be sure that this isn’t in a conspicuous place, so don’t start and stop the pleats right in the middle of any of the four sides. Instead, start and stop the pleats on a corner that may face a sofa or that will not be so noticeable. |
|
| Now use your sewing machine to attach the pleats to the slipcover, sewing about 1/4″ from the top of the pleats. |
|
| When you return the slipcover to the ottoman, it should look like this. Now you just need to hide those raw fabric edges with a little decorative detail. |
|
| I used peel & stick fabric fuse, which requires no sewing, and no ironing. |
|
| I cut a strip of ribbon long enough to reach around the ottoman, with about a 2″ overlap, and placed a strip of fabric fuse tape on the back of the ribbon. |
|
| Then I taped the ribbon to the slipcover so that it would hide the seam. |
|
| When I got to the end, I folded the ribbon under about an inch… |
|
| …and then taped it right over the other end of the ribbon. |
|
| To finish it off (and to hide the seam in the ribbon), I made three jute rosettes… |
|
| …and used fabric glue to attach them to the ribbon, right over the seam. |
And that’s it! It’s definitely a bit time-consuming with all of those pleats, but if you can iron and sew a straight line, this project should be no problem at all for you.
Did you miss any of the other DIY projects for John & Alice’s master bedroom? If so, you can click here to see a quick list of the ones I’ve posted.
Addicted 2 Decorating is where I share my DIY and decorating journey as I remodel and decorate the 1948 fixer upper that my husband, Matt, and I bought in 2013. Matt has M.S. and is unable to do physical work, so I do the majority of the work on the house by myself. You can learn more about me here.


Wow! Stunning! That is such a pretty DIY project – I'm going to have to try that myself!
This is so great and you make it look so effortless, I will have to try this sometime soon!
Thank you for such an easy to follow tutorial on pleats and ottoman cover. I "attempted" some pleats on some chair slipcovers sometime ago but I need to re-do them so with your tutorial in mind, I think I'll have better luck next time. You can see my chairs at this link http://gracioussouthernliving.blogspot.com/2010/09/chair-slips.html
Well, that won't work so you can see them on my blog at gracioussouthernliving.blogspot.com on my 9/27/10 post.
Hugs!
Judy
Does the tape hold up well?
Hi Jennie~~When you use that tape for fabric-to-fabric or ribbon-to-fabric applications, it's incredibly strong. It says on the package that it's permanent. I highly recommend it. I've used it for several things now, and haven't had any trouble with it coming apart.
wow, that would be easy…. thanks for sharing
Love the little burlap rosettes, and the green trim, so cute. Very simple, and very classy!!!
Bella 🙂
Great job – I wish I had seen your tutorial on the pleats before I DIY slip covered my couch last week. I just wrote a post about it – would love if you checked it out.
http://decoratingdiy.blogspot.com/2011/03/let-me-slipcover-into-something-little.html
Wow! I love the ottoman and the pleats! Awesome!
Wow! I love the ottoman and the pleats! Awesome!
love this. have an ottoman to slipcover and didnt want just a 'box' and also didnt want to deal with cording…..thanks!
Beautiful job! Your pictures show your efforts so well.
I LOVE this! I am working on slipcovering a bench for our kitchen table and needed an idea for the pleated trim at the bottom. Your tutorial was PERFECT!!! 🙂
I especially love how you measured the pleats using the quilting ruler…brilliant. It made folding, ironing, and pinning my trim go MUCH faster!
Do you mind if I link back to this post when I post about my bench?
I'm so glad you found it helpful! And I'd be honored for you to link back to my post. Thank you!
Your instructions with just the right visuals means I actually might be able to do this. You should write instruction booklets for a living!
I know this is a much older post, but I just found it and have to say it is the BEST tutorial on how to recover an ottoman I have found, and I have SCOURED the internet! Thanks so much! I love this and will be starting on mine this afternoon. 🙂