DIY Six-Drawer Console Table With Lower Shelf – Part 1
Yesterday, I started building a six-drawer console table, and I’m hoping I can finish it up today. I’ll show you my step-by-step process if you’d like to build your own, but I think y’all know by now that if you’re looking for precise computer-generated diagrams and cut lists, you’re not going to find those here.
When I build things like this, I generally start out with a very basic drawing and some general dimensions, and then I figure it out as I go along. 😀 And my hope is that by sharing my process, you’ll be able to see how these things come together so that you can design and build something that is custom for your own home rather than always needing exact diagrams and cut lists to build someone else’s design.
I want it to be about 72 inches wide, 19 inches deep, and 34 inches tall, so this is the basic drawing that I started out with…
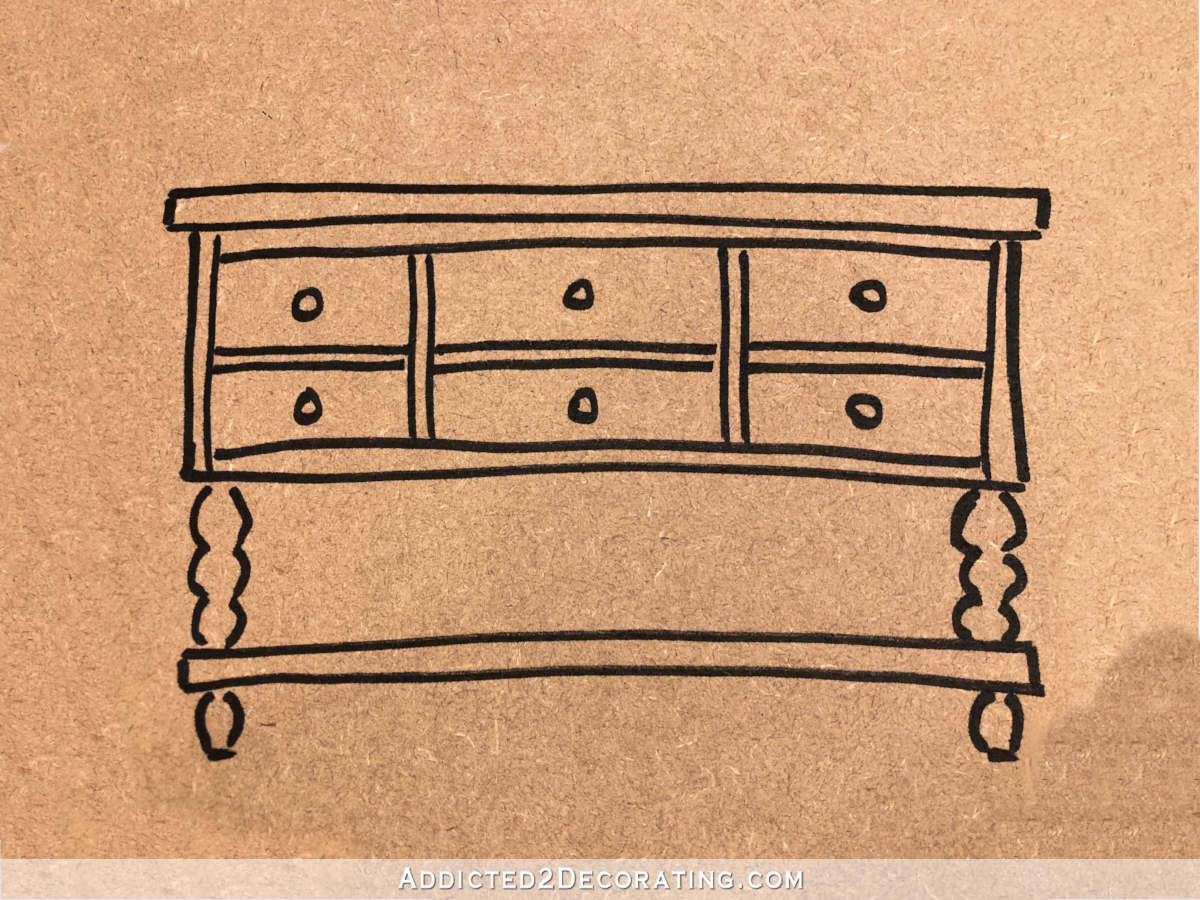
So with my basic drawing and dimensions in hand, I was almost ready to begin. I decided that it would be easier to build from top to bottom, but upside down.
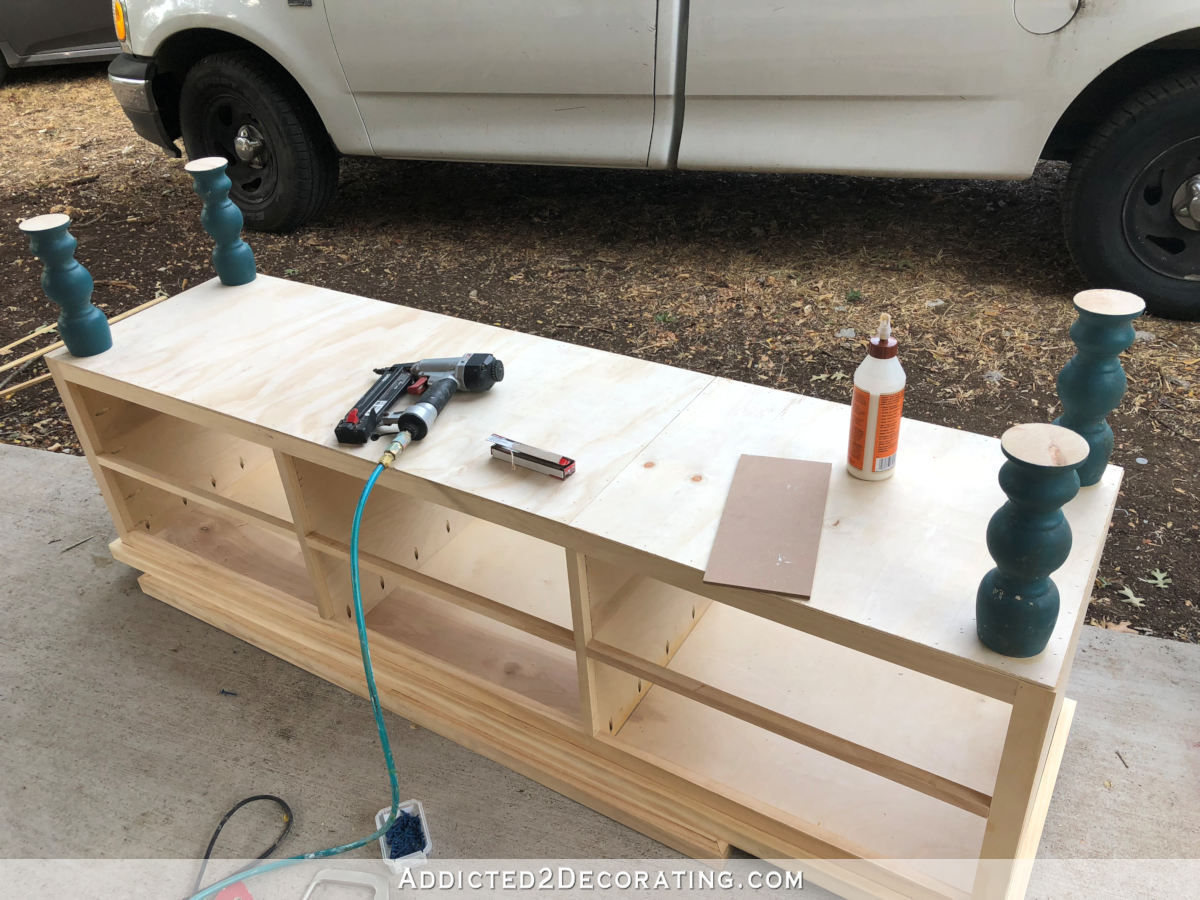
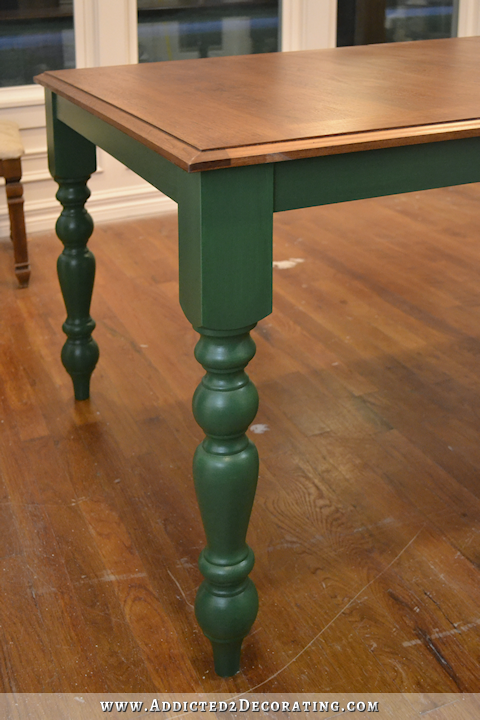
But before I got started, I needed to find some turned legs that I could use. I still had the dining table that I modified over two years ago, so I removed the legs from that table and cut them down into sections that were the sizes I needed for the console table. I used my miter saw to cut them.

I needed two sections — one 10 inches tall and the other 3 inches tall. This is how they looked after I cut them.
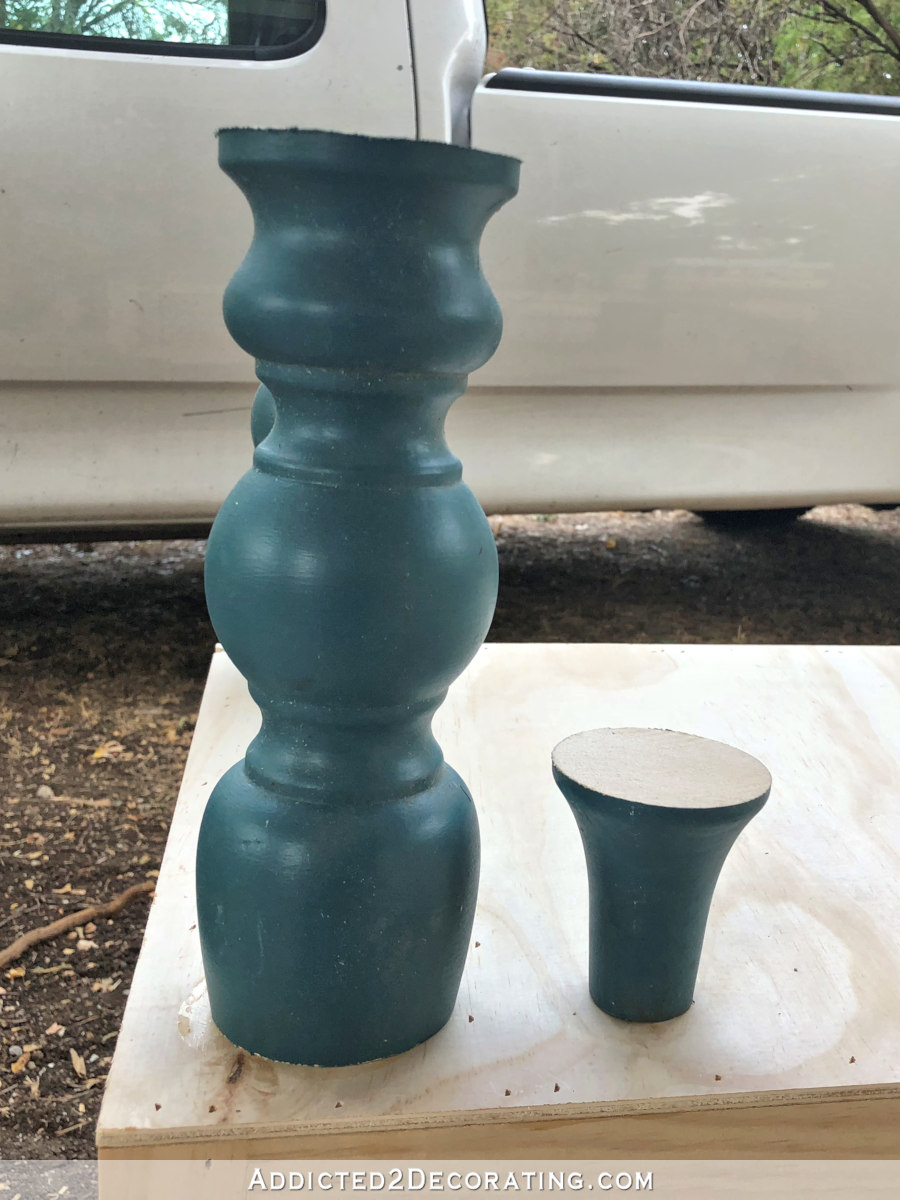
That left me with four of these sections, which I think will make unique candle holders.

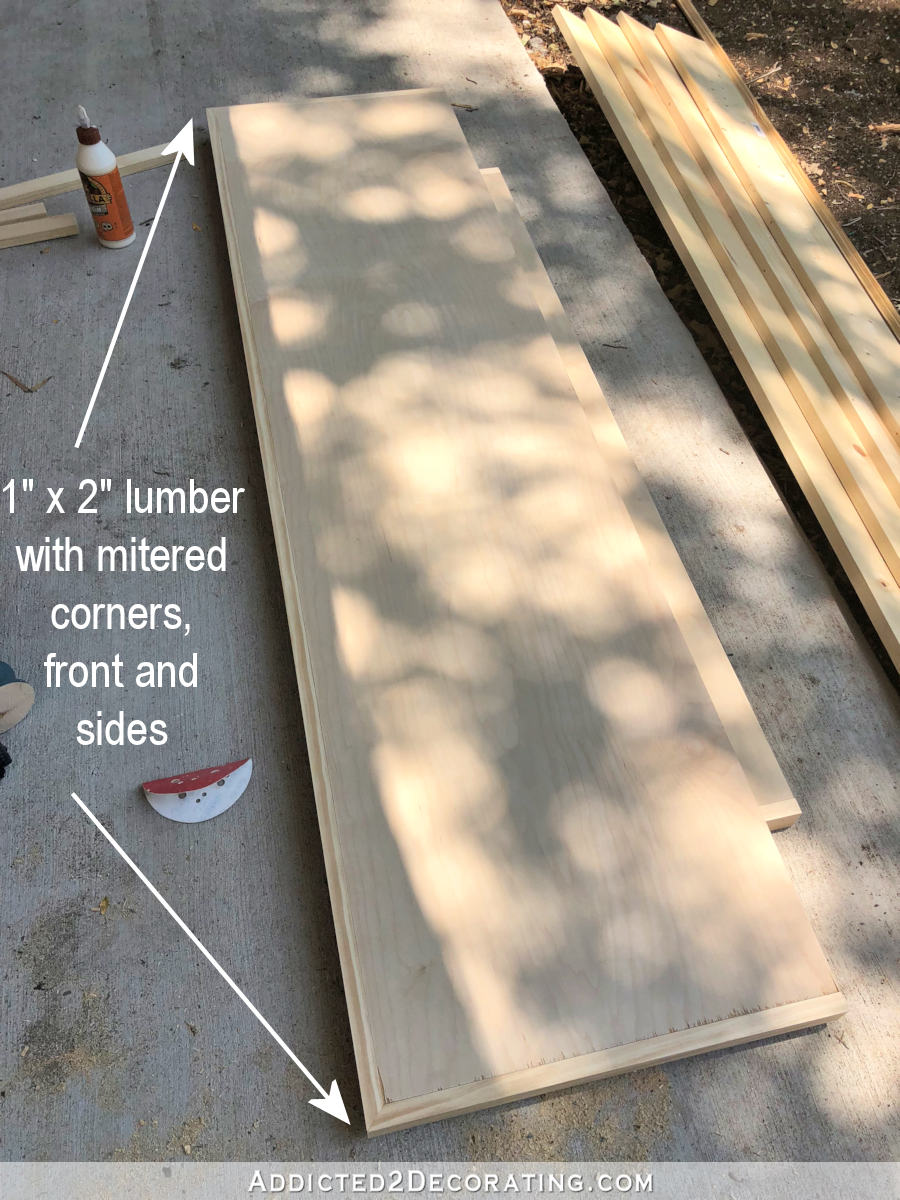
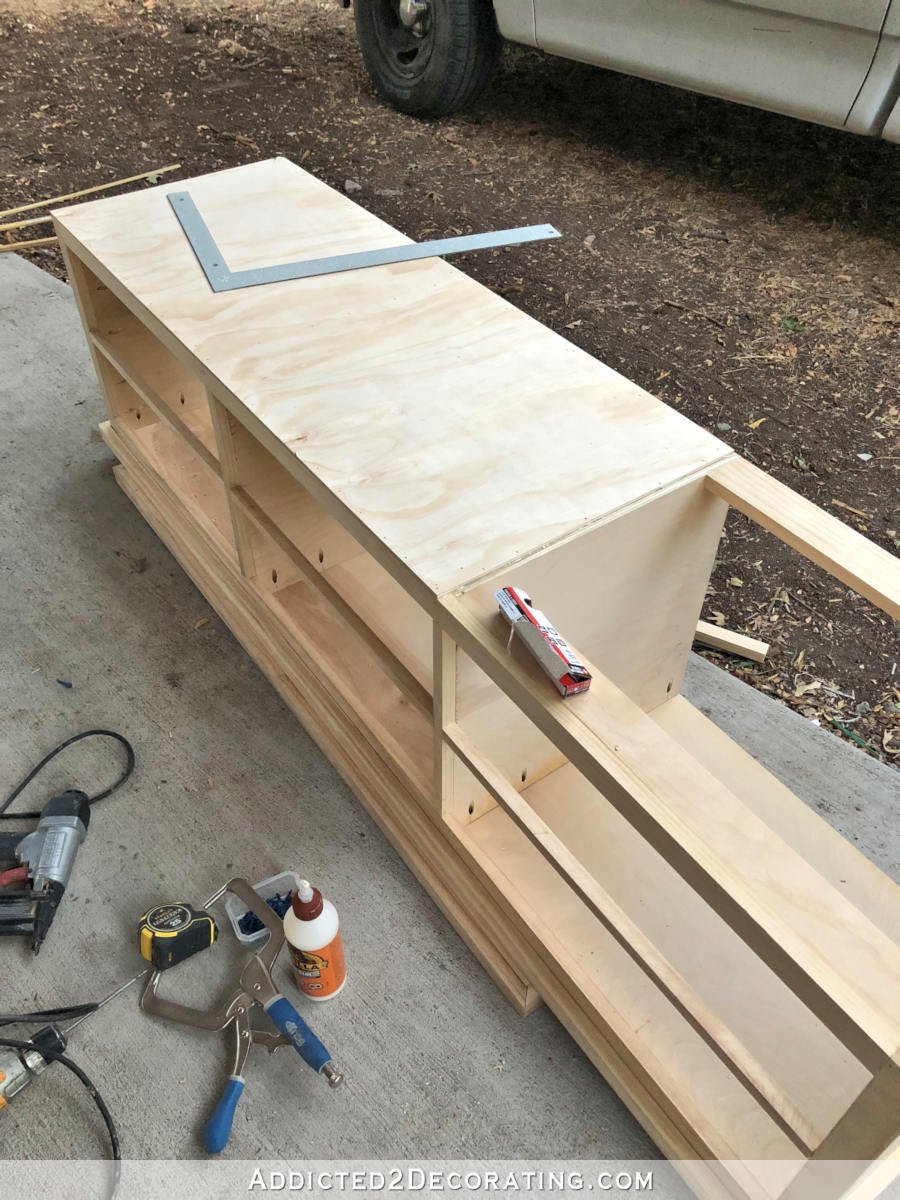
With the leg situation solved, I could then start building the console table. I started with the top, which is a piece of plywood cut to 18.5 inches by 72 inches. Then I used 1″ x 2″ lumber around the sides and front, mitered on the corners, and attached with 18-gauge 1.5-inch brad nails and wood glue.
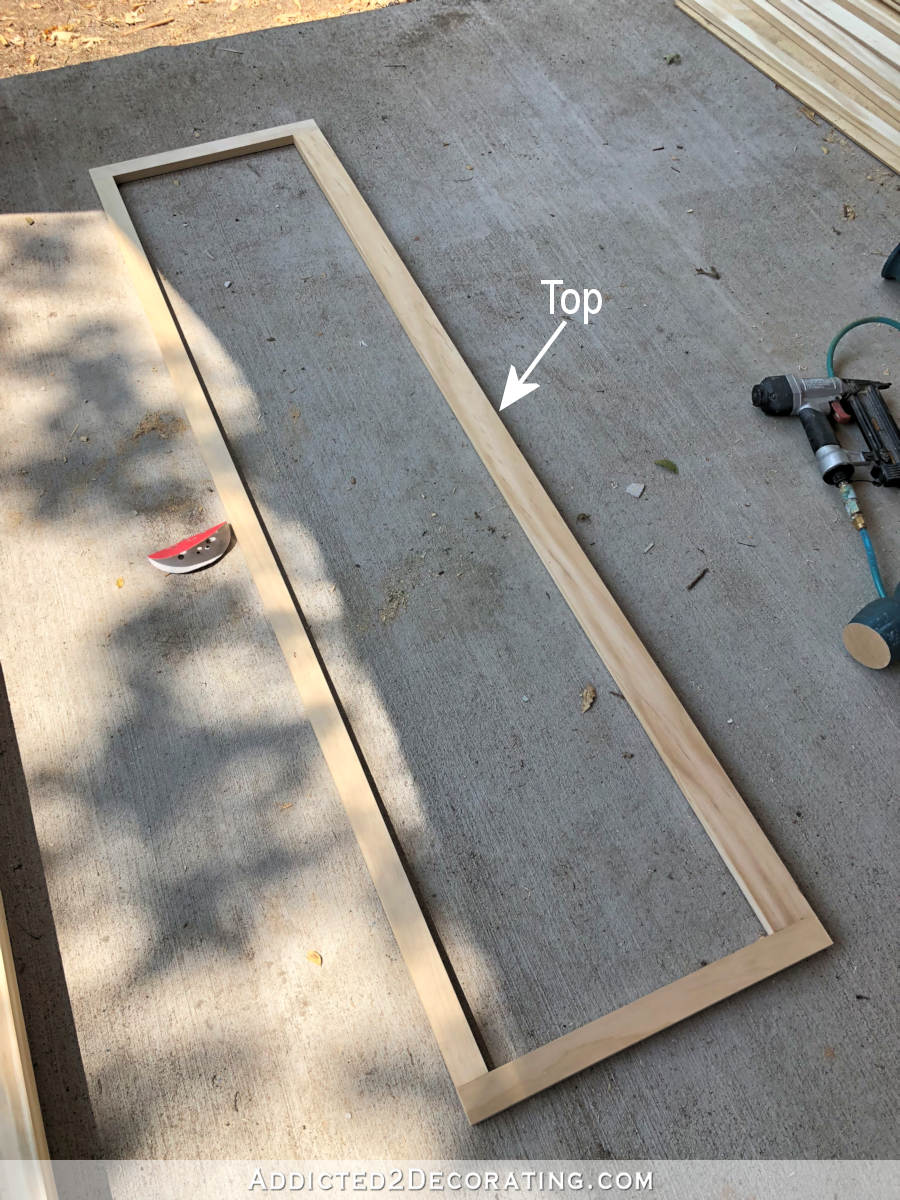
Then I flipped the top upside down so that I could build off of it.
Next, I made the frame for the drawers on the front. The first step was to build the outside frame. To build this, along with most of the cabinet, I used my Kreg Pocket Hole Jig. You can click here to see the one I have (affiliate link).
The top rail is thicker than the bottom rail and side stiles to account for the 3/4 inch that would be hidden behind the trim around the top of the console table.
This frame was put together with pocket screws at both ends of the rails.
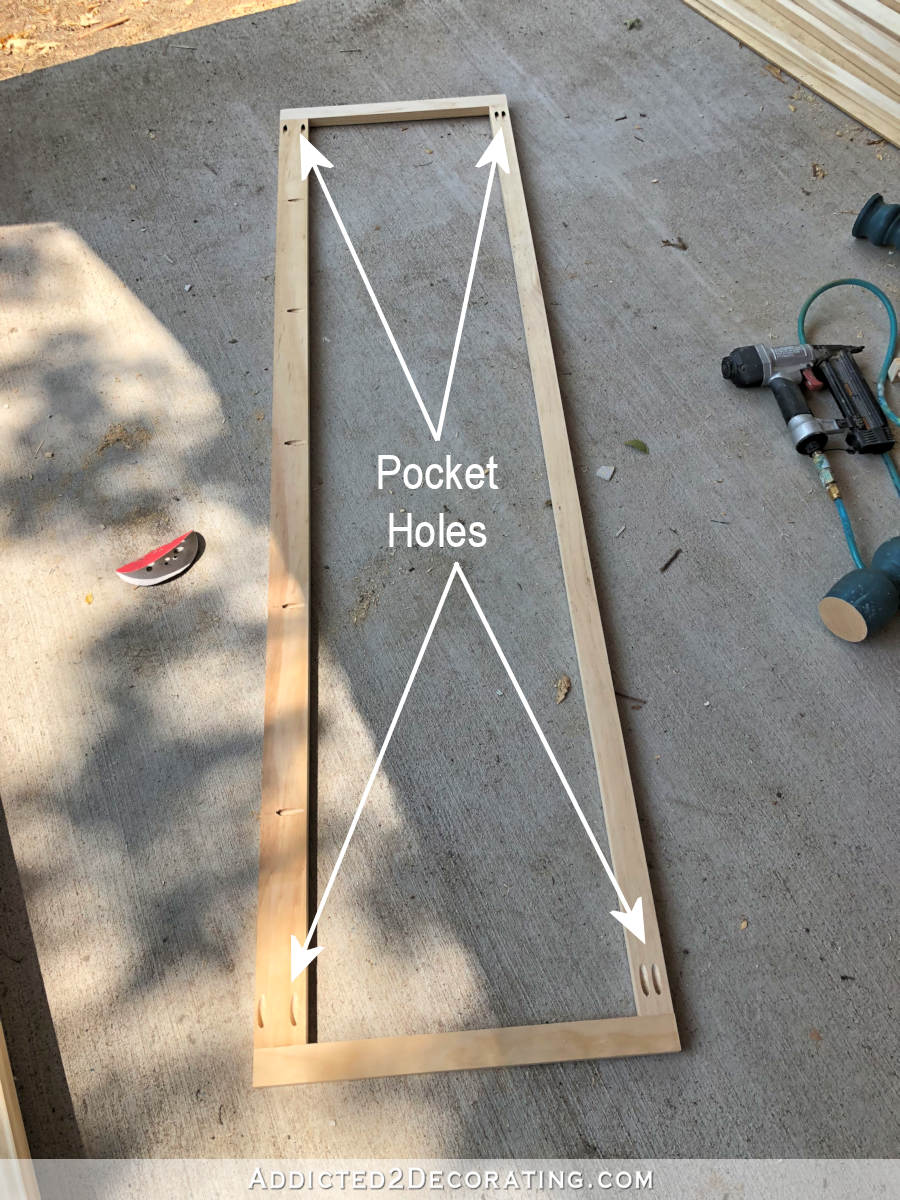
I also drilled pocket holes in the top rail that would be used later to attach this front frame to the top of the console table.
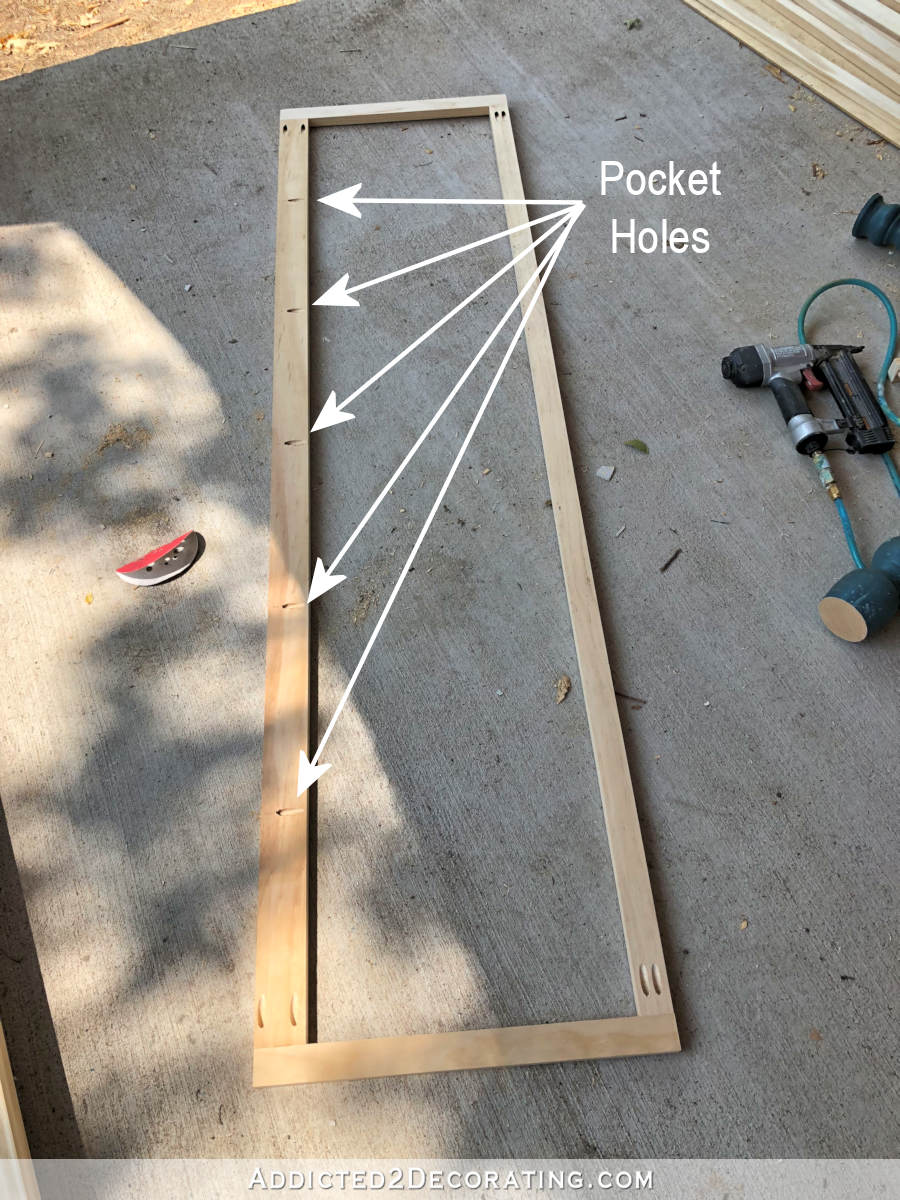
Next, I attached the inside stiles to separate the drawer sections. For this, I used 1 x 2 lumber that I ripped down to 3/4 inch wide on my table saw, and attached with wood glue and pocket screws.
Here’s a closer view of the inside stiles…
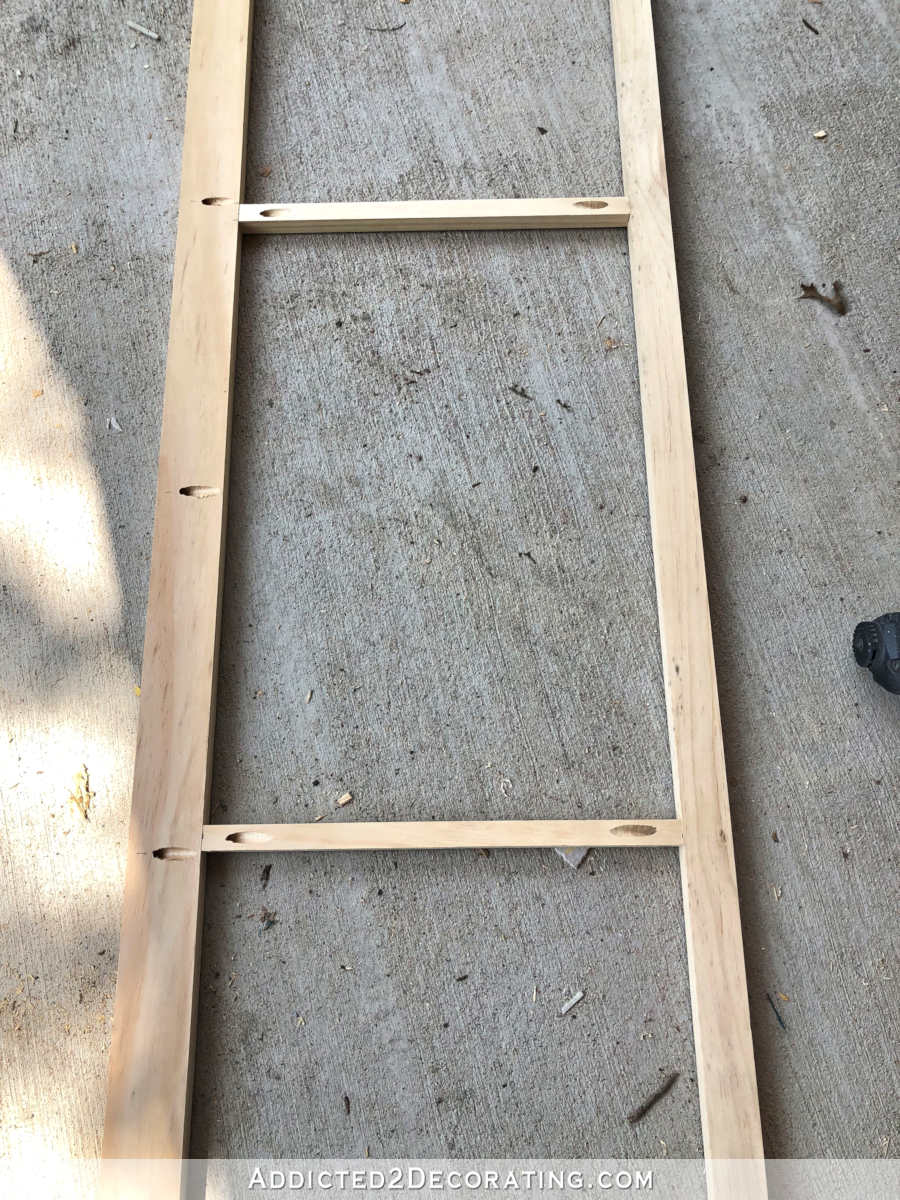
And then I added the inside rails, also ripped down to 3/4 inch wide and attached with wood glue and pocket screws.

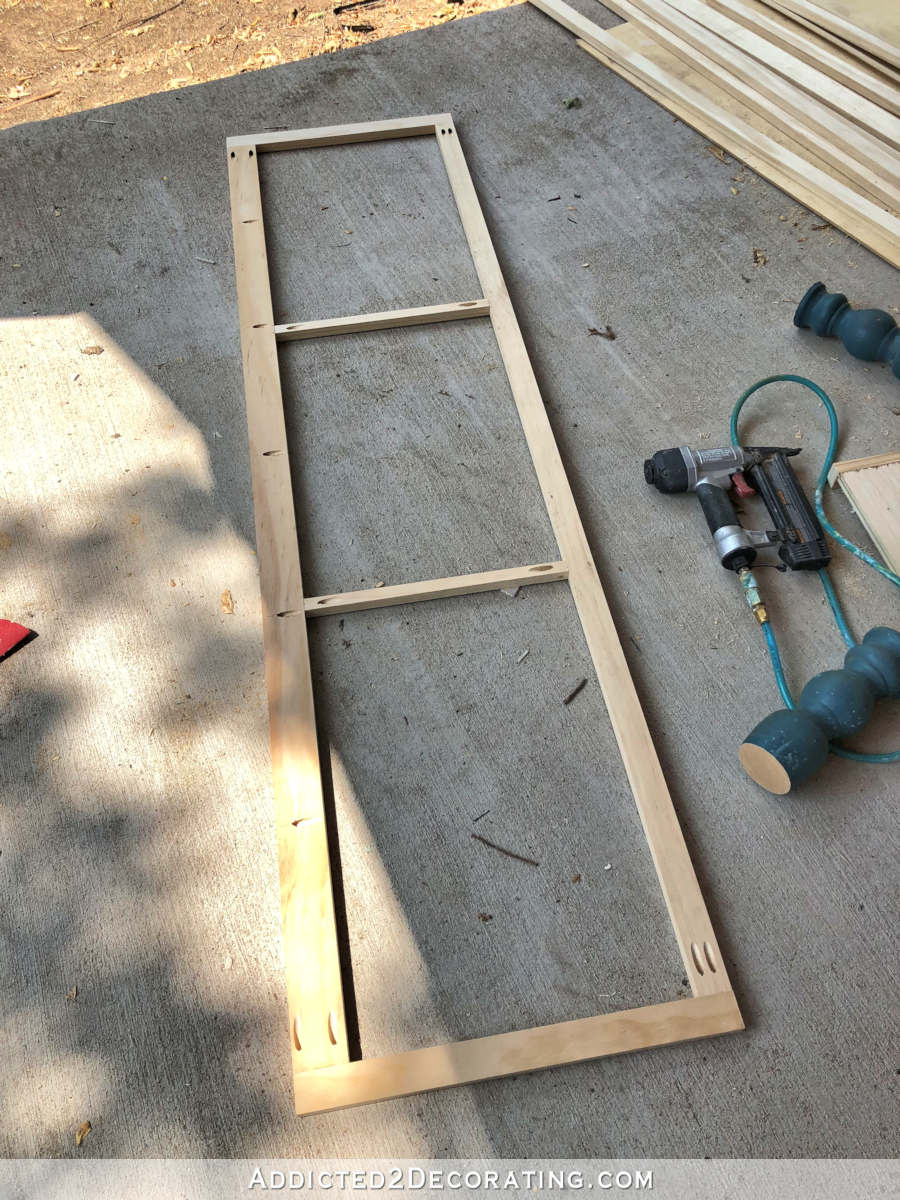
The front frame fit onto the top (which was turned upside down) just inside the trim around the top.
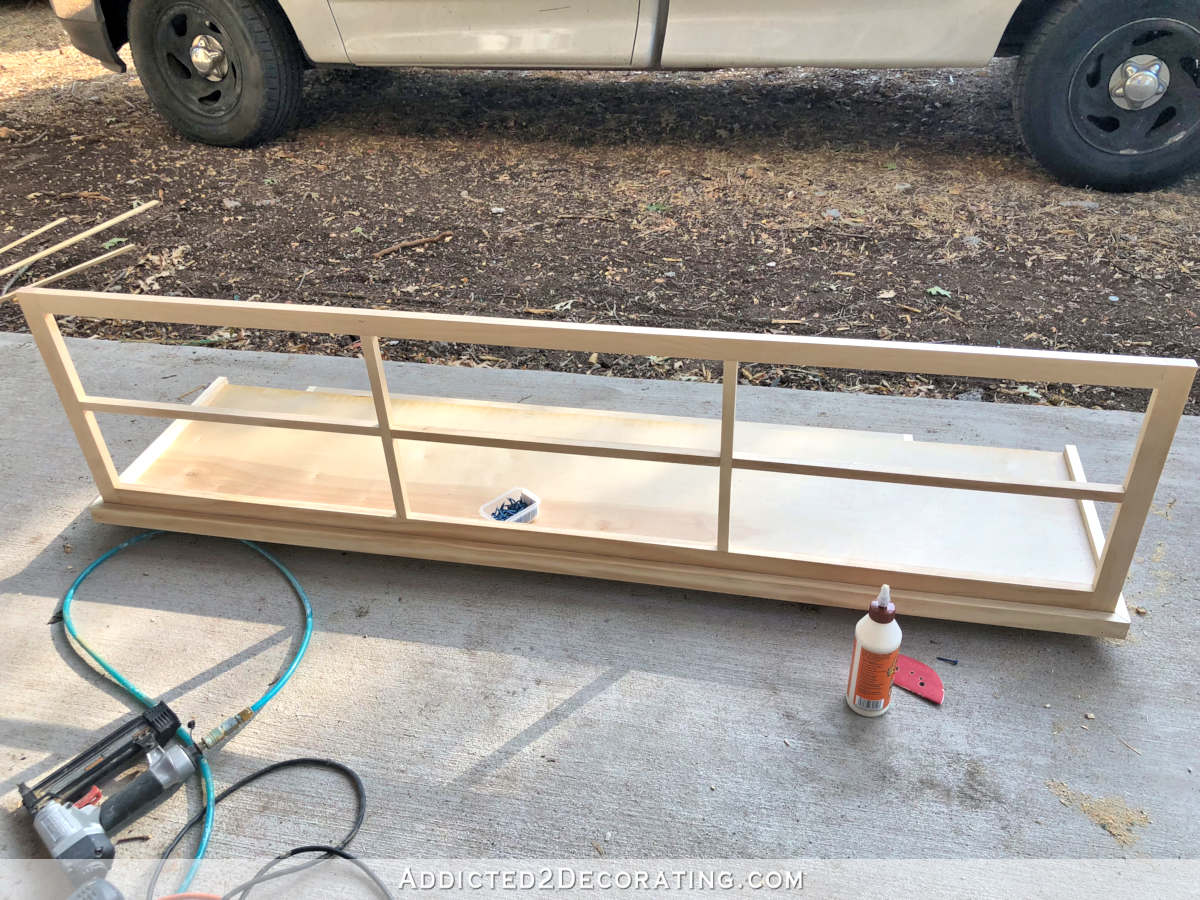
I attached it with wood glue and pocket screws through the top rail and into the bottom of the console table top.

Next I cut the plywood sides…

Those were also attached with wood glue and pocket screws.

Here’s how it looked at this point, with the front frame and side pieces in place…
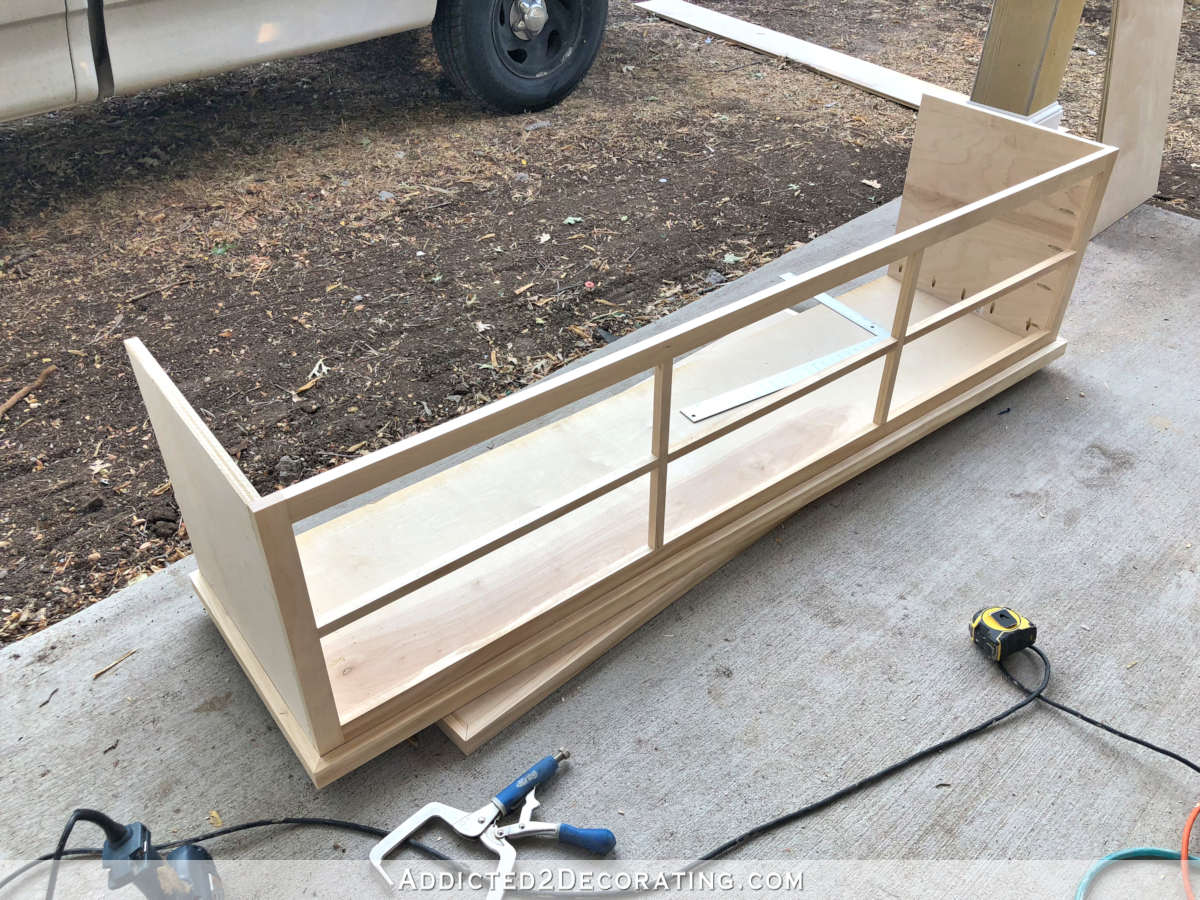
Next I cut two more pieces of plywood to the same dimensions as the sides, and attached them behind the center stiles to create the separate drawer sections. I attached these to the top using wood glue and pocket holes, but since the front stiles were so narrow, I didn’t want to put screws into them. So I attached the stiles to the plywood using little brad nails through the stiles and into the edges of the plywood.
To keep the backs of the sections square, I cut pieces of lumber to use as spacers and secured them with glue and nails. You can see them above. The pieces on either end section would also act as support for the legs.
The front needed support for legs as well, so I added two more spacers on the end sections, secured with glue and brad nails.
The spacer at the back of the middle section is attached that way because I was using nails and not pocket screws, so if I had lined them up the same, I wouldn’t be able to nail through the plywood into the ends of that piece of lumber. So I staggered it so that I could get nails into the ends.
But then I realized that I needed something solid there to nail the bottom plywood to, so I added another piece, glued and nailed into the edge of the original spacer.
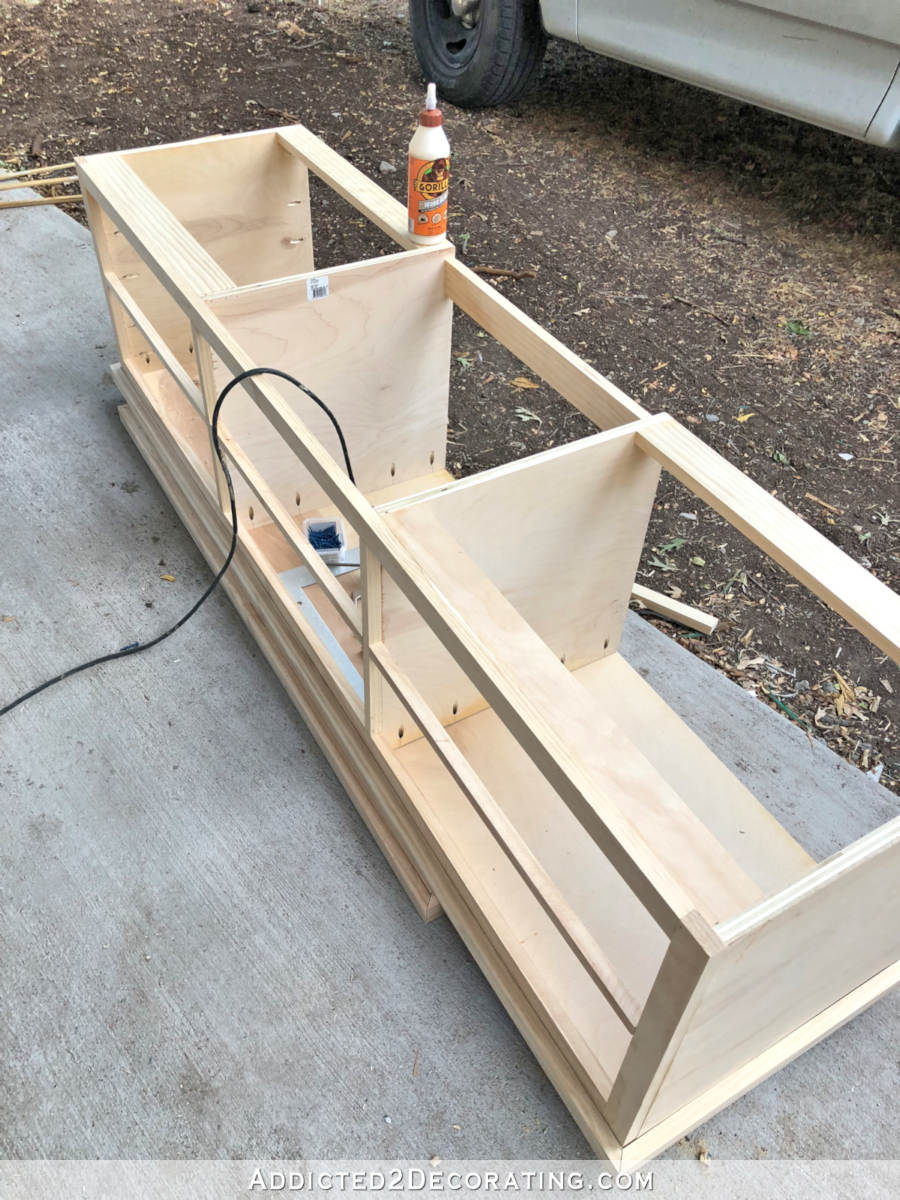
And then I covered the bottom with 1/4-inch plywood, glued and nailed into place.
I could only find what I needed in small 2′ x 4′ pieces, so I had to use two pieces to cover the entire bottom.
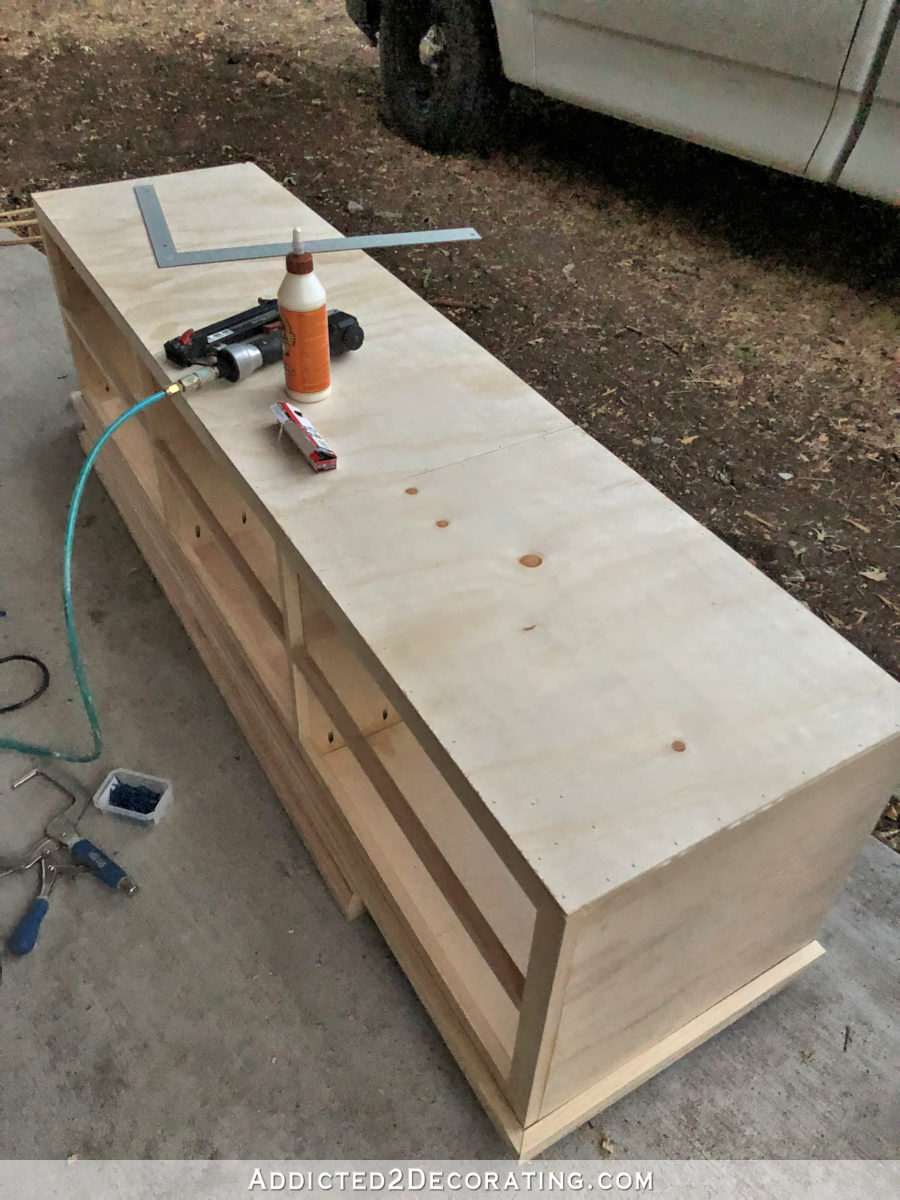
And then I was ready to add the tall leg sections. I glued them into place, and left them there overnight to dry. Today, I’ll reinforce them with screws before I continue building the lower section of the table.
And that’s where I left it. Today, I’ll definitely get the rest of the main table built (lower shelf and little feet), but if things go well, I hope to get all of the drawers built as well.
Don’t miss the rest of this project! Please note that this is a multi-post project. Click on the titles below to read Part 2 and Part 3 of this DIY credenza below…

Addicted 2 Decorating is where I share my DIY and decorating journey as I remodel and decorate the 1948 fixer upper that my husband, Matt, and I bought in 2013. Matt has M.S. and is unable to do physical work, so I do the majority of the work on the house by myself. You can learn more about me here.

Do you have someone that helps edit your posts and get these up? I’m only asking because you are so productive. By the time I finish hanging one picture, you have built a piece of furniture!
Generally, I would say I am someone with a lot of energy. But you seem to have LOT of energy. Good for you and getting so many things done.
No, I actually do it all myself — my projects (unless I specify that someone has helped me, and I always try to give credit when I have help), my photos, my blog posts, etc. My blog is a one-woman show. 😀
Well, I was kinda hoping you were going to say “yes”. lol Would make me feel better about my home improvement progress. 😉
ME TOO!!! Frankly, I think the blogging takes longer than the building! Dang, Kristi! Please tell me that maybe you don’t cook dinner…gimme something! hahaha
Well, I do cook almost every day, but rest assured that I do have help with other things. I hire out the weekly cleaning of my house, as well as the weekly grocery shopping. 🙂
Well…thanks for that 🙂 Nevertheless, you do amaze.
Wow. You never cease to amaze! Great job, and I’m looking forward to seeing the finished product!
You are crazy amazing! I love what you are capable of!
Where is this going to go? With the new sconces? In the entry way?
Yep. 🙂
great job. I am anxious to see it finished. What color are you thinking?
I’m hoping to stain it, but we’ll see how that turns out. I always have high hopes for stain, and I always seem to end up painting because I’m not pleased with the stain.
I too was thinking how much energy you’ve got! I’m tired just reading about it! 😻😴😴😴😴😴😴😴
This is where you blow my mind. Watching you build furniture amazes me. What a great job and so creative.
Have I told you lately that you are a “stable genius”?
May I ask how long it took you to do this first part? I envy your abilities!
I did all of this first part yesterday. I was at Home Depot shortly after they opened (at 8:00am) to purchase the plywood and have it cut, then I came home and got busy. I did take a couple of hours for meals and trips to Sonic for iced tea. And of course, one extra Home Depot run later in the day for items I forgot, because it’s not a proper project unless you have to make at least one unexpected Home Depot run for things you’ve forgotten. 😀
Haha, too funny! My daughter lives on Sonic sweet tea 😂😂
Oh my goodness. Reading how you build furniture is like my I.T. son-in-law trying to teach me how he writes programs for the computer. I only kind of, sort of, understand what it is you are doing. Barely. Truly amazing.
Absolutely amazing! What talent you were blessed with! Can’t wait to see finished product…..then to see where you put it. 🤔
It is going to be a little heavy with all that plywood, but…wow! It’s going to be beautiful!
Just…wow!!
I think that your plans and methods are much easier to follow than the sites with computer-generated diagrams and cut lists. You do very well at explaining things. If I ever question anything, I just have to read on a little farther and you always give the answer.
The console looks great!
I so enjoy the projects where you re-purpose items, or parts of items. When you have that “If I unscrew the base and cut off six inches, then reattach it’ll be a perfect coffee table” kinda thing.
I build pretty much the same way you do. I generally have a picture that I’ve found online to copy, but sometimes it’s just an idea in my head. It often involves some trial and error, but that really doesn’t bother me; it’s just another way to learn!
I don’t know how you build on the ground, all that bending, good grief! Woodworking is like a puzzle to me, looks as if it is to you too. I admire your creativity, hammer on girl, hammer on.
That’s the first time I’ve seen the face frame built before the cabinet. Is there a reason you went that route? It certainly looks like it’s going to come out nicely!
Nancy
Since there were six openings, it just seemed to me that it would be easier to build it first and then add the section pieces afterwards so that I could be sure they lined up exactly. If it were just one big opening, like a kitchen cabinet, I could see building the box and then doing the face frame.
Now you’ve done it – you’re tackling something my husband has decided is too much for him! LOL! He built one bookshelf with doors at the bottom, and one nightstand with a drawer before giving up on furniture. (At least the kind that have doors/drawers!) Although I think his biggest issue is patience. I thought he did a good job, but he pointed out all the flaws and goofs with obvious frustration. I would say his heart wasn’t in it.
Can’t wait to see the finished job and where it will be placed!
I will take all of this kind of post that you can give me.
Kristy you are so good at woodworking. Can you advise the best way to caulk at floor/baseboards. My husband is not good at it and I need to find a tool or instruction so that he does not make a huge mess! He means well but…
http://www.uptownfloors.com/preparation/caulk-gap-under-baseboard.htm
I am sure Kristi has a better way but I put the caulk down with the gun then dampen my index finger in plain water to smooth it. I keep a semi-wet towel on a piece of plastic to wipe excess off my finger and the baseboards if I happen to get it on where it doesn’t belong, I just slide the small bucket of clean water & the plastic bag with the towel along the floor as I move around the room.
Similar to Len, but as I am a messy person, I buy a box of nitrile gloves from Costco and change the gloves after smoothing the caulk as many times as needed. Keep a box nearby to discard the used gloves. I also find using a cordless power gun (Ryobi) gives me more control – I can easily squeeze the precise amount of caulk. If one of the surfaces is a contrasting colour to the caulk, I put masking tape on it beforehand.
Amazing, as usual!
You DO realize you make the rest of us look like slouches, right? You never cease to amaze us.
I just wanted to thank you for sharing the gift of your talent with us. Sometimes we take for granted all that you do to share your home adventures with us. You make it look so easy (not only the “home work” but also the job of blogging about it all) and we might come to expect it from you every day and I, for one, wanted to say thanks. It doesn’t go unnoticed! You truly are top shelf. Not only are you extremely talented and creative, you are generous.
Thank you so much, Joanne. 🙂 You’re very kind.
This is beautiful! Can you share what species of plywood and trim you used?
The plywood is just labeled “sanded plywood” at Home Depot. The trim is pine.
I love it already! Great design!
What? I think in the future, you need to start your own construction business. I have no doubt you could build an entire home easily. Oh my gosh, I feel so inadequate. I have said it before and i’ll say it again, you never cease to amaze me. Chip Gaines has nothing on you. You are my Superwoman. You rock my friend.
Kristi, although I am an experienced DIY-er, it never occurred to me that I can build my own furniture before I started reading your blog. A huge THANK YOU for that!!!
Kristi! This is awesome! You inspire me to be daring and take on the projects that my budget won’t allow me to farm out. You are so talented and I appreciate your sharing your techniques! Kudos to You!!!
So awesome! Can’t wait to see the finished table.