DIY Removable Cedar Shower Floor Mat
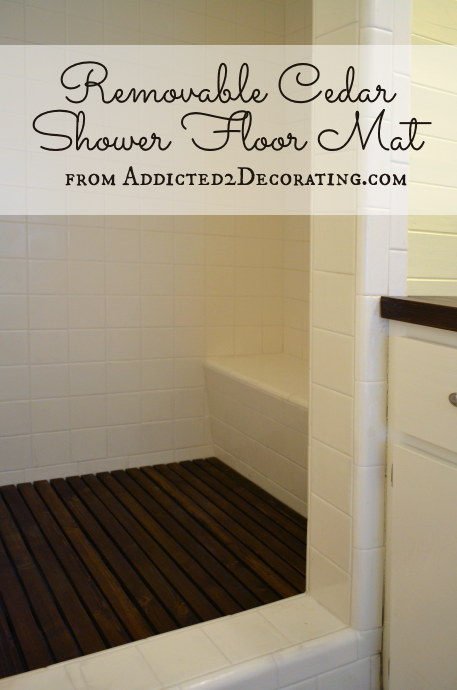
Happy Monday, all! Remember last week when I said I had a project in mind for the shower in my tiny little bathroom? Well, it’s (almost) finished! I made a removable cedar shower floor mat.
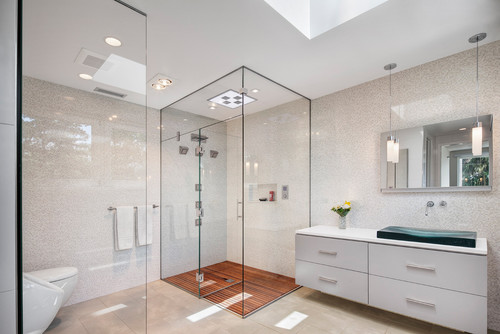
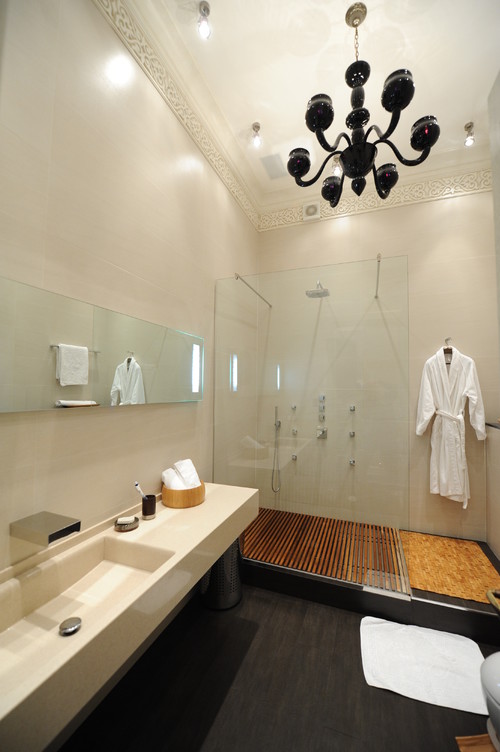
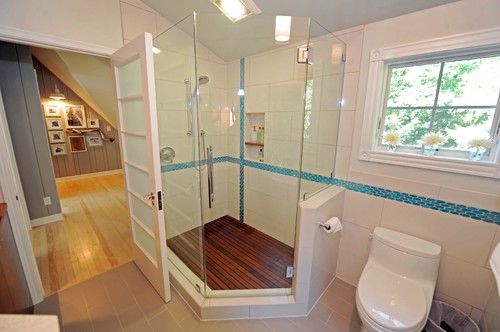
I was inspired by some of these (obviously much higher end and super expensive) wood shower floors.
If you’ve been around here long at all, you know I love the warmth that wood adds to a room. All of the countertops in the condo (kitchen, living room bookcase wall, bathrooms) are wood.
But also, this project was kind of a test run for the house. You see, I’m trying to come up with a solution for a shower that is easy to use for Matt when we get around to remodeling the master bathroom in the house.
For those of you who don’t know, Matt (my husband) has M.S. and is in a wheelchair. So when we get around to remodeling the bathroom at the house, I’d like to make the shower one where he can wheel himself in and transfer to a shower bench. Obviously, that means that there can’t be any kind of step, or lip, or curb. It all has to be one smooth floor. I know it’s possible just to have it all be tile, but I thought it might also be nice to have the shower pan sunken in a few inches (just so that it catches the water better), and then have a wood floor on top of that to make it level.
So this was a practice run to see if I could build one of these wood shower floors. And I did. And it was fairly easy!
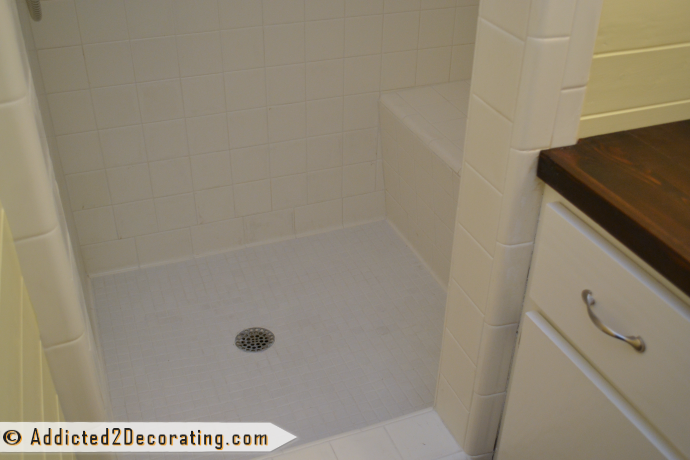
I love the way it looks. Here’s the plain shower with just the tile…
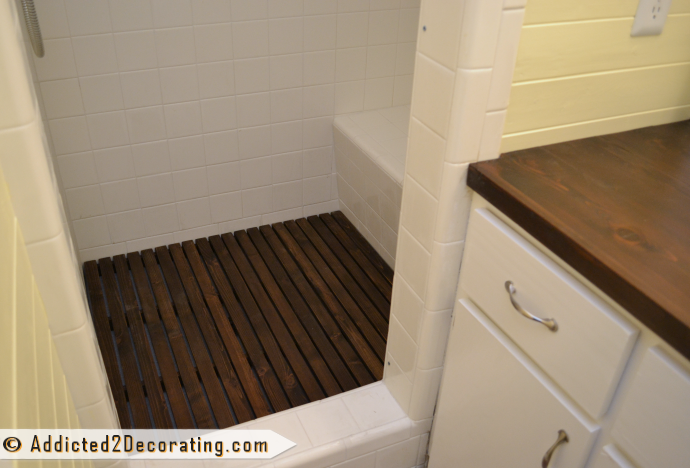
And here it is with the cedar shower mat…
It’s built like a little deck on four support slats, so the part that you stand on is actually raised above the tile about 2 inches. And because the tile floor isn’t flat (it slopes towards the drain), the cedar support beams are actually only resting on the floor around the edges, so water won’t get trapped in the middle.
And of course, it can be easily removed for cleaning.
If I do ever do this project for the house, I’ll probably use a wood like teak or IPE, but since cedar is also known for it’s resistance to weather, rot, mold, etc., and it’s considerably cheaper, it seemed like the perfect material for my practice run. Plus, if it’s good enough for decks, fences, outdoor showers, patio furniture, saunas, raised and elevated gardens, etc., then certainly it’s good enough for my little shower mat. 🙂
Here’s how I made it:
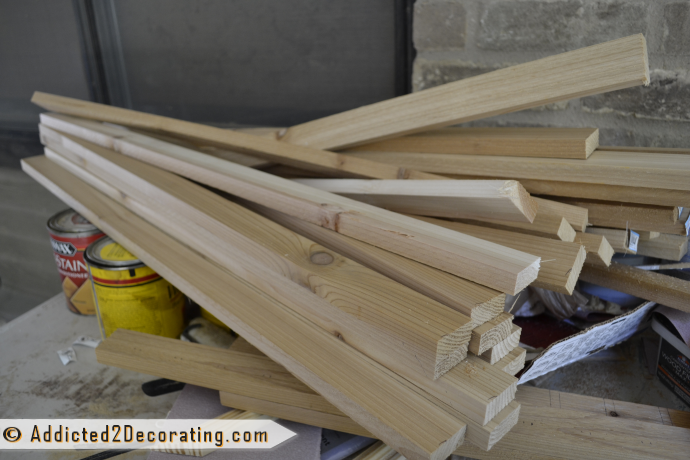
The whole thing is made out of cedar 1″ x 2″ lumber. And just a warning, it took me forever to find enough boards that were straight enough for this project, but finding really straight boards is pretty important.
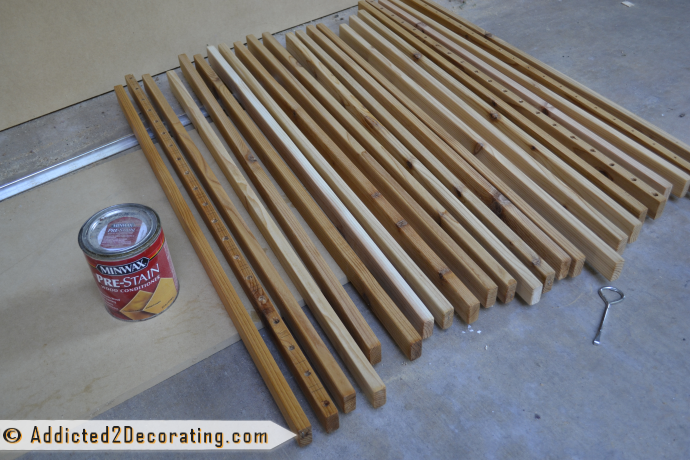
I used my miter saw to cut 20 pieces of wood the length of my shower (34 inches), and four pieces the width of my shower (35.25 inches).
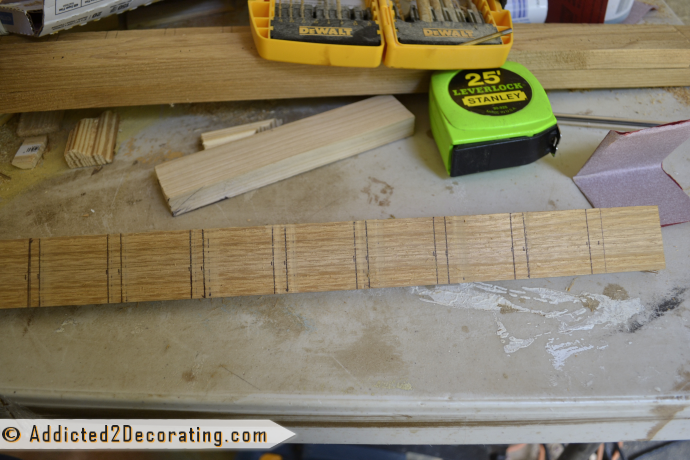
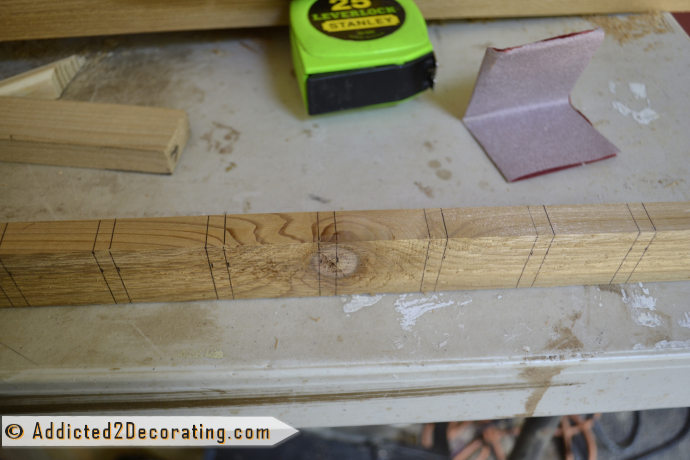
Next I took one of the four support pieces (the 35.25-inch pieces) and marked the spacing for the slats. This was a bit challenging since the spaces needed to be something like .27 inch. It took me a couple of tries to get them right.
Once I got the spacing right, I marked the edge also.
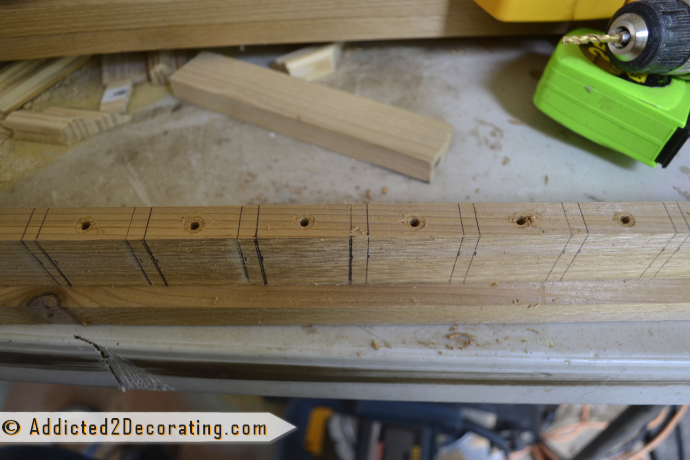
Next I drilled pilot holes for the screws. I wanted to use the support boards standing up on the edge like this to give them more strength. I also wanted the screws to go up through the bottom and into the bottom of the slats. (If that doesn’t make sense yet, hopefully it will in just a bit.)
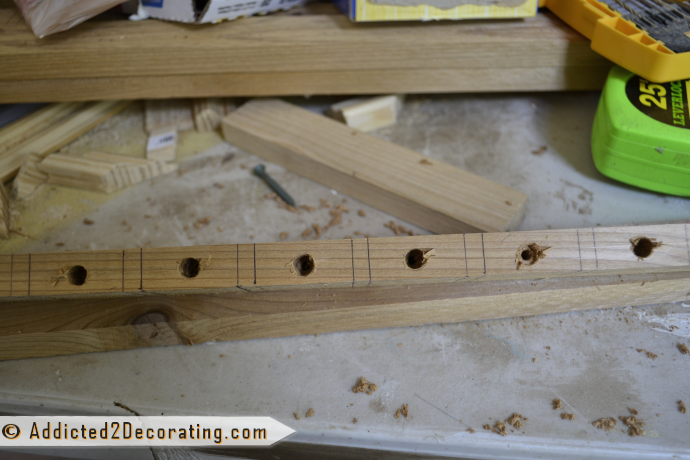
I followed with a much larger drill bit that was the size of the head on the screws I would be using, and drilled about 1/4-inch into the wood. This would allow the screws to be countersunk.
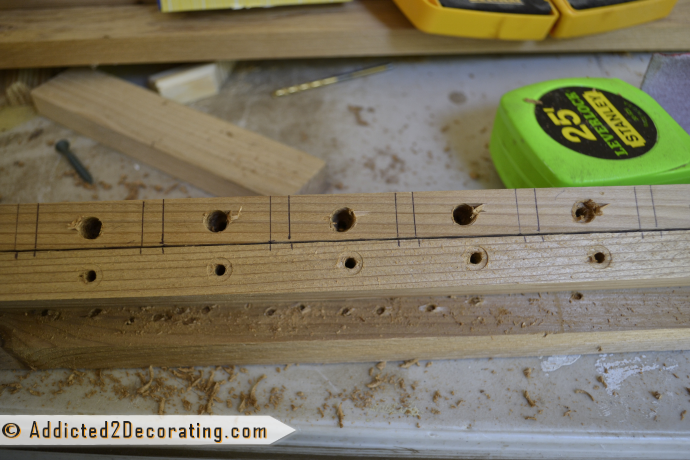
You can see here the difference between the original pilot holes and the holes for countersinking the screws. Again, the larger portion is only about 1/4-inch deep.
After all of the holes were drilled, I sanded, and sanded, and sanded, and sanded some more.
I started off sanding each board with my rotary sander just to get all of the flat sides really smooth. Then I followed up by sanding all of the edges and ends by hand. So none of the boards were left with a sharp corners on the edges, but instead they were slightly rounded.
Then I gave all of the boards (support boards included) a coat of pre-stain conditioner…
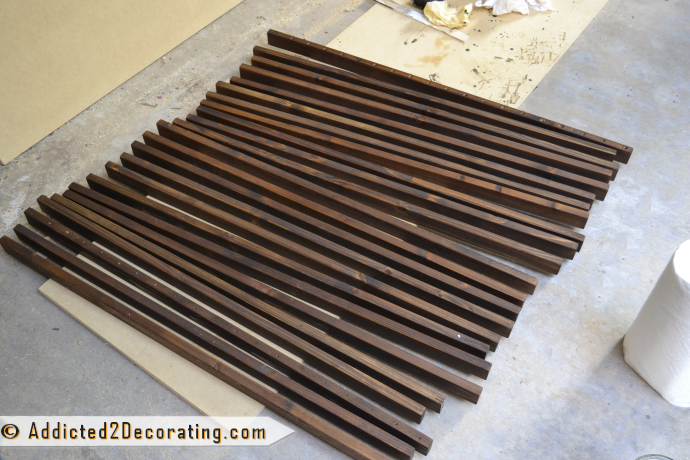
Followed by a coat of Minwax stain in Dark Walnut…
Throughout the sanding, conditioning, and staining process, I always made sure that my spacing guidelines were visible on at least one of the support boards. This required that I transfer the marks from one board to another throughout the process (i.e., before sanding the board with the marks, I transferred the marks to a board that had already been sanded).
With all of the boards stained and dry, it was time for assembly. Because the screws were going up through the bottom and into the slats, the mat had to be assembled upside down.
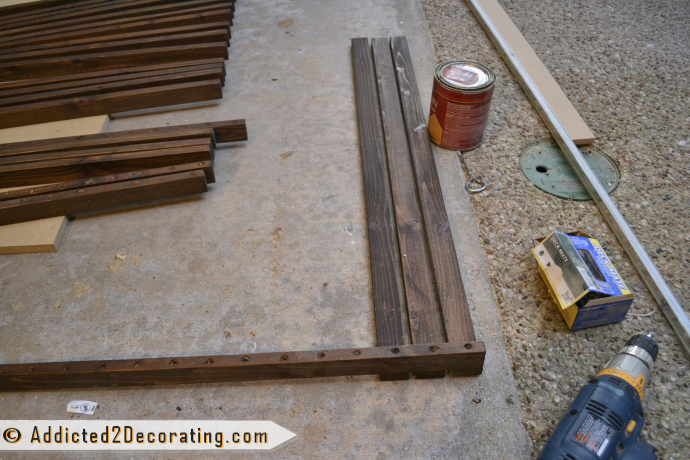
I started at one end, using my guidelines to determine the spacing of the boards. I assembled the mat with 1 5/8-inch deck screws.
I continued on until all of the boards were attached to the first support board.
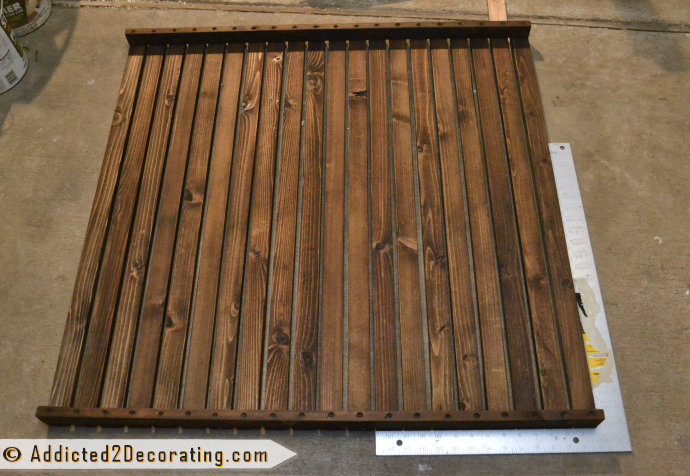
Then I used my framing square to be sure that the two outside boards were square, and I attached the support board to the other side, starting with the two outside boards and working in toward the middle.
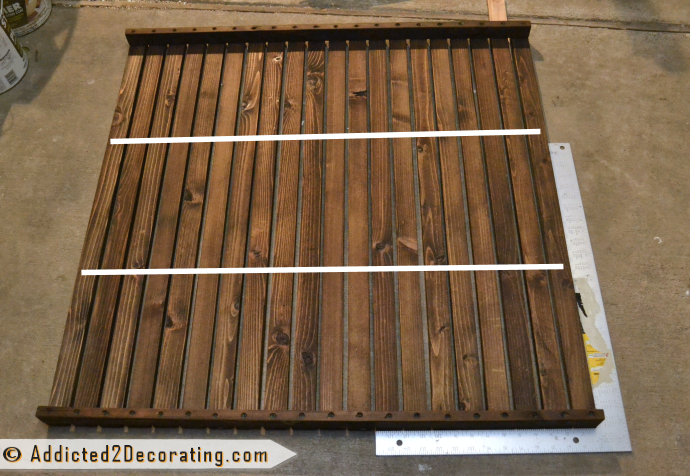
I forgot to take a picture of the final two support boards in place, but simply spaced them evenly as demonstrated by the white lines here…
During the assembly, I tried to keep everything as square as possible.
So that’s where I left the project last night. The stain still wasn’t 100% dry, so I’m going to give a day or so more, and then I have a few finishing steps that I’m going to do.
First, I’m going to use clear silicone caulk (the kind meant for showers and wet areas), and I’m going to caulk all of the screw holes from the bottom. Even though I know cedar is weather resistant, and I used deck screws, I still would like to take that extra step to protect those screw holes from having water get caught in them.
I’m also going to give the mat extra protection with a coat or two (or three) of teak oil. I considered polyurethane, but I think I’d like to try an oiled finish first and see how that will hold up. If it doesn’t give quite the protection I’m after, then teak oil can be polyurethaned after 72 hours. Also, I read that something like Thompson’s Water Seal (the one that’s made for decks) can be used as well. One woman said that she gives hers a coat of that about once a year, and it’s holding up great.
And last, I bought some little rubber slip-resistant feet that I want to put on the support boards. This will lift it up a bit more, provide extra room for drainage, and keep the support boards from sitting in water.
So the shower is pretty much finished. Tomorrow I’ll show you the mirror (or rather, the frame for the mirror) that I made for this bathroom. It’s actually finished, and I really wanted to show you today, but I couldn’t find anyone to cut my mirror over the holiday weekend. So hopefully I can take it in today and get it cut, and get my mirror hung on the wall so I can show you tomorrow.
This room is just about finished!!
Addicted 2 Decorating is where I share my DIY and decorating journey as I remodel and decorate the 1948 fixer upper that my husband, Matt, and I bought in 2013. Matt has M.S. and is unable to do physical work, so I do the majority of the work on the house by myself. You can learn more about me here.





Totally didn’t expect the shower mat but I LOVE it! It’s perfect with the sink countertop. You are so creative with an endless amount of ideas and I feel lucky that you share them with all of us. Thanks.
Really like the look of your latest project! It gives that bathroom a little extra oomph (and it’s already nice). Very cool idea to use this to give a step-less transition to a future bath as well. I wouldn’t have thought of it, but it makes perfect sense. Look forward to seeing 2.0 of this idea in your next house!
Hi!!!
I am excited to read your post today. I also have a husband with MS. Greg is not in a wheelchair but has balance problems and fatigue. We need to redo our bathrooms so badly and I want to make them better for him.
I work full time out of the home (and going to school) and this means I have little time or energy to add another item unto me. But we really need to do something. I am closely following you on your projects. I know I can do a lot of things myself but will have to higher someone to move the pipes. I have a list of wants and needs and I know what feeling I want for the bathrooms. Basically like a spa retreat at home.
Keep up the good work. You are an inspiration to me.
This looks really nice! I am amazed and how much you do in general, let alone for a house you will be selling. Not many people would put in all of these extras just for resale. Impressive!
I used Thompson’s water seal on my cedar fence picket adirondack chairs, and they held up to extreme elements for over a year still looking fabulous. You know Texas, we’re talking 100+ temps with direct sun, and when I lived by the ocean there was also a lot of salt water humidity. So, that’s still a great option! This is a really cool mat, you did a fantastic job
I love this idea Kristi!! Such a fab high end look!
You’re so talented! I love the warmth and sophistication the mat adds to the look of the shower. You could sell those girl!
I love how you think out-side of the box! Great project.
Super cool project! It looks amazing, very high end. With all these wonderful additions to your condo, you’re going to have buyers lined up around the block!
Okay….you rocked this one Kristi!! Love…..it!!!!
Great idea and great job in completing the project, I love the look.
Once again, you did a fantastic job, Kristi! Whomever purchase your condo will be very happy, indeed!
Oh my I am loving this!!! Pinned 😉
Once again, the unexpected for a typical everyday shower. You are one smart cookie!
I love your projects and this one is a gem. Inspired by you and the Young House Love team, I tackled installing engineered flooring in our guest room (we ran out of funds when we had the main area of the house done and it would save me about $800 to do it myself. Well, four days of work and I’m only 1/4 done, so I totally appreciate your past honest posts about starting and underestimating how long it takes to finish :> And I’m so sore from getting up and down on the floor it’ll take me a couple days before I’m up to starting on the last 8-12 hours of work. But reading your post tonight reminds me to soldier on. Thanks for taking the time to write up your progress and projects!
Sue, bravo for tackling that project yourself!!! Sometimes the process becomes tedious and tiresome, but I’m always so glad when it’s finished, and I can look at it and say, “I did that with my own two hands!!” There’s such a feeling of satisfaction that comes with DIY that I never get when I pay someone to do something for me.
And flooring…WOW…flooring is such a big job!!
Hi, love it!! Thinking about doing this, how much did it cost you? Thanks
this really really makes your shower look exotic! Something as simple as a cedar mat really makes it pop! You did a fantastic job. Thank you for sharing!
Awesome. Just awesome.
Keep that wooden tiles. It looks classy like a spa. Can’t wait to see your additions.
Cool Kristy! Did you just design and made it byyourself??
What a great idea! I love the way the wood mat looks in there!
I am definitely going to make one of these. My master bath is in for a new look now that the master bedroom is finished. A wooden mat will just make it so much better. Glad you did this before I get going on my bath! It looks awesome and puts an even higher-end look to that small space. Bravo!
As usual, total inspiration, Kristi!! I am right now in the middle of packing up my kitchen, getting ready to tackle a DIY IKEA remodel. (I’m a middle-aged woman who lives by myself, and this will be my biggest project ever!!) **deep breath** Just wish I could bottle me up some of your energy. 😉
How exciting for you, Julie! YOU CAN DO IT!! I hope you’ll send me pictures when you’re done! 🙂
Your vote of confidence is much appreciated!! And I will most certainly send you some pics! (Have been toying with the idea of starting a blog and was hoping to get it up and running so I could record/share the whole shebang while it was happening, but I’m not sure I can handle a total gut kitchen remodel AND a new blog!) Maybe I’ll just have to take lots of pics along the way, and then if I DO get my blog going I can post about it after the fact. But either way — my “after” pics will find their way to you!!
Just FYI, for a flat shower they make product that act as a dam but wheelchairs roll over. Here is an example http://www.staydrysystems.com/products/collapsible-shower-water-dam/
I cant believe how amazing that gorgeous bathmat looks! And you made it yourself?! You, my dear, are one incredibly talented designer. In fact, I love the whole bathroom, especially the shower flooring and wall cabinets in some of your pins! Thanks so much for sharing your creativity!
This looks great! How do you clean it?
Where/How do you come up with this stuff? Fabulous!!!!!!!!!!!!!
I love the cedar floor mat and the countertop, and the new tile … I’m drooling. I want to take a hammer to my small main bathroom, but I gotta wait. Lots of ideas.
Thanks for the inspiration
I really LOVE this idea! I may have to cajole the husband into helping me make this. Your pictures and instructions make me think I could do it too!
This is amazing! I will definitely be trying my hand at making one of these.
Love your website, I’m here everyday this past week, it seems! Sending warm thoughts and healing wishes to your husband. I have MS too, RRMS, and on the Tysabri therapy. Thanks for all you do! 🙂
I really love what you have done in your shower. I would like to do the same thing in my house but I’m having a hard time finding cedar boards that are pre-cut to 1×2. Did you buy them that size and if so where, or did you ripe a larger board yourself?
I bought them that size,and I found them at Home Depot. I think they were 8-feet long.
Wow! That is so cool that you wrote back to me so fast. I wasn’t sure if I would even hear anything. Thanks! Our Home Depot doesn’t sell them but Lowes does. Yeah! Can I ask you two more quick questions.
1. How did you decide how far apart to space the boards. 0.27 seems good, I just want to make sure its hard to see the white floor underneath the boards.
2. Is it more comfortable to have the boards running perpendicular or parallel to the shower head?
Thanks again for inspiring me. I just discovered your site and I love it!
1. I made the frame, and then fit as many of the boards on it as I could, while allowing space in between.
2. I have no idea. I only tried one way.
Awesome job! It looks so good and professionally done. Do you mind letting me know how much it cost for supplies? I want to do this project with my dad and he has the tools and paint brushes. Thanks so much!
I’m considering making one of these, but I was wondering how often you clean the shower floor beneath the wooden mat? Does it get all gunked up with hair and what not? Is it difficult to clean?
We actually moved shortly after I made this, so I won’t be any help. But if you make one, be sure to come back and let us know the answers to your questions! I think many people have those same questions.
I just bought s house with this same shower floor. Any tips on cleaning underneath? Thanks!!
If it’s removable like the one I made, then remove it and clean under it. If it’s not removable, I have no idea.
I appreciated your ideas and your design is beautiful. I am always so inspired by your posts, yes exactly! You are one of the most real bloggers out there, showing your progress after every day. I love to observe your job; it inspires me to set my alarm and does some of my own. I deal with fencing supplies in California provide amazing fencing products and price that can suit every budget. Nice capture.
Thank you so much for sharing!!!! I love that you take the time and effort to countersink the screws, screwing from bottom up. I am going to try this for my shower floor. Previous owner put in nice quality tile but bizarre color choices (floor is yellow, walls are rust and orange – looks very 70’s but was done in 2005) so I am having a pro come in and reglaze the wall tile white and then I will do a wood floor to warm it up.
This is a phenomenal idea! I am renting a place and the bathroom is tiny and old. I didn’t want to take on all of the repairs and such myself and have been looking for a good topical solution to an ugly and outdated shower. Thank you so much for sharing!!
I would like to have same in my bathroom, this will reduce the chance of getting skid & injured, no slippery floor especially for kids & elders, no splash of water. Please suggest me which type of woods are suitable for this type flooring.
This is exactly what I want to put in my shower! I had no idea how to do it or where to start. I would never of thought to put the screws in through the bottom. It makes it look so professional. I will be having one of these in my shower soon. Thanks so much for sharing. It looks fantastic!
Love the shower insert. How much does it weigh?
Did not think of using cedar. Just remodeled the master bath for my mom and sunk the shower floor down 2 inches with the idea of putting in a teak insert, so the shower will be barrier-free. Not sure, but I think teak and ipe are 3 times heavier than cedar. That could make it really hard to remove the insert for cleaning. Cedar might be a better choice. Great job!
Hi Kristi. Do the final 2 supporting boards prevent any water flow to the drain?
Mine didn’t.
I know this post is a few years old,But it is still just as relevant & on trend today,Then it was when You originally wrote it.I do have a few suggestions. 1st: Back when I originally learned how to DIY (About 30 years ago) I was always taught that anything being made or coated for a “wet room” (Bathroom,kitchen,utility,laundry,etc basically anywhere that will have running water,dampness or will be the entry from coming in from outside.I think You get the idea) That the best products to use would be a “Marine-rated” finish or applicable for marine use.In short,If it can survive being used in constructing a boat,Or a paint/other finish to survive coating a boat..It will hold up in a residential application & used in a “Wet Room”.
I was looking for inspiration to make a removable “cover-up” for My very small entry porch on My 1927 Cottage Bungalow,When I stumbled across this old post.My problem is that this House, is a lease option. Although I have done extensive DIY projects not typically done if Your not The Home Owner (I’m more then a Renter,But less then someone locked into a Land Contract) Until I take the leap & sign the legal paperwork,Which I will do eventually,I have to collaborate with The Homeowner & His Wife on all projects & allow them to have an input.The Home Owner usually gives Me cart blanch to do what I want,But did not like the suggestion that I made,To buy slate tiles to cover up the concrete on the porch.Not only is the cement of the porch pitted & has a couple of rust stains that won’t come off,No matter what product I try..
I am wrapping up an extensive porch renovation that started out as a simple repair & decided to add a few upgrades,Only because of the opportunity presented itself by having access to normally non-accessible areas of the attic.
It all started because of an electrical upgrade in the living room,Because someone back around the 1960’s spliced off of the porch light to add 2 other (interior) lights,One of which was to add a light in the small,entry vestibule.The issue was that if You turned the light on (to find something in the entry closet,For example) The porch light also came on.Or if You wanted to leave the porch light on,The vestibule light was also on.I had all the fixtures separated into 4 switches & was also able to add a light in the center of the living room,While I had the access to the usually closed off attic space & the wall cavity between the studs,was open & exposed.But that created a snowball effect of a renovation that has now consumed the last 4 months of My Life,Unexpectedly cost Me around $1,500 in materials that I didn’t plan on buying & has become a MAJOR Remodel,Which I’m now rushing to wrap up before the cold weather Michigan is known for,Settles in for the season & I end up screwed!
It started with “I might as well add such-‘n-such” mentality & I although I had valid reasons for the upgrades,Such as deciding to add on an entire new line from the breaker box to add a light over My new house address numbers because where the house numbers were then located (On the front of the porch post) not only weren’t seen because the Nickle colored numbers blended in to closely with the cream colored paint,But also it was coincidentally right where a shadow was created & no one could even see the numbers after dusk,Let alone when it’s truly dark out!! Then I added an exterior outlet on the front of the House & I a recessed light with a (very,very expensive Phillips-brand LED spotlight bulb with an extremely narrow beam of only 15 degrees) to act as a “Threshold Light”.I figured because it’s slowly being phased in as a City Code requirement & by the time I buy this House,It will be,So do it now while it’s easier.Then I happened to stumble upon an amazing deal on a “19 Moravian Star pendant light done in Mercury glass mirror,And I’ve desired a Moravian Star going on at least 25 years!! Except now that I was able to add a ceiling light in the center of My living room,I think I may want it there instead (LOL!!) but that puts Me back to needing a porch light!
Needless to say, I’ve been working on a little bit everyday,the entire summer long.One of the final touches is that I HAVE TO add some kind of wooden slat system to cover the old,pitted & stained concrete pad on the porch.Not only is it showing it’s age,But I accidentally dropped spray foam insulation on the concrete.Once You do that,There is NO WAY that spot will EVER take a stain,etc.The foam basically expands into the microscopic pores in the cement.The Homeowner said no to slate tiles even though I was going use one large ‘4x’8 piece for the porch & the only “Tiles” were going over the face of cement threshold.But,now need to brainstorm an idea to cover the concrete.Now that I basically made everything brand new,Or stripped down to bare wood & primed/painted,It makes the old porch look even worse!!
I looked at the Diy wooden “Doormats” & kind of merged it with Your shower mat diy.To basically make a 4 x 8 floating “floor”.I was thinking of constructing it out of lathing strips,Because they are only “1/2 thick,And only $15 for a bundle of I believe something like 50 pieces roughly “1.5 wide x “48 long,That would make for a really affordable DIY.The problem with that is that they are made of lower grade pine.Instead,I may be forced to buy cedar 1 x 2’s but rip the thickness down into 3/8 thick boards,so that step up from the top of the 2 steps onto the porch,Doesn’t feel “off” because of adding that additional “3/4 plus the “2 from the support board underneath.I’m thinking in place of the cross supports You added,I’d add the little plastic feet that prevent scratching from the feet of chairs,instead. They are the size of a Nickle or Dime & are made of heavy duty plastic.They would only raise the “decking” about “1/4.
I was going to use Spar Urethane over Minwax’s traditional oil-based wood stain or the new Minwax Ultimate which is a gel stain.But I think I’m going to try Thompson’s watersealer, instead.Has anyone who has used Thomson’s in the past,Tell Me if it can be used over Minwax oil based or gel stain? Or can it only go over raw wood without a stain added? If it can go over a stain,Does said stain have to be an exterior,deck type stain? (Like the typical deck stain in colors such as “Redwood” or Cedar” because I was only planning on using Minwax so I could recreate the custom mix of Ebony & Dark Walnut,That I formulated to use on My wooden entry door.
I’d appreciate any helpful answers,Especially regarding Thomson’s water sealer.I’ve never had a deck before,Only patios.So I’ve never had a need to use it & am completely unfamiliar with how or what it can be used on/with.Thank You
Hi. I just found your blog and I come here everyday. Spent the whole day here yesterday. What a blessing!
I have a question about the wooden shower mat. If you screw from bottom how do you keep the sharp tip of the screw from coming out the top?
You are the best, this is exactly what i was looking for, thank you soooo much for shareing your knowledge!
MOLD!!!! DON’T DO IT!!! I LIFTED IT UP AFTER A MONTH AND THE ENTIRE SHOWER FLOOR WAS COVERED IN MOLD. LOOKS GOOD ON TOP, BUT THIS REALLY IS A BAD IDEA.
Ummm…you still need to clean your shower. A few spritzes of 1 part bleach and two parts water every few days will keep it mold free, and yes, you still need to clean the shower regularly, as in, a good cleaning weekly.
Thank you so much for these awesome directions. We did not have cedar at our local hardware store, so I used Redwood. I only put one layer of redwood stain on it because I didn’t like the color of it. The pre-stain conditioner was almost enough. I did get a spray can of water sealer for decks and used that as my water treatment. The color does not bleed into our shower whatsoever. It was great directions and one of the most detailed project I have done. I wish I could post a picture on here for you to see! We have a single stall tile shower like in the example you showed. The measurements were a bit wacky because of the age of the house, but I just measured, trimmed and numbered each (of the 18) boards as I placed it in the shower,
I am from the Pacific Northwest and currently living in Minnesota. Cedar flooring or mats are huge in Washington, Especially using cedar. It really made me miss home and the smell of the cedar is soothing and it brings back great memories. You did mention IPE. I have never heard of it and had a hard time finding anything out about it. I think Cortana took a nap, LOL……
I have been a DIYer all my life. I have decorated many of my friend’s homes and my own. I was blessed to inherit my grandmother’s creativity and artistic talent. I was garage selling before it was cool. I enjoyed your blog and hope to hear more from you.
Thank you
I’ve been looking for an option for flooring for a “mud room” shower in an unfinished basement (basically just a shower head and a curtain at the moment, LOL). And this is PERFECT! This would keep feet off the cold concrete floor, and allow for drainage. Now I’m thinking about how I could maybe hinge it to lift up against the wall when not in use… LOVE this idea!