DIY: Mini Dimensional Quote Made From Alphabet Pasta
I really like all of the dimensional quotes and artwork that I’ve seen on Pinterest over the last several months. Do you know the ones I’m talking about? They’re made by writing out the quote (or drawing the design) in glue, and then letting it dry and painting the whole thing. I’ve wanted to make one for myself, but right now I just don’t have the wall space for something like that. So I decided to use that concept and make a miniature version using alphabet pasta.
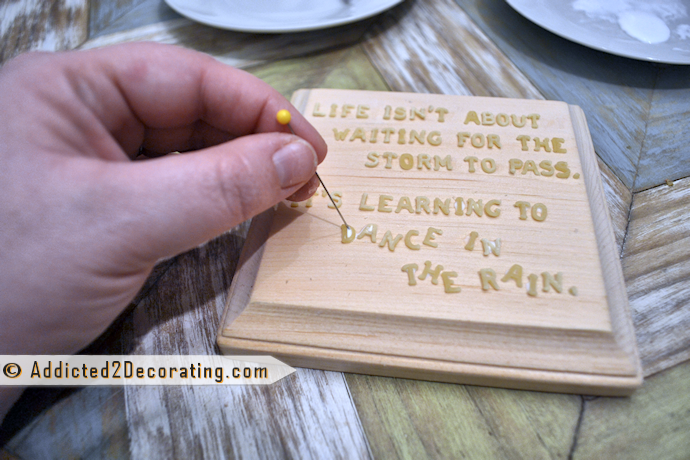
The idea is very simple. I used one of those cheap wood plaques that you can get at any craft store for about 50 cents (I think the one I used was about 4 inches square), and then I used tweezers to dip alphabet pasta into Mod Podge and then position the letters onto the piece of wood.
If Mod Podge filled any of the holes in the letters, I used a straight pen to remove the excess.
I didn’t do any measuring or marking for the letter placement. I just kind of eyeballed it.
When all of the letters were in place, I mixed up some Mod Podge and water (about 1:1 ratio) and brushed it over all of the letters, getting it into the cracks and crevices, but being sure to smooth it out as much as possible.
After the letters were dry and securely attached, I gave it a coat of spray primer.
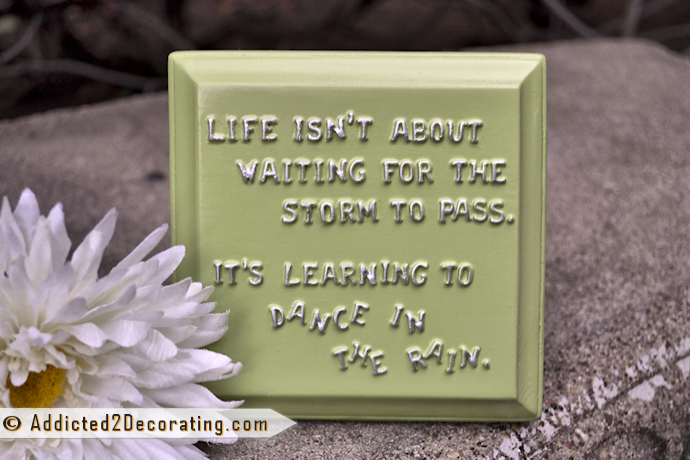
And then followed up with a coat of spray paint. Of course, you could leave it just like this…
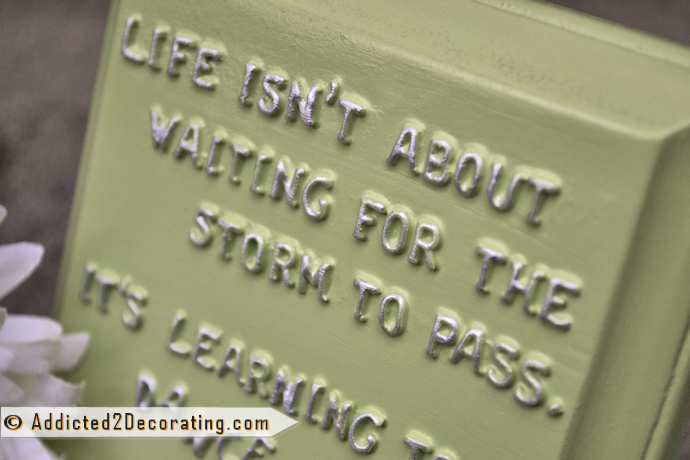
…but I decided to highlight the letters with just a bit of metallic craft paint. I just used my finger to lightly dab the paint on the raised areas of the letters.
These are super cheap and easy to make. Wouldn’t they make a cute gift for someone with a desk job? You could customize the quote just for them, or add a Bible verse that has special meaning to them.
Of course, pasta letters aren’t perfectly uniform, but we’ll just say that the imperfections add to the charm. 🙂
Addicted 2 Decorating is where I share my DIY and decorating journey as I remodel and decorate the 1948 fixer upper that my husband, Matt, and I bought in 2013. Matt has M.S. and is unable to do physical work, so I do the majority of the work on the house by myself. You can learn more about me here.






Clever, clever!!! I love this.
Too cute! I loved to craft with pasta. What a great idea.
I love this idea! It is creative and fun. I can not wait to try it.
Great idea Kristi, and sweet quote! These would be great for children to make for grandparents too!
I PREFER AN EASIER WAY DON;T USE THE HARD PASTA…LET IT BOIL TO A BENDABLE CONSISTENCY THEN TRACE YOUR WORDS OR ABSTRACT WALL DECOR WITH THE WET PASTA. LET IT SET THEN USE FOIL CRUNCHED UP TO COVER BY RUBBING FOIL NOT TOO MUCH. USE A ROLLING PIN AFTER UNCRUNCHING FOIL THEN COVER THE DRIED PASTA ART. TAKE A TOOL THAT ISNT GOING TO TEAR THE FOIL AND TRACE THE ARTWORK WITH A ERASER OR SOME KIIND OF TOOL THAT WONT TEAR YOUR FOIL.
FASTER THAN GLUING HARD PASTA ONTO A BOARD ……………TRY IT, YOU WILL NEVER USE BITS AND PIECES OF PASTA AGAIIN, CUT EXCESS OFF AND FRAME OR NOT.
THIS CAN BE USED FOR ANY STRING ART ETC. LET YOUR DESIGN DRY BEFORE ADDING FORGED FOIL. HAPPY CRAFTING
Never in a million years would I think that that is made from pasta! Love this project, thanks for the great tutorial 🙂
This is such a great idea! I am going to make some for my girl’s stockings! I think it would be a great craft for older kids.
Such a great idea! Since I’m gluten-intolerant, this is the perfect way to have my pasta, hee-hee! 😀
I would never have thought of this. It looks beautiful. I like it better than the overblown ones.
What a nice tips you have here…thanks for the ideas now I will make one of this with Christmas theme…. 🙂 Have a great day!
Great idea! I love it!
No stinkin’ way! (Imagine me popping my hand to my head and saying “why didn’t I think of that!). I wanted to do this with foam letters on a $1.00 unfinished wood picture frame from Michaels – figured it would be a great craft project with my granddaughter and she could give to her mom and other grandma for Christmas. All the letters were way too big though and I had just about moved on to the good old standby of decoupaging 4×4 tiles.
This is brilliant!
What a great idea! I love the way this came out. And this project would be a lot better for me because I’m sure me + trying to write with glue would not turn out so well! =]
You have the best ideas! This will make an affordable and very personalized gift. Happy Holidays!
This is adorable! I may have to find the time to make one for Christmas-thanks for sharing the great idea!
Ummmm….AWESOME!!!! Can you say easy DIY inexpensive Christmas gifts for the girlfriends?!?!
Eek! LOVE it!!
What a brilliant idea! Love the quote!
So cute! Love it!
This is just perfect! I love it and will pin to do in the future…hopefully with the grandkids! It turned out so cute.
Debbie 🙂
How crafty! Great idea, looks like fun too.
What a great quote for the last day of the wettest January we’ve been having here in Florida ~ this is supposed to be our DRY season! Thanks for all the nifty production hints ~ if the job still existed, you’d make a great paste-up artist, back when we had to use this process for titles! I learned “re-purposing” found objects from my grandmother, who taught me how to make Christmas tree decorations from toilet paper rolls and red crepe paper [they were out in the woods on a hunting trip; I have no idea where the crepe paper came from]. Thanks for your generous sharing.
Love, Love, Love that idea. Been looking for the alphabet pasta…….did you seriously use the teeny tiny ones that I found online? I’m hoping you can tell me the brand etc so I can order some. I can’t wait to make some but I think my pasta is tooooo tiny 🙁
HELP
I don’t remember the brand, but it was definitely very tiny.
Thanks so much (that’s what I was afraid of)….lol
I’m definately going to give it a try, very cute. Wish me luck 🙂
Lori