Studio Wallpaper Is Up! (Plus, Tips For Installing Spoonflower Wallpaper)
Y’all, my Spoonflower wallpaper is installed in my studio, and I couldn’t be more excited about how it looks! Now if you’re new around here, let me get you caught up. This is wallpaper that I designed myself specifically to go in my studio (i.e., my combo home office/sewing room/craft room/art studio). If you want to see how I designed the wallpaper, you can see that here…
So anyway, my plan for the weekend was to finish the studio floors. As of Friday, they still needed three more coats of polyurethane. Well, as of this morning, they still need three more coats of polyurethane. 😀
You see, my plans completely changed when I looked out the front door right before lunch on Saturday and spotted a package that looked like it could hold about eight rolls of wallpaper. I was so surprised, because FedEx tracking said it would be here today (Monday) by 9:00pm. But I tore that box open, and sure enough. There were eight rolls of gloriously bold, beautiful and colorful floral Spoonflower wallpaper inside.
Needless to say, the floors got put on hold (the two coats of poly that were already on them were enough to protect them during this somewhat easy project), and right after lunch, I got busy installing wallpaper.
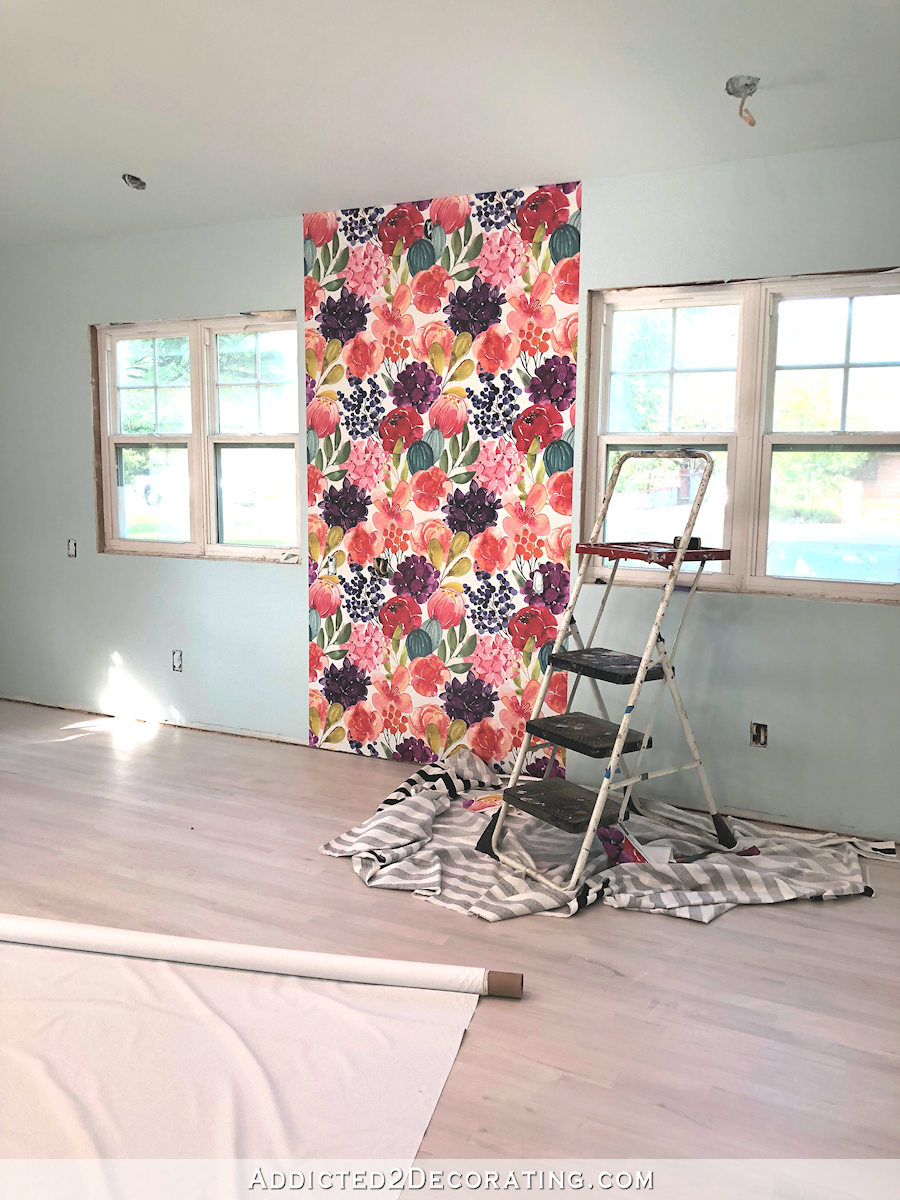
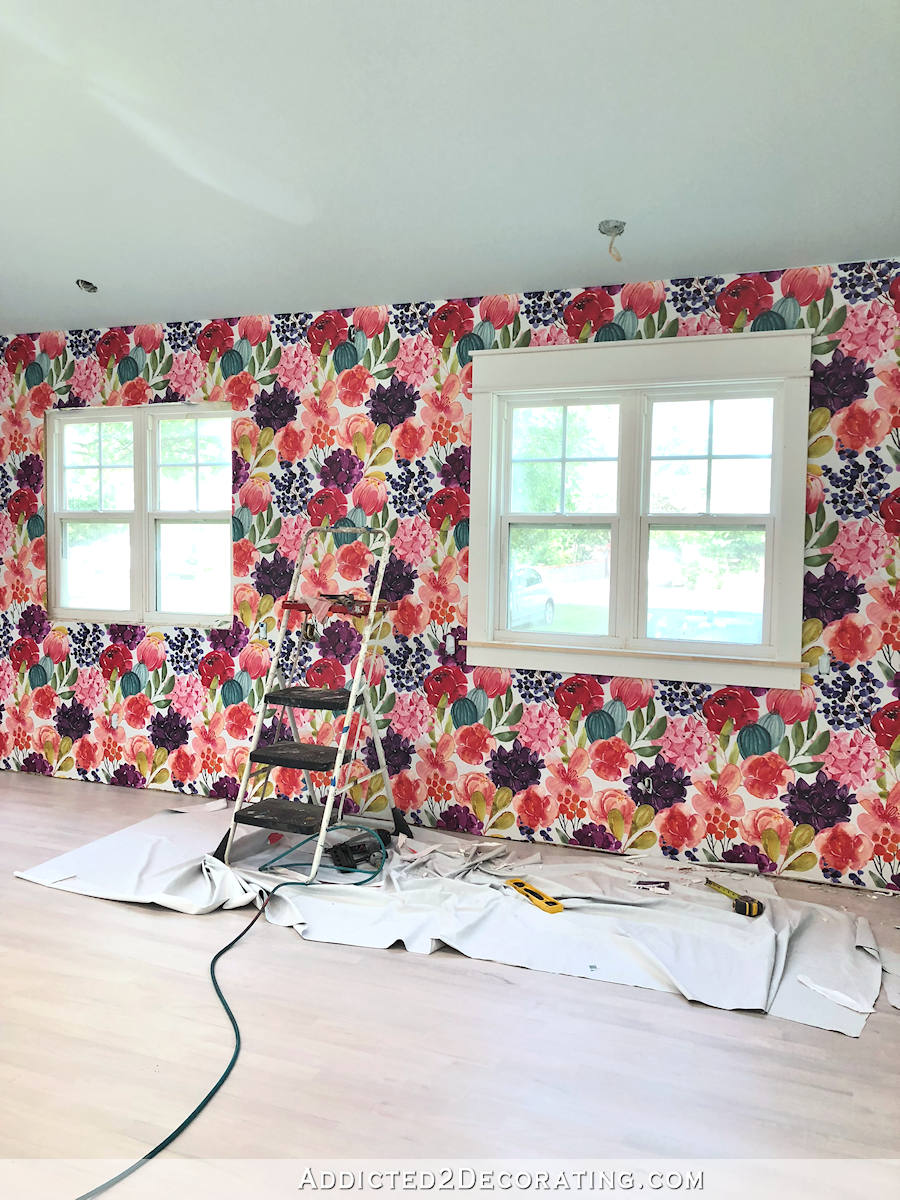
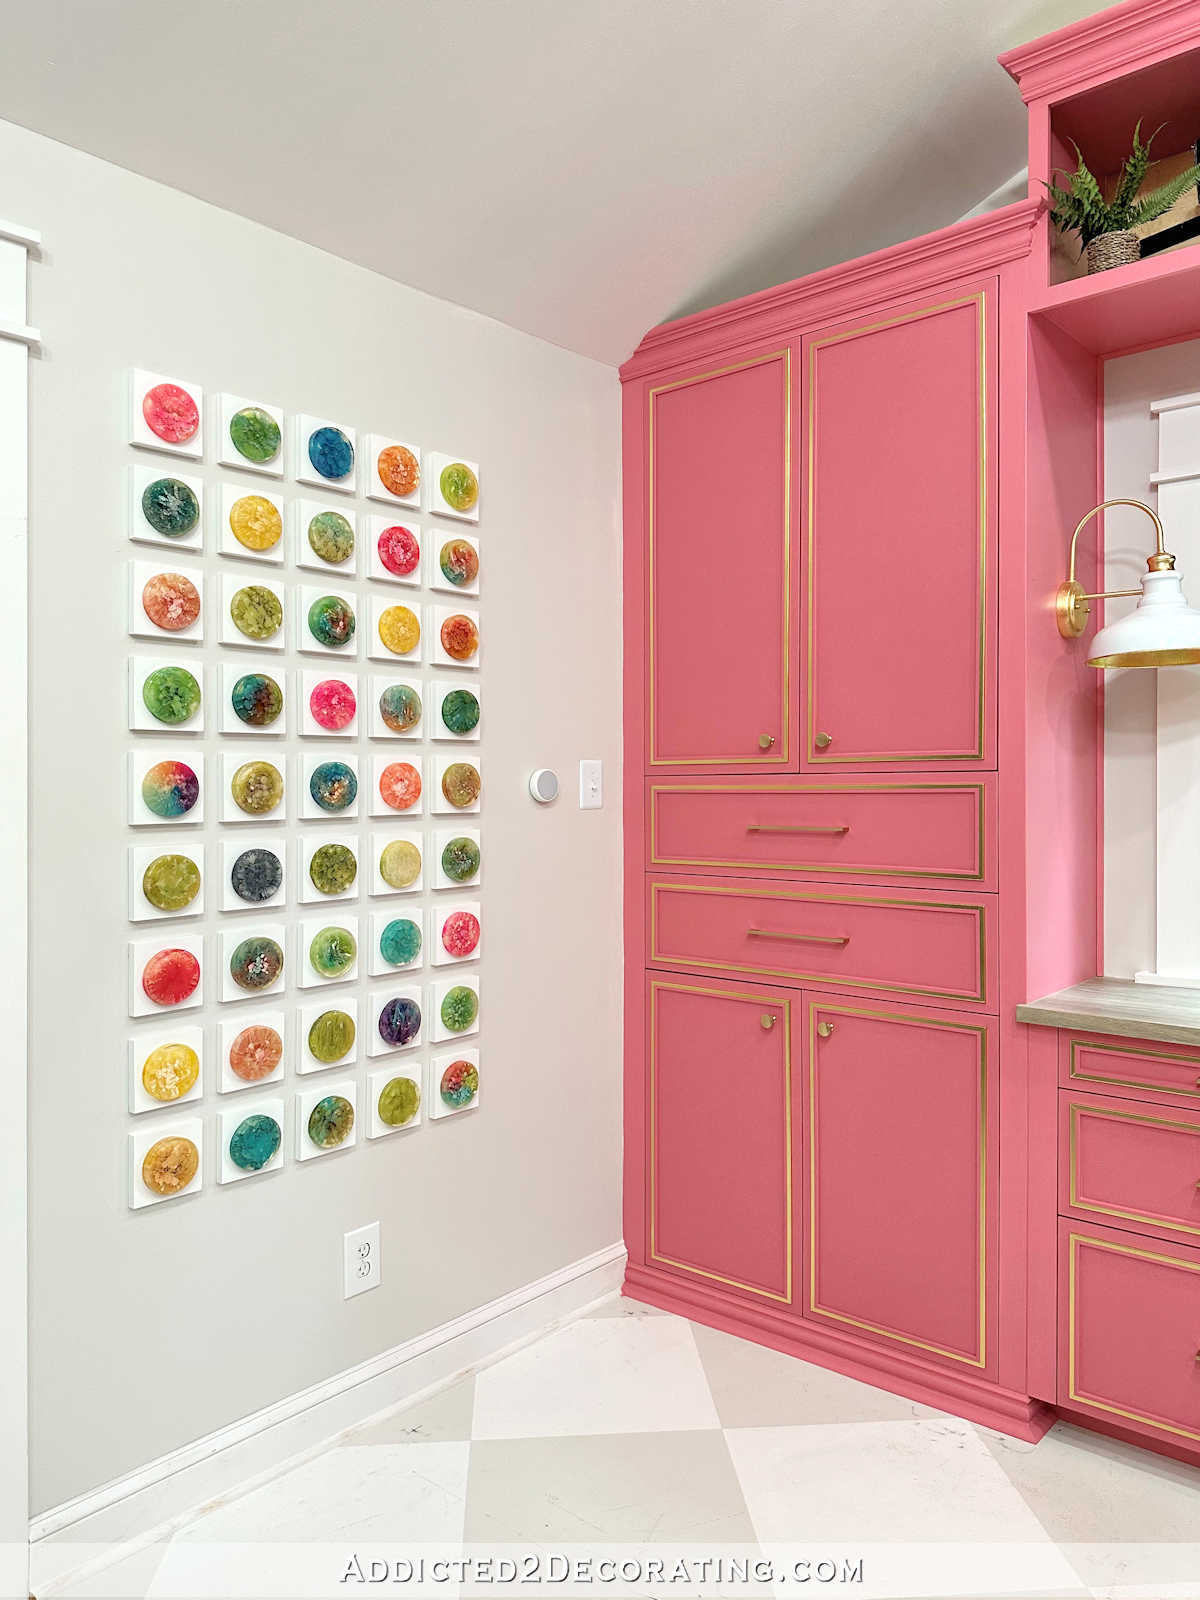
But I couldn’t stop there, so yesterday, I installed the casing around the windows. I didn’t get it wood-filled, sanded, caulked or painted, but even in its unfinished form, I could see this wall start coming together. Here’s how it looks as of this morning…
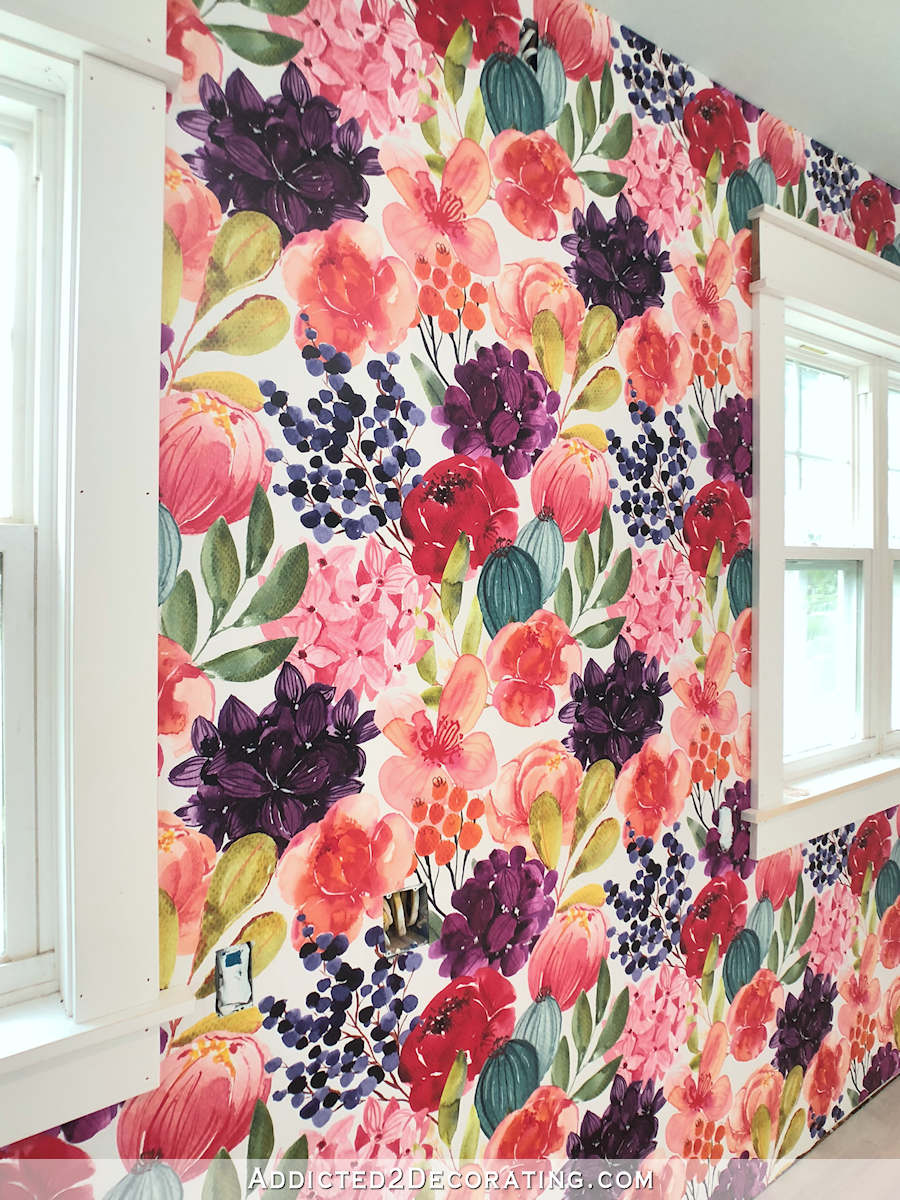
I said I wanted that wall to look like an explosion of flowers, and I think I got it! 😀 And oh my gosh, I’M SO EXCITED!!! I can’t stop staring at it.
Let me just say that I KNOW this isn’t everyone’s cup of tea. Not everyone likes things as colorful, bold, and busy as I do. (And really, if you don’t like it, I don’t really need to hear about it. Just let me be excited about it, okay?) But y’all, I absolutely love it. I just want to sit and stare at that wall.
Of course, a lot of it will be covered up. This wall is going to have a floor-to-ceiling cabinet on each end, a desk-height cabinet in the middle, a desktop stretching across the entire wall, ,and probably a piece of artwork or a corkboard in the middle of the wall underneath the wall sconce. So the wall is far from finished right now.
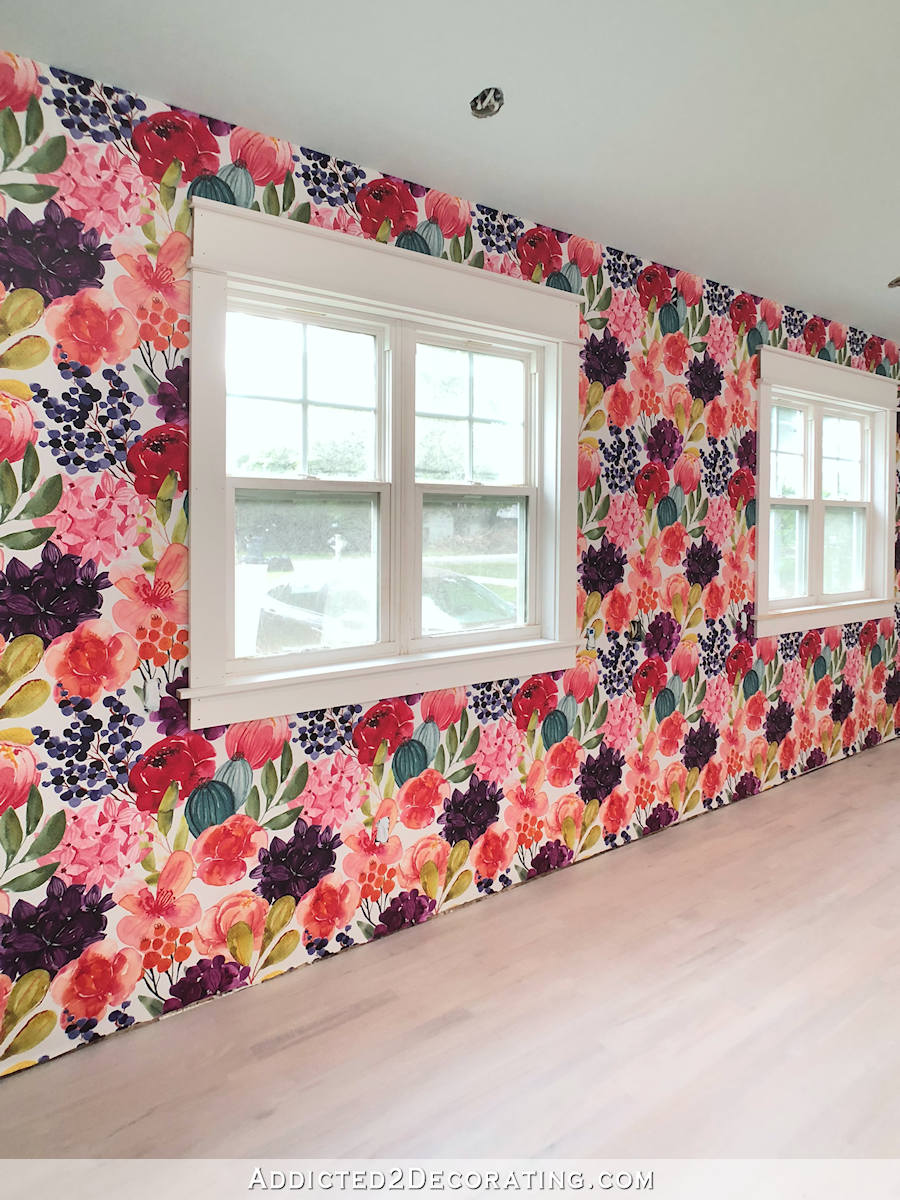
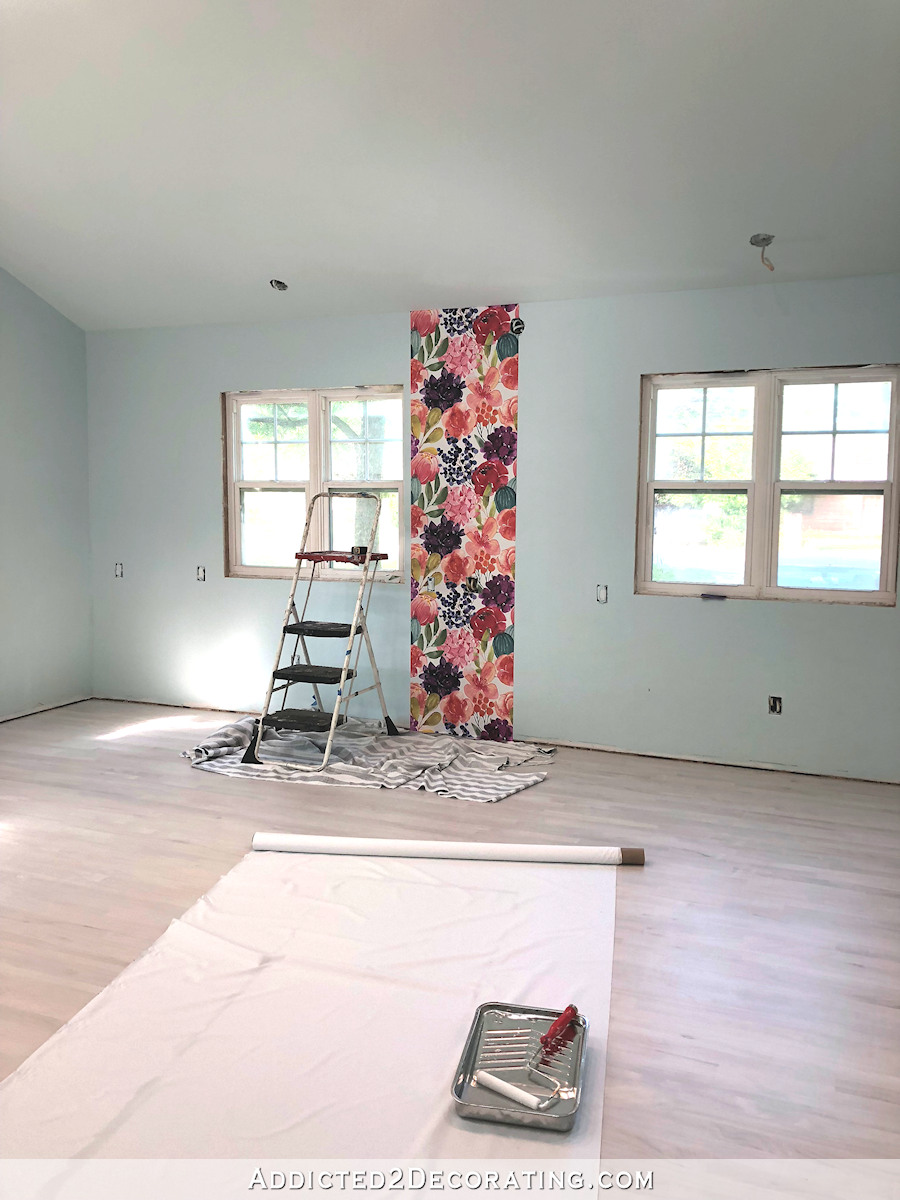
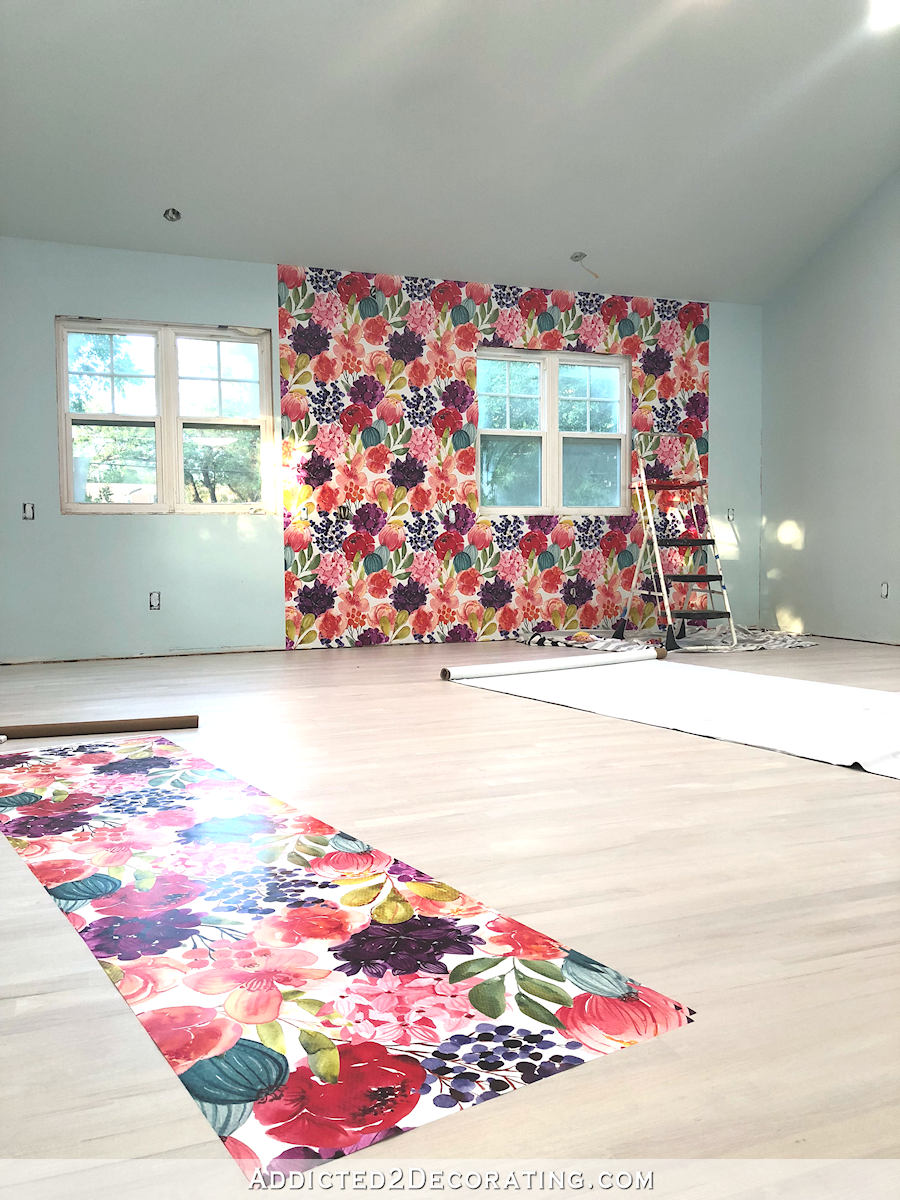
And right now, here’s the whole view of the wall…

There was no need in putting wallpaper on the ends that will be covered completely with floor-to-ceiling cabinets.
It’s been a very long time since I last installed patterned wallpaper, but this process was surprisingly easy. I was also very pleasantly surprised with the quality of the Spoonflower wallpaper. I’ve been hesitant in the past to purchase wallpaper from there, but I’ll have no hesitation to do so in the future.
But along the way, I did learn a couple of tricks, so I want to share those with you.
My tips for installing Spoonflower wallpaper
I used the water activated wallpaper instead of the peel-and-stick since the peel-and-stick costs more.
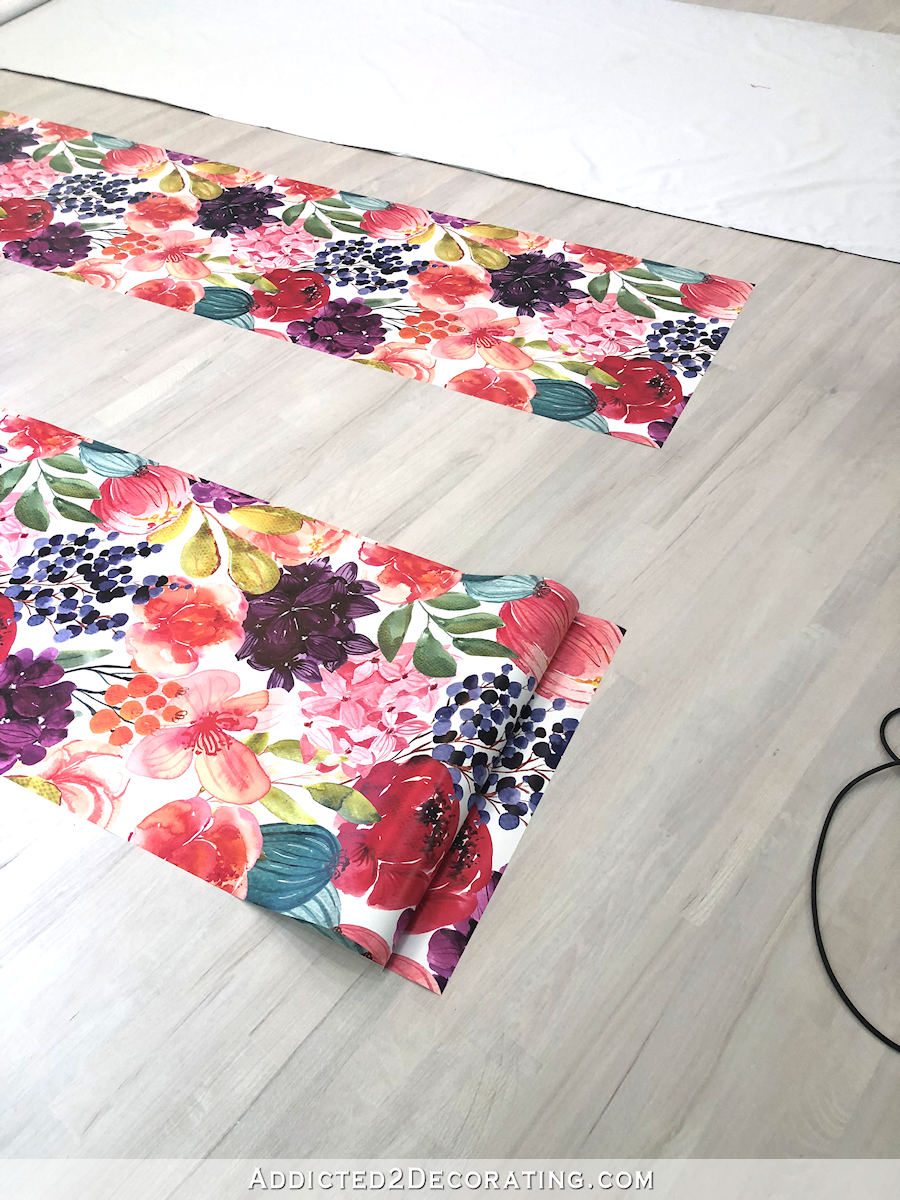
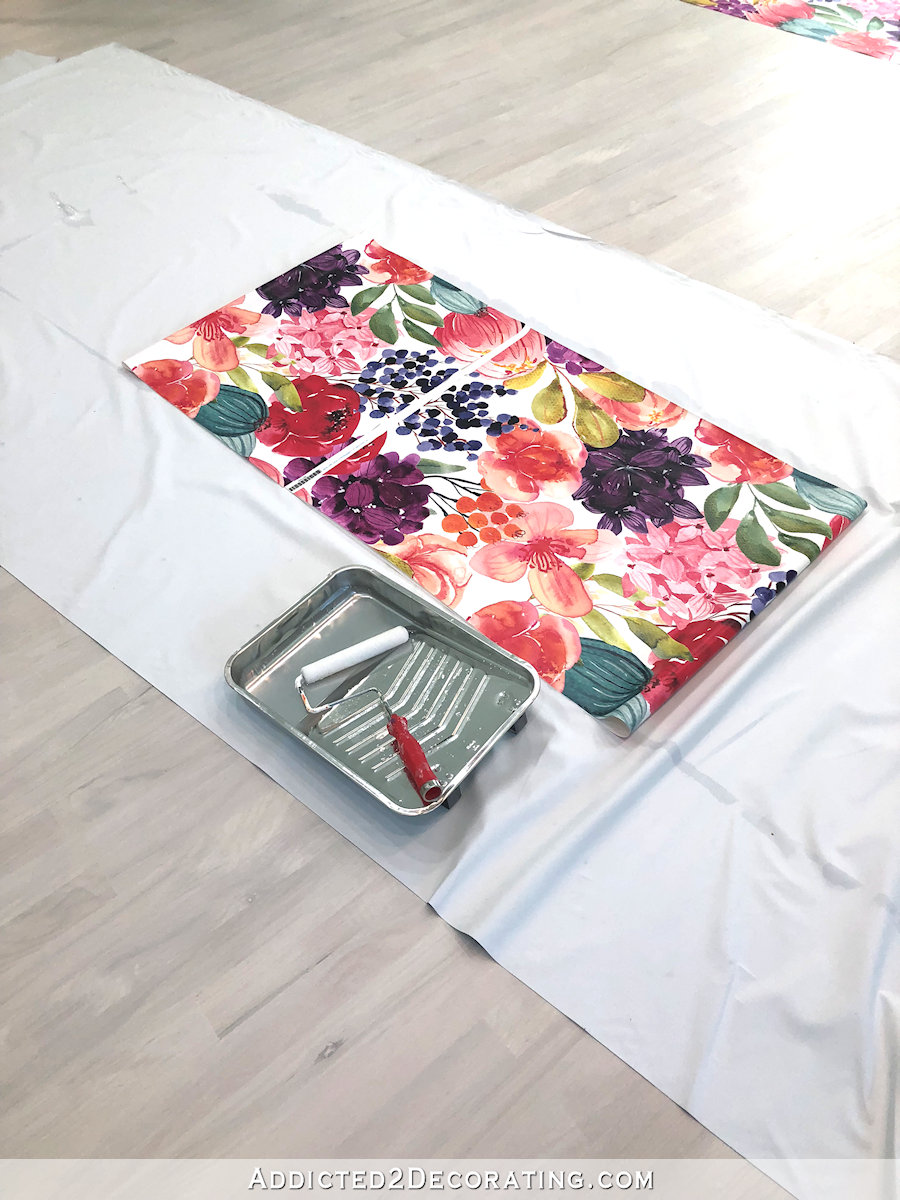
The first tip I learned is to unroll the wallpaper, printed side up, and let it sit for about 15 minutes. If you unroll a roll of wallpaper, and immediately place it printed side down on your work surface to begin activating the adhesive, the paper will start to curl up, and it will be very frustrating to work with. So just unroll it, give it about 15 minutes, and then it will be very easy to work with.
You can see the difference here in the one that has been unrolled for 15 minutes, and the ones that have just been unrolled…
The directions on the package say to place the wallpaper on your work surface (I used some extra blackout drapery lining so that the plastic layer would protect my newly finished floors), and then use a roller to spread water on the back to activate the adhesive. Then fold the paper over on itself and let it sit for 3-5 minutes.
I followed the directions precisely on the first piece, even waiting the 3-5 minutes, and it didn’t work so well. By the time I got the paper to the wall, some of the adhesive had already started to dry.
So on subsequent rolls, I placed the roll face down on my work surface, and using a 6-inch roller soaked with water, I started in the middle of the paper and worked towards the top half of the paper, rolling a generous amount of water on the paper. As soon as that half was covered, I did it again, and then immediately folded that paper over on itself.
Then I did the other half in the same way — rolled water from the center to the end to cover the entire bottom half, and then repeat. Then fold the paper over on itself.
I didn’t get pictures of each of those steps because I was having to work very fast, but here’s how it looked with both halves activated and folded over on itself.
As soon as I got the bottom half activated and folded over on itself, I picked the piece up and headed towards the wall. There was no need to wait any longer. The amount of time it took to roll, re-roll, and fold the bottom half was plenty of time for the top half to activate. And the amount of time it took to line up and smooth out the top half on the wall was plenty of time for the bottom half to activate.
The directions also say to start on one end of the wall and work from one side to the other. Because I wasn’t covering the entire wall, I didn’t do that. Instead, I started in the middle.
Using a level, framing square and pencil, I marked a line in the center of the wall, offset by 3/8-inch. (Spoonflower prints their wallpaper so that the edges overlap 3/4 inch.)
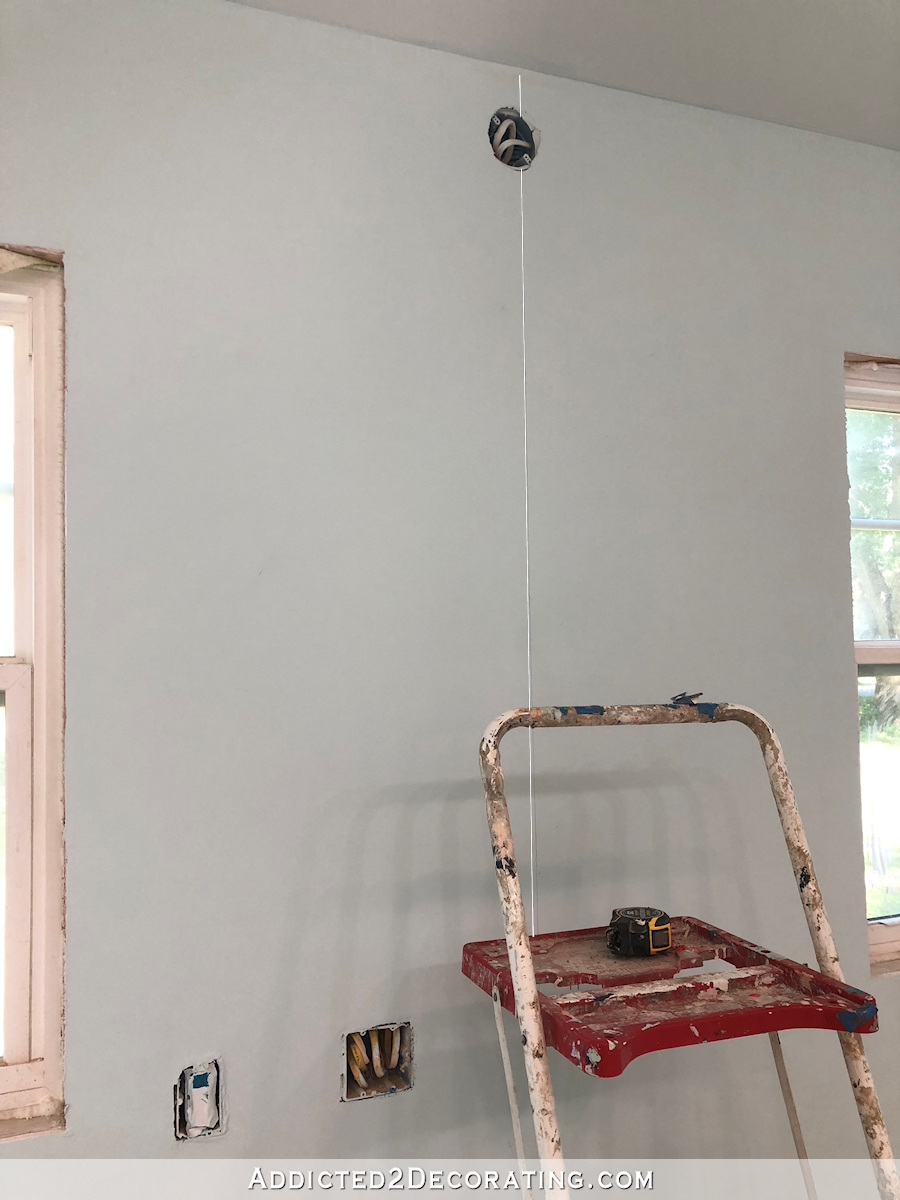
And I used that plumb line as a guide to hang the first piece.
And then I worked out from there…
I was very impressed with the quality of the adhesive on the wallpaper. It was a strong adhesive (not one single time did I have an area that hadn’t been smoothed out really well yet start to peel away and fall off the wall like I’ve experienced with other wallpapers in the past), but it also allowed for easy adjustment.
My wall required eight widths of wallpaper, and what I love about Spoonflower is that you can have them print custom length. So I specifically ordered eight pieces of 8-foot-long wallpaper, and they were all printed exactly the same so that the pattern lined up perfectly.

That’s a HUGE bonus with Spoonflower wallpaper, because with most companies’ printed wallpaper, you’re left with a lot of wasted paper at the end from having to match patterns. With Spoonflower, there’s no waste. (And even though this is sounding like a commercial, I promise that this isn’t sponsored. 🙂 I paid for my wallpaper just like anyone else has to, and they have no idea who I am.)
I mentioned earlier that Spoonflower prints their wallpaper so that it overlaps 3/4-inch. I was aware of this before I ordered it, and I assumed that it had to be trimmed once it was installed. Lots of wallpapers (especially grasscloths) are installed that way to ensure perfect seams. But the directions specifically said that trimming wasn’t necessary.
I was dubious about that claim, and was fully prepared to trim the seams if need be. But as it turns out, the overlap was just fine. It may be because my wallpaper is so busy, but I have to run my hand over the surface in order to find the seams, and even then, I can’t see the overlaps. That was a pleasant surprise, because I was NOT looking forward to trimming seams.
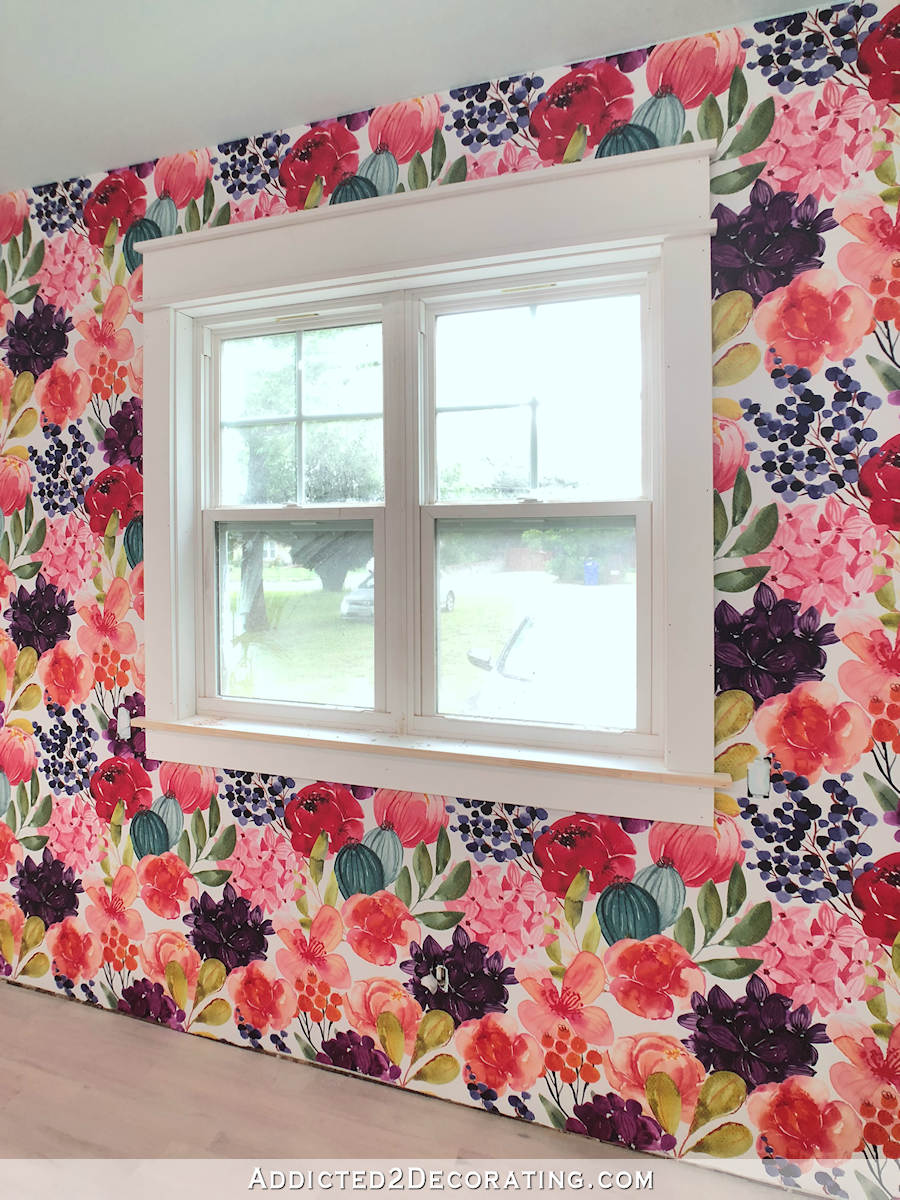
I loved the wallpaper on the wall just by itself, but of course, trim and casings make everything better. It was so fun seeing the progress as I installed the thick white trim against the bold wallpaper yesterday. And what a difference it made!
And it’s not even finished! Although I got the casings installed, none of the finishing steps have been done yet. Those casings will look even sharper when they’re painted.
So it was an exciting weekend! 🙂 But now I need to double back and get the rest of the polyurethane on the floor. I might be pressing my luck if I try to do more in this room before the floors are fully protected.
Helpful sources and products:
Want to purchase the wallpaper I designed? You can find it here…
I’ve also made the design available in a fabric print, which you can find here…
And if you want a step-by-step tutorial for how I install window casings, you can find that here…

Addicted 2 Decorating is where I share my DIY and decorating journey as I remodel and decorate the 1948 fixer upper that my husband, Matt, and I bought in 2013. Matt has M.S. and is unable to do physical work, so I do the majority of the work on the house by myself. You can learn more about me here.


AAAAAbsolutely amazing!!!!! Do those floors you bugger before you get going too far and possibly damage them. You are such an inspiration. Thanks for bringing us along for the ride!!
I absolutely LOVE it!!! So gorgeous!! And your cabinetry will bring it all together…be the stunning addition. It is so exciting to see your vision come together, isn’t it? And what is most exciting for You Kristi, is this is your work space. I Know you are thrilled and we are all excited for you to have it. You’ve come a long way to finally be at this stage…the pretty things! Kudos to you and all your incredibly amazing work! You are one of a kind and I so admire your abilities. 😊
I absolutely love your wallpaper on your wall and your instructions! You had me laughing so hard with your comment to those who didn’t like it. What a great way to deal with negativity in a fun way!
You had great instructions for hanging wallpaper.
I’m new and really enjoy your blog.
That looks AMAZING…. now I want a big flower wall in my house somewhere!!
Awesome.
I can’t wait to see this once all your cabinets and so forth are on this wall. It will be amazing! So pretty.
Love the wallpaper!! I really enjoy watching the progress of your home. You are so talented & such an inspiration!!
I would not be able to keep from smiling every time I walked into this room. I love flowers and bright colors. Absolutely gorgeous.
The studio is going to be amazing when finished….I LOVE the paper and now that you’ve got the molding up – it’s spectacular!
Glorious!!!!
OH MY GOSH! That is what I said when I saw this beautiful wall! Just when I think I can’t love one of your projects more than a previous one, you “outdo” your self! I love it! This studio is going to be fabulous!
Wow!!! Beautifully inspirational!
Love it!
I knew I would LOVE it and I do. Thank you for hopping right on that, my OCD was stressing big time! 😂😂😂
Wonderful! Perfect place for that bold paper with the natural light and floors. Enjoy😁
I think you’ll enjoy your day coating the floor and looking at the paper. What fun!
Right? What a view!!!
Always admired big bold floral prints, but too afraid to use in my own home. Absolutely BEAUTIFUL! I look forward to seeing it completed. Also, so happy you stayed with the white washed floors.
This is getting so exciting!!! I believed in your vision from the start and it is turning out so beautifully! If you can’t be playful and colorful in a creative studio, where can you?! And now those window casings….sigh. I would love more info on that in a future post. I’ve always wondered if you would have to remove all that trim if you had to replace the windows. I’d love to do that in my home. I need to search your site to see if there’s already a tutorial on doing these, but if not, I hope you will post one for us.
Cyd, so sorry. Don’t know why my comment became a response to yours.
Awesome! So glad you are tickled pink! ~:0)
I LOVE this wallpaper! Love everything here!
Such an improvement in a short (relatively) amount of time! It might be easier to get those floors done with that beautiful wall to look at.
Kristi:
The wallpaper looks amazing! So bright and cheerful. I totally get why you just want to stare at it. You’re been on a roll and the room is really starting to take shape. I look forward to seeing your finished floors! Kudos for the great job!!
I had my doubts, but that is truly AMAZING!
Kristi,
I absolutely love it. I just want to keep staring at it myself. You did an awesome job.
You are unbelievable! I don’t think I have the self-discipline it clearly takes to accomplish all that you accomplish in such a short period of time. The wall is gorgeous (and I did have my doubts, mind you) and once all your “built-ins” are in, it’s going to be even more stunning!!! Brava to you!
Just beautiful!!
So lovely! A perfect accent wall! I am sure it is difficult to stop looking at your indoor flower garden! Just keep your mind on your floor work or you may end up with a polyurethane foot! Lol
Sheila F.
I am watching this with interest. I’m getting ready to do my office at home and I have been thinking about doing one wall with something huge and spectacularly flowery but probably with a dark background. I think your wall is going to look fabulous when all the cabinetry and desk is in place.
I am glad you went with the white background on your paper. The colours really pop and it fits with the white trim around the window and soon to be white corner units.
Love It !!!!!!!!!
Gasp ❤️❤️❤️❤️❤️ 🤩. Love it
Gorgeous I love it! You are going to want to live in the room!
Absolutely adore the wallpaper and how it looks in that great big studio! The colors are so inspiring and I can’t wait to see it with the cabinetry and desk against it! The floors are also beautiful!
I love the print and colors it looks just beautiful. I am a lover of color as well and you will enjoy that view I am sure for many years to come!! Terri
Oh My! I love how it looks. The color splash you’ll see every time you look at the wall is awesome. Have you already done a tutorial on how you trimmed the windows? Please do if you haven’t. thanks for the inspiration Kristi.
I have two posts that cover the window and door casings, but I looked at them yesterday and they’re not very clear. I’ll write one later this week or next week with very clear pictures and instructions. I still have one window that needs casing.
I LOVE it!
Such happy wallpaper!
I can’t believe you hung this by yourself. I have hung wallpaper with a husband’s assistance. He loved putting the paste on it but left to go watch TV in another room while I am standing on the ladder trying to get it even. We laughed later when a friend said that more than one couple has gotten divorced after a wallpaper hanging project! I loved it when you designed it but seeing it on the wall…..
even better. You are one amazing woman!!!
My husband and I nearly divorced after applying and removing piddly little wall paper borders when we were first married, lol. I couldn’t imaging doing a whole room.
Happy place! Aren’t you glad you went with the whitewash’s floors? ! 😉👏🏻👏🏻👏🏻 What a compliment to the wallpaper 👍🏻💜
Yes! I’m so glad I went with the light floors. I think the dark floors would have sucked so much light out of the room.
Wondering if the time gone by between 2nd and 3rd Coat of poly will mean you will have to lightly sand before applying? Or is that pretty much the rule between 1st and 2nd coats? Also wondering if it’s pretty standard to do four coats of poly on floors? I’m cleaning up my 1962 oak hardwood and will need to sand and poly the hallway and at least one strip that has to be added new in a room that was once two bedrooms, turned one master.
I’ve been able to determine my floors are red and white oak, no stain, with I stained oil based poly (although, I have no idea what brand). I understand that in 47 years the poly has yellowed and it would be impossible to match my floor using the same method. If you were trying to spot poly my floor, would you stain that room to match the others, then seal with water based poly that won’t yellow? I’m scared obviously. I’m trying to do bits and pieces because the whole of the floors are gorgeous already. I probably need to just refinish, no stain and water based poly. I’m so intimidated at this moment.
With I stained oil based poly = with oil based poly that also isn’t stained.
Unfortunately, I will have to sand since it’s been more than 24 hours since the last coat. I’m definitely not looking forward to that. 🙂
It’s hard to know how I’d handle your flooring situation without seeing it. But I can tell you that trying to match 47-year-old finish wont’ be easy. I certainly don’t envy you for the task ahead of you!
Oh boy! I guess I’m refinishing them. 😬
What poly would you go with? I’m thinking we’ll keep them natural but I guess that really depends on what they look like after sanding.
Oh My Gosh!!!!!!!!!! If this were my wall, I would spend at least a month just staring at it. Put everything on hold. Just sit and stare at all this beauty…………
Me too!!!!
Kristi, that is beautiful! It will be an amazing backdrop!
And yes, I came out of my lurking corner 😄
Well it is definitely my cup of tea! I love color and I love your wallpaper! It is so light and cheery. This is perfect for a workspace!
WOW!!! The wallpaper is beautiful. I can’t wait to see the room finished.
Wow! This will be a perfect workshop for you! Very energizing vibe. Enjoy your new space.
OMG this is even better then I imagined it would be! Its glorious and fun, and colorful and Magic!!!!!! I now want to put bright floral wallpaper up on every wall I don’t have (I am moving from a small bedroom, to a friends Office room for a month, and then in July finally moving to my new rental place, where hopefully the land lord will let me paint the walls). You are an inspiration 🙂
This is GLORIOUS!! Love love it!!
Absolutely beautiful. Never heard of overlapping seams but if it works okay. Is “your” wallpaper available to the public on Spoonflower?
I won’t be selling it directly, but I did contact the artist who created the watercolor flowers and we worked out a way for people to be able to get the wallpaper. I’ll share details tomorrow.
Love, love, LOVE the wallpaper! What a great anchor design for the room. The floor and wallpaper look fantastic together.
I can’t wait to see the rest!
Love, love, love it! I don’t think I’d be able to cover it with anything the wall is drop dead gorgeous!
Love, love the Wallpaper. It is so bright and colorful. I can’t wait to see the completed project. You just might bring wallpaper back into vogue.
Oh my goodness, I love that wallpaper! You just can’t cover it up with cabinetry and shelves, it’s too gorgeous! Put them on another wall!
Seriously, I have a crush on that paper.
You done good, girl.
Kristi, what a feast for the eyes to see that glorious addition! Beautiful work.
Beautiful!!!
Gorgeous, I love it. The colors are some of my favorites and I must order it. Your home is looking spectacular. You always amaze me with your incredible talents. You deserve a show on HGTV. Thanks for sharing all your beautiful work!
O. M. G. Gorgeous! I’m just blown away at your talent, and and creativity. I want to look at Spoonflower to see what I can do in my bedrooms in my new house!
Yes, this is you! The desk and cabinetry will only accent it even more! I can only imagine being full of smiles each time one enters and sees this field of flowers!
I’M OBSESSED!!!!!!!!!!! I LOVE that you use florals so much, I don’t think most people our age enjoy them so much. This paper brings the perfect amount of color!
Love, love, love! Your tastes and designs are identical to what I would want if I were that handy. I never knew what I truly liked until I saw yours.
Three words…I LOVE THIS!!! It is mesmerizing to look at, and I think I would KEEP looking at it.
It is so colorful and cheerful. I can understand why you stopped everything when that box arrived! Isn’t exciting when something comes earlier than expected! Loving everything.
Glorious, refreshing, robust. I swear it will be like working in one part Victorian conservatory of tropical flowers and one part fairy garden. Thinking that will fuel your work days with energy and lots of creativity.
You’re certainly fueling my own desire to “what the heck” go bolder and fresher. Your design still seems clean, not busy or crazy. The white trim and solid colors really seem to help your design hold it’s energy, keep it all in balance. You have reason to celebrate but looks like every day will feel festive.
OMG, your wallpaper is absolutely stunningly gorgeous…….and with your window casings…….and with your fabulous whitewashed floors. What a happy, energizing, vibrant and creative studio this is going to be for you Kristi.
Breathtakingly beautiful. You keep topping yourself with your creativity. Just awesome.
Just beautiful! We have been pretty dry in Georgia, good weather to cure poly. Hope you’re having the same.
Gosh I love that wallpaper. I’m EXCITED!!! for you!!! And it’s looking great with the light floor.
Beautiful I love it!!!
Wish I could sit in your room with a cup of coffee and enjoy your beautiful wall. I’d call it my happy place. Absolutely gorgeous!
LOVE LOVE LOVE it!!! I’d never get anything done today! I’d just have to stand there today soaking it all in! This turned out absolutely gorgeous! You never cease to amaze me with your vision. 😋 Just beautiful!!
What a happy room to be get inspiration from ! But really you are just an inspiration to yourself and those around you! Beautiful!!
Gorgeous! I LOVE IT!
What a gorgeous floral explosion! Quite stunning; your vision is amazing. Can’t wait to see it all come together. I wouldn’t want to do anything else except sit in a chair and gaze at that wall. Thank you for sharing your skills, talents and vision with us.
WOWZER!!!!!
I LOVE this!!!! I cannot wait to see it with the colorful cabinets!!!
This room is just so happy! I don’t think you could feel any other emotion next to that wall!
Amazing!
I can visualize you across the room, back leaning against the wall as you sit and smile the biggest smile!!! It’s SO pretty and energizing! I am in love too! Almost a shame to cover it up with cabinets, but they are needed I’m sure! Now get that poly done, because we are almost as excited as you are!
That wall paper looks amazing against the crisp white trim and with all the other white painted shelves, etc. It has just enough pop to get your attention. At first I thought ohh, a bit busy but you had the vision just right. So glad the wall paper was good and easy to install.
It is so gorgeous! I would sit and stare at it too! It is truly a statement wall! I can’t wait to see this room finished. What a lucky girl you are to be able to work in such a lovely room.
Love the bold wallpaper. So many beautiful colors!
This reminds me of dancing in the rain; we loved it as kids but when we “grow up” we become more conservative. Why do we stop doing what we love and we paint our houses white? I am so sick to death of seeing white white white. Kristi, I hope you start a colour revolution and inspire decorators ro recommend what makes their clients happy, rather than what looks good on social media pages.
Now I’m wondering what I can wallpaper ? ;0)
Color, glorious color! I love it!!! I bet you go by every half hour just to look at it and smile really big. I know I would! LOVE seeing it all come together. <3
I am absolutely in LOVE with your room! Wow!!! You are so amazing! Love, love, love!!
An absolute triumph Kristi! it is so beautiful.
that wall and your floor makes for a perfect marriage too!
and i can totally see your vision – everything you planned will only make it look even lovelier! Are you tempted at all to have possibly a little less on the wall now – so as not to cover too much of it up? 😉
I am! I think I’ll make my cabinets on each end a bit narrower than I had originally planned. And the corkboard for the center might be replaced with something like a “to do” board made out of acrylic or glass, with the center portion (where I can write) backed by a semi-translucent film that will allow a hint of the flowers to show through, while also allowing me to see the writing on my board. I’m still trying to figure it out, but I don’t want to cover up too much!
knew it 😉 those sound wonderful.
you could also put your desk in front of this wall and put the planned cabinets to the left of the external door where the desk was going to go… but maybe that’s too big of a change … especially given all the electrical etc … but i can just see a beauitful desk and lovely flowers peaking through between the legs 🙂
whatever you do i know i will LOVE it! your acute sense of style and colour
just gets better and better hon x
That’s the most beautiful wallpaper I’ve ever seen and so perfect with the whitewashed flooring!! I think this will be my very favorite room yet!
I. Am. Speechless. LOVE it. How does Matthew feel about it? I just bet he loves it too!
Ummmm. Welllll. He loves that it makes ME happy. 😀 And he loves that it’s not in a main room of the house. 😀
ha ha LOL! It looks great! Congratulations on an excellent job!
Wow–just wow! What a gloriously, happy place to go to work in every day. You are so talented–and lucky to have such a space. Now I want a studio like this!!! Not happening, but a girl can dream. 🙂
Hey Kristy,
I haven’t commented in a long long time, but I had to on this wall. It is absolutely beautiful, and it’s perfect in your studio. I can just imagine being a client and coming in and seeing that and being so inspired by you. love watching the progress on your home and all your energy.
Gorgeous!
These colors would not work for me but it is gorgeous. I mean so gorgeous I’m rethinking my love for leaf wallpaper. Great job.
It’s like a gloriusly beautiful summer day not matter what time of the year or how unlike a summer or spring day it is outside. It simply lifts one’s spirit.
The wall is stunningly beautiful! Great choice in the colors, Kristi.
Oh my goodness, Kristi, the room so far is looking so fresh and bright and clean and … juicy! That wallpaper is stunning, the colors are so vibrant and fresh and they remind me of perfectly ripe juicy spring and summer fruit and I mean that in the best, most complimentary way possible! Those floors turned out INCREDIBLY GORGEOUS, they are so smooth and even and perfect I just want to run my hand over them! They look like they’d feel like silk. You are an amazing artist and designer, every time I think I’ve been totally wowed and blown away by something you’ve done, you turn around and do … THIS! I don’t know how you manage to top yourself, but you do. and do it so well. I remain duly impressed and in awe of your talents, as always.
I actually was shopping Spoonflower’s wallpaper last night because I want to use something pretty to line by kitchen and bedroom drawers and the back of a bookcase, so I’m glad to hear a positive endorsement of their product by you of all people!
It’s beautiful!
Something I just noticed- on the bottom of your website, you have a ribbon with instagram posts. In the thumbnail with May’s free artwork, it looks like an Egyptian cat-princess face kinda thing wearing a head dress, haha! I did not notice that when I downloaded the artwork but it’s pretty prevalent in the thumbnail. Did anybody else notice that?!
I never doubted your vision for a minute! I love and respect your use of bright, bold, colourful paints, patterns and fabrics! I get the heebie jeebies when I’m in an all beige space! My sister in law has beige walls, beige carpets (ick) and outdated beige furniture and draperies. It’s her home and she can do as she pleases…but I’m with you on colour! Luv, luv, luv the wallpaper! Beautiful…
Hey! It’s Lori – we met in the paint sprayer aisle at Home Depot a few months ago. I’ve loved following your posts with my morning coffee. I had my own exploding bathroom volcano this past weekend in 2 tubs, 2 toilets. and 1 shower. The cause? Roofers threw construction debris and wait for it…scrunched up beer cans in the line that extends up to the roof! Ugh! I had no idea that an alternative could do a clean out in the front yard was a large pipe that comes up through the to the roof with a cap on it.
I’m sitting here envying your casing. What is the small piece of trim in between? Is is rounded?
Lori! I’m so glad you commented! I lost your card, and have so wanted to get back in touch with you but had no way of doing so. I’m so sorry to hear about your exploding volcano experience! And what careless roofers!
I think the small piece you’re referring to is just a 1″ x 2″ piece of lumber. (I used pre-primed finger joint lumber.) I’ll be doing a more thorough tutorial on my casing later this week or next week.
So glad to have your contact info again!
I love it!!! It’s bold, my colors, bright and I hate to see one iota of it covered with anything! lol
Perfect choice on the flooring also, even though I loved the darker wood too.
Kristi, you are a gift. Every post is like Christmas and no one photographs and explains the steps as clearly as you. Yes! Please do a tutorial on casings! Me and my mitre saw will be front and center! Thanks so much!
Wow!Just Wow!
WOW – GORGEOUS! I love bold prints – I just have a hard time deciding which one to use. Your walls are to die for.
Absolutely stunning!! Your studio will be a feast for the eyes—you should have ‘My Happy Place’ written above the door to enter. I can’t wait to see those gloriously painted cabinets!!
OMG, love love love the wallpaper that you designed!