DIY Chest Of Drawers — Part 3 (Walnut Storage Cabinet For Our Bathroom) — Finished!
The DIY chest of drawers in our bathroom is finished! I had hoped to get both the storage cabinet and the second vanity finished this weekend, but the storage cabinet took way longer than I thought it would. But it’s finally done!
If you missed the first two posts on this DIY chest of drawers, you can find those here:
- DIY Chest Of Drawers — Part 1 (Walnut Storage Cabinet For Our Bathroom)
- DIY Chest Of Drawers — Part 2 (Walnut Storage Cabinet For Our Bathroom)
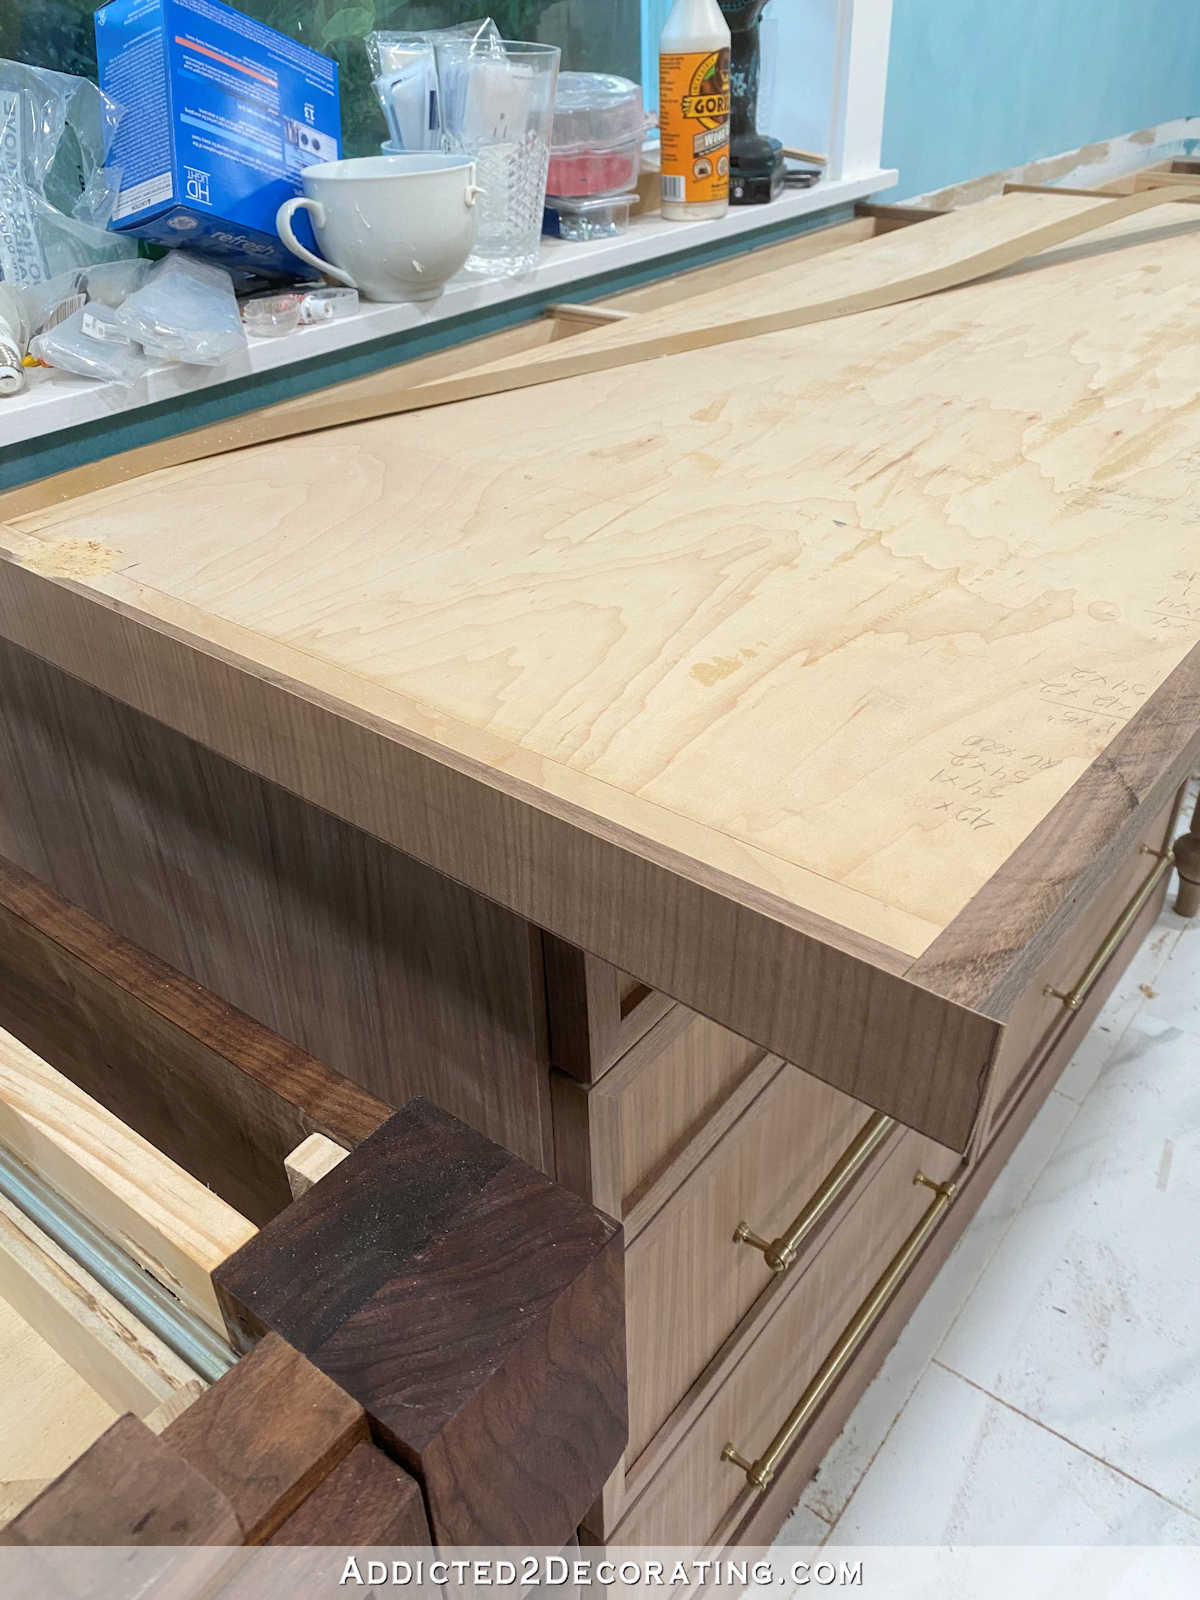
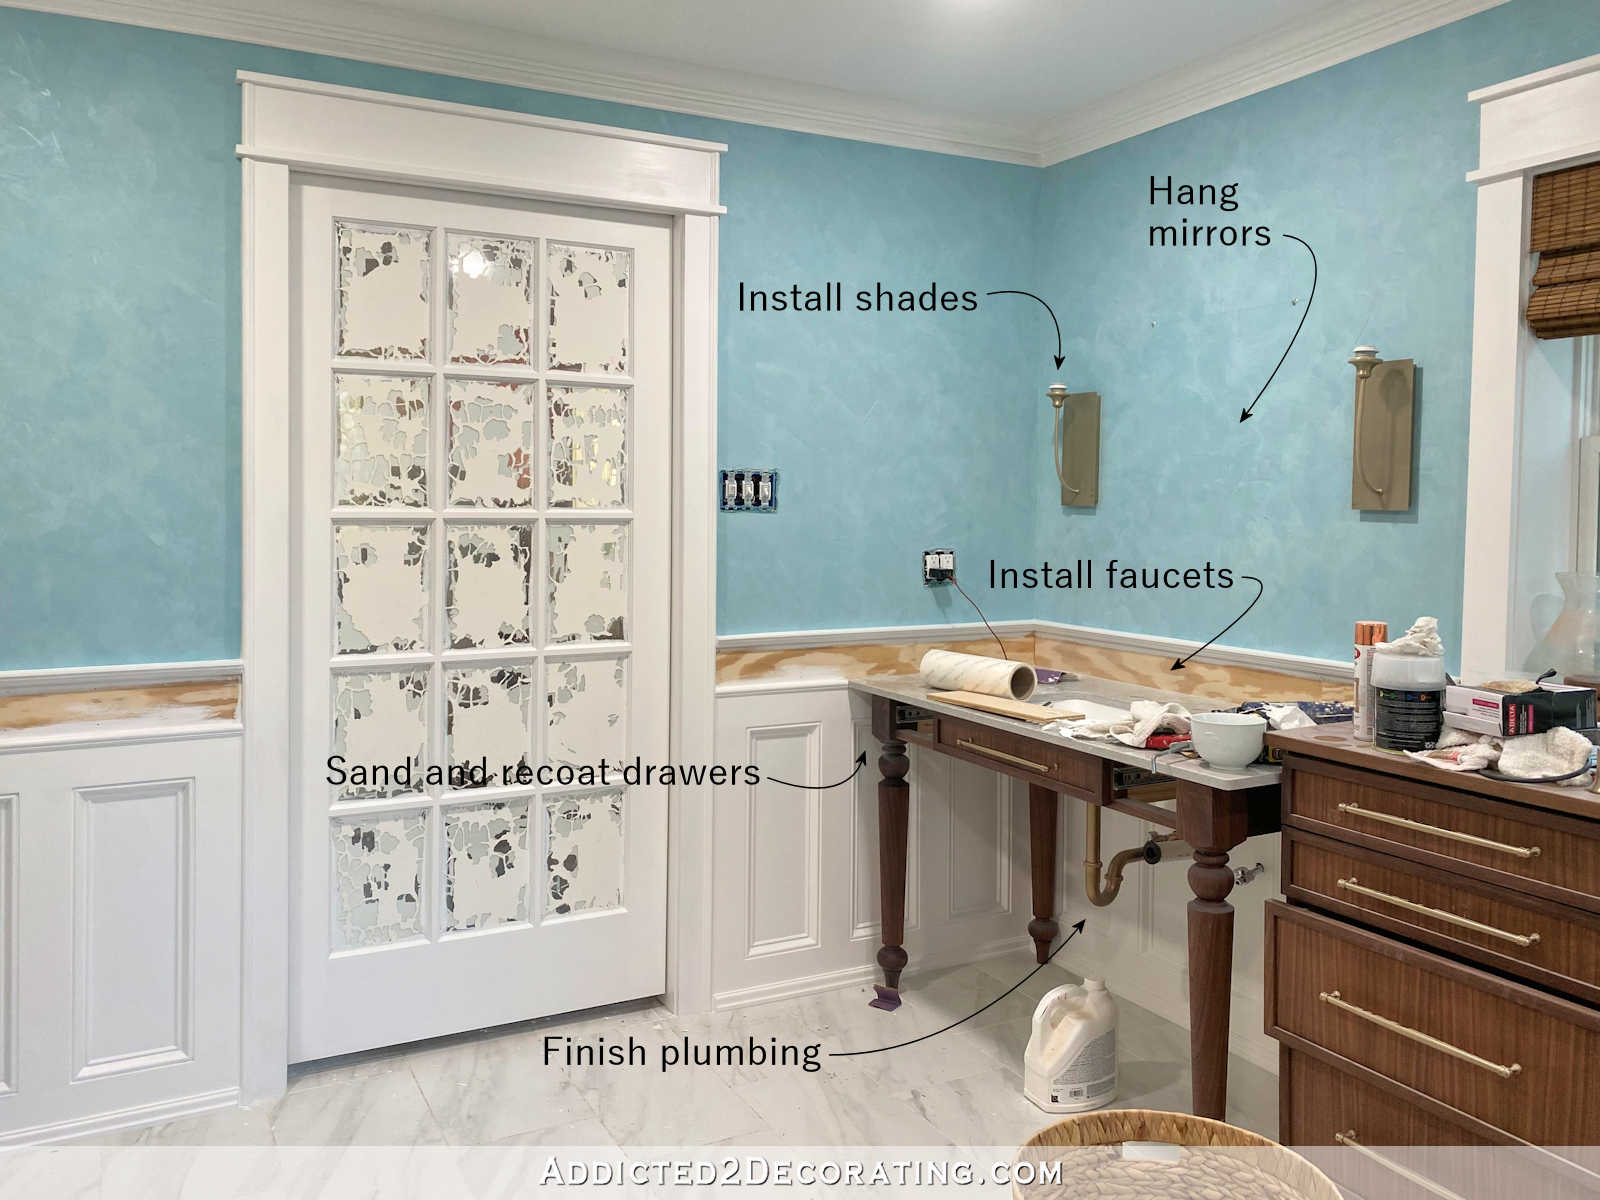
When I left off at the end of Part 2 of this project, the storage cabinet looked like this…
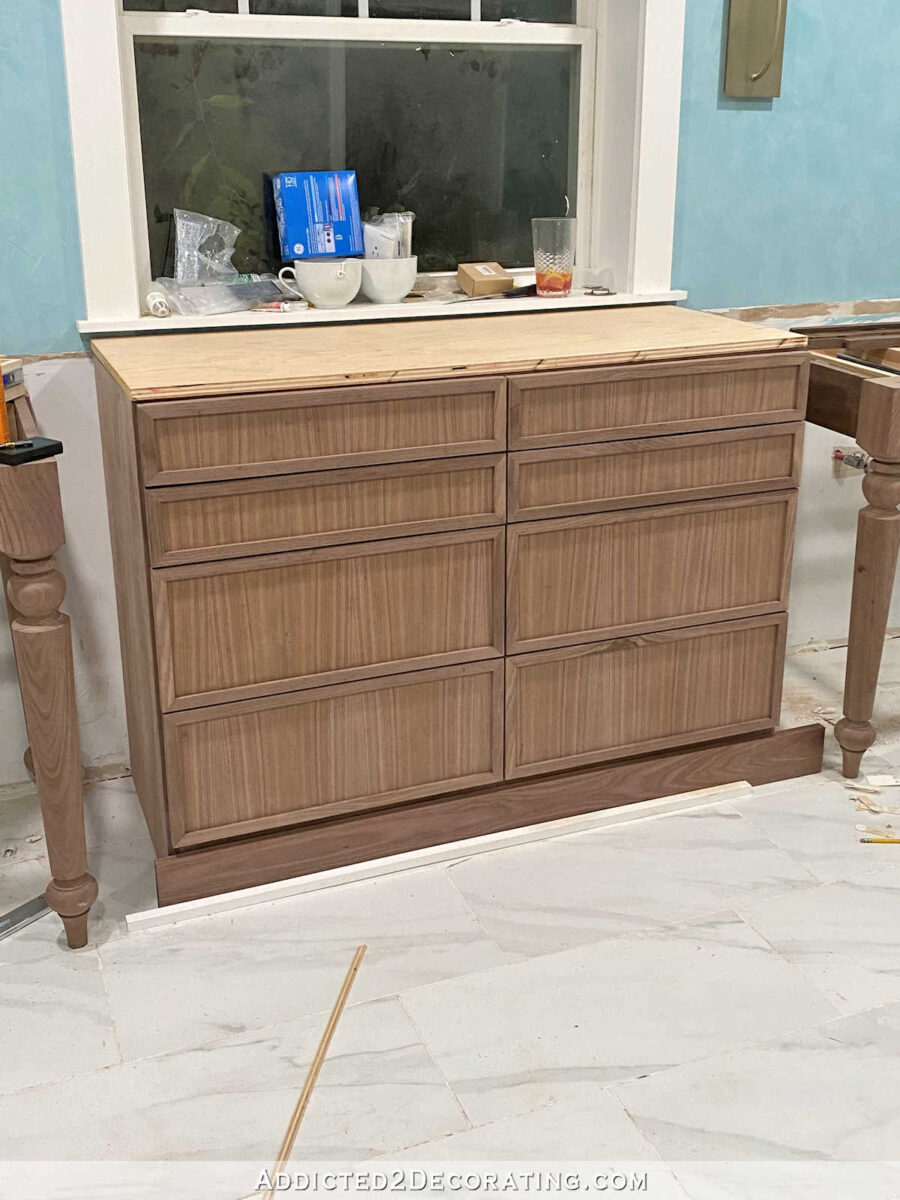
The bulk of the work was done, but I still needed to make and attach the top, and then add the trim along the bottom. And then the whole thing needed to be finished with the Rubio Monocoat finish.
Now that the DIY chest of drawers is finished, this is what it looks like…
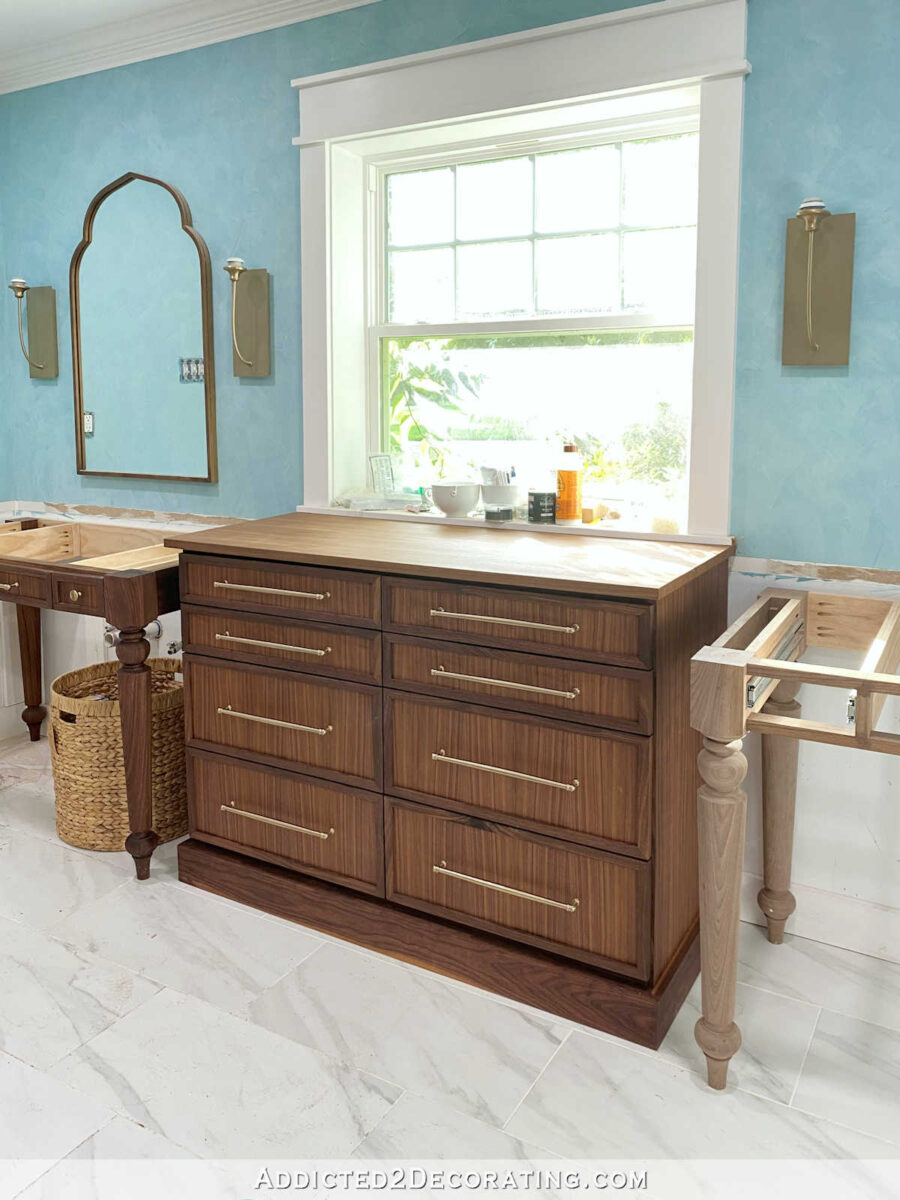
I had originally planned to use my router to create a pretty edge profile around the top, as well as on the top edge of the bottom trim. But because of the simple and squared design of the drawers, I decided to keep the style of the top and the bottom trim simple and squared as well.
To finish the top, I cut a piece of 3/4-inch plywood to fit the top. I made a mistake and cut it too small, so I had to cut a strip and attach it with glue and 16-guage nails to get it to the correct size. Then I used my table saw to rip down some walnut lumber to 3/4″ x 7/8″. Then I cut and attached those pieces to the side edges and the front edge using 18-guage nails.
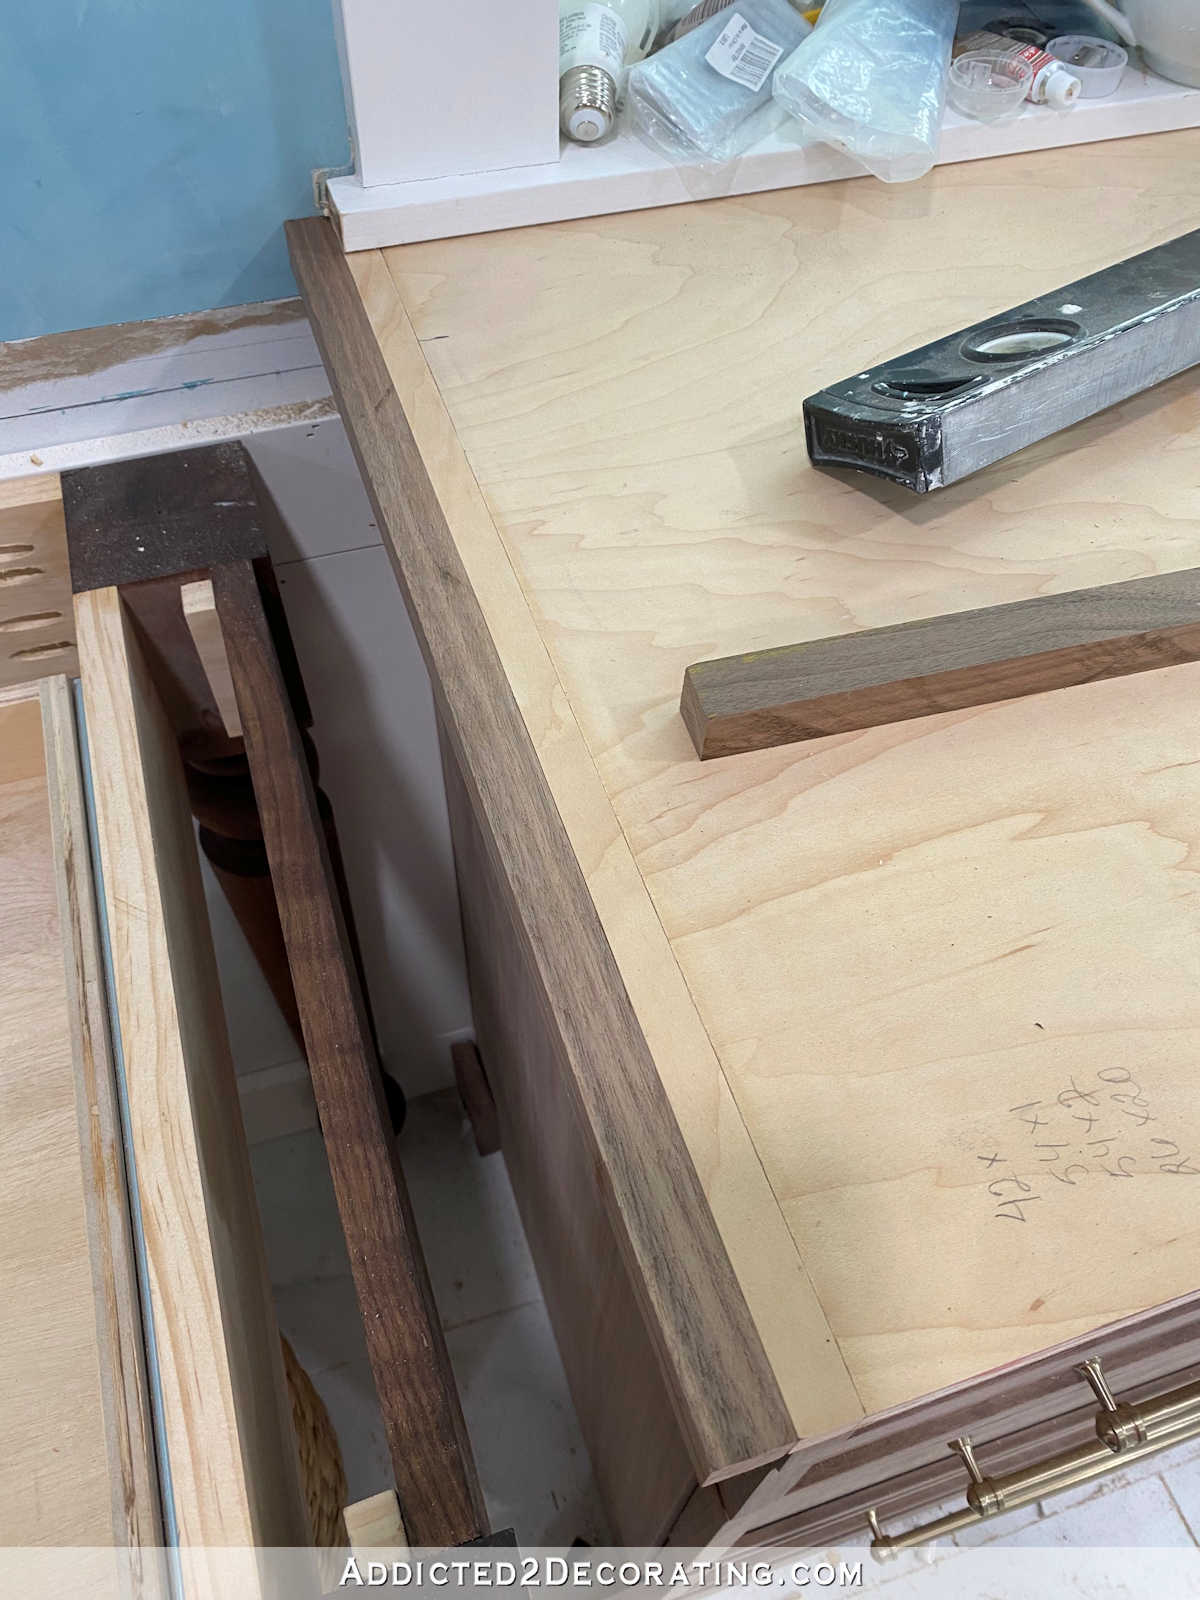
This picture shows more clearly how the side pieces were attached.
After attaching those pieces to all three sides, I then cut some walnut veneer to cover the edges. I attached those pieces with contact cement. I attached the two sides first, and then trimmed those pieces on the top and front.
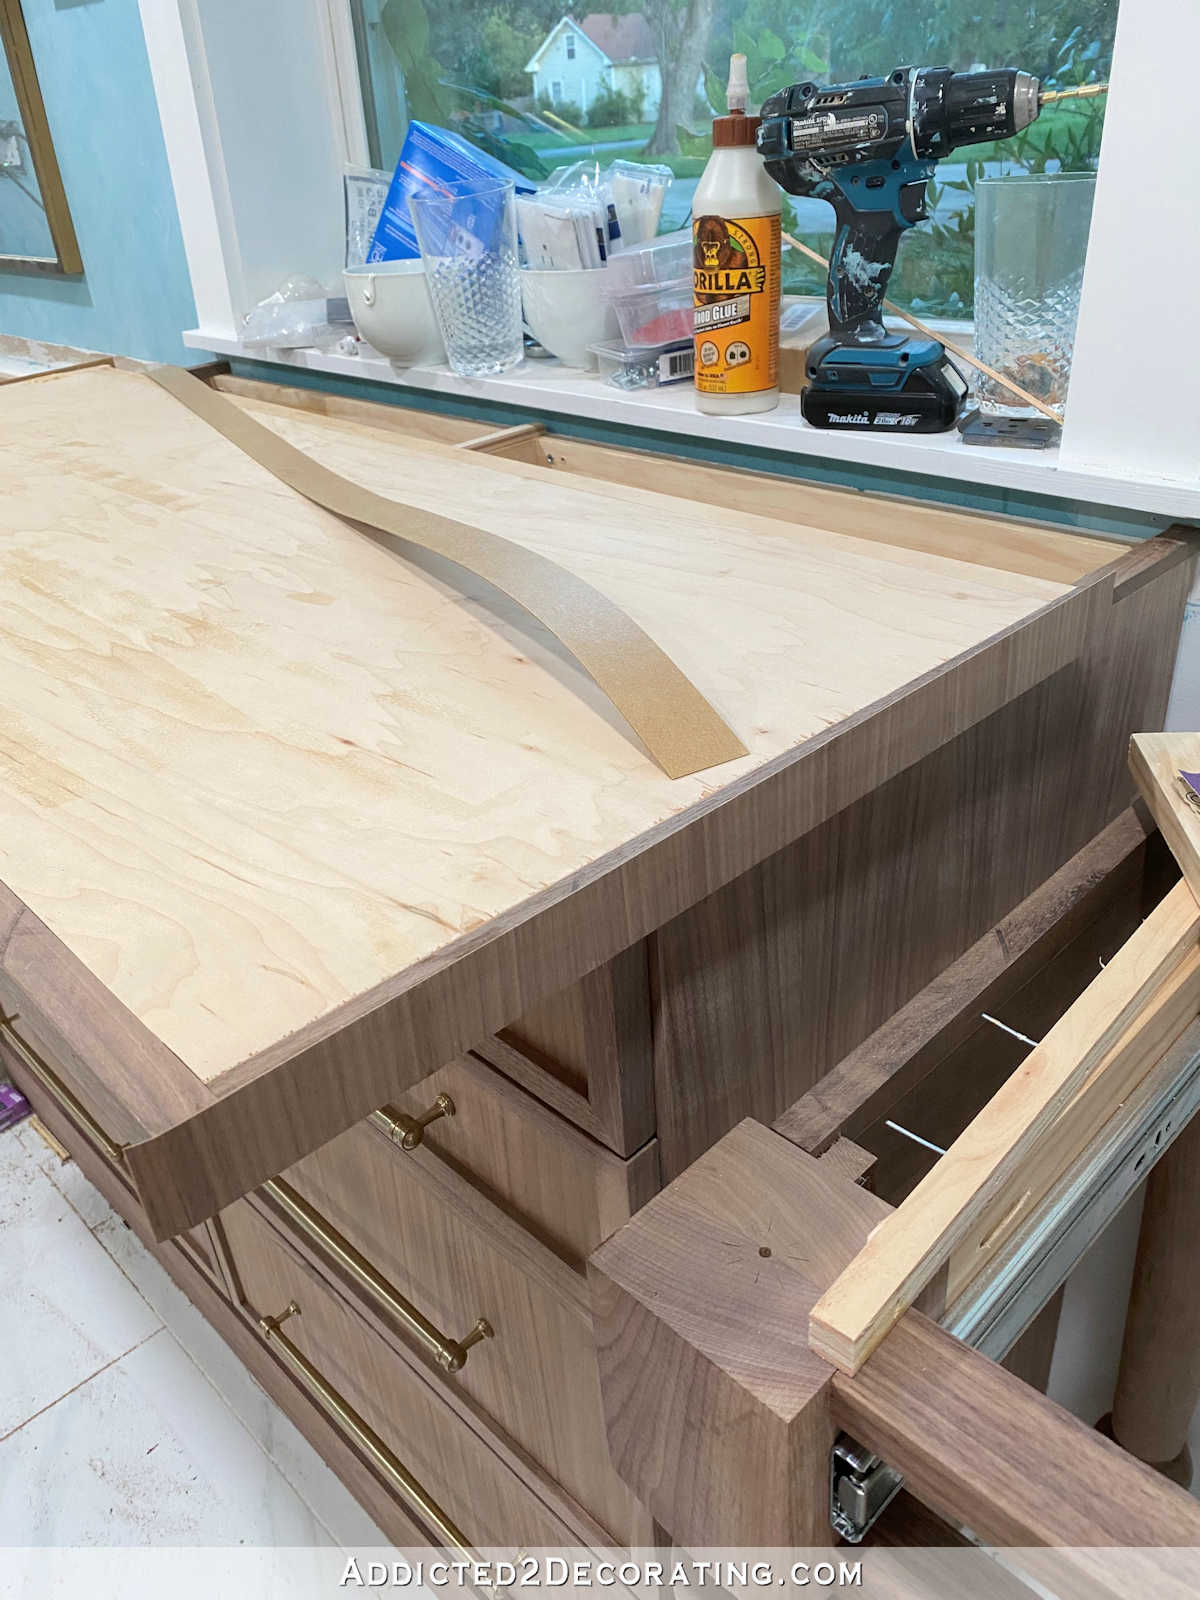
And then I attached the veneer on the front edge. You’ll notice that the wood grain on the veneer on the sides is vertical, and the grain on the front is horizontal. That’s the closest you can get to making a piece of plywood look like a solid piece of walnut lumber using veneer.
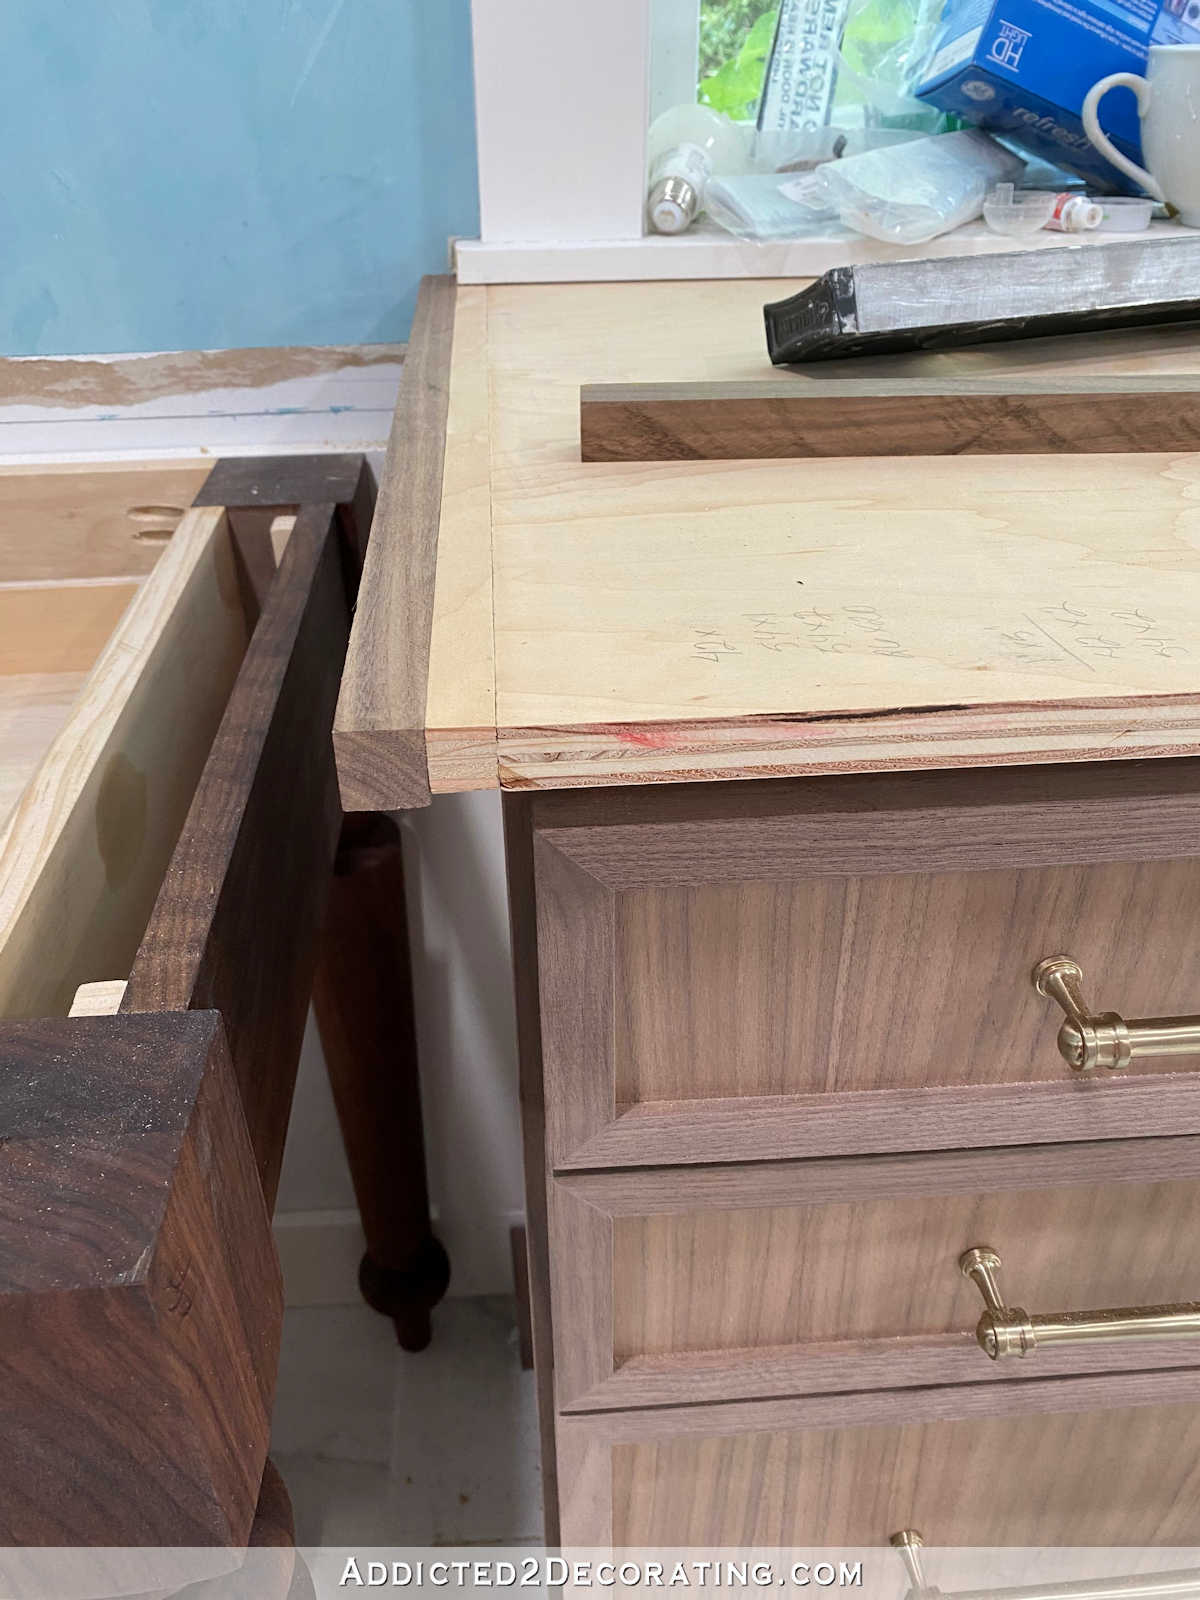
With the side and front edges covered and trimmed, I was then able to add the large piece of veneer to the top and trim it to size.
I wrote about using veneer with contact cement in more detail in this post:
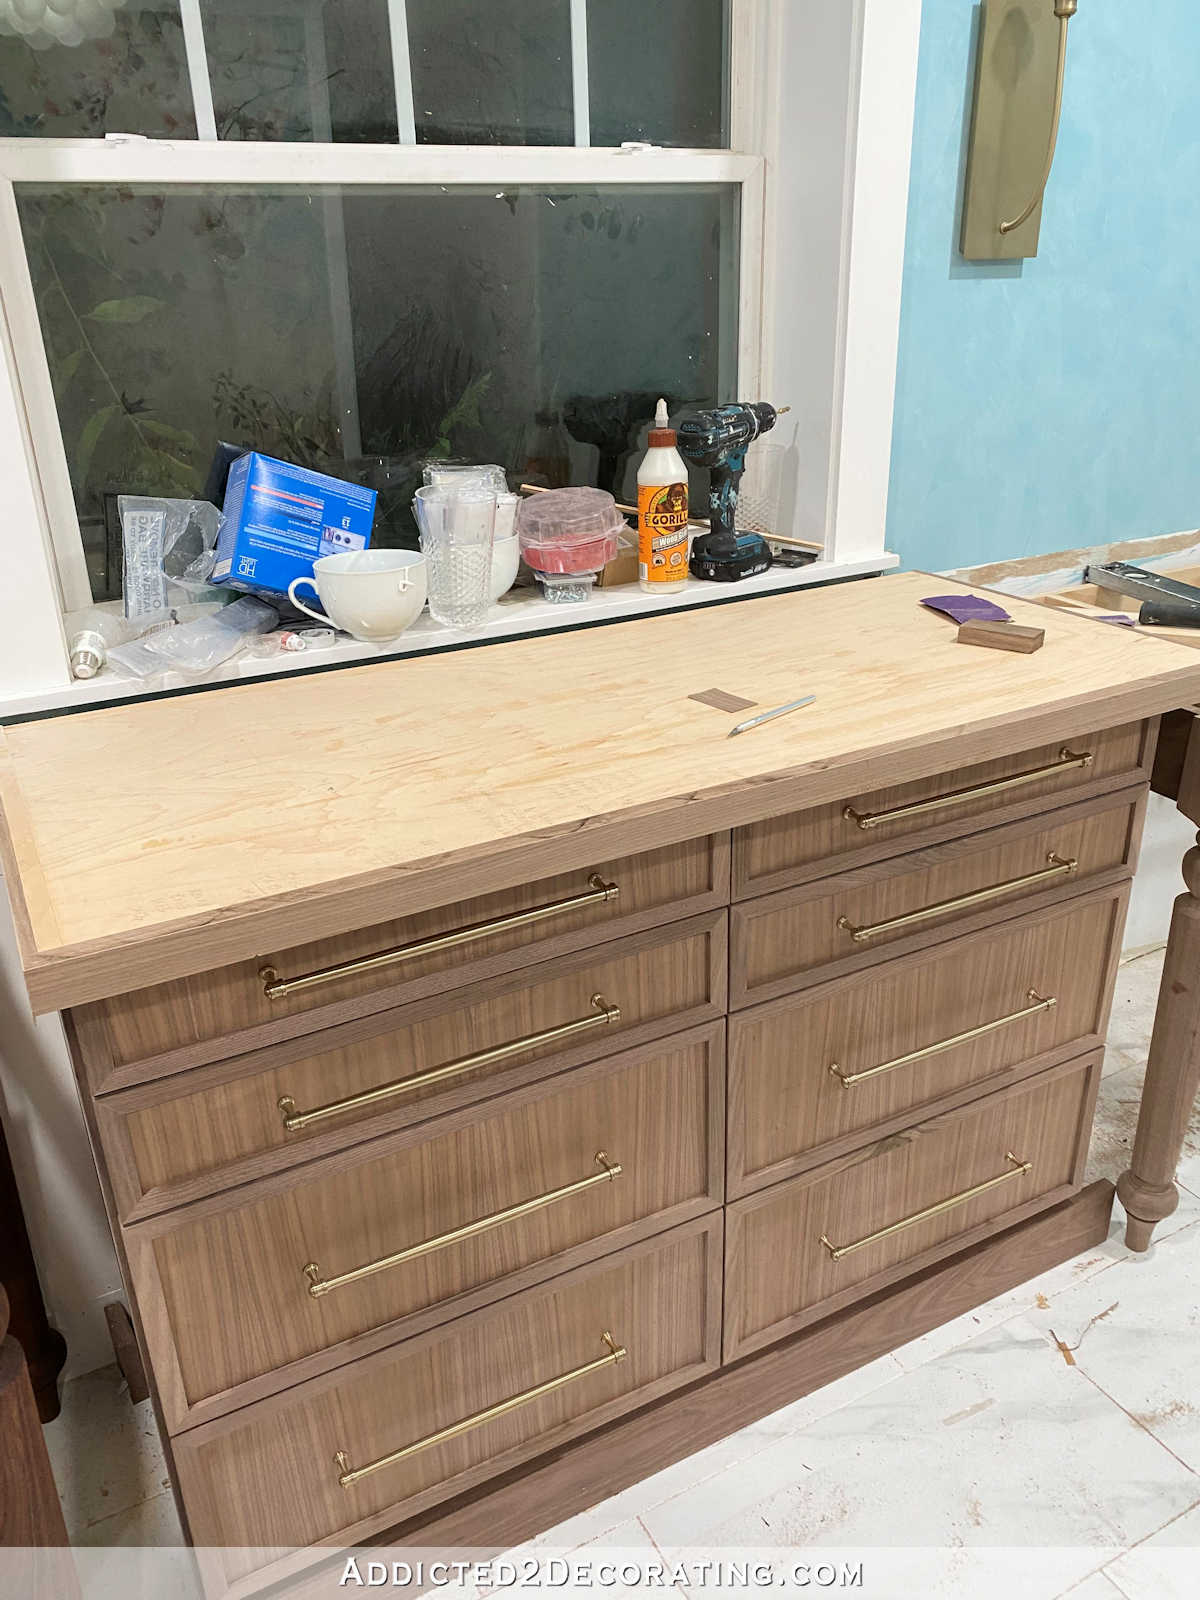
For the trim around the bottom, I used 1″ x 4″ walnut lumber (actual size was 3/4″ x 4″), with the pieces mitered on the corners, and attached with 1.5-inch 18-gauge nails. I filled those holes with walnut wood filler, and once they were sanded, they disappeared.

With everything assembled, I gave the top and the bottom trim a quick sanding with 120-grit sandpaper, got everything cleaned up with mineral spirits, and then once it was completely dry, I finished it with Rubio Monocoat. I wrote in more detail about how to use Rubio Monocoat in this post:
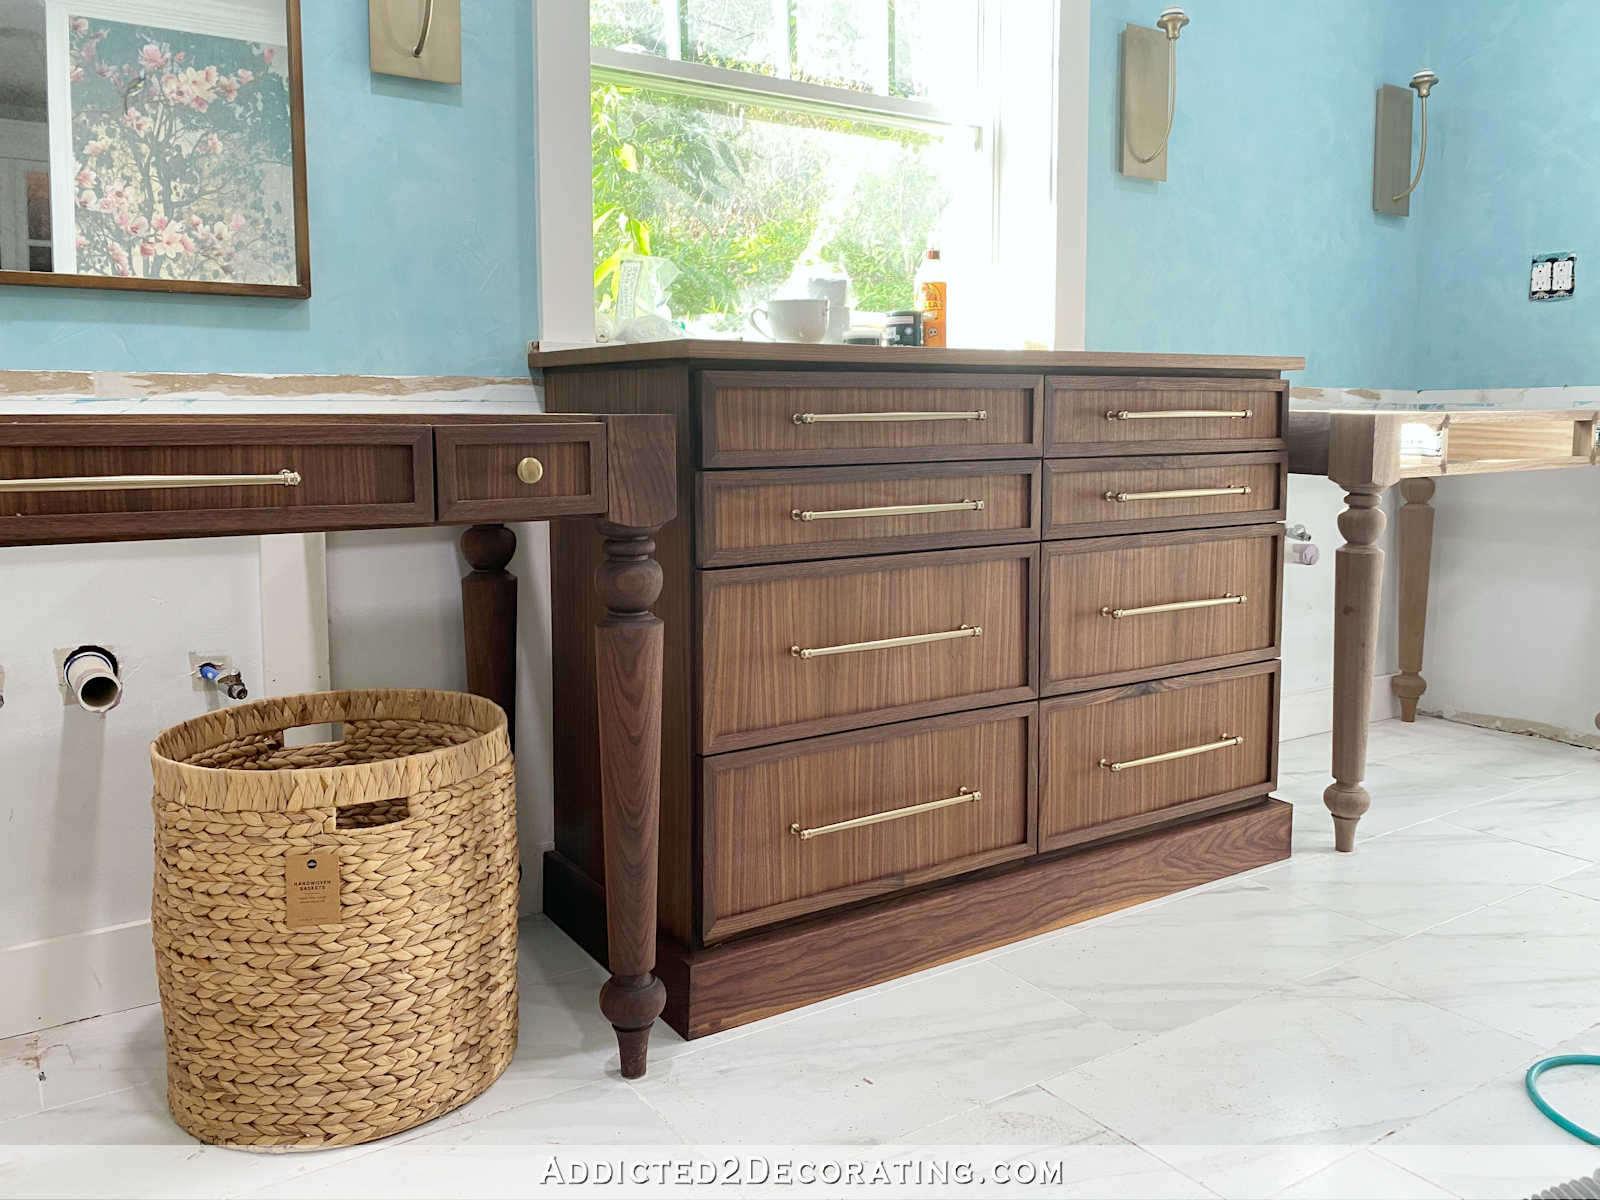
So that’s two down, and one to go. I just need to finish the second vanity, for which I still need to make drawer boxes and drawer fronts, and then I can check off this huge project from the “to do” list for this bathroom.

Addicted 2 Decorating is where I share my DIY and decorating journey as I remodel and decorate the 1948 fixer upper that my husband, Matt, and I bought in 2013. Matt has M.S. and is unable to do physical work, so I do the majority of the work on the house by myself. You can learn more about me here.


The vanity knocked my eyes out and this is even more lovely. Thank you for taking us through the steps.
It’s really lovely, Kristi.
You have designed and created each room to perfection – every detail so well thought out!
This master bath is your BEST work so far! A masterpiece!!!
You just keep getting better and better!
Thank you for sharing each detail from the why’s of your design to how you made it materialize!
So inspiring!
You should get your home into a magazine spread!
Beautiful…you are amazing!!
Absolutely gorgeous. It all looks so glam and cohesive and uncommon (in the best way) – your whole bathroom is a standout.
Looks great! You are on a roll !
So so gorgeous!
Oddball question- are you going to get glass cut for the top of the dresser to protect the surface? Its a bath, and I see something being left on it (washcloth/towel/bottle with drips on side) that affects the top after all the work. Or if something happens, you’d replace it at that time?
I hadn’t thought about it, but I do love the idea.
I have glass tops on our chest of drawers and was the best decision. They are clear glass with a slightly rounded edge to soften them. Makes them look classy as well as practically protecting the top surface.
Btw bathroom is looking amazing!! Love it
I love glass-topped dressers. They look so finished!
BEAUTIFUL!!!
I know this isn’t helpful, but I just have to say these are the most gorgeous things I have seen in quite a while! Swoon…
Well done, Kristi, well done! You will have many years of satisfaction with the excellent work you have done. It’s absolutely beautiful!
YES! It just looks wonderful, and you are really on a roll. It won’t be long, and that whole wall of sinks and storage will be ready to use! You must feel so good about how your design is coming out. Just awe inspiring! Can’t wait for the next post!
I knew it would be beautiful! The suggestion of a glass top was great!
Absolutely beautiful!!!
You should be proud of this work!
Wow!
What you have finished looks boutique high end.
I agree with the glass top idea for the dresser.
That will add to the custom/high end/zen vibe and protect that work.
WOW! Those are both so stunning! Great job! It is a huge project!
Are you getting granite tops for the vanities? I thought you were getting that for all the tops.
The vanities will have quartz tops. But the plan for the middle cabinet was a wood top from the beginning.
Hi Kristi:
It is gorgeous! I’m confused about one step. You explain that you cut pieces of walnut lumber and used them to cover the side and front edges of the plywood top. And then you covered that walnut lumber with walnut veneer. Why did you need to cover the walnut lumber with veneer there?
Good point Susie – I’d like to understand this as well. Perhaps it would be too obvious that the top is veneer if the strips on the edges showed as real wood? It would be nice to know Kristi’s reasoning.
I had a few reasons for doing it this way:
1. The walnut lumber isn’t actually 3/4″ thick. It’s just a bit thicker. I liked the idea of having that extra thickness edging the 3/4″ ply.
2. I don’t always get it perfect when cutting veneer across the grain (like I had to do on the end pieces). Sometimes the wood veneer “splinters” on the cuts. Having the real wood underneath gave me the assurance that even if the veneer splintered in some areas on the cut edge, there would still be walnut showing from underneath and not pine showing through.
But really, if I didn’t happen to have extra 1″ x 2″ walnut lumber on hand, I would have used pine, and I would have made do with it. But I was glad that I had the extra walnut on hand for those reasons above.
Thank you for explaining that!
It’s like a dream. Everything is coming together from nothing to something beautiful and fantastic. This is so exciting to watch the progress on this room. I can wait to see how it turns out with the finishing touches!
Oh my goodness, this cabinet is simply stunning and looks so high end. You have done an incredible job Kristi. I’m in awe of your talent, vision, design and workmanship! I think every room you’ve finished, is your best work, but this bathroom is truly next level stunning and really looking forward to seeing its completion and reveal. You’re so close now!
It,s starting to look fabulous
This is GORGEOUS! I’m curious though, because my husband always says “couldn’t we just buy it and not have the hassle”, was this cost-effective versus sourcing what you wanted from a furniture company? It wouldn’t be as satisfying or as custom, just researching to effectively win my next argument.
You missed your calling to be a furniture maker!!! Great
Job as always.
Just when I think that you have outdone yourself, you continue to amaze me! That chest is a work of art! It is an heirloom that you will always be able to look at with pride and a great sense of accomplishment. Great job!