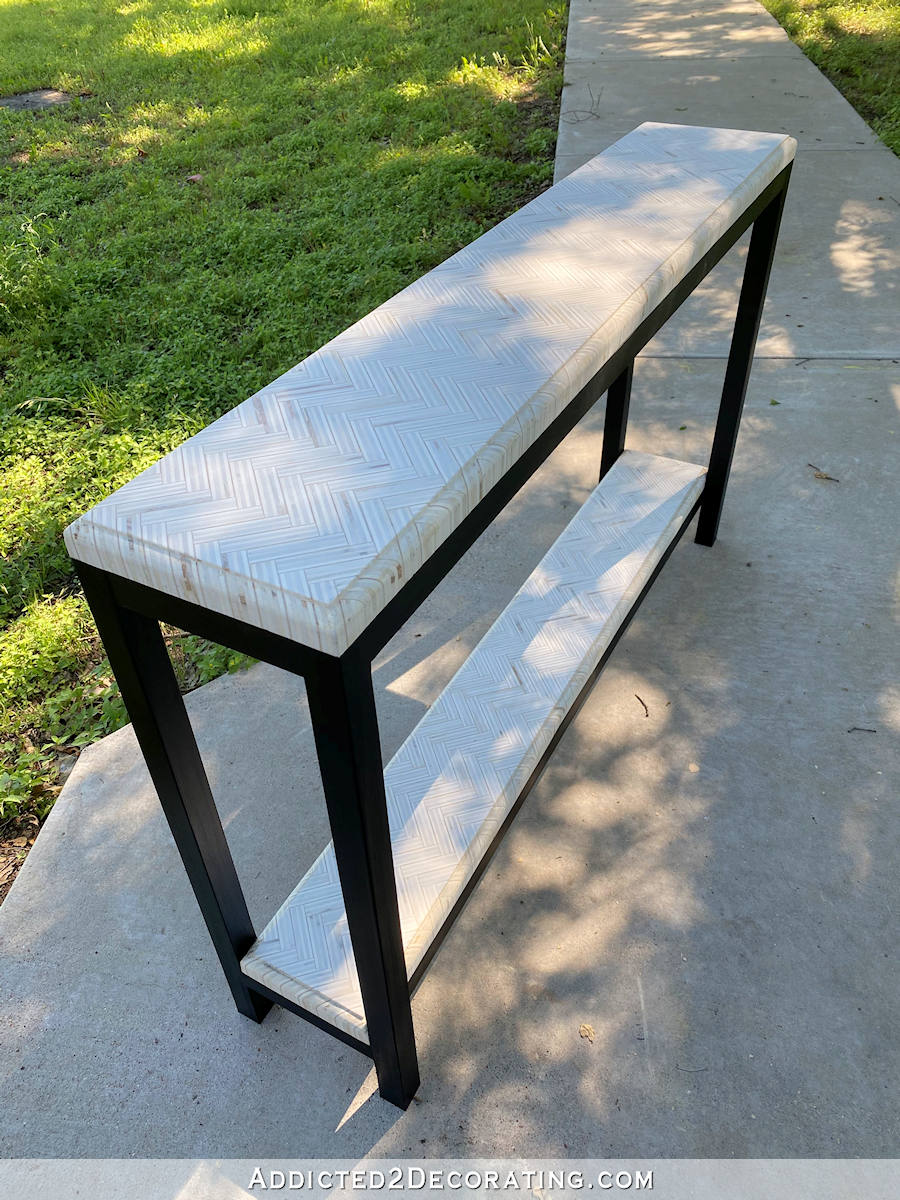
DIY Console Table With Lower Shelf
In December 2019, I made an edge grain plywood herringbone coffee table for the living room. I made it a very specific size so that it fit the furniture arrangement that I had in the room back then, so it needed to be long and skinny. It ended up being 52″ x 18″.
If you missed that project, you can click here to read how I made the original DIY edge grain plywood herringbone coffee table


When I rearranged the furniture, this long and skinny coffee table no longer worked in the room. But I had spent so much time and effort on that herringbone top, and I loved how it turned out, so there was no way that I was going to give this piece away (which is usually what I do with the things I made and no longer have use for). I decided to repurpose it for the “new” hallway instead.
Our original hallway had three bedroom doors, as well as the double doors on the bathroom. So I built a small console table to use in the small area to the left of the bathroom doors.
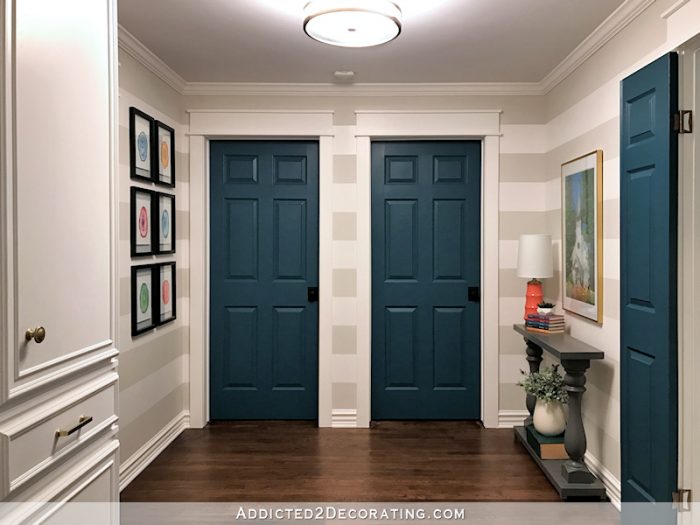
But that small console table wouldn’t work in the “new” hallway with the new arrangement. Now that the hallway isn’t as deep (i.e., there’s no room to the left of the bathroom door for a table or anything else) and one of the bedroom doors is gone, I needed a much wider table in that spot.
(Note: If you’re reading this post on any website other than Addicted 2 Decorating, that means you’re reading on a site that is stealing my blog content. I hope you’ll consider joining me on my actual blog by clicking here.)
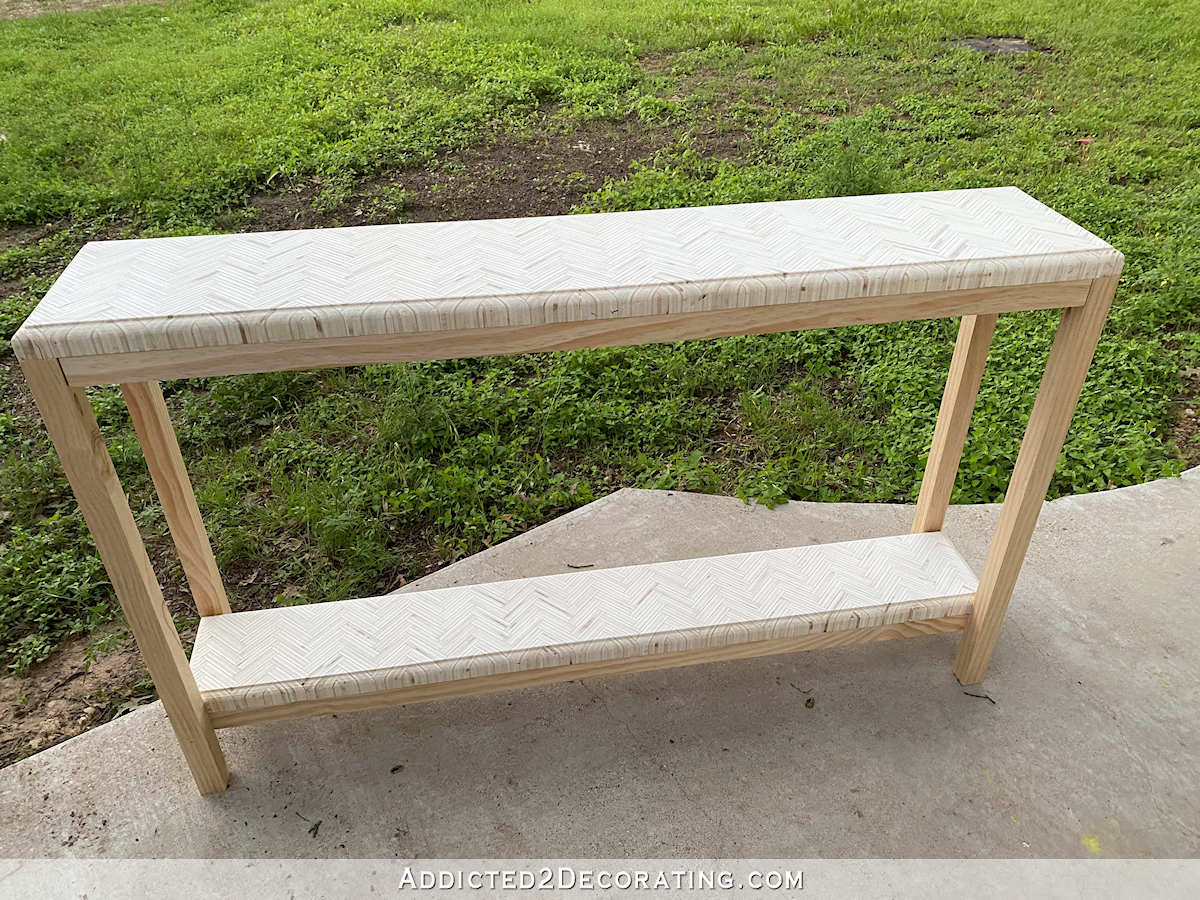
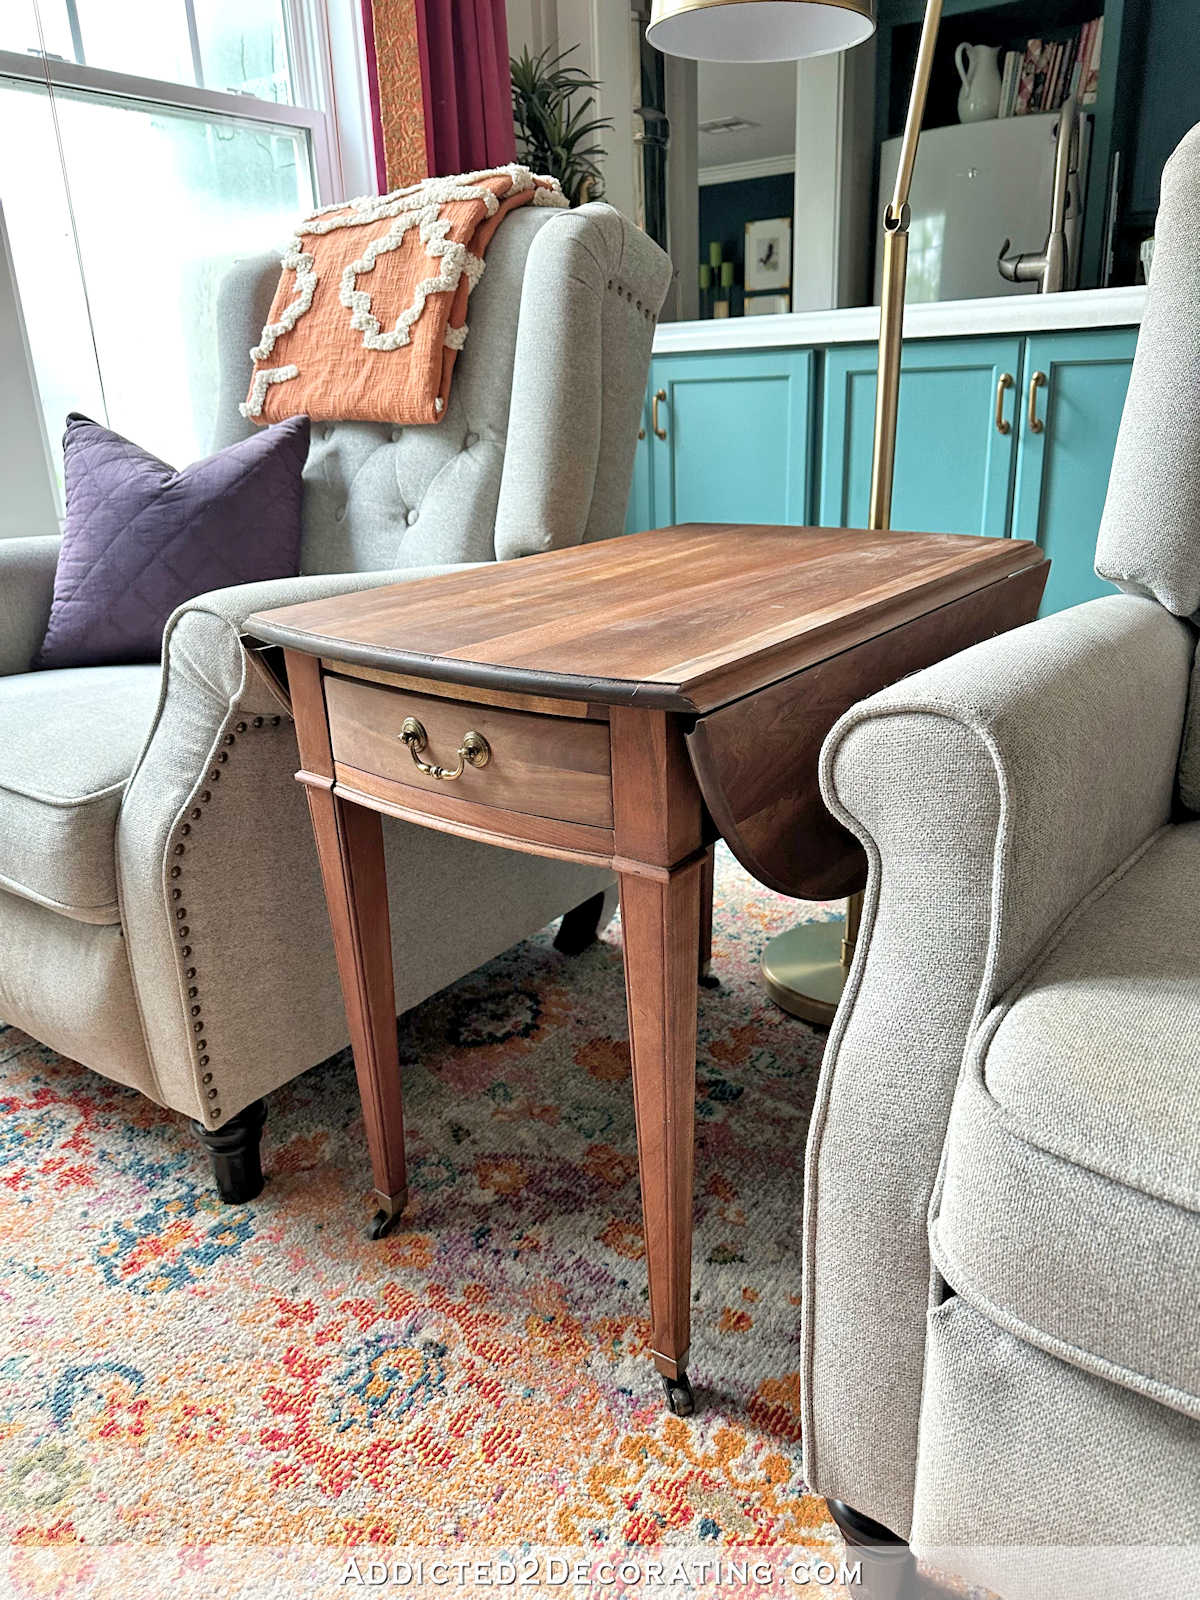
So I decided that this herringbone top would make a perfect table for the hallway. And since I didn’t want to waste any of it, I came up with a design that used every last square inch of that top. I turned the coffee table top into this hallway console table with a lower shelf.
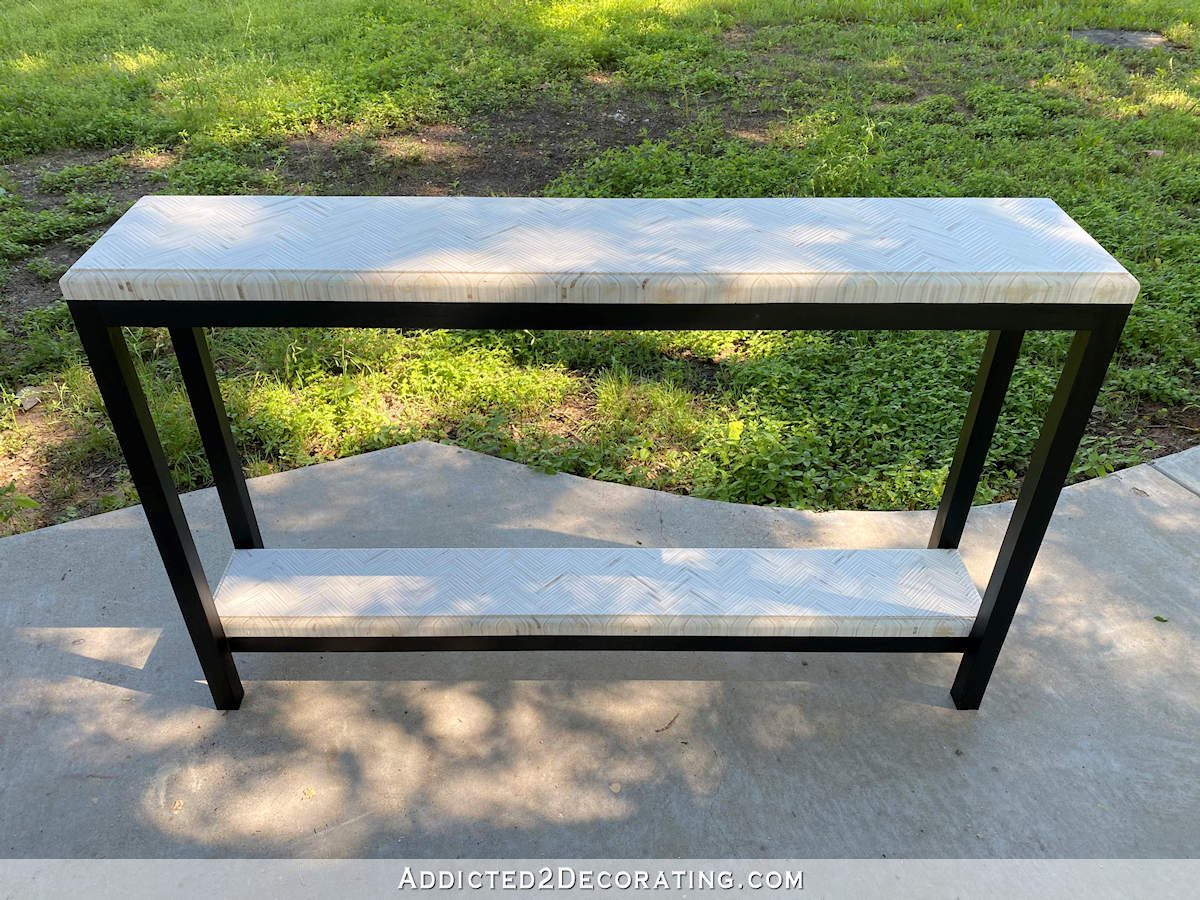
The original top was 18 inches wide, so I used my table saw to cut the top into two pieces, with one piece 10.5 inches wide and the other piece 7.5 inches wide.

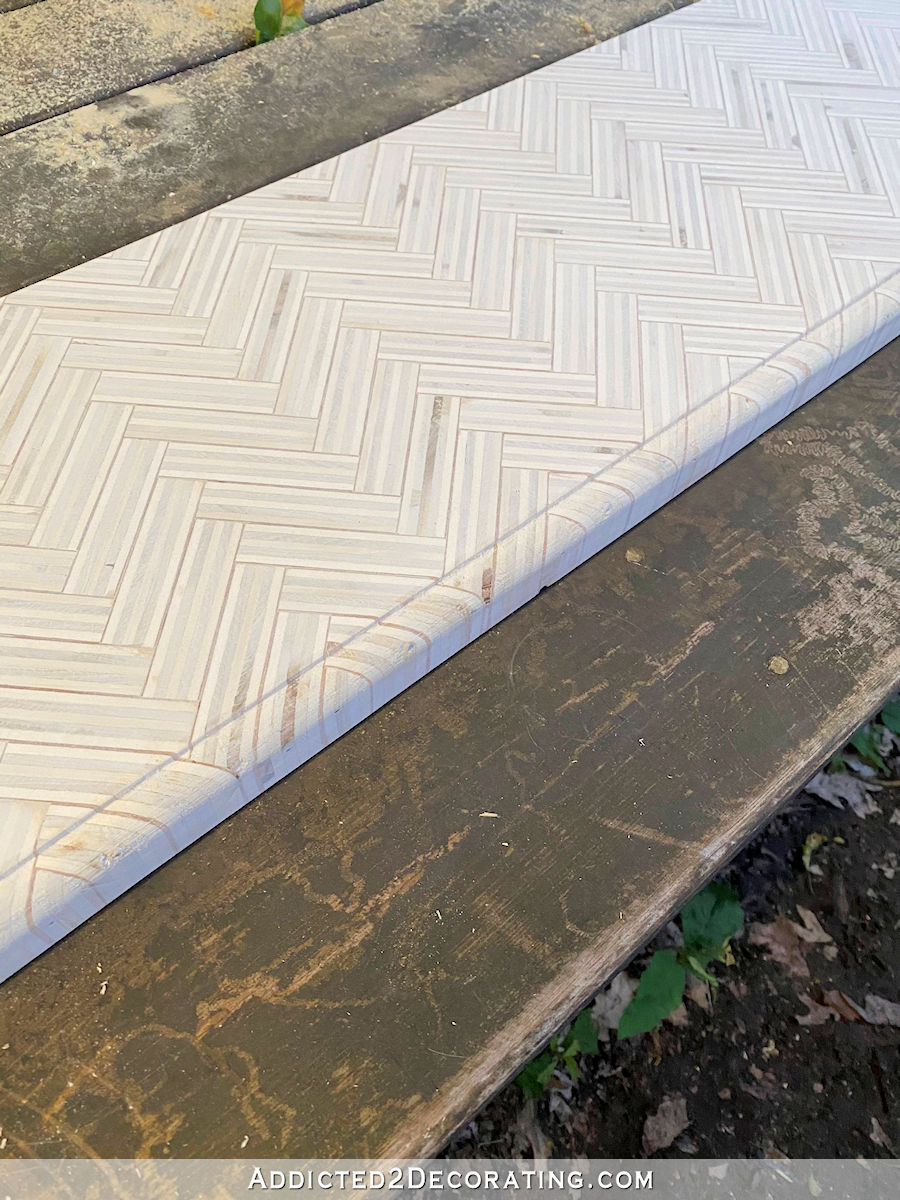
Then I used my router to finish off the edges on both pieces.
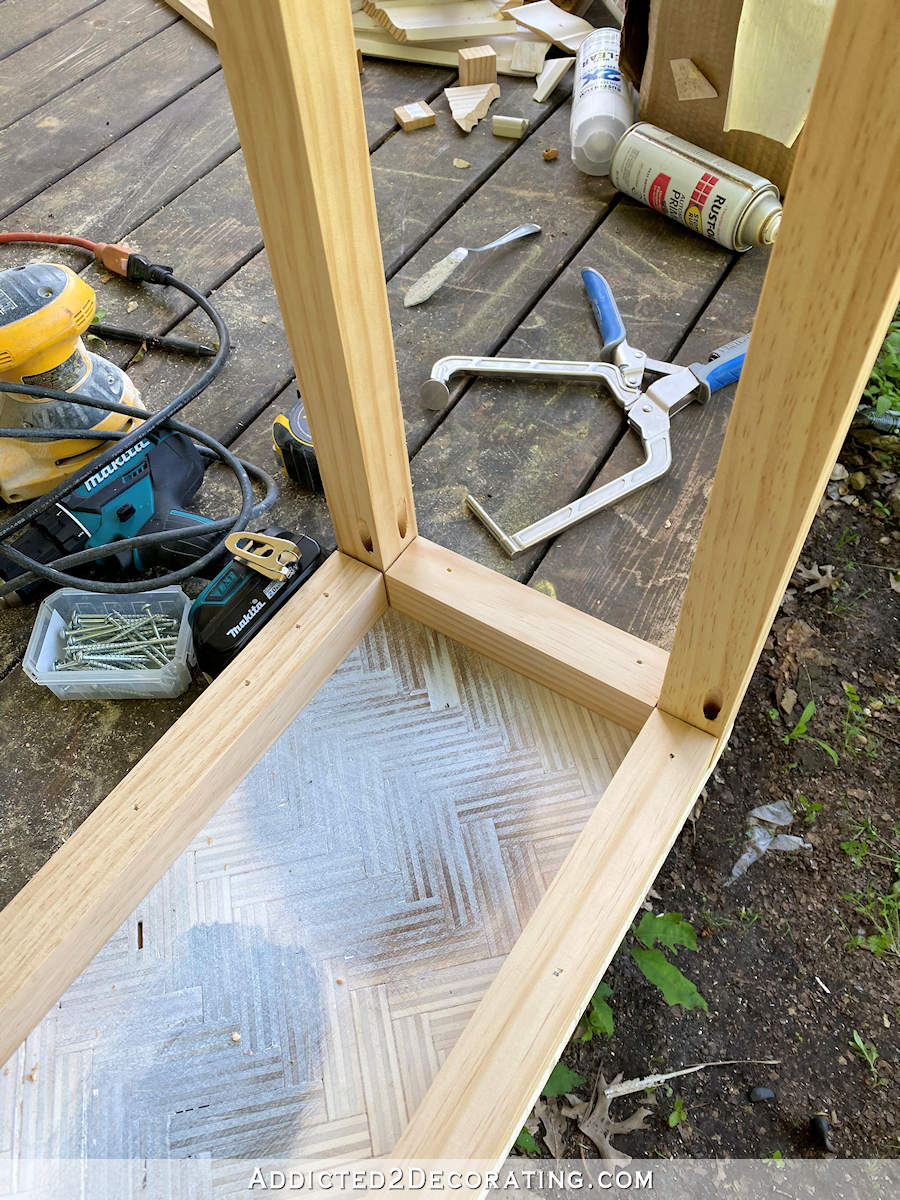
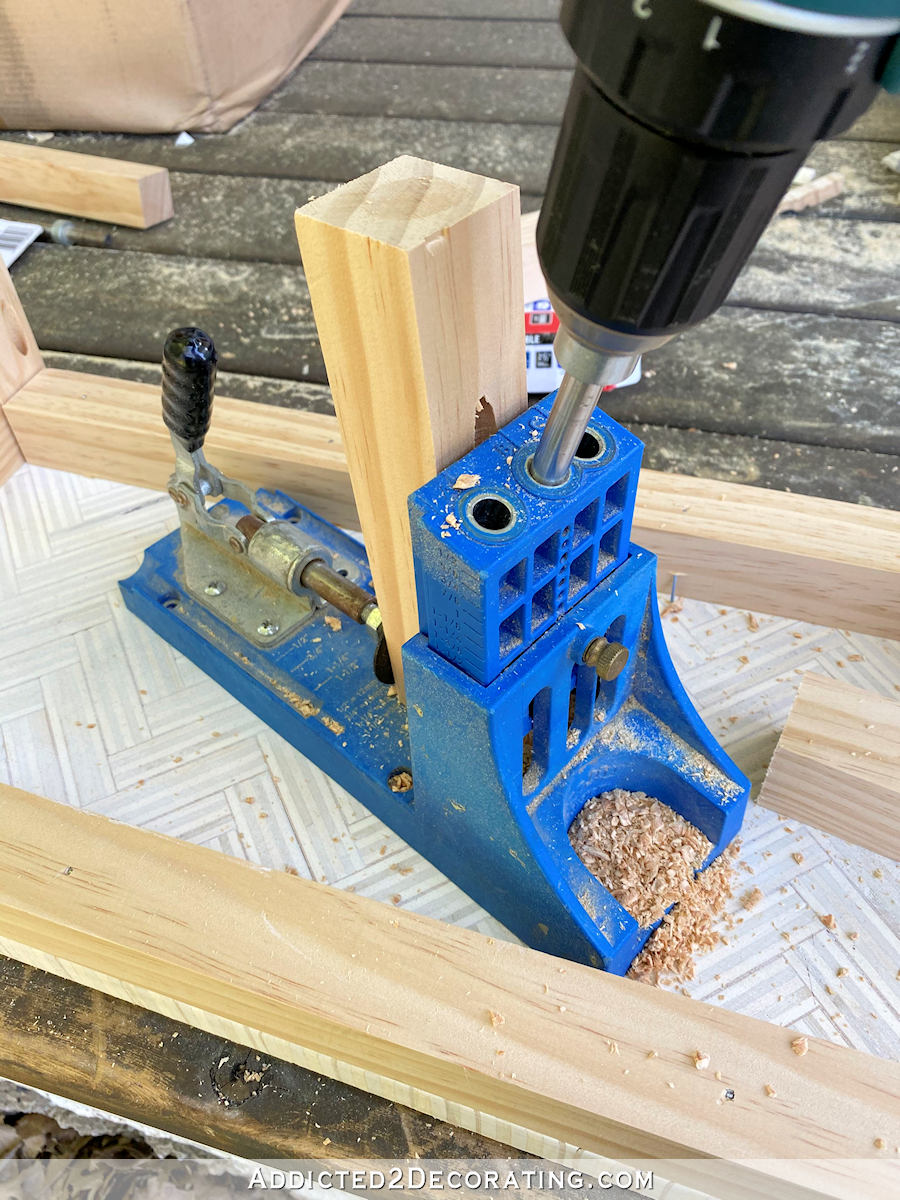
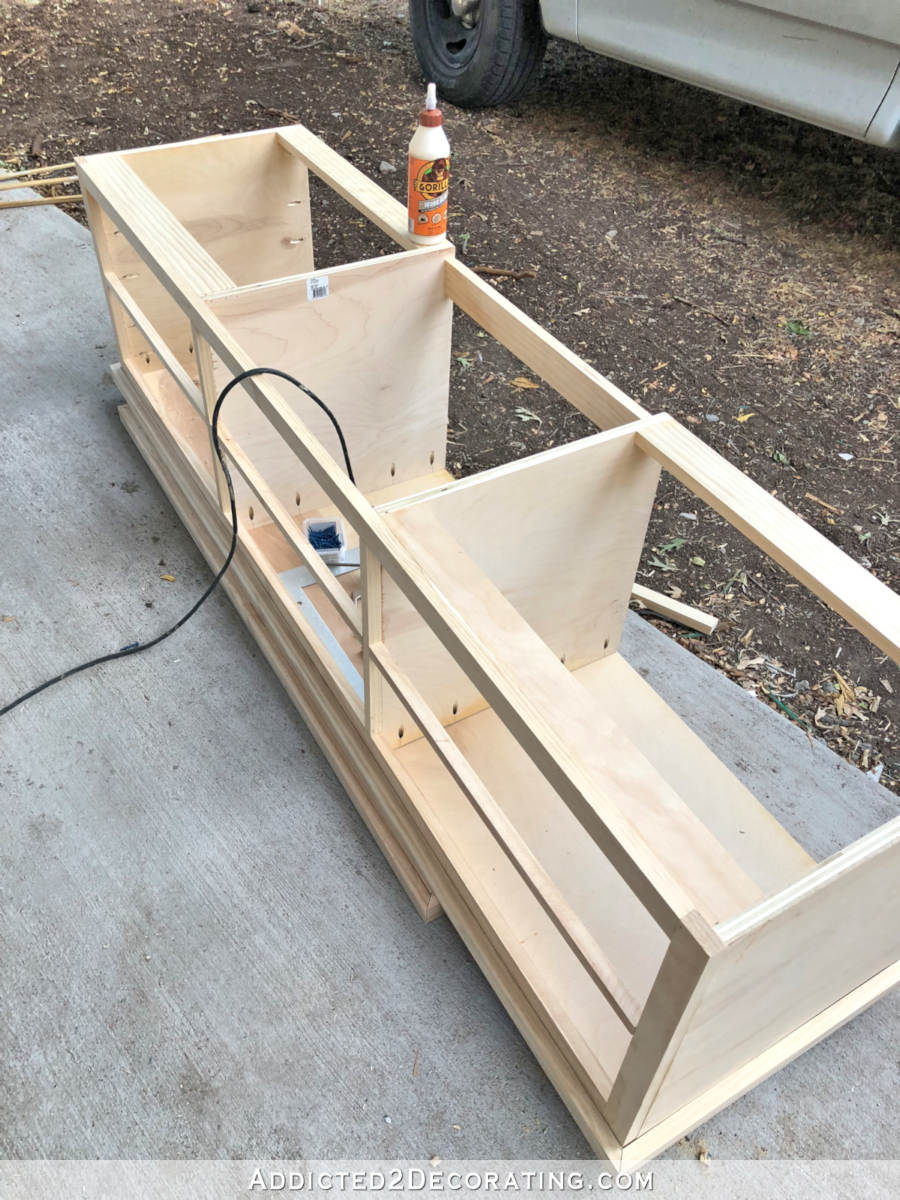
Using 2″ x 2″ lumber, I cut four pieces to 30.5 inches in length for the legs. Then I used my Kreg pocket hole jig to drill pocket holes on two sides of each leg.
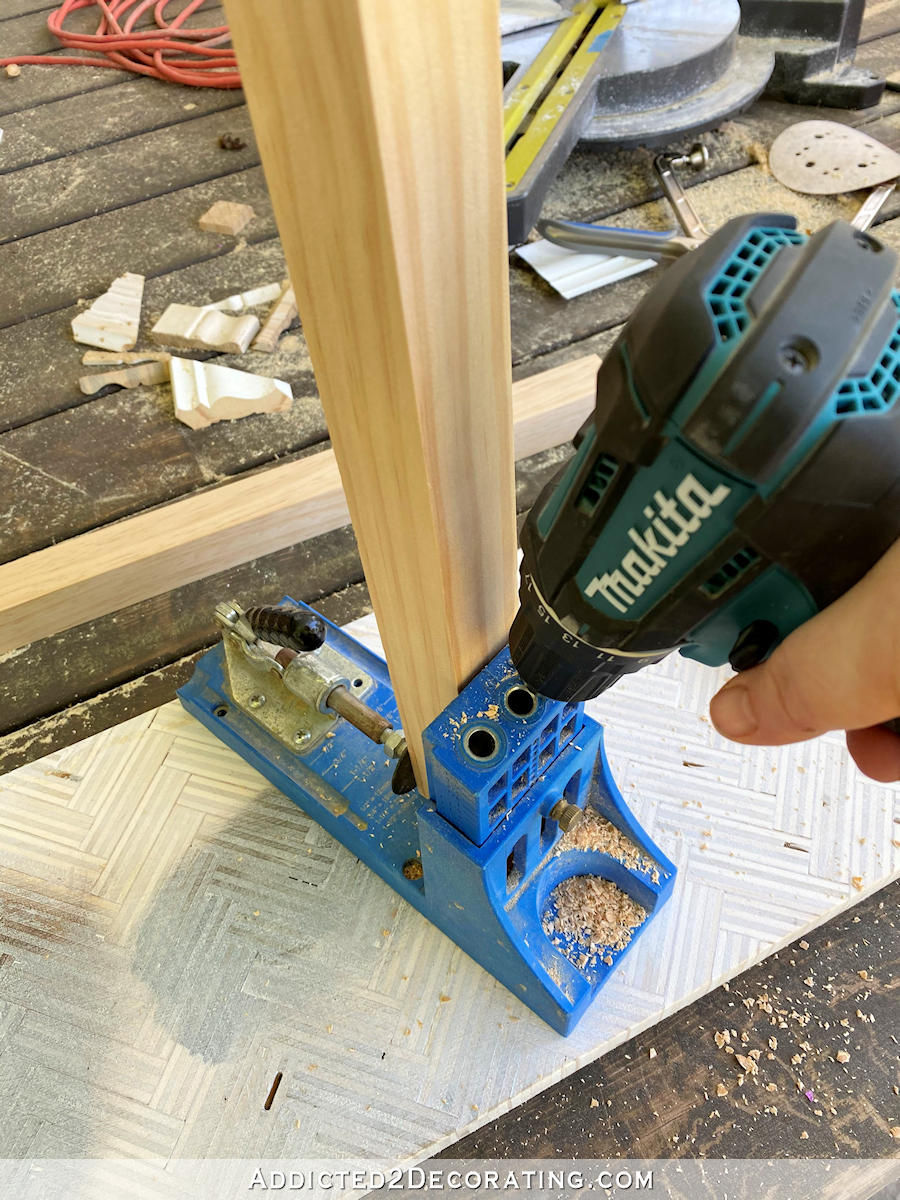
With all of those holes drilled, I turned the top piece upside down, and placed a leg right on the corner using wood glue and a Kreg clamp.
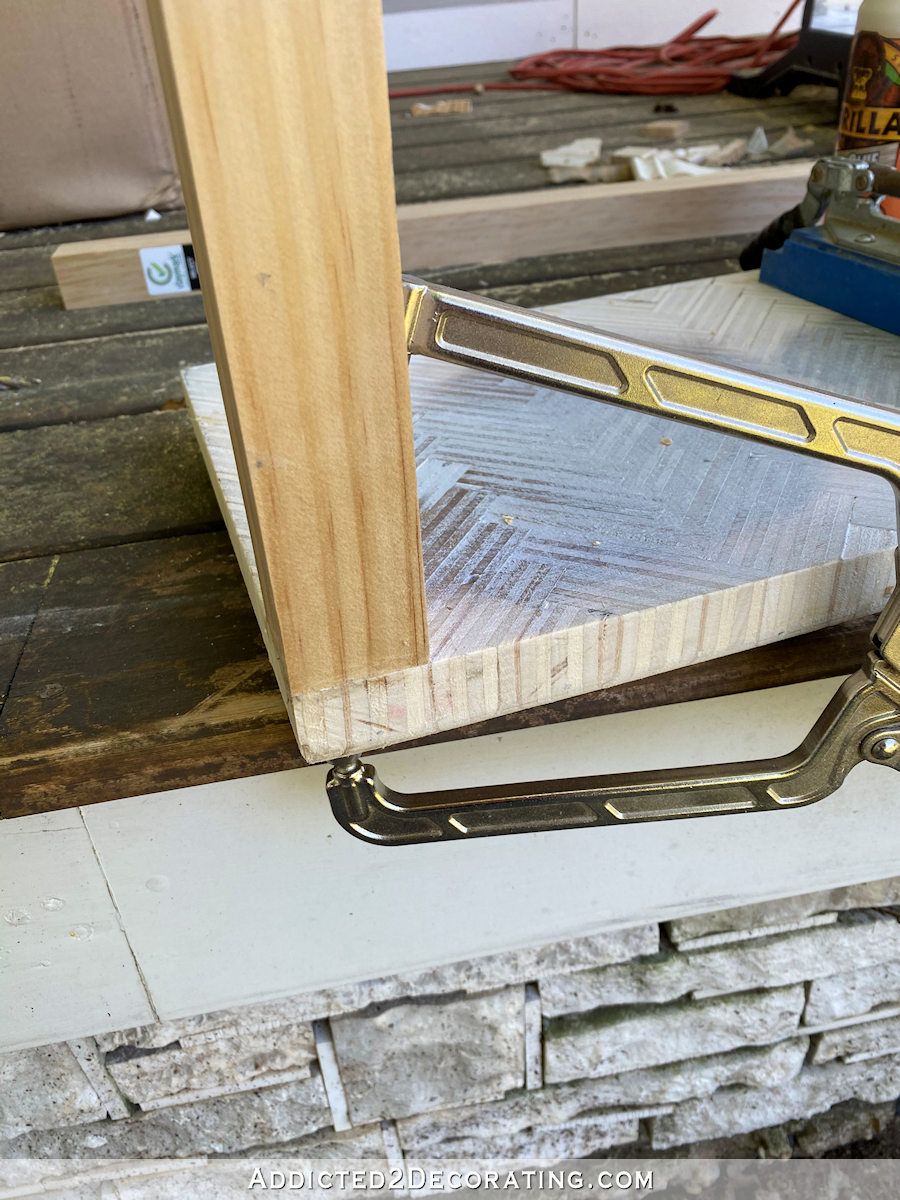
With the leg clamped into place, I screwed the leg to the top. (There were two holes. The clamp takes up one hole, while I secured the screw into the other pocket hole. Then I placed the clamp into the other hole, while securing the screw into the second pocket hole.)
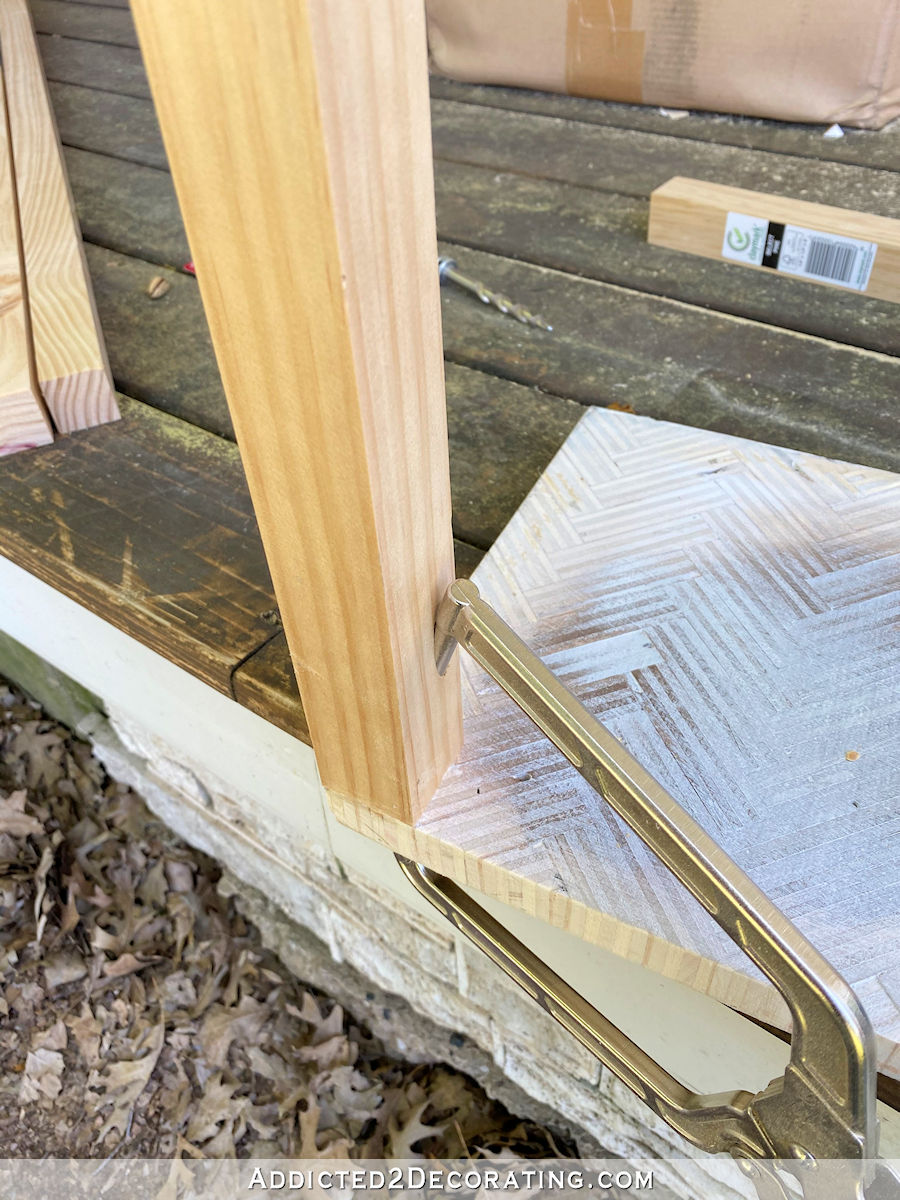
After repeating that process three times to secure all four legs to the top, I then cut 2″ x 2″ pieces to go between the legs. On these pieces, I secured those into place using my nail gun and 16-gauge 2.5-inch nails. I nailed those pieces directly to the table top.
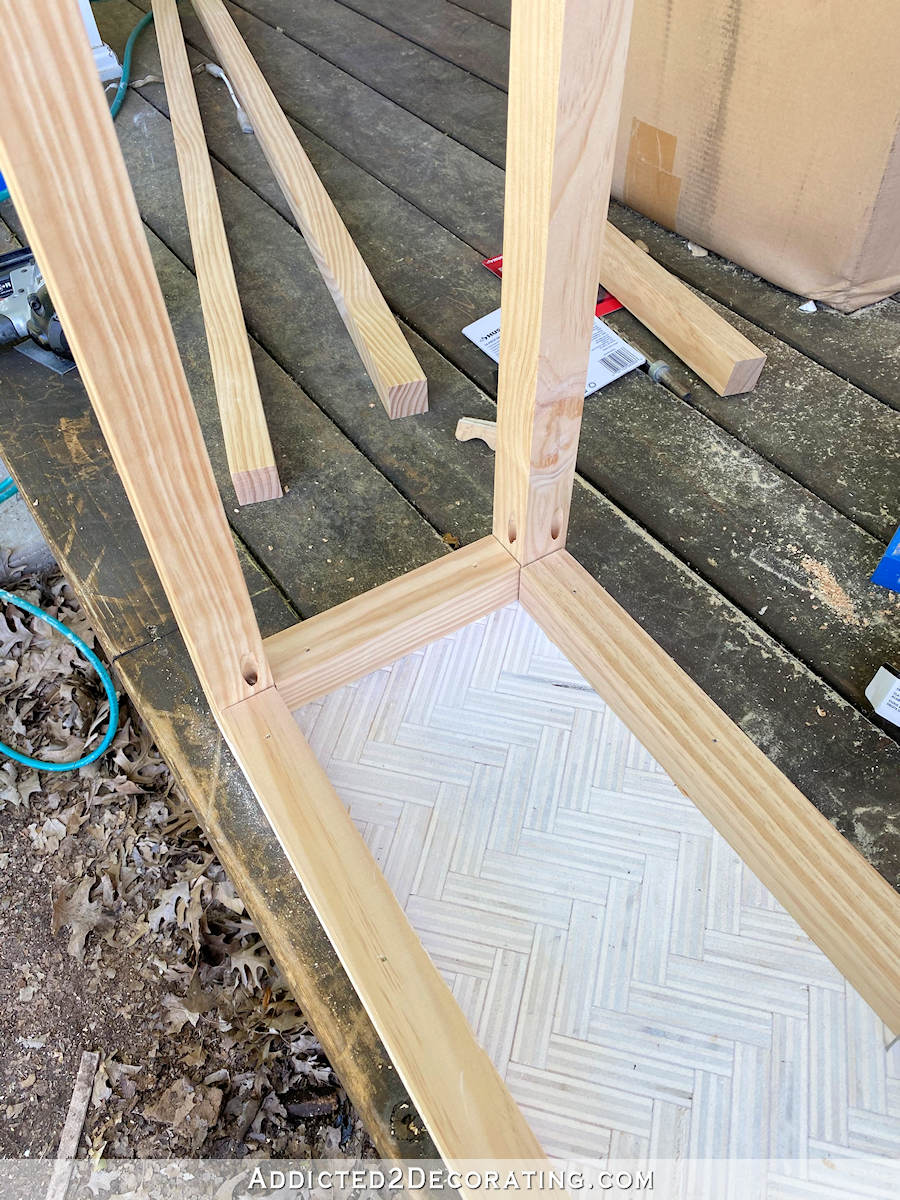
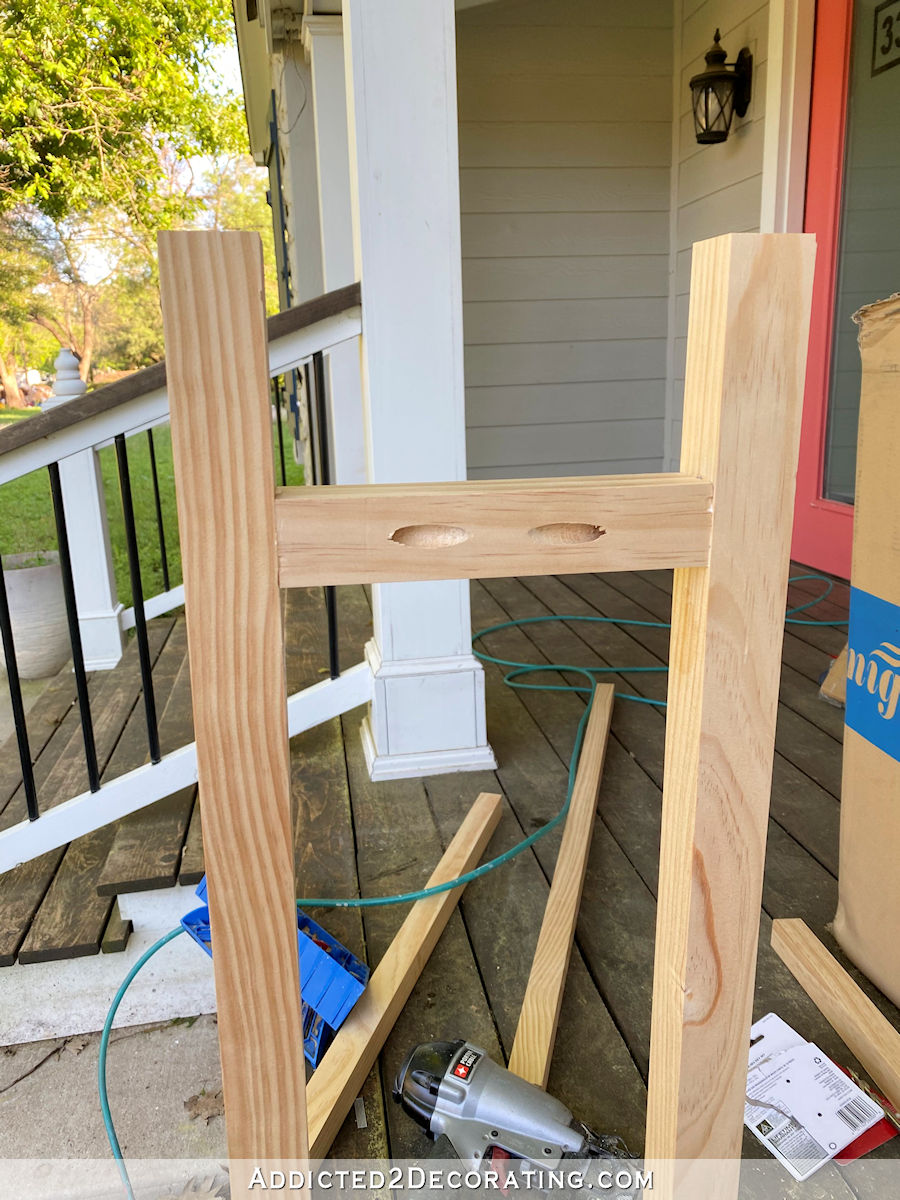
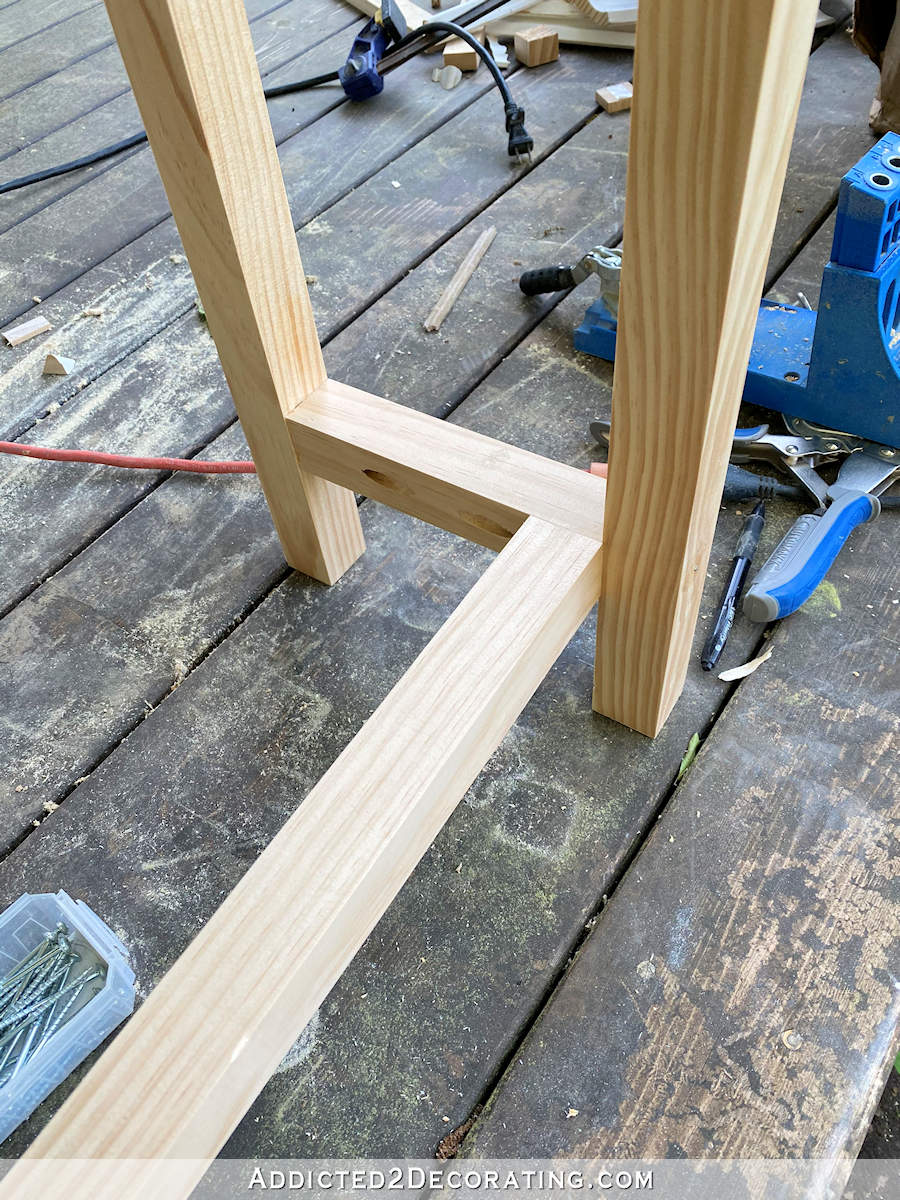
Next, I cut some 7.5-inch stretcher pieces to use lower on the legs, and I drilled pocket holes on each end of those pieces.
I measured and marked four inches from the bottom of the legs, and then used wood glue and a long clamp to hold the pieces together while screwing the pieces together through the pocket holes.
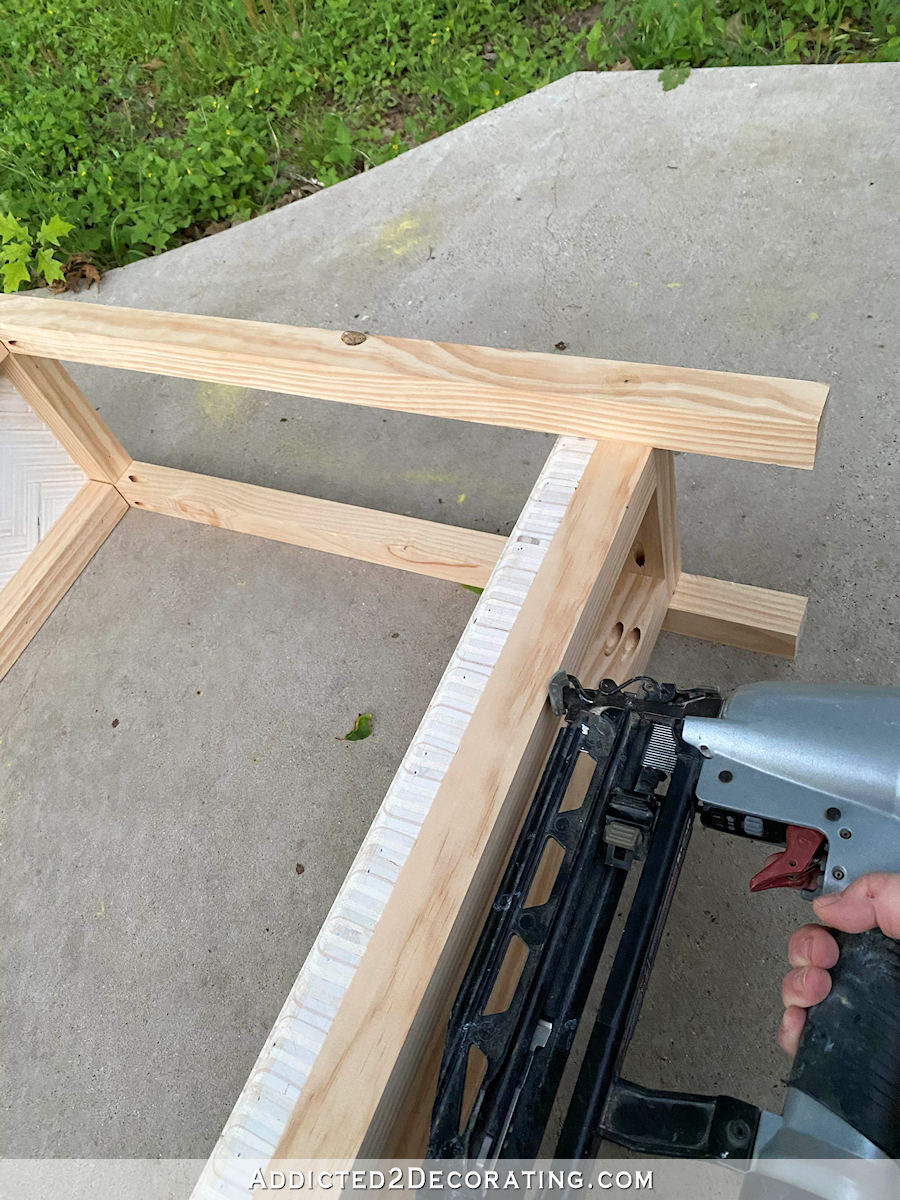
After securing the other short stretcher on the other side, I turned the table right side up, and then cut the long stretcher pieces for the front and back of the lower shelf. I drilled two pocket holes on each end of those long stretcher pieces.
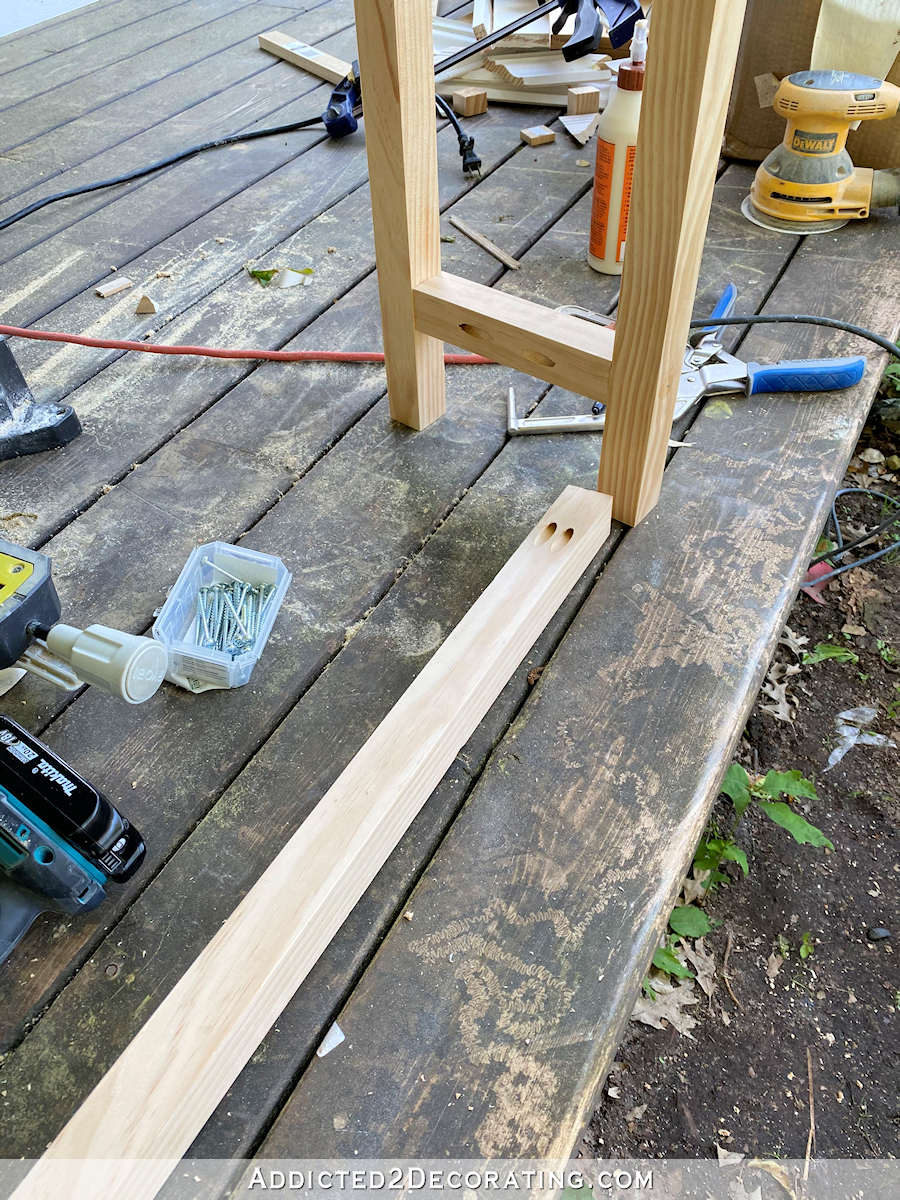
Using wood glue and clamps, I lined up these long stretcher pieces to the short side stretchers (i.e., not to the legs) and screwed them into place.

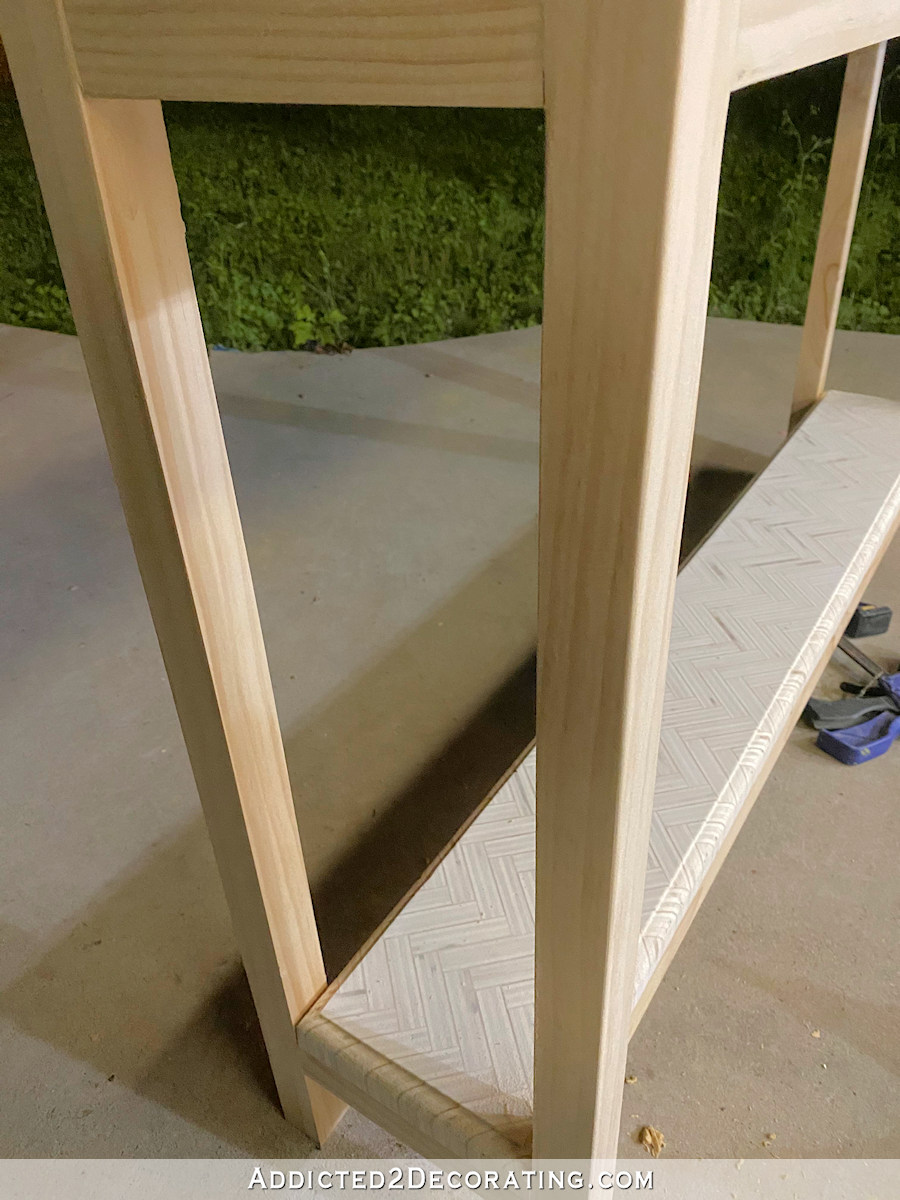
I did this because the lower shelf was cut to fit inside the legs. That’s why it’s only 7.5 inches wide while the table top is 10.5 inches wide.
And then I repeated that process for the back stretcher piece.
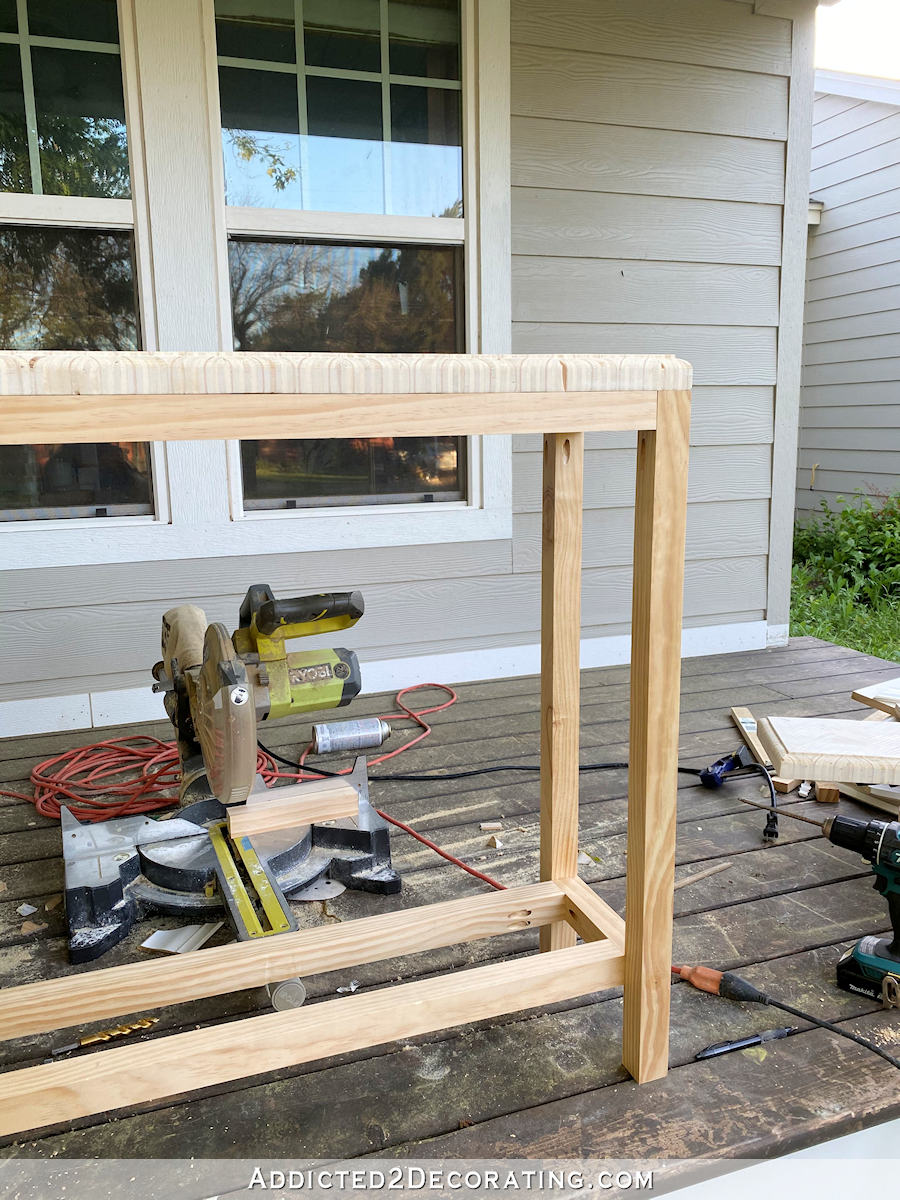
And here’s what it looked like with all of the bottom stretcher pieces in place.
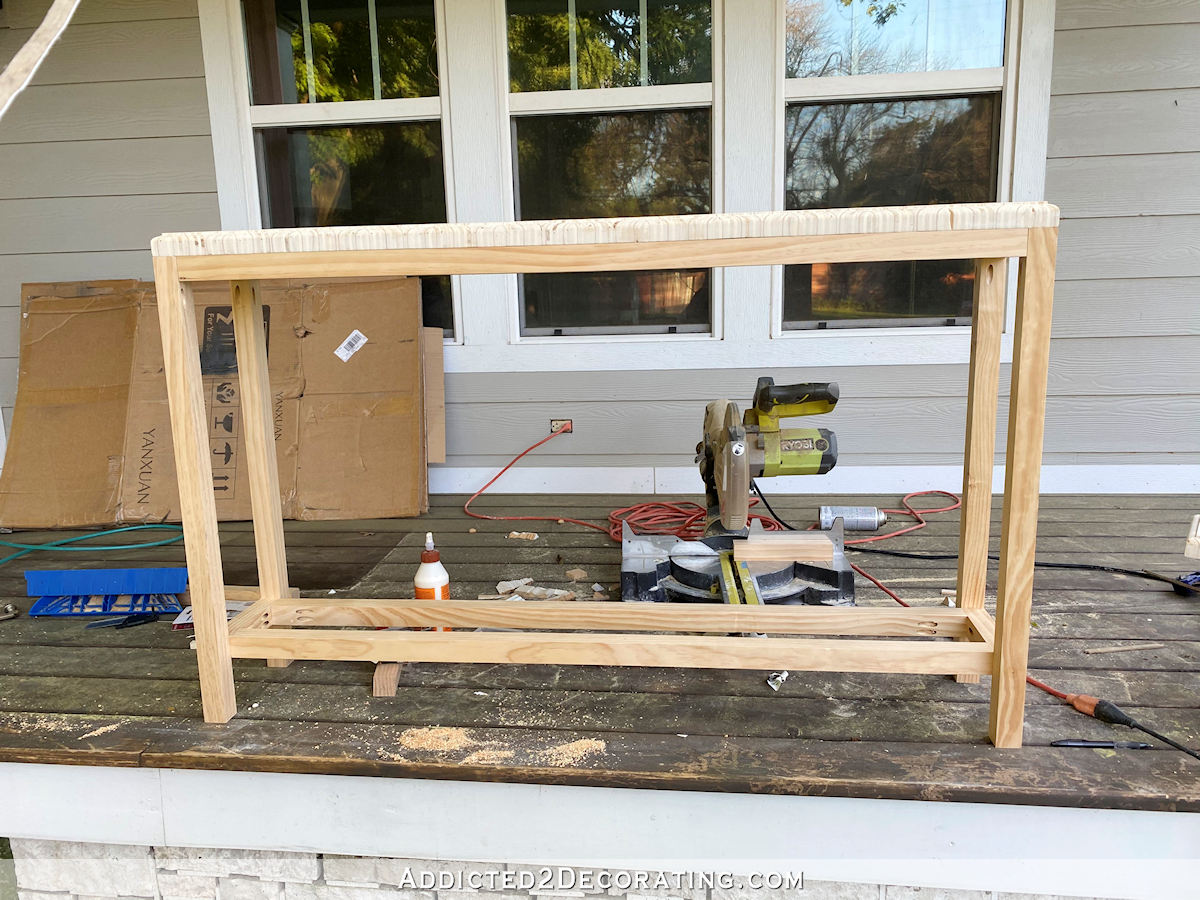
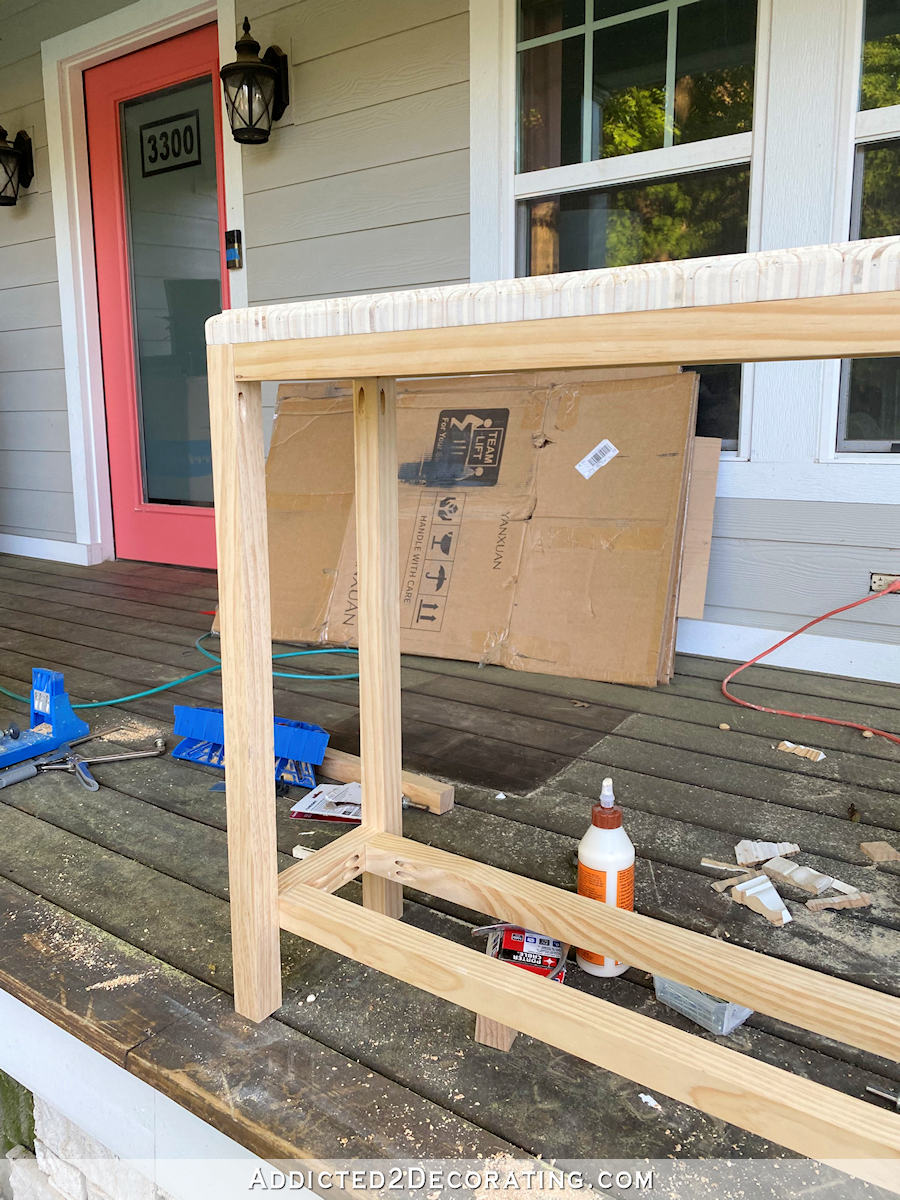
Then I checked to be sure that the lower shelf fit inside the legs as it should.

When I was sure it fit just right, I turned the table on its side and nailed the bottom shelf into place using the same 16-gauge 2.5-inch nails that I had used to secure the top.
The final part of the build was to fill in the pocket screw holes that showed (i.e., the eight holes used to secure the legs to the table top). To fill those holes, I used these Kreg paint grade pocket hole plugs. These are cut to fit perfectly into the holes. I just added a little wood glue to each one, pushed it into the pocket hole, and then covered the tops with wood filler.

Once those plugs are sanded and painted, you can’t see those holes at all. In fact, just after being wood filled and sanded, they’re pretty hard to see, as you can see here on the back leg in this picture.
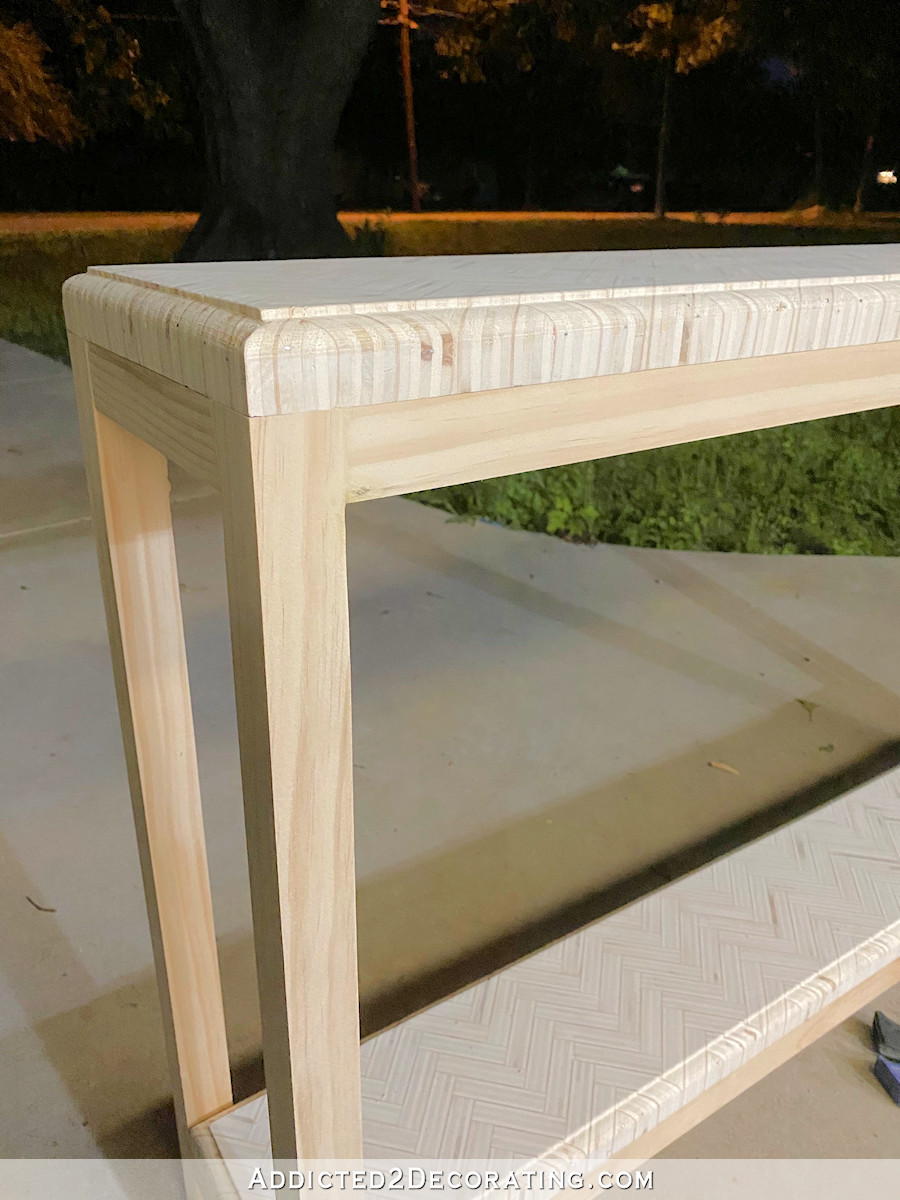
Then I did a whole lot of wood filling, sanding, and finishing. I used 150-grit sandpaper to sand the whole thing by hand, concentrating on the edges of the legs and stretchers. I always like to sand off those harsh edges on new lumber. I’m not sure if it shows in these pictures (the edges on the right leg have been sanded, but the edges on the left leg haven’t yet been sanded), but to me, this is one of those finishing tasks that makes a huge difference on the finished product. There’s just something about those really harsh edges that don’t look as finished to me.
And finally, I taped off the shelves with painters tape, and gave the stretchers and legs two coats of black paint (Behr Pure Black), sanding with 220-grit sandpaper between coats.

Before painting the second coat, I also added some Floetrol to the paint to give it the smoothest finish possible.
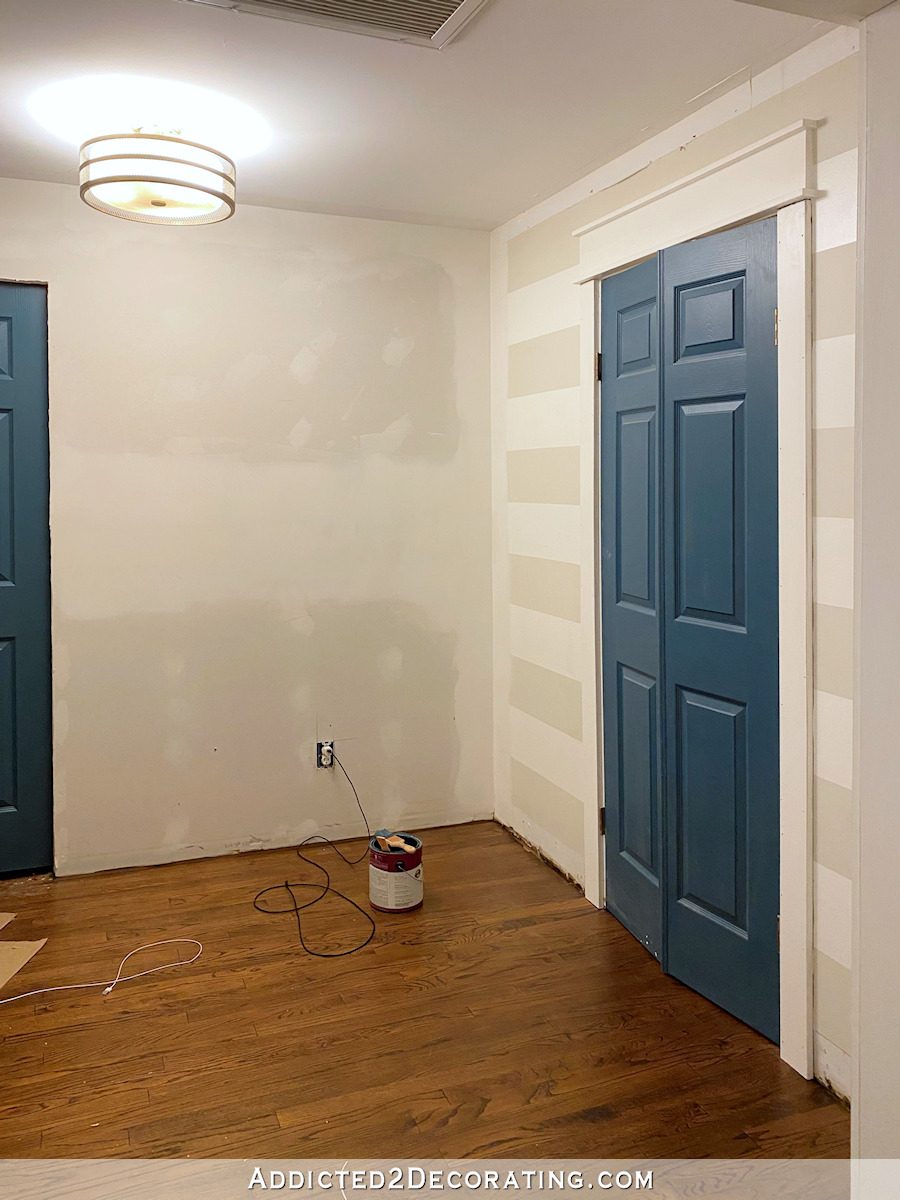
I still need to paint the stripes on the hallway walls (that’s today’s project), but here’s the table in its new home.

It’s a perfect fit, and I’m so glad that I didn’t have to lose a single square inch of that table top that I spent so many hours making in 2019.


Addicted 2 Decorating is where I share my DIY and decorating journey as I remodel and decorate the 1948 fixer upper that my husband, Matt, and I bought in 2013. Matt has M.S. and is unable to do physical work, so I do the majority of the work on the house by myself. You can learn more about me here.

Wonderful!!!
Yay!! As I stated a few posts ago, I REALLY loved this piece, so I’m happy you were able to re-purpose it. Looks great!
Looks great. Can’t wait to see hallway finished.
So, so good!
Glad that you could reuse the tabletop as it is truly beautiful! What will you use those gorgeous legs from the old hallway table for?
I’m not sure yet, but I’ll hang onto them until inspiration strikes.
Love the redo, so glad this piece of “art” was reborn and not lost. Looks like it was originally made for this space. Thank you for the inspiration to do this too.
You are amazing! That is all!
I love it and am so glad you could ‘remake it into something so useful and beautiful.
WOW – love it – you are just the bomb!
So glad you were able transform your beautiful table top to make it useful (and still beautiful) for you! I always thought of how lovely and labor intensive it was. I looks great!
Stunning!
This is one of favourite projects you have done..❤️
So glad you were able to reuse your coffee table. Your new console table is just as gorgeous!
Wow! I loved it as a cocktail table, and love it just as much as a console. Your artistry on this table is one of my favorite examples of faux bois. Really excellent, all of it.
It looks fantastic! And great reworking of it! I know it will look lovely in it’s new location!
Kristi. you are just so talented. Your husband must be so proud of you. It amazes me to see all the sides and talents of Kristi!
What a great save for your beautiful coffee table! I love it.
Wow! Just beautiful. Can’t wait to see finished hallway!
Perfection!
You are so talented. Thanks for the inspiration.
Ya did good, kid.
I love it as a console table even more than I loved it as a coffee table! It looks perfect there in your hallway and like it was originally built just for that spot! It is so awesome you were able to repurpose that gorgeous table to use it there! I can’t wait to see the finished hallway. I loved the previous hallway, but I have a feeling this one will be even better! I’ve said this before, and I will continue to say it…. oh, how I wish I had your vision and talent! xo
Once again, great job!
It’s beautiful!!! I have always LOVED the coffee table, but I love the side table even more!
Incredible transformation and it looks perfect in that pace. This chevron top has been one of my favorite of your diy projects. I love reading through every step of the process.
Absolutely INCREDIBLE – AS ALWAYS! You are amazing! this is one of my fave projects and now it’s even more amazing! That beautifully routered edge takes it to next level. Bravo. One day I want to make this 😊