Breakfast Room Dining Chair Makeover – From Neutral To Colorful
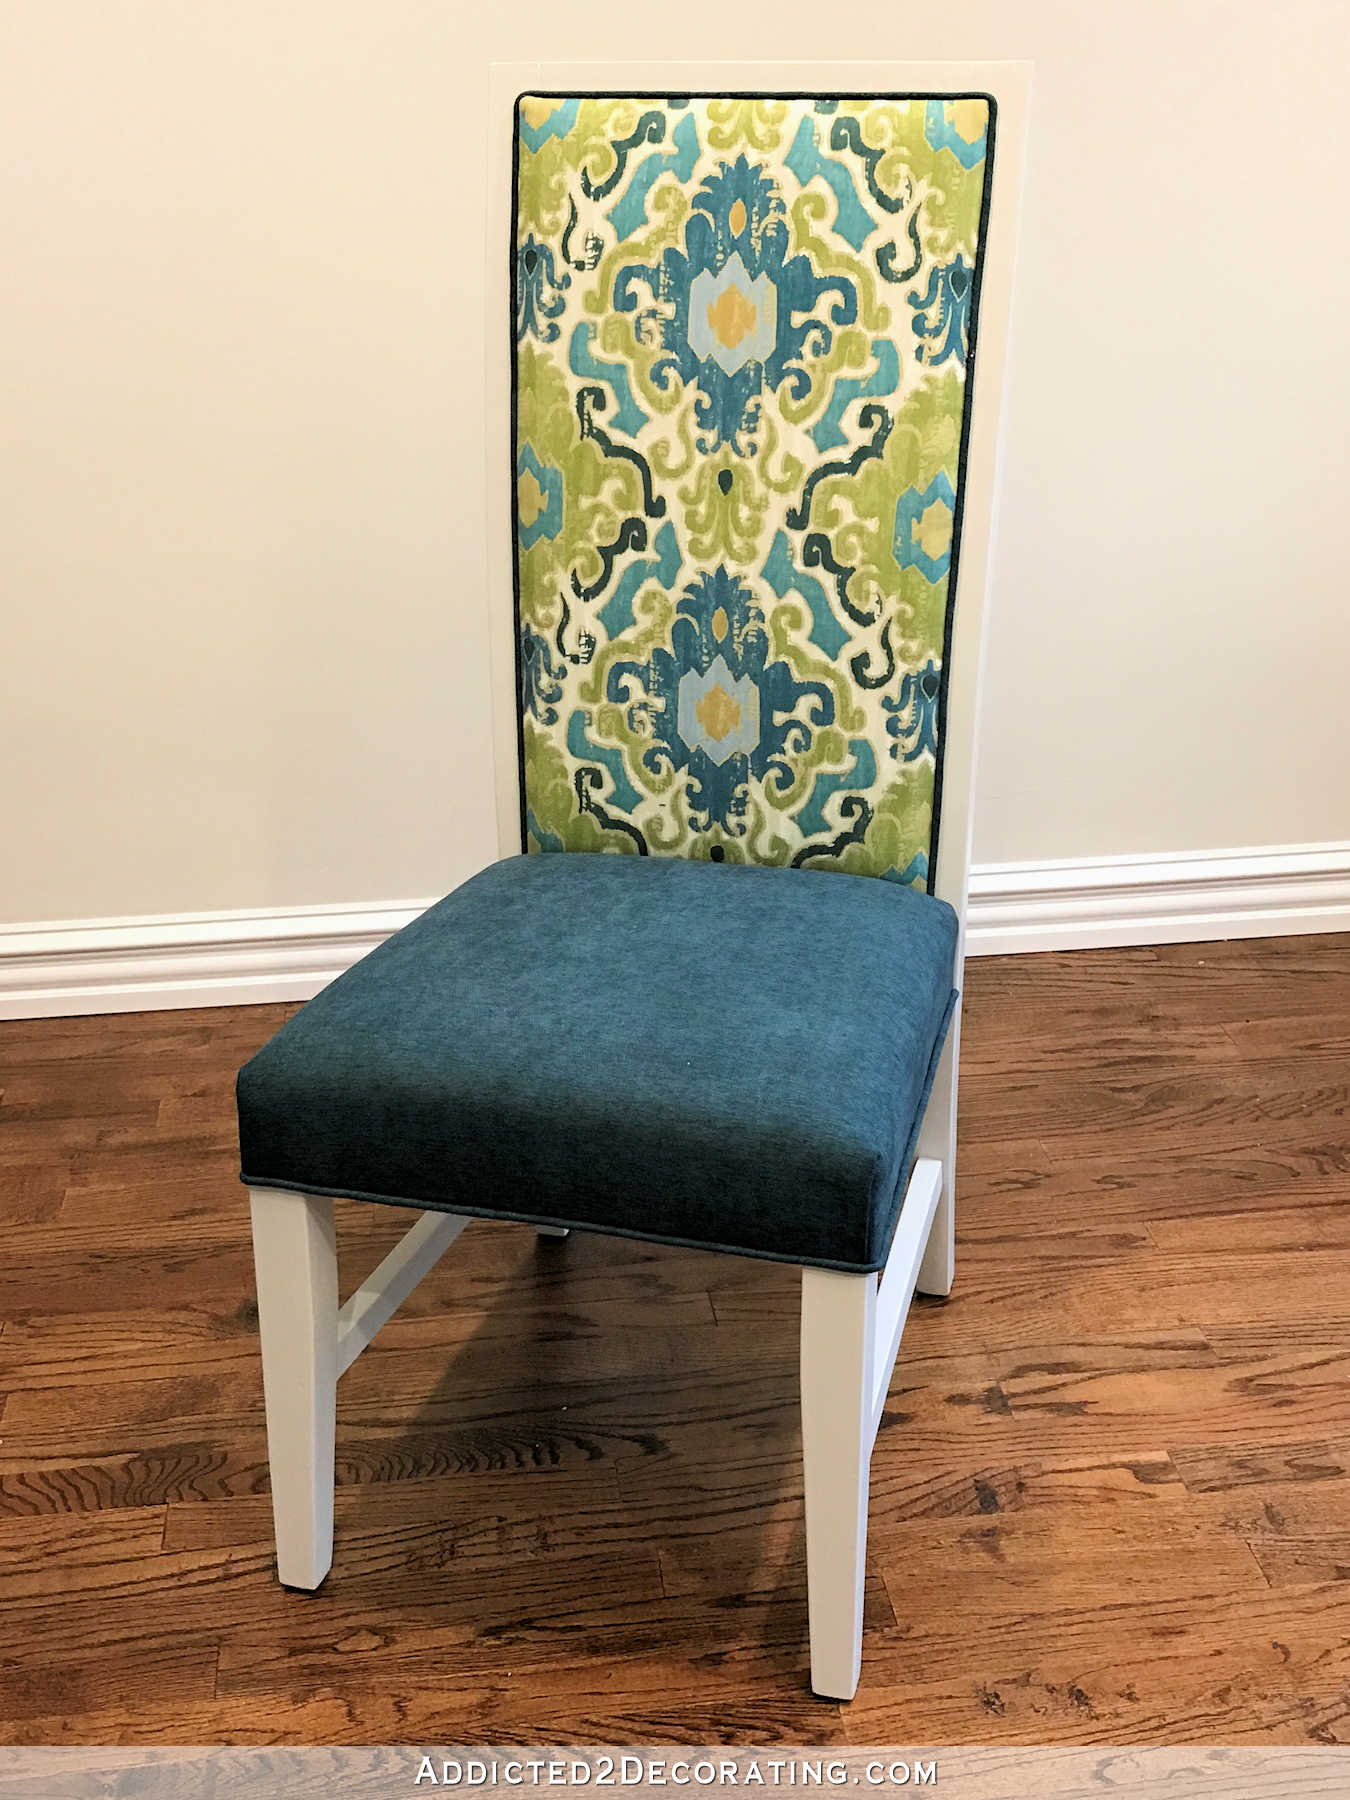
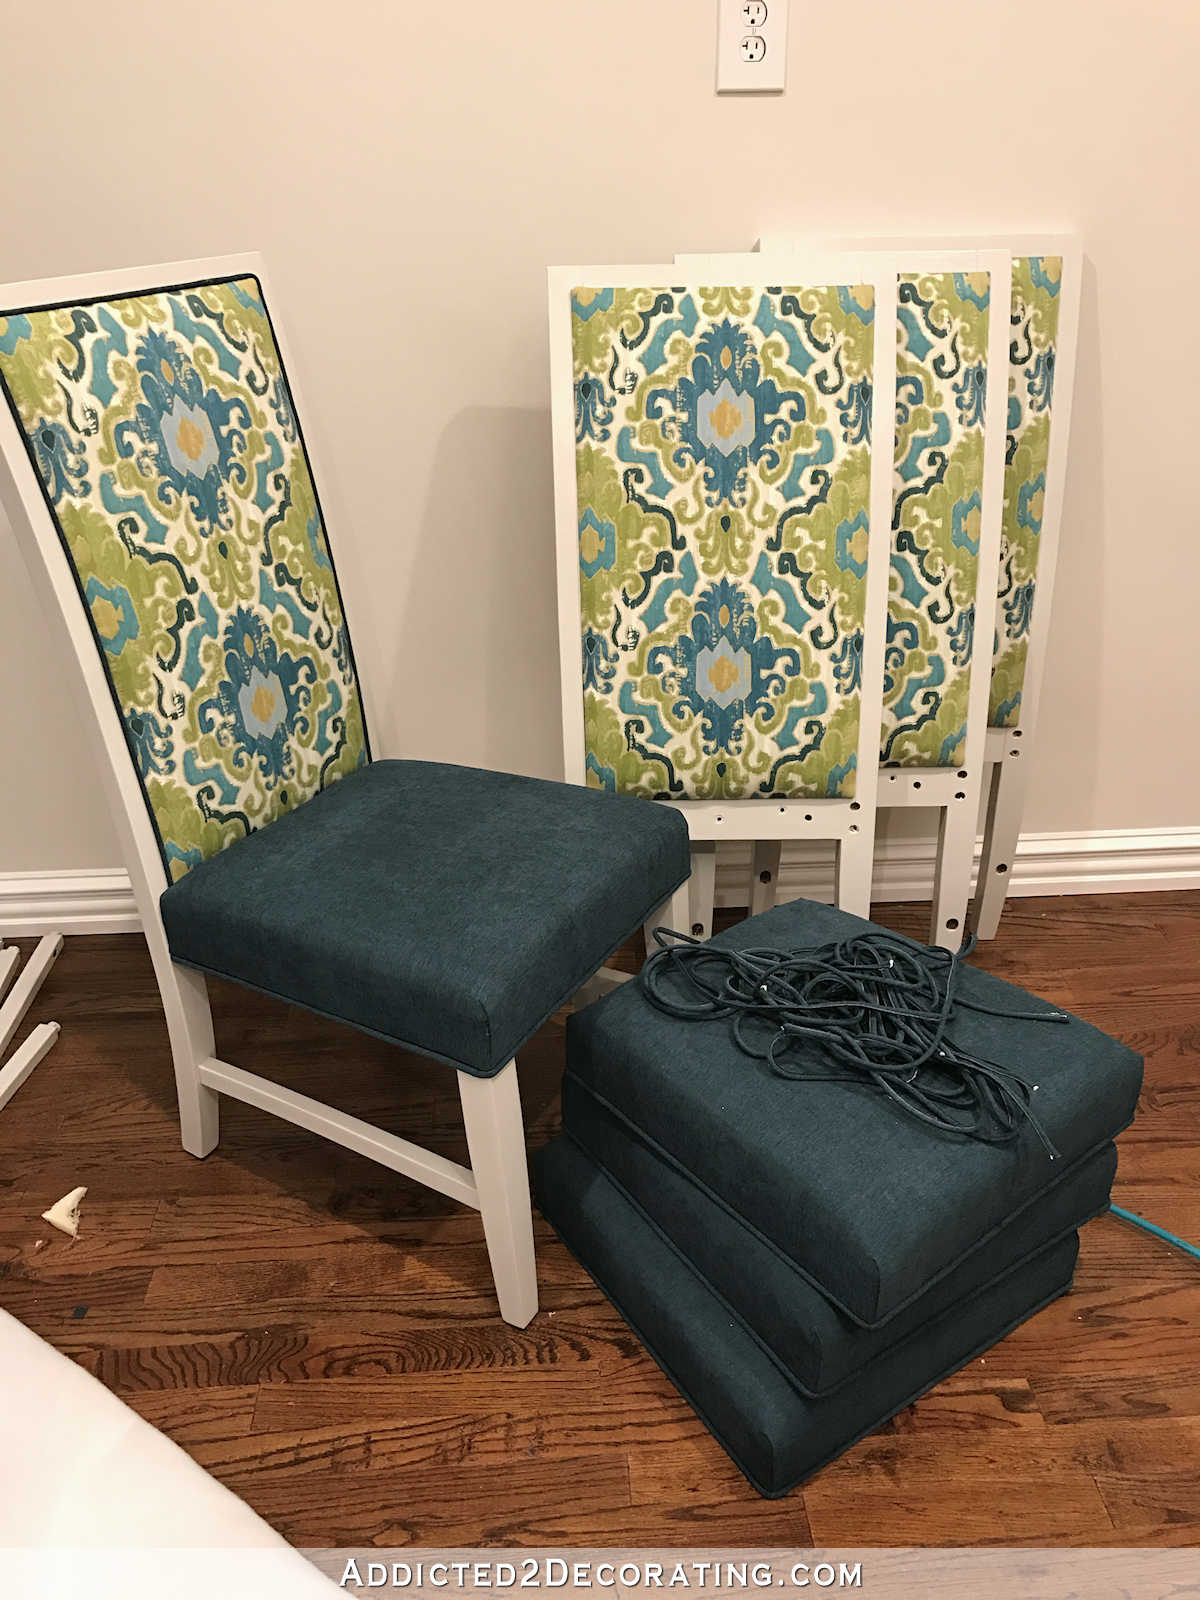
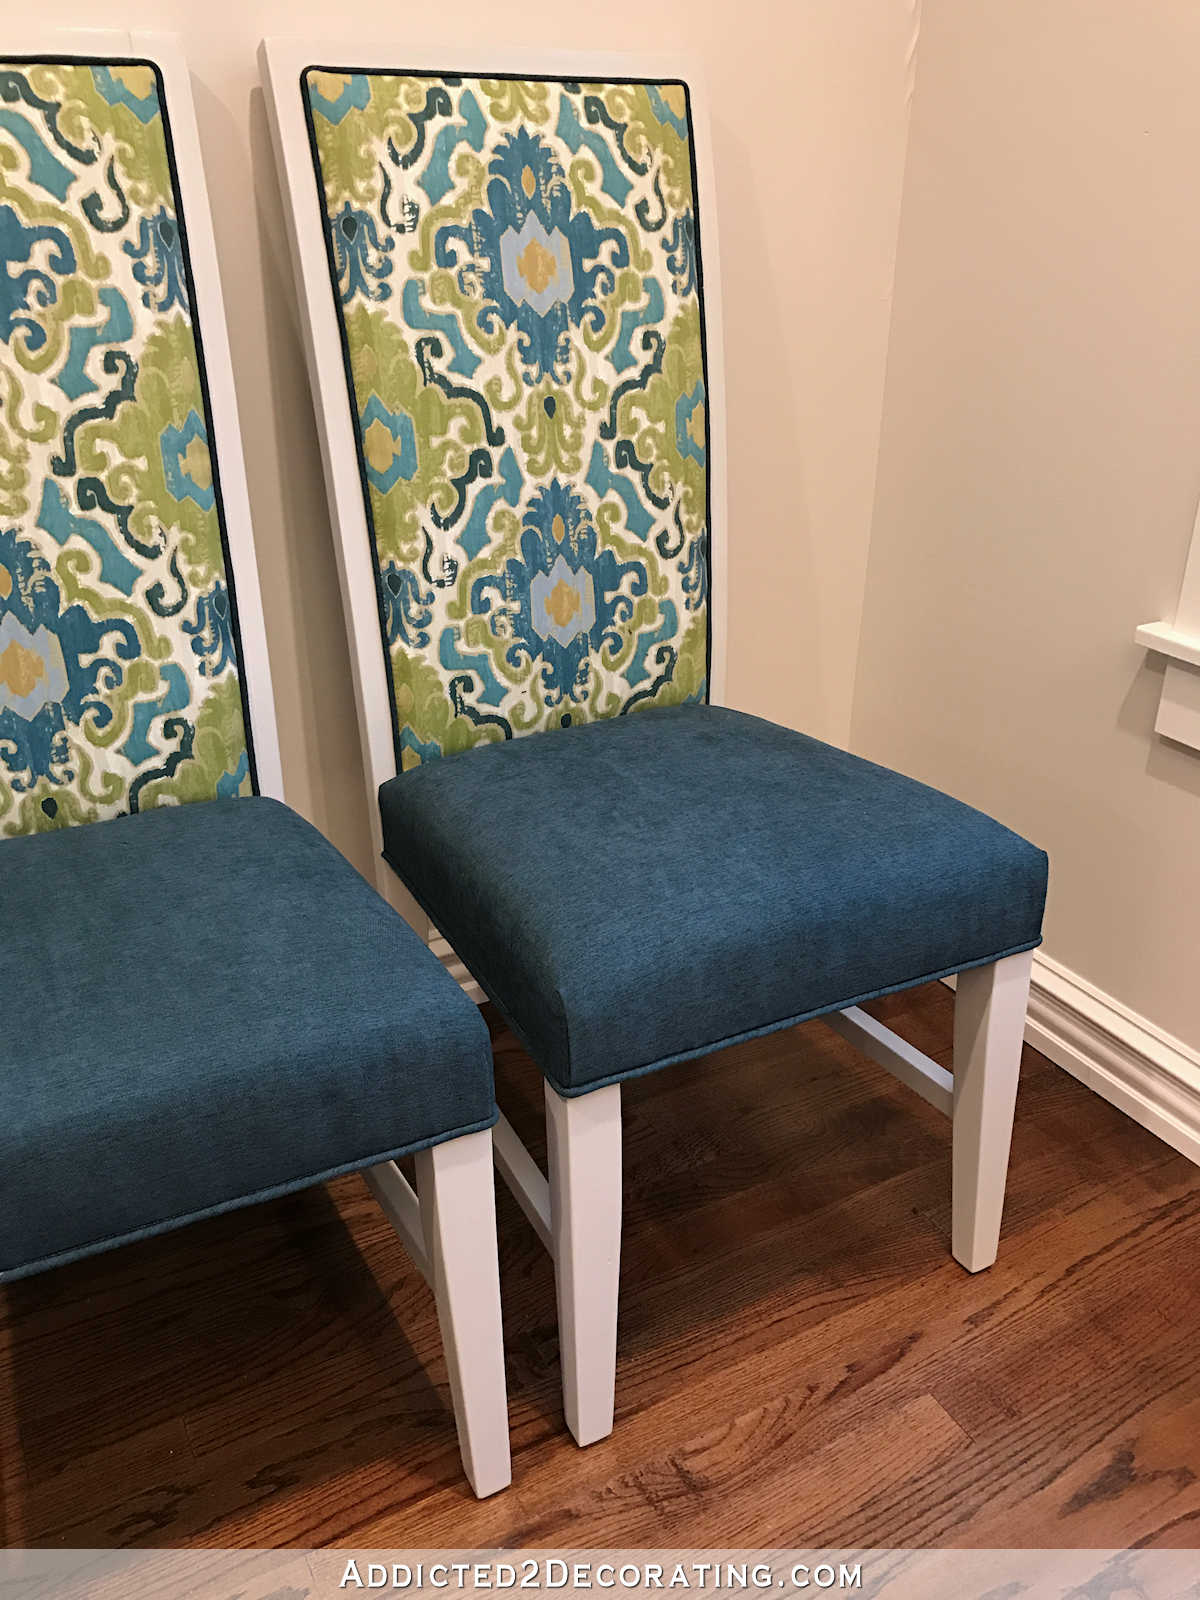
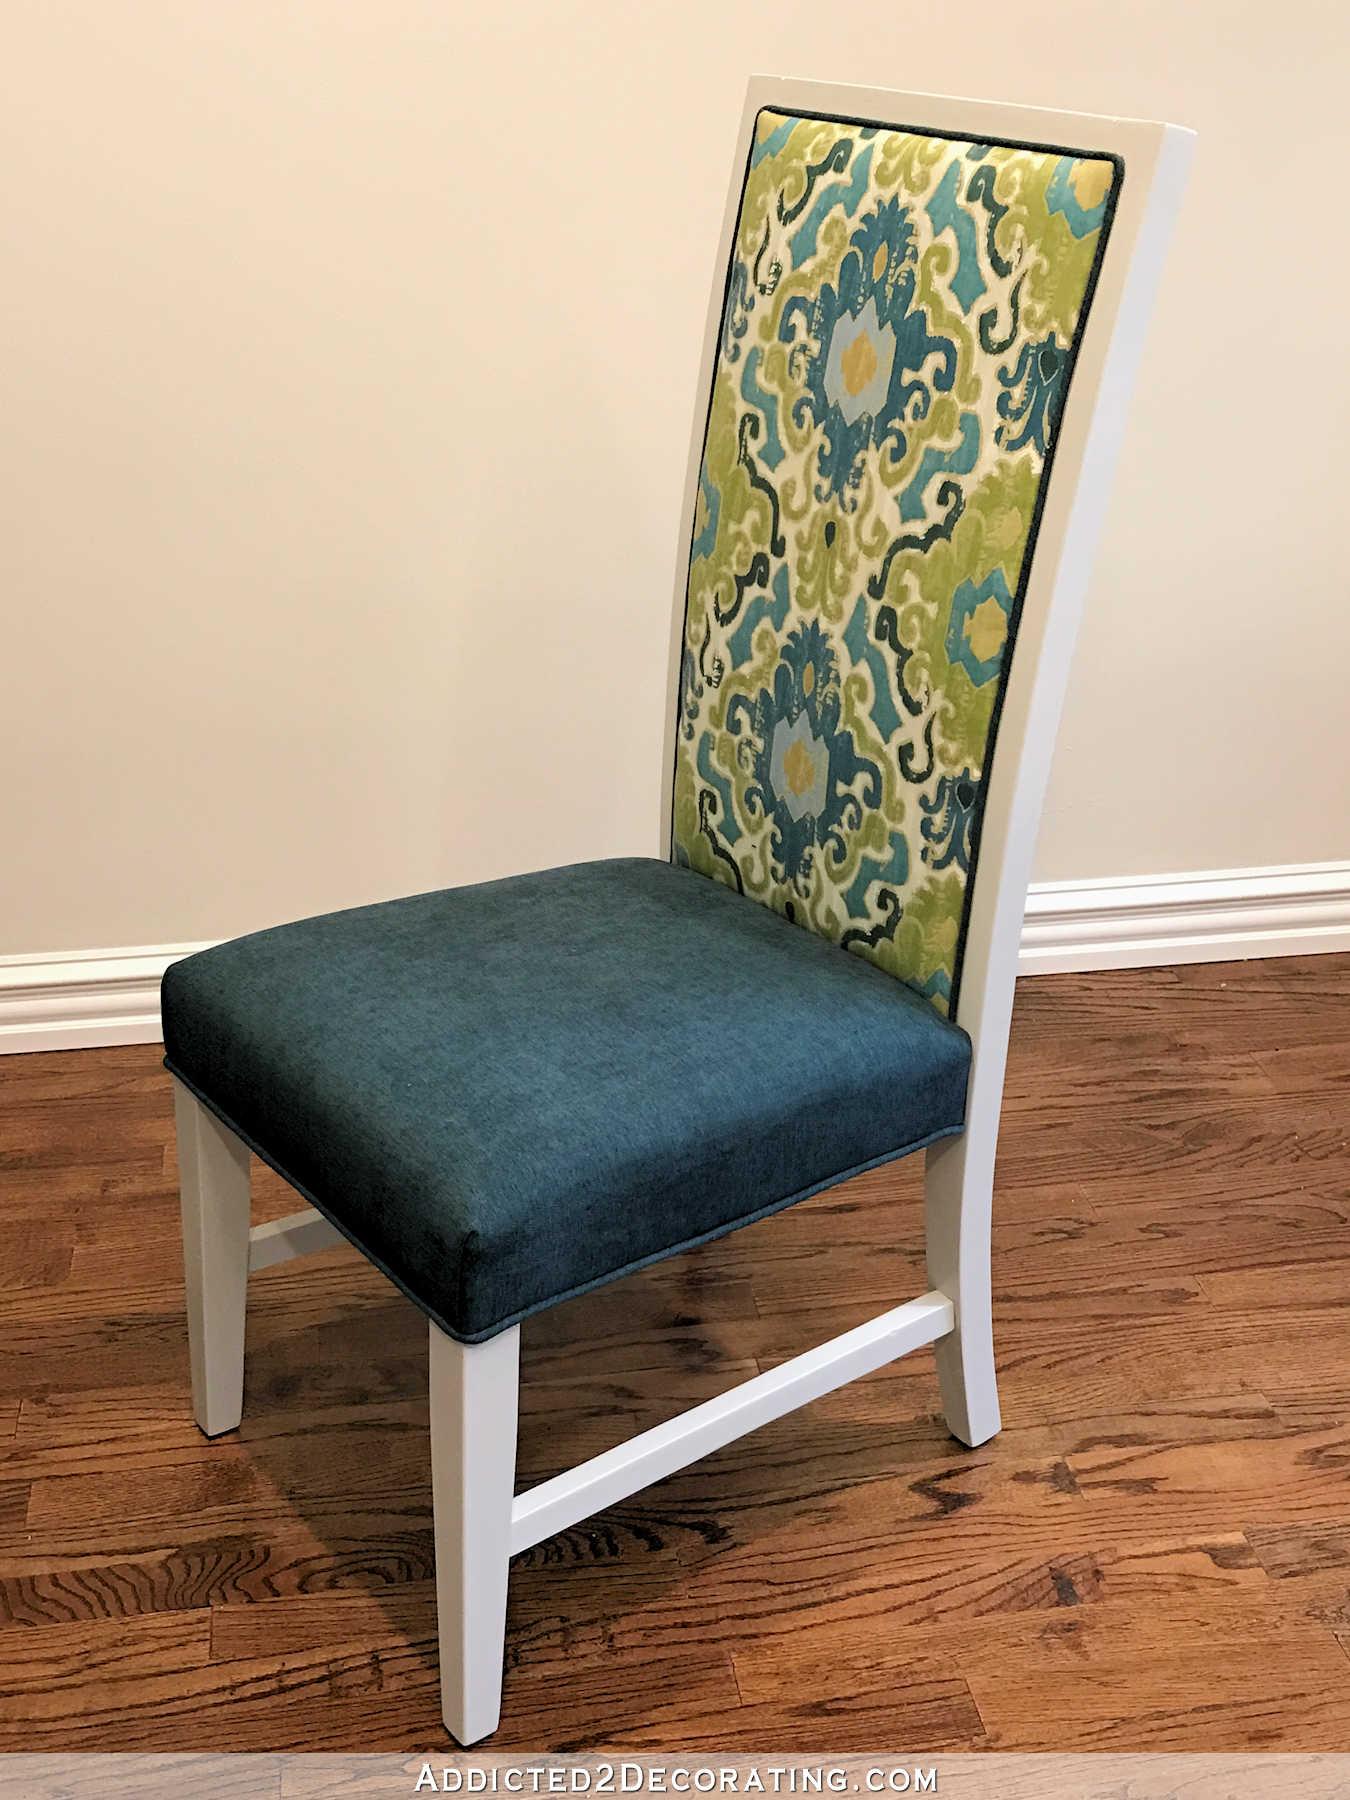
My dining chairs for the breakfast room are finally finished! Here’s a look at one of them after sanding, priming, and painting the frame, and then reupholstering the backrest and the seat. Here’s the front…

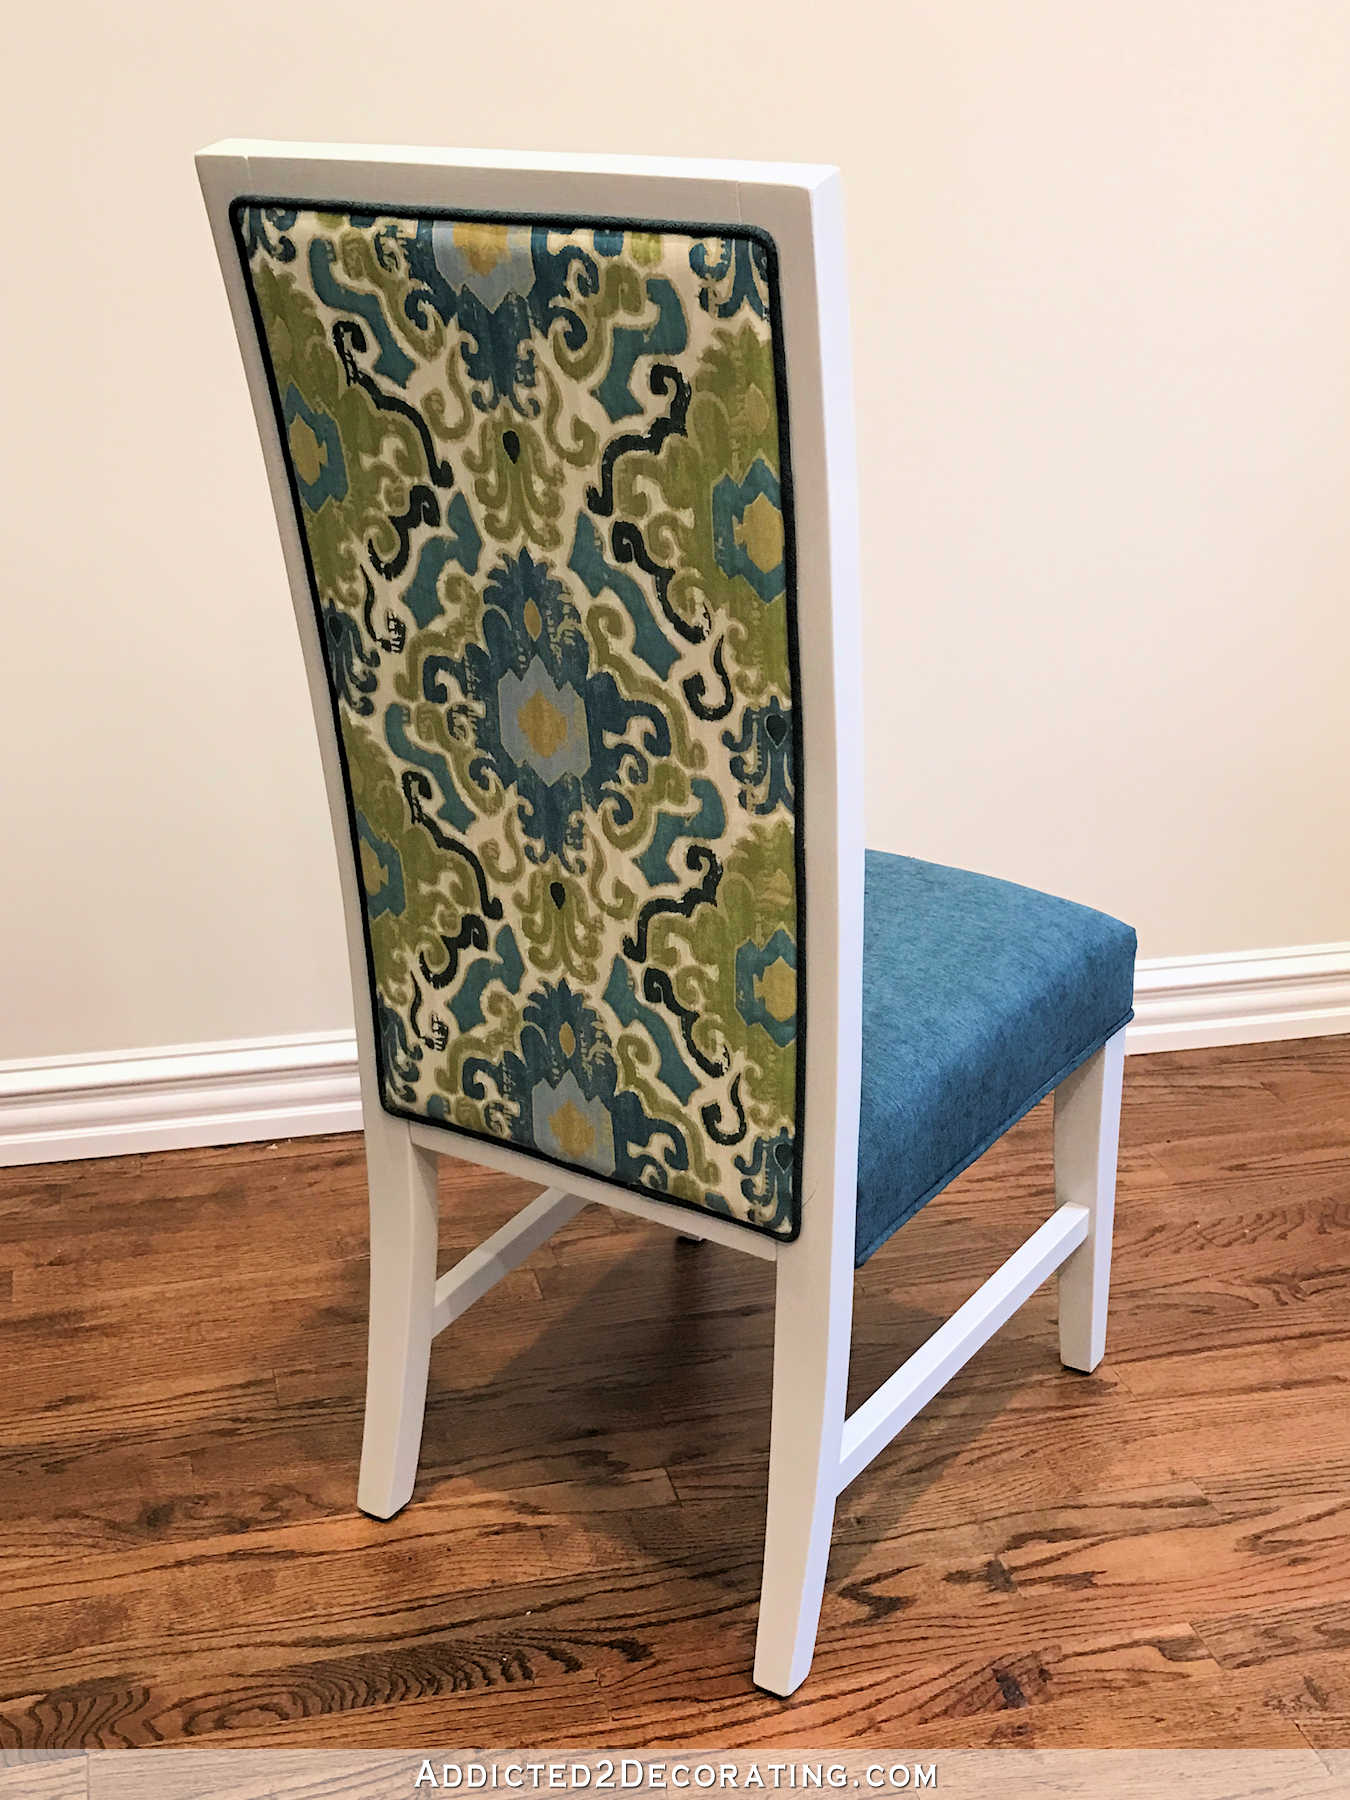
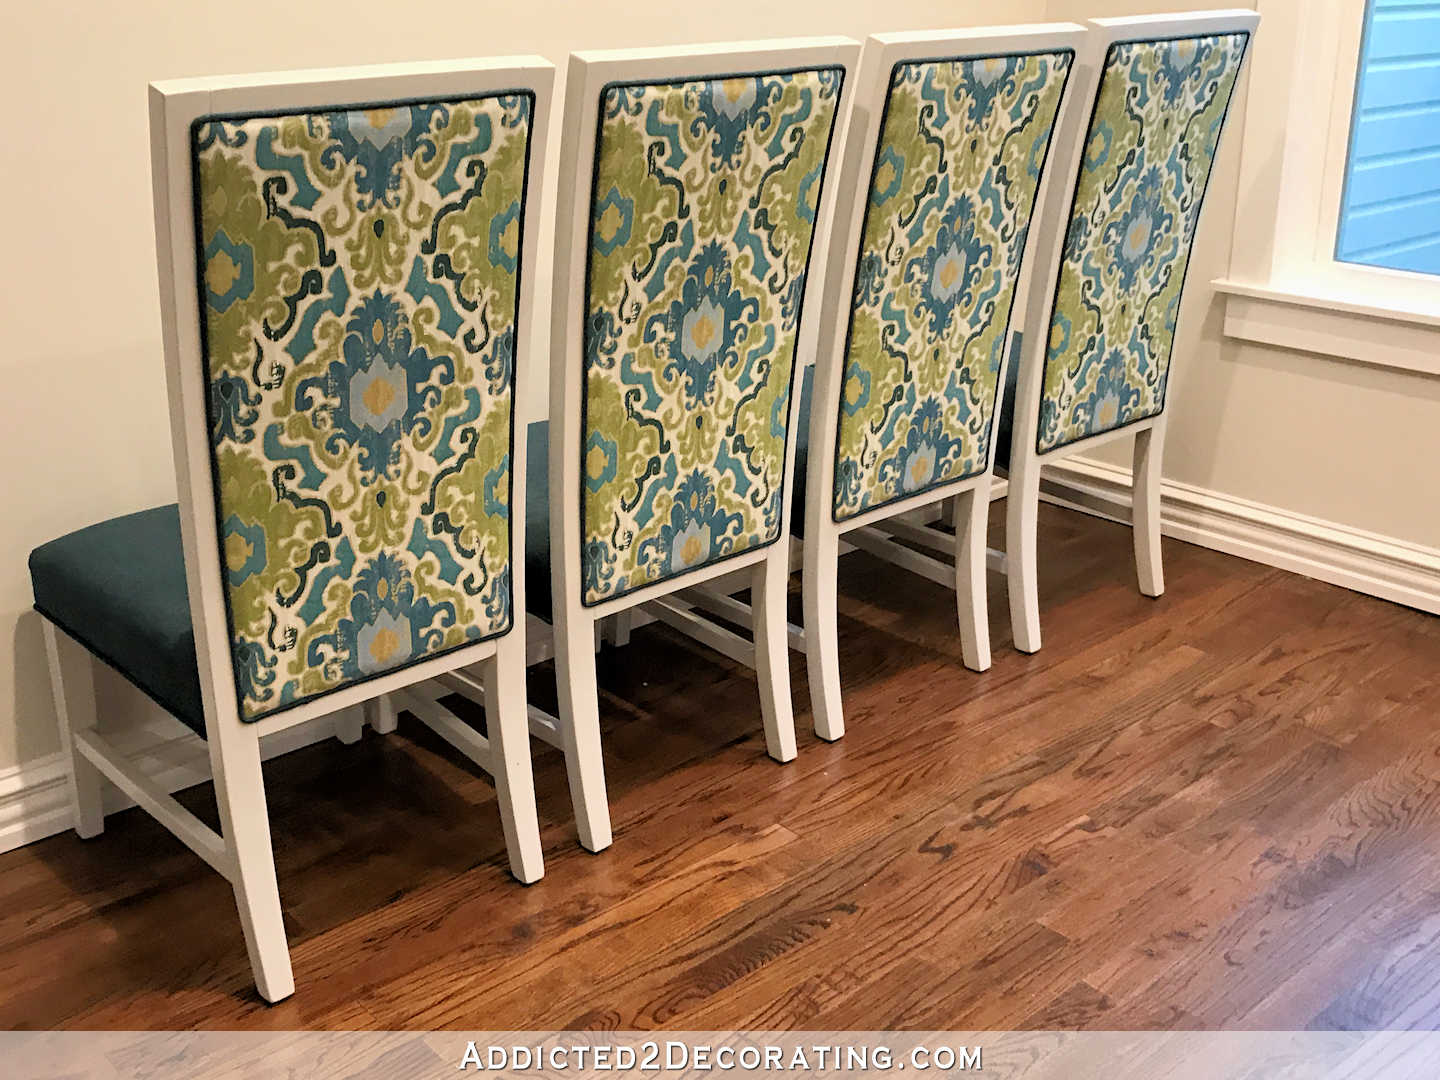
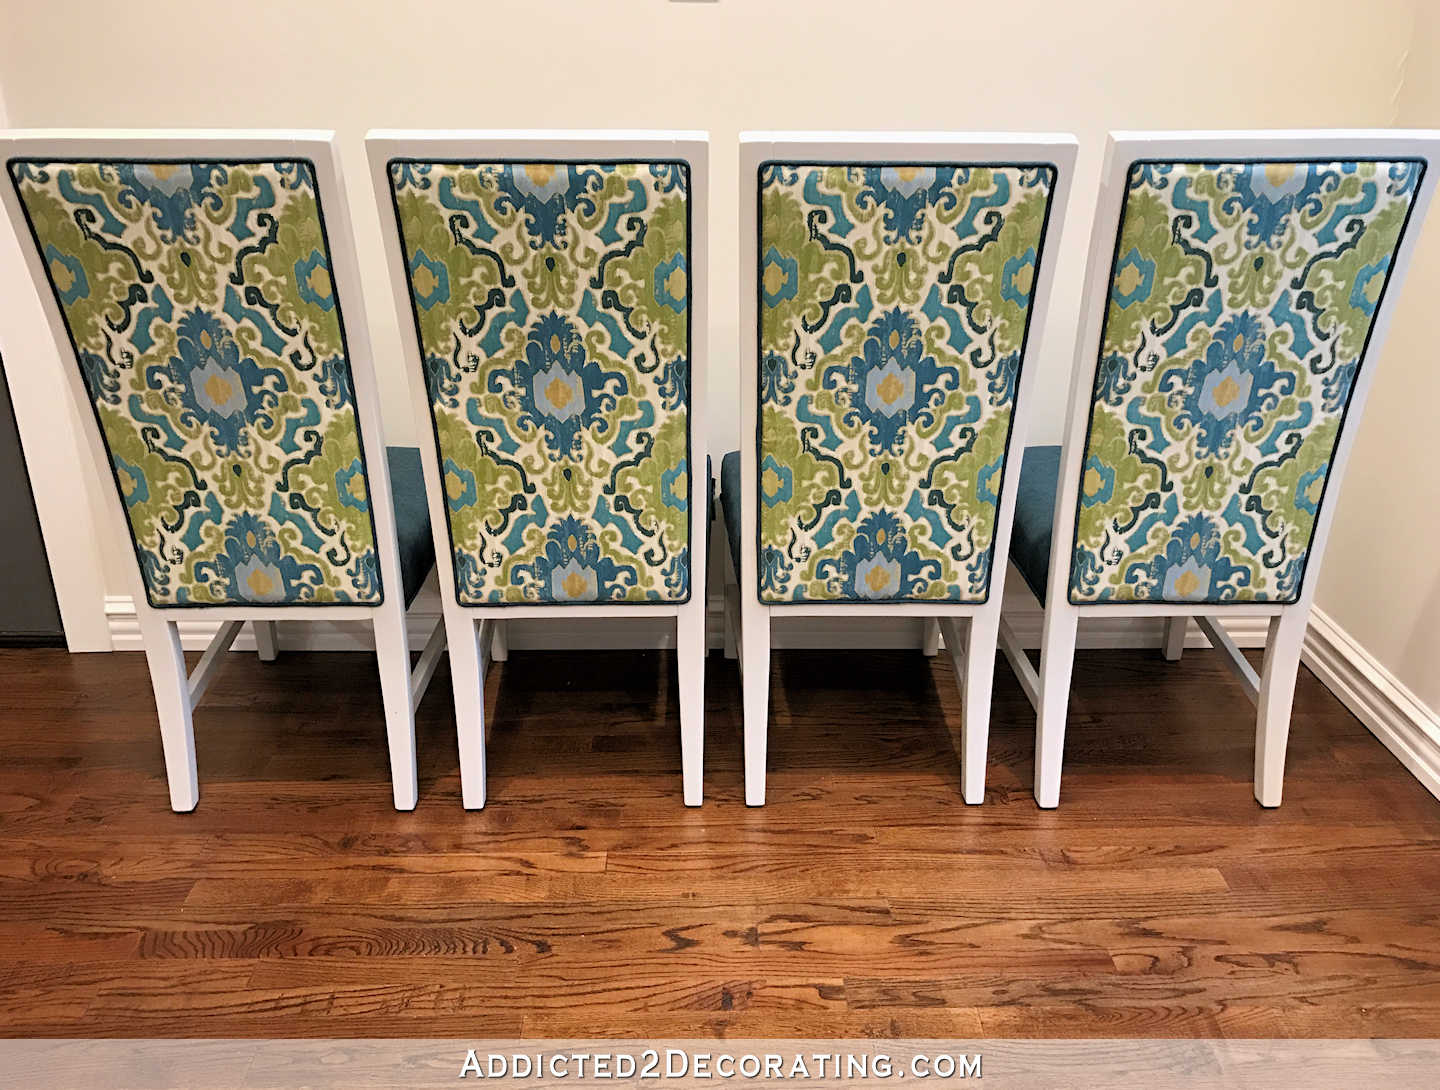
And here’s the back…
And just as a reminder, this is what these chairs looked like before…
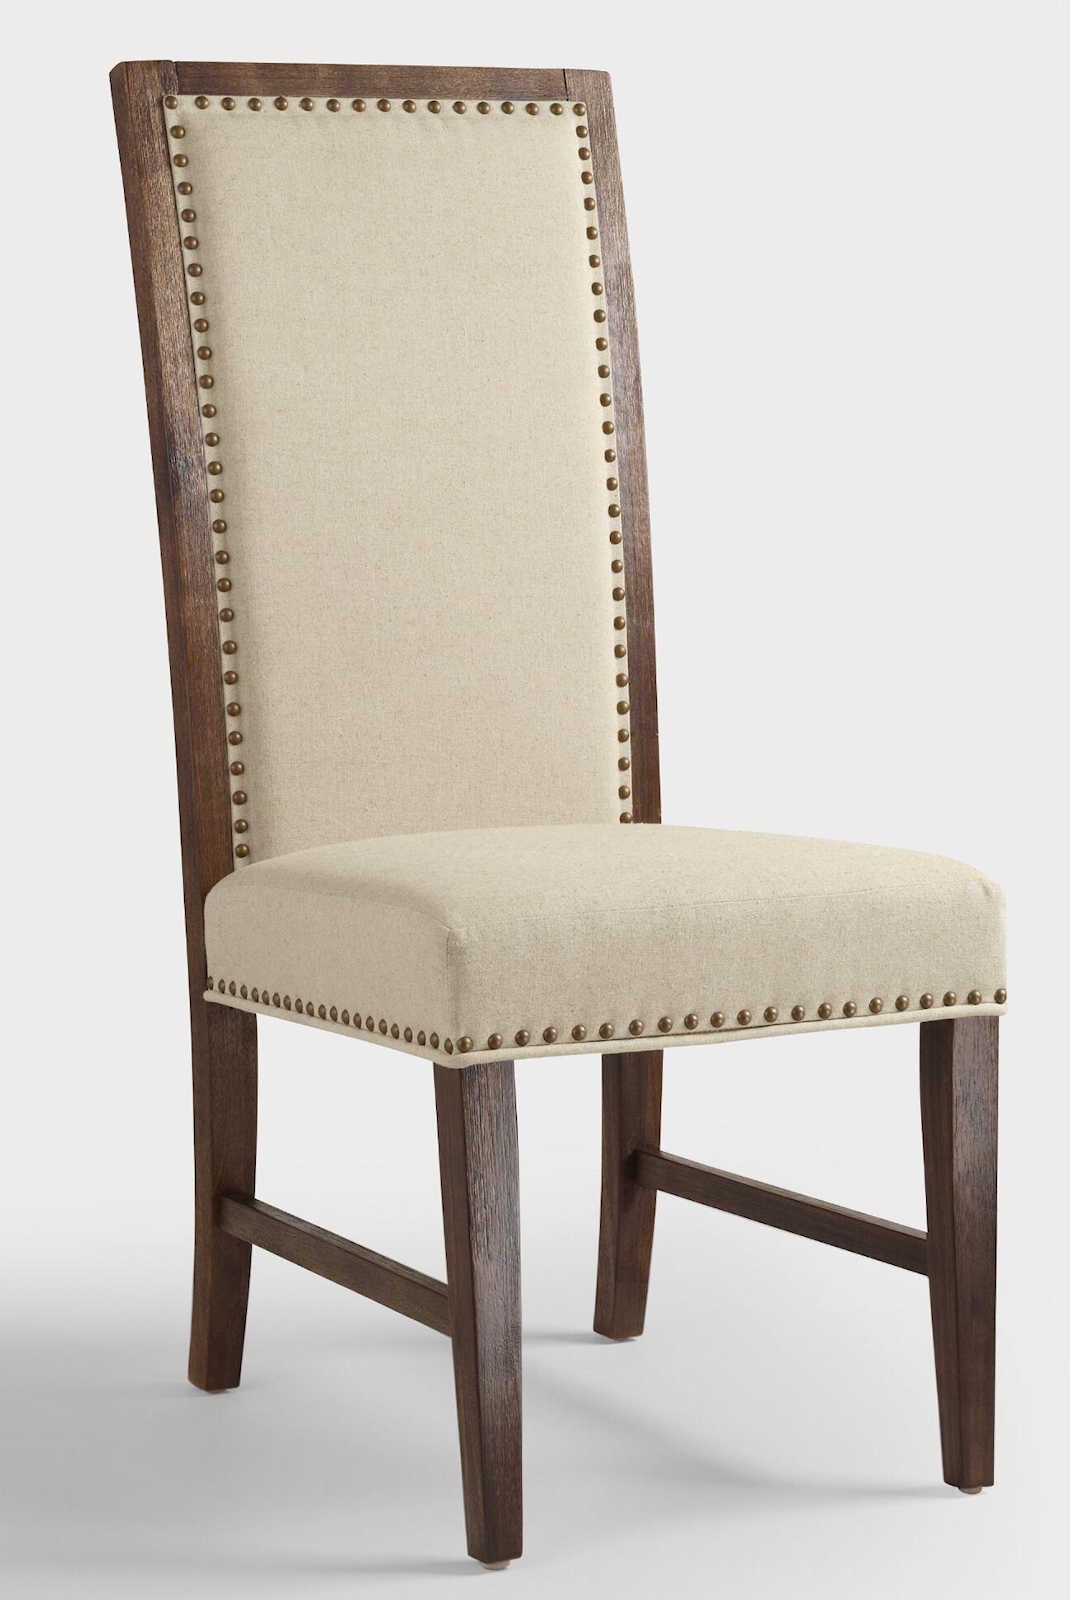
These are the Rustic Java Greyson Side Chairs from World Market, which I bought on sale. I think they were something like half price when I bought them (maybe less). It seems like I ended up getting them for about $60 each or something like that. The original was pretty, but very neutral and brown. That’s not really me. But the new and improved version is very much me, wouldn’t you say? 🙂

I painted the chairs a Sherwin Williams color called On The Rocks, which is somewhere between an off white and a super light gray.
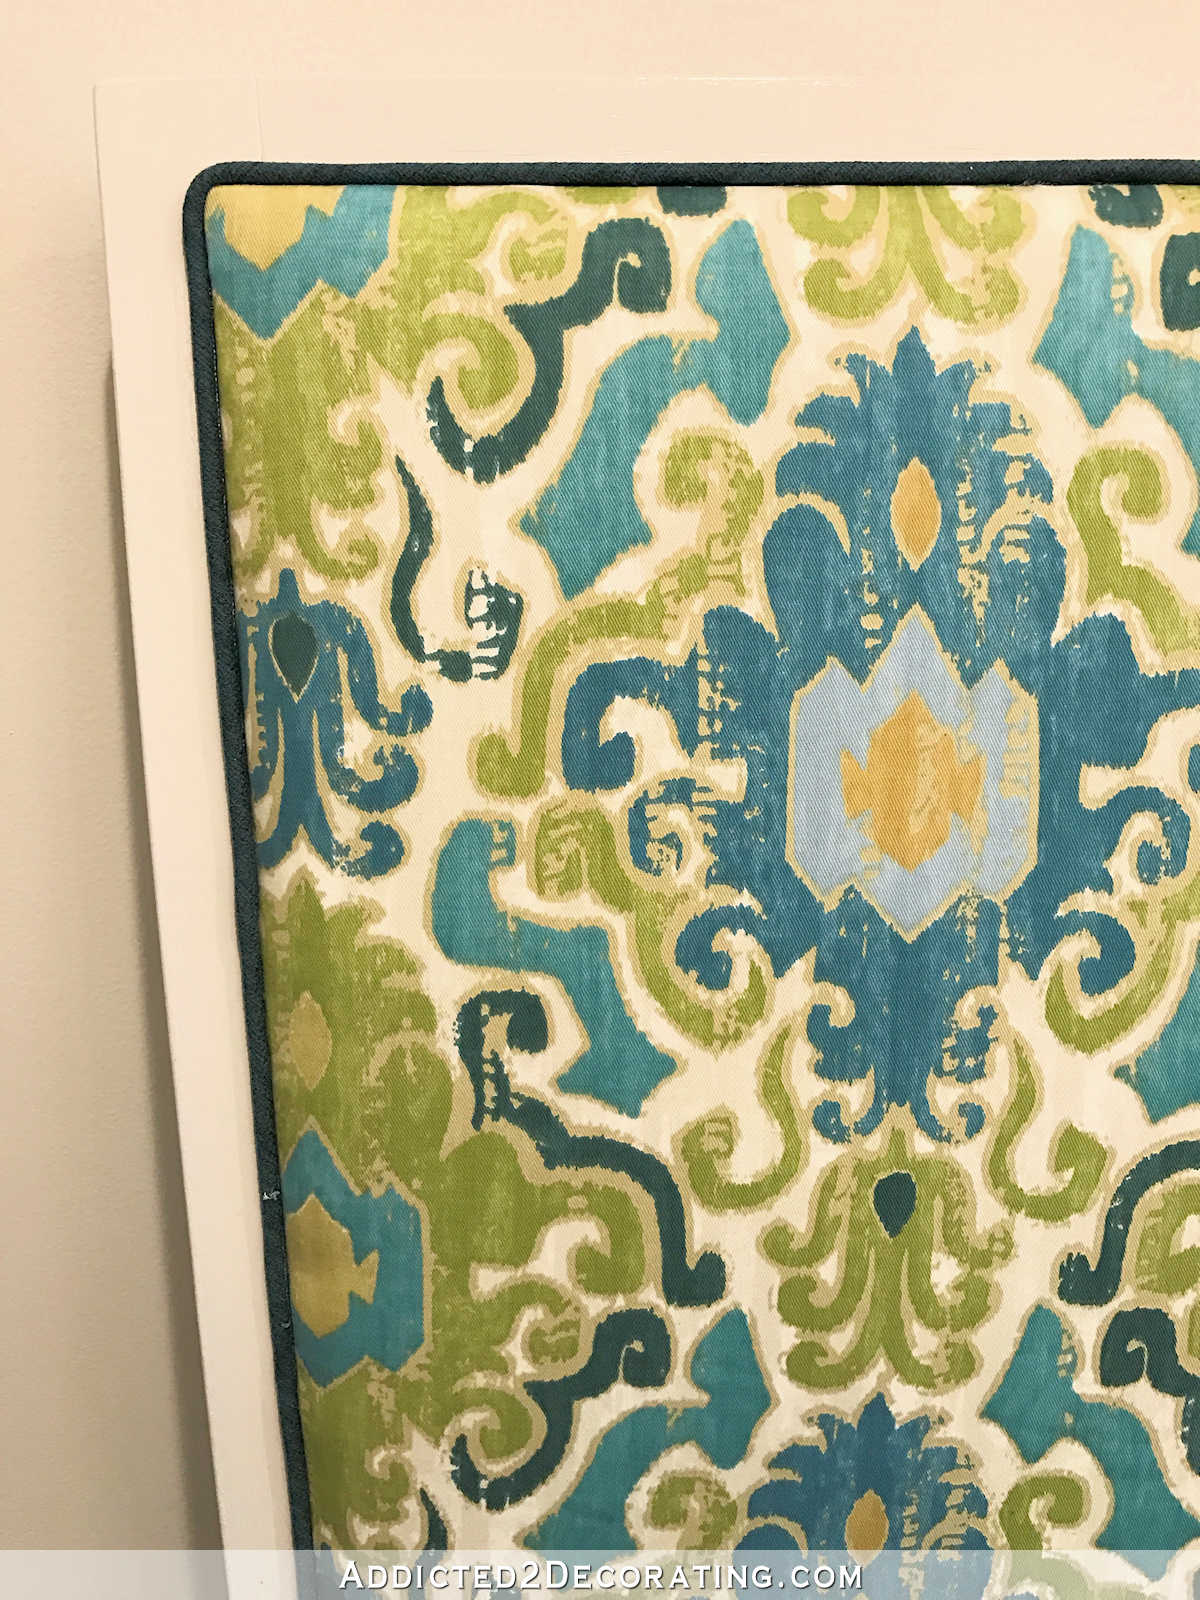
On the front and back of the backrest, I used this fabric from Joann Fabric, which was 40% off.
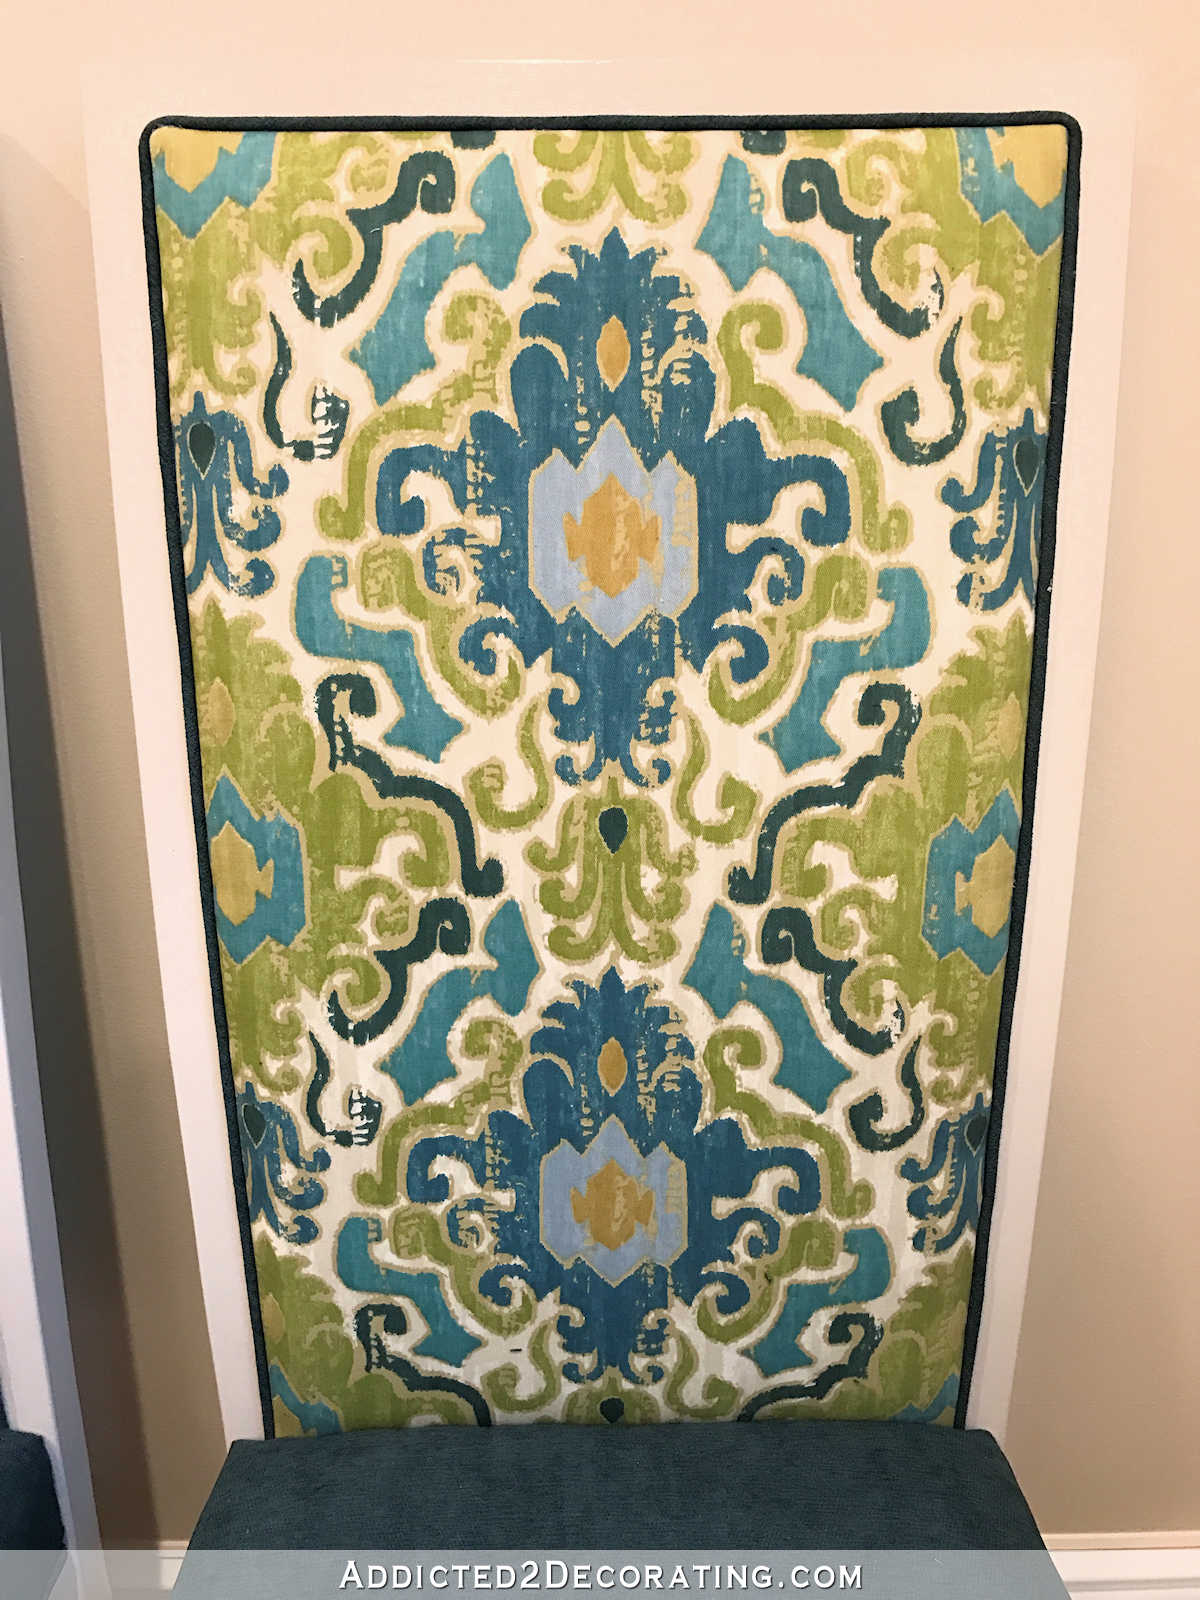
And for the seat and welt cord, I used this fabric, which I also got on sale.
I didn’t really take pictures for a thorough start-to-finish tutorial because all three upholstered parts of these chairs were basic wrap-and-staple (for the seat) or wrap-and-glue (for the backrest pieces). I mean, it took a while to complete four chairs, but the process was really very simple. But I do have some process pictures and hopefully some helpful hints to share.
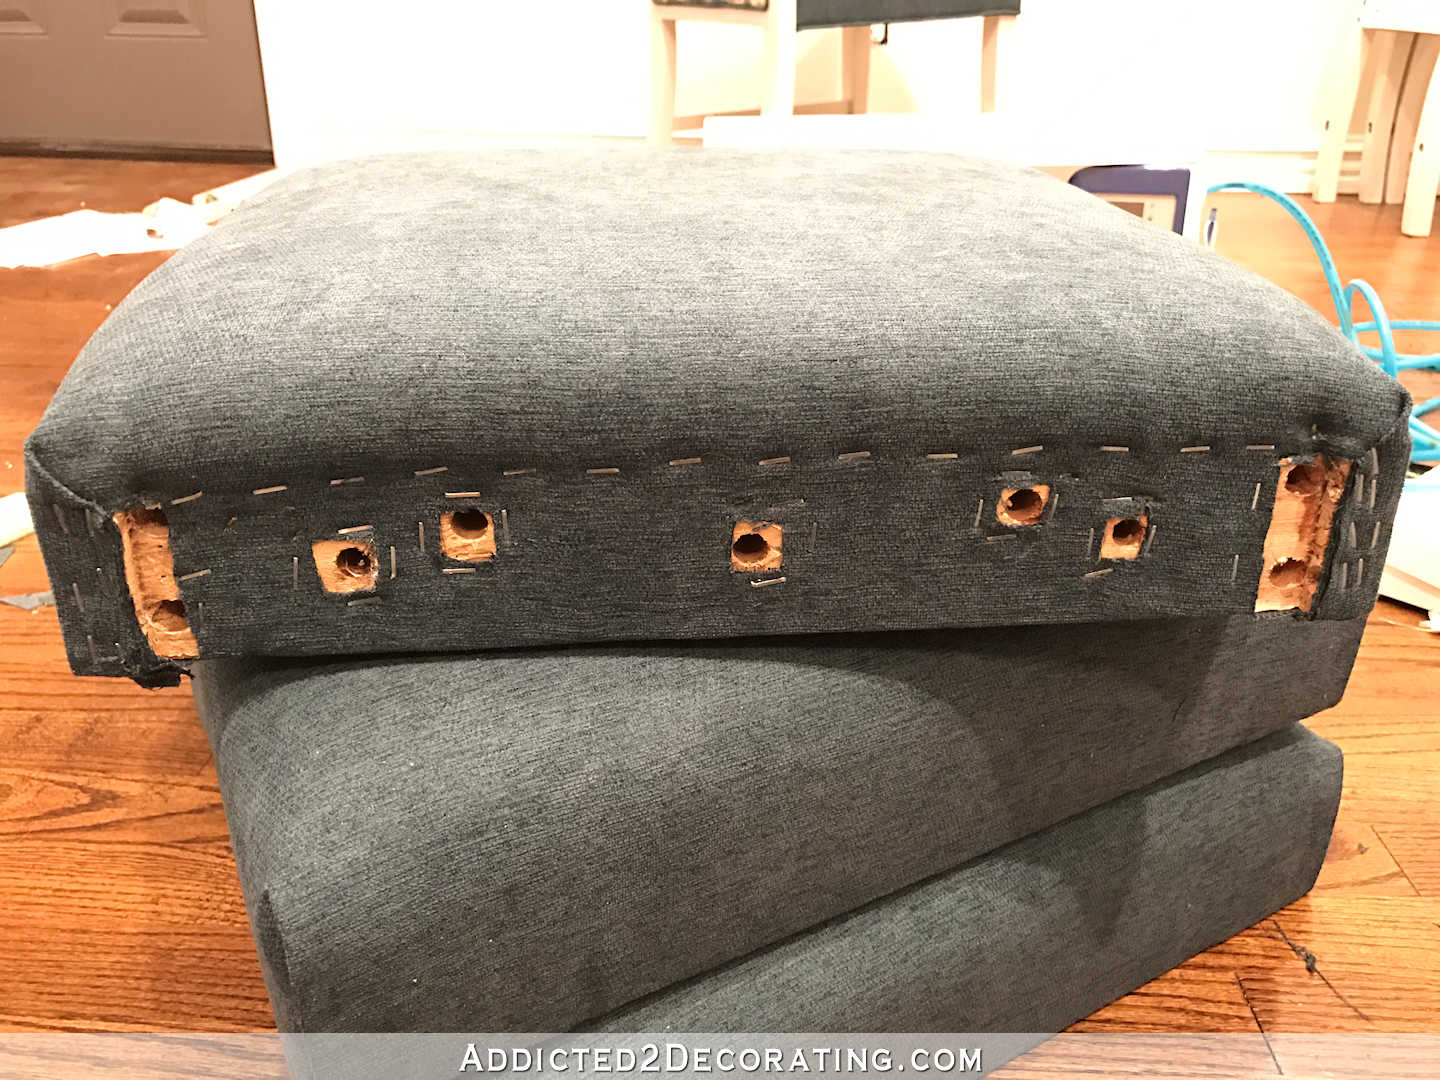
The back of the backrest was that thick cardboard that’s often used on upholstery. I just popped it out of the frame with a flat head screwdriver (it was secured with tiny little finishing nails). The front of the backrest was thicker 1/4″ pressed hardboard.
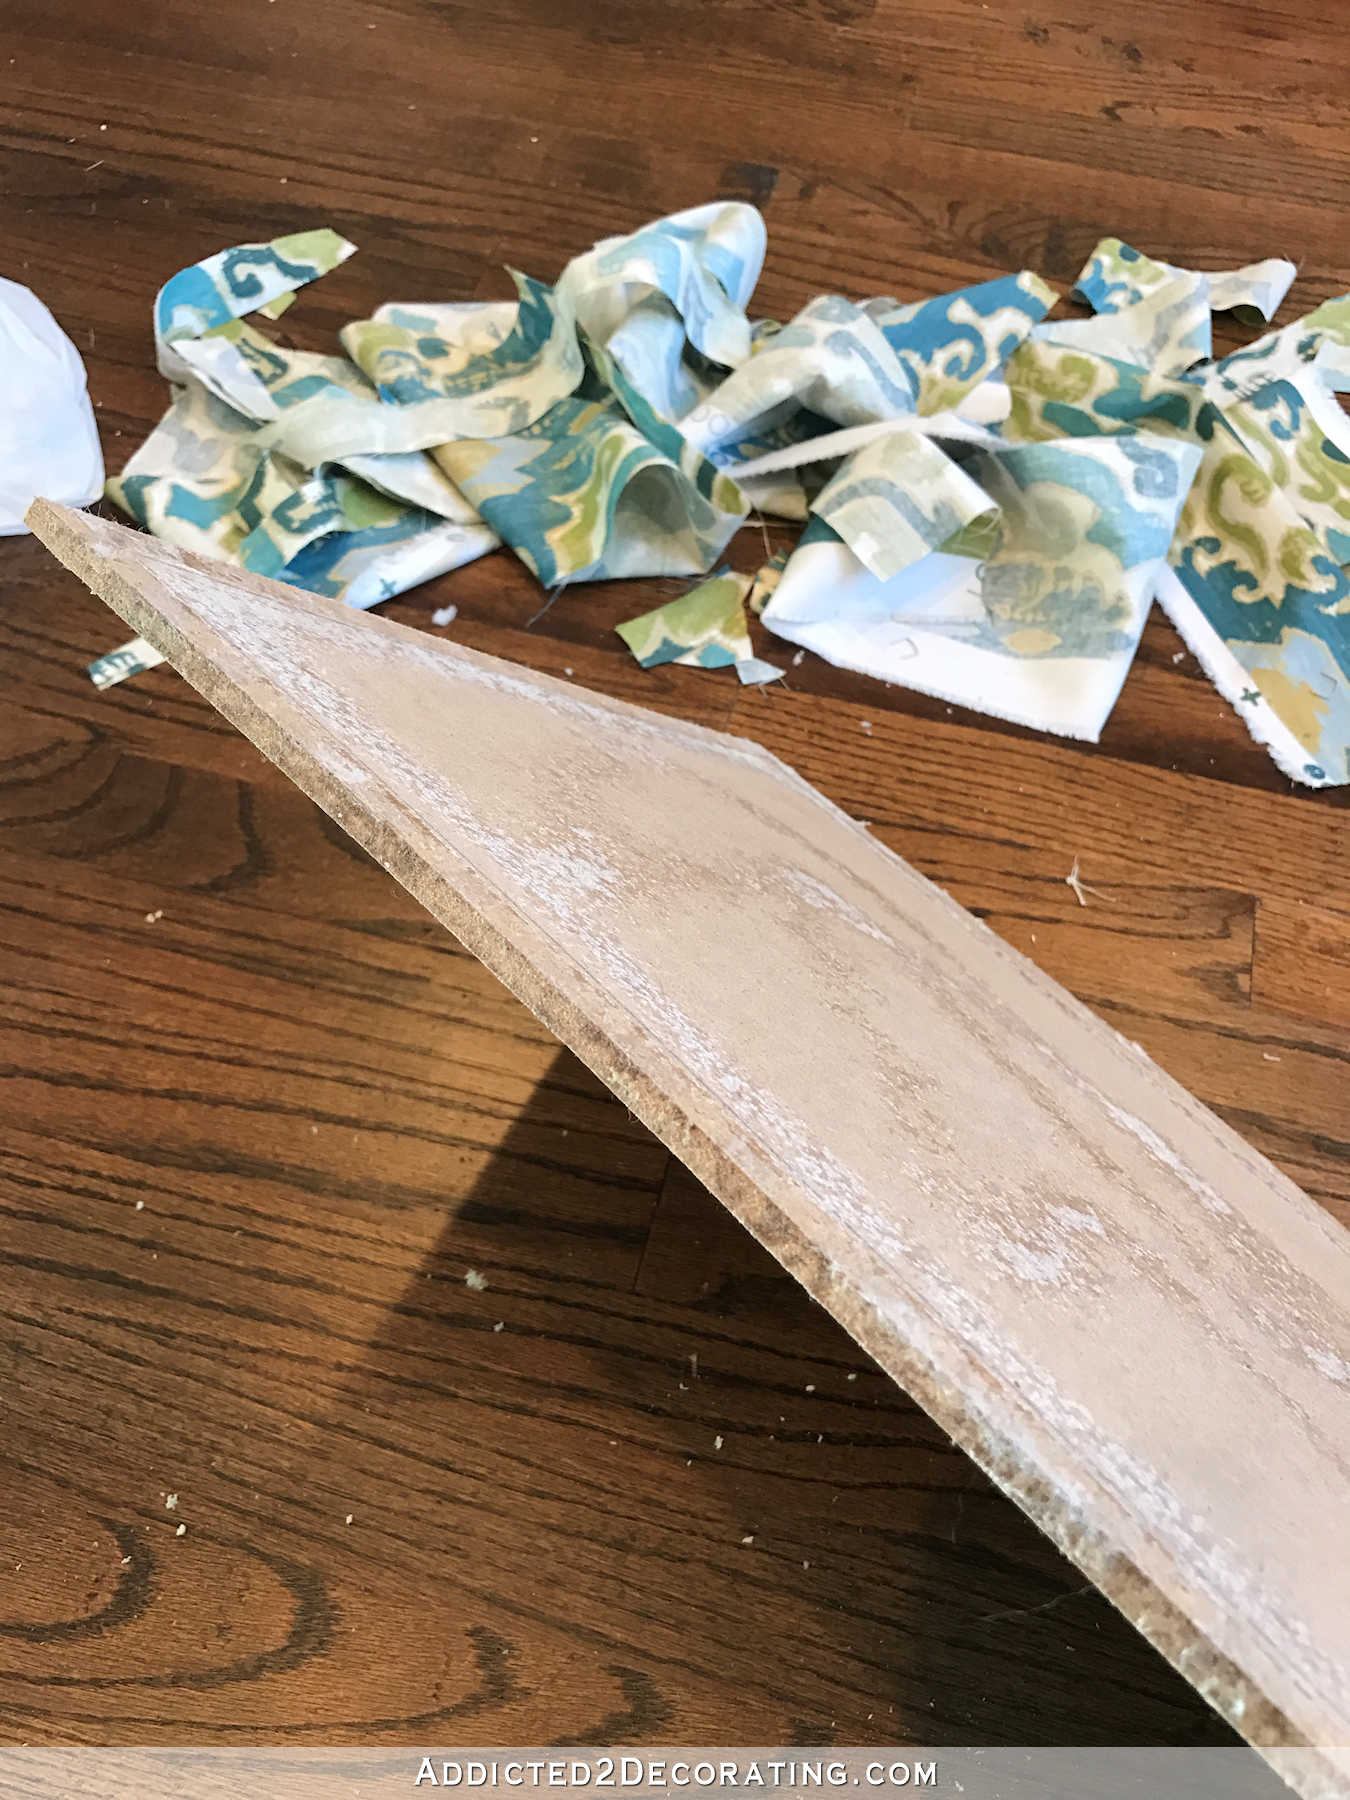
On both pieces, I just removed all of the fabric, batting, and foam, and then started from scratch. On the back, I just covered it with a layer of batting (adhered with spray adhesive), and then covered with fabric. On the front, I adhered 1/2-inch foam, a layer of high loft polyester batting, and then the fabric. I cut the batting so that it went right to the edges of the pressed hardboard. In other words, I didn’t wrap any of the batting around to the back because I didn’t want to add any width or height to the pressed hardboard, which fit snugly into the seat frame.
Upholstery projects with patterned fabric will always result in a lot of wasted fabric because you have to make sure the pattern falls in the same spot on each chair.

To attach the fabric to the backrest pieces, I used hot glue.
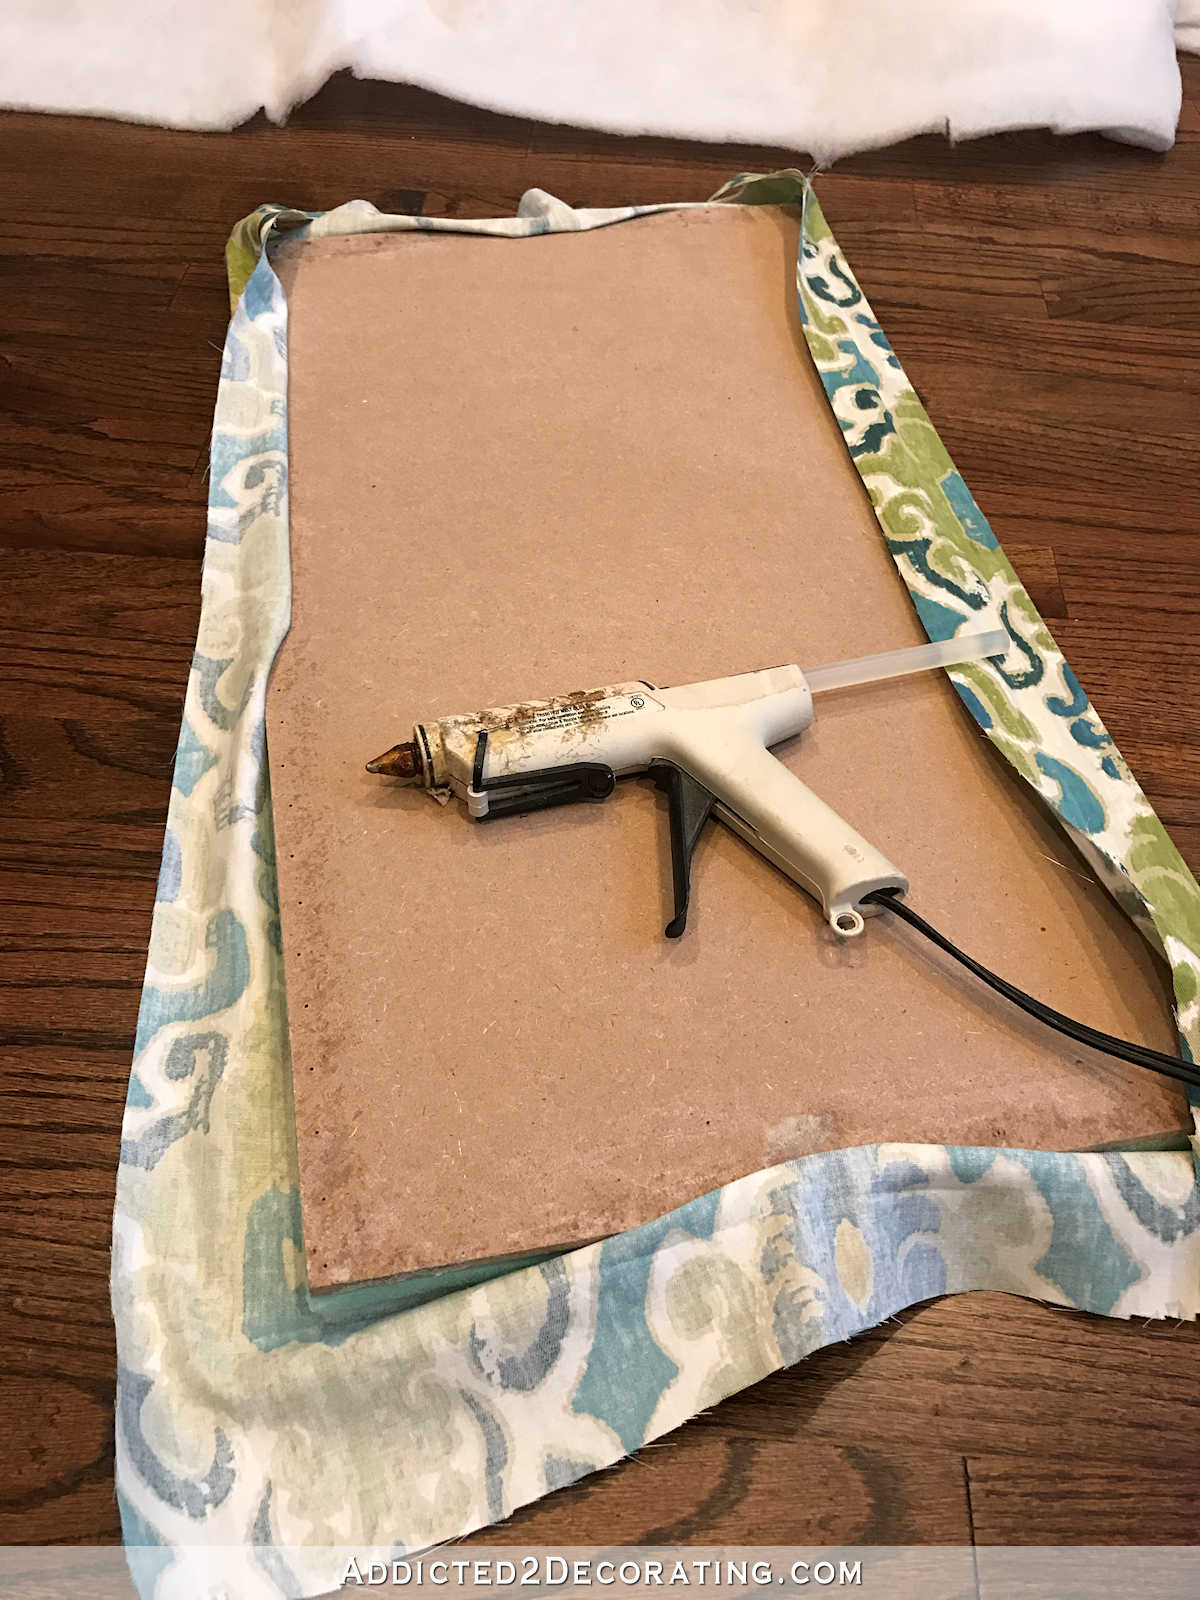
If you’re going to use hot glue for upholstery projects (which is completely acceptable on projects like this where staple guns won’t really work), I highly suggest getting a big, sturdy hot glue gun. Don’t try to do upholstery projects with those tiny glue guns you see for three bucks hanging in the checkout line by the register in the craft store. I got my hot glue gun and the big hot glue sticks at Home Depot.
The welt cord for the backrests was sewn just like regular welt cord. (Be sure to check out my tutorial for sewing continuous welt cord.) But then I trimmed off the excess fabric as close to the stitched seam as I could.

And then I glued it so that the stitched seam was facing down and hidden between the chair frame and the upholstered backrest.
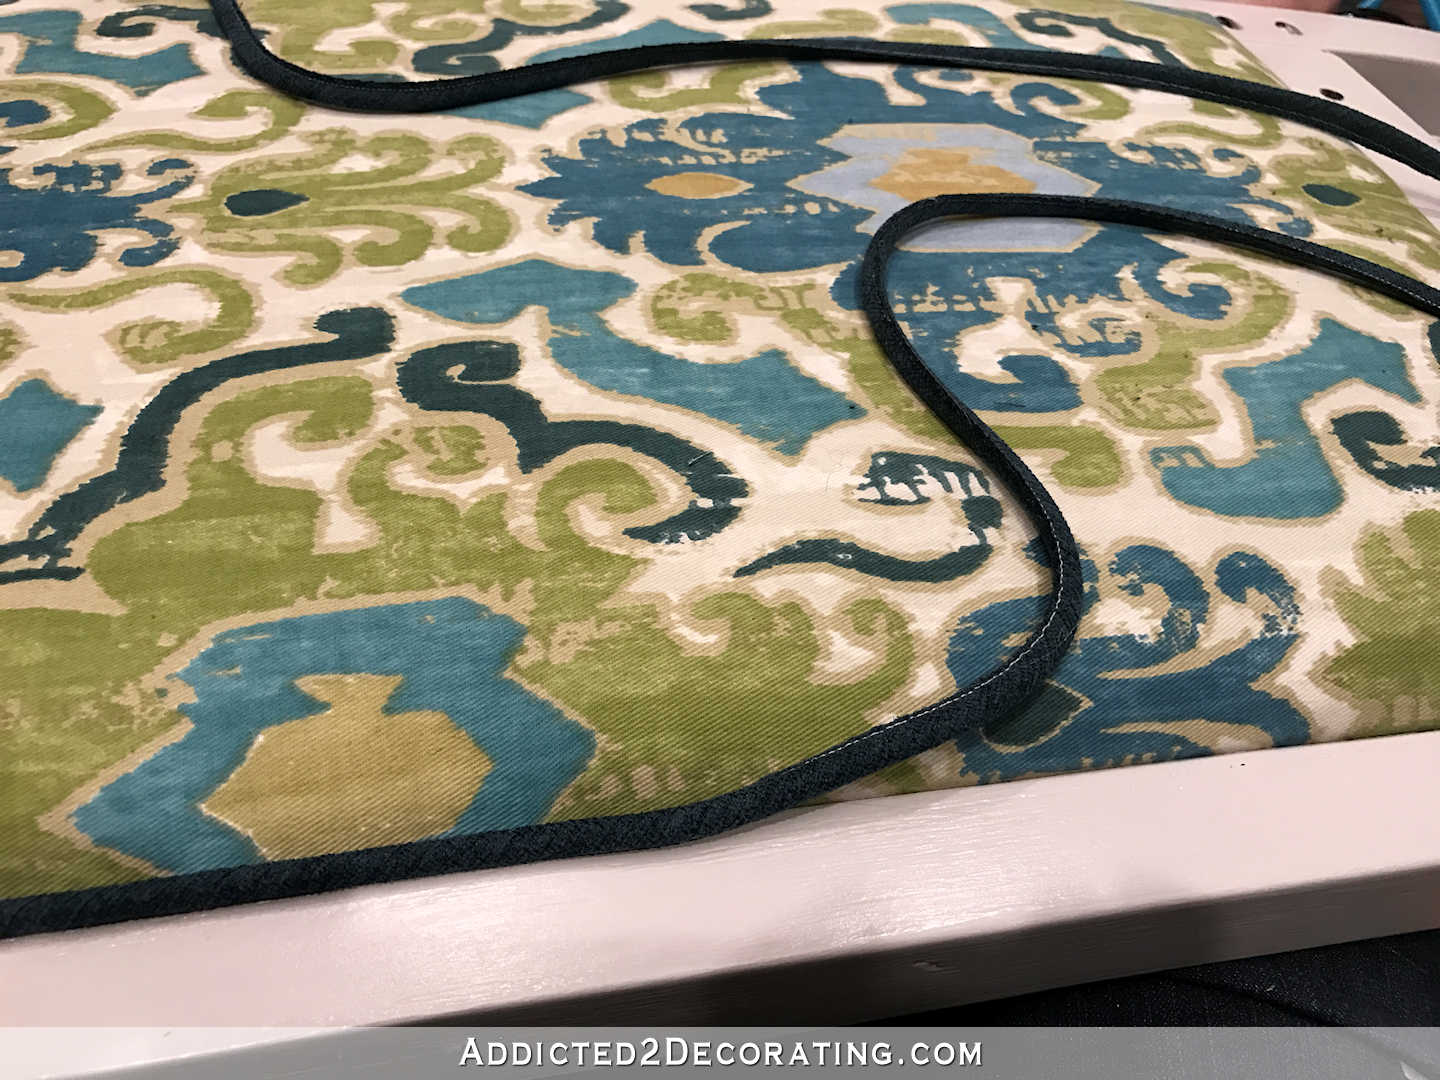
The welt cord wasn’t really necessary on the backs, and it actually looked nice without it. But I like contrast, and I also like welt cord, so I opted to use it on my chairs. You can see here the difference between the back with the welt cord and the back without the cord.
If you want the finished look of welt cord on your upholstered projects, but don’t want a high contrast look, you can always use the patterned fabric to create welt cord to go around the edge of the patterned fabric.
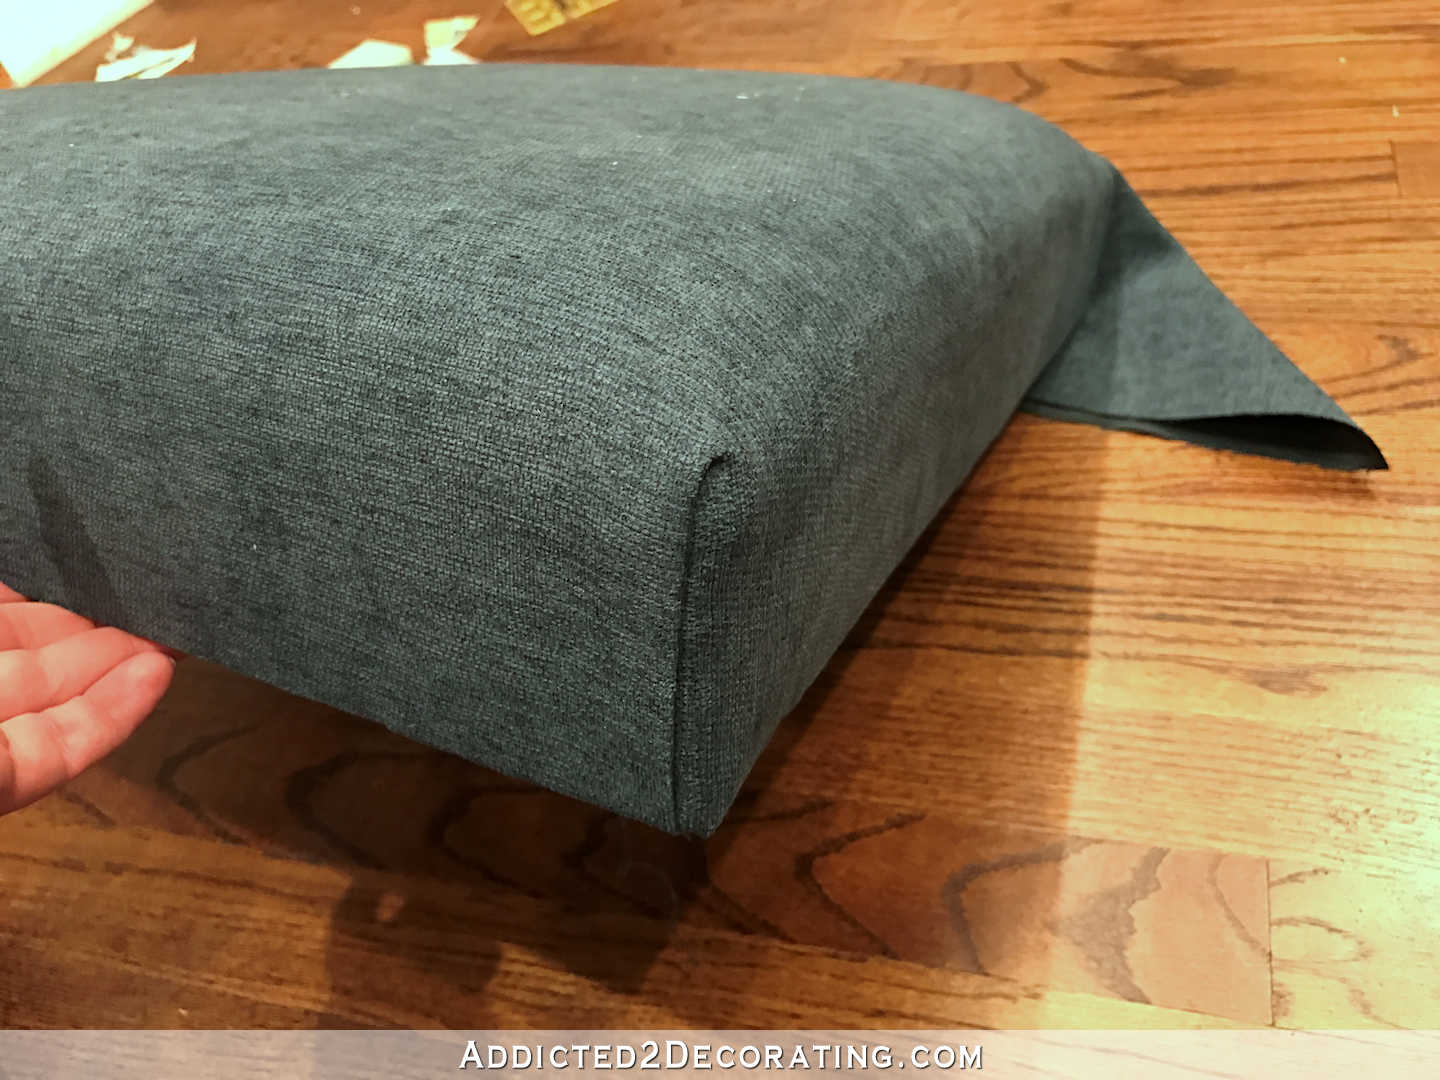
The seats were also just a wrap-and-staple, which is quite easy, but corners always seems to stump people. For the front corners, I stopped stapling the front edge about four inches from the corner. Then I wrapped the fabric from the side around to the front and stapled it into place.

And then I folded the front fabric so that the crease was right along the corner, and stapled it underneath.
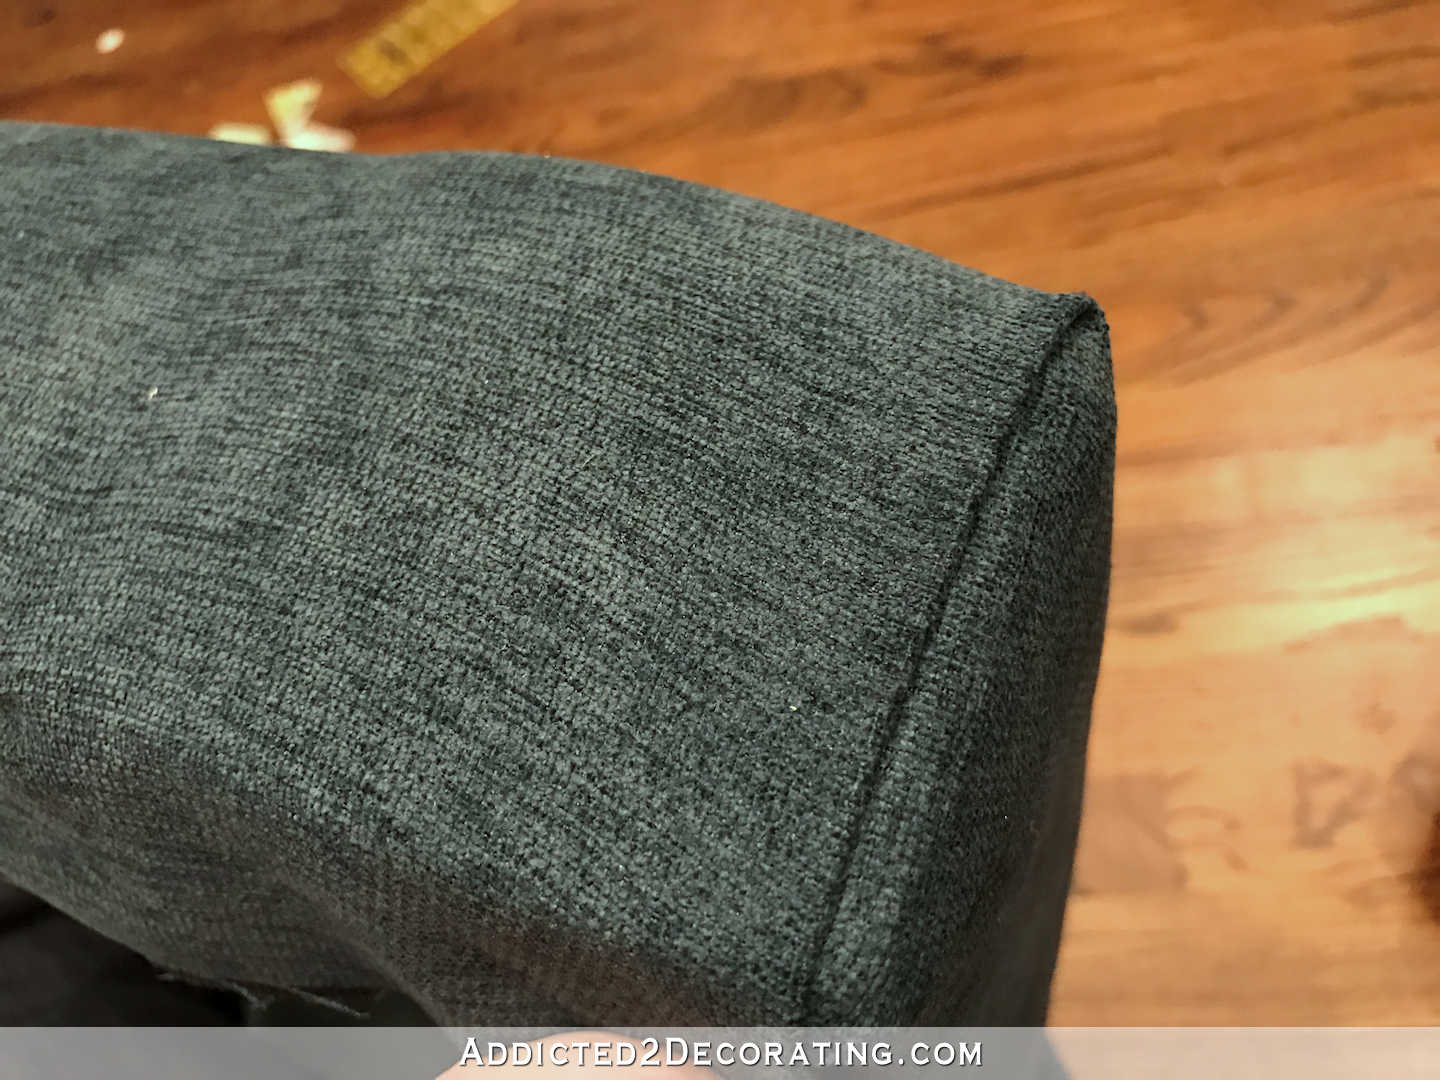
This created a very clean look on the front without having to sew a seam.
The backs were done in a way that is specific to this particular chair design. I had to staple around all of the screw holes and then cut away the fabric that was in the way.
It was a long process from start to finish, but I’m so pleased with how these turned out.
I finally have seating for my breakfast room. Now I just need a dining table. 🙂

Addicted 2 Decorating is where I share my DIY and decorating journey as I remodel and decorate the 1948 fixer upper that my husband, Matt, and I bought in 2013. Matt has M.S. and is unable to do physical work, so I do the majority of the work on the house by myself. You can learn more about me here.


Love them! The colors are perfect for your breakfast room and the chairs look outstanding on your newly stained floor.
Wow, you have really transformed these chairs into ‘Kristi style’ chairs!! They are SO you and I love the colors. They are going to be so perfect in your breakfast room.
I agree, very “Kristi style”. The other chairs that she had made, never seem like Kristi at all.
Lovely work! Please tell us what kind of staple gun you use… I feel like I’ve tried every one on the market and still have trouble. Love your blog!
Catherine
I have the one that comes with this air compressor combo set. It shoots the regular size staples, and I like to use that one for any type of wrap-and-staple projects, like chair seats, headboards, etc. I also have this narrow crown staple gun, which is necessary for upholstery projects where the narrow staples are needed, like on showwood chairs where you’re having to staple the fabric into a routed out channel inside the frame. But because the staples are so narrow, it’s not the best option for wrap-and-staple projects where the wide staples are better, and less precise placement is needed. I find them both to be invaluable and to serve very specific purposes for upholstery, so I highly recommend them both if you can afford both.
Very pretty!
Wow! I love them! Great transformation!
Now those beautiful chairs look like your style! Looking forward to seeing them around your table!
They are totally not my style, but they are ABSOLUTELY FABULOUS!!! Again, you inspire! I have a very old chair that begs to be updated, but I have been terrified to step up and give upholstery a try, but again, you push me to take that step and be brave and just go for it. You’re a hero when I get nervous about trying things and that little voice with the megaphone that says “you can do this!!”
Beautiful and thank you for the how-to on the front seat corners, you just improved my day!
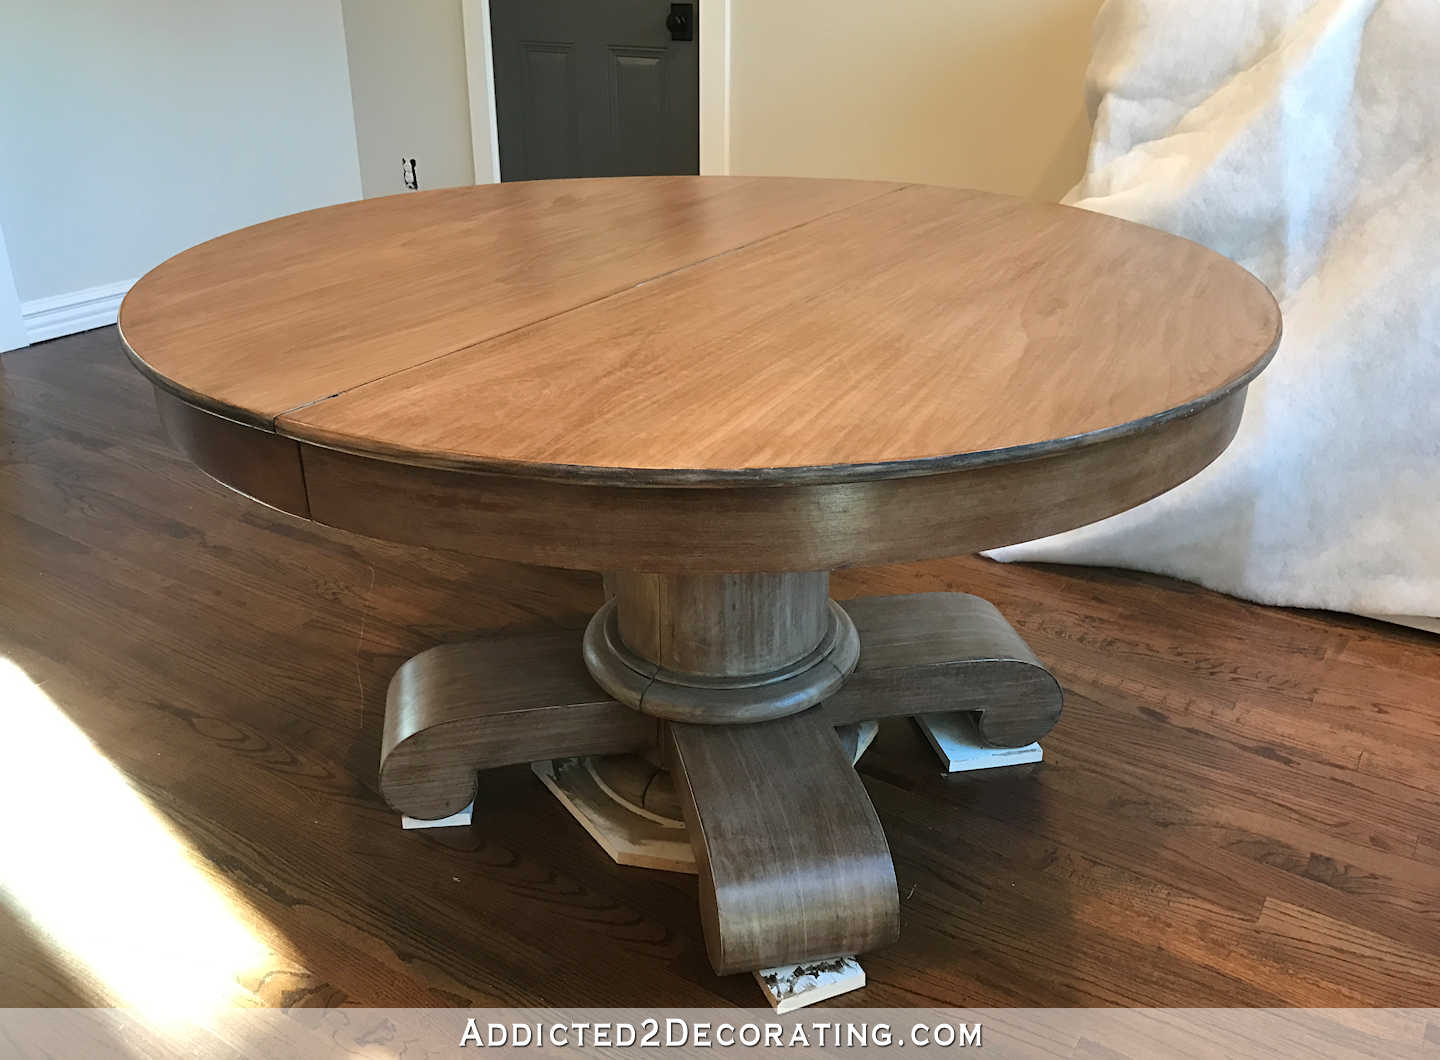
Wow, Kristi, those chairs look like a million bucks! Will you be adding skirted chairs for the head and foot of the table, or is the table going to be round? I still am curious to see what that cerused table would look like in that room…
Kristi is using a round table. She has showed it in previous posts.
They are gorgeous! Thanks for sharing.
Definitely you 🙂 Love them!
Glad you are back in your groove! As soon as I saw the picture all I could think was that they look very “Kristi”! (and I mean that in a good way 🙂 )
Very very classy. You did an awesome job!
Thumbs up!!! Thank you for all your great tutorials!
I think they turned out well too. Very nice! Did you have to sand them first before painting?
I did have to sand them because these particular chairs are made to look very rustic in style, and so the wood was pretty rough. I didn’t want that rough, rustic look, so I used my rotary sander with 150-grit sanding discs to sand off almost all of the rough texture.
Chairs are beautiful.
Those colors look fantastic with what you have going on in the room. Very stylish. I love the seat color too – it’s such a deep teal without being too green.
Beautiful chairs!
Do you no longer have the ceruse table you did? I don’t recall now what kind of base it had, but am I correct in thinking it didn’t have the heavy look of the base on the round table you plan to use?
I just looked up the cerused table, and I see why the style of the base wouldn’t work with your chairs.
Beautiful, Kristi! I just love all those colors.
Love love love these! Love the colors, patterns, etc. Can’t wait to see them around your table 😉
Love these! Kristi do you have atutorial on how to paint chairs that have a stained finish? Not sure on primers, type of paint etch…do you spray them? Or brush? I have two arm chairs and 4 side chairs that I am considering. Thanks.
I don’t have a tutorial for chairs specifically, but I pretty much paint all furniture, cabinets, chairs, etc., the same way — sand, prime with Zinsser oil-based Cover Stain primer, sand with 220-grit sandpaper, paint with latex paint (paint conditioner optional), and then topcoat if needed. On these chairs, I used General Finishes water-based poly in a satin finish. I generally suggest spraying chairs, but I actually used a brush to do all coats (primer, paint, topcoat) on mine because on the days I worked on them, it was very windy outside.
I share more details about painting cabinets and furniture here: https://www.addicted2decorating.com/how-to-paint-cabinets-with-a-paint-brush-and-get-a-near-perfect-finish.html
The chairs look very professional. The piping really makes them.
Kristi,
These look great!! Much much better than the brown. I hope to begin thrifting again soon and am trying to develop “Kristi Vision.” I tend to look at things as they are and pass on them, rather than think–now with some new paint here, and a little bit of paint there, this could be something really good!
Love the way they turned out, great job matching the pattern across the chairs! I’m just wondering why you chose to replace the batting and foam on new chairs?
The batting that was on the back was very thin and stuck to the fabric, so it tore when I took the fabric off. The batting on the front was also thin and tore. The foam on the front was actually fine, and in very good condition, but they had cut it about 1/2-inch in on the sides and top, stopping short so that there was no foam underneath the nailheads. I wasn’t using nailheads, and wanted the foam to go all the way to the edges. Fortunately, everything on the seats was in good condition after I removed the seat fabric, so none of that had to be replaced.
Beautiful!!
It looks like you applied welt cord to the bottom edges of the seats also. No?
Yes, the seats also have welt cord. That was applied the standard way — I left the excess fabric and used that to staple the welt cord on the bottom of the seat.
thank you for answering that question..I had the same thought as Mary. LOVE the chairs. Makes me want to redo mine. AND thanks for showing me the trick to doing corners.
Great job! I don’t know how you can do so much so quickly. And thanks for the ‘trim off the welting’ tip…it never would have occurred to me and it’s so smart!
Awesome job Kristi. I liked your tip for the corners, even though I had to read it like 4 times to understand! I kept thinking you were stapling the front fabric in the fold, and “Huh? how do you do that?” Then I read it over and over, and realized you meant stapling to the underside of the seat! DUH! I need a nap! 🙂
They are fabulous!!! Loving everything about them. You make these jobs look so easy. For someone with your talent, I’m sure it is. Can’t wait to see more…
Kristi,
These are absolutely gorgeous. And, they truly look like your style. I love them. I can’t wait to see more:) I am just blown away by these chairs! I am still smiling!
JoAnne
These turned out looking professionally done! I hope that you are able to make the table work with them! I really miss the playful watercolor floral fabric. And the winged chair you did. I am still mourning their demise…..
But, these look like “you”
They are beautiful – and so you! I love that there is someone else in the world that changes their mind daily!
I love them and when I think of your style, Kristi, this is exactly what I picture- love, love, love them!
Love them and they look fabulous on the floor. Once again a truly professional job. It’s all starting to come together.
My frugal self says, “What was wrong with the chairs before?” but my designer self says, “YES! YES!! YES!!!” What a nice job!
Love the chairs! Recognized the fabric immediately – I built my kitchen/dining room seating out of the same fabric last year! Reading your blog is one of the things that has inspired me to go a little funkier with color/pattern than I have in the past. Too funny that we picked the same fabric for the same purpose. Here’s a pic of my rolling storage cube dining seating (please note: photography is NOT my strong suit): https://www.pinterest.com/pin/168251736060374358/
I love your rolling storage cube seating! And that fabric looks so good on them. How funny that we chose the same fabric for our dining seating! 😀
Gorgeous, my favourite colours too! Well done Kristi
Seriously AMAZING! I love them. Great job!
I’m not planning on it.
OMG Kristi!!!!
Love, Love, LOVE these Chairs!!!! My daughter has the same ones. (in the original state of course) I sent her a picture of what you’ve done and she liked your make-over as well. She and her hubby aren’t exactly DIYers, so who knows if they would ever recover their own chairs, but they have an almost 18-month old, and another one on the way (maaaybe if I helped???)
At any rate, I’m confused as to why you started from scratch with the new batting and foam. Why not just re-use the existing foam and batting, especially since it was new? I once took a upholstery class and the teacher’s recommendation was to re-use if they were in good shape. Am I missing something her? Were they ruined in the process of removing them? and the expense to replace just wasn’t that much?
I also wanted to apologize for not commenting in such a long time. I have problems with my computer freezing/acting up on your site, so hadn’t visited in a long time. As I was trying to figure out where I had left off, i happened upon a picture of your (possibly finished) breakfast room, and I was BLOWN AWAY! WOW!!! You have really made some changes!!! LOVE the new floors, and most of the other things you’ve done. I’m SO in awe of you! When I saw the picture of your table and new chairs, I quickly exited, because I wanted to see all the work that led up to it first! Ha Ha!! So, I went back to sequentially read everything. Now I’m getting close!
So I read all the comments and now I know why you didn’t re-use the foam and batting.