How To Build A DIY Console Table (It’s Finished!)
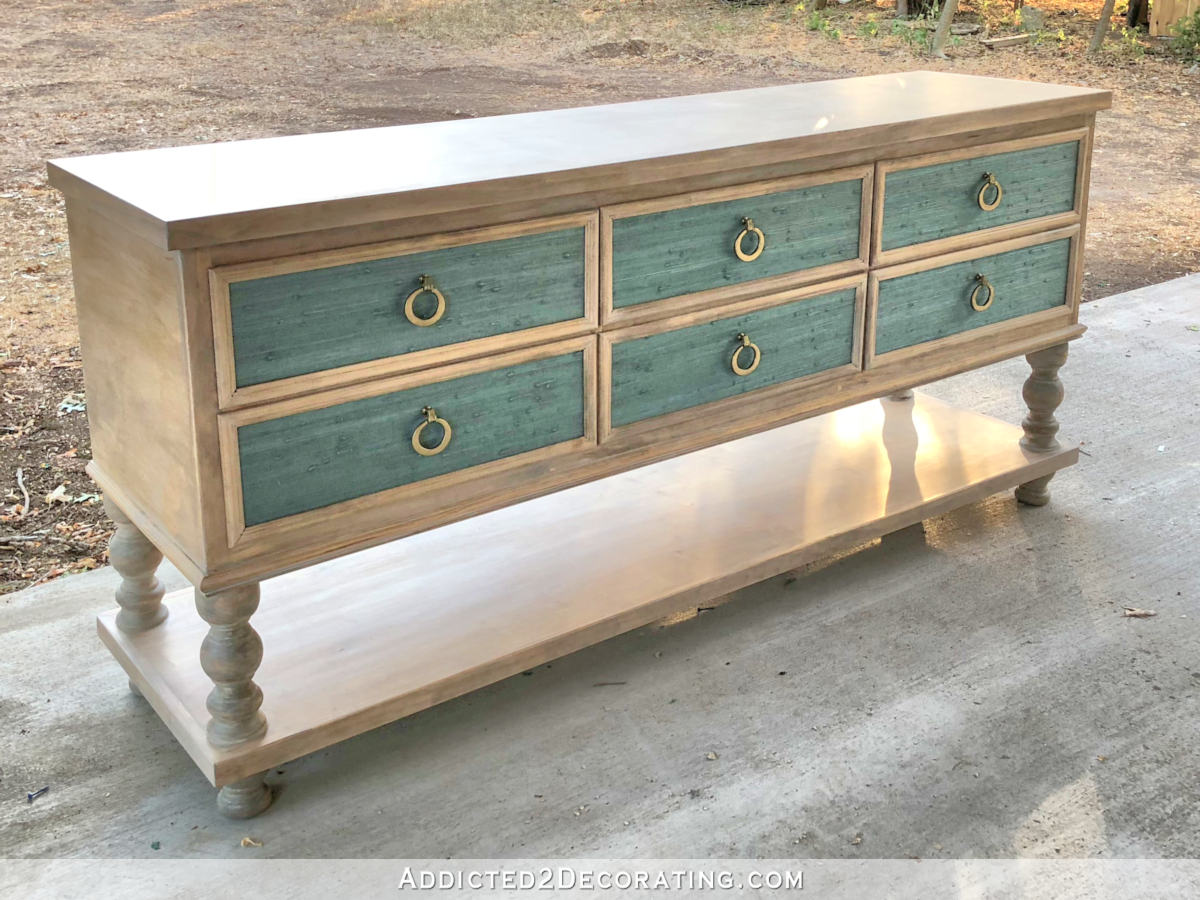
This DIY console table took me much longer than I thought it would. The basic build went relatively quickly, but the finishing took way longer than I had anticipated. But finally, it is finished!
Please note that this is a multi-post project. If you missed the first two posts about this DIY credenza, you can click the titles below to get caught up.
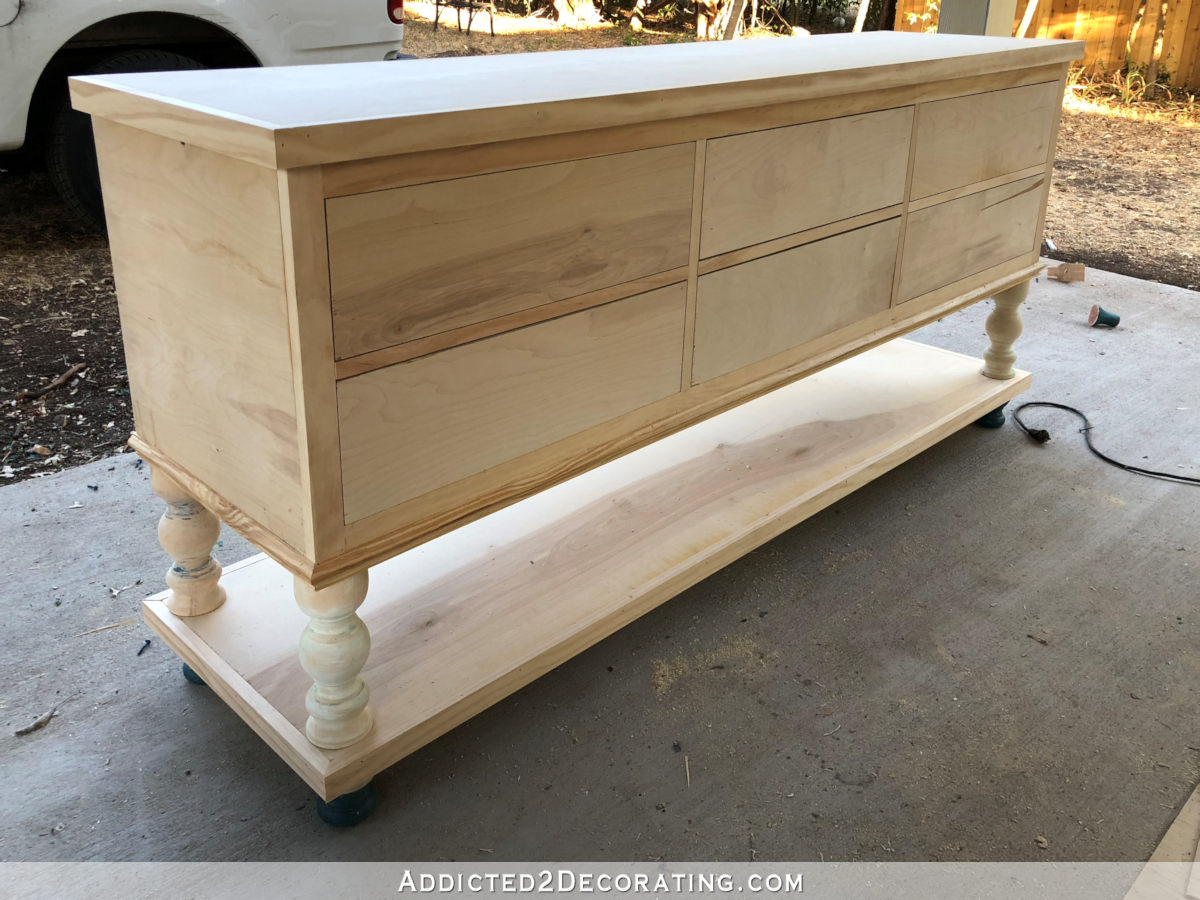
At the end of Part 2, the console table looked like this…
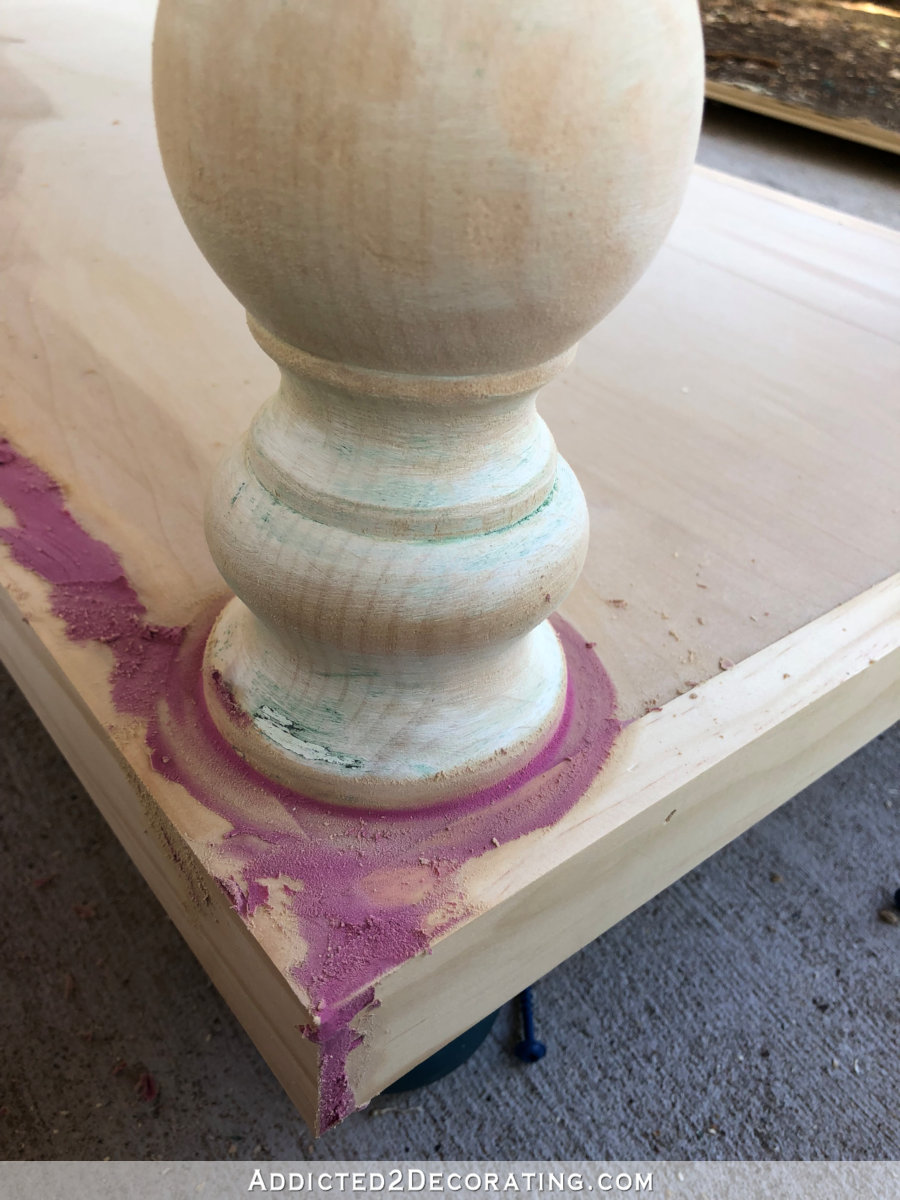
To finish the table, I started by filling all of the cracks, joints and nail holes with wood filler. I accidentally bought the wrong kind (the kind that’s pink when it’s wet), but at least you can see it better in photos.
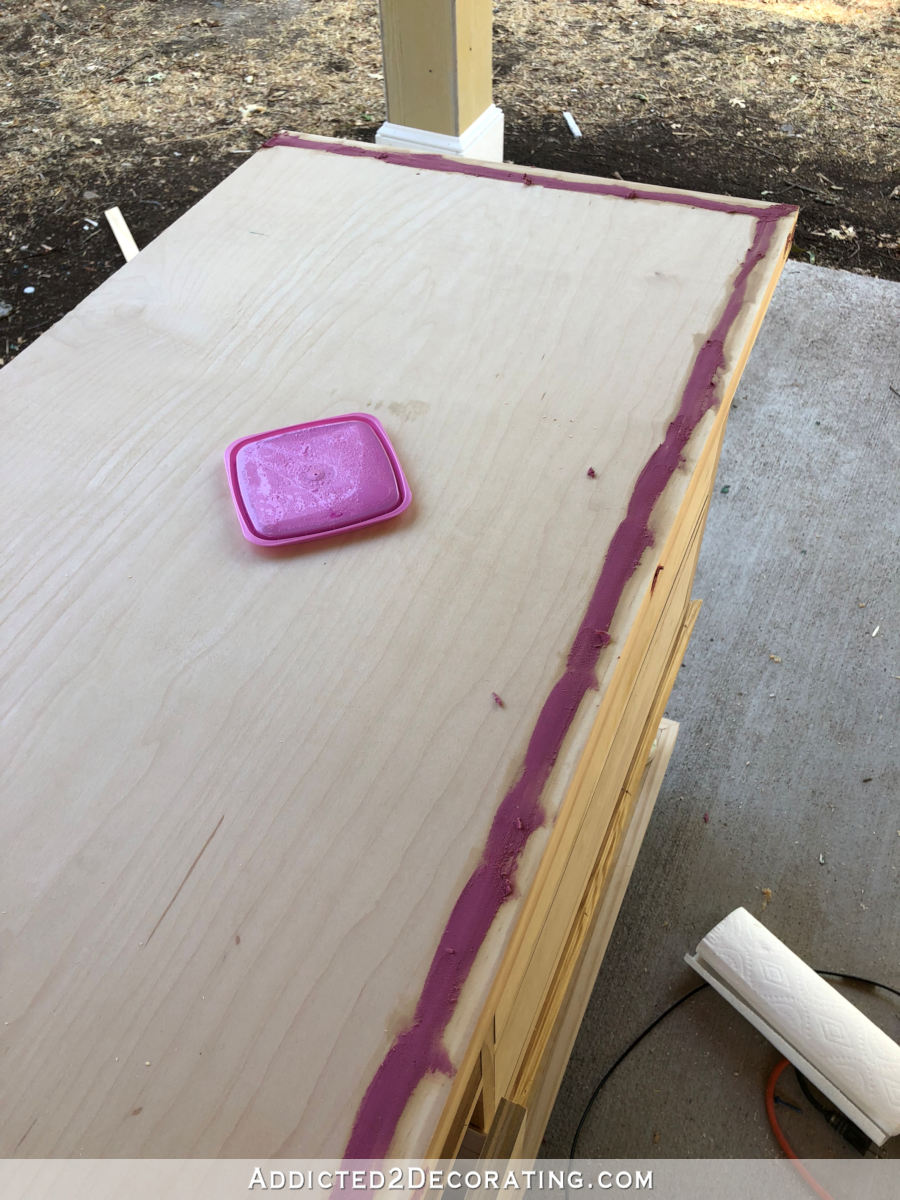
As you can see, I use wood filler very liberally. Since it shrinks as it dries, I like to build it up when I apply it so that it can be sanded as smoothly as possible without having to reapply after it dries and shrinks.
I also used it to fill in where the legs meet the lower shelf.
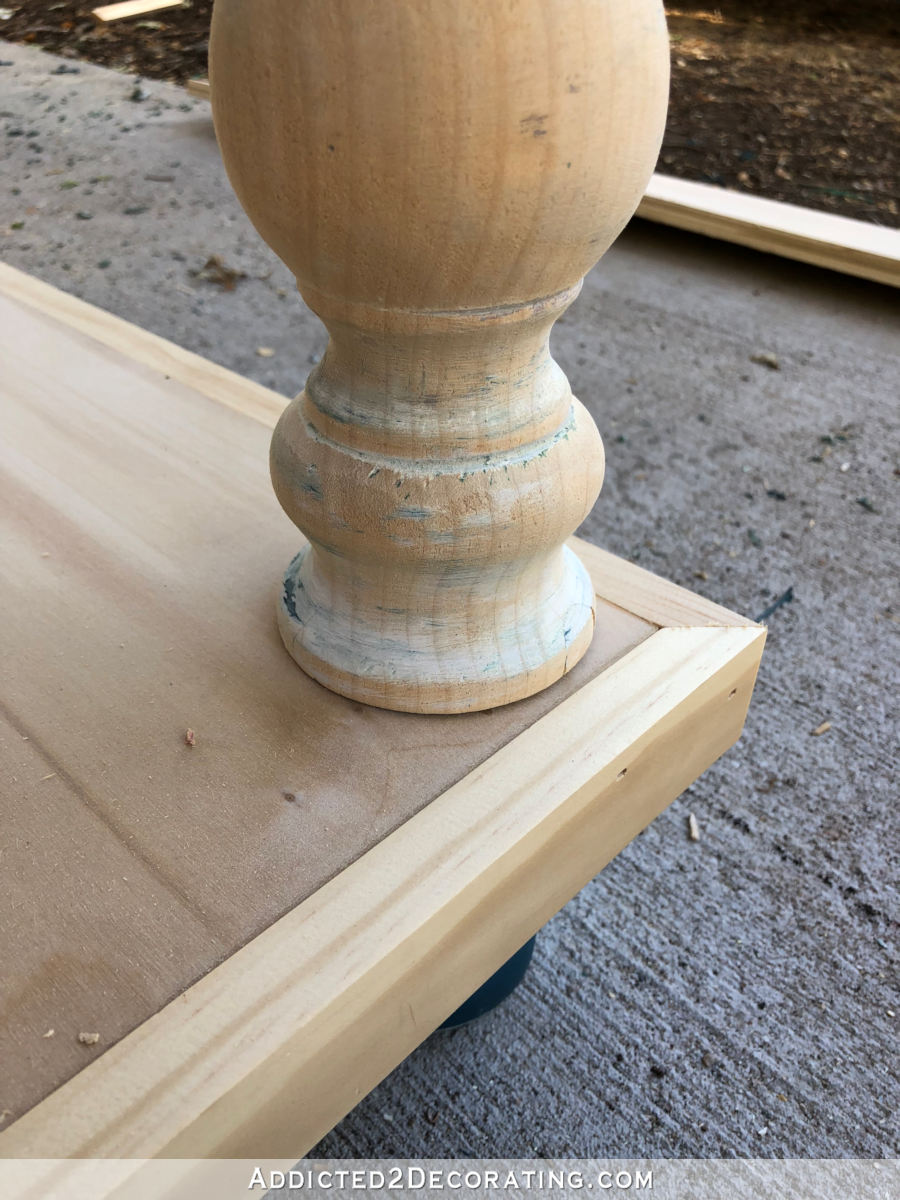
If I were planning to paint the piece, I would generally fill in areas like this with caulk. But since I was planning to stain, I had to use wood filler.
Once all of the wood filler was dry and sanded smooth, I stained the whole thing with Varathane wood stain (oil-based) in Golden Oak.

I wiped it on with a rag, left it for a few minutes, and wiped off the excess. And I’m so glad that Home Depot now carries this brand! It’s so far superior to Minwax. This DIY console table is made with birch plywood on the top and lower shelf, and the rest is pine. And yet, you can see that the Varathane wood stain turned it all the same color. I was amazed. And relieved.
I gave the stain about an hour to dry, and then used Briwax liming wax, which is a white wax. I found mine here (affiliate link).
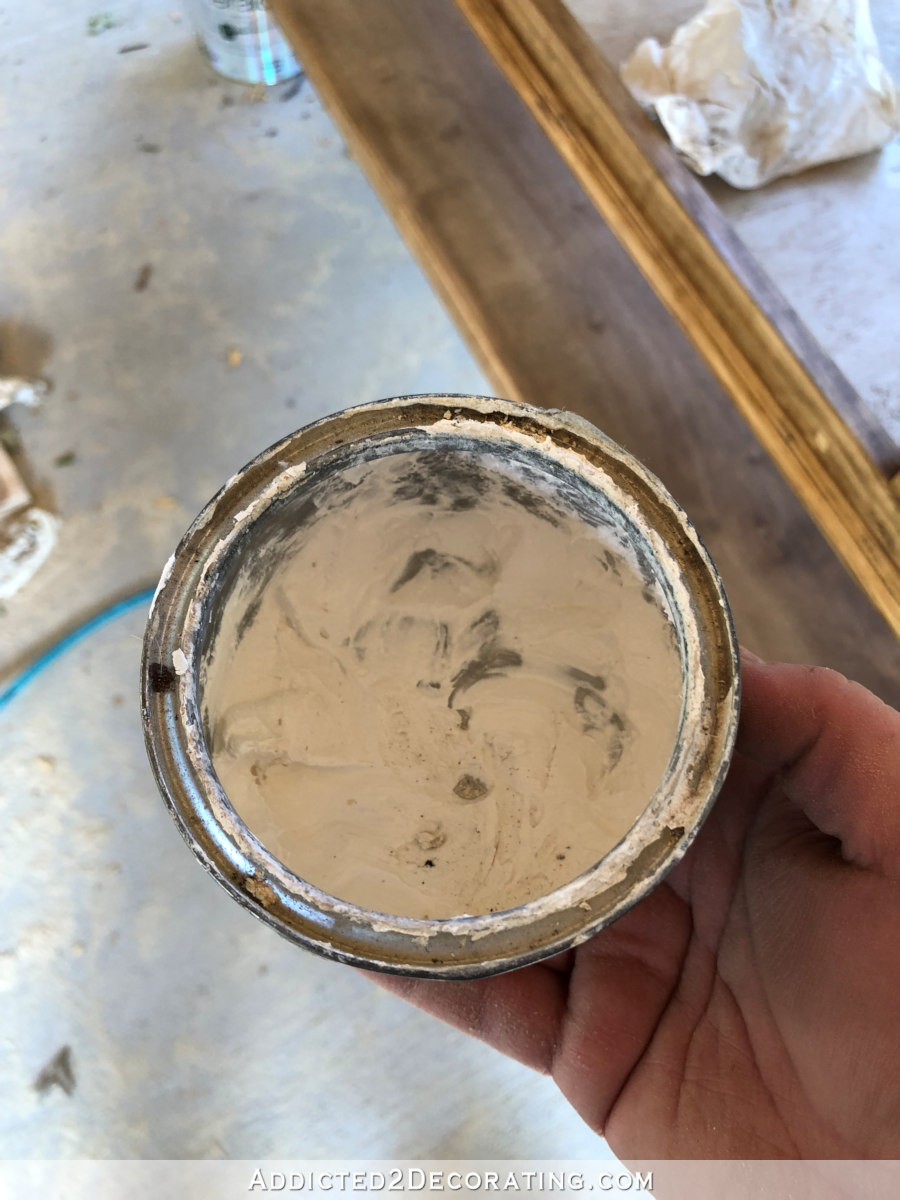
I covered the entire thing, working on one large section at a time and applying the wax with a white cloth. And then after about an hour, I buffed it with “000” steel wool. You can see the difference it made here…
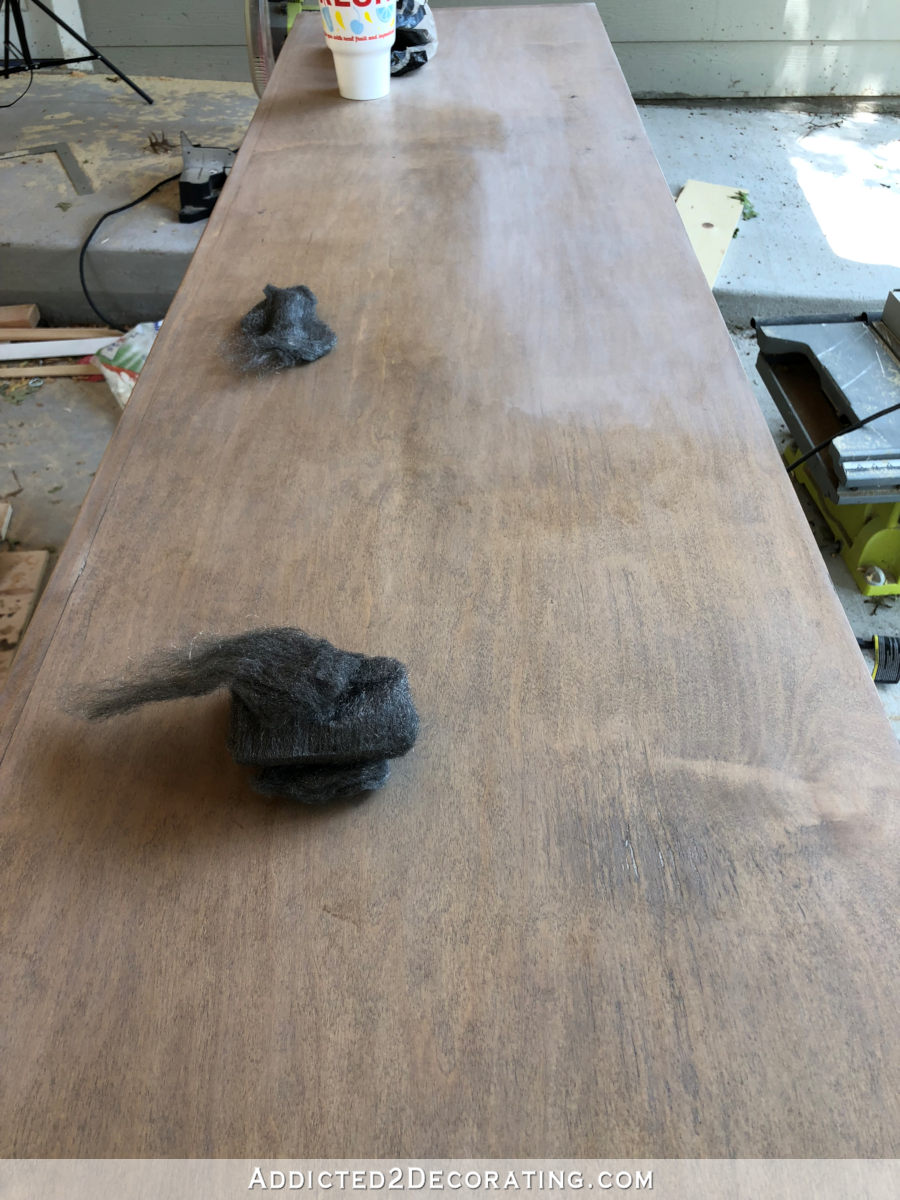
Obviously, the brighter, whiter areas are waxed but not buffed. The darker areas have been buffed with the steel wool.
With that done, I worked on the drawer fronts. First, I covered them with the grasscloth that I had leftover from the entryway wall. I applied it using wallpaper adhesive, and when it was dry, I trimmed it with scissors.
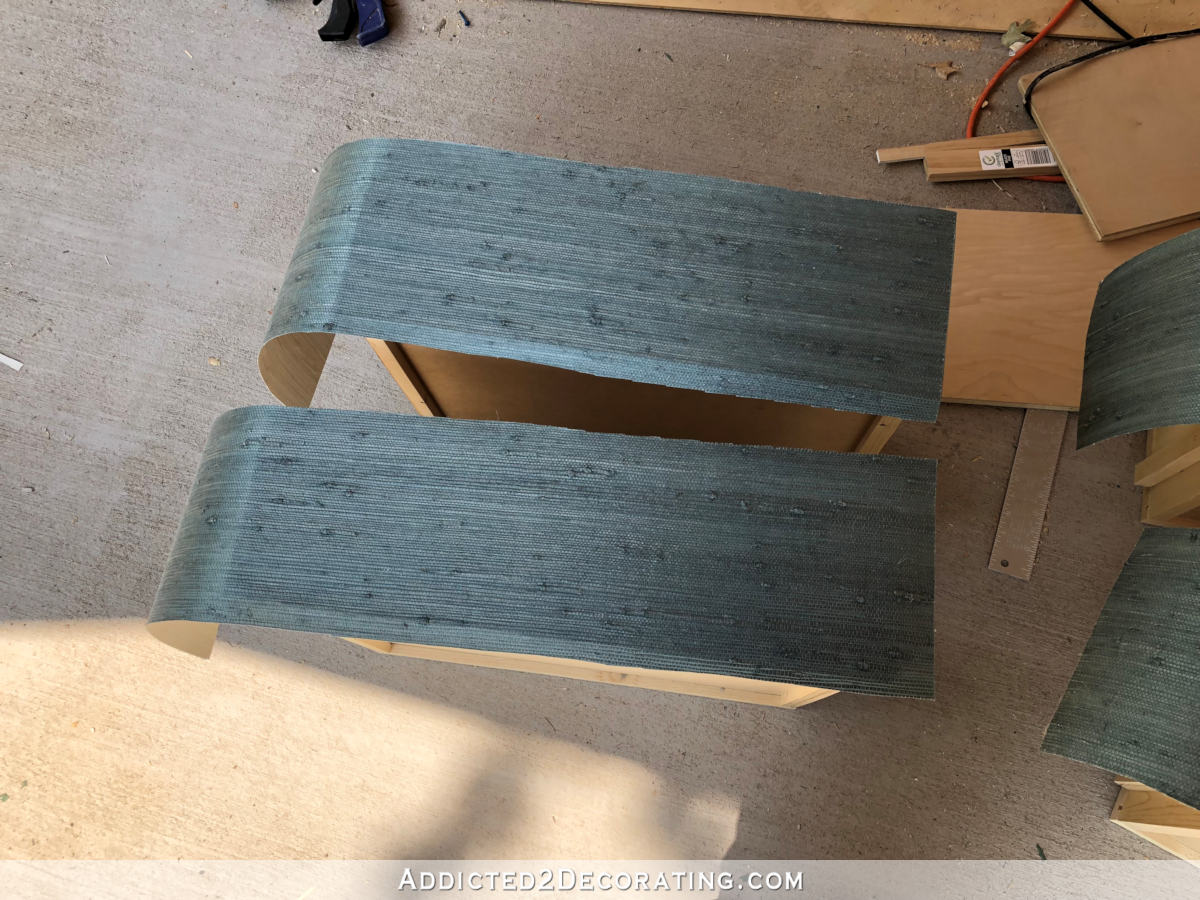
At this point, this is how they looked.
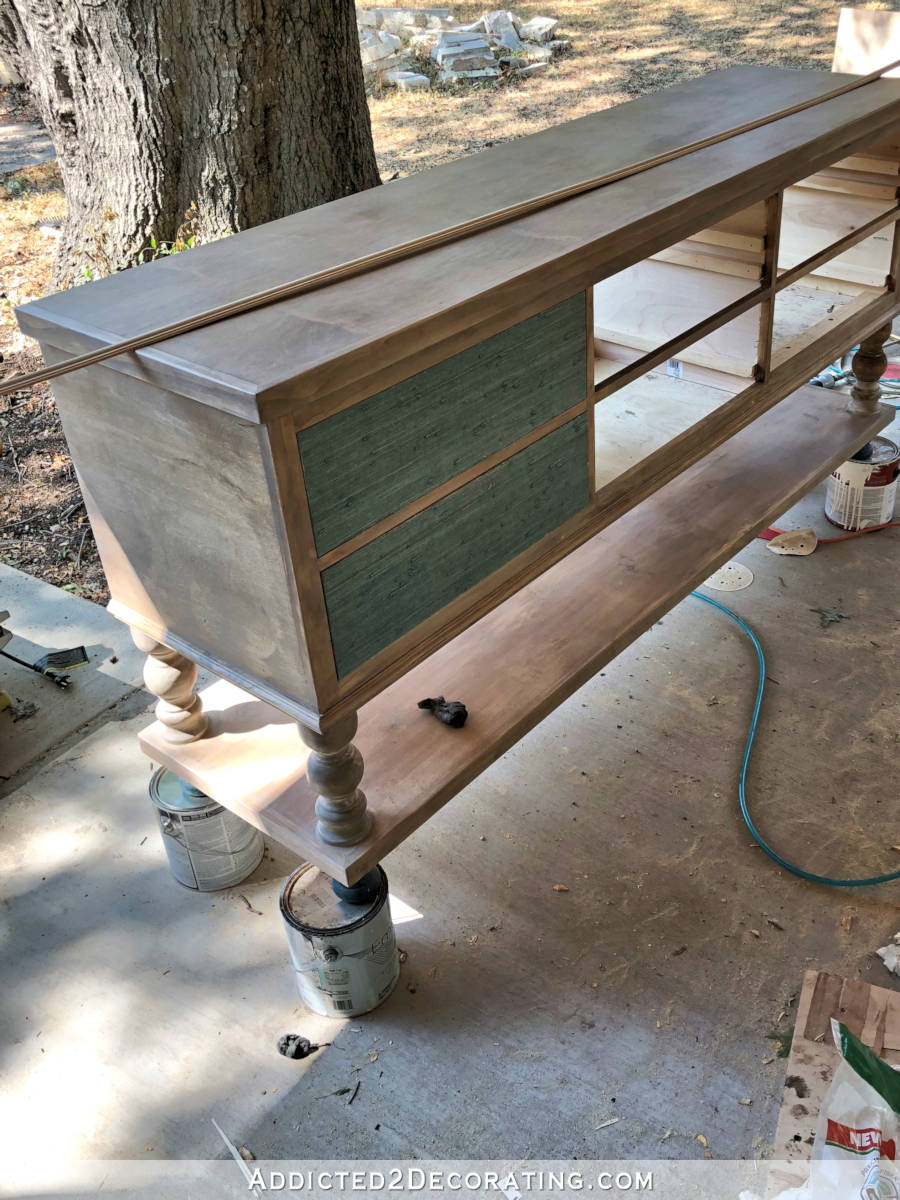
They needed one more touch to be finished. Using a medium-sized cabinet trim (sold at Home Depot in eight-foot lengths), I made frames to fit around the drawer fronts, allowing a 1/4-inch overlap on all four sides. I didn’t want to use nails on these, so I just assembled them with wood glue and handled them very carefully until they were attached to the drawers.
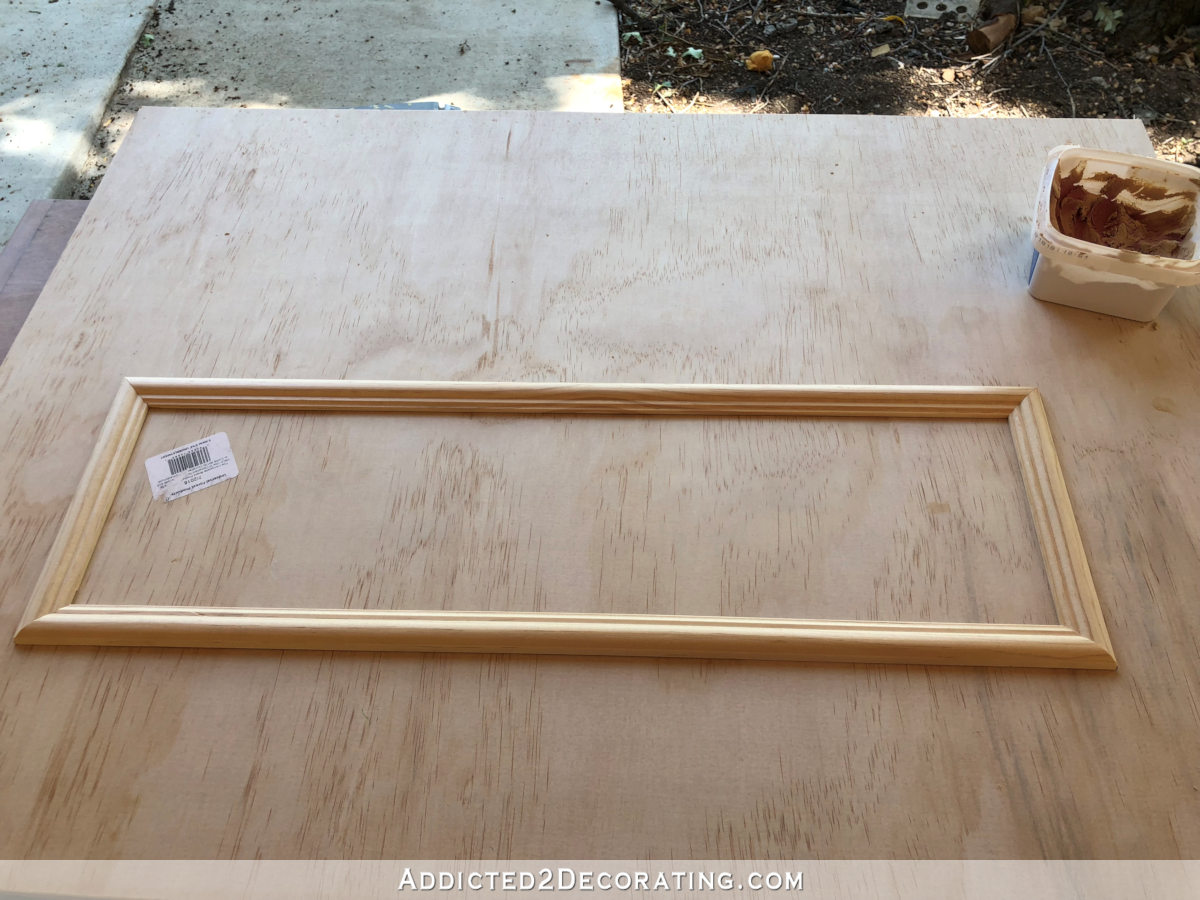
I finished these frames the same way I did the rest of the table — stain, wax, buff with steel wool. And then I was ready to attach them to the drawers.
Please note that this is a multi-post project. If you missed the first two posts about this DIY credenza, you can click the titles below to get caught up.
Rather than centering the framed on each drawer front, I instead attached them in relation to each other so that they would be lined up as perfectly as possible on the front of the console. I did this by inserting all of the drawers, and then taping the frames in place, making sure they all lined up with each other with equal spacing.
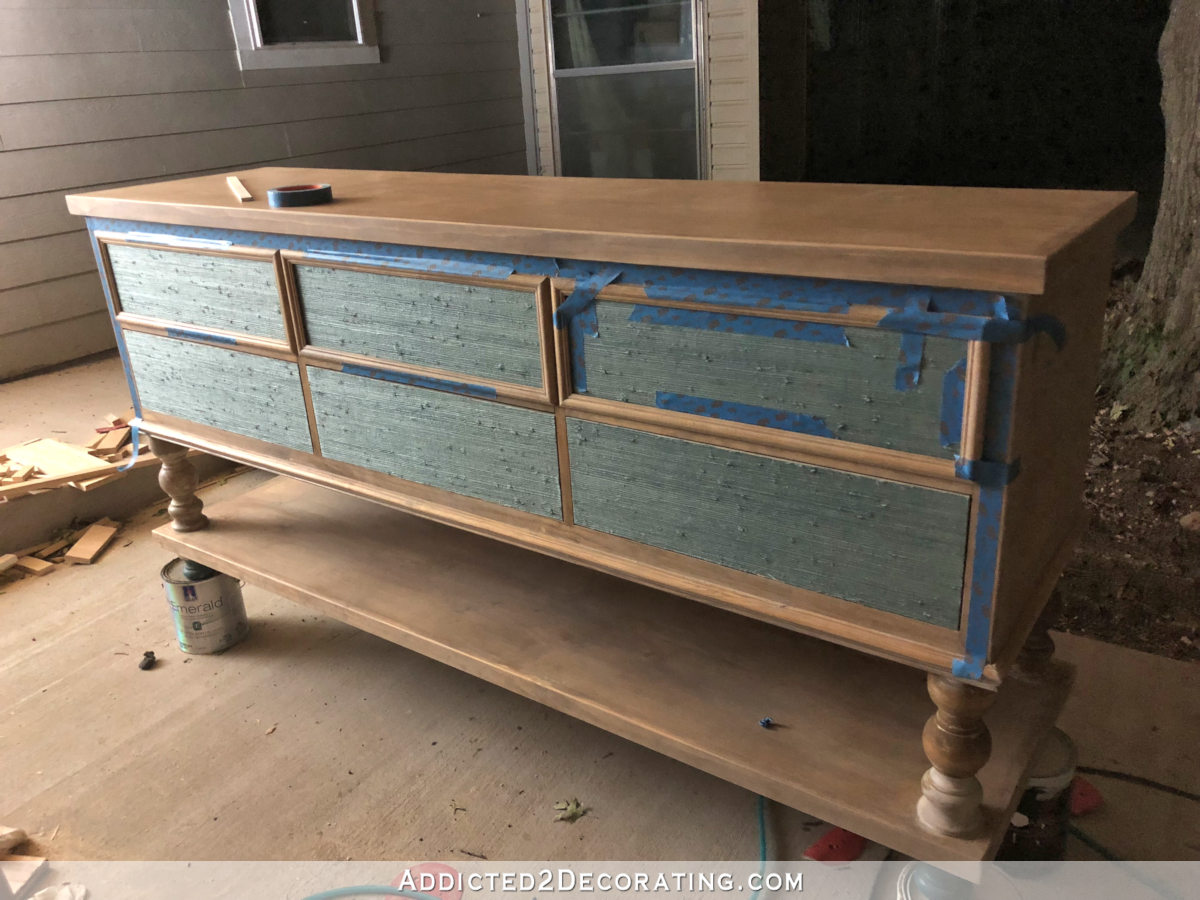
Once I had the placement for each frame marked with painters tape, I attached each one with wood glue and clamps.
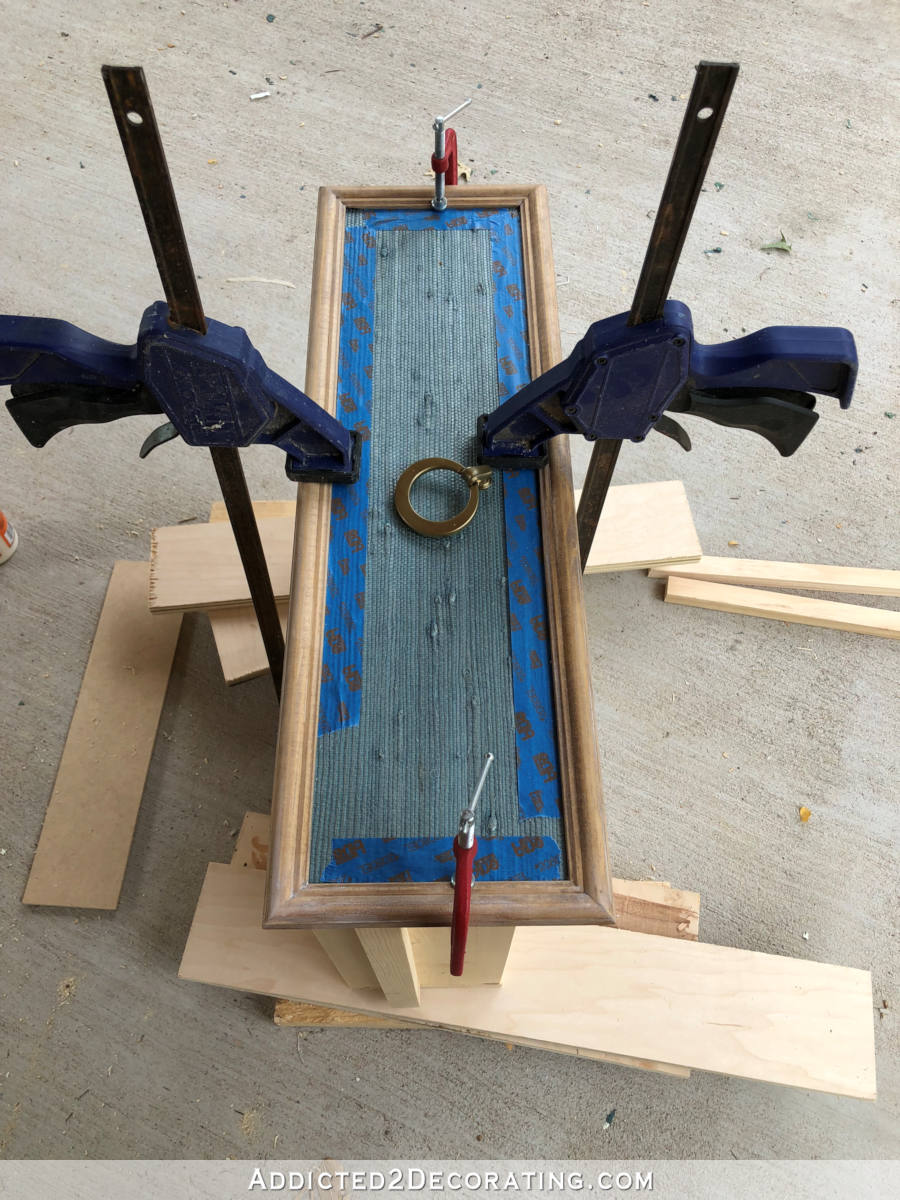

I needed one final touch to finish the DIY console table — the perfect pulls. I decided that I wanted ring pulls, but after searching and searching, I nearly gave up on finding some that I actually liked and that were big enough and didn’t cost a fortune. I finally came across these at Hobby Lobby. I’m pretty sure that these are the only ring pulls that exist in Waco, Texas, and they just happened to be the right size. But the color and style wasn’t exactly right.
But both of those problems could be easily remedied. As far as that art deco style goes, I just flipped them over and used the back sides, which are smooth and simple in style. And for the color, I gave them a coat of this spray paint…

That was much better, but they still needed a little something, like a backplate, where they attached to the drawer.
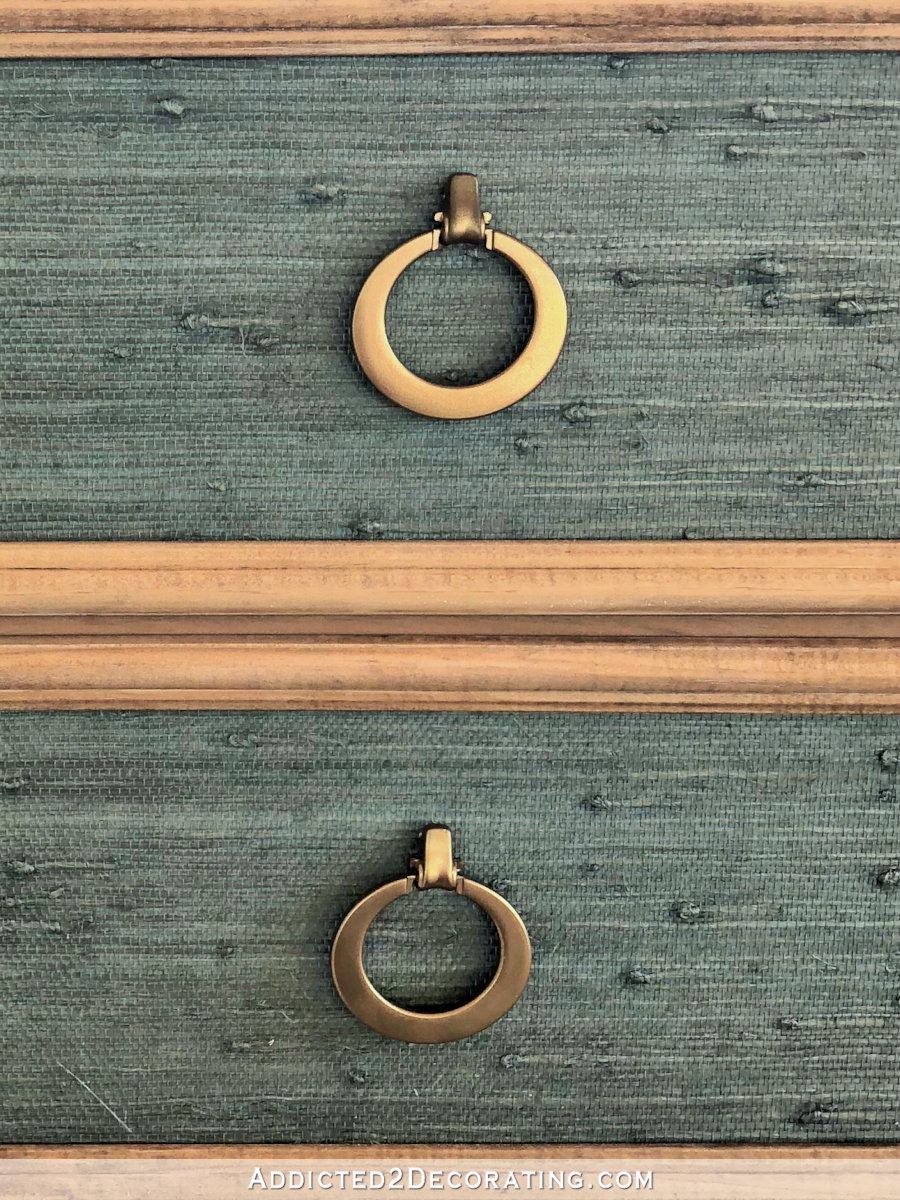
So I headed to Joann Fabric and walked up and down almost every single aisle trying to find something that would work. I was certain that I would find what I needed in the jewelry-making section, but surprisingly I found what I needed in the notions aisle. Can you tell what these are?

They’re pieces of snaps. The package came with something like 24 pieces that all combine to make snaps (something I’ve never used, so I can’t even tell you exactly what these pieces are). There were seven of these specific pieces in the package, and they happened to be exactly what I was looking for.
It’s a small detail, but it’s one of those small details that I think makes a difference. You can see here the pull with the backplate on the top, and the pull without the backplate on the bottom.

And with that, my DIY console table was finished!
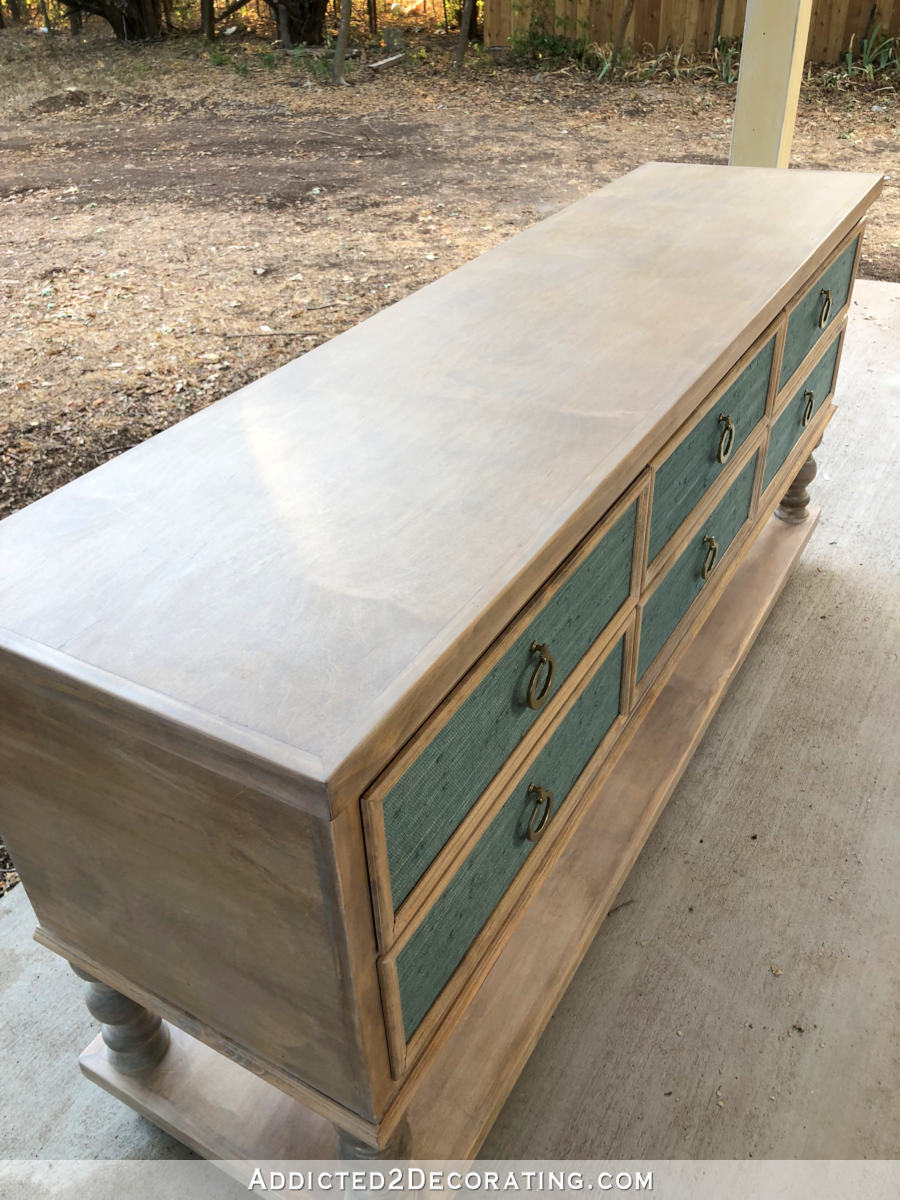
I’m very pleased with how this turned out. When deciding on the finish, I knew I wanted something light and natural rather than a painted finish.
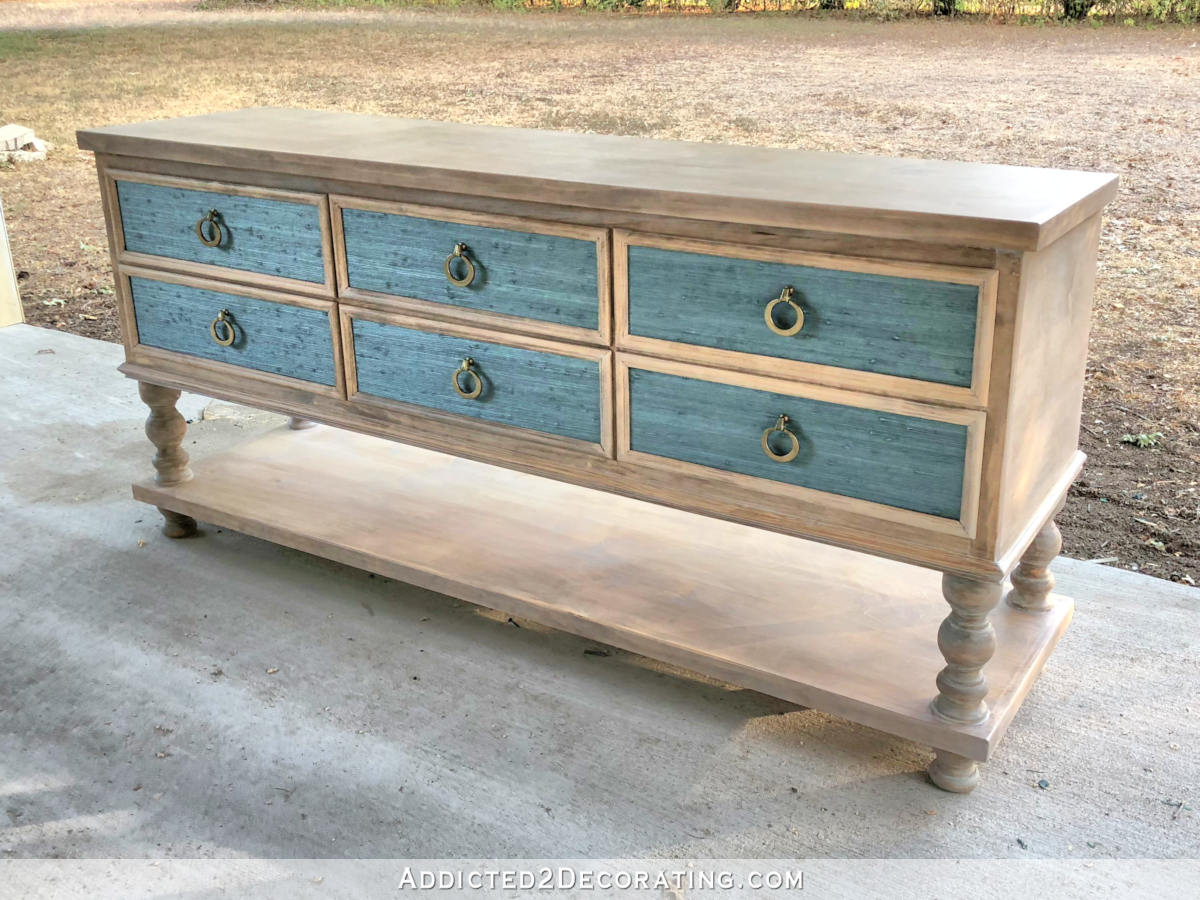
I tried a couple of other finishes, including a stained finish coated in polyurethane with white pigment. That looked awful and plastic. But this buffed wax finish turned out much closer to what I envisioned.

And because the whole thing has been buffed with a fine steel wool, the surfaces are incredibly smooth.
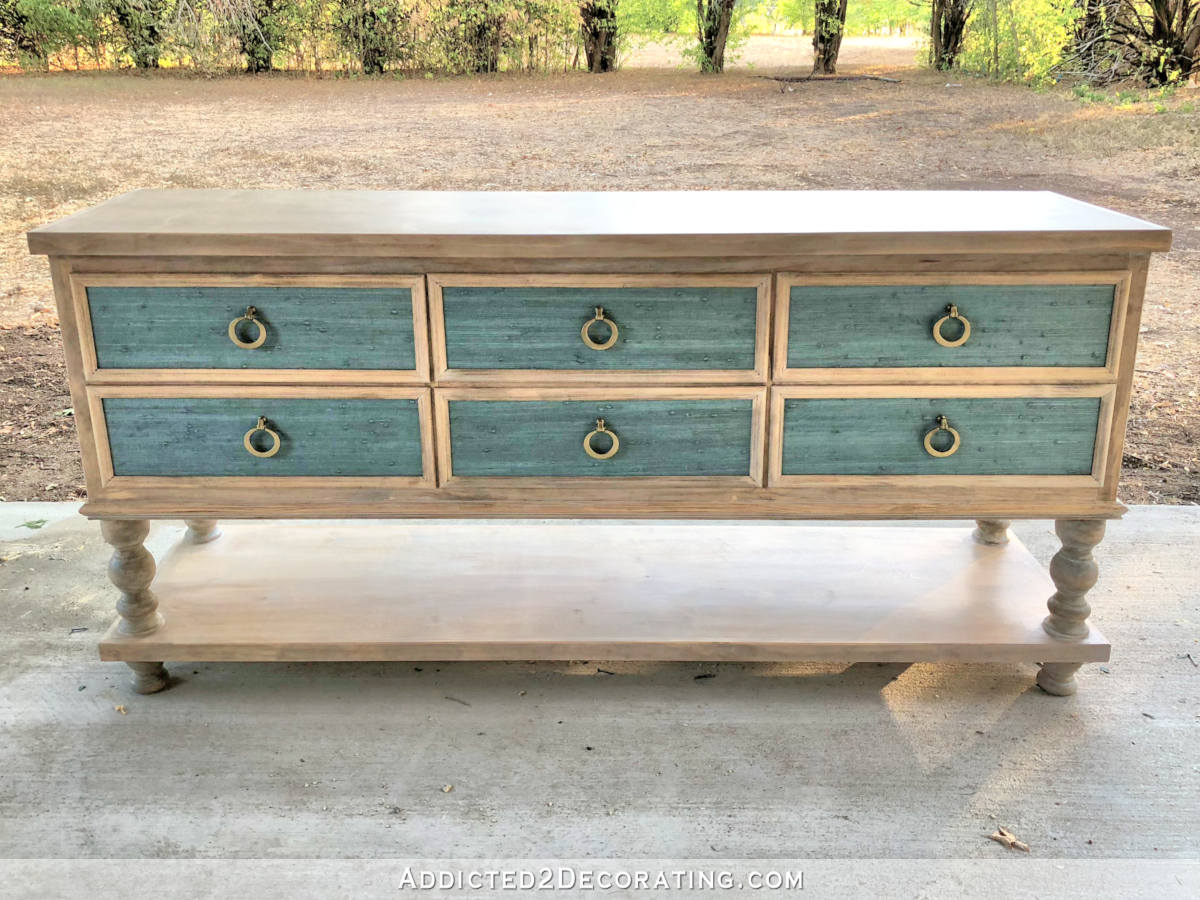
Now just know that if you ask me where it’s going, I’ll ignore your question. 🙂 You’ll see soon enough. But I have a feeling that you could easily guess. 🙂
Want to save this DIY console table project? Don’t forget to pin it!

Want to review this DIY credenza project from the beginning? You can click the titles below to see the previous two posts about project.
Addicted 2 Decorating is where I share my DIY and decorating journey as I remodel and decorate the 1948 fixer upper that my husband, Matt, and I bought in 2013. Matt has M.S. and is unable to do physical work, so I do the majority of the work on the house by myself. You can learn more about me here.


Very pretty!
What a clever idea to use the snaps. Never would have thought to look all over. Brilliant
Very cool!
Swoonworthy! I love the addition of the inset grasscloth. This looks so high-end; absolutely beautiful work! Can’t wait to see it’s final home with the sconces.
Kristi… I know where it’s going. 😉 And I LOVE it!! In fact, I think it is my favorite furniture piece of all that you have done. Your skills are getting madder by the second. The color, the grass cloth, the pulls… perfection!!
YES! Grass cloth re-incorporated! I wondered if you were gonna put that back in somehow. love that look on the drawers! I think the piece turned out awesome! Plus your “Kristi-hack” (lol) on the hardware is fantastic!
Okay- so how in the world do you get this furniture into the house? I don’t doubt you are strong, but you are tiny compared to me and there’s no way I could struggle that thing in. Do you use a furniture dolly and/or gliders once you get inside? I usually end up dinging a corner of the piece, the wall, scratching the floor…etc.
I bet I know where it’s going… lol
This is absolutely beautiful! It will be perfect in your home, great job!
Very nice!
GORGEOUS!!!!!!
Love the pulls – they are gorg 🙂 🙂
ABSOUTELY BEAUTIFUL!!!! WOW! love the finish, color choices. everything about it. you are one heck of a skilled person. what can you NOT do ????!!
Just….WOW!
Favorite project ever! I LOVE this!
Absolutely stunning!
This is my favorite piece of furniture so far. I love it!!! Something like this would be several thousand dollars retail. AMAZING! Can’t wait to see it all pulled together with your other pieces… whereever it’s going to go… 🙂
Beautiful job!! But be prepared, with a bottom shelf that low to the ground, it will be a great hiding place for Peeve and Cooper’s toys. 🐈 🐕
Beautiful! My husband and I need something desperately like this for TV console. We want it to be about 90 – 95” long for his 75” TV. I have found nothing that fits the bill without costing a fortune. I plan to show him this and see if he thinks we might be able to pull it off. Thanks for all your sharing.
I’m amazed once again. Absolutely beautiful! Do you have any idea what was the total cost to build?
I love it! I hope you are putting it in your entry. it’s perfect for that space!
Love it!
I think I know where it is going also. I have one question – why do you buy furniture when you can create master pieces like this? I love everything about this console table – it’s perfect!
Looks good! I’ve been using Varathane (Rustoleum) stain for several years now after using Minwax for twenty years. It beats Minwax hands down (sorry Minwax) on ease of use, consistent color, and vibrancy in my opinion. You many know this, but Wal-Mart (at least ours) carries it as well.
My first reaction when I openned this blog was WOW!!! This is beautiful!!!!! Cant wait to see it in your entryway 🙂 !
Simply WOW! I have no other words!
NIIICE! Very niiiice! The added snaps to the pulls was perfect finishing touch!
Wow Krist. That turned out really nice. Kind of has a 1600’s Spanish antiquey look to it, doesn’t it? So on the sanding, did you hand sand everything or did you use an electric sander for anything at all?
Oh my; how absolutely beautiful! How creative! What are you going to keep in the drawers?
I will confess … I do not like grass cloth. I really do not like grass cloth on walls! I found it held dust and dander.
That said… I LOVE your grass cloth drawer fronts! They are perfect; the edges are contained; they will be so easy to lightly vacuum if need be; and they are gloriously gorgeous.
I know where the console could go…north to North Dakota, to live in my sewing room!
So beautiful! Your details make it perfect! Love the grass cloth!
Beautiful!
Lovely!
Wow!!!
Very very nice!! I’m so glad it’s not painted and I hope it’s going in front of the grass cloth wall. Natural wood pieces warm up a room so much more than paint!
Look! Kristi’s looks every bit as good.
https://ecantiques.com/products/cerused-oak-and-grasscloth-chest-of-drawers?variant=38291023811
I’d say hers looks better! More personality😆
This is absolutely beautiful! Your artistic ability amazes me. This is my favorite of all your projects.
Love it! I think I know where it’s going…can’t wait to see if I’m right 🙂
I absolutely love this! You must be so proud of it.
It’s very pretty!
absolutely ADORE!!! I want one!
Love it! Great job! Glad you were able to utilize the leftover grasscloth and I LOVE the pulls. I think I know where it’s going too, and Peeve will love shooting her toys underneath it! LOL!
You mean the wall-formerly-covered-with-grass cloth! Last we saw on the blog, there is purple paint with a Greek Key border where the teal grass cloth used to be.
Beautifully done!!! LOVE your furniture pieces! And, I’m so thrilled to learn your Varethane and white wax finish. It’s perfect and I hope to duplicate it on a bathroom vanity. Fingers crossed!
Totally A-W-E-S-O-M-E! I’m inspired to make one! Great job!
Outstanding. Your talents are endless!
OH. MY. GAWWWWDDDD! It’s sohohooooo BEAUTIFUL! Your talents never cease to amaze! This piece is stunning, I love everything about it! It’d be perfect in my home LOL!
You are amazing!
P.S. I think I know where you’re going to put it!
That is crazy pretty!
NICE!!!
And those snaps made all the difference!
Looks like a high end piece!! Fantastic as always!
A very nice console and thanks for the build instructions. I love the flip on the pulls and the little snap backers; that’s so clever and they came out so well with the coat of paint. I’m happy you’ve found a way to incorporate the grass cloth. I cried with you when it was ruined.
Absolutely beautiful. Thank you for sharing. Love those ring pulls and that detail you added with the snap. Would never have thought to flip them over.
I didn’t know wood filler stained so perfectly! Love everything about this!!!
Wowzer!!!!!
What a gorgeous piece! I love it!
Kristi you have designed, built and created an absolutely beautiful and stunning piece of furniture! I think this is your best work!!!!!!!!
I am just blown away! So beautiful!
One word: Unbelievable.
Wow! That’s beautiful!
Absolutely stunning! And I love how the piece looks almost golden in the light outside. Yes, I know you’ll be putting it inside, but I had to comment on that anyway. It looks incredibly high-end, classy and simply gorgeous! In my next life, I want to come back as YOU!
Wow… you don’t have to shop for furniture (or anything else) when you can make so many things yourself! It turned out beautiful. But… With all the spence it took, your hard labor, plus the time it took you, was it worth it? You really have to love what you do, I guess. But beautiful, it is!
cielo
Wow! I discovered this blog from google. I just want to say this is my new favorite site. Keep up the stunning work.
This is one of my new favorite sites- hands down. I love (and appreciate) the step by step instructions paired with the photos AND the source lists! These posts are not only beautiful but they are incredibly easy to understand and utilize. Great work!
Sorry I am late for the party but that piece is gorgeous. I read once that 70% of the cost of fine furniture is in the finish. You would think it would be building the piece itself but after this job I am sure you know why it is the finish that runs up the cost of fine furniture. It is stunning. I especially love the drawer fronts. They really add a luxurious feeling to the piece. I wish I had half your talent.
I made one! OMG the drawers about did me in!! I didn’t realize how important the sizing of the wood drawer rail guides would be. I was going by your pictures saying to myself “ok it looks like a little wood here and a little wood there” not thinking how it was all going to fit together. I should have been more precise! The grasscloth is such a beautiful accent. Great job on the detailed description and of course for your beautiful original creation. You are so talented and such an inspiration. Looking forward to reading through your blog for other plans 🙂