
DIY Upholstered Bench – How To Build The Bench Base
Over the weekend, I got quite a bit of work done on the benches for the dining room. I’m building two identical benches to flank the pantry doorway, and these will be upholstered in a dark pink (raspberry?) velvet fabric. At this point, I’m undecided on the color that I will use for the bases. I had originally intended to do a light natural stained wood color, but if you’ve been following along on this dining room project, you’ll notice below that the bench that I ended up with is very different from the bench I had planned to build. And with this new design, I’m now unsure about the color. So let me show you how the bench bases will look and how I built them.
Here is the new design for the bench base.
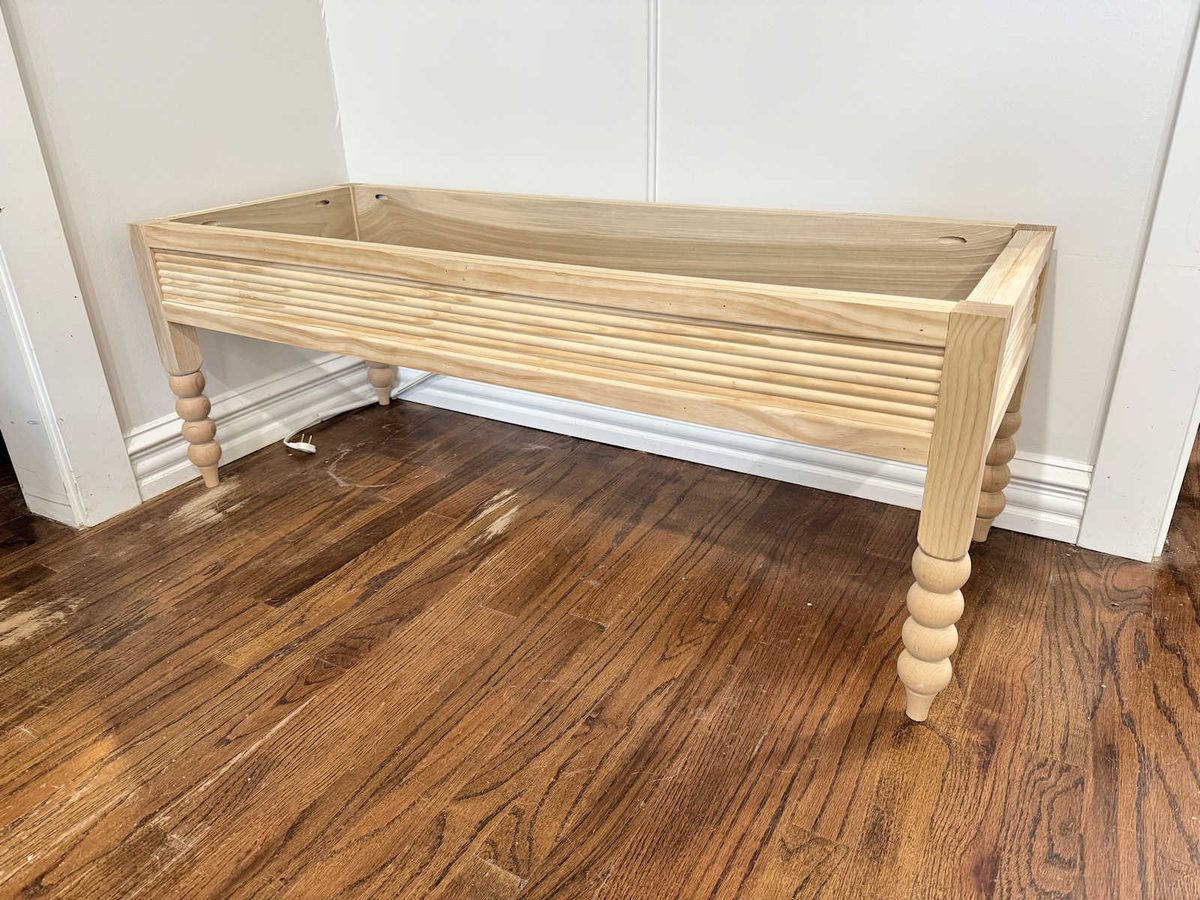
The reason I had to go with a totally new design is because my blade broke on my band saw, which I needed to cut out the scalloped design that I had originally planned. I thought I could just run up to the big box home improvement store and get a new blade.
Well, that didn’t work out. I couldn’t find the right sized blade locally, so my only choices were to either order a blade online and wait for it to be delivered or go with a completely new design. I didn’t want to wait, so I decided to go with a new design. And to be honest, I’m kind of glad it worked out this way because I really love this simple fluted design for the skirting portions of the bench. Sometimes a roadblock ends up being a blessing.
If you’ve never built anything before and want to start with something simple, a bench is a great project to start with. They’re so easy to build, and you can use your choice of decorative trim and legs to create the look you want.
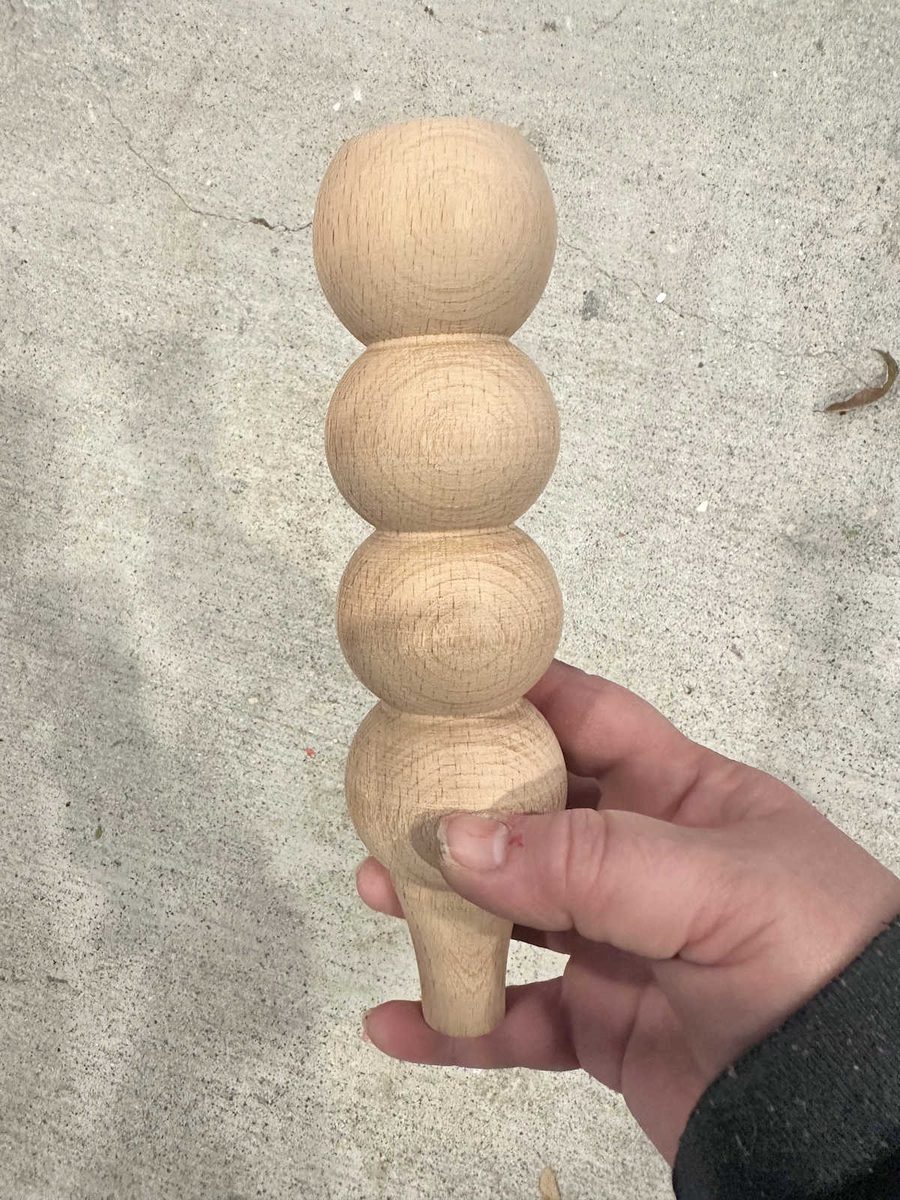
My design started off with these cute legs that I bought on Etsy. But I couldn’t use these legs on their own because I needed square blocks on the tops of the legs where I could attach the skirting pieces. So I had to get creative and make my own blocks.
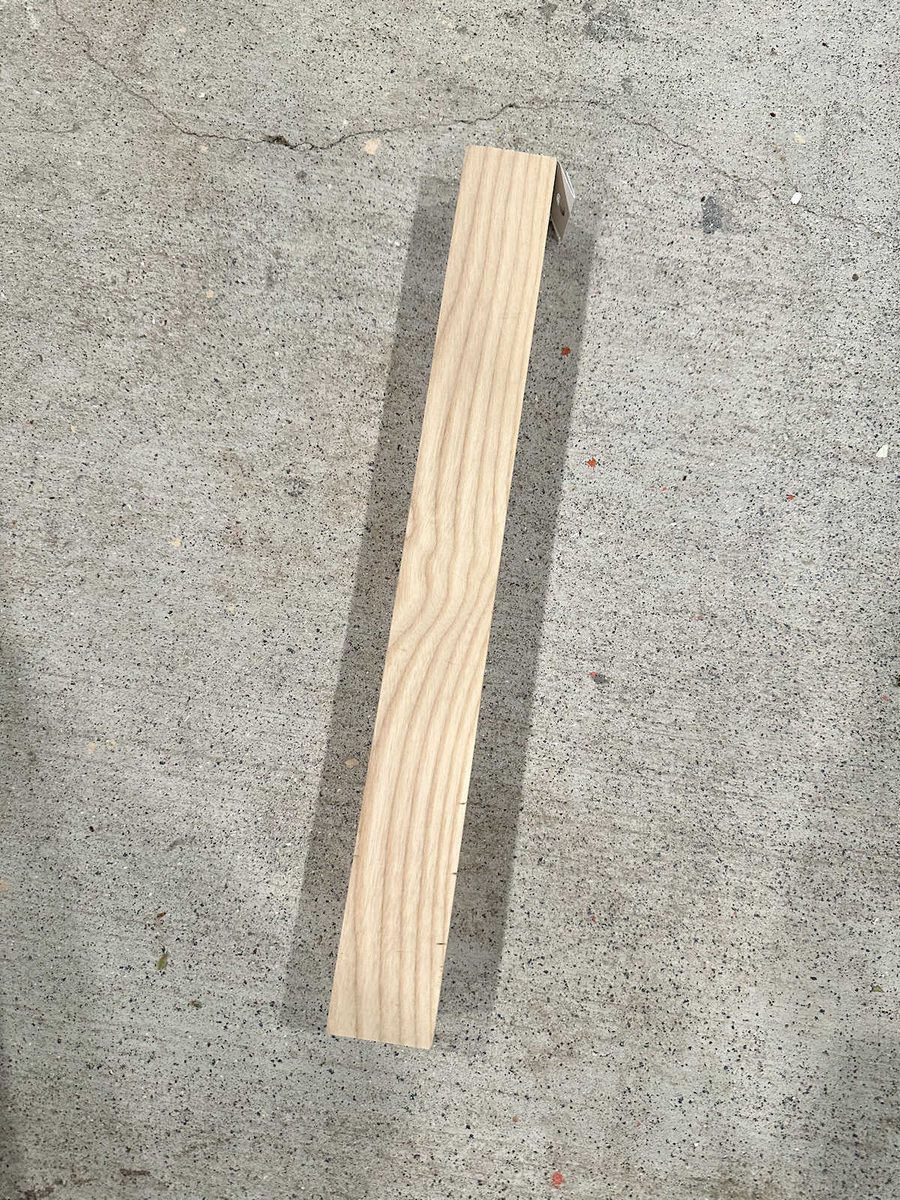
To do that, I used these plain square furniture legs that I found at Home Depot. These come with a threaded screw already attached to one end, so I used pliers to remove that screw.
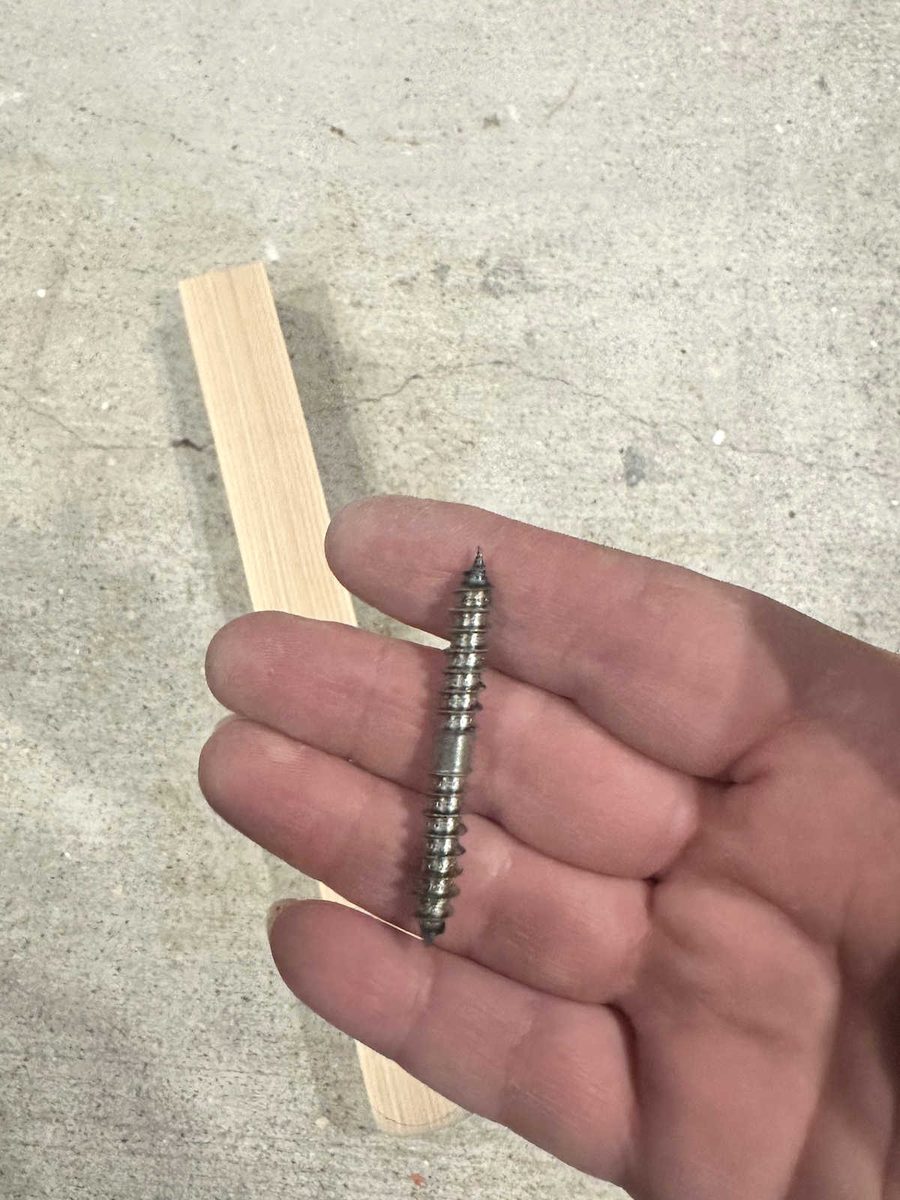
And then I used this dowel screw, which is basically a double-ended screw, to attach the two pieces together.
Using my pliers to grip the screw in the middle, I screwed it into the decorative round leg…
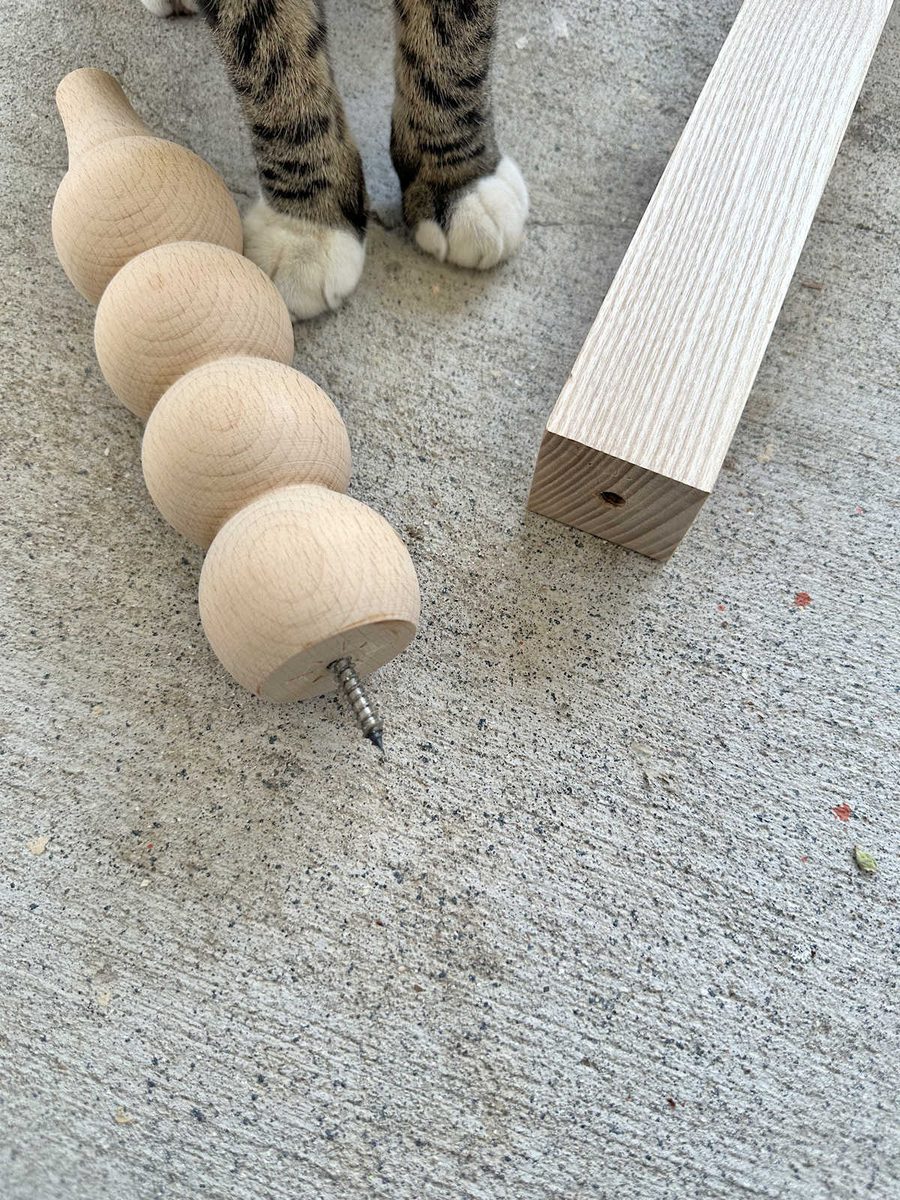
And then I screwed the other end into the square leg. But as you can see, this wouldn’t have looked quite right had I left the square leg like this. It needed a bit of shaping to make it look better.
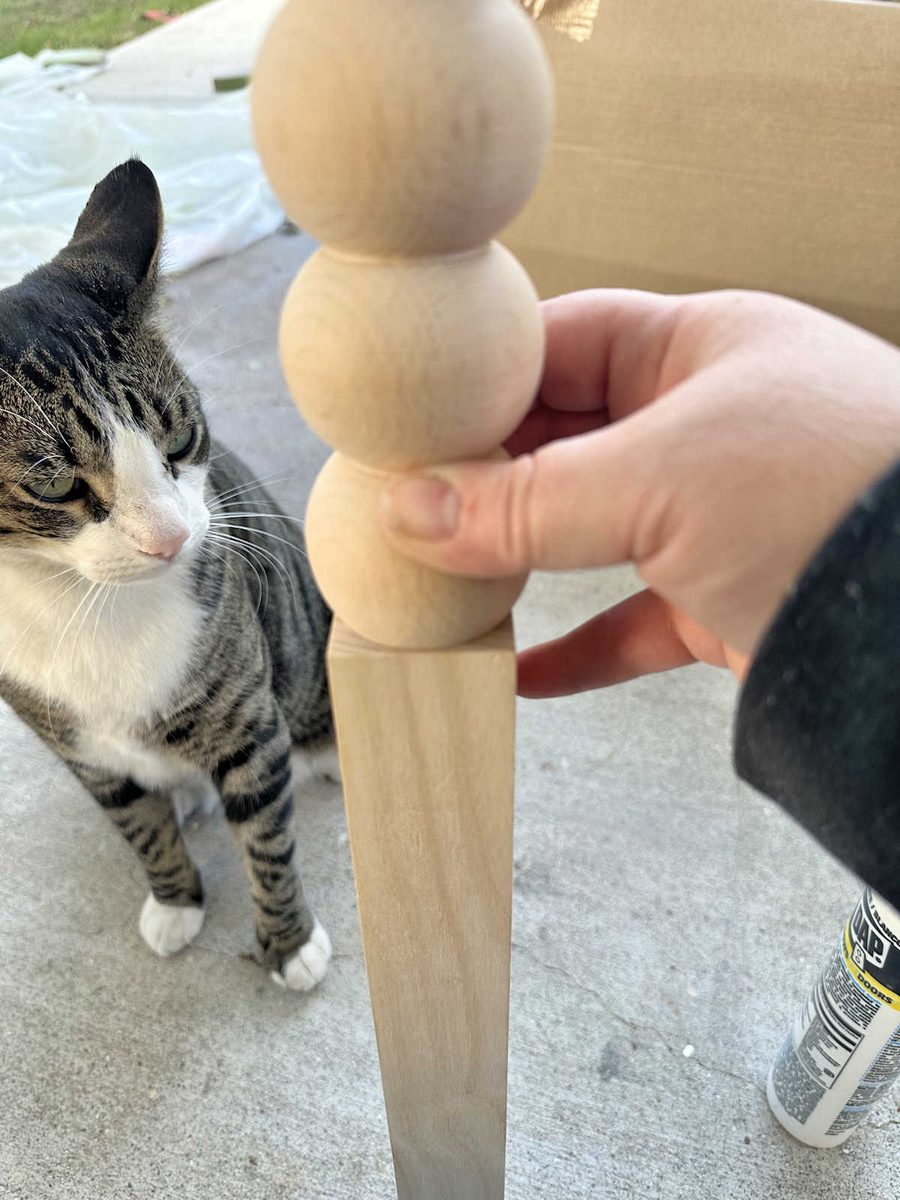
To do this, I traced around the round leg on top of the square leg with a pencil.
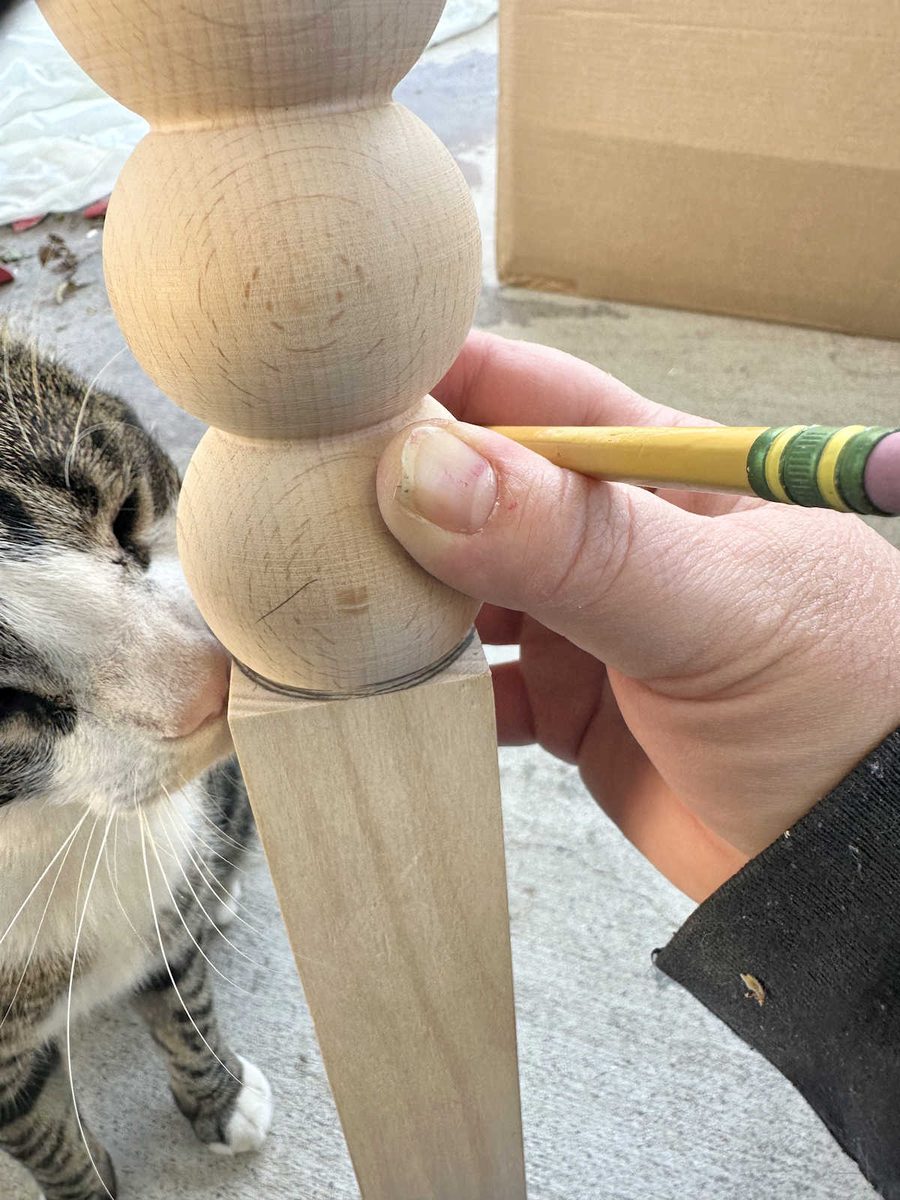
That gave me this guideline on top of the square leg when I removed the round leg.
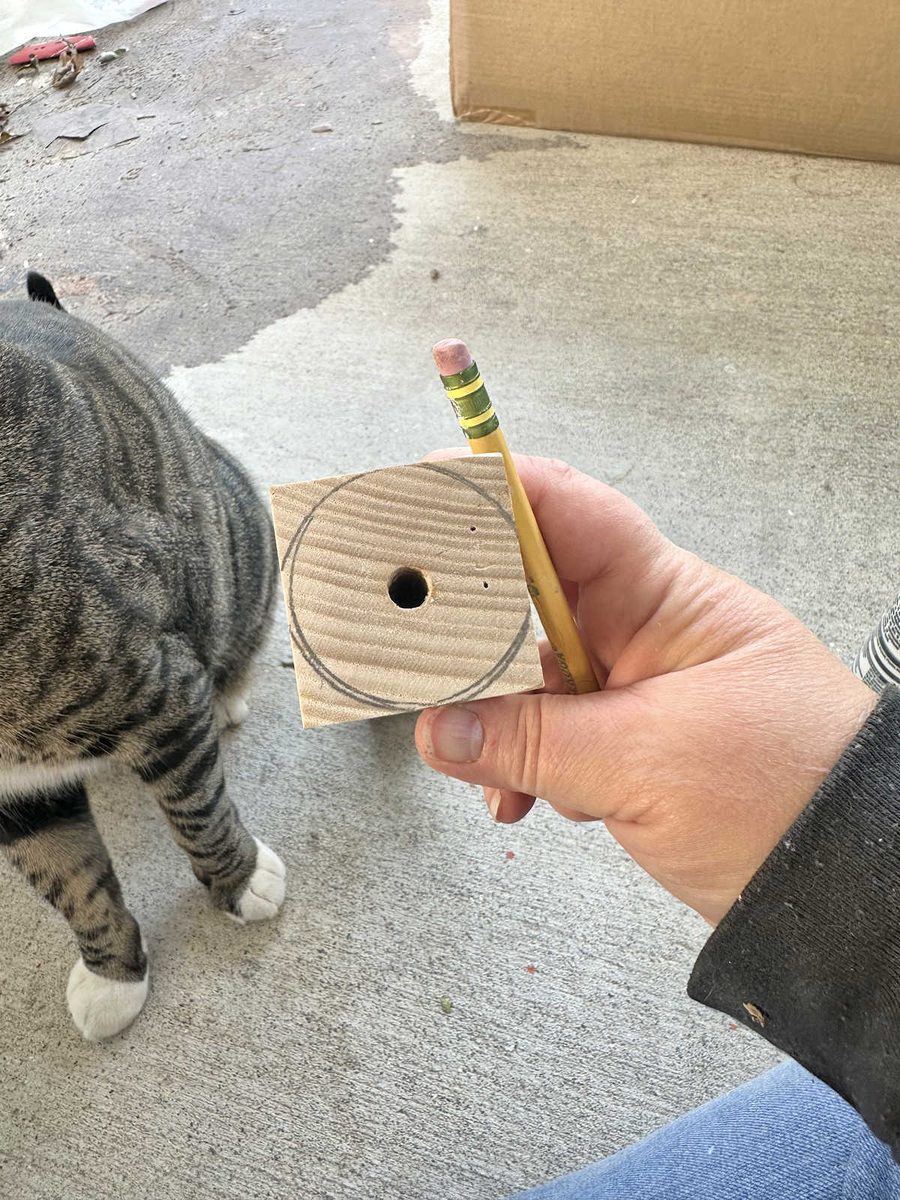
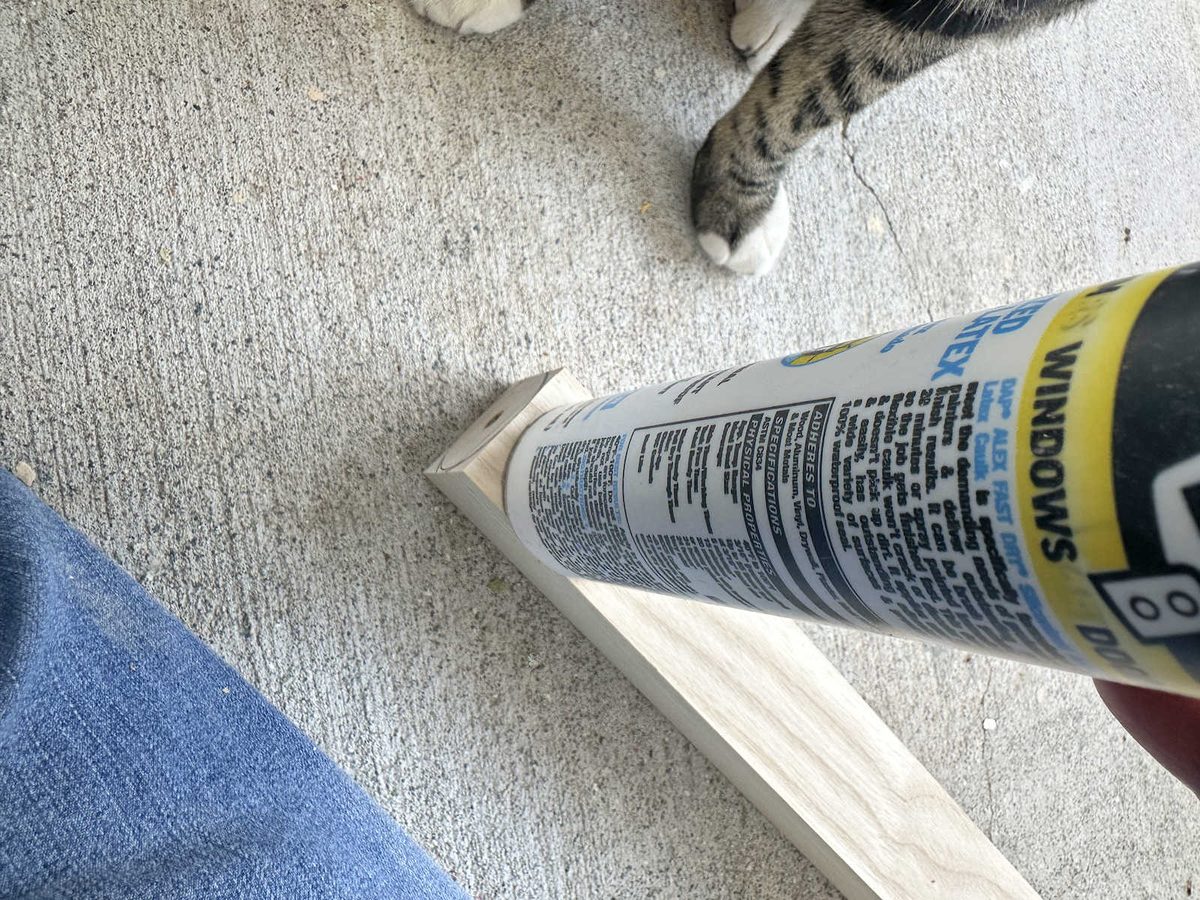
And then I used a tube of caulk to mark the top on all four sides of the square leg. I left about a 1/8-inch space at the top of the leg.
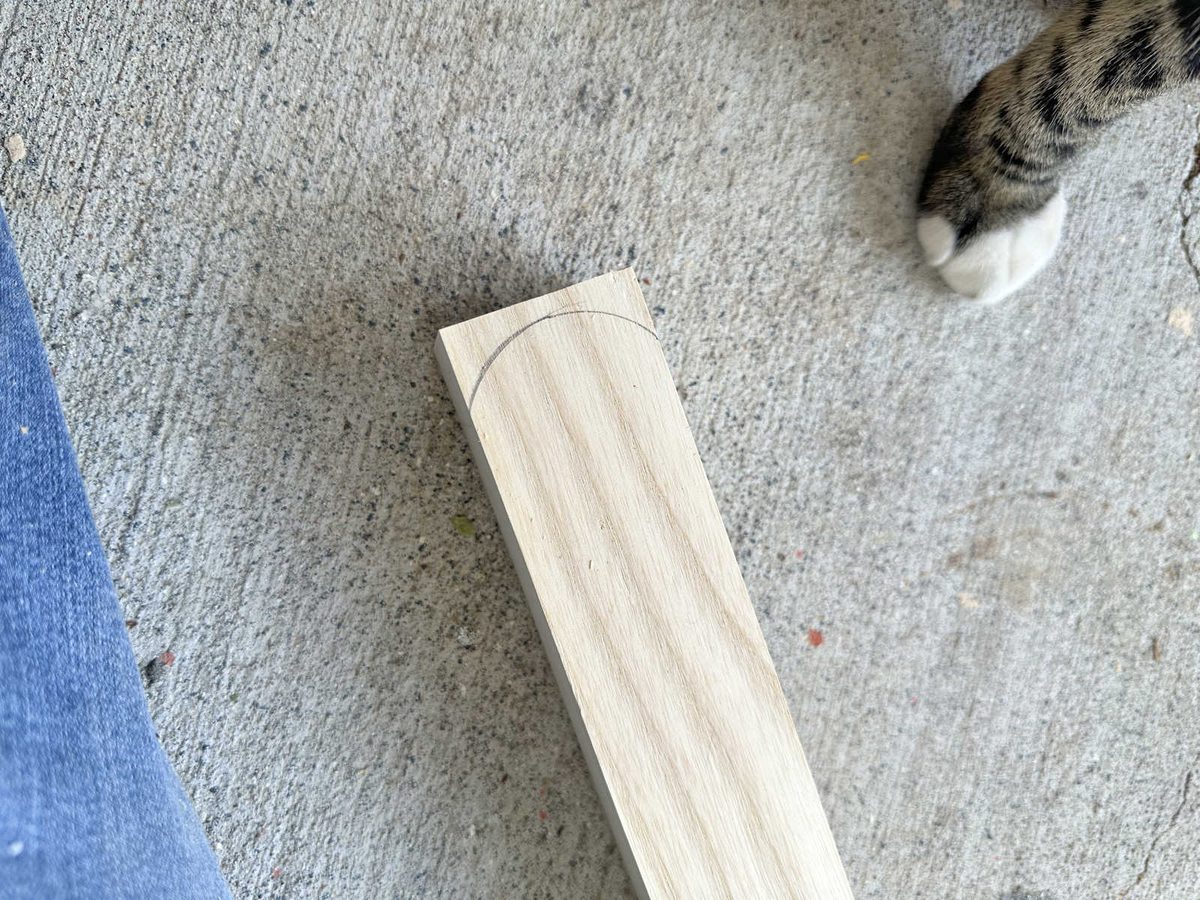
So all four sides had an arch that looked like this…
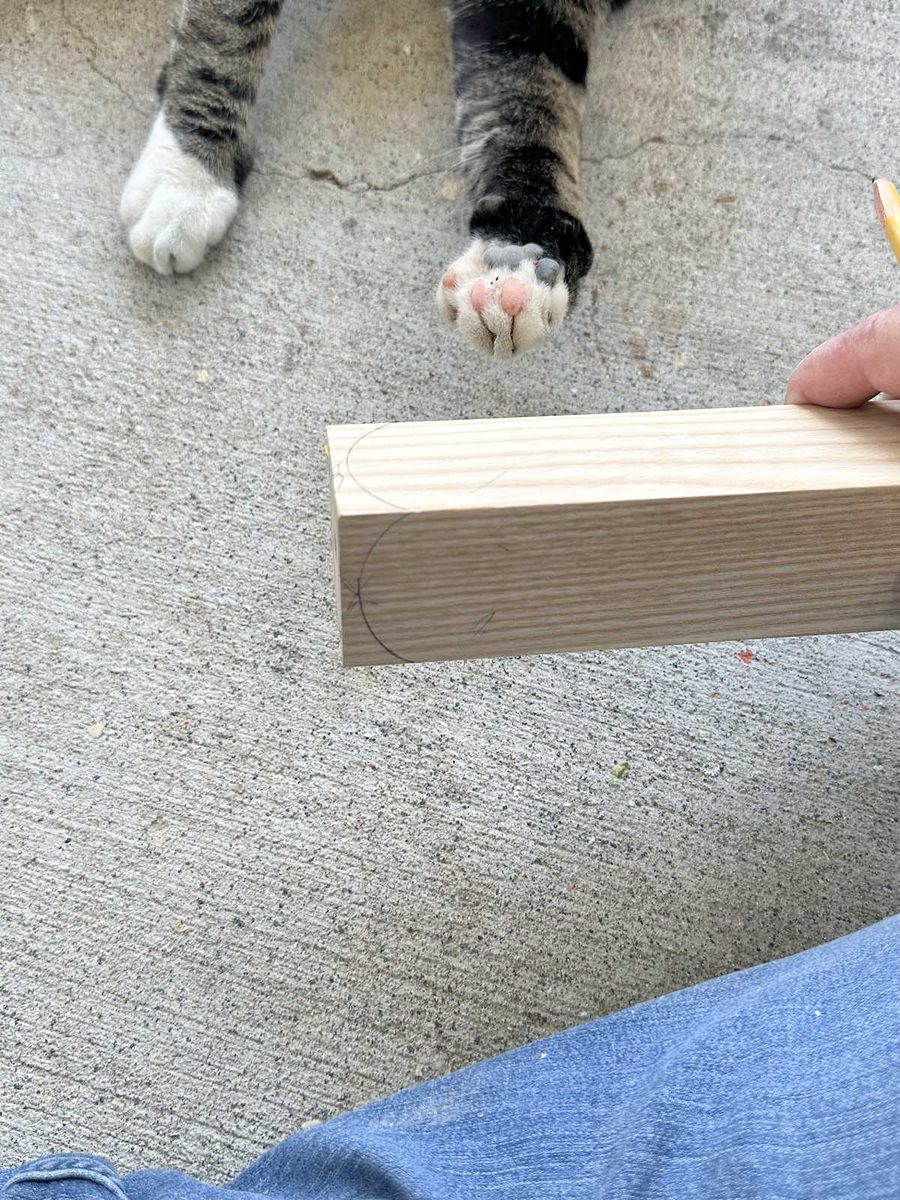
I just eyeballed the placement on all four sides, but I made sure that the marks met on the corners.
All of these marks gave me a guide for sanding off the corners and the edges to make a rounded design on the ends of each of the square legs.
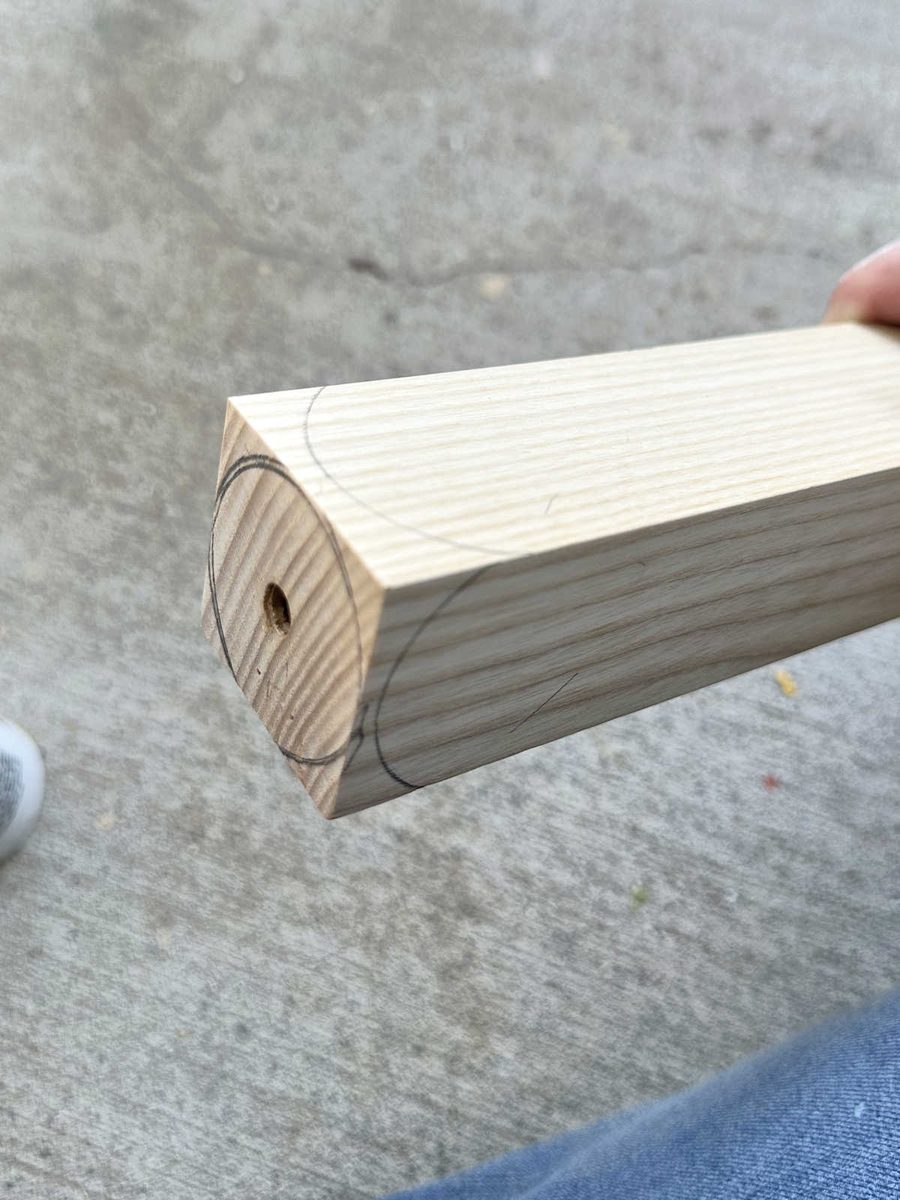
I used a 60-grit sanding disc on my sander to cut through the wood really quickly, and then worked my way to 150-grit to smooth it out. Here’s how it looked with all of the excess sanded away and the end of the leg shaped according to my guidelines that I drew.
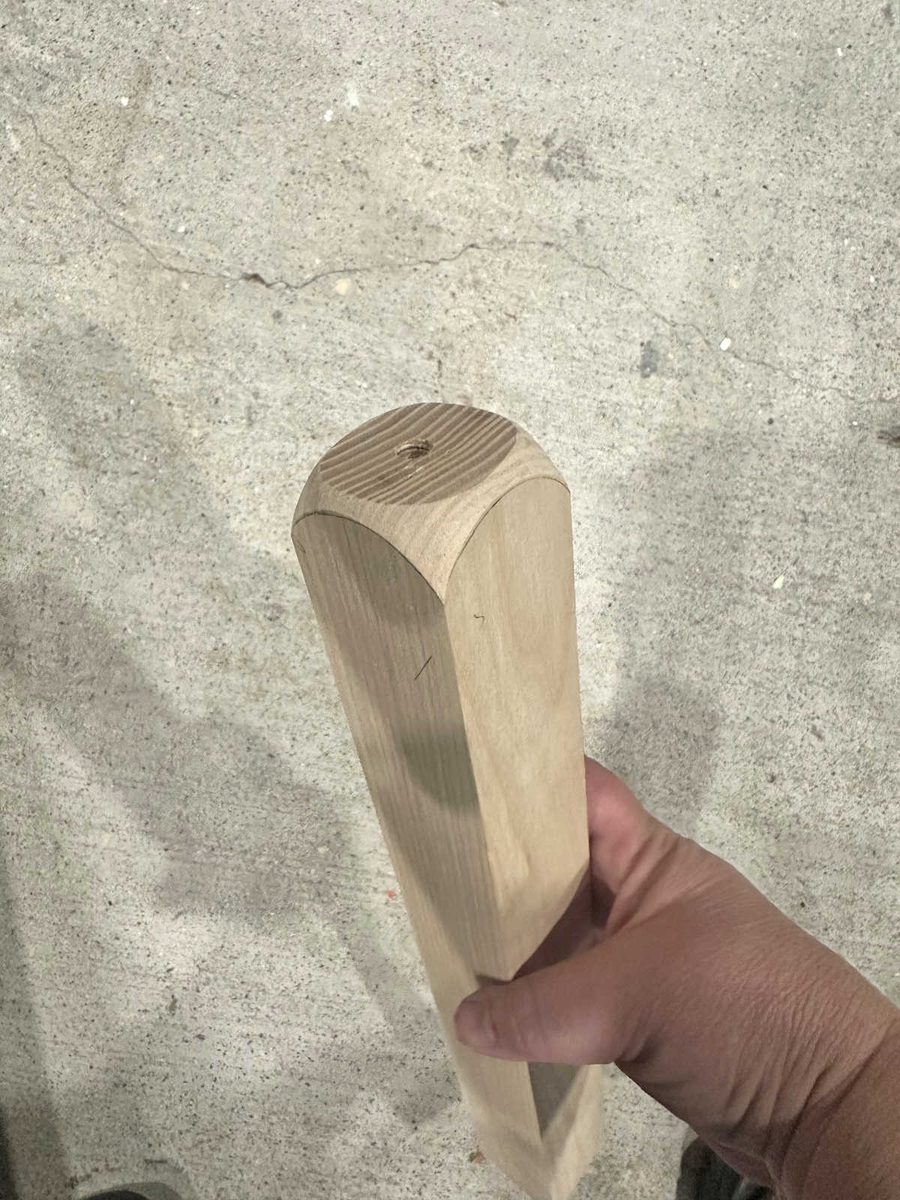
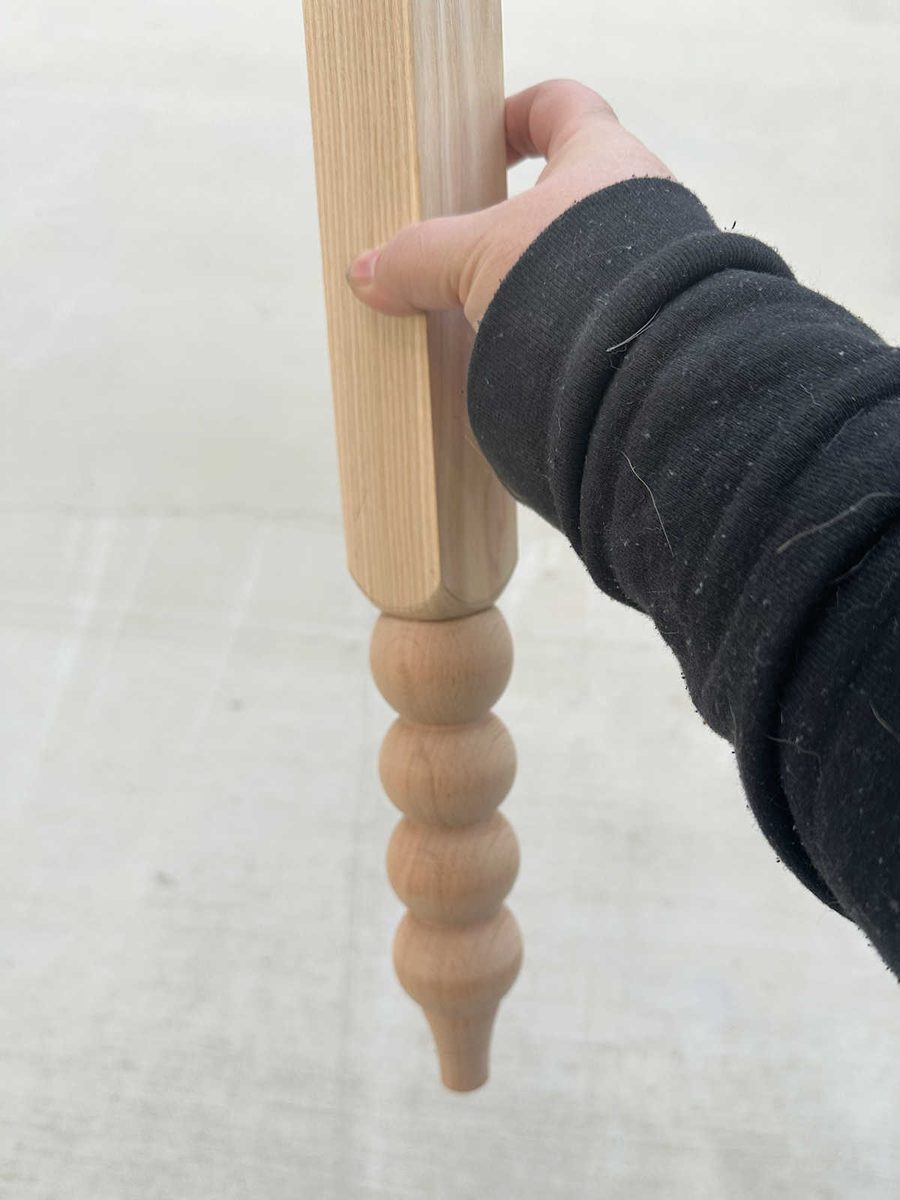
And once the two pieces were glued and screwed back together, this was the finished leg.
Then I had to make the stretchers (skirting) to hold the legs in place. For these pieces, I used a solid 1″ x 6″ piece of lumber to give the sides a strong foundation, but then I use decorative trim on top to make it pretty. This is where you can really get creative. You can put together any combination of trim that you find on the trim aisle of Home Depot or Lowe’s to create the exact look you want. I went with two plain 1″ x 2″ pieces of lumber and a pretty fluted trim for mine.
For the piece that will actually give these sides the strength they need, I used the 1″ x 6″ lumber, which I ripped down to about five inches using my table saw. Then I used my miter saw to cut two pieces for the front and back of the bench to 43.5 inches long, and two pieces for the ends of the bench to 14.5 inches long.
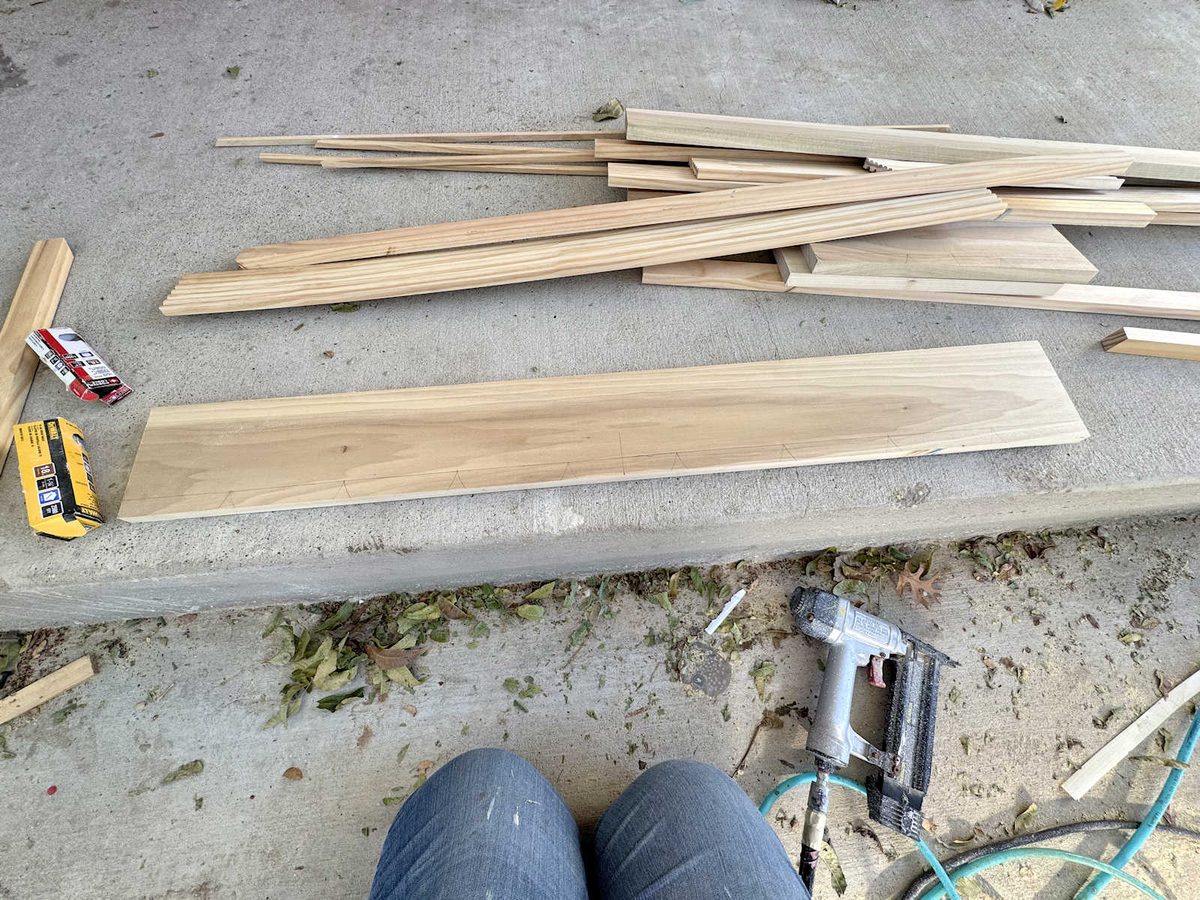
I also cut all of my trim pieces to the correct lengths using my miter saw before I started assembling the stretchers. To assemble them, I started at the top and attached a 1″ x 2″ piece of lumber. I glued and nailed this in place using 18-gauge nails in my nail gun.
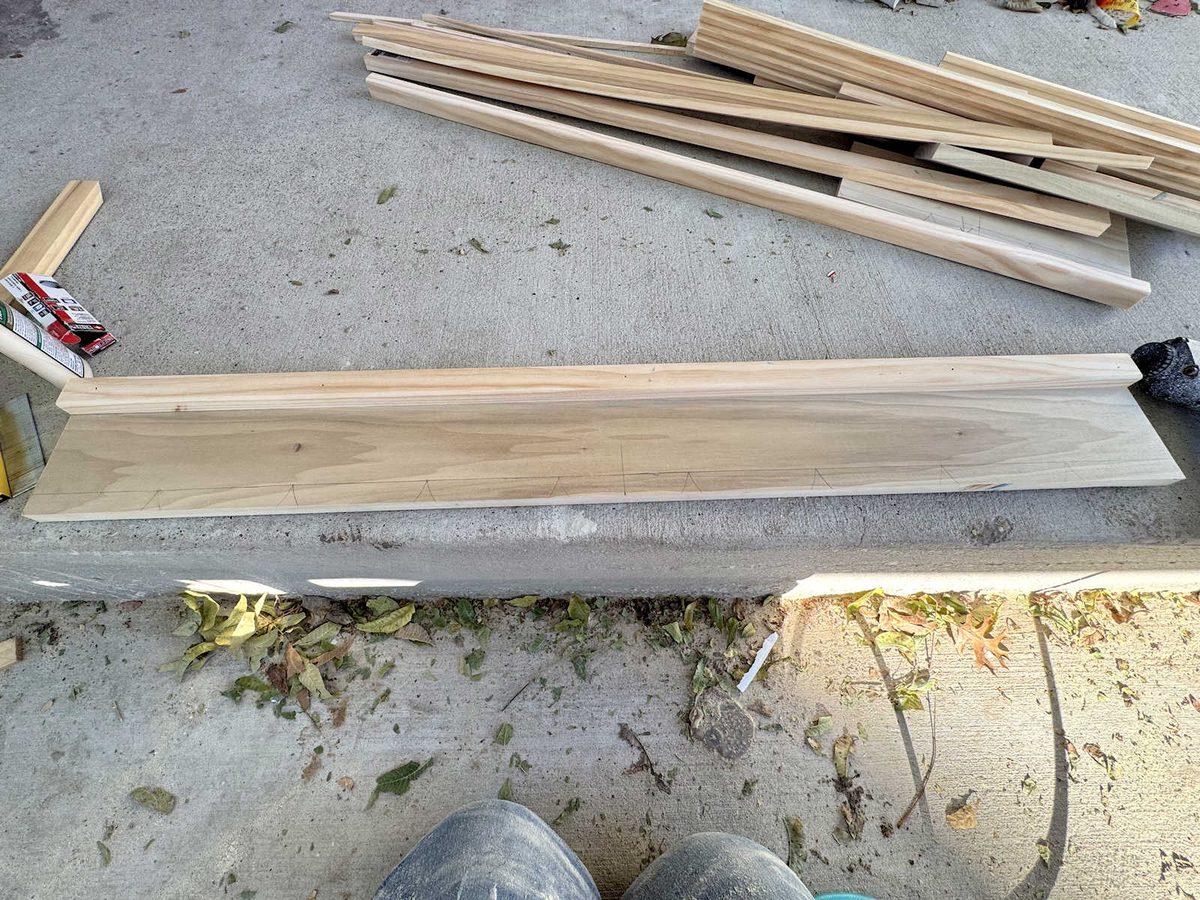
I do want to point out that before I attached this piece, I used 80-grit sandpaper, and then 150-grit sandpaper, to remove the sharp edge on this corner of this piece to give it a soft rounded-over appearance. I think those details make a big difference on a finished piece.
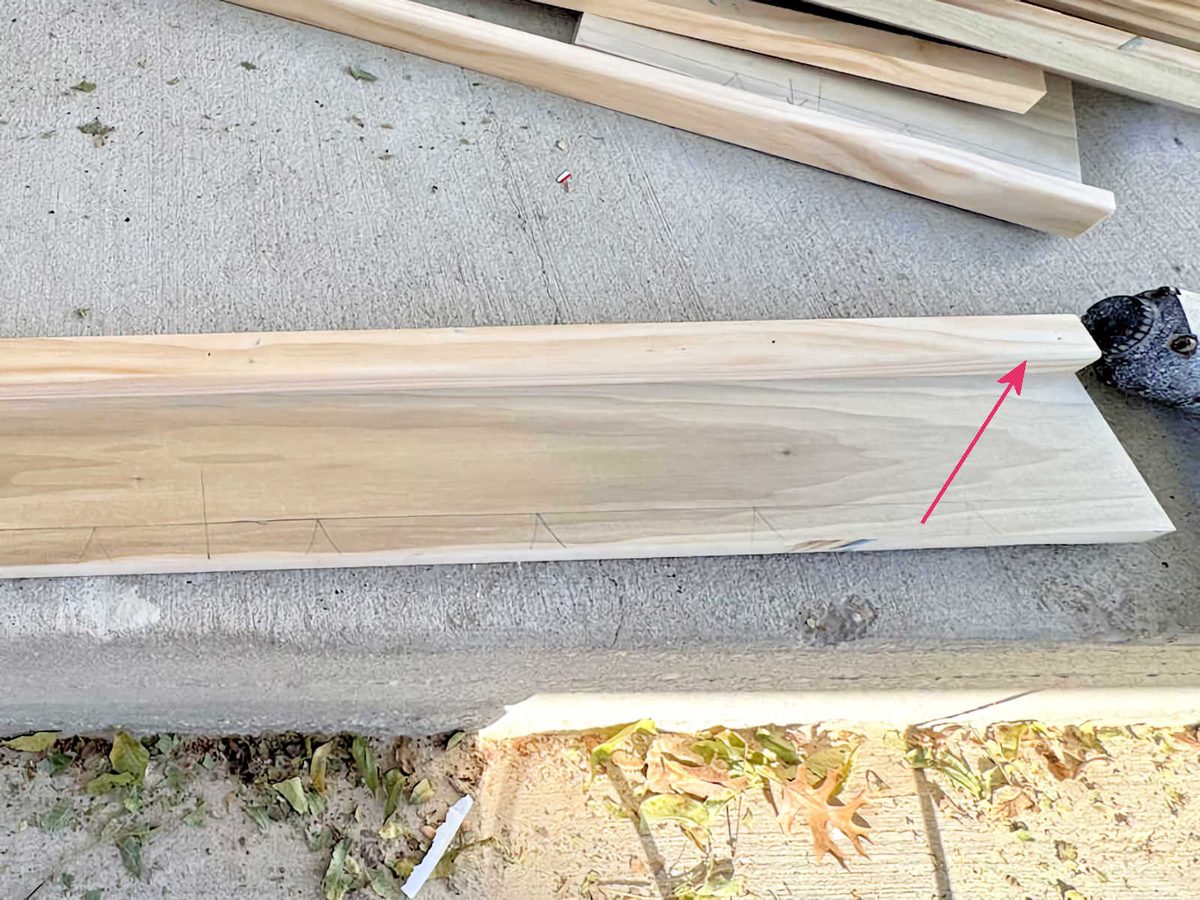
Right under that piece, I attached a piece of fluted trim, gluing and nailing it on using 18-guage nails. I nailed right through the top of the trim because the nails are small and those holes can easily be filled in with wood filler.
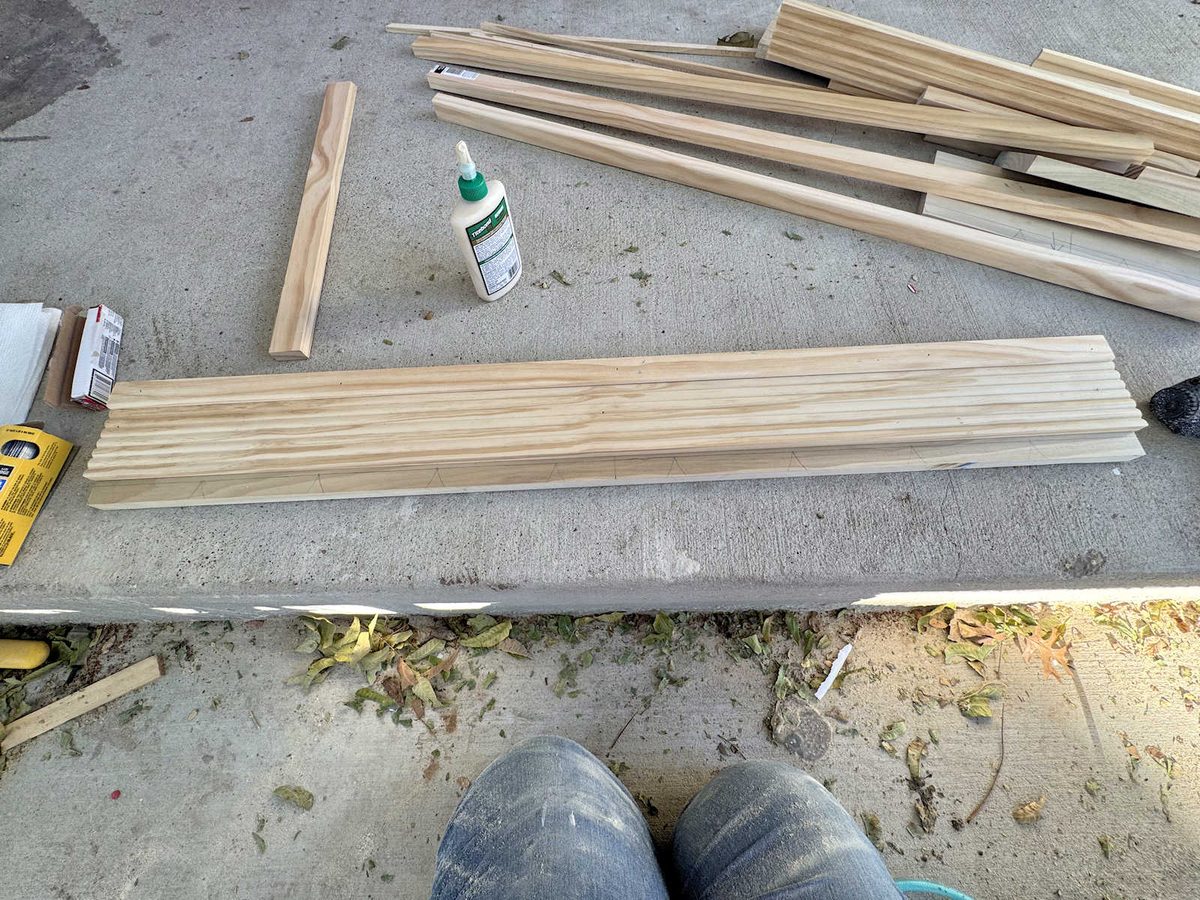
And then I attached another 1″ x 2″ to the bottom to complete the design. Just like on the top piece, I also sanded that sharp edge on the top of this piece before attaching it to soften that edge and give it a gentle rounded-over appearance.
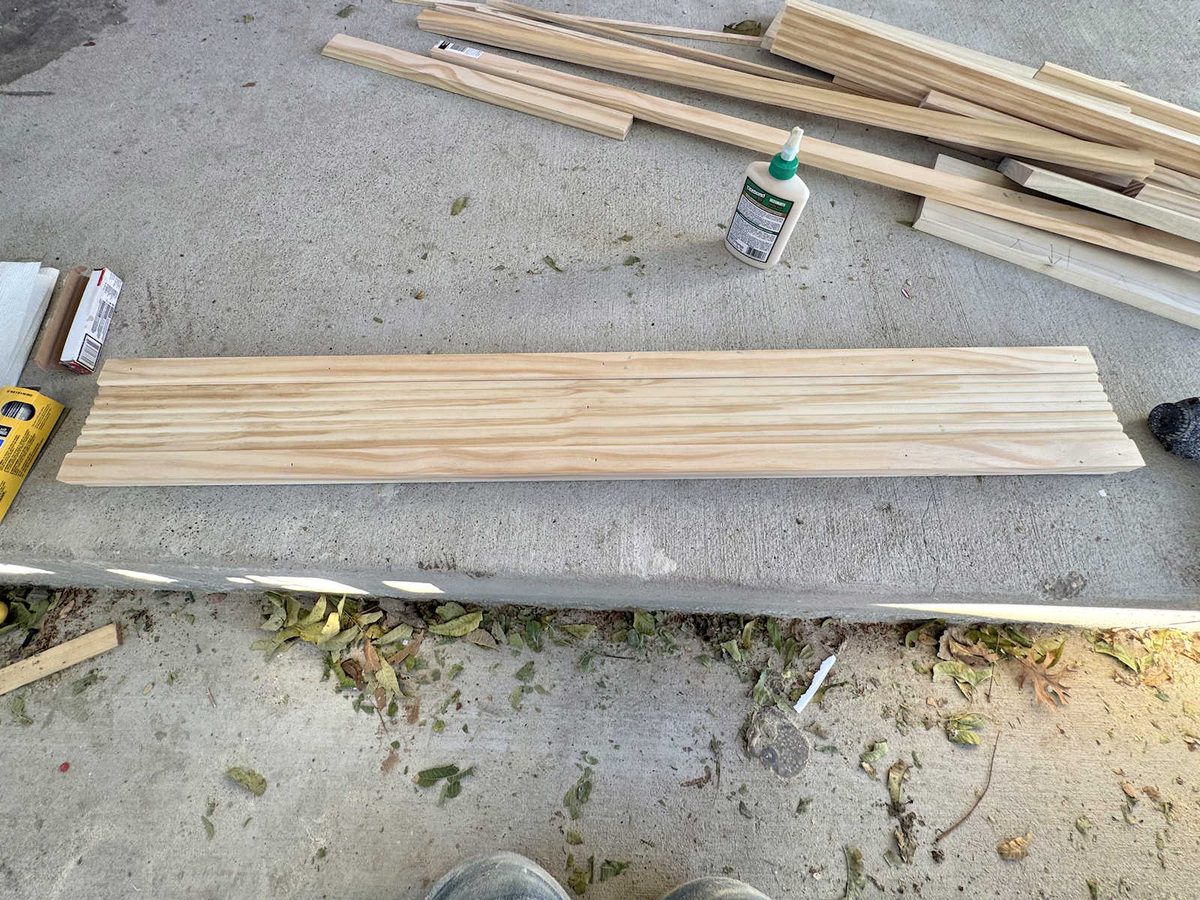
I repeated that process three more times to create the other three skirting pieces for the bench, and then with my four legs and four skirting pieces finished, I was ready to assemble the whole bench base.
I started the assembly process by using my Kreg pocket hole jig to drill two pocket holes into each end of all four stretcher pieces.
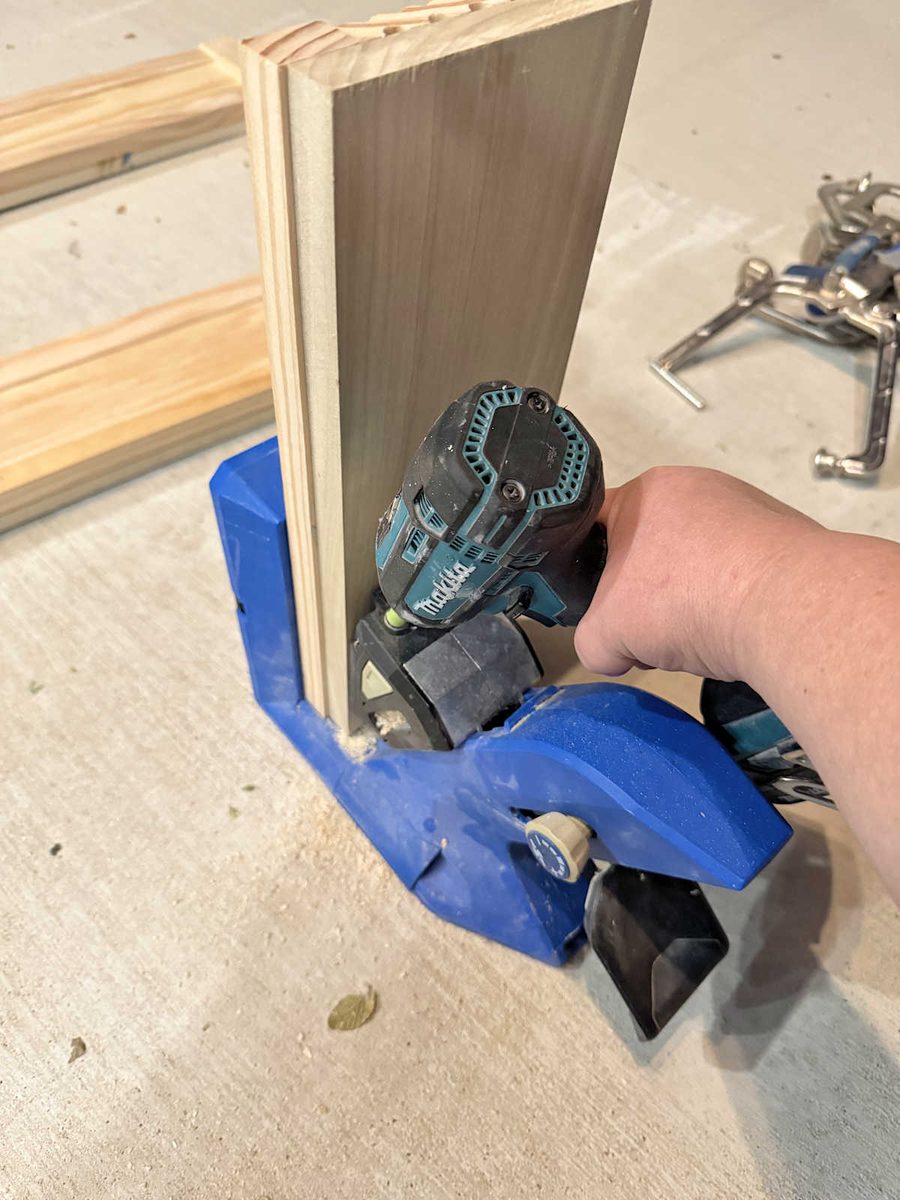
Once those pocket holes were drilled in each end, I assembled two legs to each of the small stretchers. I placed the stretcher piece face down and then glued the legs to the ends of the stretcher and clamped them together. Then I screwed them together using 2-inch Kreg screws in each of the pocket holes.
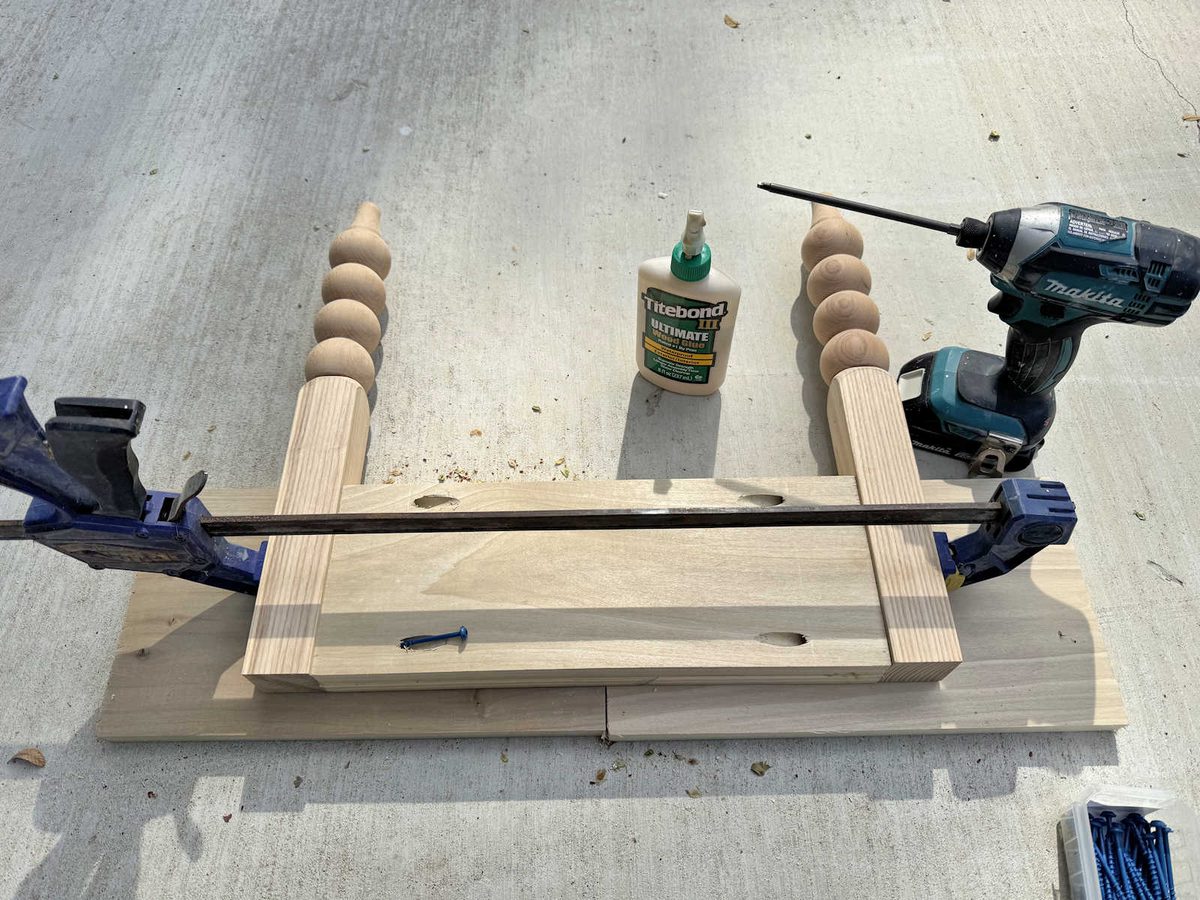
With the two small stretcher/legs pieces assembled, I moved on to attaching the long stretchers on the front and back. To do this, I used a Kreg right angle clamp which has one side that goes through the pocket hole and the other side is flat. I don’t like the flat side to be right against my project because the pressure can leave marks on the wood, so I always try to remember to put a scrap piece of wood between the clamp and my project. With the top being clamped together, I screwed the stretcher to the leg in the bottom pocket hole. Then I could release the clamp and put a screw through the top pocket hole.
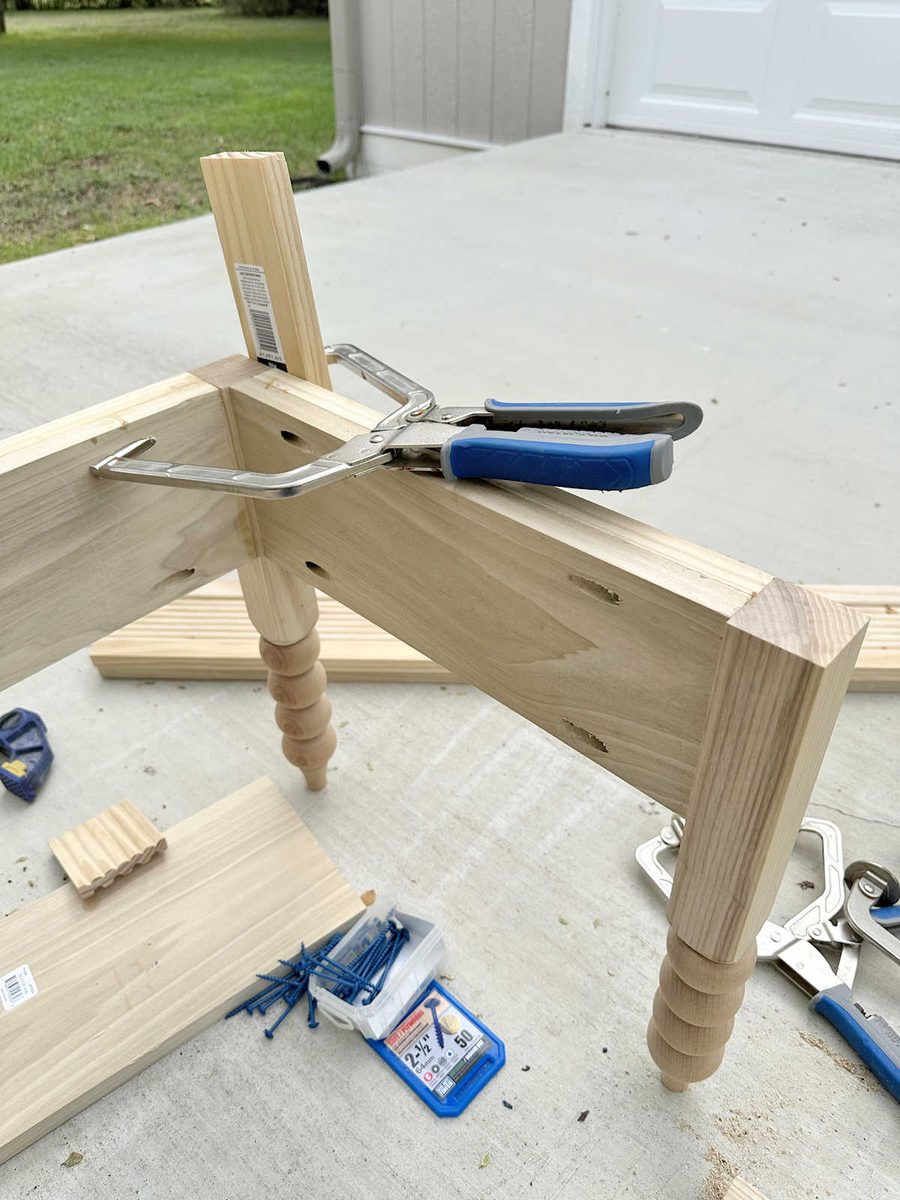
And once that front stretcher was glued and screwed to the leg, I had half of my bench put together.
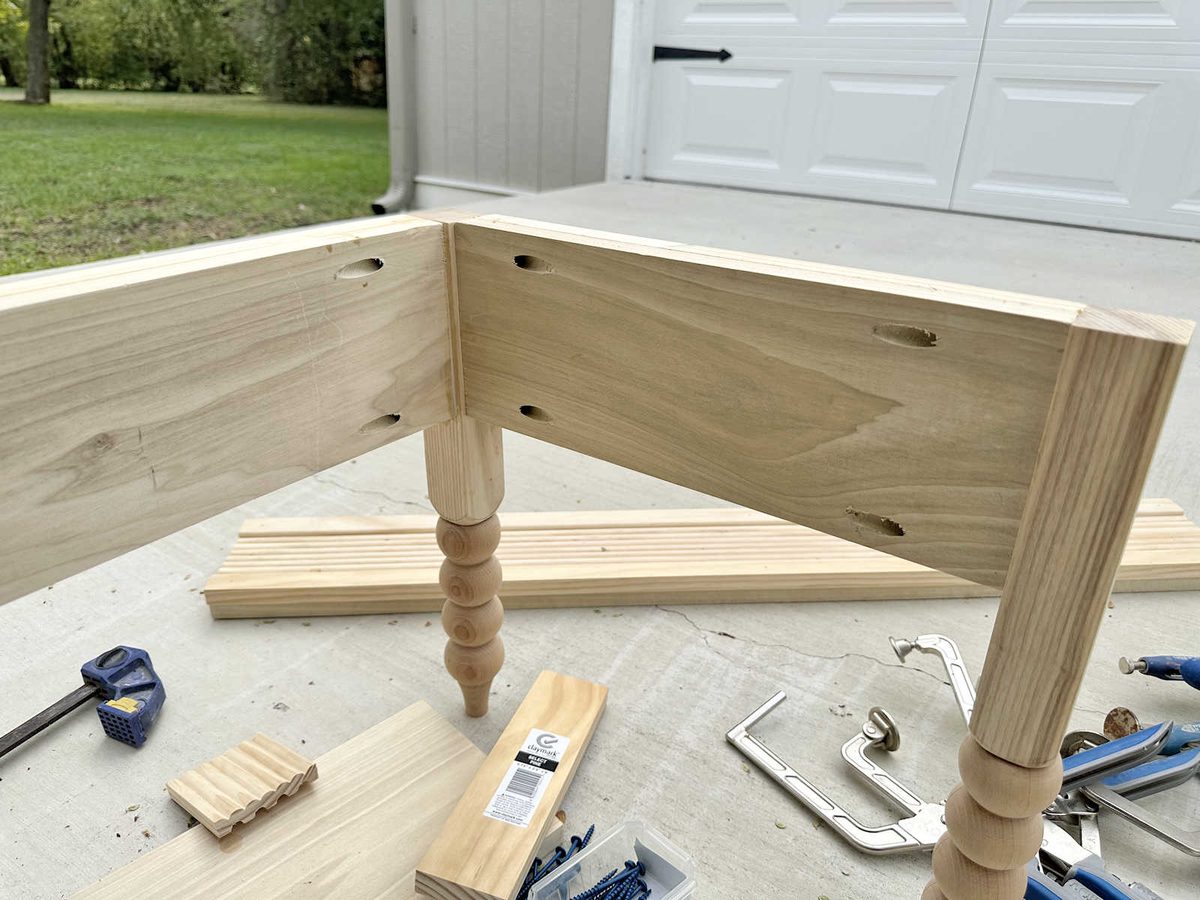
I repeated that process on the other end to attach the stretcher to the second assembled end piece, and then repeated the process to attach the back stretcher. And with that, the bench base was built.
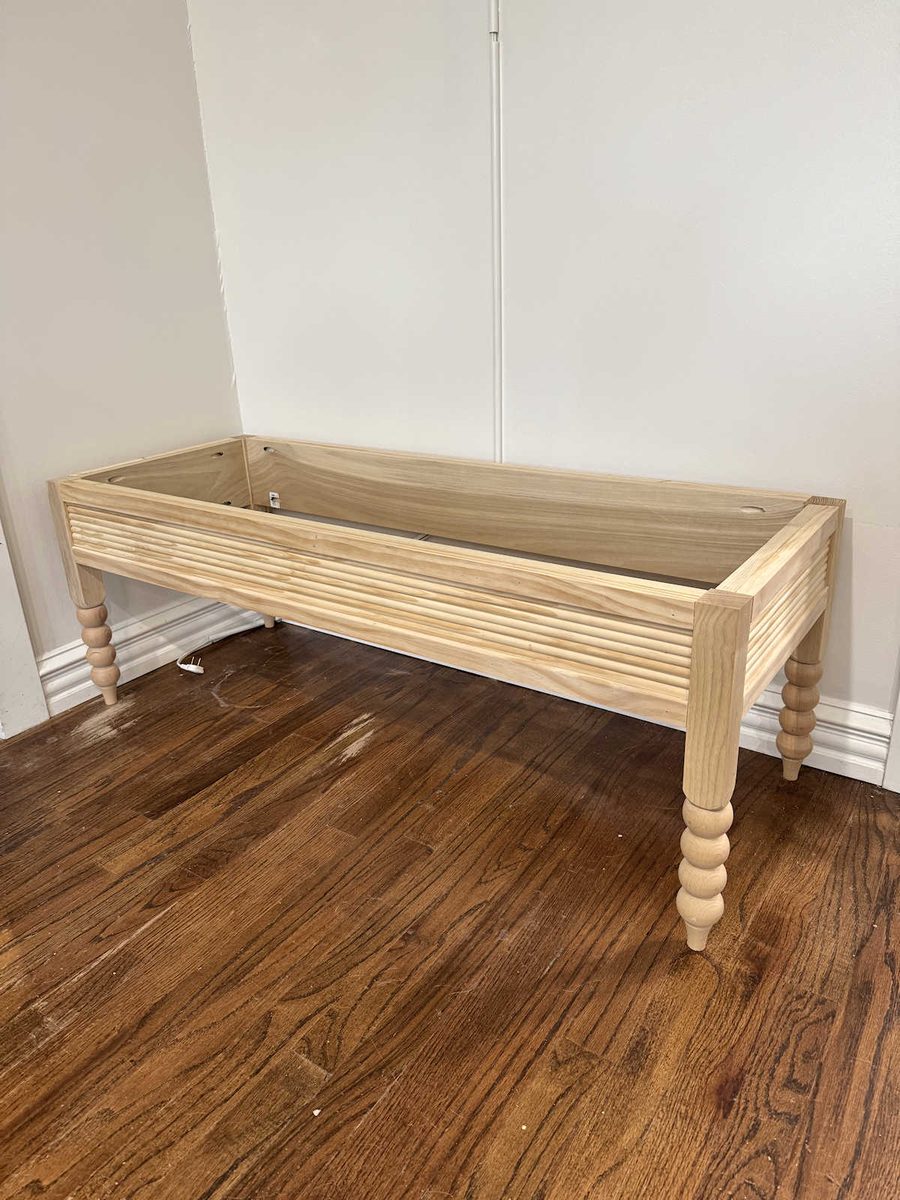
I’m really leaning towards painting these bases white. I think that would not only look so pretty with the dark pink velvet that I’m going to use on the upholstered top, but I think it would also show off the fluted trim better. With a natural wood color, the pretty detail of the fluted design kind of gets lost in the wood grain. The other option I’m considering is a dark stain color that will make the grain disappear and give it a more solid color. I know that for now, a dark base will kind of blend into the dark stained floor, but keep in mind that next year, I’ll be refinishing our floors in a light, natural wood color to match the floors in our bedroom suite. So I don’t really want to make a decision based on the current floor color.
Either way, I’ll probably make the final color decision when I actually have the fabric in hand. I’m really hoping it’ll get here this week so I can get all of these fabric projects done — curtains, benches, and dining chairs.
By the way, this is the second pair of benches I’ve built for this room. I didn’t go into as much detail on the process for this bench because I’ve already written a pretty detailed post about how to build and upholster a bench from the first time around. If you want a more detailed process, you can see those previous posts here: Part 1 – DIY Upholstered Dining Room Bench – How To Build The Frame
Part 2 – DIY Upholstered Dining Room Bench (Finished!) – How To Upholster The Seat

Addicted 2 Decorating is where I share my DIY and decorating journey as I remodel and decorate the 1948 fixer upper that my husband, Matt, and I bought in 2013. Matt has M.S. and is unable to do physical work, so I do the majority of the work on the house by myself. You can learn more about me here.

Hi Kristi,
Just curious, have you considered painting the bases black? I think it would be beautiful with the dark pink fabrick as well as the light stained floors.
I have considered it! I’ll wait until I get the fabric in hand, but I think black is another good option.
Excellent instructions on your bench project, as usual, but what I really enjoyed was Tiger’s input, lol.
I love all the bonus pictures of your kitty. Such a good helper 🙂
Looking good! Although the scallops were pretty, I think this goes with your room a little better so to me, all’s well that ends well. 🙂 I’d probably vote for a dark stain so the pink doesn’t look childish but you’ll know better when you see it in person. I think we all wish we could be right there with you! And you probably think ” thank goodness they’re not!”
I agree this design is better than the original, scalloped edges. Not sure what it says about my brain, but my first thought was “what a dusting nightmare”. Ha! 🙂 (And your furry supervisor is adorable!)
I like this more sophisticated version of the bench much better than the one with scallops which looked like something for a child’s room.
You stated this was a great beginner project, however, I do not have a cat to assist. Will I still be able to do so?
Love the pics with Tiger he looked like a great helper!
Haha! You can, and you’ll probably get it done much faster than I did with my “assistant”. 😀 He’s adorable, but he sure does slow me down! He seems to think the only reason for my existence is to pet and cuddle him and give him belly rubs. And feed him, of course. 😀
I was so looking forward the scalloped benches, they truly took my breath away! I really want to make one for my own home.
I thought the scallop brought a softness and whimsy to the room. Curious to see what color you choice with the pink fabric. I do love how the room is coming together.
I love the new design for the benches! Also, your attentive helper
Lively benches, I love the fluted detail. I vote for white paint.
I love the bench you are making…and I love your little companion…She loves being right there on the job with you…and I’m so happy she is now a part of your family too.
She is so pretty, and lucky to find a special home with you.