Simple DIY Picture Ledges (New Sitting Room Gallery Wall)
Remember my failed attempt at a floral wall mural on the TV wall of the sitting room (i.e., our breakfast room)? I finally painted over it last week (while Matt sat in his recliner and literally booed me repeatedly throughout the process 😀 ). , and replaced it with something that I absolutely love. I didn’t want to get rid of the frame that I built years ago for the TV, so in order to make it look not so dominant on that wall, I needed to come up with a solution that integrated the framed TV while taking some of the attention away from the TV. My solution was to build some simple DIY picture ledges to surround the TV. Once I had those built and installed, I filled them up with colorful artwork. Here’s how this project turned out…
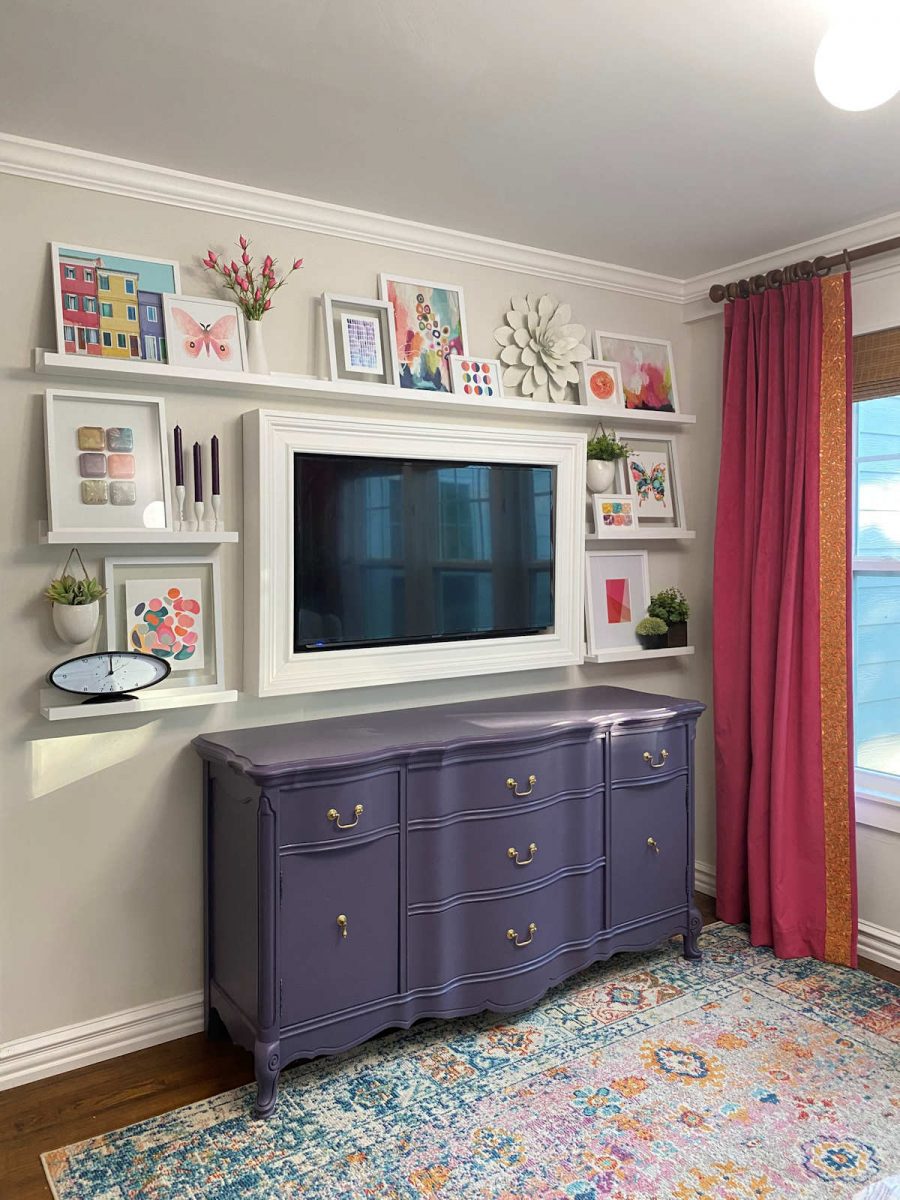
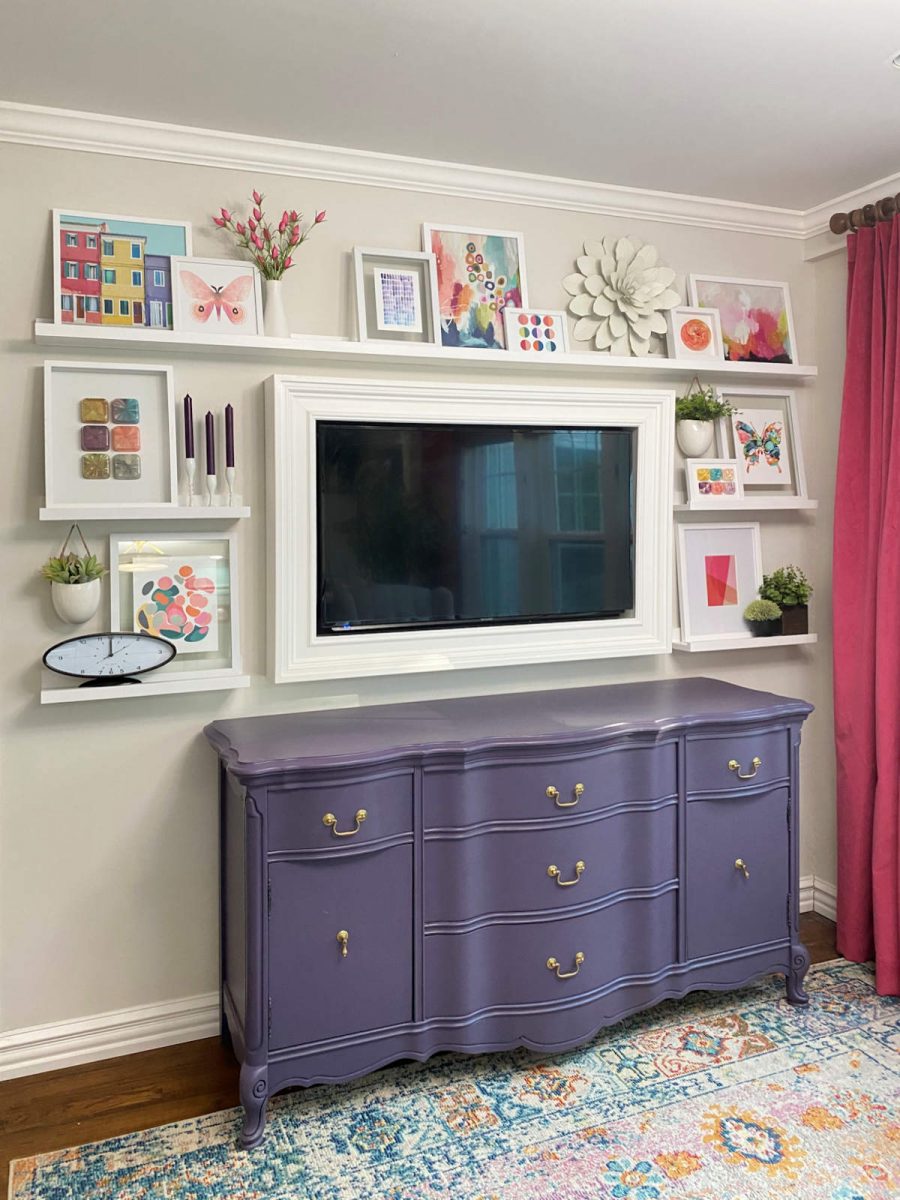
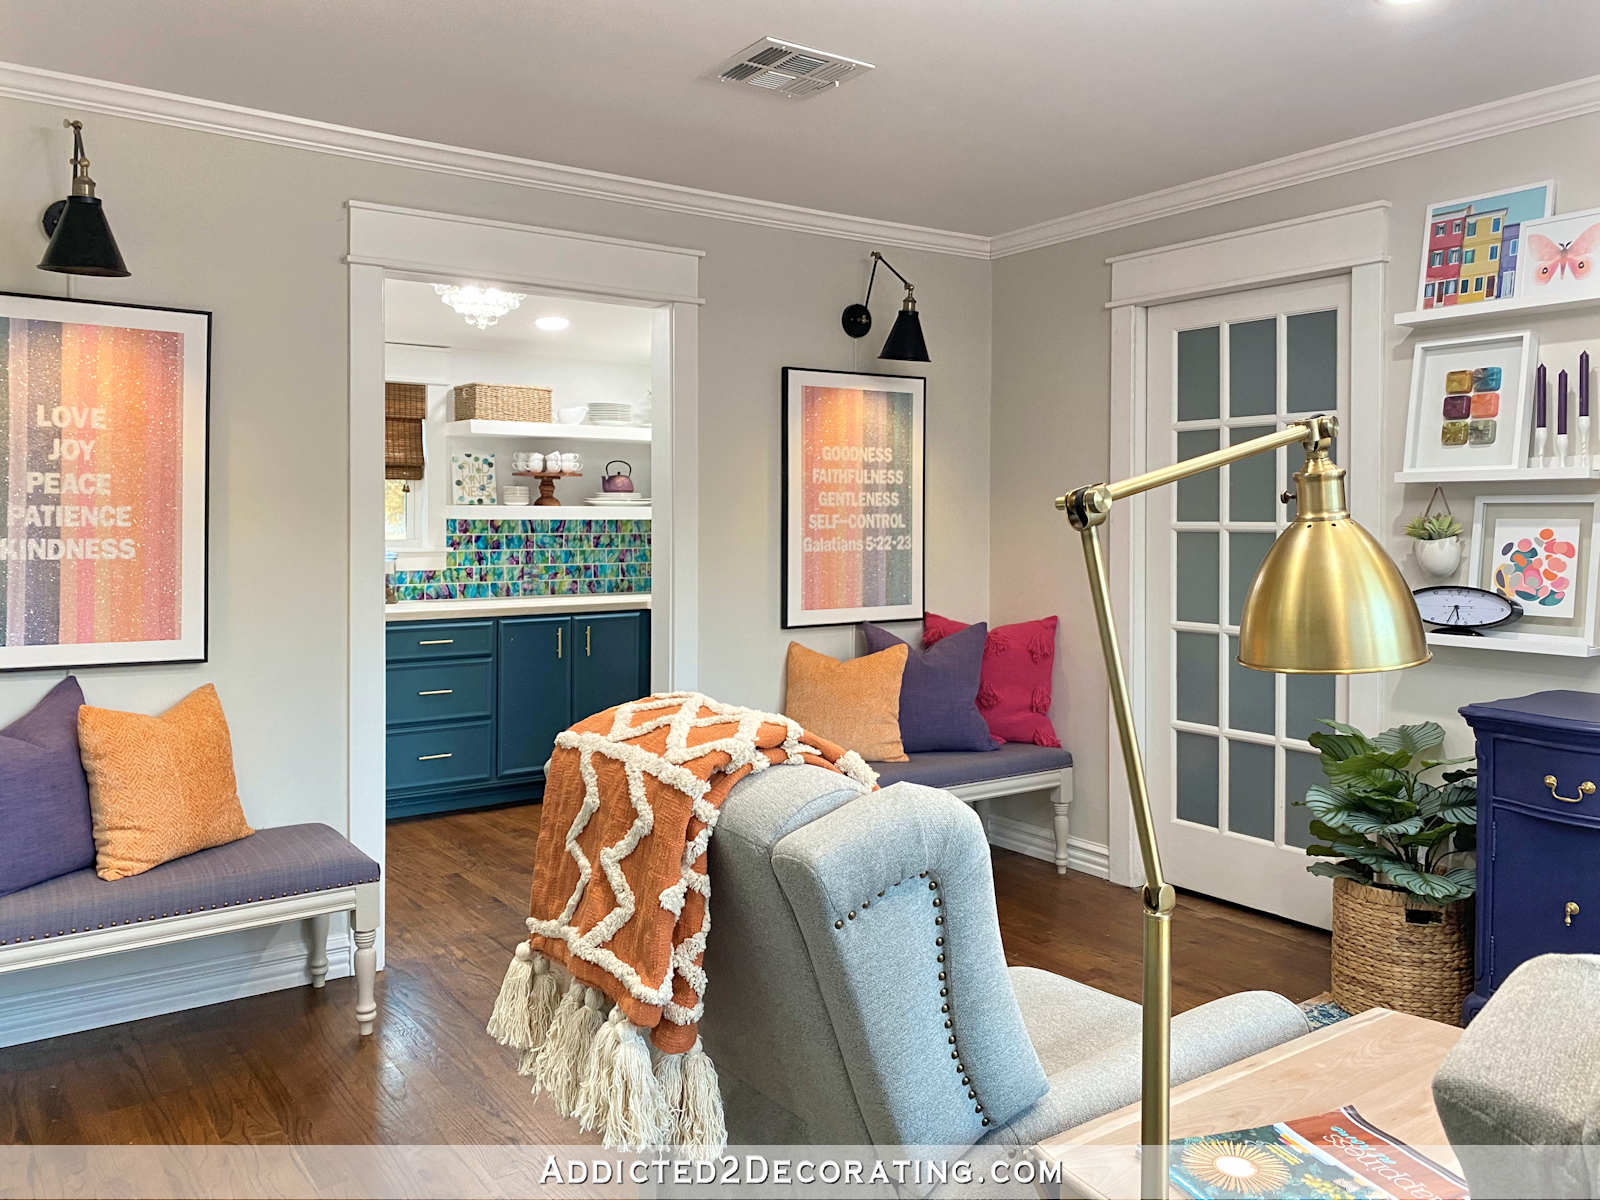
I can’t even tell you how much I love this! I’ll be the first to admit that when you add velvet curtains to a room, especially in a somewhat dark and saturated color, things can go in a very formal and serious direction in a hurry. Well, that was the last thing I wanted, and I think this wall went a long way towards lightening things up, injecting lots of color and brightness, and adding some lightheartedness to the room.
I absolutely love to walk through this room or sit in my recliner and just take it all in. My goal was to fill those shelves with bright and colorful art that I would actually enjoy looking at day after day, and while it took me a couple of hours of scouring Etsy for prints that fit the bill, I managed to find a collection that I love to see as I’m walking through or sitting in the room.
These picture ledges were so incredibly simple to build, so let me show you the process.
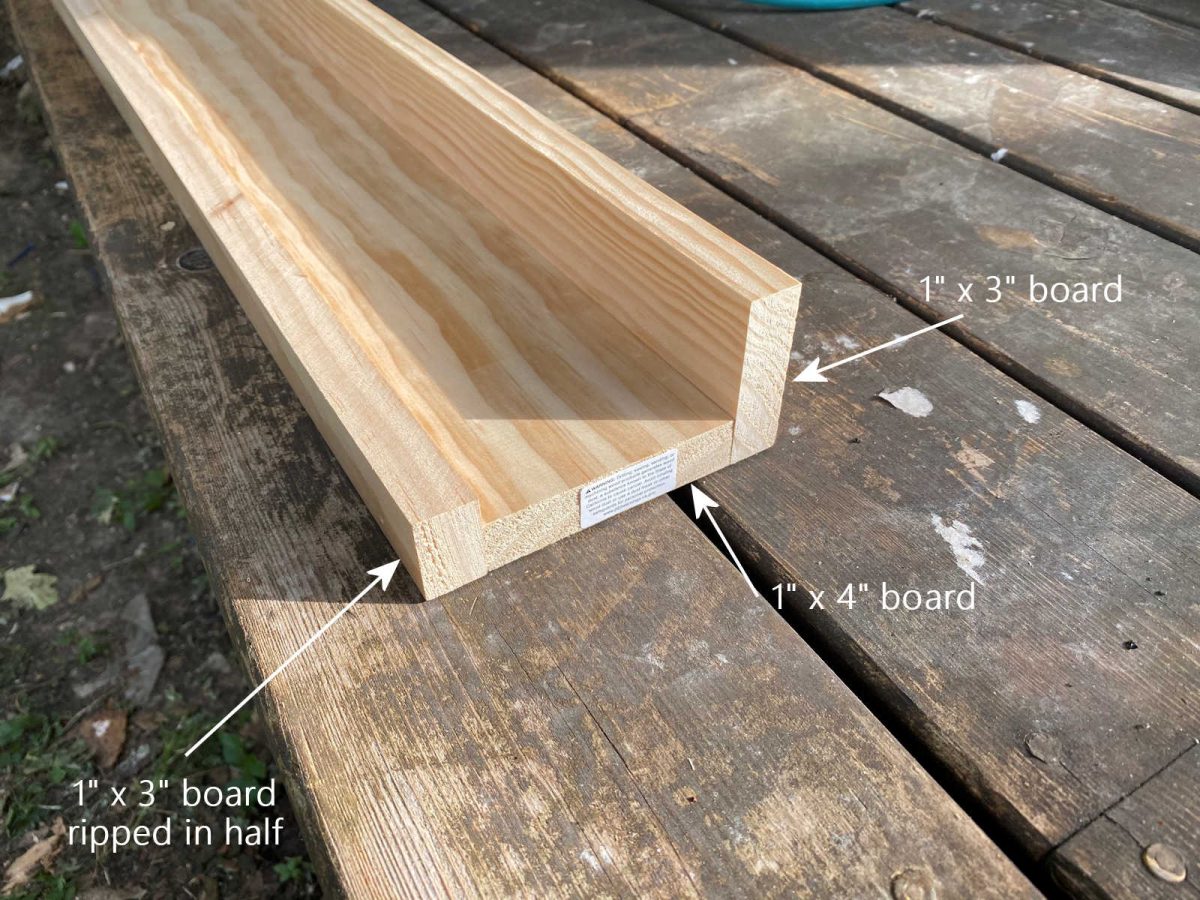
I started with a 1″ x 3″ x 8′ board and a 1″ x 4″ x 8′ board. I put a bead of wood glue on the edge of the 1″ x 4″ board…
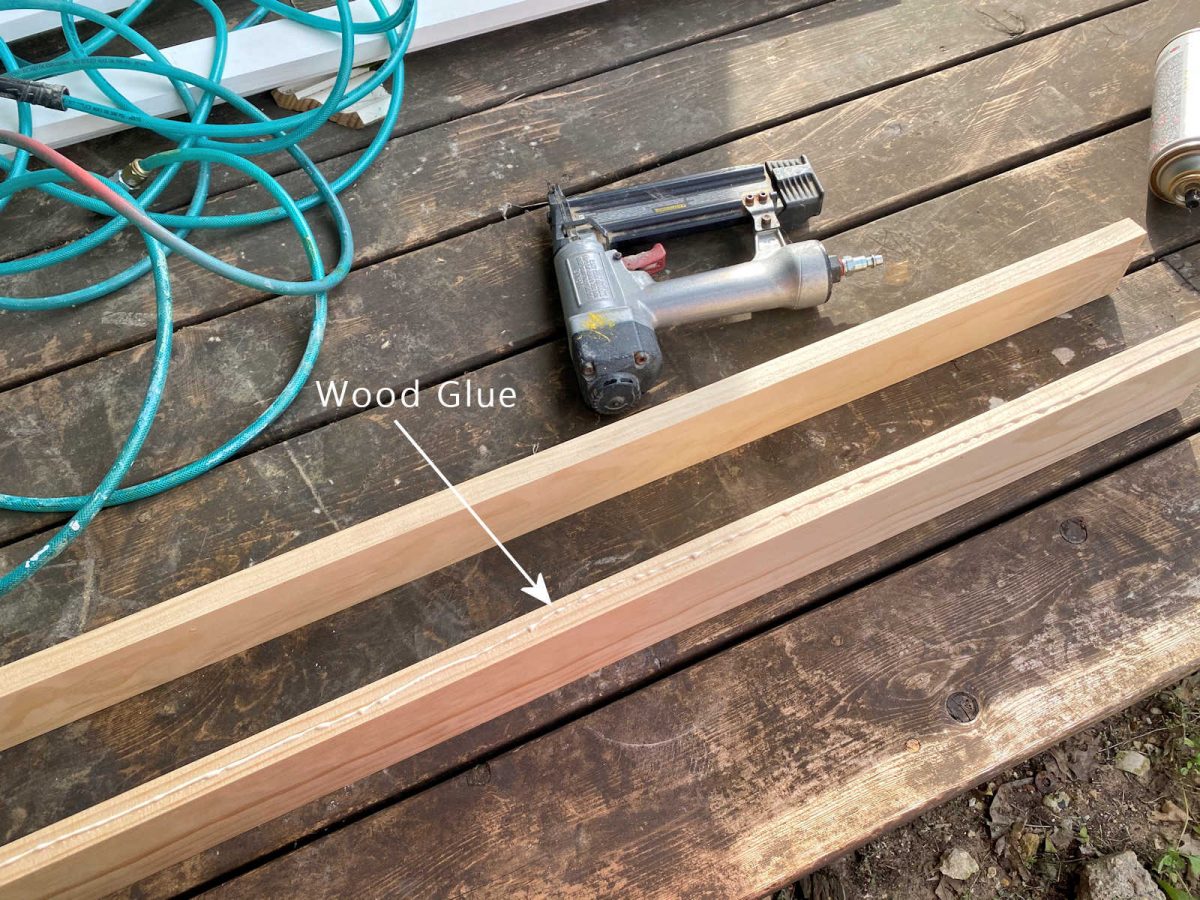
…and then placed the 1″ x 3″ board on that, lining up the edges, and nailing that into place with 18-gauge 1.5-inch nails in my nail gun.
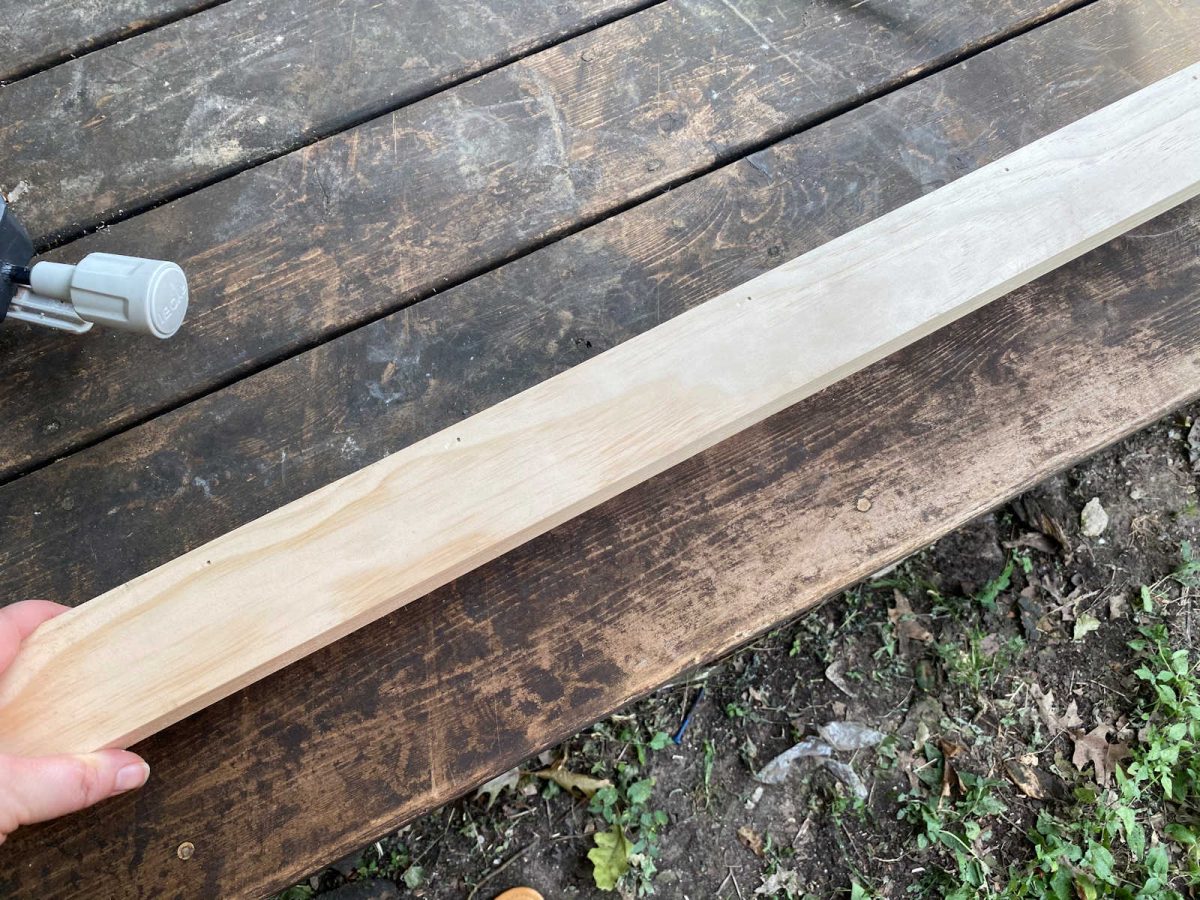
Here’s how it looked once those were nailed together and placed upright as it would appear against the wall.
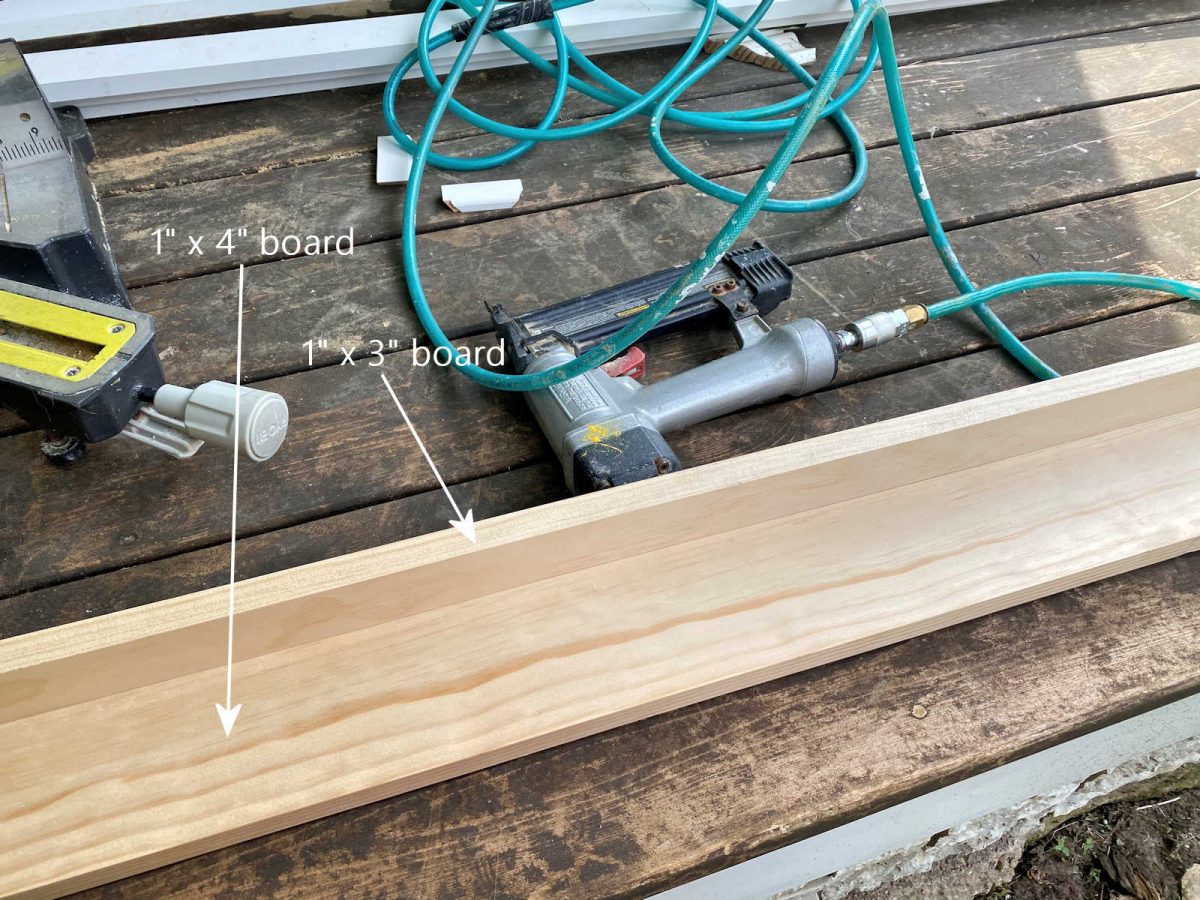
Here’s a view of the profile so you can see how they’re nailed together…

For the lip on the front edge of the ledge, I used my table saw to rip a 1″ x 3″ board in half, and then attached that to the front using wood glue and the same 18-gauge 1.5-inch nails.
If you don’t have a table saw, you can simply purchase a simple trim that covers the front edge and provides a little lip.
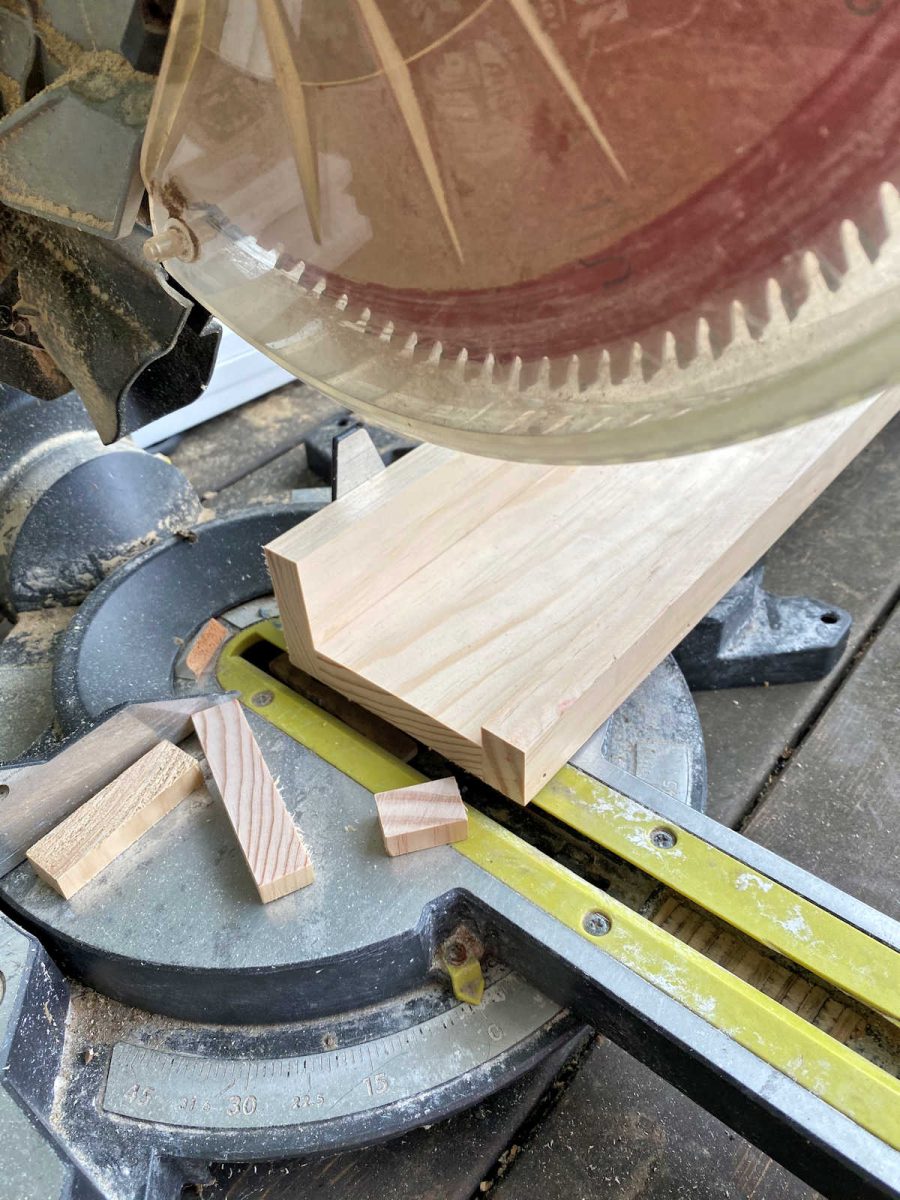
Once the ledge was assembled, I cut the sizes I needed for my wall. I recommend assembling the ledge first and then trimming the edges so that all three pieces are cut at the same time to give a really nice end.
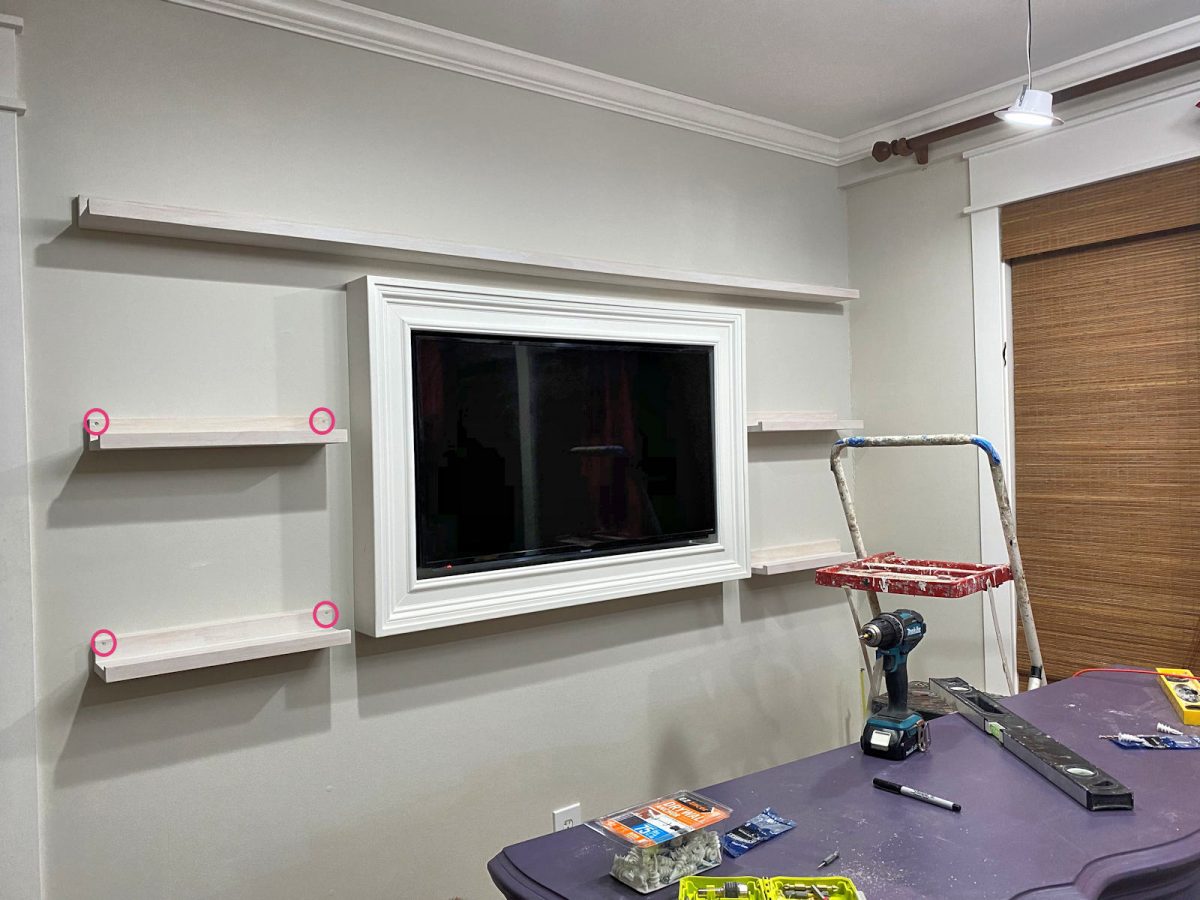
Once the ledges were cut to size, I went ahead and installed them on the wall before priming and painting. For the little shelves, I used two screws (one at the top of each corner) and screwed into drywall anchors. For the long shelf, I used three screws (adding one in the very center of the ledge), also screwed into drywall anchors. You can see the placement of the screws circled in pink below.
Of course, you can prime and paint the ledges before installing them, but I found it was much easier to install and then paint.
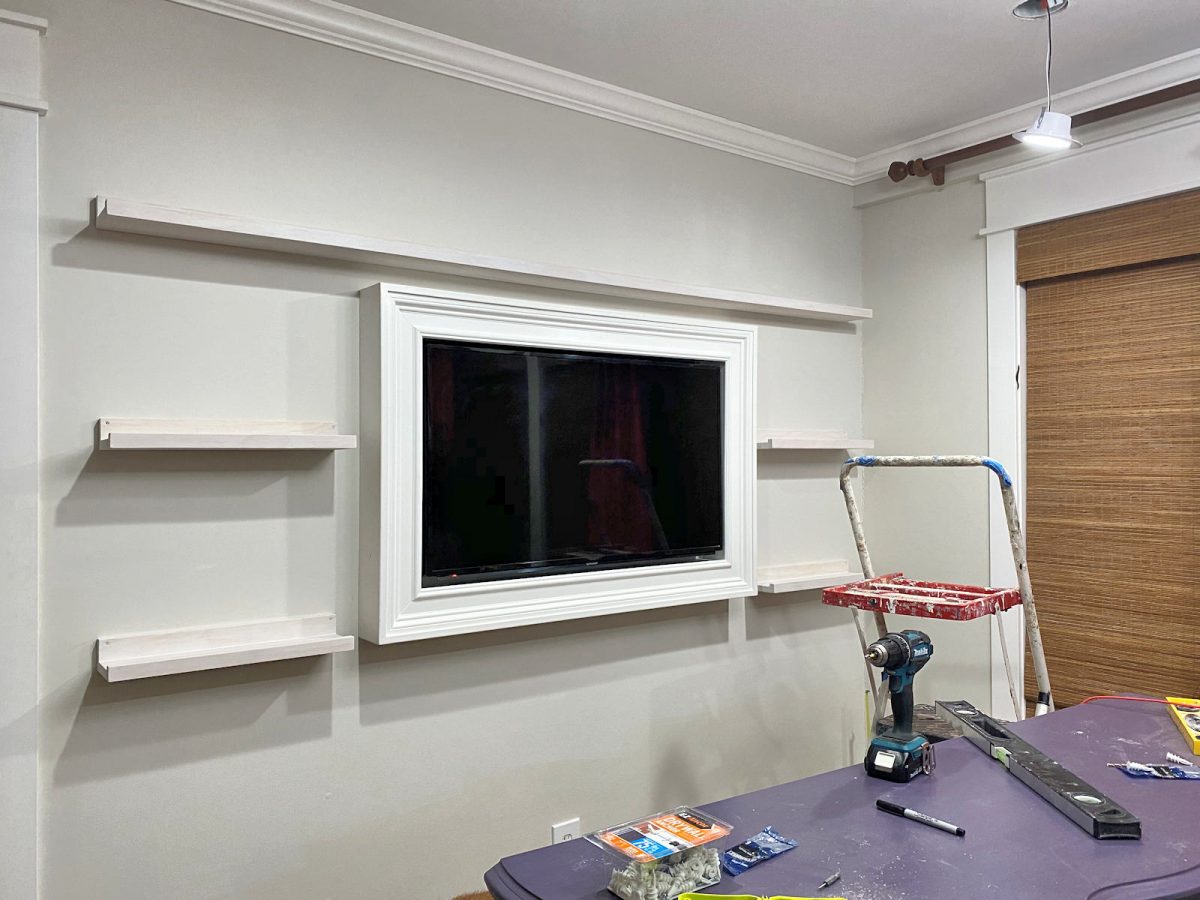
After two coats of paint, I gave them about 24 hours to dry, loaded up on some frames that I found on sale at Hobby Lobby, and then set about arranging them to see what size would go where to give me an idea of what direction to head with artwork.
All of the artwork I purchased came from Etsy, and they were all instant downloads. I did change the colors on three of them so they would better coordinate with my room, and then I uploaded them to the Walgreen’s website, and they were ready in under an hour.
Here’s where I found each item:
- All frames – Hobby Lobby
- Colorful tumbling rocks print (bottom left)
- Oval clock – Hobby Lobby
- Hanging vase – Hobby Lobby
- Purple candles – Hobby Lobby
- White candlesticks – I had these on hand
- Square resin mosaic – I made those
- Colorful houses print (top left)
- Pink moth print
- White vase/pink flowers – Hobby Lobby
- Purple and blue watercolor brushstrokes print
- Colorful abstract print (top center)
- Circle print (top center)
- Large metal flower – Hobby Lobby
- Framed resin disc – I made that
- Colorful abstract print (top right)
- Watercolor butterfly print
- Small resin squares mosaic – I made that
- Pink and orange geometric print
- Faux potted greenery – Hobby Lobby
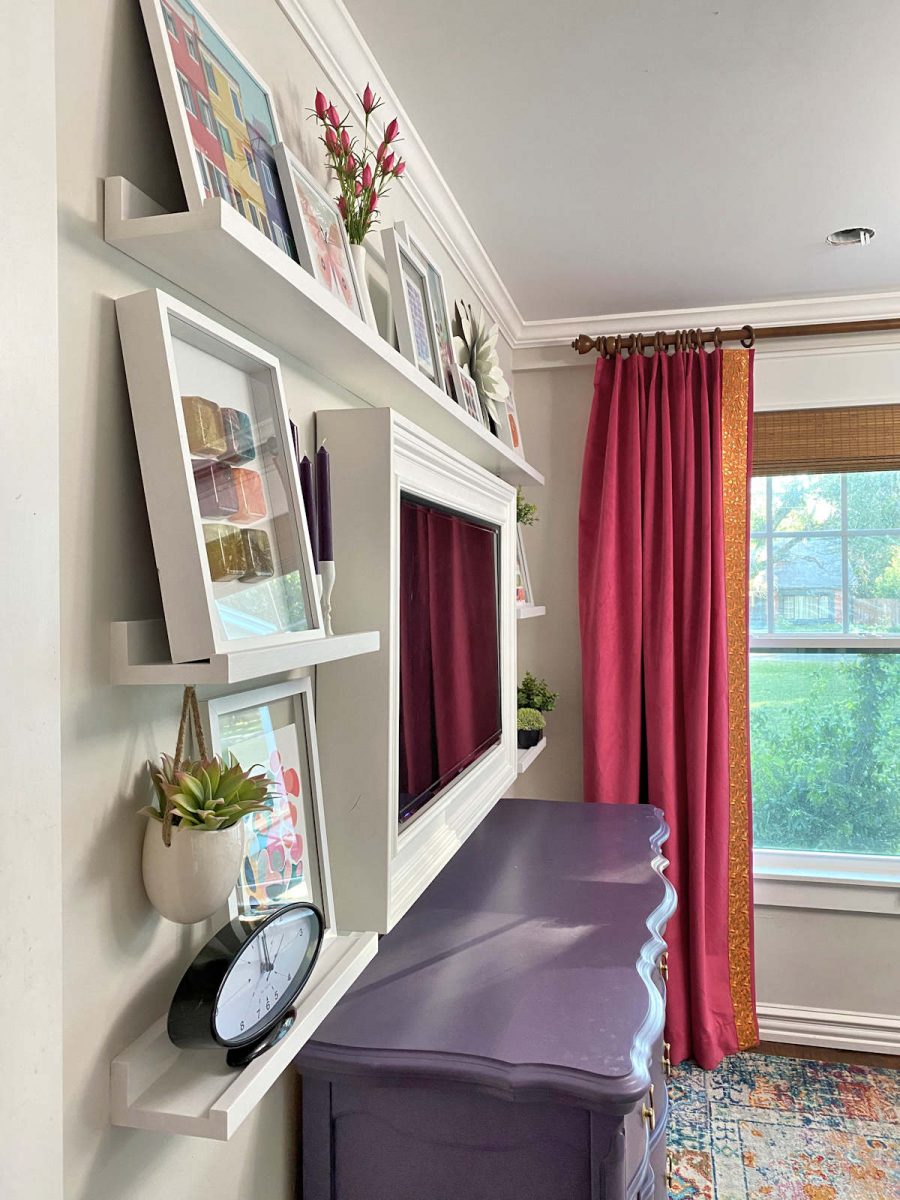
Here’s how the picture ledges look from the side view.
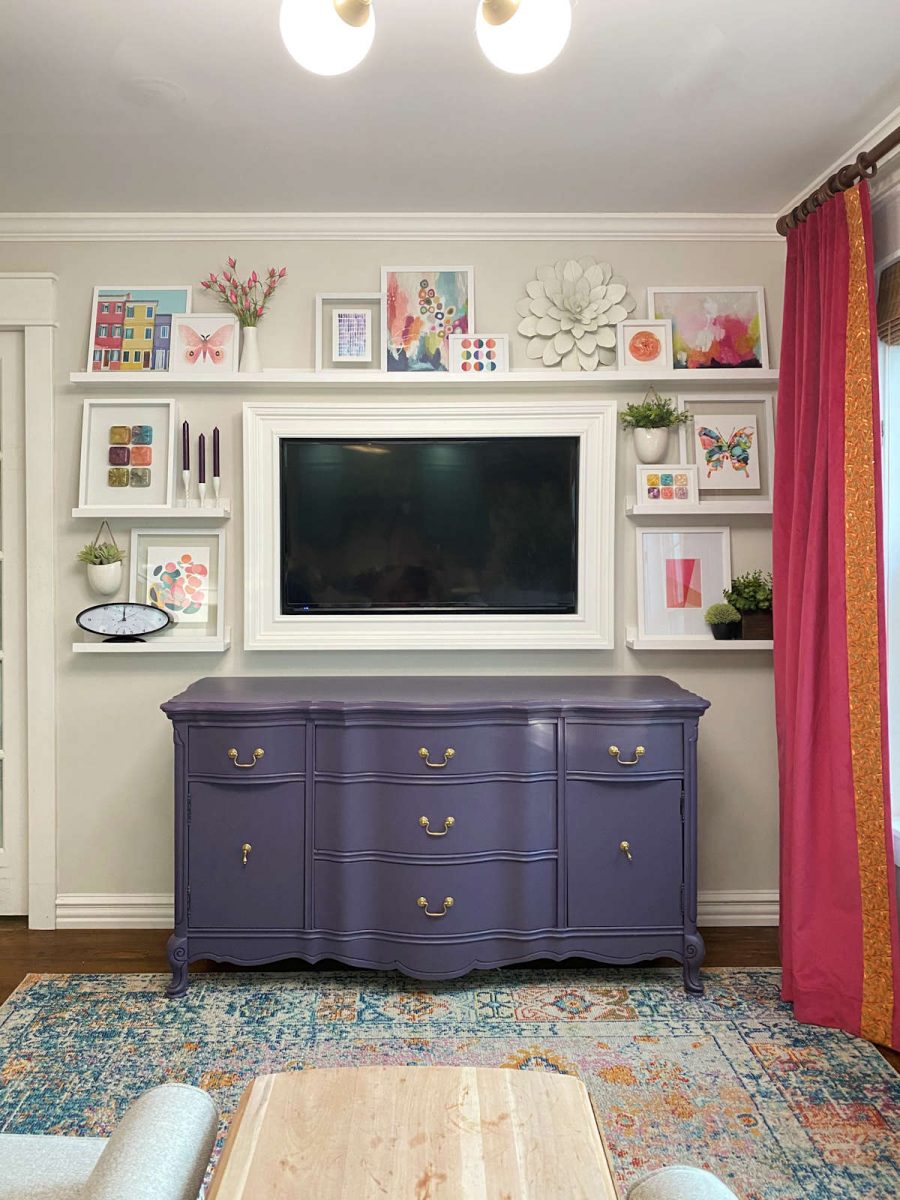
And this is the awesome view that I have when I’m sitting in my recliner. This whole thing, with all of it’s bright and happy colors, just makes me smile.

I hadn’t planned on “training” my curtains to hang perfectly because for the last few years, I’ve found myself preferring the less structured look. But I think I’m going to go ahead and “train” these curtains to hang in a more structured way so that they don’t cover up the ends of the shelves on the right. When I’m sitting in my recliner and relaxing at the end of the day, I want to be able to see everything as much as possible without the curtains obstructing any of the view. 🙂
Here are a few close(er) up views of the items on the shelves…


Now I just need some new pillow covers for the pillows on the benches flanking the pantry, and this room will be finished.
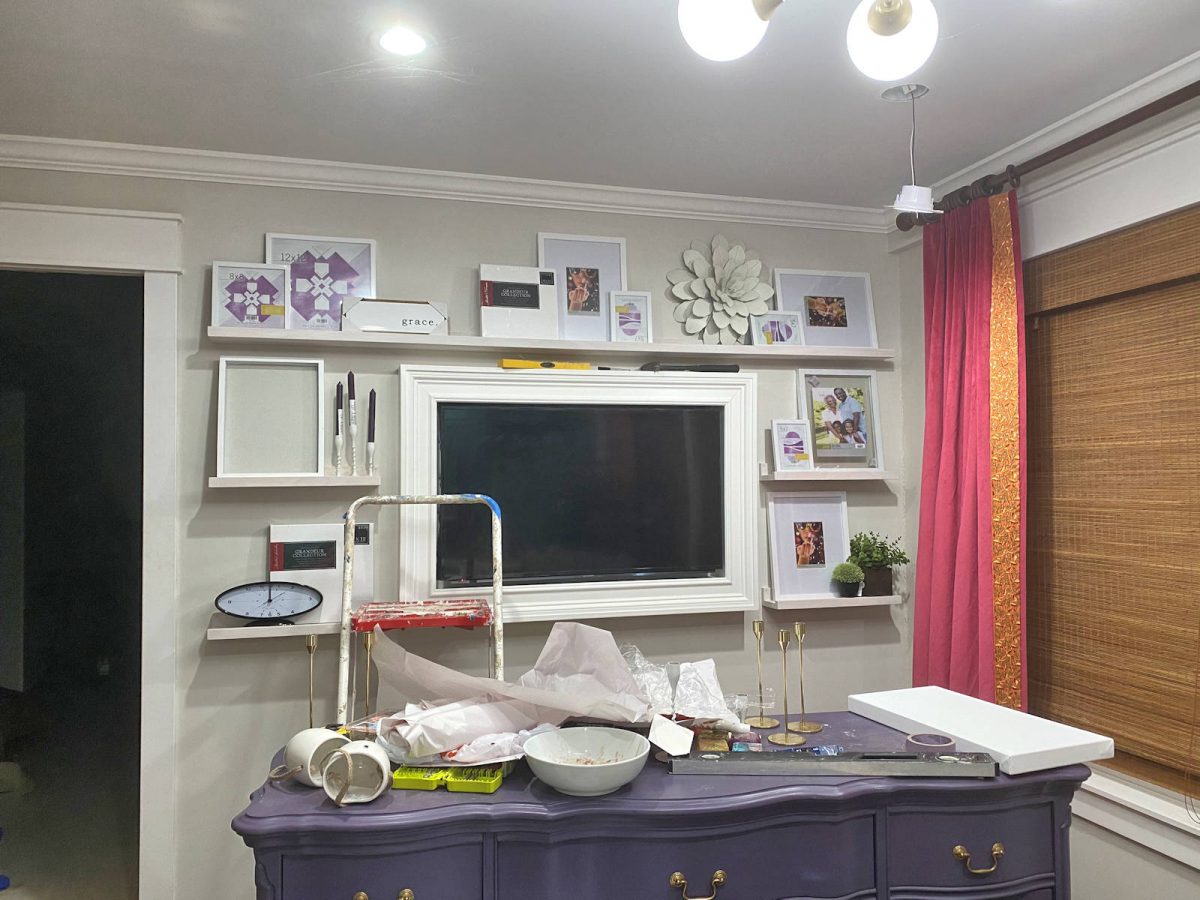
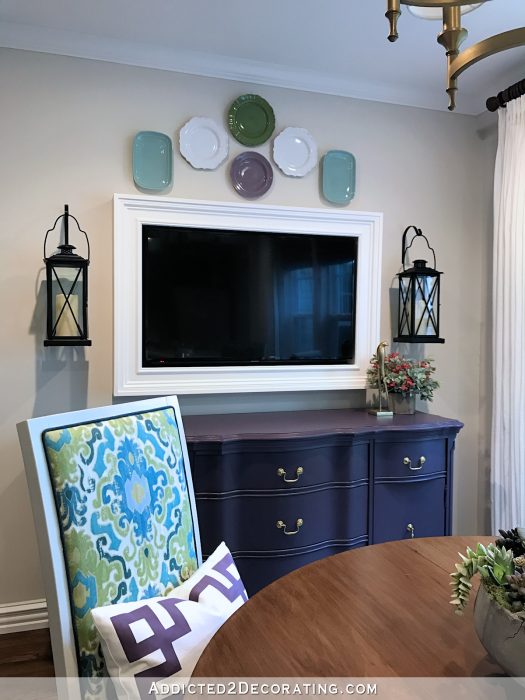
Here’s how this wall used to look. There’s nothing inherently wrong with this, but it just wasn’t me. It’s missing the warm colors that I’ve realized I love so much, and it’s a little too plain for me.
And here’s it’s new more colorful look. This is definitely more me — colorful and busy. 😀

Addicted 2 Decorating is where I share my DIY and decorating journey as I remodel and decorate the 1948 fixer upper that my husband, Matt, and I bought in 2013. Matt has M.S. and is unable to do physical work, so I do the majority of the work on the house by myself. You can learn more about me here.
![I Have A Level Breakfast Room Floor! (Leveling A Concrete Floor With A New Layer Of Concrete) [VIDEO]](https://www.addicted2decorating.com/wp-content/uploads/2016/08/breakfast-room-leveling-the-concrete-floor-square-thumbnail.png)
LOVE IT! I never comment but this time I had to….it is symmetrical and balanced. You nailed it. It’s a 10!
Looks amazing 👏
I will be making some of these!
Looks GREAT!
Absolutely awesome!!! I’m inspired! 🤩
LOVE.
Gorgeous!! Your creativity and vision are amazing!
Love it so much better! Those curtains are stunning also!
Wow! Wow! Wow! When I saw the first pic, I smiled! This is just right! Love how you explain your whole process and where you got all your things. Best yet – you teach us if you don’t like something, start over. Sit in your recliner and enjoy!😊
Perfect. It is a vast improvement on the floral mural – in fact there’s no comparison.
I like this wall. Glad to see you back posting, please continue to inspire us. Thanks
This wall is beautiful. I love, love, love it! Perfect!
LOVE! LOVE! LOVE!
Smashing! Good choices and work.
Busy, but I really like it!
It’s absolutely gorgeous, it turned out so well! And now I want something like this somewhere in my house.
Amen! Me too!!!
Your sitting room (breakfast room) is absolutely adorable! The colors you chose come together very nicely. I also love the framed tv! You are a true designer.
I love it! Of course the first thing my eye went to was the resin blocks, lol!
Love it! Best thing you have done.
Loved it before and LOVE it now!!! Just beautiful!! How in the world do you keep from damaging the tops of pieces you already have done…like the purple buffet….when you work in the rooms without covering it? I would scratch the heck out of them I am sooooooo not careful🤪🤪
I do not even have the words for how much I love this. It’s magnificent. You have blown me away. Again.
Love it!
Yours turned out great! I’ve been making these for a while and they’re so handy… a great solution for a long hallway.
For shorter spots, you cant beat the IKEA convenience and price tag…but for those pesky areas this diy is a great solution
Lovely!
Fabulous!
Everything you do I love! I “thought” I loved the before until I saw the after…you do this to me every time…now I absolutely LOVE the after so much more! You never cease to amaze me!
I love it! So happy and colorful…so you!
💕💕💕💕💕
Yes!!!
Wow! It’s gorgeous, and looks like “you”, well done! And I am a hard sell because I really loved the flower mural you did, so I would have been booing along with Matt as you were painting over it.
What’s Matt’s take now?
TV walls are hard! I’ve been struggling to find the right arrangement and you have no idea how much your post helped me! 💡
Wow! Awesome! I love it!
So much color! So much personality!
No hum-drum here!
PERFECTION!
I LOVE this!
Wow – way better than anything I’ve seen or could think of for this wall! Enjoy the fruits of your labor!
Fantastic, Kristi. If only I had the talent for arranging objects on shelves that you have. I absolutely love it.
I absolutely adore this! You have created such an eye catching arrangement that catches your eye before noticing the tv. This just exudes happiness!
Love, love!!!
Absolutely love this. It feels so much more you than the mural and genius idea to add the hanging pots.
I really, really love what you have done! I have enjoyed all the iterations of this space! Your energy is amazing . Hope Matt is enjoying this too .
Do you think you’ll keep this set up for when this room returns to being a breakfast room? I think I’ve liked every way you’ve designed this wall.
This is so YOU. What fun to look at and know that anytime you want a fresh look you can make it happen. Something tells me it will be a new hobby to play in the land of art. Wheee!
Hope Matt likes it too.
Phenomenal!!!! It’s fun to watch your need for symmetry creatively incorporate freshness and asymmetry with balance. This wall is truly fabulous. Would you do it in the same proportions if the room had slightly vaulted ceilings? Your end result is so purposeful, intentional, wonderfully 3 dimensional.
Have always loved the dining chair upholstery. Would be so fun for your pillows in this new color scheme.
Much more energetic, I like it!
That is perfection! I love it!
I like this wall. Glad to see you back posting, please continue to inspire us. Thanks
So beautiful and so you! 😍
This is absolutely stunning. Building the shelving seems simple enough but filling those shelves as beautifully as you’ve done shows the creative artist that you are.
That’s so pretty. I noticed that everything in that area seems to lean pink and your gorgeous dresser isn’t able to be as beautiful as it once was.
You knocked it out of the park! Holy smokes it’s so perfect. LOVE the symmetry, the prints, the color…everything.
So pretty! You did a great job! I want a TV frame!
Simply gorgeous!
I love this!!! One of my favorite things about you, Kristi, is your ability to use color in fun and beautiful ways without it turning into tacky. Great job!
Fabulous!!!
I loved the flower mural too, but I love this even more! You have a great eye for symmetry and design. 😍👍
I absolutely love the new wall decor!!!
I’m not sold on the curtains but absolutely love the shelving solution!
It looks great, and very much YOU!!
I made a long 18′ one as a first “on my own” DIY. It’s three 6′ sections. I made them with MDF and tried the kreg jig. They did not go together neatly. Because of that false start, I filled the holes and decided to pre-drill/screw together the back, then pre-drill/nail the front edge. I really didn’t want to split my material. Lining 3 sections up end-to-end highlights some flaws but I still love them.
Kristi, you have absolutely made my day! Now I know what to do with my TV in my bedroom. I can’t thank you enough!!
Love that so much, plus the pics you take are great! I laughed out loud at Matt boooing you!!
Wow! Kristi, that is gorgeous! You know I’m a neutral girl, but even I love that colorful wall! And you did an awesome job of decorating the shelves! Nice!
I love this so so much… I am filing this idea away in my mind for a future project in my home. Thank you! I hope you will write a post about training curtains because I would really like to know how you do that. Although there is a small part of my brain that thinks you may have already done that? Anyway, your wall is beautiful. 🙂
What a GREAT solution!! And so colorful which seems so YOU! Fantastic job!
Wow!!!! I absolutel ove this look!! Grand slam for sure.
It is just right!
Truly you and so amazing
I love it!!! So pretty!!!
Such a simple project making those shelves, yet what an impact! Then, you have the brilliant idea that I never thought of, to buy the prints you like, but adjust the colors to what you need for your space…then the placement of all the items…I would never look at the TV, but enjoy that wall all evening! I bet Matt likes it better than the mural at this point. One of my favorites, other than the pantry which I covet! 😉 Adore those wall planters – gotta get over to Hobby Lobby!
I love these and can’t wait to make them. Thanks for always sharing!
I am so in love with this that I am saving the photo to adapt for my home.
I copied your tv frame long ago, now I’ll be copying your shelves!
Very pretty and colorful; before I really looked at your list of where you found things, I thought, I really love those three dimensional square tiles only to see they are your art work. Brava!
You are so incredibly talented. I am constantly wowed and impressed with your selections of art and choices of color. I am so drawn to your design abilities. You are magically inspired.
I took one look at this and said ” Love it” in a song! It is awesome! I am such a pink fan so anything with pink will get me, but i think it is scores ahead of what you had on this wall but i too liked that when you did it.
Fantastic!
👍🏼❤️❤️👍🏼
What a fabulous idea! It’s beautiful and relaxing. The colors are wonderful and look perfect with the curtains.
Love this so much! It adds so much happiness and makes the dresser and curtains pop!
Oh I love this the most. I love how you added in some of your resin work. Noticed that from my initial look at the pictures.
LOVE!! Well done!
I absolutely love how you’ve pulled it all together. To me, now the purple drapes work. Nice!
The ledge shelves look so nice, and your display is so pretty. That purple on the drawers I fall in love with every time I see it!
Love this!!! Looks perfect with the rug & curtains!
Hi Kristy! Beautiful Room! I plan on adapting your idea for my living room, adding a cabinet to house our gaming systems. I’d love to see how you have housed Matt’s computers and or gaming systems. I remember one of the rooms was labeled as Matt’s game room.
Omg! Just beautiful! I agree, much better! The other wall was pretty, but this just pops!
Love all!
I LOVE how you hung the greenery on little tea hooks under the shelves! Brilliant
I absolutely LOVE the pop of color and joy this wall brings to the room! Gorgeous!
This room just goes so well with what you have now in your house. I love that you get a glimpse of all the bright colors to come on the way to your lovely floral studio.
I really like how you are not afraid to experiment, redo, experiment and redo to get what makes you happy. And it always looks good, no matter where you are in that process. You could call your blog Fearless Decorating!
LOVE it!!!!
It’s an amazing change! I love it.