DIY Whitewashed Red Oak Studio Floor – Part 1
My whitewashed red oak floor isn’t finished yet, but we did get the most important (and definitely the most difficult) step finished yesterday — the actual whitewashing of the wood floor. So I wanted to show you how it turned out, and also share the whitewash stain formula that I ended up using.
The floor still needs to be polyurethaned, and that will happen later this week. I ordered the polyurethane late, so it’s not scheduled to arrive until Wednesday. I’ll also be adding some white universal tint to the polyurethane to brighten and smooth out the finish a bit more, so the final floor should be a bit whiter and brighter than it is now. But this first step was a very good start towards cutting the red and pink undertones of the red oak floor, and giving the floor a nice, bright appearance.
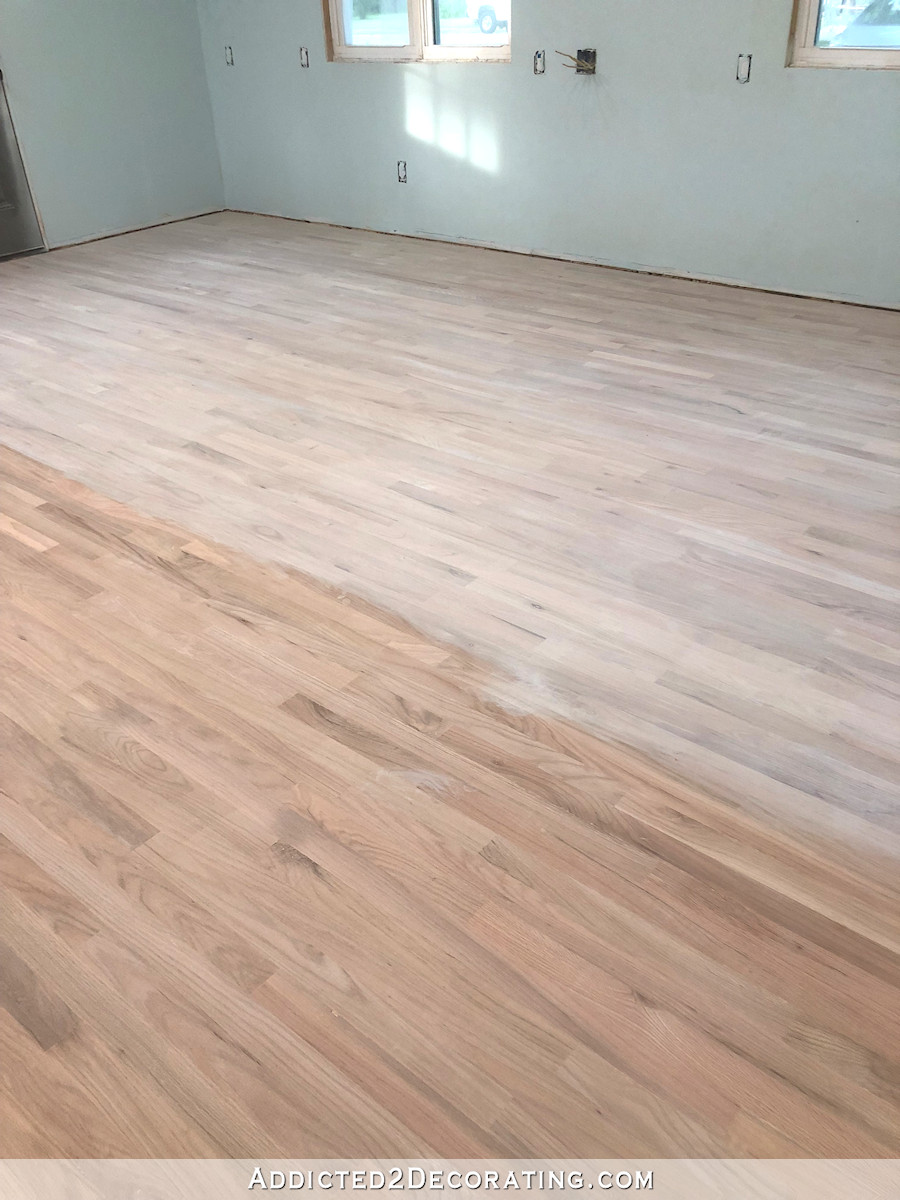
Before I show you the whitewashed floor, let me remind you just how red red oak flooring really is…
Many of you suggested that I just seal the floor in its natural state, but red oak is way too red (pink, actually) in its natural state for my personal taste, and any clear sealer (yes, even water-based) enhances the pink even more.
I used red oak flooring because that is the flooring that’s throughout the original part of the house, and in the event that Future Kristi wants this floor to be stained to match the rest of the house, that can be done since I used the same species of wood. But for now, I want this floor light and bright.
This was definitely a two-person job. My brother used a rag dipped into the stain mixture, and wiped the stain on the floor. Then I came behind him with dry rags and wiped away the excess. Because water-based stain dries ridiculously fast, we had to work pretty quickly.
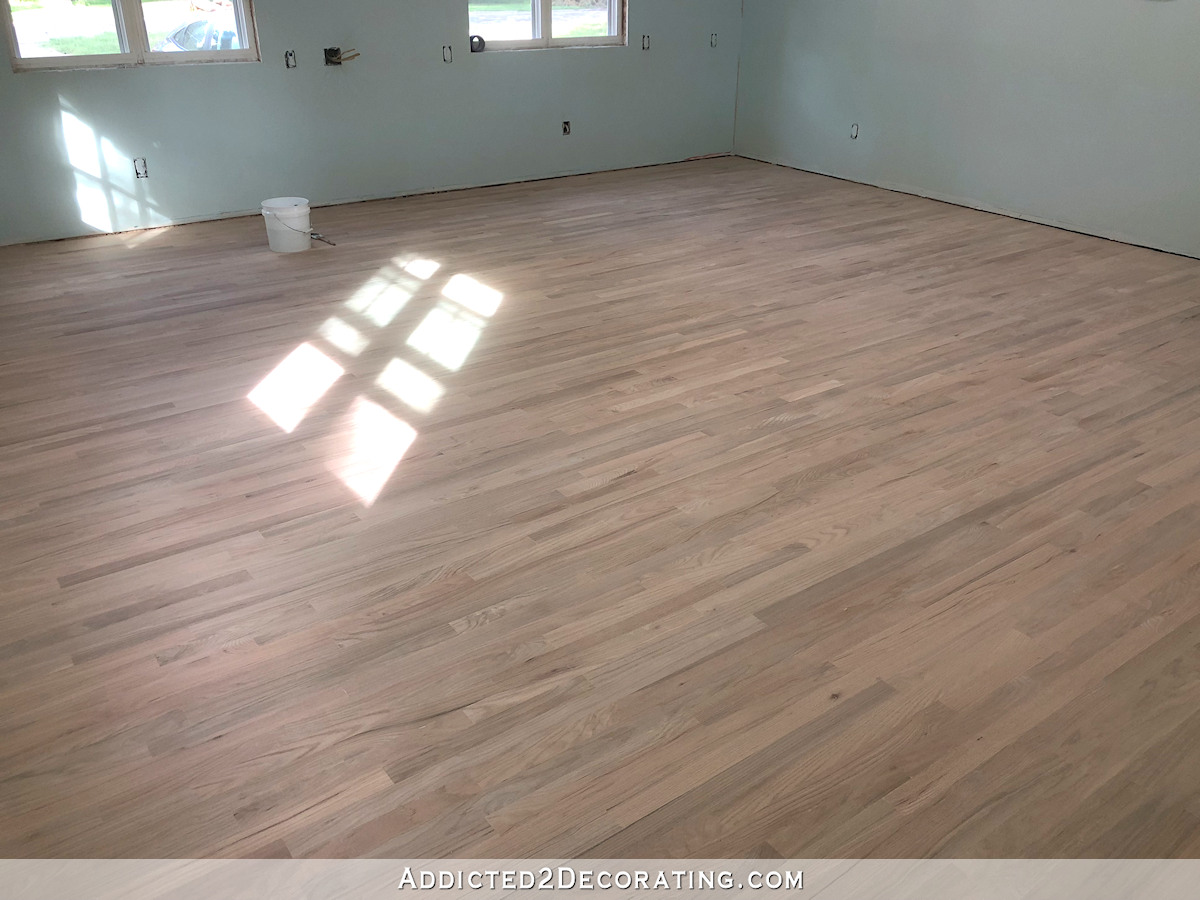
Here’s a look at what the whitewashed area looks like compared to the natural red oak floor during the whitewashing process…
You can see that the whitewash is subtle, and yet it drastically cuts the red/pink color from the wood.
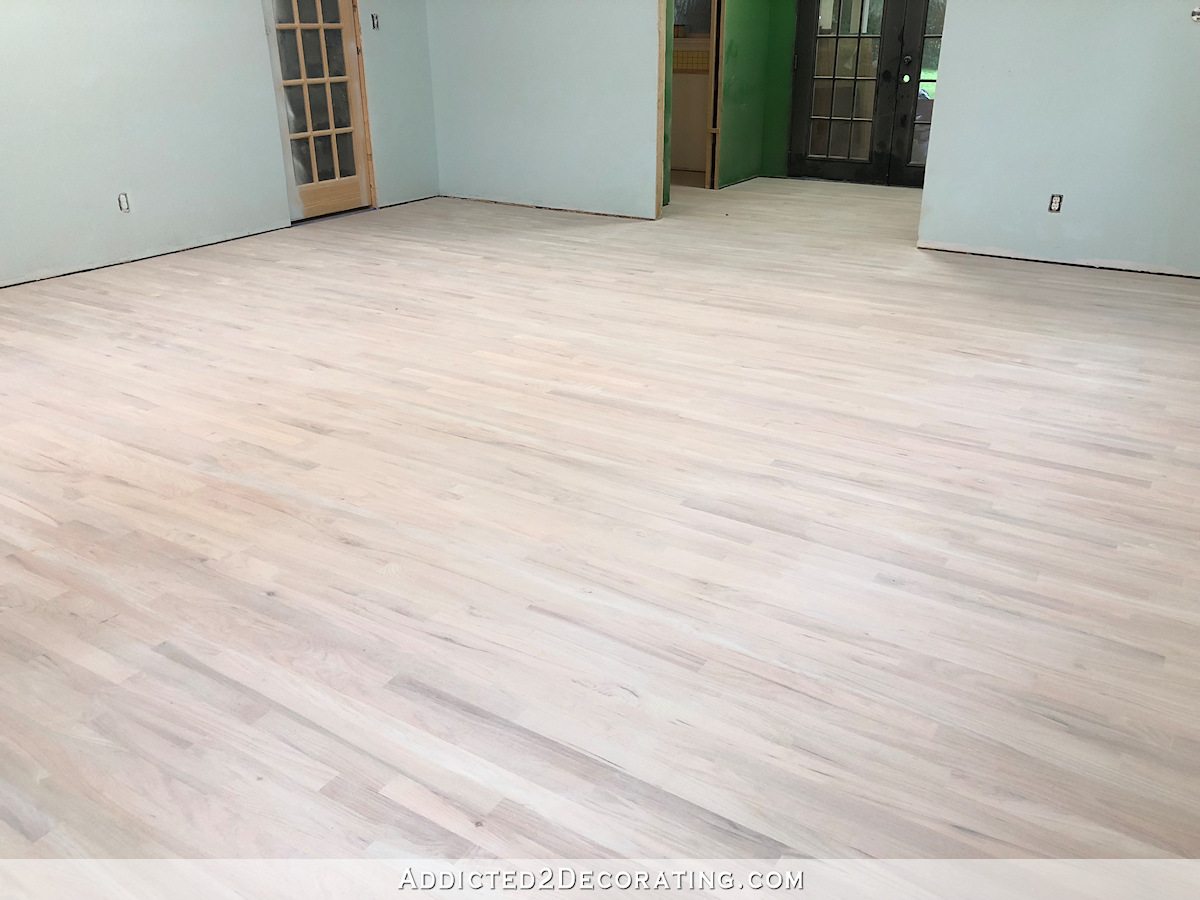
It took us just under three hours to do the whole floor — studio, half bath, storage closet and back entry — but just look at the beautiful results!
Once again, here’s the before picture…
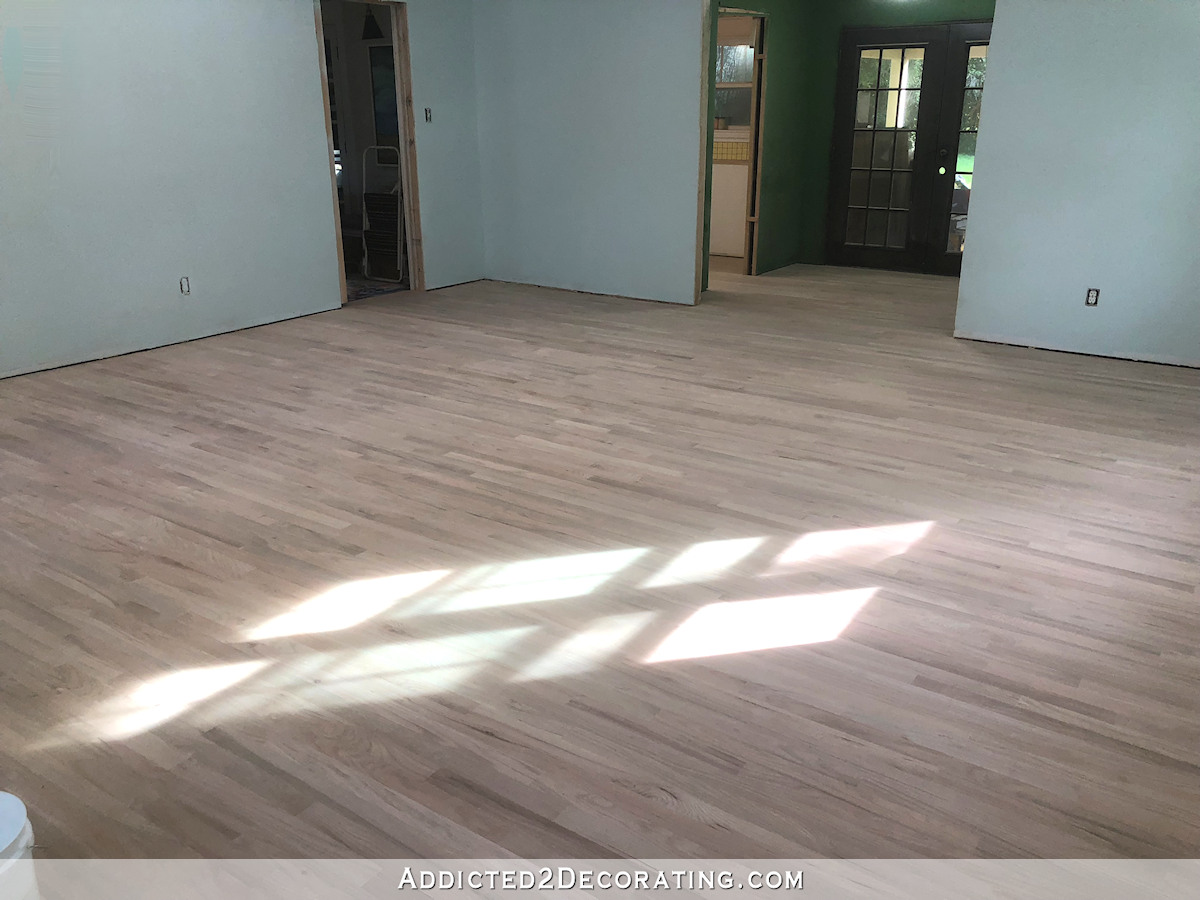
Here’s another view of the whitewashed floor…
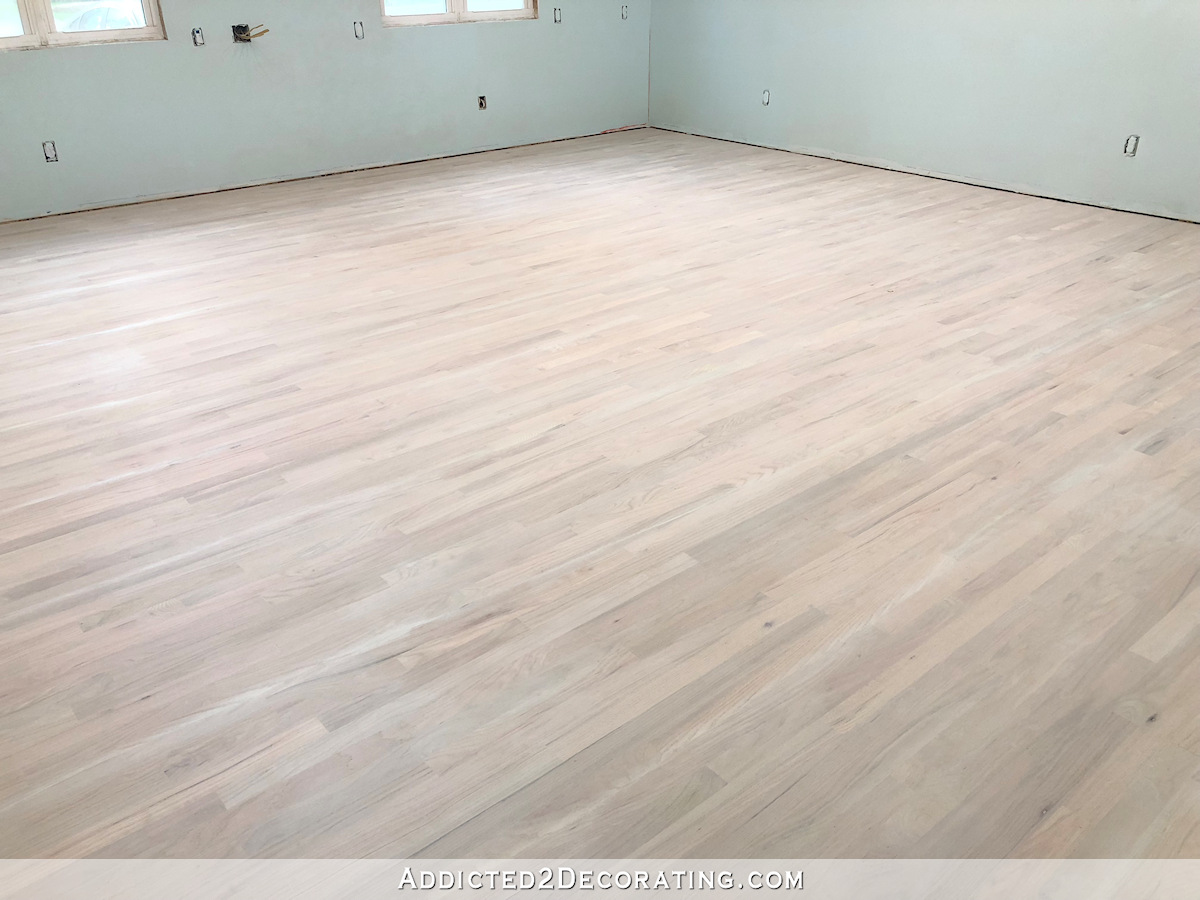
And here’s how that same view looked before the whitewash stain…
That’s not quite an apples-to-apples comparison since those pictures were taken at different times of the day, which affects the natural lighting in the room. But there’s nothing inaccurate about the red tones in floor in that before picture.
As I mentioned, the floor finish is only halfway done. I still have to polyurethane the floor, and that will make it whiter and brighter. But I’ll share those details, as well as the finished floor, later this week. But here’s the most important info I can give you about this first step…
Stain Formula For Whitewash For Red Oak Floor
First, let me make clear that I wanted my floor to be whitewashed and have a light and bright appearance, but I did NOT want a rustic, farmhouse result (like this). Rustic is not my style at all. I wanted a clean and consistent look to the floor. The last thing I wanted was a streaky appearance, or the look of whitewash stain over dark wood, or the look of aged wood hidden under a chipped off white finish. So if any of that describes the look you’re going for, then this may not be what you’re looking for. Or at the very least, you may require a staining step with a dark stain before you whitewash the wood.
I’ll also say that the stain I used specifically says on the can “not intended for floors.” That didn’t stop me. 🙂 But just be aware of that before you try this.
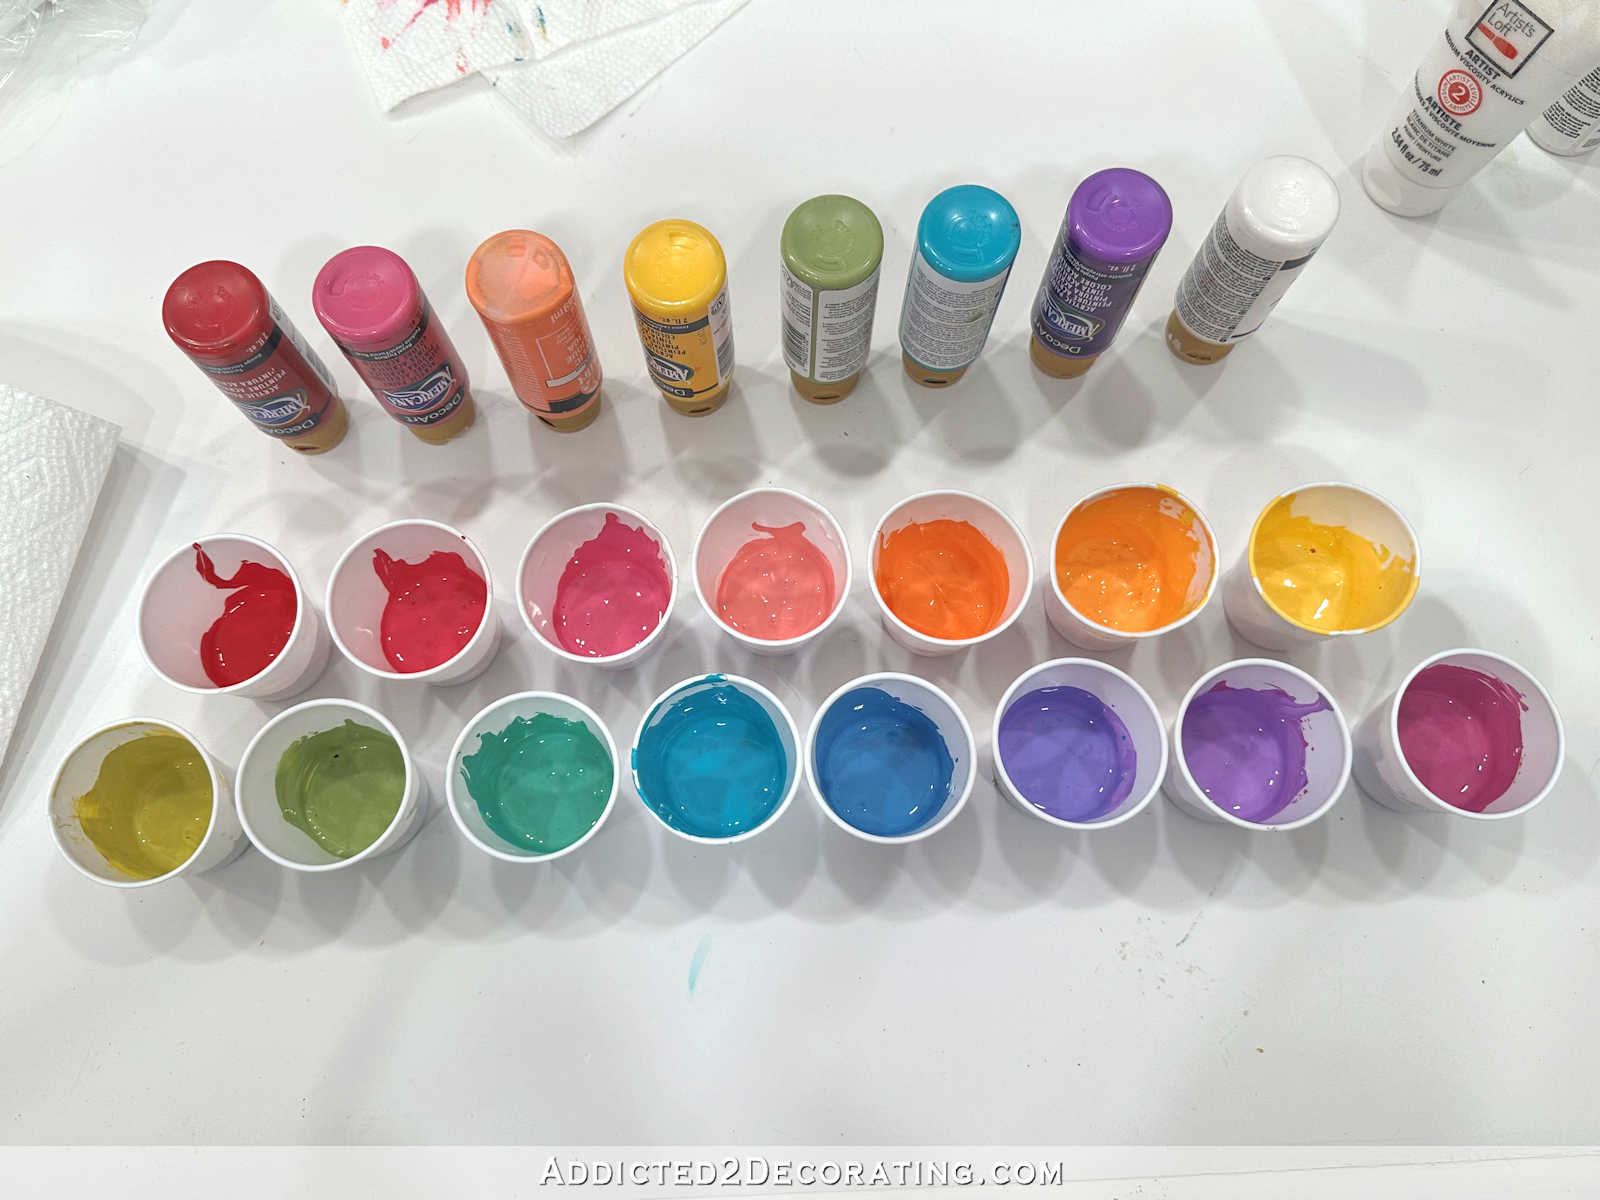
Anyway, I purchased a two-gallon bucket from Home Depot, and for my 550-square feet of flooring, I mixed:
- 1 gallon of Varathane classic water-based white tint base wood stain
- 6 teaspoons of green craft paint
- 1 cup of Behr white flat ceiling paint (no colorant added — just use it right out of the can)
- 1 cup of Floetrol
- 1 cup of water
This was plenty of stain for my 550-square feet, and I even had quite a bit left over.
The purpose of the green craft paint was to add a slight green tint to the stain to counter the red undertones of the wood. And in fact, the Varathane white tint base stain right out of the can has a slight red undertone to it. So the green cuts both. This is the specific green paint that I used, purchased at Michael’s.
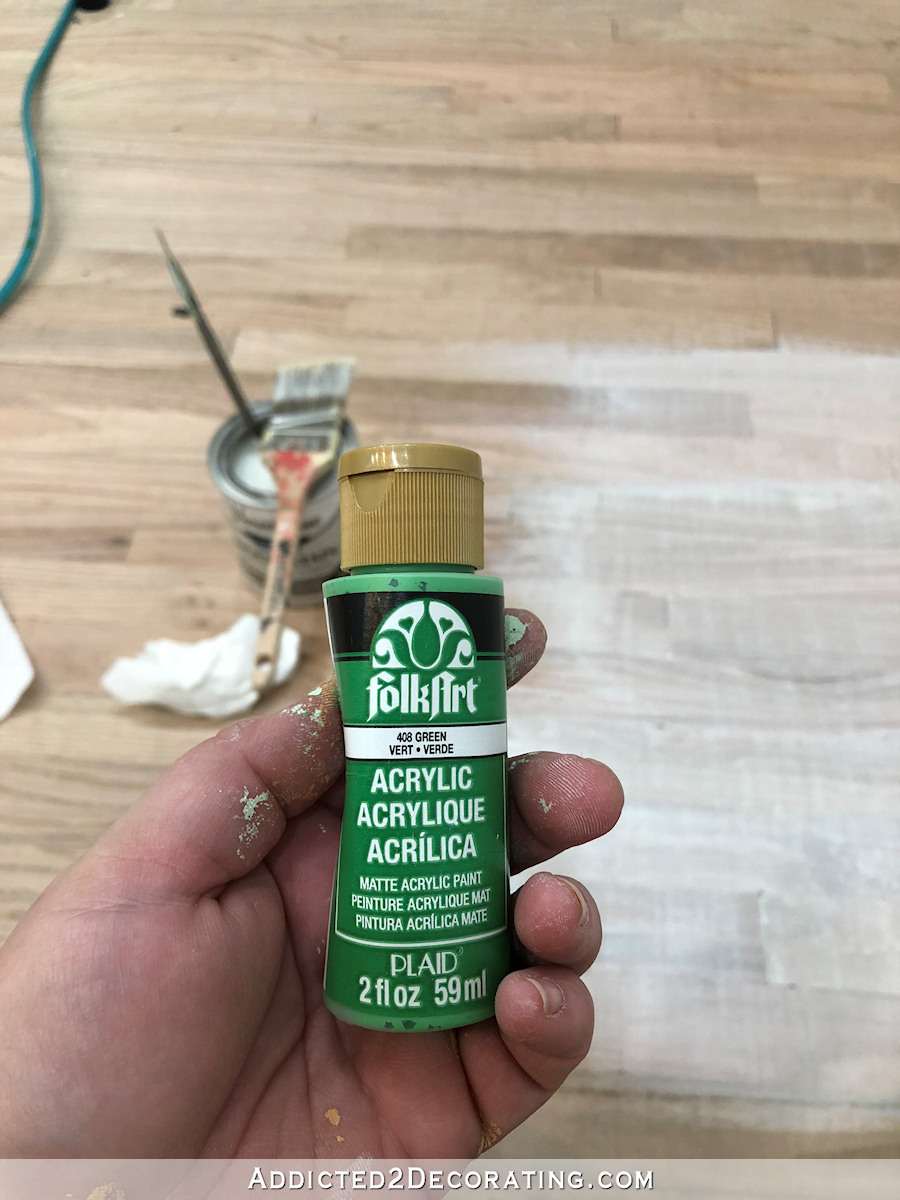
And the stain did have a green tint to it. It was subtle, but unmistakable.
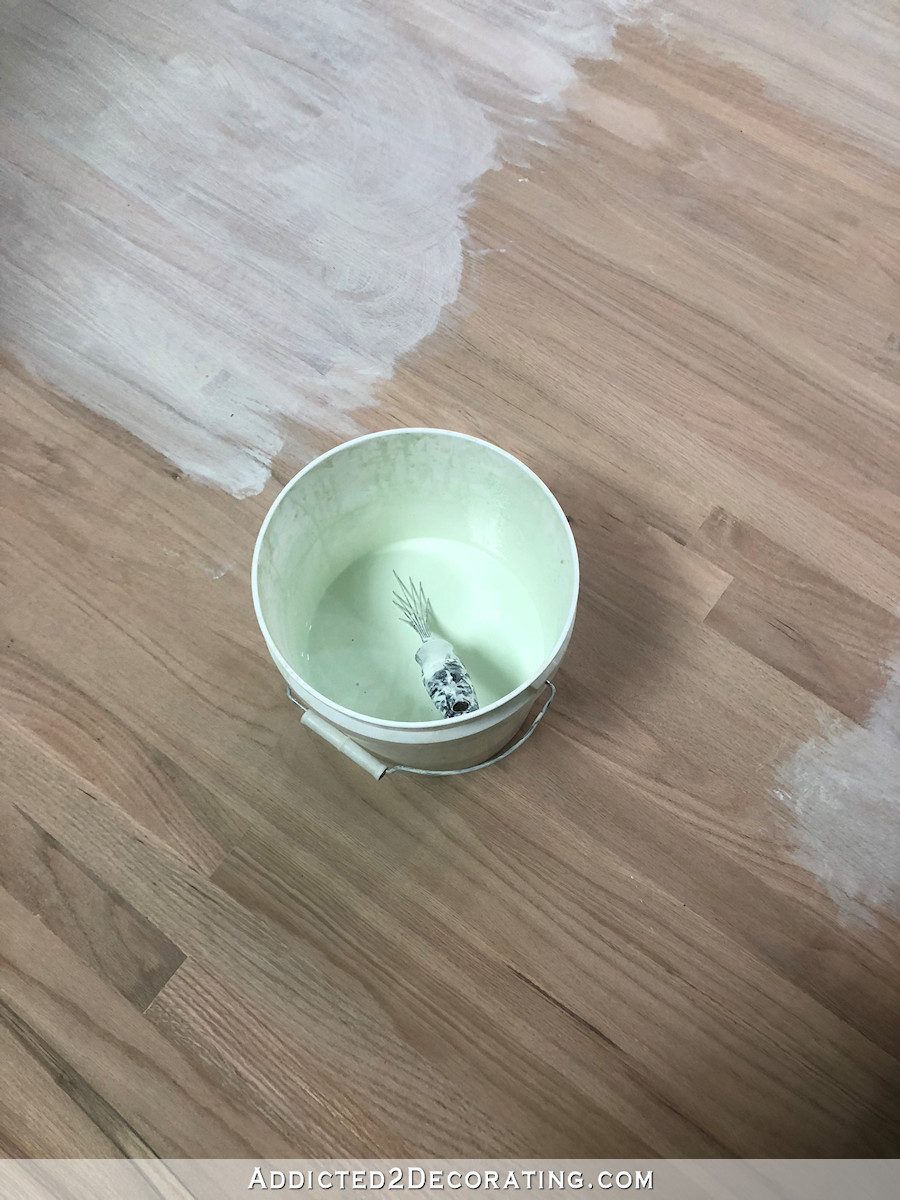
But you can see that once it was on the floor, the stain doesn’t look green at all.
If your flooring has a different undertone that you want to minimize, just use the color that is opposite the undertone color on the color wheel. If your floor is really yellow, add a touch of purple. If your floor is really orange, add a touch of blue. You get the point.
The white paint was added to add a bit more solids to the very watery stain. A few days ago, I tested this stain on the floor before I sanded. The first two samples that I tested were one coat of stain (one straight out of the can, and one with a bit of green tint added). The one coat seemed way too sheer. So I tried a third sample with two coats of stain, and that seemed too white and opaque. So I thought one coat of stain with some paint to add more solids to the watery stain might be a good in-between compromise between the one and two coats of stain that I tried the other day. (You can see those samples here). The one coat of stain with a bit of white paint added did seem to get me somewhere between those samples a few days ago.
I added the Floetrol in hopes that it would slow the drying time just a bit. The main thing that makes water-based stain so frustrating to work with is that it dries so fast, causing problems where a wet edge meets an already-dry edge. The Floetrol did seem to help a great deal. But I would still recommend turning off ceiling fans and anything else in the room that causes too much air flow that might dry the stain faster. The longer you can keep a wet edge, the better the result will be.
But even if you are very careful, turn off anything that creates air flow, and work really fast, you might end up with some areas of overlap that dried too fast and could’t be wiped off with a rag, like this…
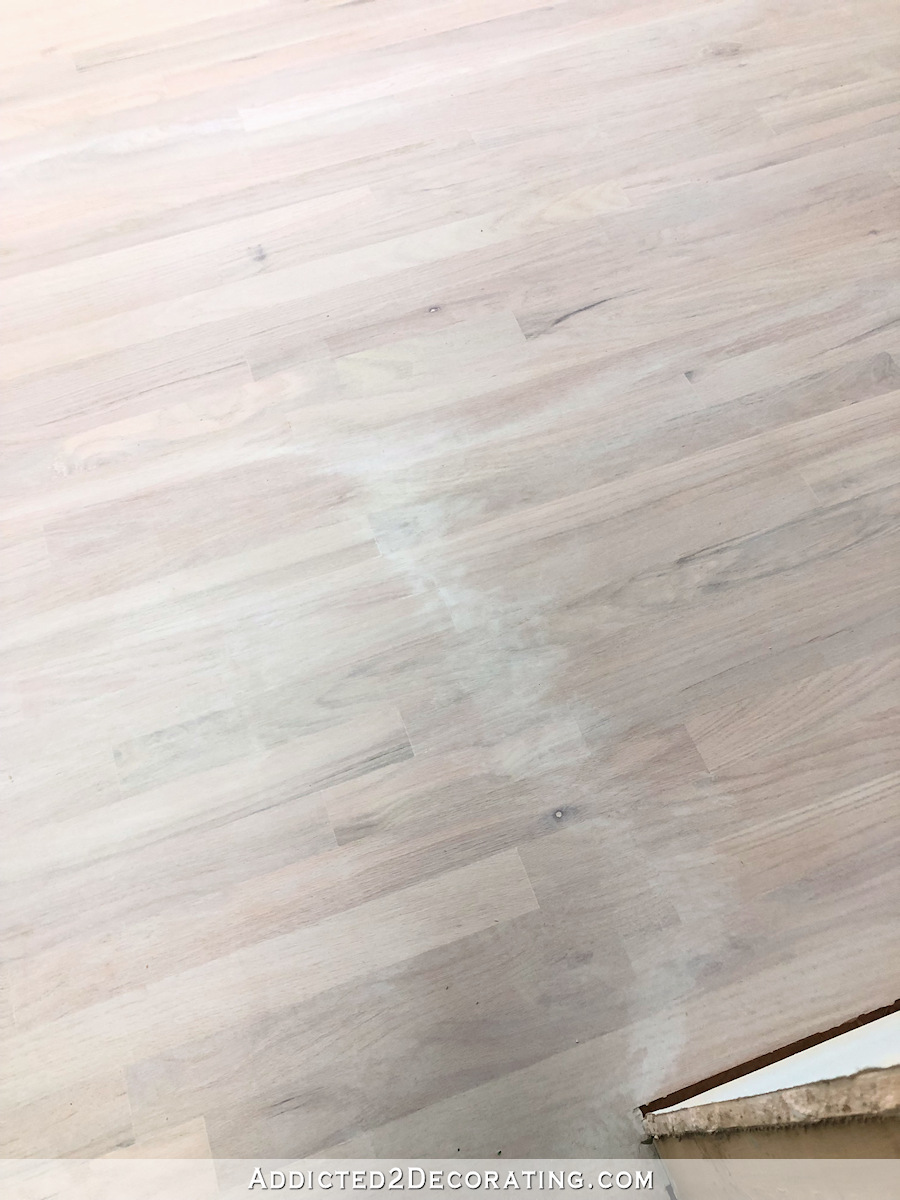
If that happens, don’t panic! Just let it dry completely, and then use some 220-grit sandpaper and lightly sand the overlapped area until it matches the rest. If you keep trying to rub the drying stain with a rag to get rid of the overlap, you might end up taking all of the stain off instead, and then if you try to add more stain, you’ll make an even bigger mess of things. So it’s better to just let it dry and then sand it lightly and strategically to make the line disappear.
And finally, I added a bit of water just to bring the whole mixture back to the consistency of stain.
So that’s Step 1 in the whitewashing process. I can’t wait to get this finished!
Update:
My whitewashed red oak floor is finished! Here’s how it turned out…

You can find the next post for this project here…
And see the final post, and the finished floor, here…

Addicted 2 Decorating is where I share my DIY and decorating journey as I remodel and decorate the 1948 fixer upper that my husband, Matt, and I bought in 2013. Matt has M.S. and is unable to do physical work, so I do the majority of the work on the house by myself. You can learn more about me here.
I wonder if Home Depot would add some green tint to your stain and eliminate the need to add craft paint.; just a thought. The floors look beautiful and I love the Bird of Paradise paint with the wallpaper.
Nope. There are nine colors to choose from if you want Home Depot to tint that stain. They won’t do anything outside of those nine colors. At least the one here in Waco wouldn’t.
I love it when your plan comes together. I use your hits to convince my hubby we need to try one of your projects. I love the lighter floor it makes your room look so much brighter and bigger.
Beautiful whitewash! From whitewashing the two brick walls in my sunroom, I know what a leap of faith it can be. But so satisfying when it’s just right after ring.
I love the floors. Can’t wait to see finished studio. I’m a color girl like you so this studio is going to be a happy place. You are lucky to have a great brother that helps you. I’m working on a craft room made from a bedroom where my last son just moved out. I’m using fuchsia, orange and purple with some black as a neutral.
That looks amazing.
It’s gonna be great!
Wow, so great. So, do you think the white wash technique made your red oak look like white oak ? That’s the way it looks on my computer to me.
They are beautiful!!!
Woohoo…… SCORE 🤗
My contractor says that any whitewash on a red ok will look great at first and eventually the pink will creep back out…What is your experience? Thanks!
Mine have darkened just a tiny bit, but they’re still very light and bright, and there’s not a hint of pink anywhere in them.
I thought polyurethane can turn yellow as it ages. Am I wrong? How do you prevent that?
Crystal clear water based polyurethanes shouldn’t yellow. Oil-based polyurethanes are yellow/amber right out of the can, and will continue to yellow/amber with age. And there are some water-based polyurethanes that have an amber color as well. If you don’t want the yellow/amber color, you just have to be very careful about which on you purchase, and it will definitely have to be water-based.
Is the polyurethane the product made by General that you liked so much? You used to use Waterlox for your floors, what changed your mind?
I’m using a Varathane polyurethane made specifically for floors. Waterlox is an oil-based product and is amber in color. It’s not something that could be used on white floors.
Did you have to wood fill the entire floor (like you did in the bathroom and hallway) on the entire floor before you sanded it?
Yes, I trowel filled the entire floor before I did the final sanding.
What a beautiful change. Thanks for all the info.
Looks beautiful! I read that you added Floetrol to it to extend the time and my question is, can you add Floetrol to an oil based paint too? Thanks in advance.
Floeetrol is specifically for water-based products. For an oil-based paint, you’d need to use Penetrol. Both products are made by the same company, and can be found together in Home Depot.
Floetrol has the oil based equivalent for sale, too. I know that because Kristi has written about it before. I just re read her posts on cabinet painting, which mentions it.
Oh darn, I bought the wrong product, lol. Back to Home Depot again. It’s been years ago since I painted anything.
Kristi answer wasn’t there when I posted . But oil based paints don’tdry as fast as water based, so you may not need it. We can’t get oil based in Canada, it has been years now.
It looks great!
Looks good and I’m really looking forward to the wallpaper and cabinets. Such a bright and cheerful room to get to work in.
I wish you had done a time lapse so we could see it going on in real time.
WOW……..it looks a-maz-ing!!!!! I love it. Big thank yous to Kristi´s brother for helping Kristi do this floor.
GORGEOUS!!!
Looks great! Amazing how adding the green craft paint helped tone down the pink so well! Wonder if that powdered Tempra would do the same, if you would ever need a larger quantity? I often wonder if that is what Folk Art and other craft paints are made from. Not quite the same consistency, but maybe? Anyway, I am loving your hard work and hope your brother knows we appreciate him helping you!
I was one that suggested sealing the floor in its natural state, but I definitely see why that wouldn’t be something you’d want to do! Nothing better than a visual!! lol This floor is really beautiful, and I can see using this in the main part of a house, but I guess it’d make more sense to use white oak, wouldn’t it? Would you need to use the green paint in that case? Great job you and your brother did!! 👏👏
The floor looks gorgeous, Kristi! Light and airy just as you you’ve said. Love it!
I really like it. You can still see the wood grain but it’s light and bright. Great job and thank you for sharing your process with us.
You guys have done a great job. You brother is really useful, and so kind to help you out the way he does. We all need a brother like that!
Beautiful and just what I’m looking to do on my floors. Did you apply the whitewash with a rag?
Thanks
Well, once again you pull off something amazing !! You are THE energizer Bunny !!! Kudos to you !!!
Amazing. How do I hire you to come to MN and do this at our place? 😀
Curious…..how have they held up over time? They ate beautiful.
Tom
They’ve held up incredibly well, and that’s even with my 95-pound dog playing in there constantly. He’s very hyper and loves to twirl and run and jump, so he’s very rough on the floor. I can see some superficial scratches in the one area where he loves to play all the time, but nothing deep, and nothing that actually goes through the topcoat. But it’s holding up beautifully, and I’m sure if I looked, I could find a floor product that would make those superficial dog claw marks disappear.
Oh my goodness this is exactly what I was looking for. Thank you for sharing this. So it’s been 2 years…. How is the floor holding up? I have a lot of dogs, so I really want to make sure the color will hold. I know the protection will be in the top coats of poly, but just wondering. 😊
Mine’s holding up just fine. Scroll a bit and read my reply to Tom Dutton for more details.
I love the white wash floors you created and am trying to copy the same formula. I am having difficulty following your recipe for the white wash stain. I have been on line trying to find the water based varathane classic white tint stain. It seems to come in oil base but cannot find in water based. Would you recommend another brand of water based white stain as a replacement?
I’m pretty sure that whitewash stain has been discontinued. 🙁
If I were to redo my floors today, seeking the same or similar result, I would use a product called Rubio Monocoat. In fact, I’m seriously considering redoing my floor using this product. The floor, which has been finished with the method in this post for a few years now, has some areas that have gotten darker and have a brown tint. It’s not horrible, and honestly, I could probably live with it. But since DIYing is my job 😀 , I really want to try out Rubio Monocoat and see how that works.
After doing a lot of research, I found an example of Rubio Monocoat used specifically on red oak. You can see it at this link under the heading “Neutralizing the red in Red Oak”. https://www.rubiomonocoatusa.com/blogs/blog/white-colors-difference
Thank you for your quick reply I will look into the rubiomonocoat site. Does this product need a sealing coat such as polyurthane? I like the matte finish of your white washed floors. I am assuming I cannot use water based polyurethane on oil based stain.
Robin
Hi Robin! I realize it’s been a few years but maybe this will help somebody else if it’s too late to be of use to you. Any, the great thing about Rubio Monocoat is that it’s a one-coat stain and seal product, so no need to apply a separate, protective finish (i.e., polyurethane) on top!