My Finished DIY Whitewashed Red Oak Hardwood Floors
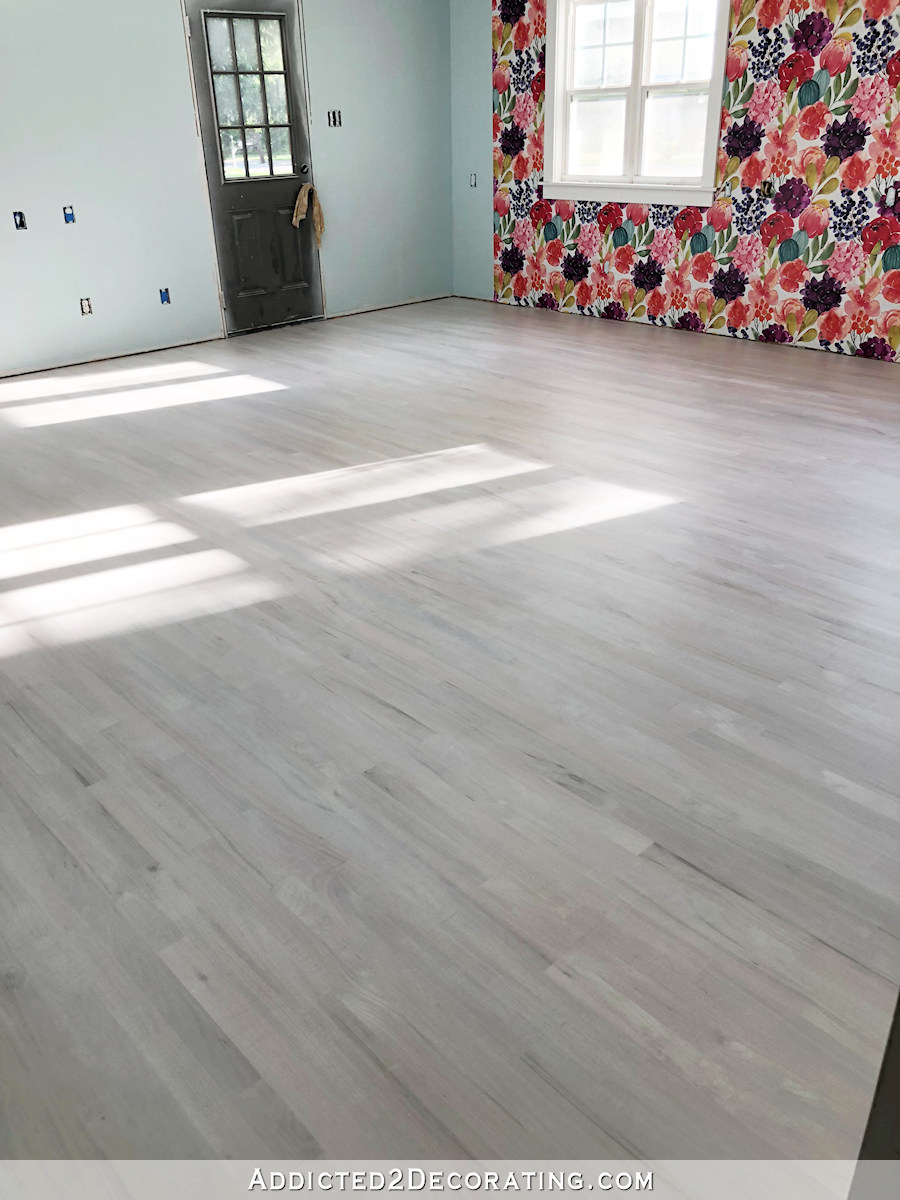
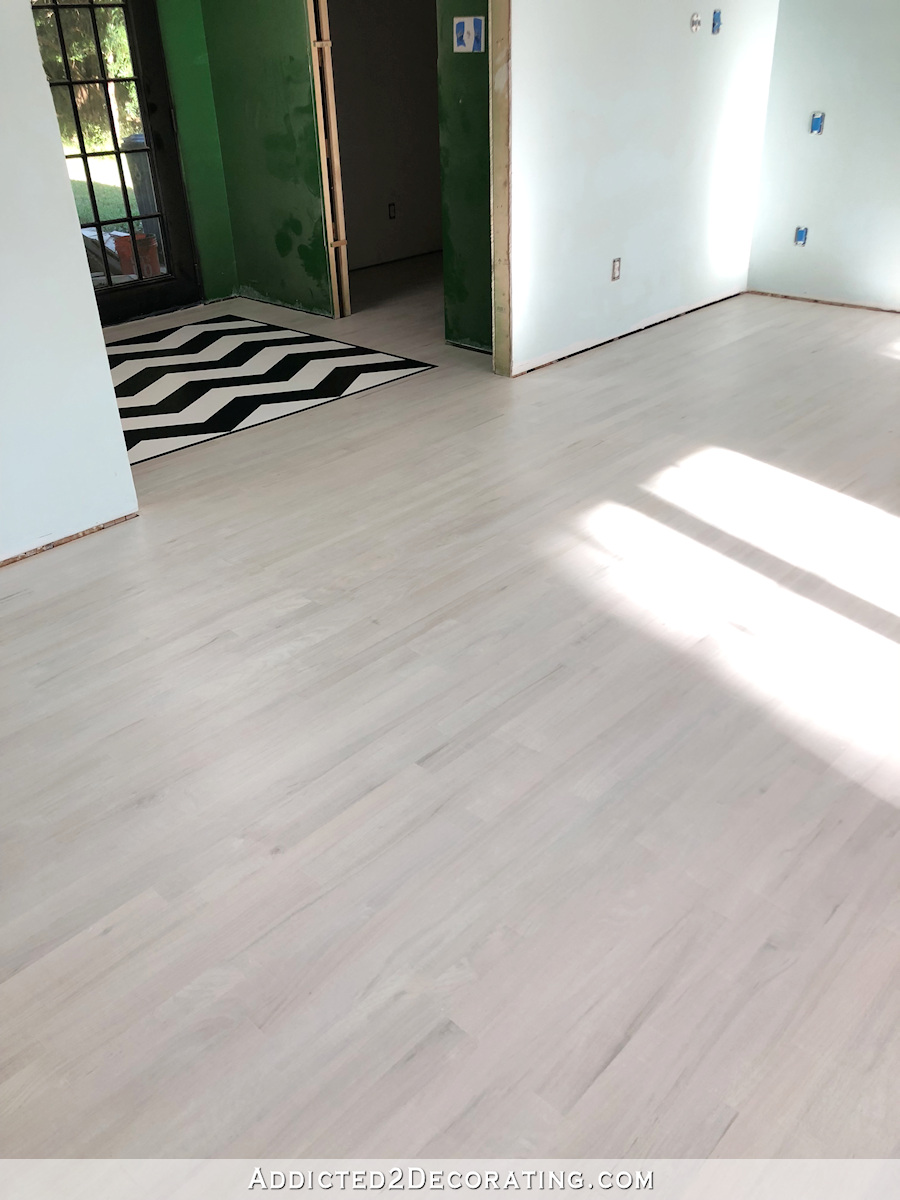
My floors are done, and while whitewashing red oak hardwood floors is a huge job, I think it was very well worth the effort and hard work. My studio is so light and bright, and I don’t think it would look like that with dark stained floors.
I finished the floors last night, so I couldn’t walk on them to take pictures until this morning. Unfortunately, the early morning sun was pouring through the front windows and making it impossible to take pictures without glares on my floor, so I’ll get better pictures at a later date. But for now, here’s how my whitewashed red oak floors look…

I’ll have to admit that I was very unsure about this whole process. The whole thing was a guessing game for me — trial and error — and I was figuring it out as I went along. Fortunately, I didn’t have much error, and the whole project went pretty smoothly. And in the end, the results far exceeded my expectations. I could not be happier with my whitewashed red oak floors!
I explained in a previous post how I did a custom stain mix for the floor, and how the whole staining process went. If you missed that post, you can find it here…
I gave the stain a couple of days to make sure it was really good and dry, and then I mixed up my custom white-tinted polyurethane to seal the floor.
I only used the white-tinted polyurethane for the first two coats, and I brushed on these two coats using a 5-inch stain and waterproofing brush. I attached the brush to the end of an extension pole so that I could stand while brushing it on.
The reason I brushed it on instead of using a T-bar or foam pad is because I tried several methods, and while the brush was more time-consuming, it gave a much more even and consistent coat without ridges and overlapping areas that were more opaque white than the rest of the floor. But because a brush also puts down a thinner coat than a T-bar or foam pad for polyurethane, I had to do two coats to equal what one regular coat would have been.
My White-Tinted Polyurethane Formula
The polyurethane I used is this Varathane Floor Finish in matte.
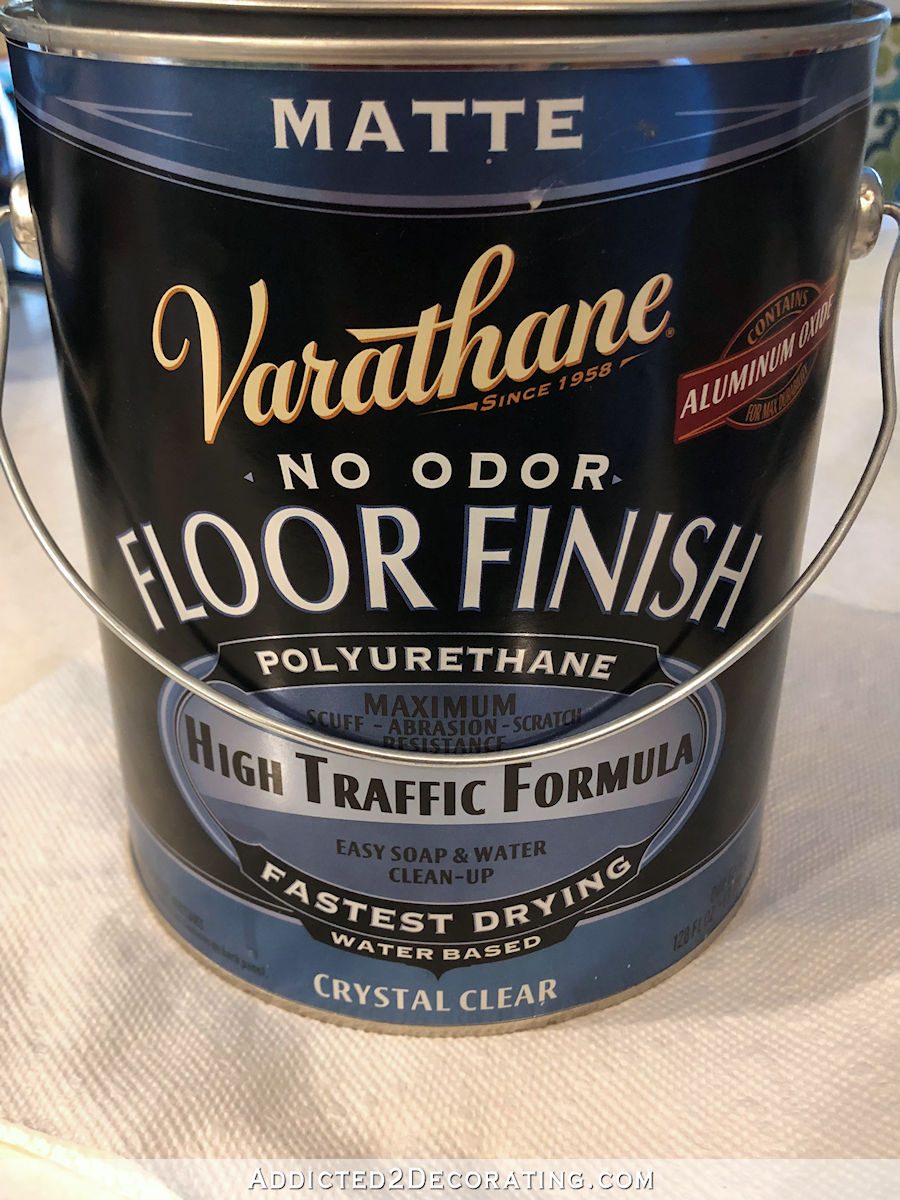
The only place I could find the matte finish is at Home Depot, and I had to purchase it online because they don’t have the matte finish in the store. They only sell it in a two-packs, which I find to be irritating, but that’s the only option.
And to give the polyurethane a white color, I used this universal tint.
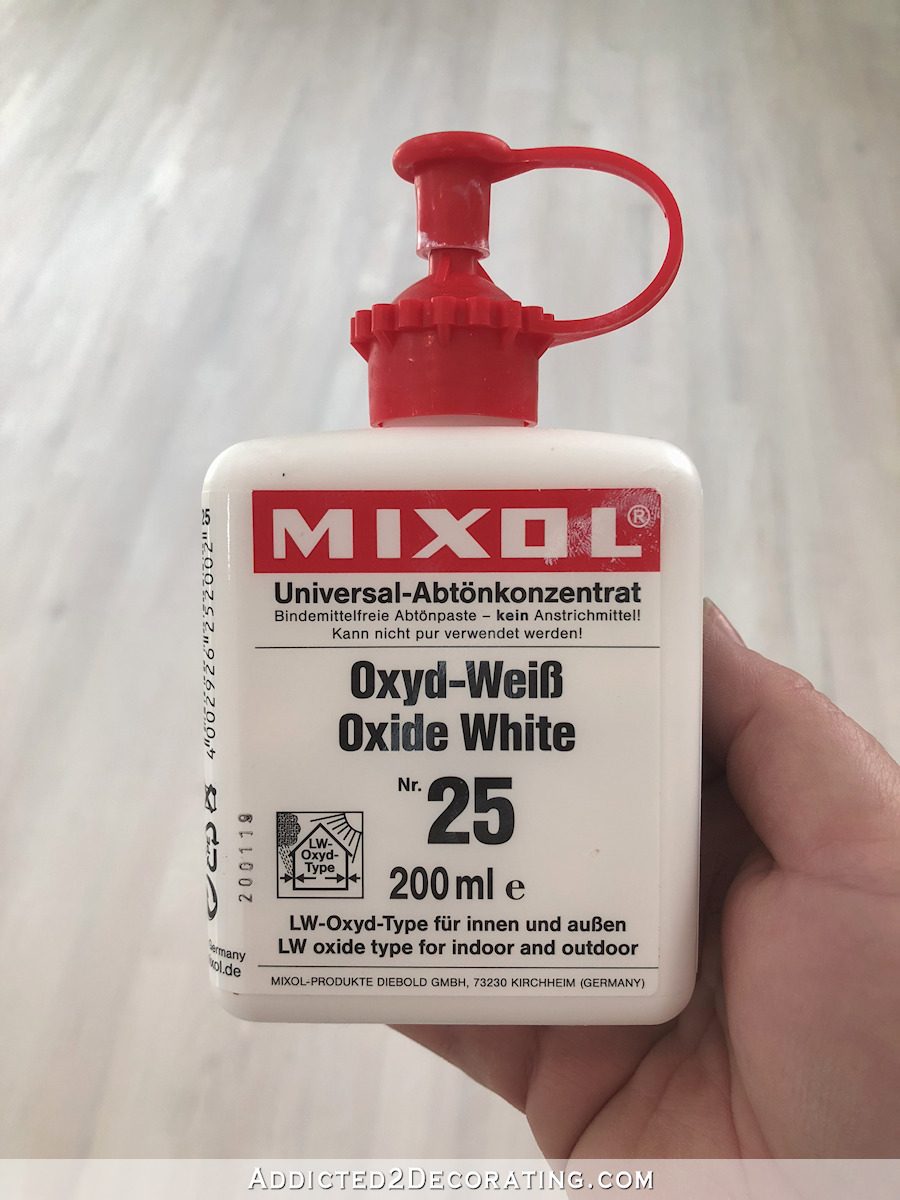
It was challenging to figure out how much to use since water-based poly in the can looks milky white on its own, so this part was completely trial and error. But I finally landed on the perfect ratio 1.5 fluid ounces (that’s three tablespoons 😀 ) of white universal tint per gallon of polyurethane.
After mixing really well in a 2-gallon bucket, I tried applying that mixture with the 5-inch brush. I applied the poly in about 18-inch rows, but I had a problem with the first row drying by the time I got back to do the next row, and if you don’t have a wet working edge when you start the next row, it makes it very challenging (if not impossible) to get the two rows to blend.
So to the mixture, I added 8 ounces of Floetrol per gallon of poly, and mixed everything together really well. Then I tried again.
That worked perfectly. The Floetrol extended the drying time long enough that I could do an entire row (my room is about 20-feet wide), and then come back and start the next row while the previous row still had a wet working edge.
To be clear, I have no idea if Floetrol affects the durability of polyurethane, but it was a chance I decided to take in order to get the finish to look like I wanted it to look, and for ease of application.
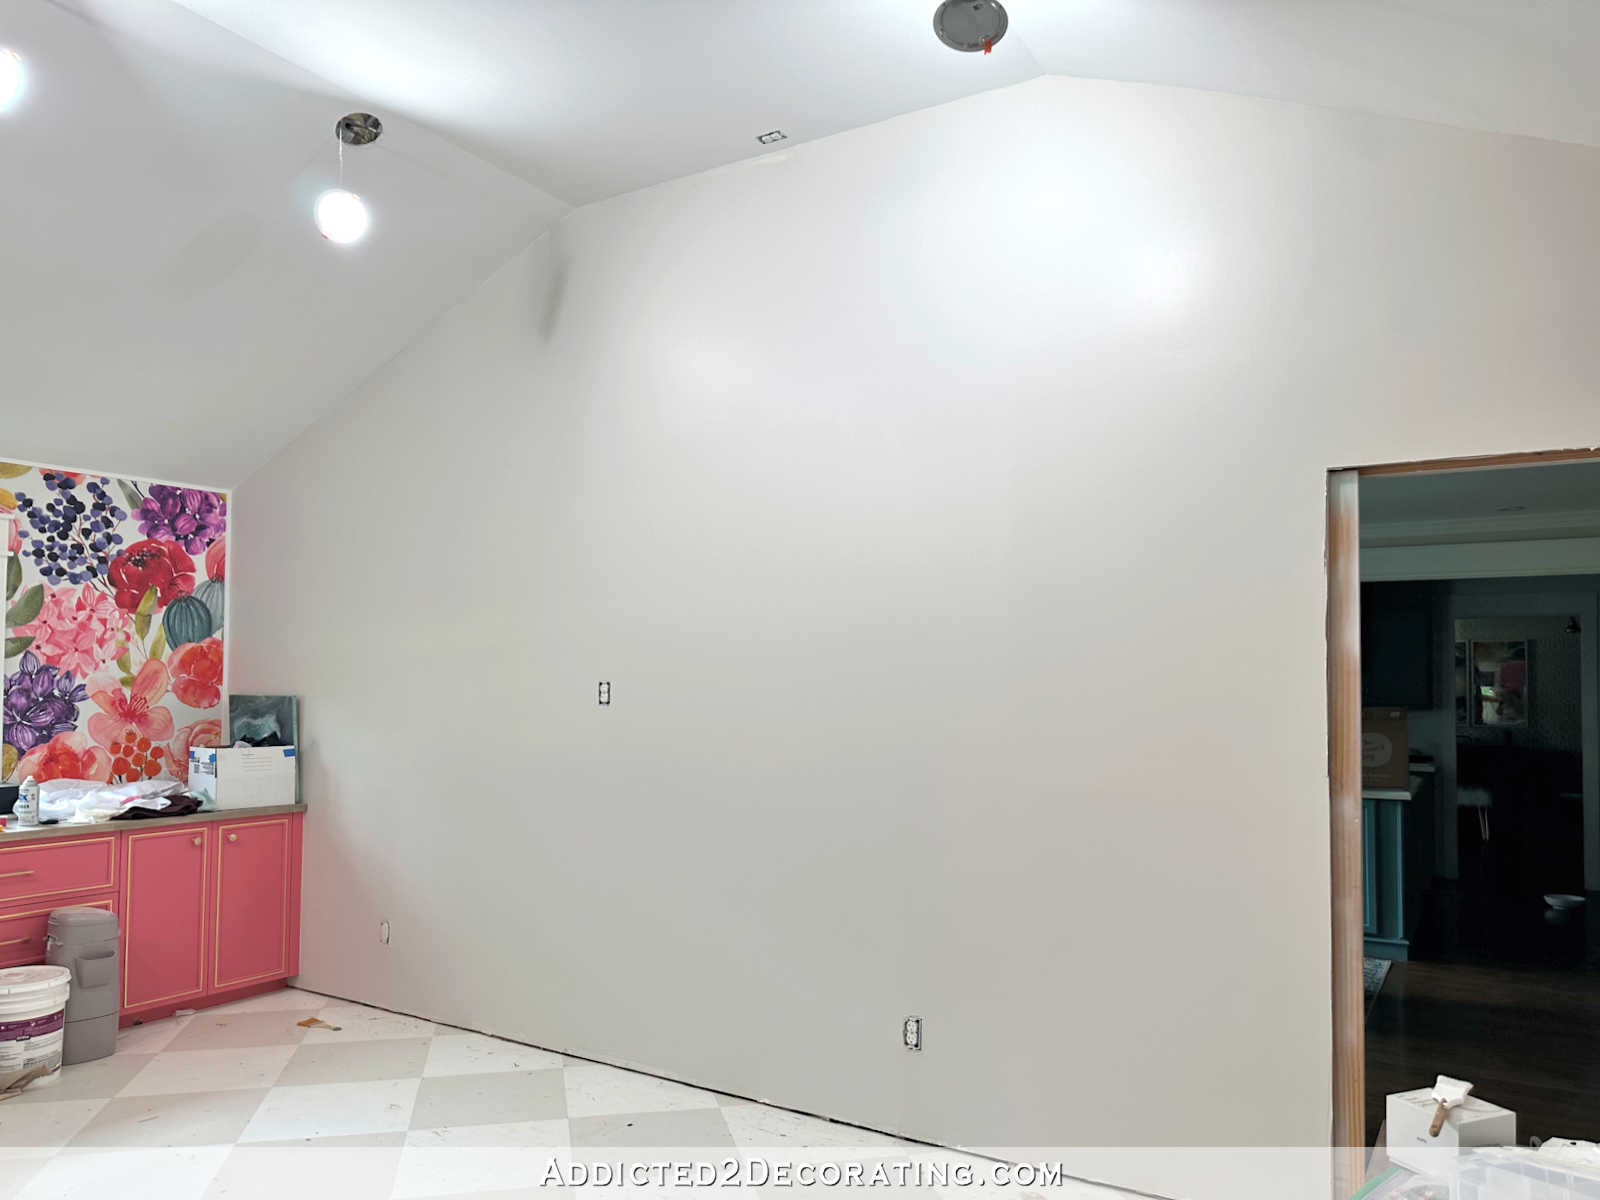
Here you can see the difference that the white-tinted polyurethane made over the white stained floor.
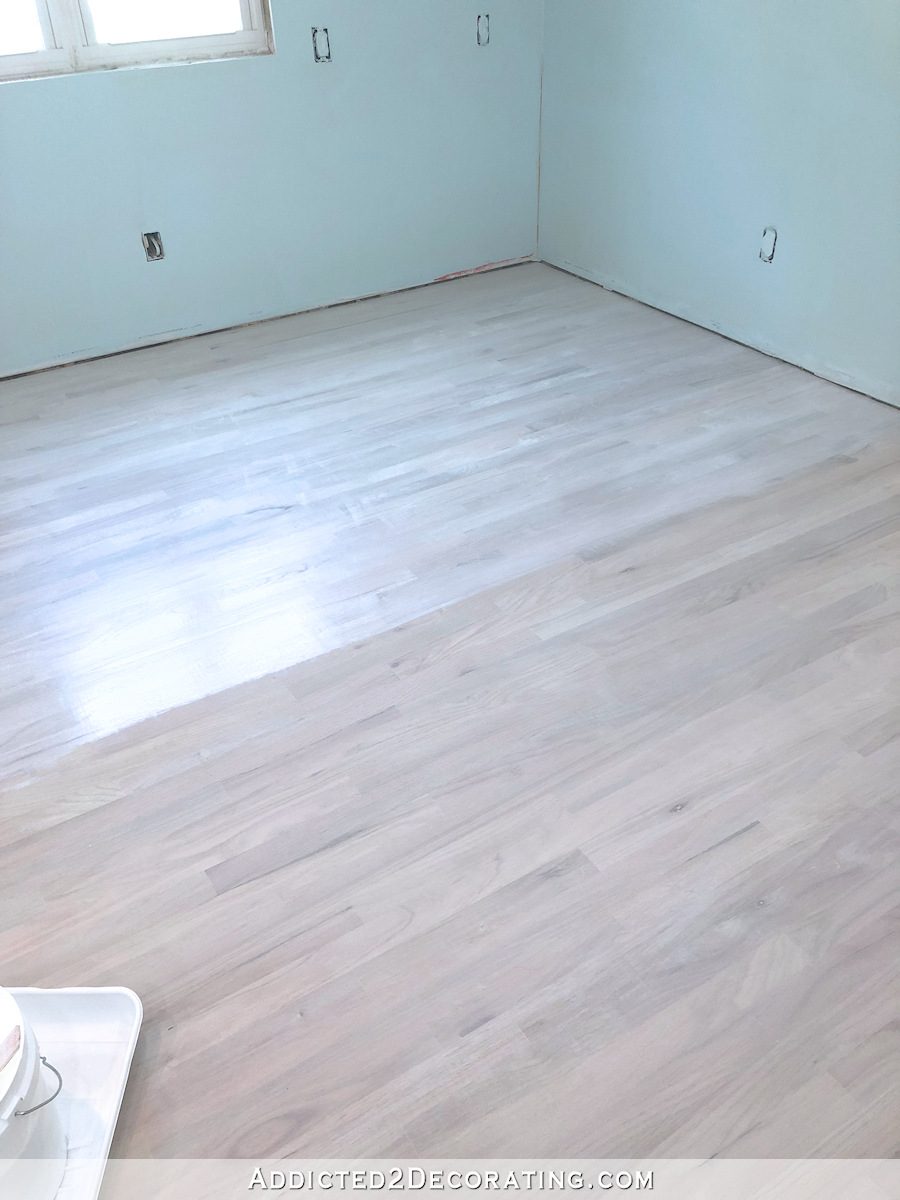
Keep in mind that it looked much brighter white when it was wet (and it was wet when I took that picture). Water-based poly on its own looks milky white in the can, and also looks milky white when applied, but dries crystal clear. So as it dried, the white softened a bit.
After the first coat of white-tinted polyurethane dried, I sanded the entire floor by hand (sounds crazy, I know, but it only took about an hour for 550-square feet) using 220-grit sandpaper. I did this because water-based products raise the grain of wood, so I wanted to get it as smooth as possible before the second coat. But I also wanted to get the finish (i.e., the white color) as even as possible before applying the second coat. So being down close to the floor, and literally examining every inch of that floor as I sanded it by hand, gave me the opportunity to sand out any overlaps that may have gotten too white.
So I sanded, vacuumed really well, and then applied the second coat of white-tinted poly in exactly the same way with the 5-inch brush.
I mixed up a total of 1.5 gallons of white-tinted polyurethane for my 550-square feet, and that was plenty to do two coats. In fact, I had quite a bit left over.
After the two white-tinted coats, I applied three clear coats of the same polyurethane. I applied those coats using a foam pad for water-based polyurethane for floors, but I highly suggest getting a T-bar instead. I couldn’t find one locally, and I didn’t want to wait to order one online, so I went with the foam pads for polyurethaning floors that they have at Home Depot.
I’m so thrilled with how my floors turned out! So let me show you a few more pictures…


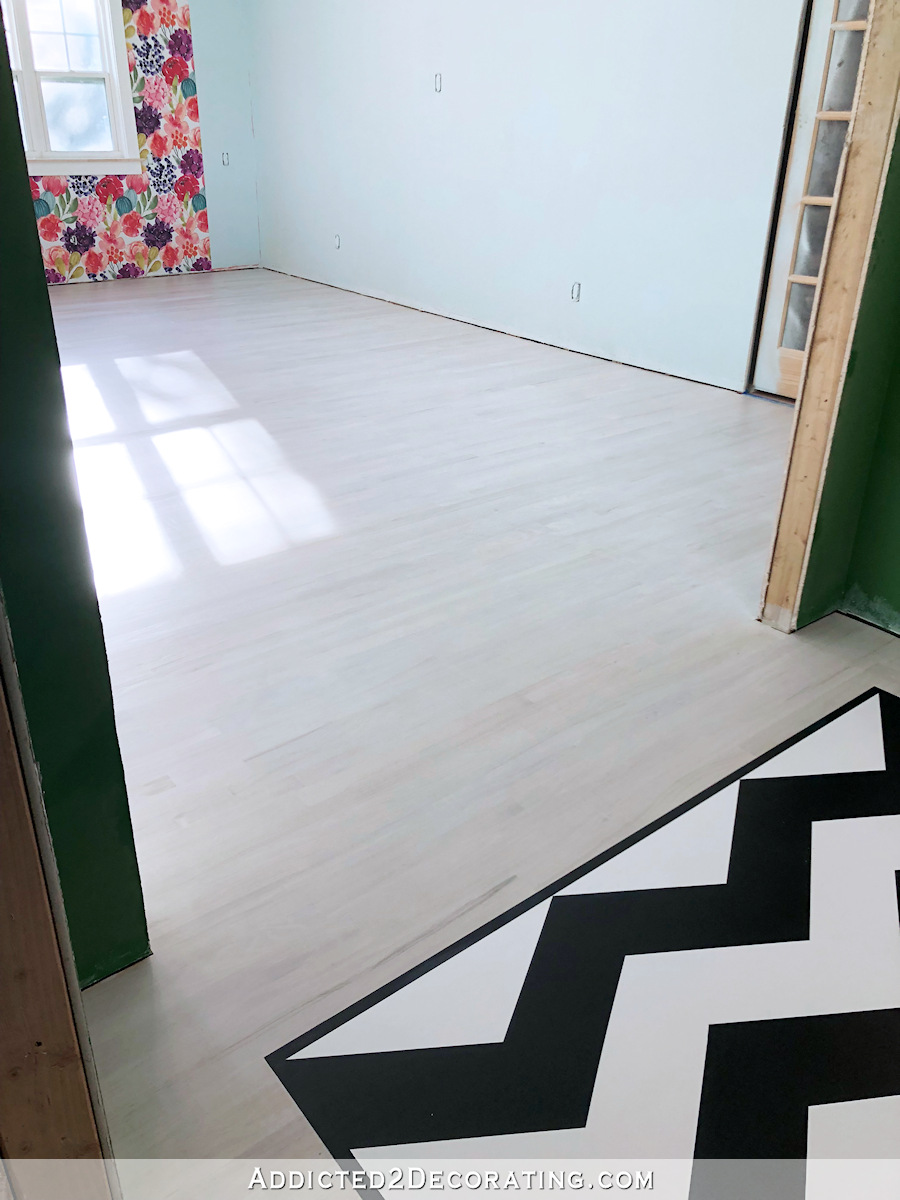

And again, I’ll try to get better pictures later in the day when the sun isn’t streaming through the front windows and glaring off of the floor. 🙂
Helpful sources and products:
- 5-Inch Stain & Waterproofing Brush – This is what I used to brush on the two coats of white-tinted polyurethane. I attached it to an extension pole so that I could stand while applying the poly. The threads on my extension pole didn’t fit the threads on the end of the brush, but I just used wide painters tape to hold them together, which worked just fine.
- Mixol Universal Tint, White – This is what I used to tint the polyurethane for the first two coats. It worked really and mixed in very easily. And this tint is pure white without any noticeable undertones that I could see.
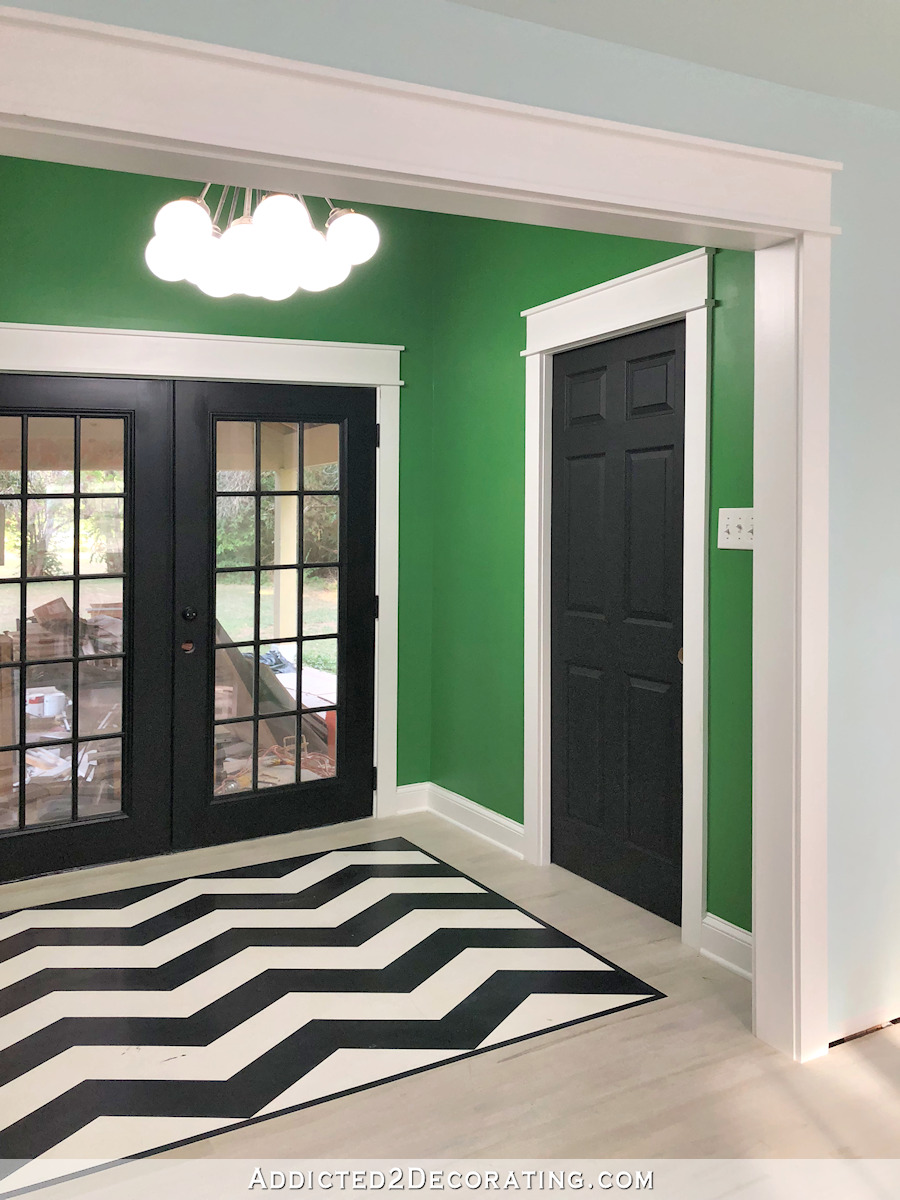
Looking for info on my painted black and white chevron floor design in the back entry? You can find that here…
UPDATE: Want to see how these floors held up over time? I compared all five finishes I’ve used on our hardwood floors in our house here: Comparison Of The Five Hardwood Floor Finishes I’ve Used In Our House (Waterlox, Oil-Based Polyurethane, Whitewashed, And Two Different Painted Floor Finishes)

Addicted 2 Decorating is where I share my DIY and decorating journey as I remodel and decorate the 1948 fixer upper that my husband, Matt, and I bought in 2013. Matt has M.S. and is unable to do physical work, so I do the majority of the work on the house by myself. You can learn more about me here.

Your floors are stunning. Few things make me happier than beautifully whitewashed floors. What an amazing job!
Great and beautiful job!
The floor looks great. Job well done!!
Thanks for sharing.
Absolutely beautiful!! And you’re right…worth all the hard work!
Super beautiful job. The lighter floors are awesome for a bright studio. You will be so happy working in that studio – once you can stop looking at that gorgeous wallpaper!
I thought the matt would look dull, but it really does have a nice sheen to it
They look beautiful! I love everything about this part of the house and can’t wait to see more!
Question: is there a secret for perfect edges on your chevron painted area where the border meets the wood? When I’ve painted lines on walls, I’ve used your trick of painting the base color along the tape and then painting the accent/stripe color over it for the perfect edge, but that doesn’t work when your base is wood! I’m in the middle of a painting project on a wood shelf right now and my lines are awful!
I don’t really have a secret for the perfect edges, except that (1) I used the blue 3M tape with the blue label/orange writing for floors and delicate surfaces (can be used on newly painted surfaces), and I’ve always had really good success with that specific tape. Also, right before I paint, I just use my finger and press really well on the whole taped design to make sure there are no little bubbles or wrinkles, and paint immediately. On this floor design, my lines were perfectly crisp just doing those two things. I didn’t even do the “base color over the tape” trick, and my lines were still perfectly crisp. So perhaps it’s just a matter of switching tape, and then making sure you press it down thoroughly right before you paint.
I have done this chevon pattern on wood floors with zero bleed over. I lightly scored my lines with a straight edge knife and metal ruler. When I applied the stain (or paint) I didn’t put it right up to my scored lines. I used a small chip brush for control, kept it away from the lines and lightly applied a small amount of the stain and let it bleed up to the scored lines. After seeing how it flows you will know how close you can apply it to your scored lines. My wood was pine and it bled a lot so applying it not close to the edge worked like charm for me. The scored lines are so light that they doesn’t show up even after poly finish.
I actually really like your photos with the light streaming in.
Me too 👍🏻
Gorgeous job!
The floor came out so beautifully! The whitewash really tones down the heavy grain of the oak and I like it a lot.
Love these floors! Makes me want to do my whole house!
Process question! Is it possible to stain/whitewash the floors before installation?
Not Kristi but you wouldn’t be able to fill voids or sand the floor to level without undoing all your prefinish. If you wanted a super rustic look you might be able to get away with it.
Unfinished flooring has to be installed, then sanded in place with a drum sander, and then finished in place.
I do as well! Your photos are always so lovely. I would love to see a photo tutorial.
Kristi, your understanding of these products is incredible. This floor is perfection and you always get the look you are envisioning. Can you help a girl out? I have 1200 sq ft of southern yellow pine I have to stain for walls. Your recipe would be perfect for this job. Couple of questions: Would you pretreat first to avoid uneven blotching? Would you use purple acrylic paint to tame the yellow? What kind of finish would you use since these are walls? The entire house is all windows and French doors with plenty of light. Thank you so much. I learn so much from you every day!
Pretreating the wood is definitely an option if you’re concerned about blotchiness. I was concerned about that as well with my floor, but I was pleasantly surprised with how the whitewash stain evened out the tones of the wood. Since it’s water-based, it sits on top of the wood more than an oil-based stain does, so that gives you more control in evening out the tones.
As far as the finish, I would actually use the same thing I used — Varathane floor finish in matte. Since your room gets a lot of light, I wouldn’t think you’d want them shiny. The matte finish actually has a slight satin finish to it. But the reason I suggest it instead of something like General Finishes is because I did a TON of reading before selecting my finishes, and I almost went with General Finishes topcoat on my floor. But on their website they say that it has a tendency to yellow when used over light surfaces or white painted surfaces. I didn’t want to take the chance.
The Varathane is crystal clear and I didn’t read any reviews saying that it can yellow. So if I were doing walls, I’d still go with the Varathane floor finish in matte. However, if that still turned out to be too satiny for my liking (I don’t like any shine at all on my walls), I would probably finish with a coat of General Finishes Flat Out Flat over the Varathane. Both are water-based, so there shouldn’t be any conflict there. But I’m an experimenter and don’t mind taking chances. 🙂
If the wood is yellow, purple should work to eliminate the yellow. But be sure and test it out in an inconspicuous area before using it on the entire wall. 🙂
Thank you! You’re brilliant! All questions answered. I appreciate your time very much.
Amazing job! The room is going to be awesome. I can’t wait to see it finished.
Fantastic!!!
LOVE these floors! Kristi, do you think you would ever go back and whitewash the red oak floors of your house now?
I thought about it for about five minutes after the whitewashing was finished. But as much as I love the light and bright floor specifically for my studio, I really do prefer the coziness of the darker floors for the rest of the house.
Absolutely beautiful!!!
The floors are beond awesome! Great job but then you always seem to beat expectations. You are one of a kind and what I wouldn’t give to have your talent, your energy and your tenacity.
Your floor is beautiful! I look at the pictures and I can imagine myself dancing across the room!!
BTW — I can’t dance! 😀
Turned out beautiful. Love it light like that.
I’m curious… How did the transition from the breakfast room to the studio turn out?
The transition isn’t finished yet. I still have two boards that need to be stained dark and polyurethaned to match the breakfast room.
Turned out beautiful.
You deserve to have them look awesome after all that work. You HAND SANDED them! And used a 5 inch brush! Unbelievable. Well they are stupendous.
Stunning, just stunning! Your studio is going to be so good!
Love the floor. Love the painted rug. Love the green entry with the black doors and that amazing light fixture. And I think your custom wallpaper will be an amazing backdrop to all the cabinets and work surface you have planned. I’m already envious of your fabulous studio.
It is lovely! High five!
Just fantabulous! Love love love it ALL!!!!!
Just one question? Can I be you when I grow up? Everything you do is “ah” inspiring! I always look forward to your post! Thank you!!!
I love the sheen of the floor. It looks so soft.
Looks fabulous! That space, even as is, must be inspirational to your creativity. So fun to see your vision for myself.
I am in love with your floor! TBH, I love everything you have done! Wow!
You continue to amaze ! You should be so proud of yourself . . . just wow!
I’m writing this comment 3 years after you published your whitewashIng of oak floors. I would appreciate knowing how the floors are looking now. Any recommendations for changes to your process? Thank you for the details on this project.
They still look great, although they did darken just a little bit. They still look light and whitewashed, but they’re just not quite as bright white as they were originally. If I didn’t have pictures documenting the original floors, I probably wouldn’t even notice the change.
As far as the process, I think this process is still a great one. I wouldn’t hesitate to use this process again. But just recently, I’ve discovered a new product that I absolutely LOVE, and that I just recently used on the walnut vanities and storage cabinet in the bathroom remodel I’m currently working on. The product is called Rubio Monocoat Oil Plus 2C. After using it on the vanities, I read that the product was originally created for use on floors. I love the product so much, and I’d love to try it on floors. After doing a little more reading, I found this link where a person shares the specific colors that were used on a red oak floor to produce a light, bright white floor: https://www.rubiomonocoatusa.com/blogs/blog/white-colors-difference
All of that to say that there’s more than one option. I only have personal experience with the process I shared here. While I do have experience with the Rubio Monocoat (in the Pure color), I don’t have experience using any of the colors, or experience using it on a floor. But if I were to do this floor again, I sure would be tempted with the Rubio Monocoat!! I absolutely loved it on my walnut vanities and storage cabinet.
I’m late to the party but just wanted to say these floors look awesome. Great job.