Easy Acrylic Tree Artwork With Layered Colors
Disclosure: This post is sponsored by Canon PIXMA, but all opinions expressed are 100% my own.
![]()

When my mom and I were cleaning out my storage units, I came across two huge pictures that I had purchased several years ago.
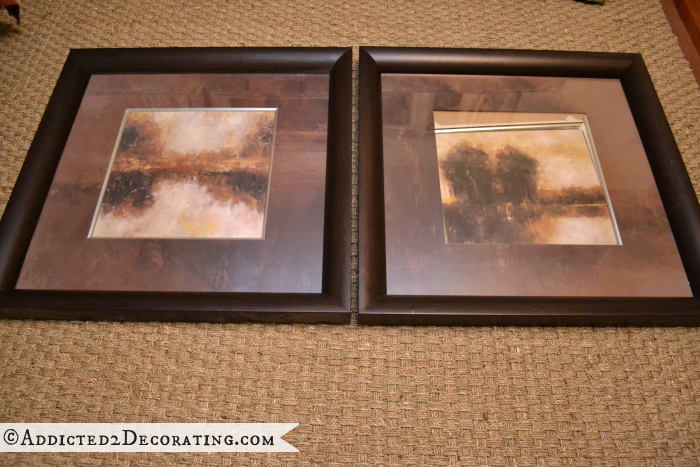
They’ve been in storage ever since I started decorating the condo in teal, orange, and green, because obviously they really fit with the colors I had chosen. But I didn’t dare get rid of them because these things are big — each picture is 32 inches square, and each one has a mat with decorative trim, glass, and a big fat frame.
Obviously the one on the right had some issues after being in a non-climate-controlled storage unit for several years, and the artwork itself just wasn’t doing anything for me any more, but I brought them to the house in hopes that I’d find some inspiration for some new DIY artwork.
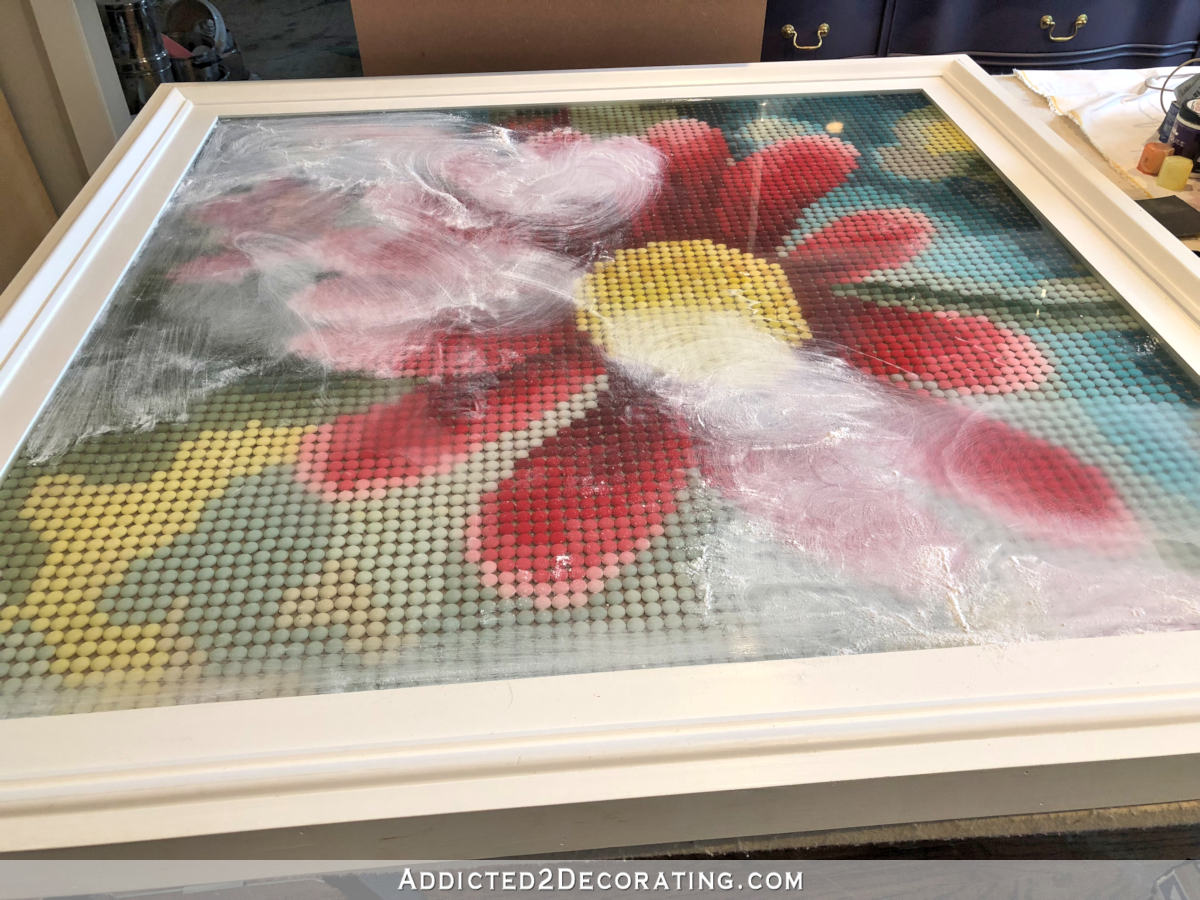
And I found that inspiration while at Pier 1 when I came across this…
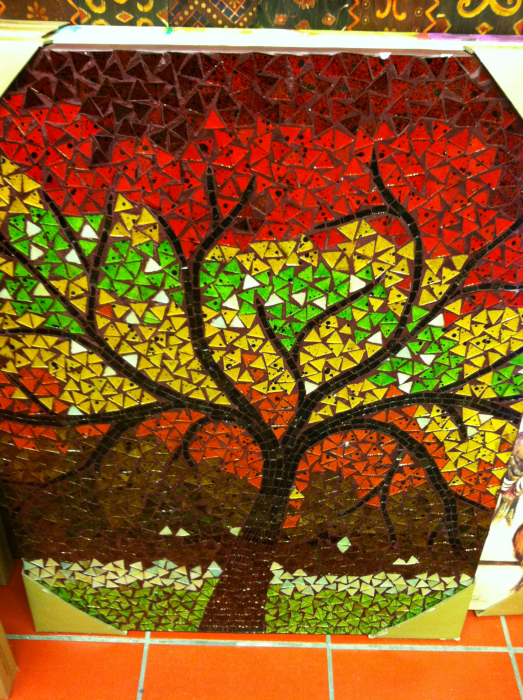
Now y’all know how much I love trees (and birds). After all, I had a huge one painted on the wall in my condo kitchen. I don’t know why, but I love just about anything with trees on it, and the quirkier the better.
What really caught my eye about this mosaic glass artwork was the layered colors. I love how that looks. What I didn’t necessarily love (especially not particularly for my house) was the really bright colors and the shiny aspect of the glass. It’s just a very “loud” piece. But I thought I could easily use it as inspiration for my own artwork, so I snapped a picture and sent it to my printer at home using Canon PIXMA MG7120 printer and the PIXMA Cloud App.
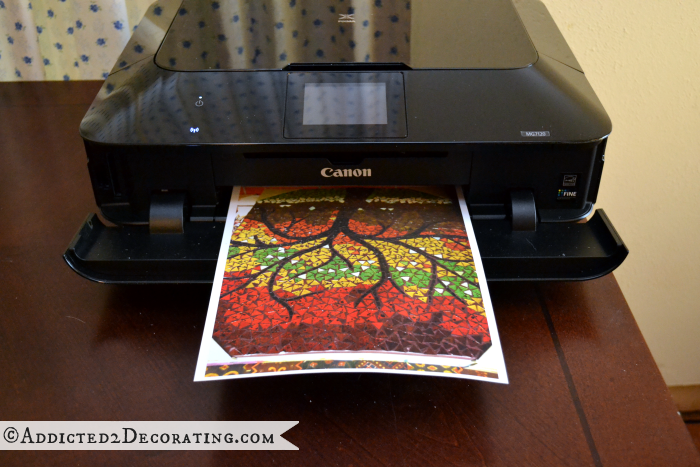
When I got home, I grabbed my inspiration piece off of the printer…
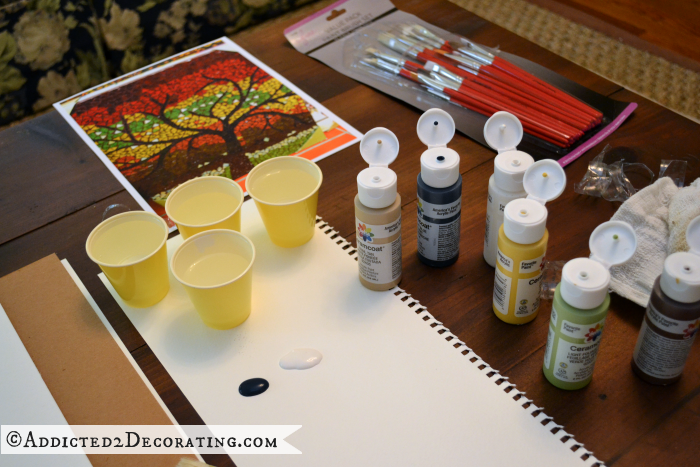
And gathered my art supplies (a large piece of watercolor paper, various art brushes, several small cups of water, a rag, and some Delta Ceramcoat craft paints in Midnight Blue, Light Foliage Green, Brown Iron Oxide, Trail Tan, Straw, and Magnolia White).
I made a misstep right off the bat, thinking that I wanted to make some sort of grass in the foreground, with water just behind it.
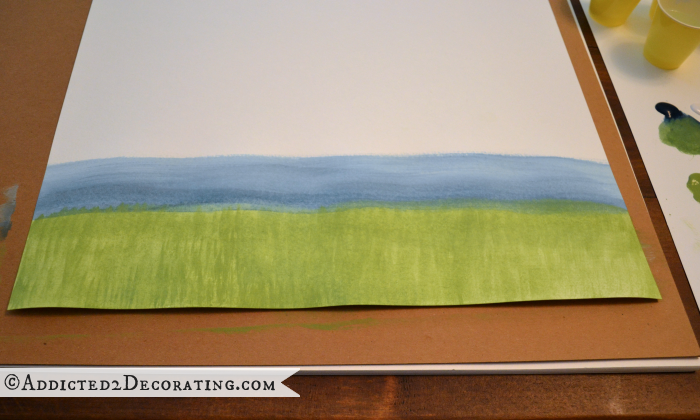
I didn’t like it. I thought it looked like a child’s artwork, but I pressed on. I started creating my layers of color, starting with the brown, and working up the paper.

I really liked how the top layers looked, but I hated the “grass” and “water”, so I decided to redo those areas using the same swirling, swooshing motions that I used on the top layers.
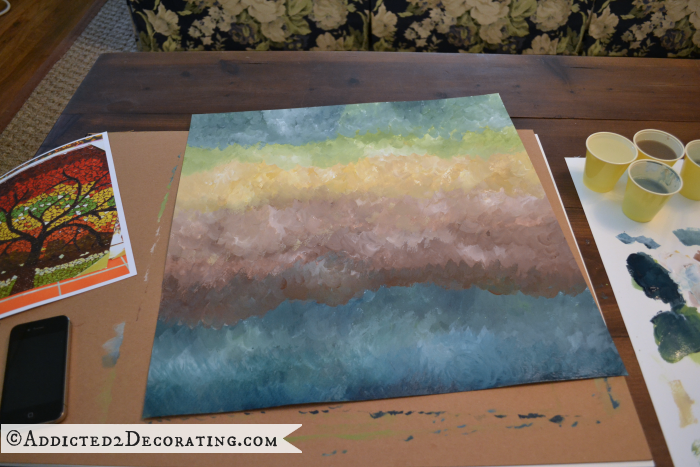
Must better.
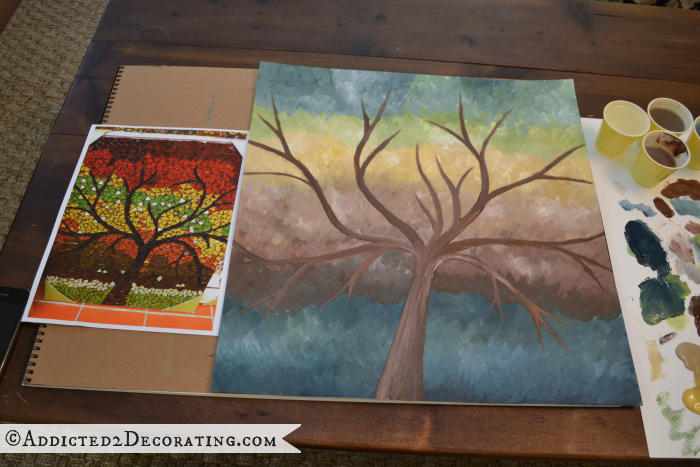
Then I used a round craft brush to add the tree trunk and limbs. I free-handed it, trying to follow the inspiration picture as closely as I could.
Then I put it in the frame. I’m no artist, but even so, I like my new picture so much better than the originals. The colors (especially the blues and greens) are just more “me”.
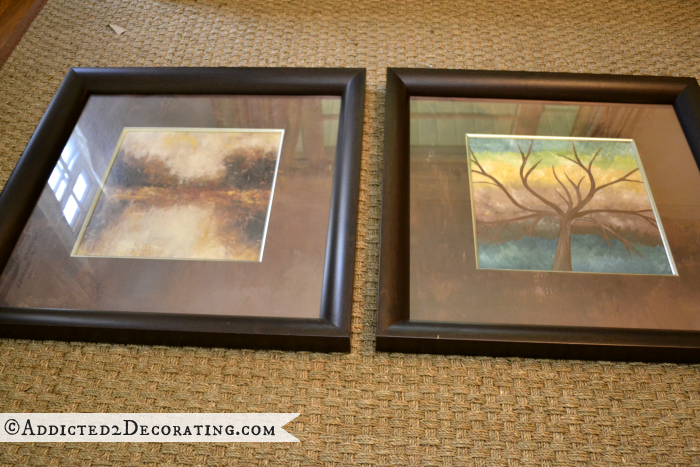
When I painted this a few days ago, I had originally planned on putting it on the wall between the two small windows in the living room. But I think that wall need something non-square, so I’m actually working on a decorative mirror to go on that wall. So now I have to find a new home for this painting. Perhaps I’ll use it in the hallway.

Addicted 2 Decorating is where I share my DIY and decorating journey as I remodel and decorate the 1948 fixer upper that my husband, Matt, and I bought in 2013. Matt has M.S. and is unable to do physical work, so I do the majority of the work on the house by myself. You can learn more about me here.

Love it! Great Idea!
You are so creative and talented!!!
Your no artist?? Excuse me?? I beg to differ!!!!!!!!!!!
You copied a print and then made a copy of a copy. Your re-invention was much better and more creative than all the copies. You do have a wonderful sense of color. Now go out and take some photo’s of trees, the shapes and the spaces in between the limbs while they are bare. You do have some buried talent in there.
Impressive! Love it!
Wow, Kristi! Is there anything you can’t do? Your creation is gorgeous! So much prettier than your original inspiration!
You make everything look so easy!!!!
I agree with everybody! Great job, Kristi!
once more, you blow me away.
It came out great.
Really great job. Don’t you feel so accomplished? This is a huge improvement over the original. Always save those frames. I’m afraid I’m hoarding a few also.
So pretty! I really like it!
you have a steady hand! really nice!
here only hangs artwork from my children!
Maybe paint the mat to brighten it up?
Pretty work.
Beautiful painting! It’ll look great in your hallway (or anywhere). Are you planning a companion piece for the other frame? You have such talent and can only imagine how beautiful a pair of these would be. GREAT JOB!
I’m actually not sure what I’ll do with the other one now. I was originally planning on using this one in my living room, but now that I have the lotus flower mirror in there, I don’t even have a place for this one. Perhaps I can use them in the hallway, or in the future dining room or family room.
With the colors you’ve chosen to use, it will probably be great in any of those rooms. I will keep a ‘look out’ for this in your other rooms – kind of an eye spy game. : )
Seriously…all your DIY artwork is very inspiring. I always thought I would need to spend lots of money to put décor on my walls, but after seeing all your beautiful artwork, I feel like I can have cool stuff on my walls too with the benefits of not having to spend a lot of money and, even more so, the awesome factor of knowing it’s done by my hand. Very cool.
Kristi, I want to come to your house and do arts and crafts projects with you! Everything you do always looks like so much fun! 😀 I love how you repurposed your old artwork into something more “you.” You are so creative!
Best,
Kimberly
Bravo! Strong work.
Girl, is there anything you can’t do?! You are a talent to behold and inspire. Thanks for sharing.