Easy (Painted!) DIY Greek Key Accent Pillows
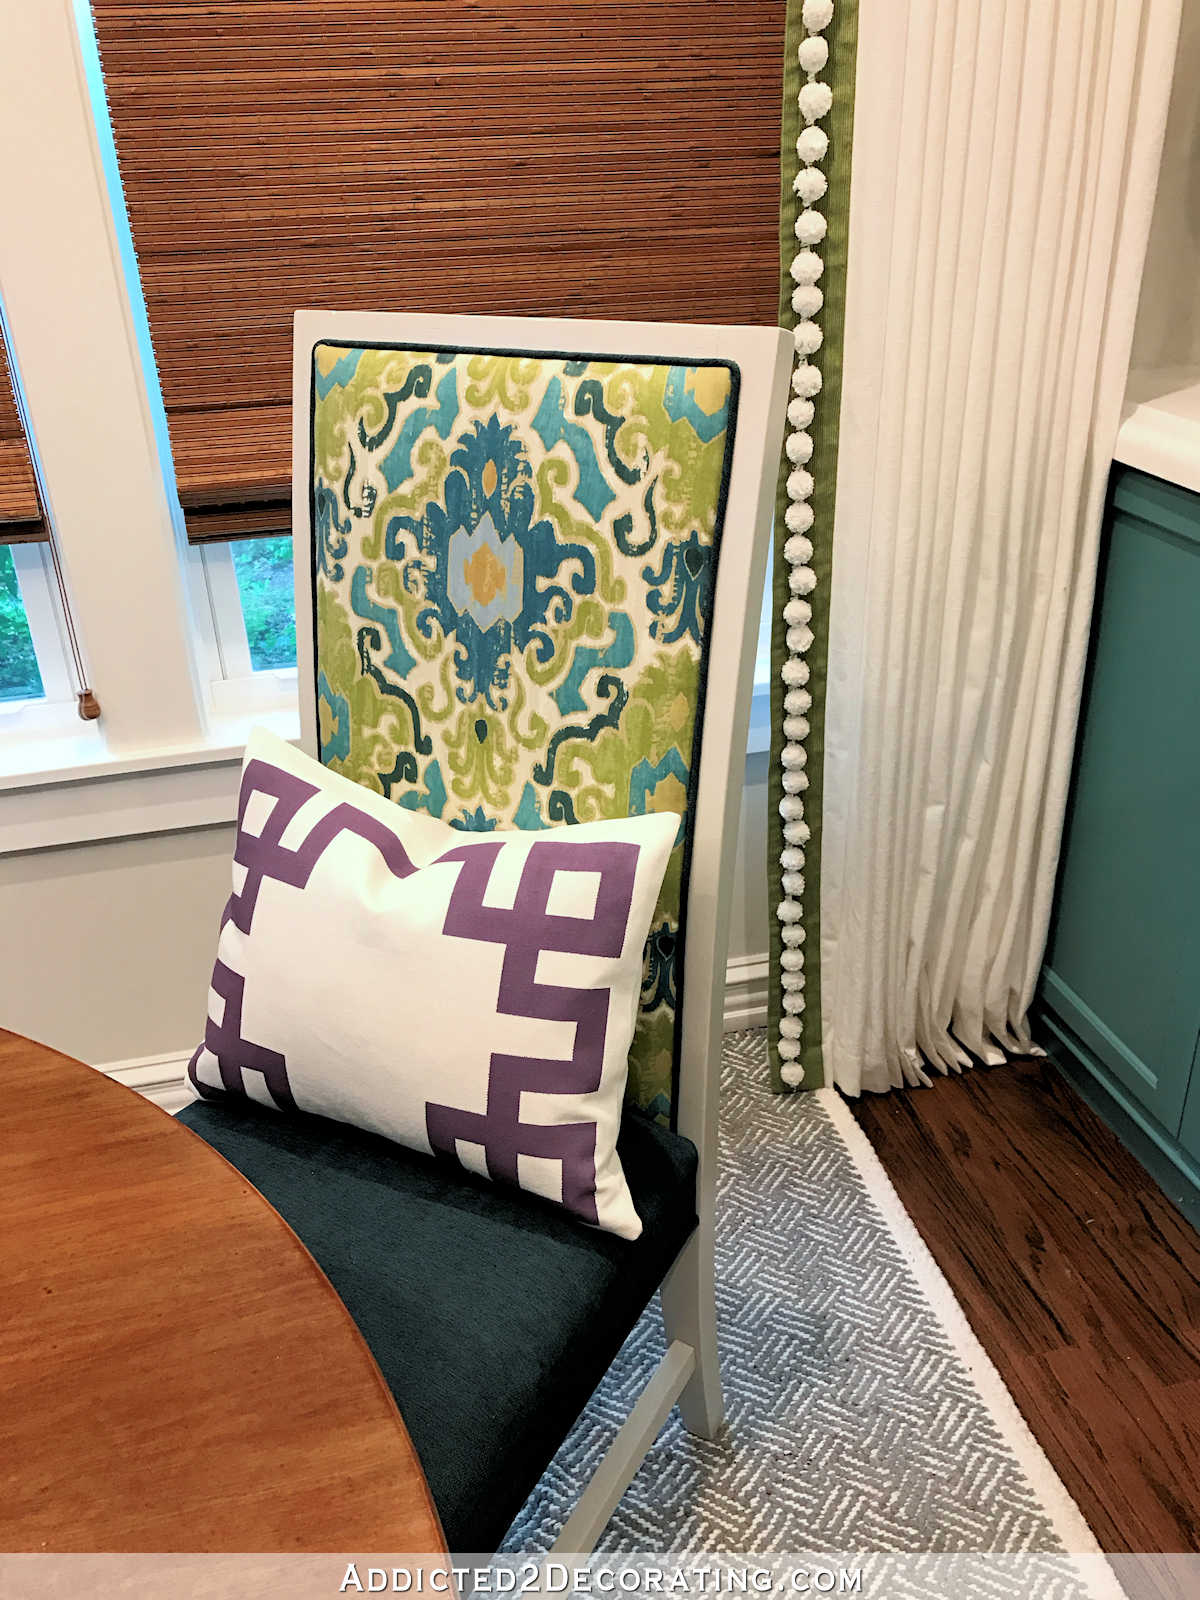
A couple of weeks ago, I brought my laptop into the breakfast room and sat at the table for a good long while working on my computer. I was pleasantly surprised about how comfortable the chair seat was after sitting that long (these chairs are from World Market, and I just used the existing seat foam when I reupholstered them, which you can read about here). But if I’m going to be sitting for long periods of time, I always prefer a lumbar pillow on my back.
I knew immediately what I wanted — a 14″ x 18″ white pillow with a purple Greek key design. And I knew immediately that trying to find something so specific ready-made would be a fool’s errand. So I headed to the fabric store to find some purple trim so I could make my own. Well, that was a bust also. I couldn’t find any purple trim anywhere that looked good with the existing purple in the room. Everything was way too bright and too red. And after looking through every single fabric at both Hobby Lobby and JoAnn Fabric, I found only one fabric that came close enough to use in the room, so I tried to make my own trim using the fabric folded around 1″ Stitch Witchery fusible tape. But once I got the design on the fabric and folded that DIY trim around the corners, it was way too bulky to look good.
So my only other option seemed to be paint! I used a Behr color called New Orleans and mixed it with Delta Fabric Medium (used according to the directions) to make the design on my pillows. I used a thick 100% cotton twill fabric for the pillows and pre-washed the fabric so that these pillow covers can be washable in the future.
Figuring out how to tape off a Greek key design was quite a challenge for me, but I finally figured out an easy way to do it without having to measure and mark things over and over and over again.
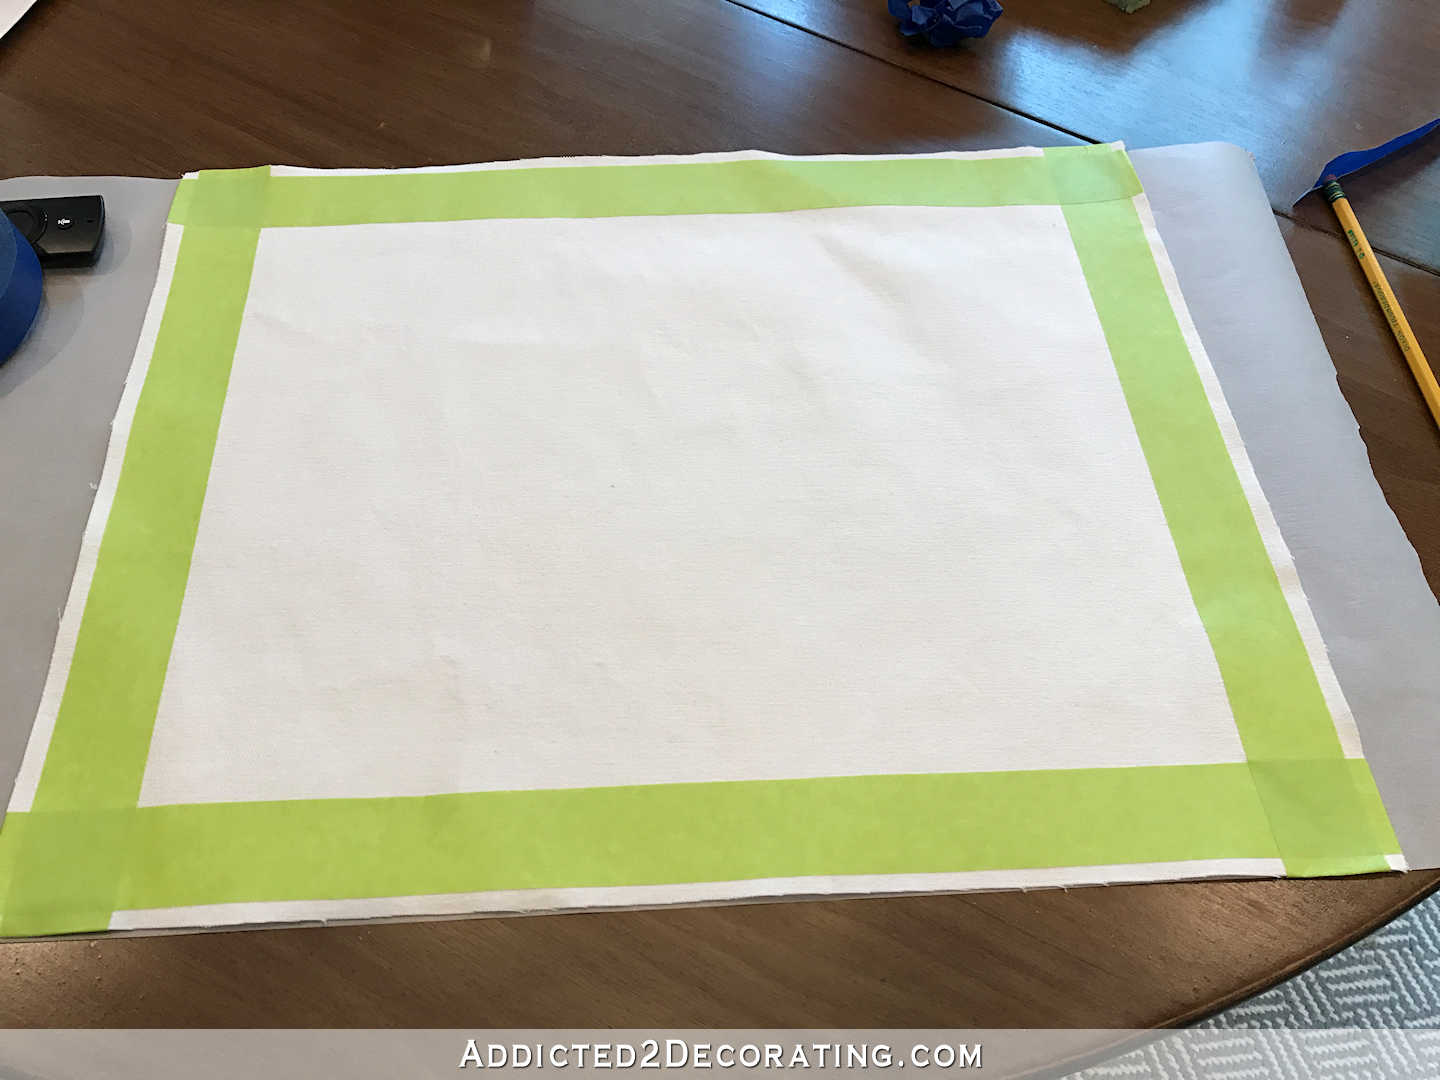
I started off by cutting my fabric to 15.25″ x 19.25″ for my 14″ x 18″ pillow plus seam allowances. Then I used high adhesive painters tape and taped off a border on all four sides…
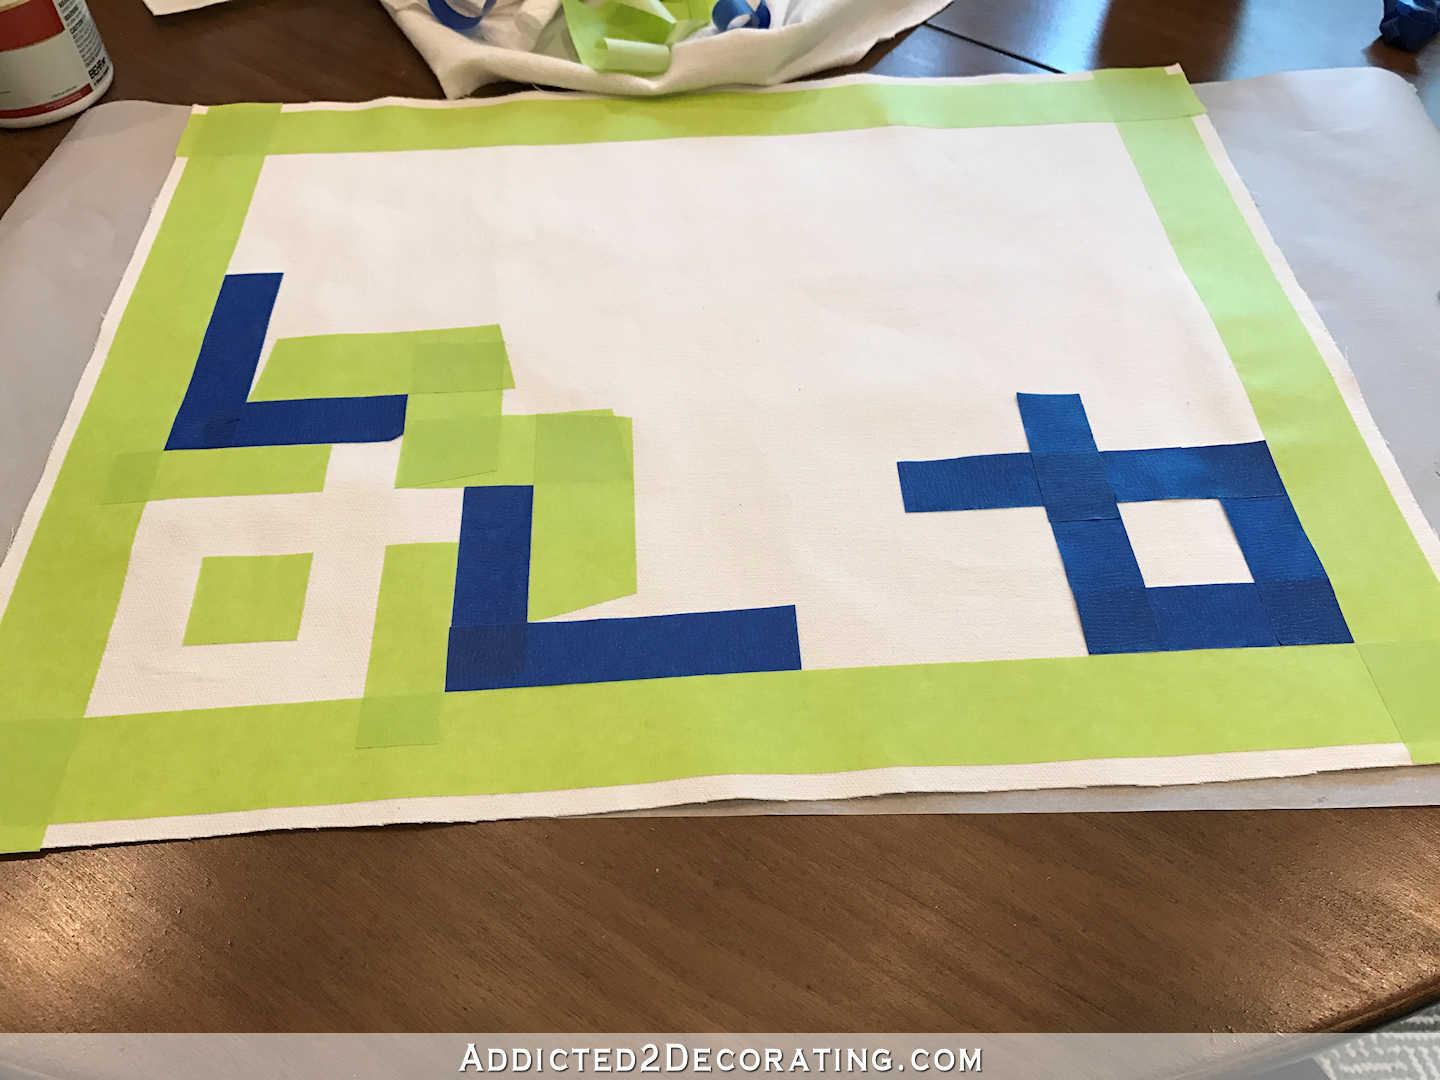
Next I made a tape template for the corner box design. This is the only thing I measured, and I only had to do it once since I used this template over and over again for all of the pillows. The only thing I made sure of was that the center hole was 1.25″ square since the painters tape I was using to tape off my design was 1.25″ wide. That way I just had to cut off a square of tape for the center rather than having to make lots of little cuts to tape off the center.

So I started taping off the design by (1) placing the corner template in the first corner right up against the green border. Then (2) I cut off a square of green tape and taped off the center of the square design. Next (3) I taped off the areas on either side of the square design. For this, I did have to cut my 1.5″ tape down to 1″ wide since I wanted my design to be 1″ wide. And then (4) I continued with the 1″ tape as a stand in for my painted design. And (5) used the green tape to tape off around the 1″ tape.

Once I got that far, I removed the blue corner template, moved it to the next corner…
…and repeated that process over again…

When I made it all the way around, I removed all of the blue tape (saving my corner template for the next pillow cover) and was left with this taped off design.

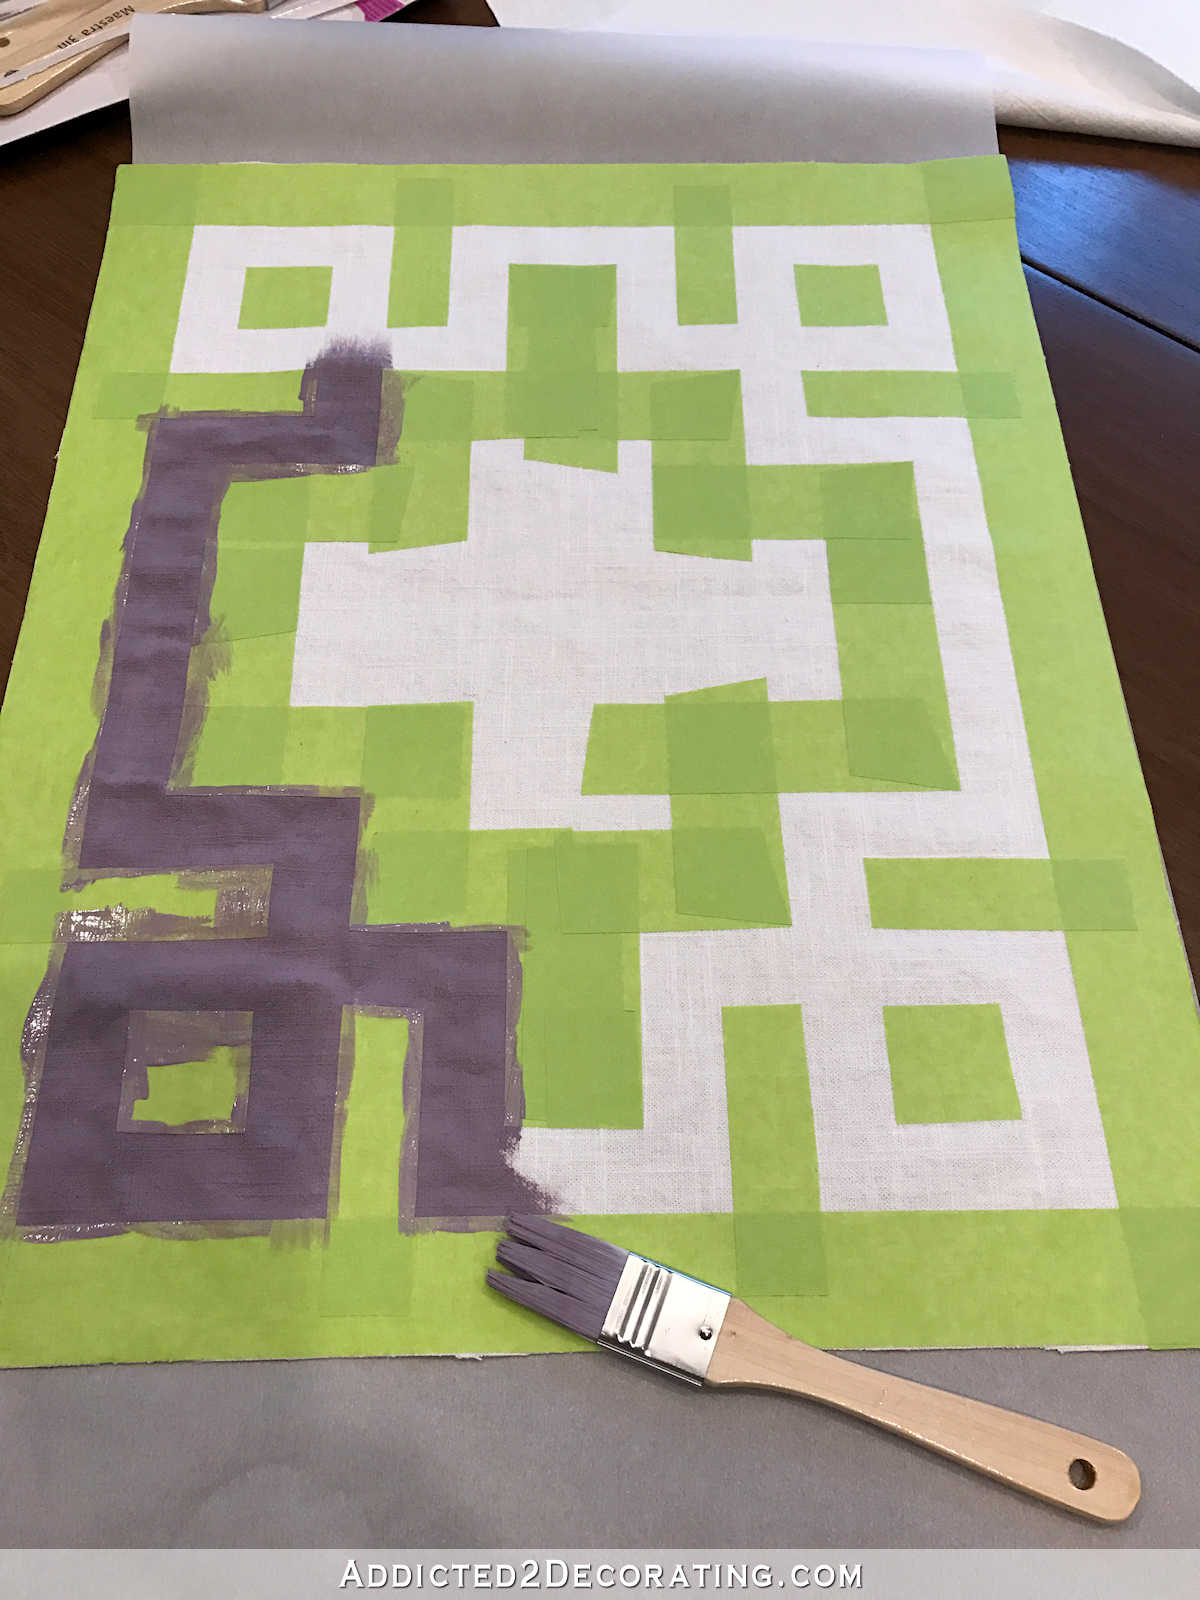
I mixed my paint with the fabric medium, pressed the tape down really well all the way around with my fingers, and the began painting. I made sure that I never brushed from the fabric towards the edge of the tape. I always either brushed from the tape to the fabric, or brushed parallel to the edge of the tape. I just didn’t want to force any paint under the tape by brushing towards and onto the tape.
This is the first one I did using linen fabric from my fabric stash rather than thick cotton (a big mistake!), but you can see the brush I used to paint the design. I found this brush in a package of three at Home Depot.
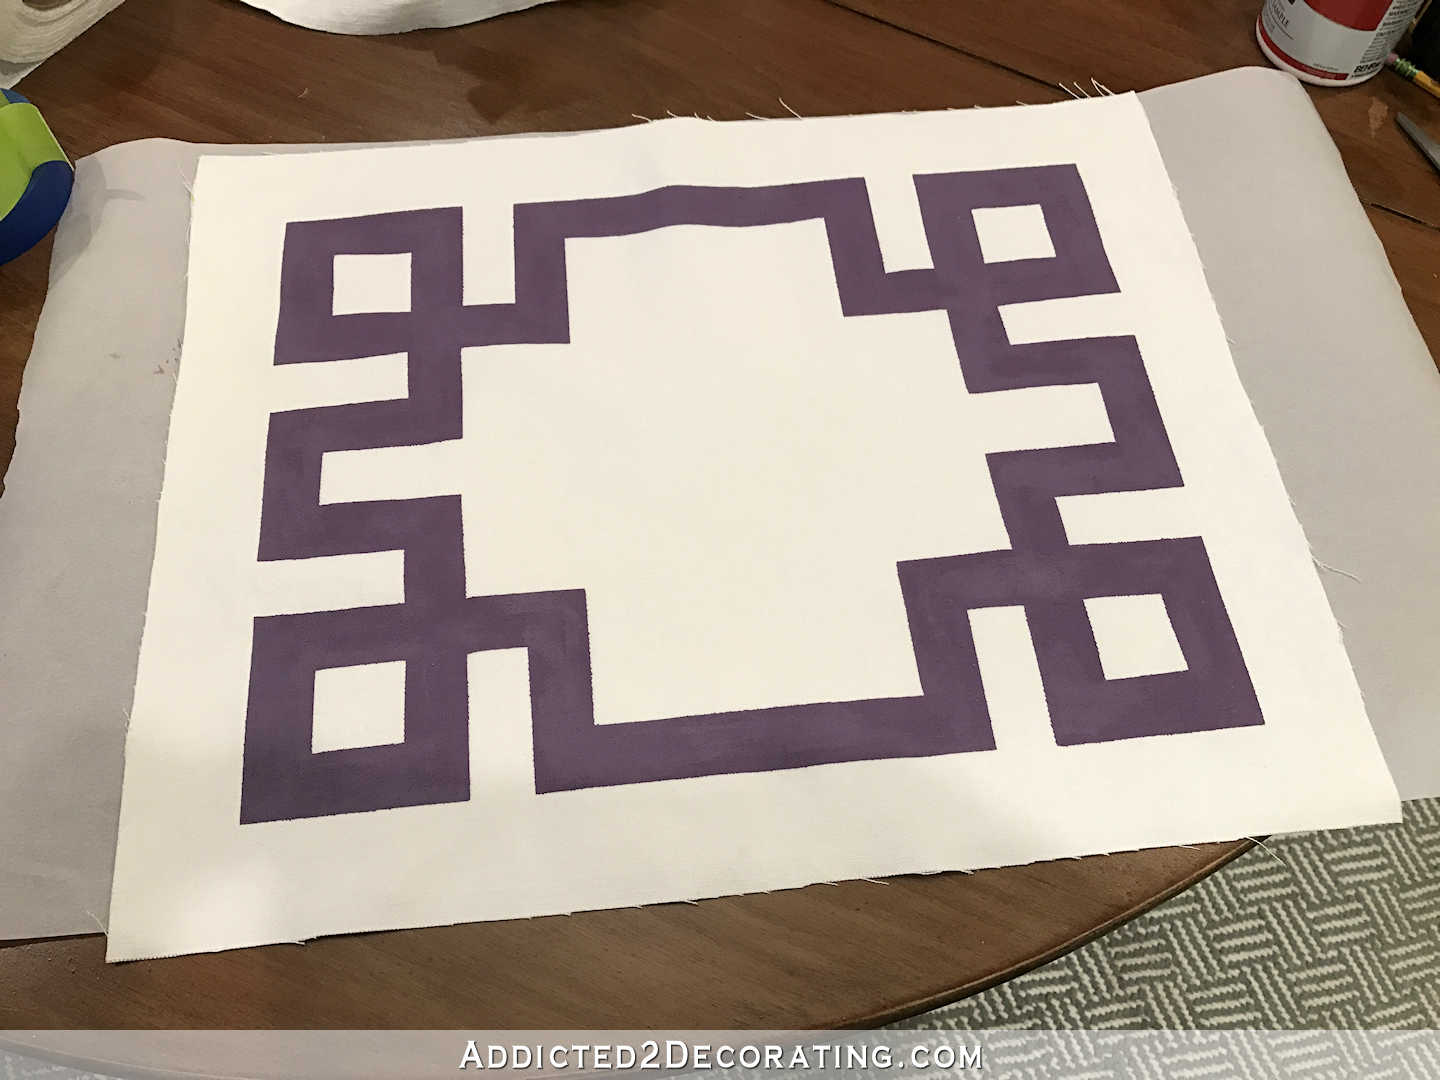
It took two coats to get the color and paint saturation consistent all the way around, and then I left it to dry for about an hour or two. Then I removed the tape and heat set the design with an iron according to the directions on the Delta Fabric Medium bottle.
I usually do envelope closures on the backs of my pillows, but since the backs of these pillows will show just a bit, I wanted a cleaner look. So I opted to do zipper closures on the bottom seam.
I started by placing one of the painted front pieces face down on my ironing board, and then I turned up and pressed a 5/8″ fold along the bottom edge. I repeat that on a back piece (i.e., a non-painted piece of cotton fabric).
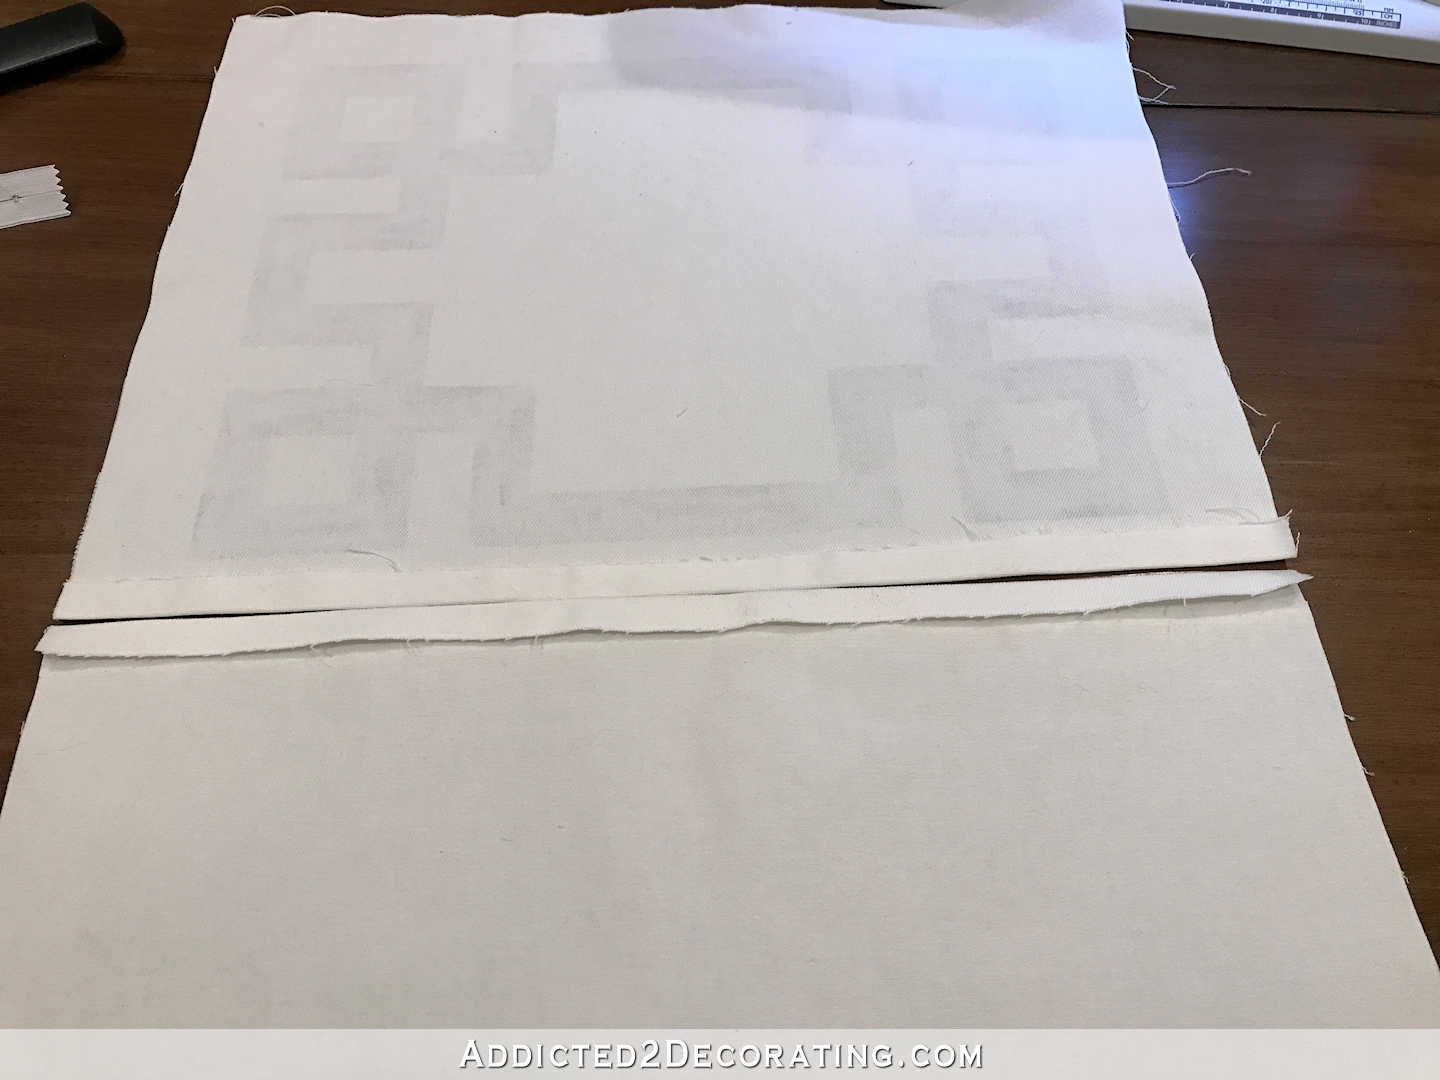
My fabric pieces were 19.25″ wide, and I used 16-inch zippers, so I pinned and sewed in seams on each end about 1.5 inches long (i.e., from the edge of the fabric to the pins shown). That left an opening in the middle about 16 inches long.

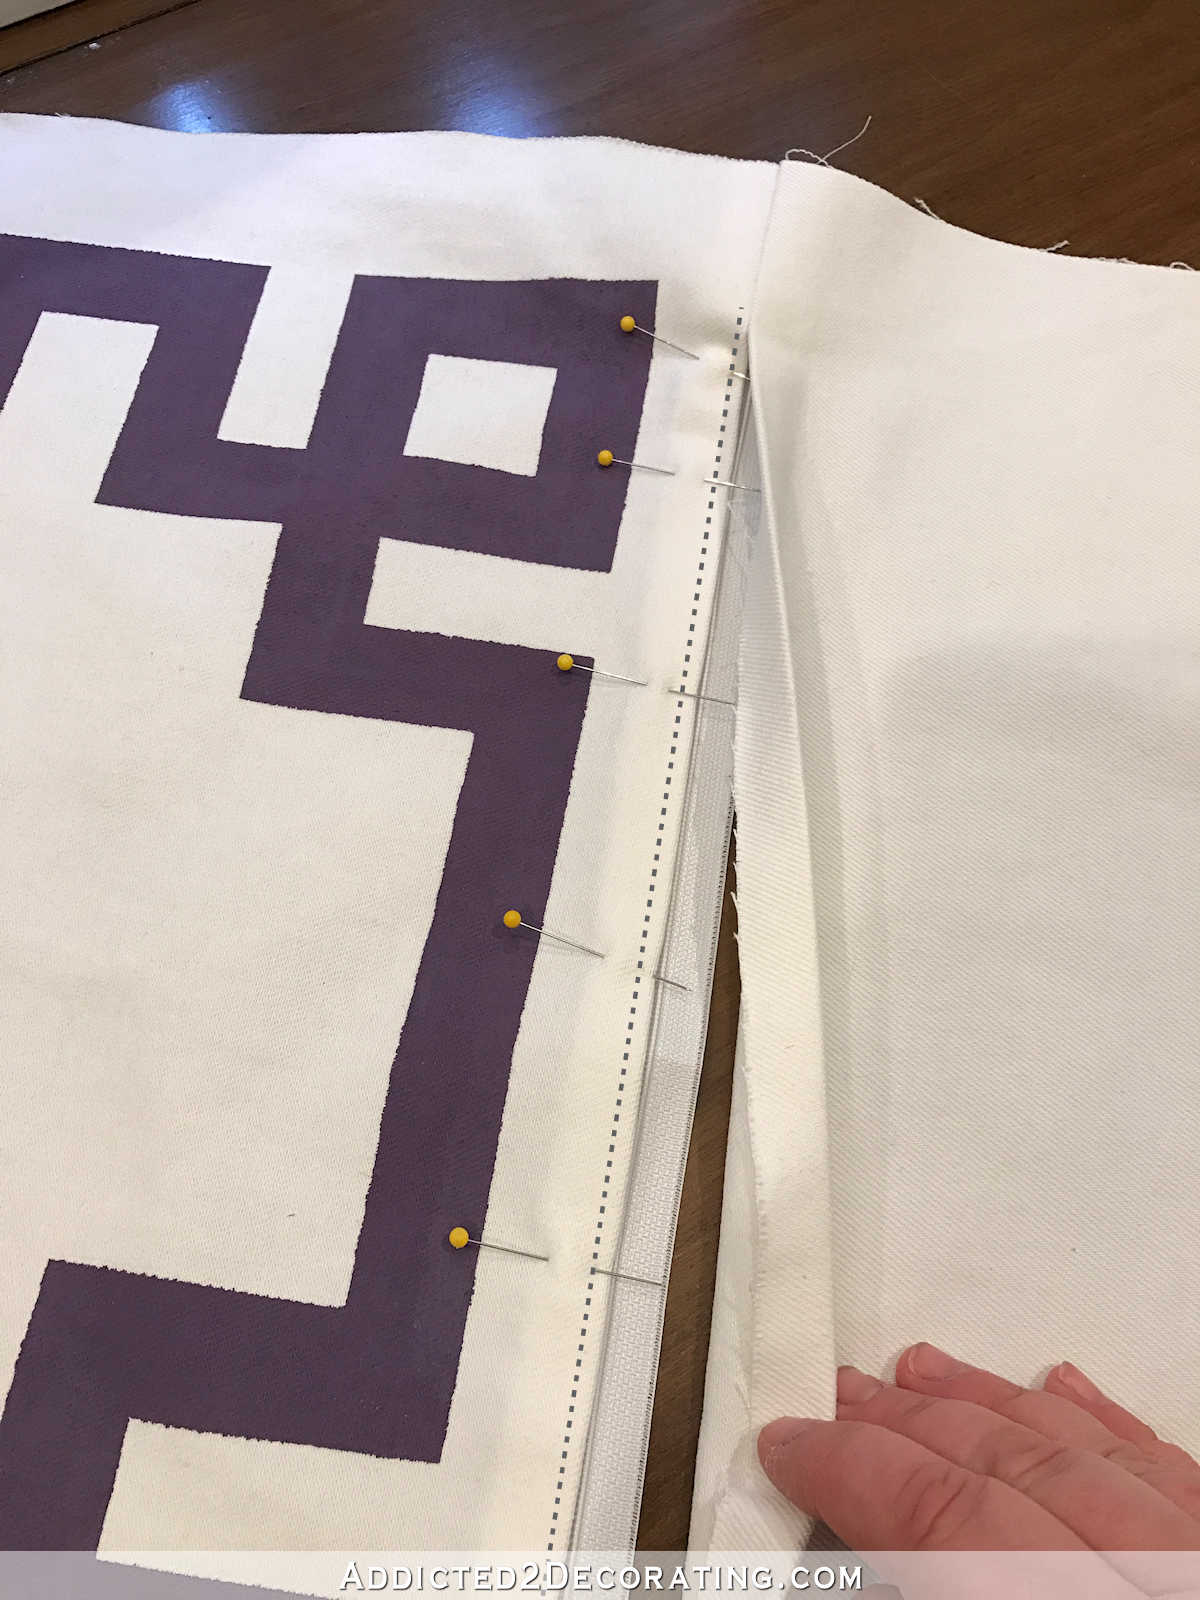
I placed the fabric on the table with the right side up, and then centered the zipper in the opening. I pinned it into place on one side, and then stitched it as close to the zipper as possible using the zipper foot on my machine. The dotted line below represents where I stitched the zipper.
Then I removed the pins and pinned the other side so that the two folded edges of the fabric were lined up perfectly, and I sewed the other side into place. Here’s the finished zipper…

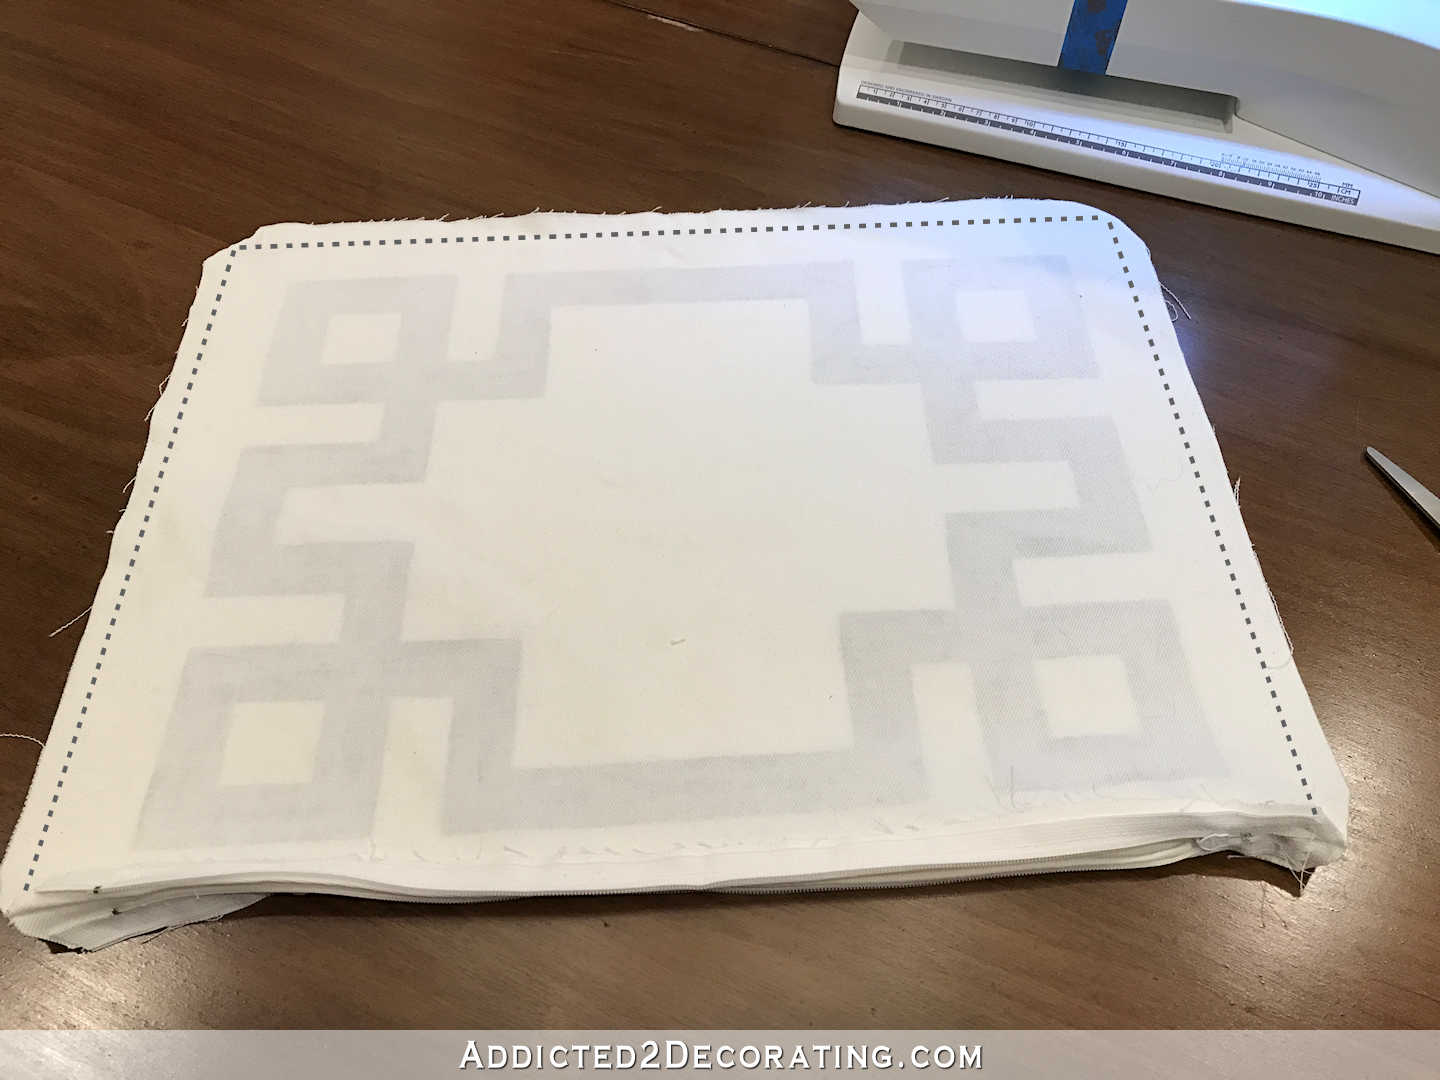
Before sewing the rest of the pillow, open the zipper!!! Then I pinned the other sides of the pillow cover with the right sides together, and sewed them together using a 5/8″ seam (represented by the dotted lines on the photo below). Before flipping the pillow cover right side out, I trimmed the excess fabric from the corners to remove some of the bulk. This makes it easier to get sharper corners on the finished pillow cover.
I flipped it right side out, pressed the seams to get crisp edges, and then added the pillow inserts. I always prefer down/feather inserts for my throw pillows.

And voila! A painted Greek key accent pillow. I was really hoping I could find trim in just the right color so that I could avoid using painted fabric, but as it turns out, I think the painted fabric looks just fine. My mom saw them in person on Saturday and couldn’t immediately tell that they were painted. In fact, she didn’t realize it until I told her.
If everything goes as planned, this room will be completely finished this week!!! I’m so excited! And in other news, my cabinet doors are finally finished and have been shipped! They are on their way to me right now, and should be delivered TODAY!! I still have to prime and paint them before I can install them. But that means that very soon, both my breakfast room AND my kitchen will be 100% finished. Done. Complete. Oh, what an awesome feeling that will be!!

Addicted 2 Decorating is where I share my DIY and decorating journey as I remodel and decorate the 1948 fixer upper that my husband, Matt, and I bought in 2013. Matt has M.S. and is unable to do physical work, so I do the majority of the work on the house by myself. You can learn more about me here.

Great job on the pillows! I hope all goes smoothly with the rest of the work that will make these rooms complete.
So professional-looking. I’m impressed, as usual.
I still have fabric medium which I ordered when you did a post on painted fabric way back – and haven’t still used it… This looks so wonderful and custom-made though, that I silently vowed to myself just now that i need to find a project to try that 🙂 I love the colour and design and admire how very tidy your results are.
Good luck with the work this week and do allow yourself some breaks, too!!!
Awesome job, Kristi! You made it look so easy but I know differently. Cannot wait to see the end result 😁
LOVE it all!!!
So clever! I don’t think you ever think IN the box! 🙂 I learn so much from your blog!
The pillows look great! And I like the Greek key and am going to make some covers myself. I don’t have the patience though to mask around with tape. Wouldn’t it work if you have painted some white trim and then attached it to the fabric?
I’m not sure. The paint does make it stiff, so I’m not sure how painted trim would have worked around the corners. But it might be worth a try! If you do try it, I’d love to hear how it works out.
I’m so excited to see you at the place of being able to rest in and enjoy the results of all your hard work! It helps motivate me (and others, I’m sure) to keep plugging away at the projects I’m in the middle of, knowing that there is light at the end of the tunnel. Take some time to really enjoy it before moving on-the garage is calling your name, isn’t it! Congratulations
The lumber cushions look awesome! Great design. So excited for you that your kitchen cabinet doors are on their way to you today. What an exciting month to get 2 rooms completely finished. Just a quick question though. As your front room, entry way and music room are already completed, when are you going to furnish and decorate those areas, so you can use them? Or do you have other plans for them now?
To have rooms totally completed will be an awesome feeling for you!
I’m so glad your doors have shipped. I live in Hickory and was about to make a visit to the factory for you!!
Love the pillows. They look grea!!
Great job on the pillows! I’m sorry but the color doesn’t work for me! I couldn’t use the purple with the chairs. Your workmanship is nothing short of perfection!
Excited for your doors, are you filling in the grain on these, or do they come with it filled in?
Yaaaaaayyyyyy! Almost done with TWO rooms, woohoo! I love the color combination you’ve used in these rooms. I would probably have never considered using teal and purple together, but they look wonderful. Are you going to make a video ‘reveal’ when the rooms are completely completed? 😉
Yes, please!
The pillows look really good and I’m sure they will give you the support you need. Can’t wait to see 2 completed rooms. Amazing work!
Wonderful!! I’m so happy for you. You’ve worked so hard and have a lovely house to prove it.
Congrats Kristi! Two complete rooms! AWWWESOME! You’ve worked so hard. It’s exciting to see these rooms finally in the cruise mode. The pillows are beautiful. I may borrow your idea! Can’t wait to see more, but for now…time to enjoy! Congrats. Susie from The Chelsea Project
Awesome job on the pillow. I like the way you think and how you find solutions when something isn’t working the way it was supposed to, lol.
Wow…love it! Creative way to get the colors you want and design you want! Thank you for these great ideas. Do you have a link to buy the fabric medium …I will go through you😀
Amazing job. I’d love to see a pulled back view to incorporate the console area. Love the shots of the whole room and how everything fits together so nicely.