Home Gym Walls — Compromise & Progress
I’m finally making some real progress on the home gym walls! It’s not as much as I had hoped to have accomplished by this point, but that’s because I took a detour (as often happens with my projects) before making the final decision on how I wanted things to look.
A few days ago, I showed you three different options I was considering for the walls. The crowd favorite was clearly this option with the stripes in the middle of the walls, with white above and below.

I was so glad that was the crowd favorite, because it was my favorite also. So earlier this week, I painted the darkest teal section on the main wall, which I showed you on Monday.
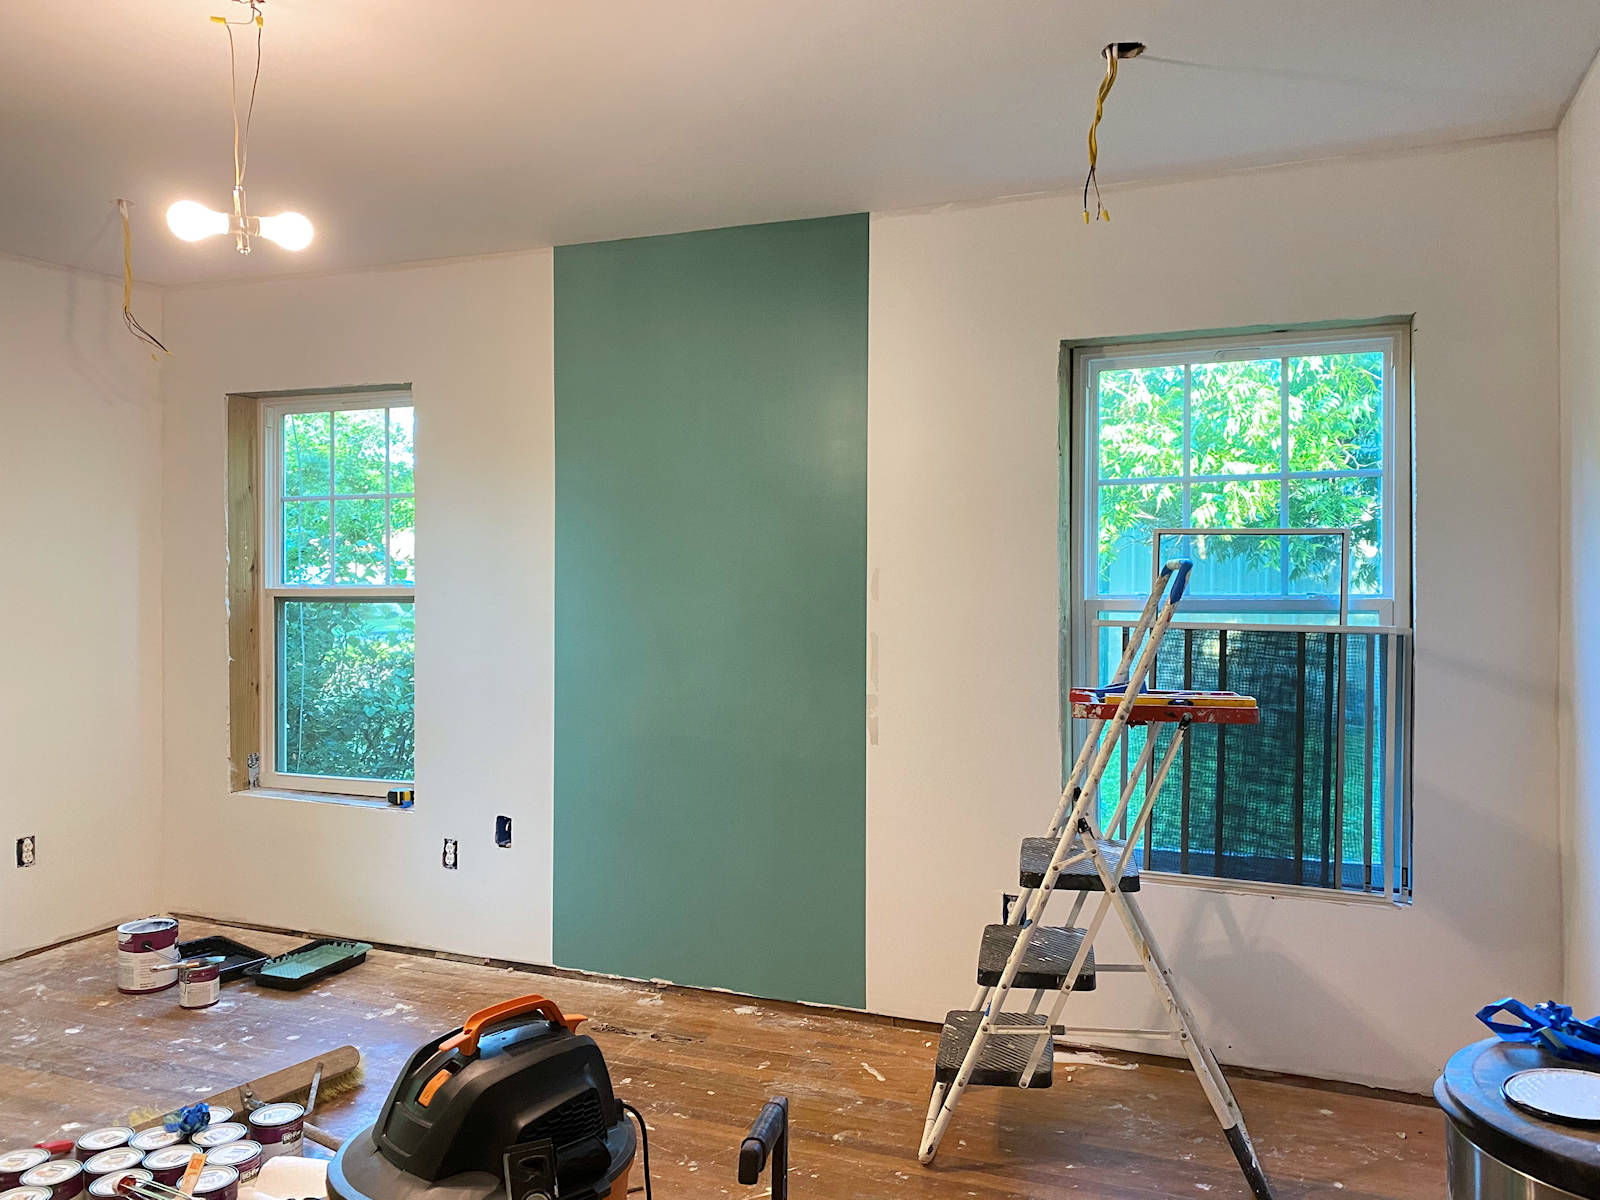
And then after letting the walls dry about 36 more hours, I started taping off that design. I knew right away it wasn’t going to work.
Living in an old house presents challenges that can be quite irritating for a perfectionist like myself. And living in an old house that sits on a pier and beam foundation that is always moving and shifting ever so slightly throughout the year can be enough to either make said perfectionist loosen her grip on perfection a bit (or a lot), or otherwise she will be driven absolutely mad.
I’ve gotten used to the quirks of an old, constantly shifting house where nothing is ever perfectly level, square, or plumb. But even in the other rooms where things aren’t perfect, I can generally fudge things a little so that the average person won’t notice. To date, the room that has presented the most problems for me has been the breakfast room…until now. This room is, by far, the worst. You can literally feel that you’re walking “uphill” as you walk towards the front right corner of the room.
And because everything is so off, that means that the windows (the windows that have both vertical and horizontal lines on the upper half) aren’t perfectly plumb or level. Neither is the ceiling. Neither is the floor.
So when I started marking off a design that is comprised of nothing but vertical and horizontal lines in this room where nothing is square, level, or plumb, I could tell immediately that it was going to look awful and accentuate the non-level and non-plumb windows, ceiling, and floor. As a perfectionist with a touch of OCD (even one who has learned to loosen her grip on perfection over the years), I knew that design would have been the end of me.
So it was back to the drawing board for me. And if straight horizontal and vertical lines wouldn’t work, then I decided I needed to go to the very opposite end of the spectrum and do a totally freeform design. After searching on Pinterest and Instagram for anything that I could use as inspiration, I came across this piece from an artist I follow on Instagram.
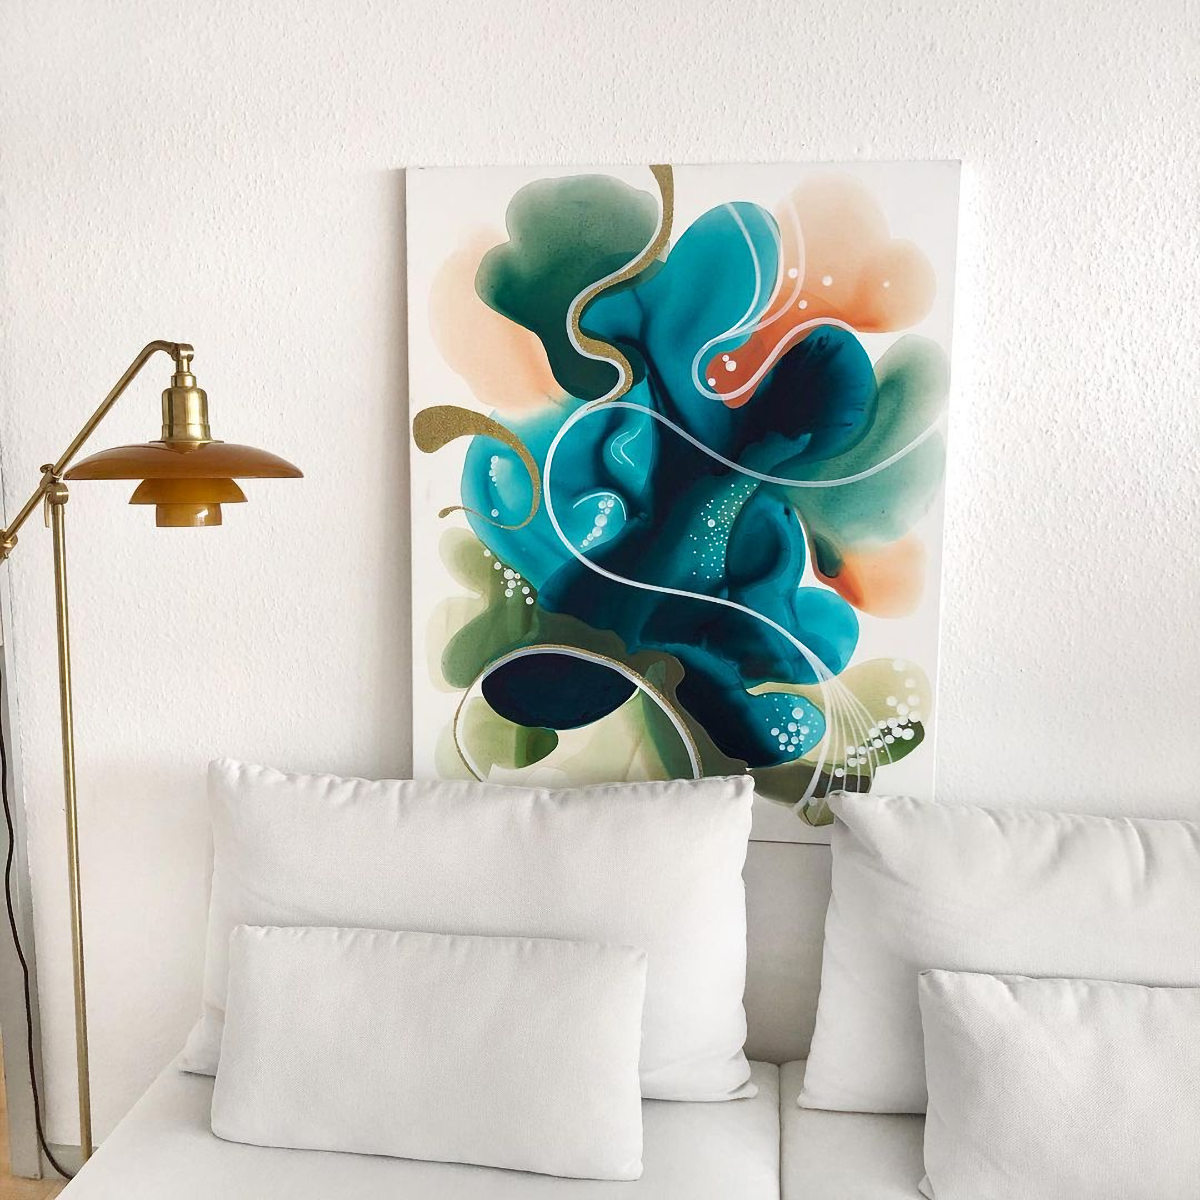
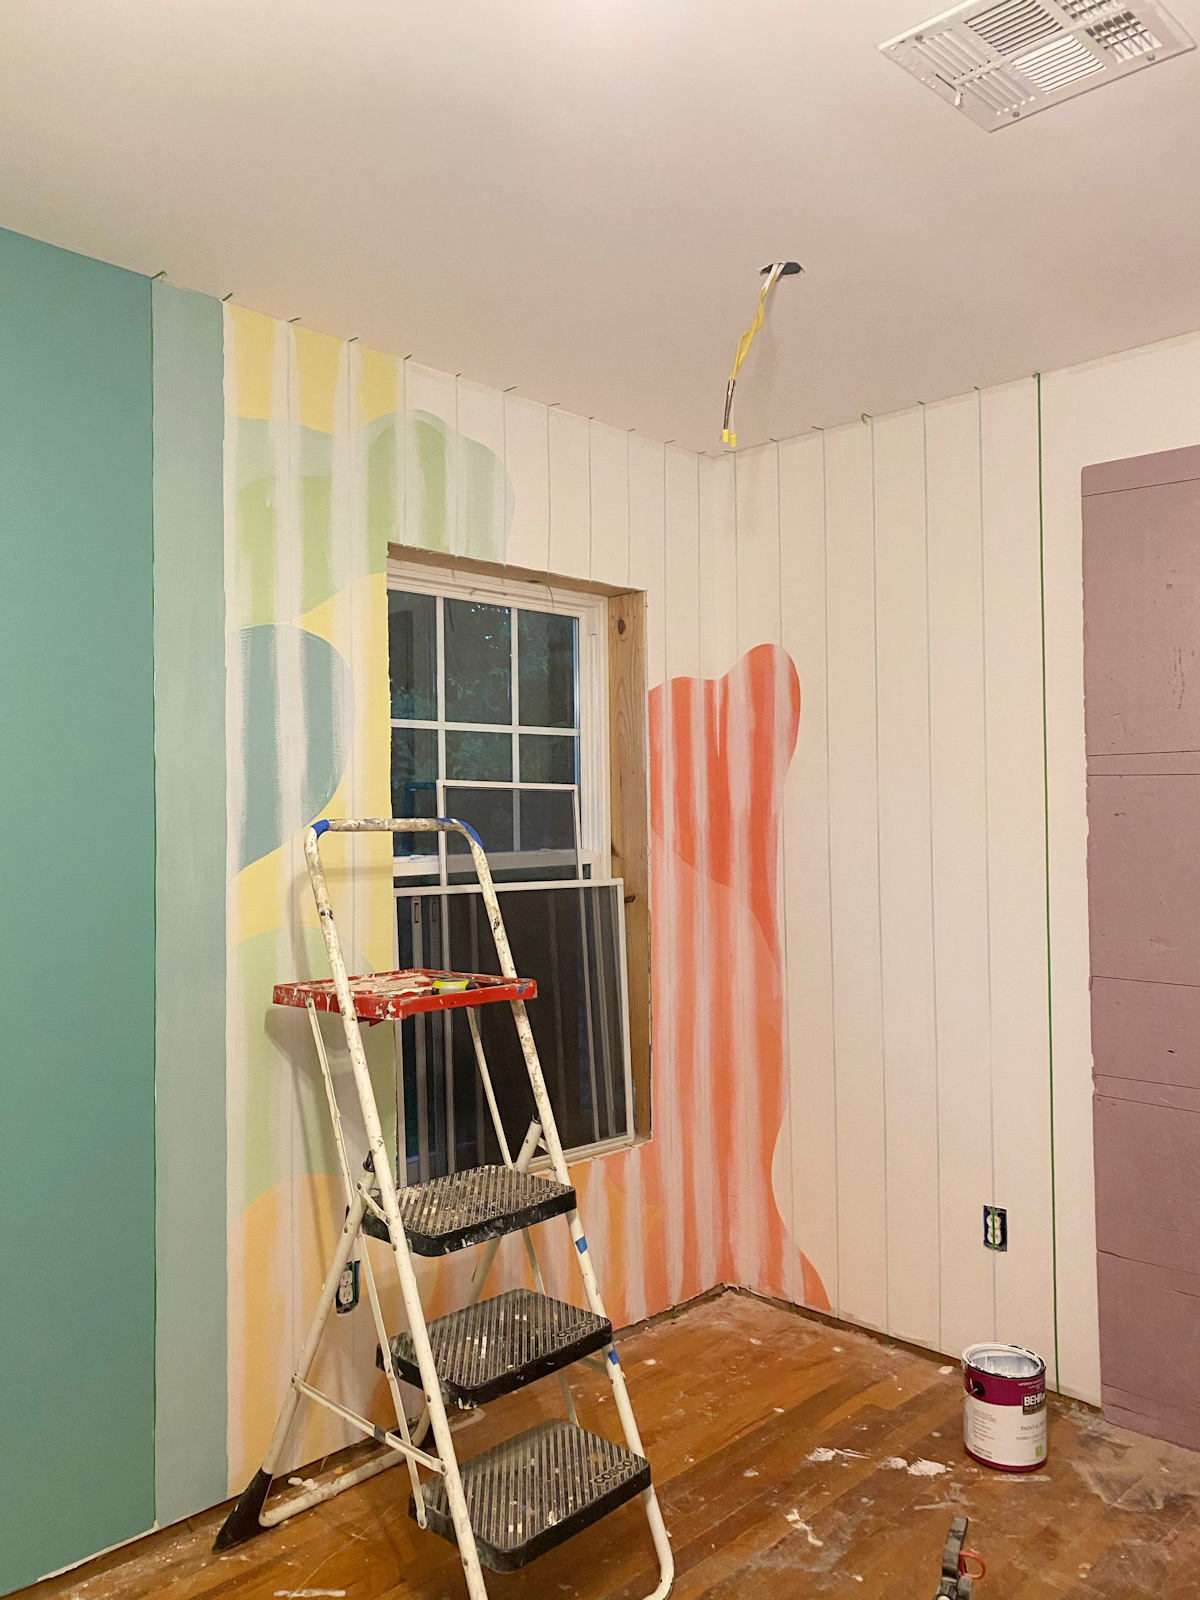
I decided to do something loosely inspired by this, with all kinds of freeform shapes in my various 15 different paint colors, and then embellished with white curvy lines, white dots, a bit of shading, some highlights, and some gold accents here and there. I started off by using a pencil to draw some very random freeform shapes, which you may (or may not) be able to see here…
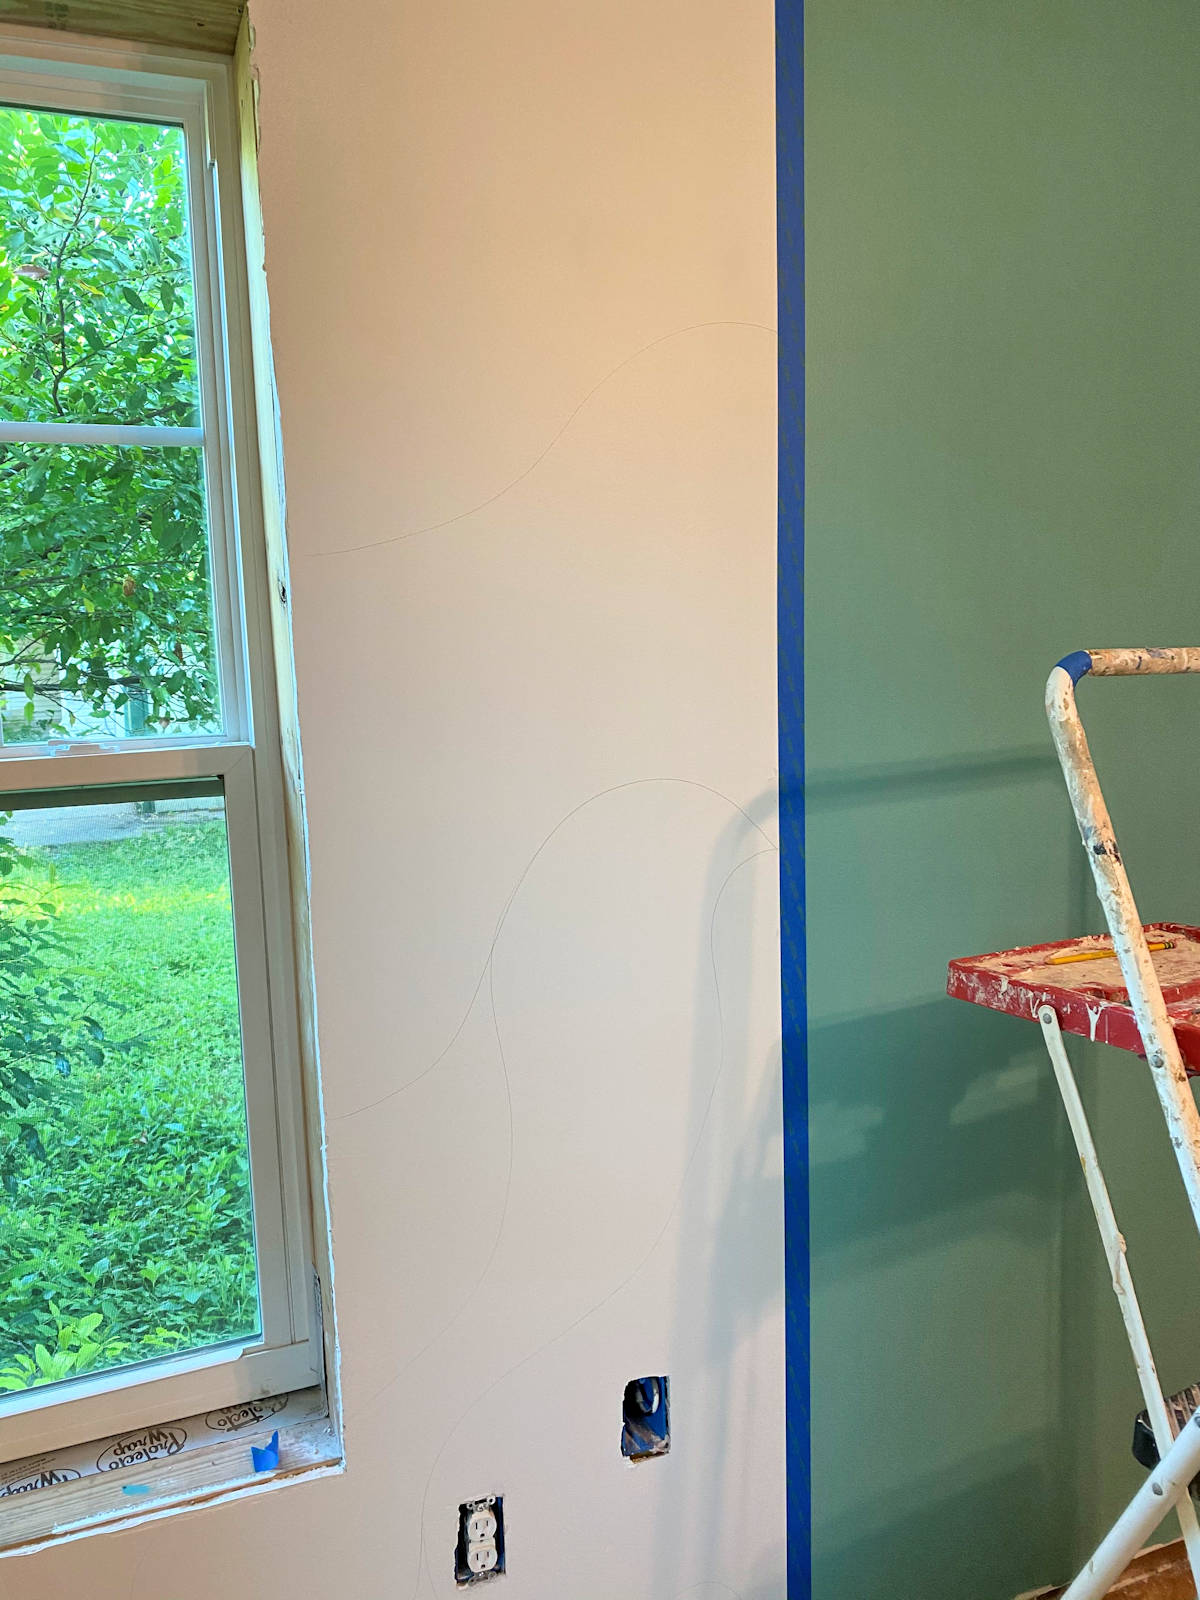
I did a few of those and then realized that I could just as easily do freeform shapes using a paint brush and paint as I could using a pencil first, so I went directly to the paint brush and paint step. This is how it looked after a few colors.
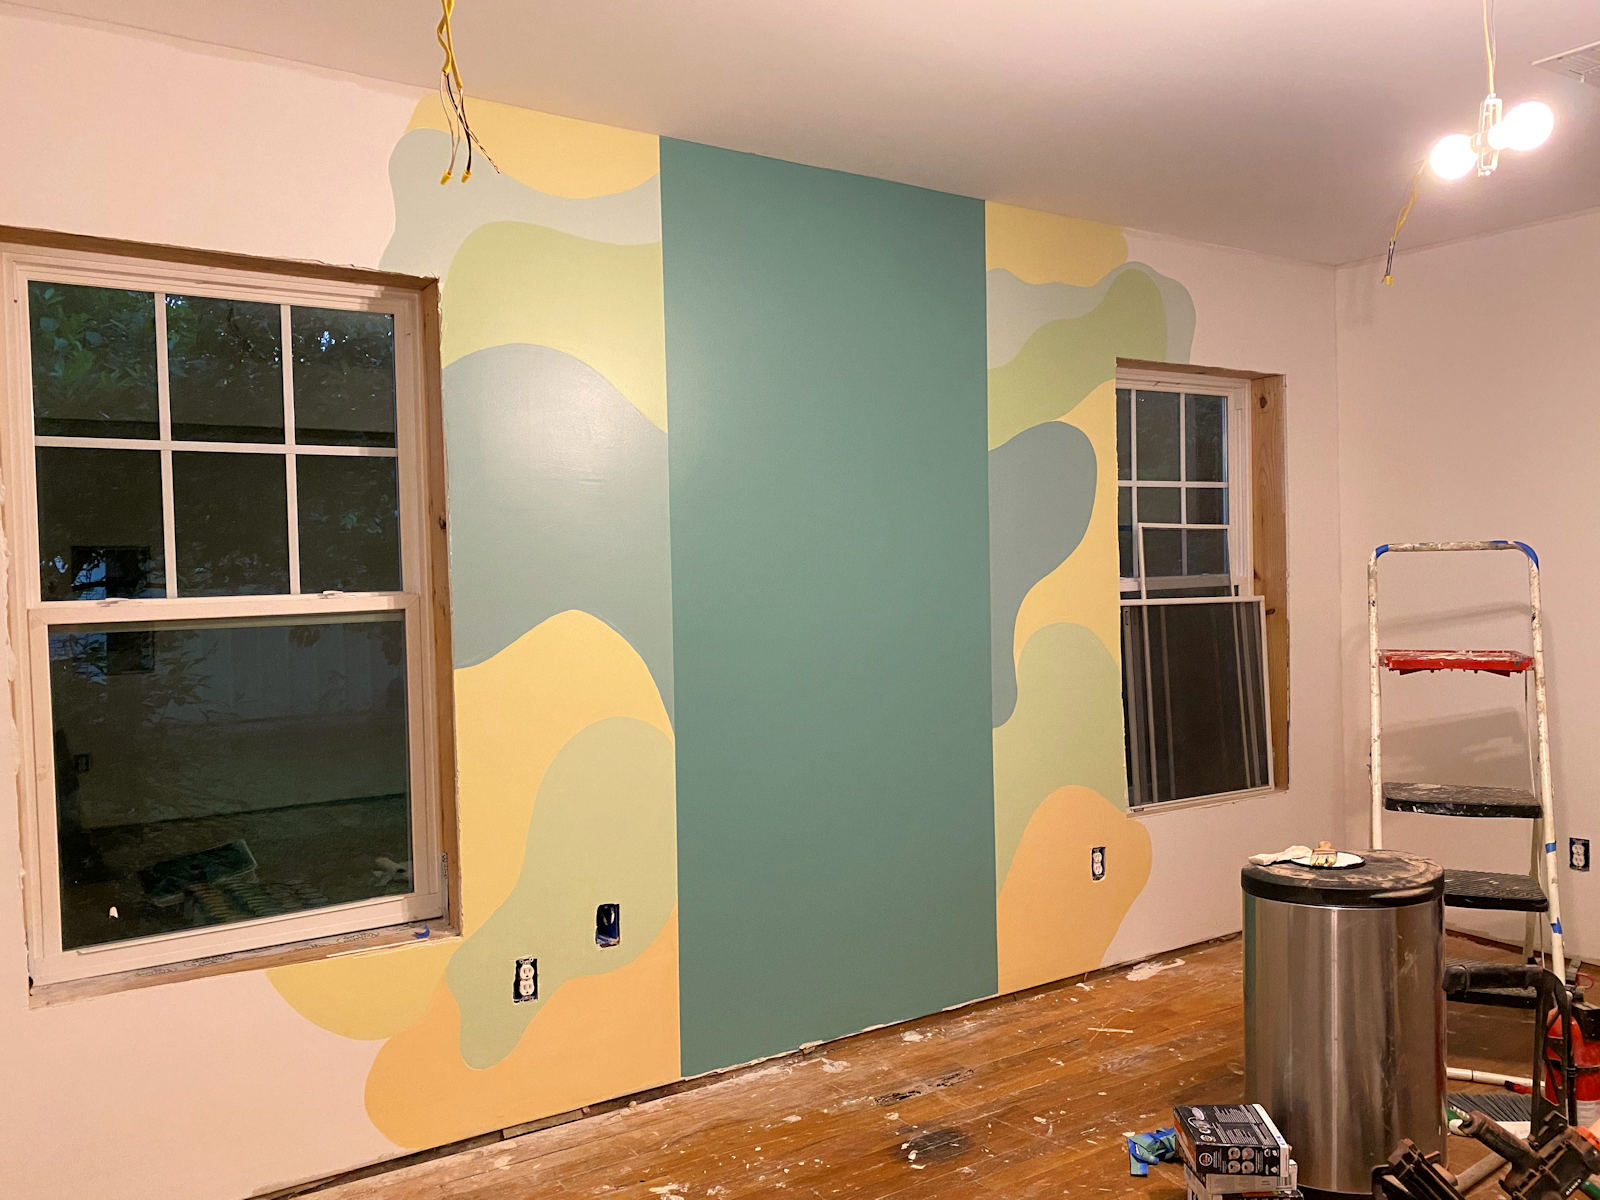
I wasn’t sure about it, so I added more until I got to my warm colors.
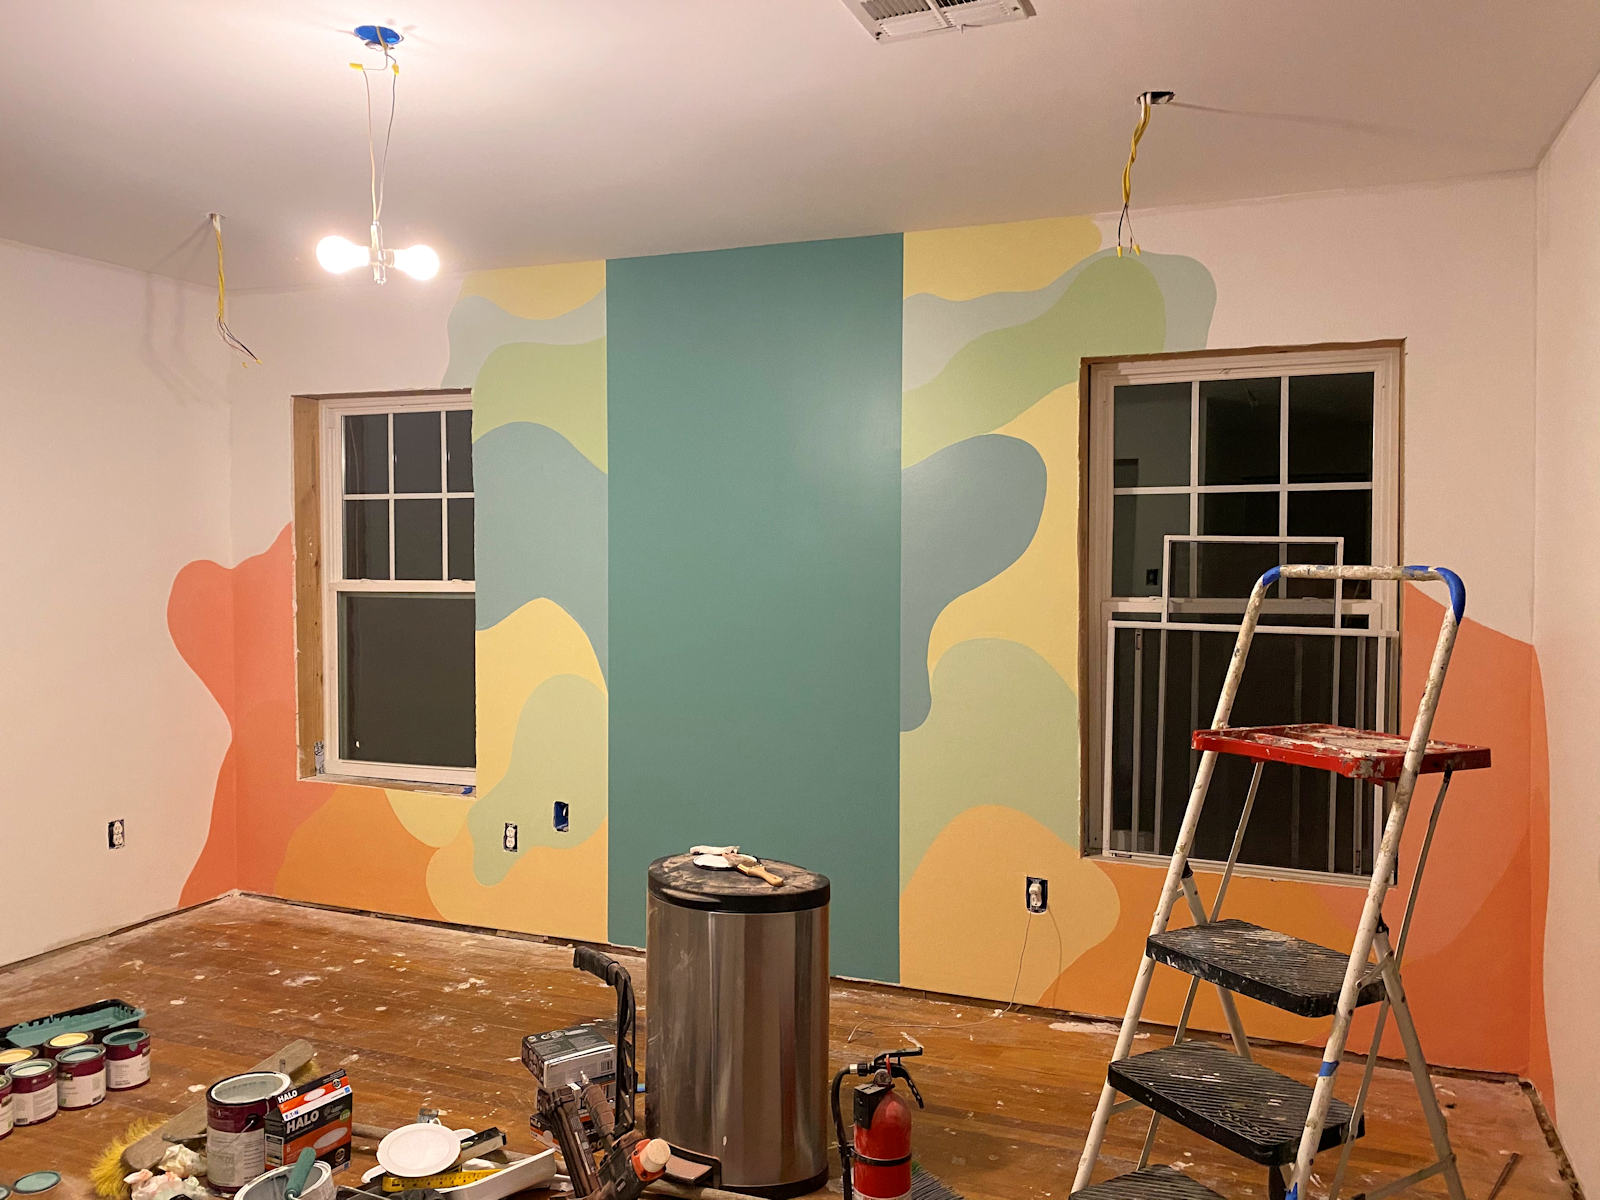
At that point, I still wasn’t sure, so I decided to stop for the night and look at it in the daylight the next morning.
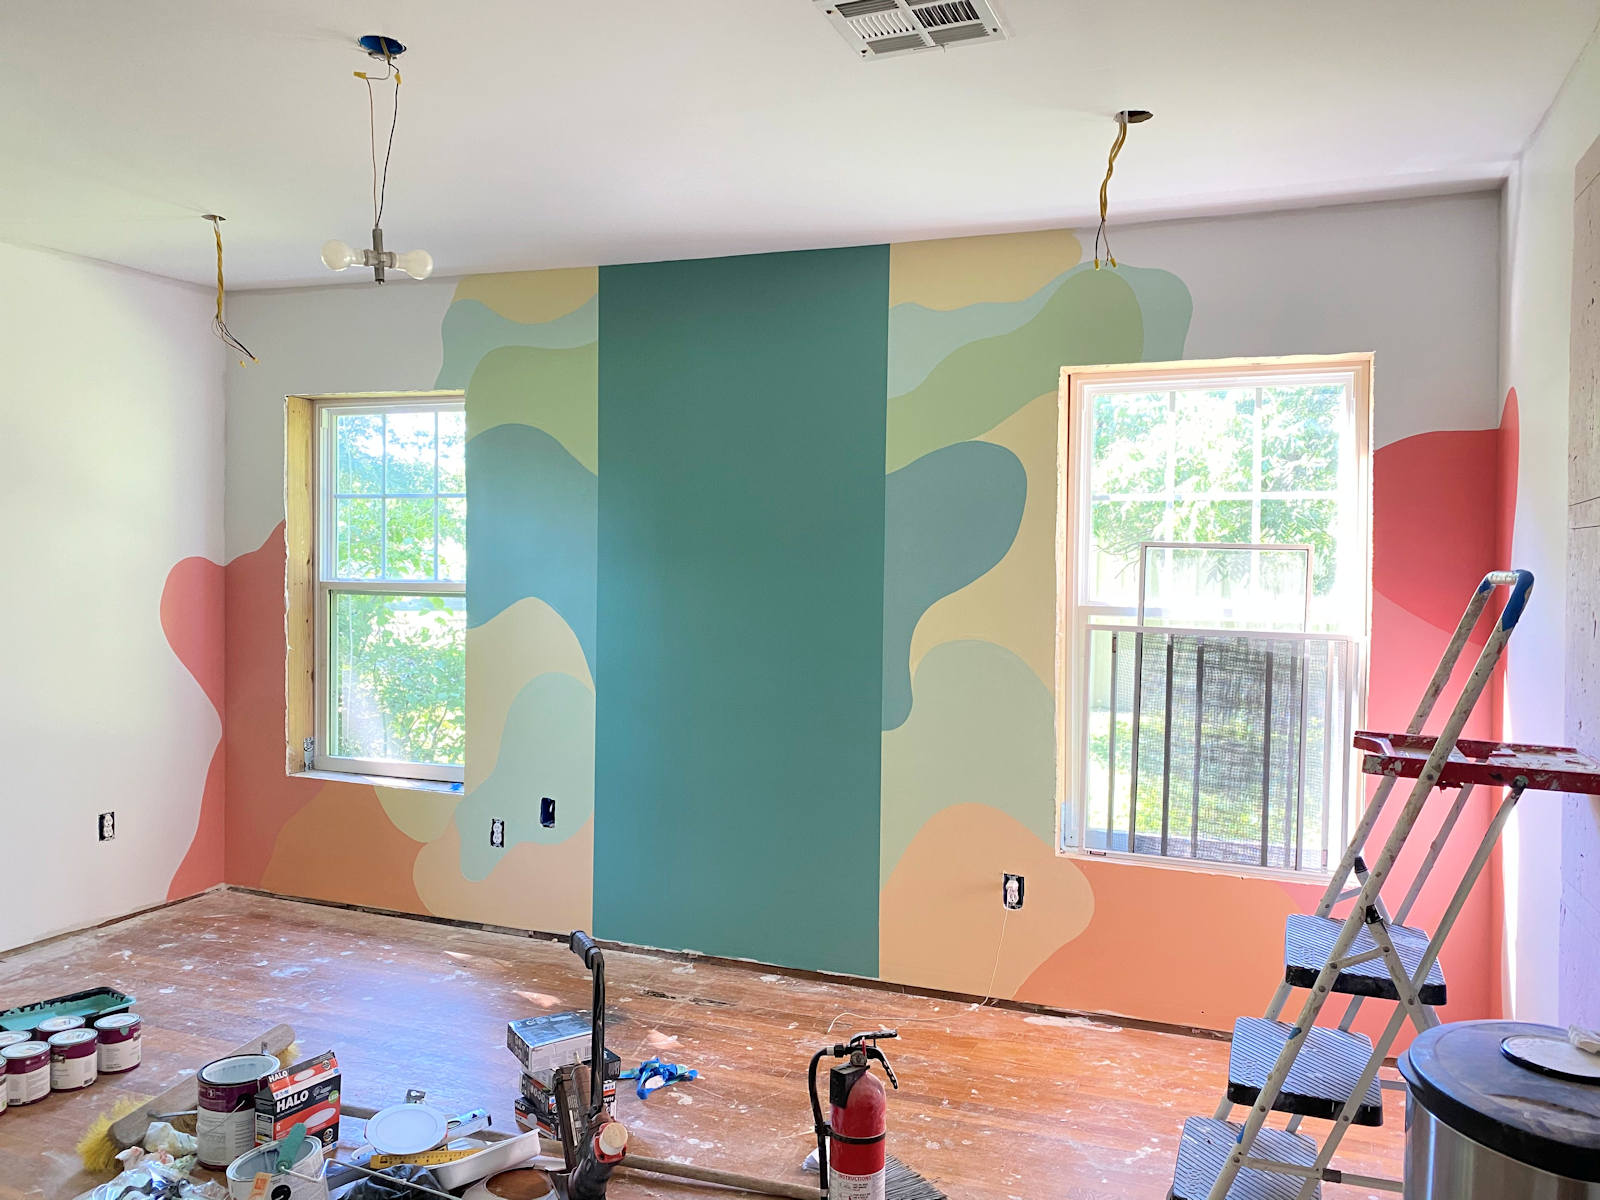
I still had a ton of embellishments I wanted to add before this design would be finished, but there was still something that just wasn’t sitting right with me. First of all, at this stage, this looked like something that belonged on the walls of an elementary school.

And even though I knew it wouldn’t look anything like this after all of the embellishments were added — white curvy lines, white dots, highlights, shading, gold lines, gold shapes, etc. — my mind just couldn’t see anything beyond “elementary school.”
But the biggest problem I had with this design is that I had spent quite a bit of time narrowing down about 150 paint samples to a select 15 to use in the perfect order to produce a beautiful gradient from teal to whatever that reddish pink color is. And I had taped them together in that beautiful gradient, and that beautiful gradient of paint colors had been sitting on my kitchen counter for weeks where I could see it every day. And every time I saw it, I loved it more and more. I had my heart set on using all of those colors in that exact order, and here I was settling for a design where that gradient was almost completely lost.
I told my mom and sister about it during our Wednesday lunch, and both of them assured me that I’d never be satisfied with this freeform design, even if it turned out gorgeous. I knew they were right. And that left me with one remaining option — full vertical stripes. The room, even with all of its quirks, can handle vertical stripes. It was when I added the very obvious horizontal lines along with the vertical lines that things went off the rails. But vertical stripes floor to ceiling would work. They weren’t my first choice, but I decided to try.
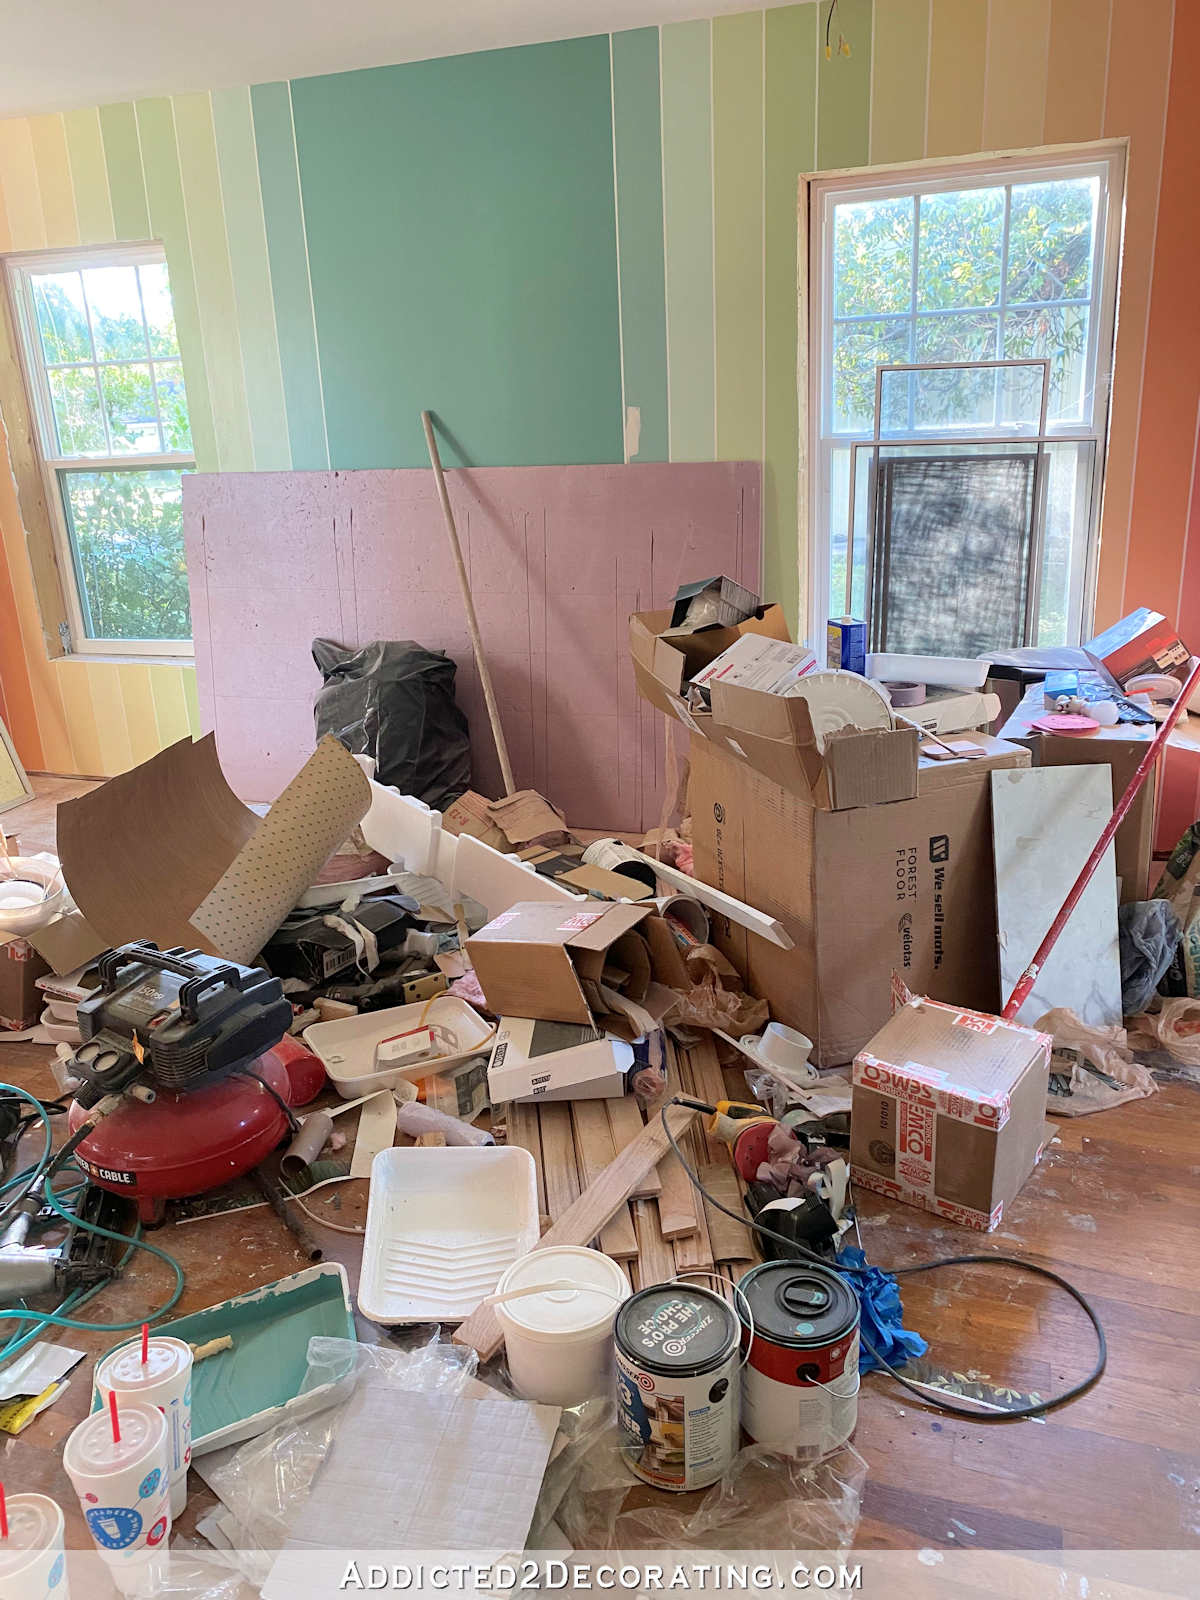
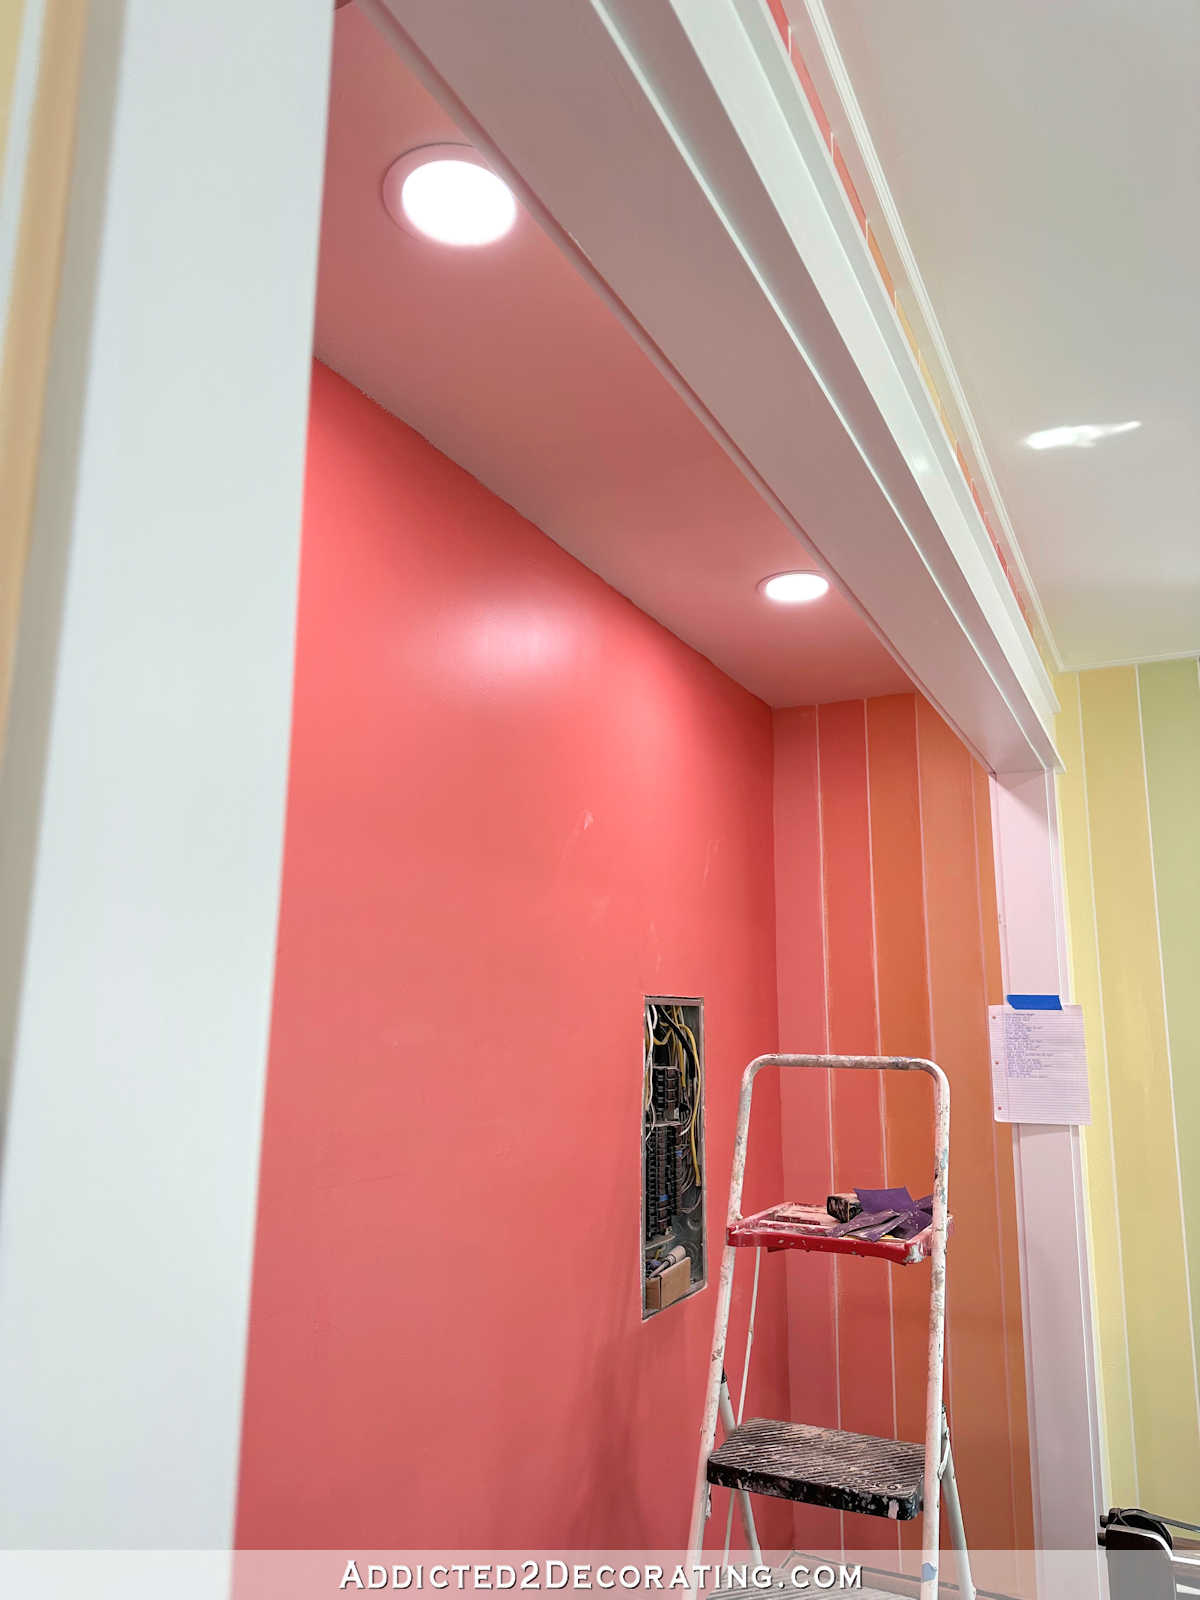
So yesterday, I sanded down that design a little just to remove any paint ridges that the brush may have left behind, and I started marking off 6-inch vertical stripes on the wall.
I wanted the colors separated by tiny stripes of white, so I used 1/4-inch painters tape to tape off the stripes.
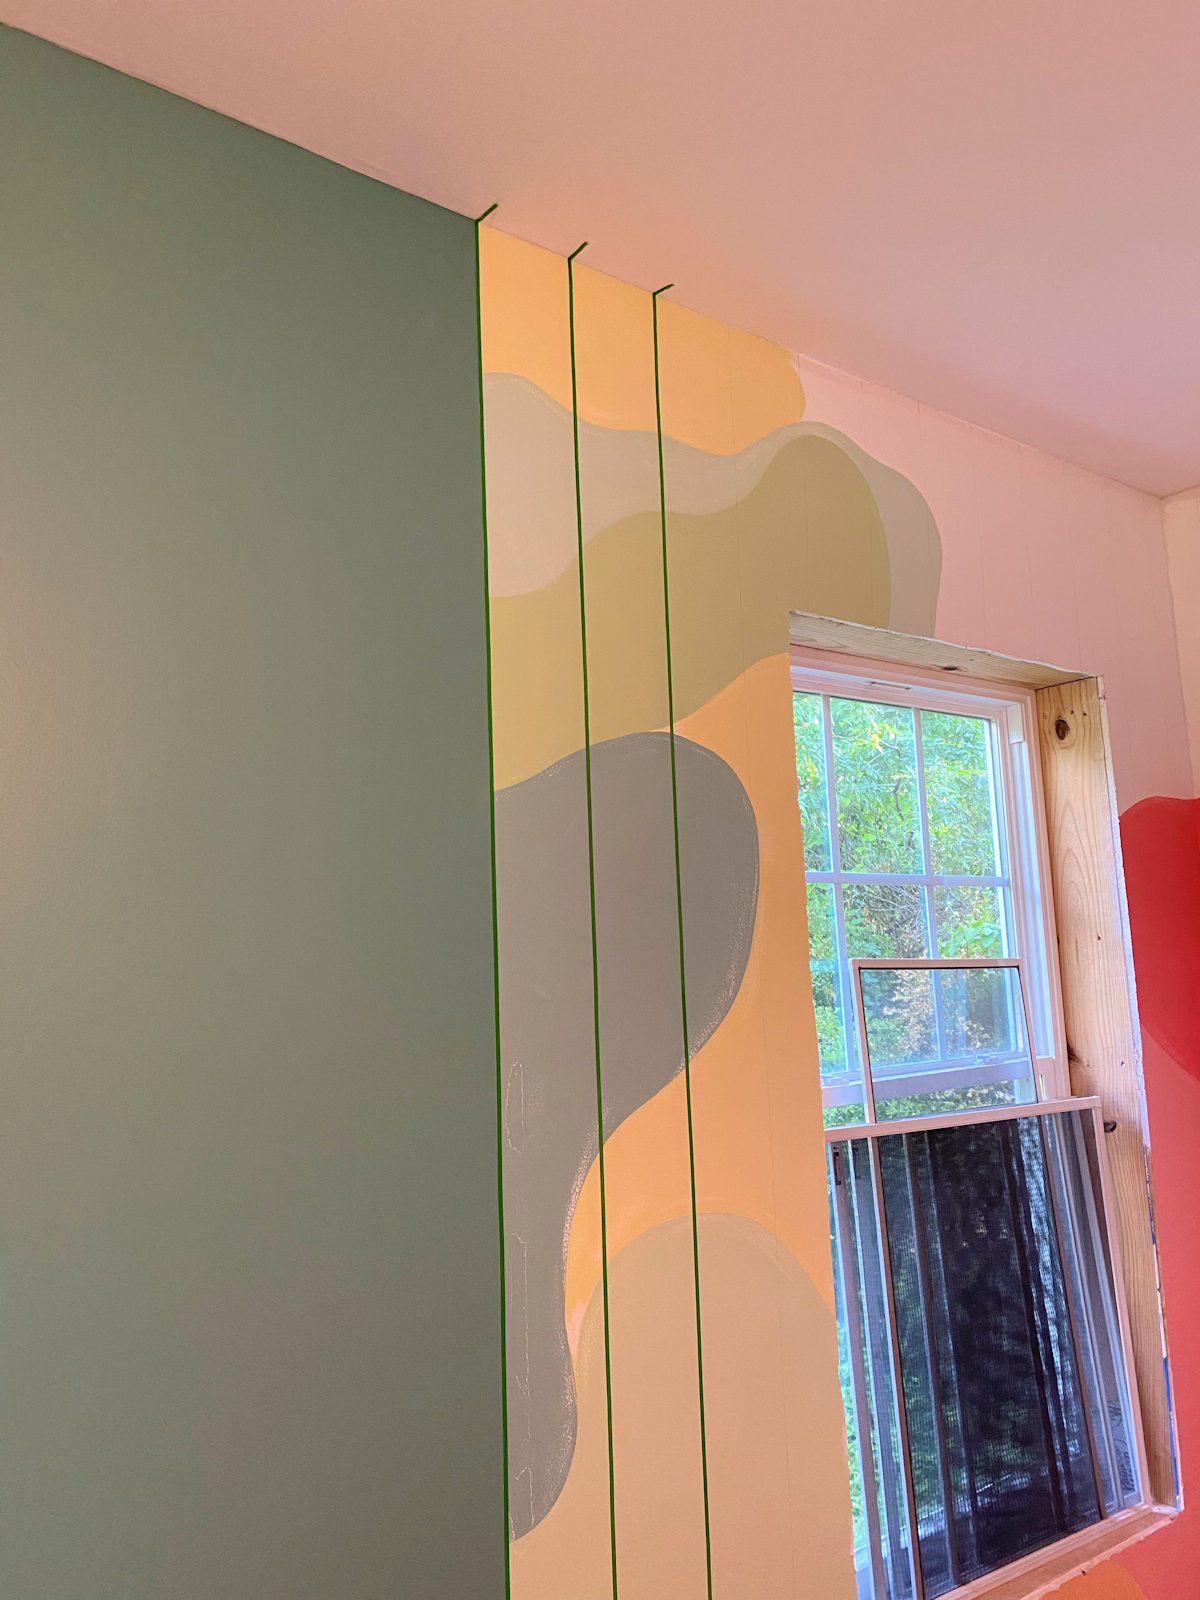
After I got quite a few marked and taped off, I sealed the tape with a thin coat of the white wall color.
Obviously, I’ll have some touchups to do on the areas of the walls where I had already painted the various colors. But on the rest of the walls that are still white, this method will leave perfectly crisp 1/4-inch white stripes between the colors.
On these particular areas where I tried out the freeform design, I’ll have to come back after the wide stripes have had a couple of days to dry, and I’ll have to tape off those skinny stripes and repaint the white between the colors. It’s a pain, but it’s the price of trying out different ideas.
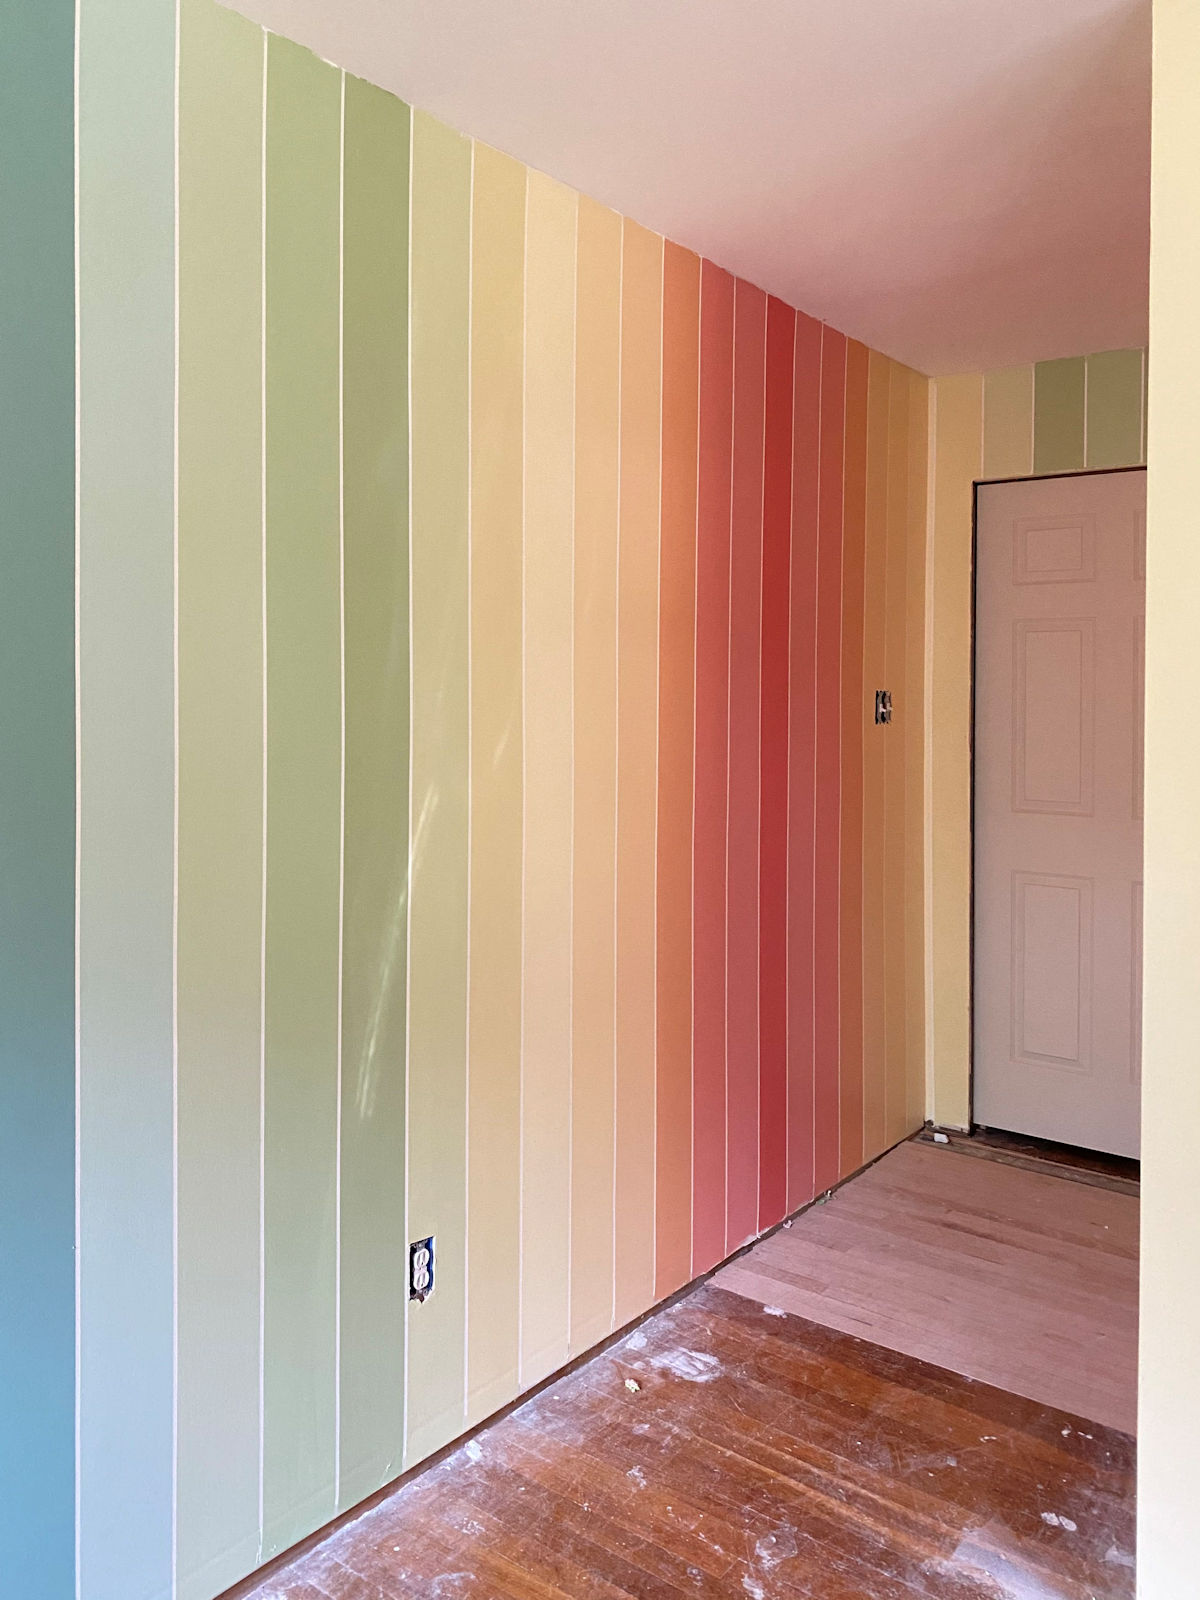
So after getting all 15 of the colors on the wall last night, this is what it looked like.
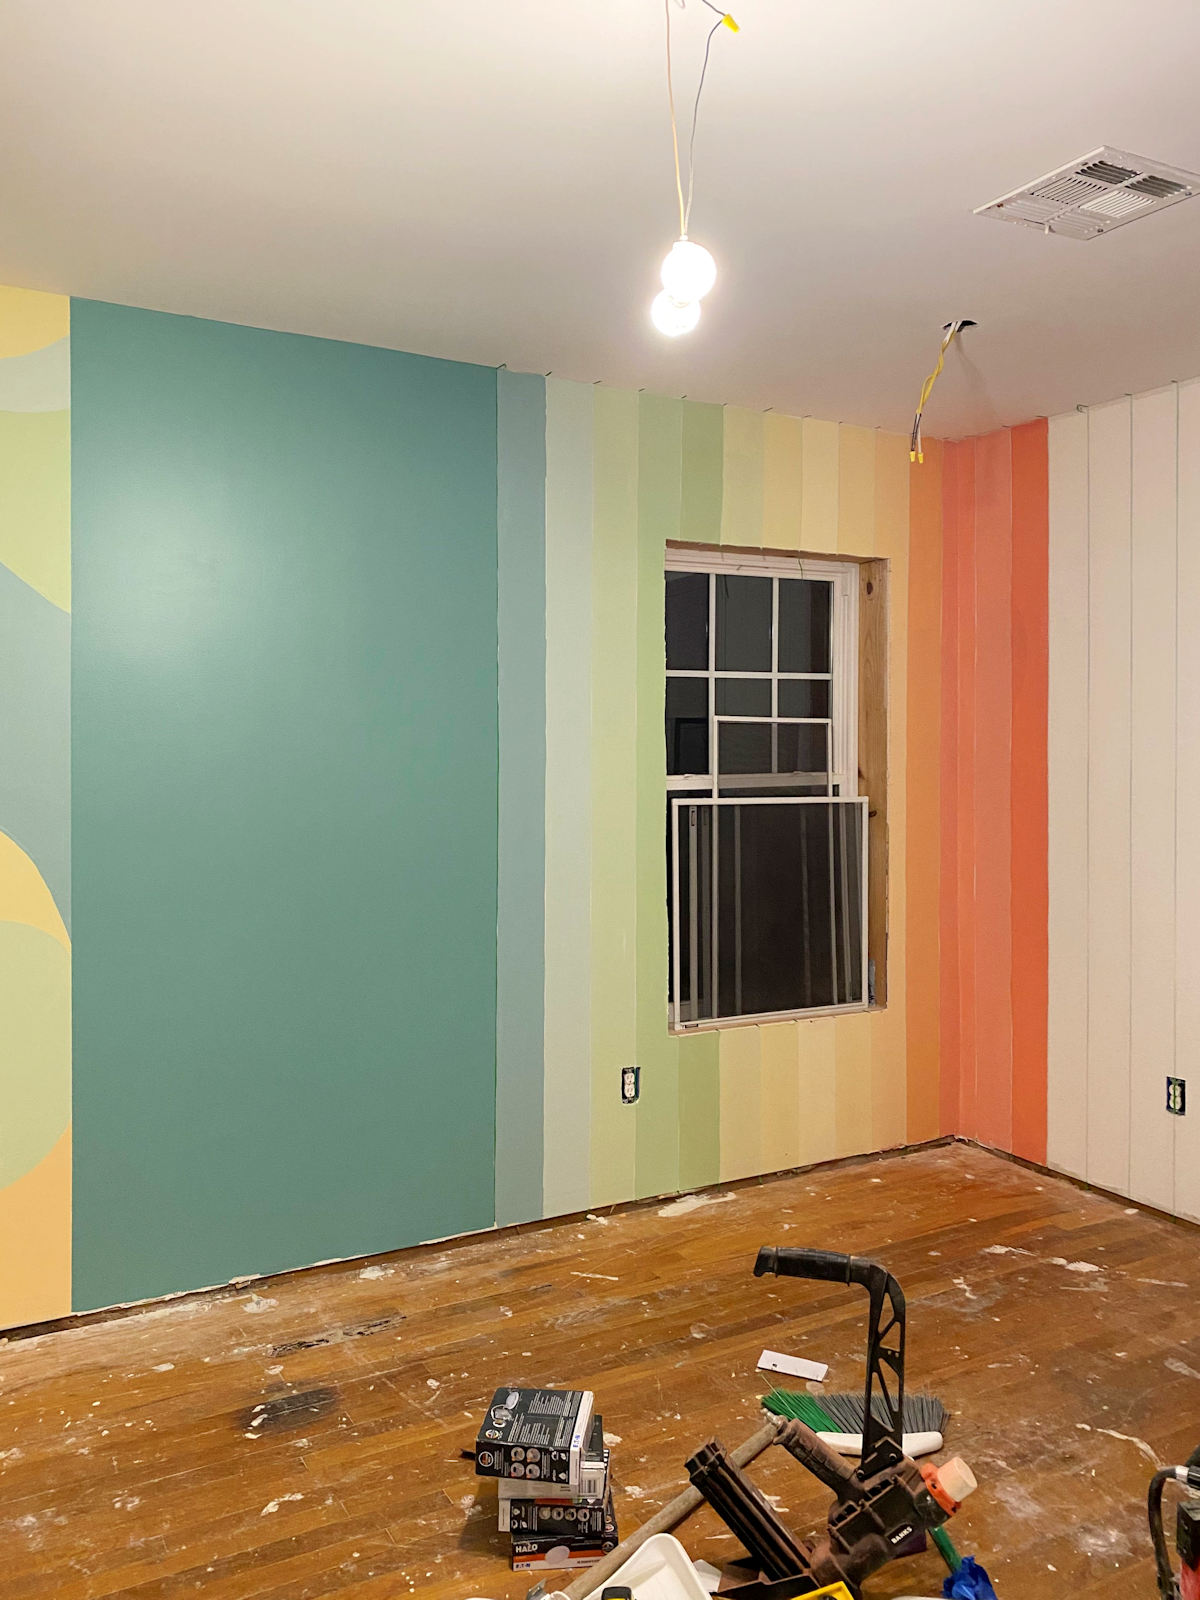
It reminds me of Fruit Stripe gum. 😀 And I love it.
Of course, right now you just have to imagine the little 1/4-inch white stripes between the colors. But I like this so much better! And I’m so glad I decided to go back to my original gradient stripe idea, even if I had to modify it quite a bit and couldn’t get exactly what I had originally wanted.
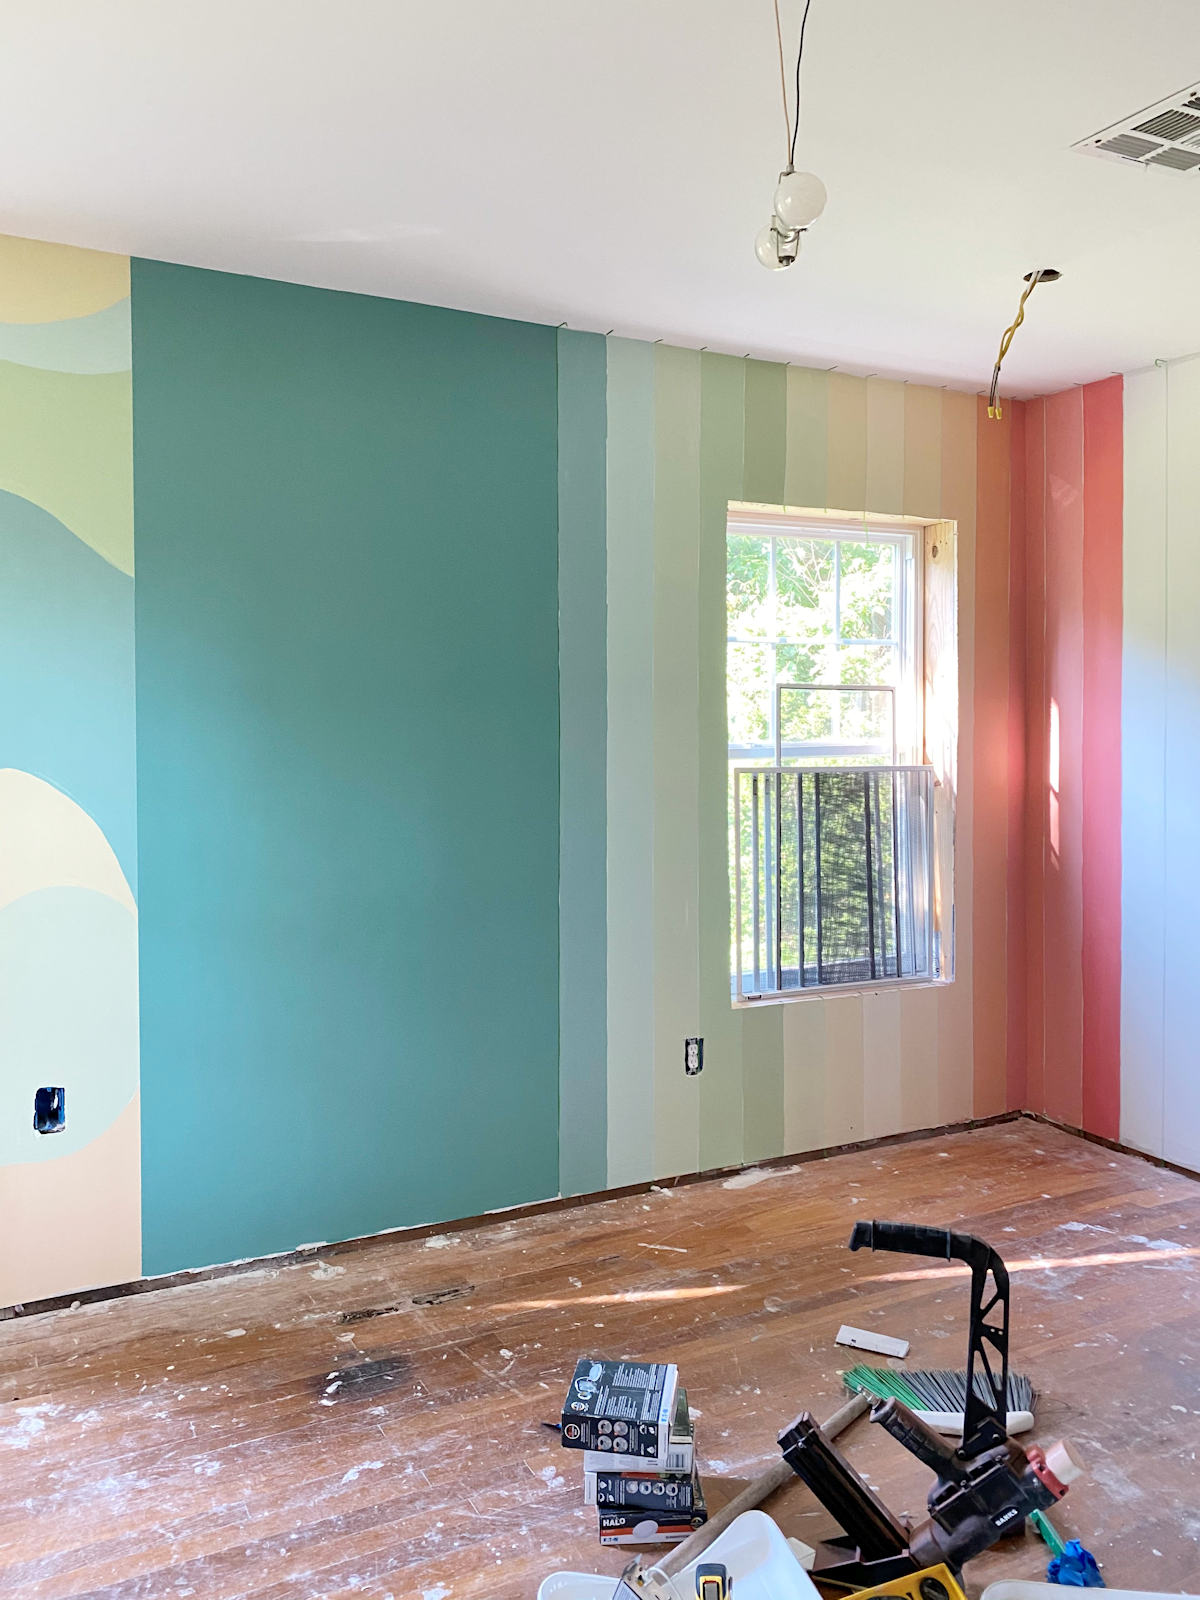
I think this is going to work out perfectly. It’s going to take a whole lot of time to get all of the walls painted, but I’m full speed ahead now that I have all of this sorted out, and I can already see that I’m going to love it.
Old houses are great, huh? 😀 They really are, but perfectionism and old houses don’t really mix. And sometimes an old house will outright reject your design plan. I wanted lots of vertical and horizontal lines in this room, and in hindsight, I’m pretty sure I could hear my house laughing at me. 😀
By the way, I have all of these paint colors listed on my house sources page. Click here to find them.

Addicted 2 Decorating is where I share my DIY and decorating journey as I remodel and decorate the 1948 fixer upper that my husband, Matt, and I bought in 2013. Matt has M.S. and is unable to do physical work, so I do the majority of the work on the house by myself. You can learn more about me here.


This looks amazing! Thought of it the other day but would you have considered floor to ceiling stripes on a slant? Not like herringbone but just enough to disguise the quirks of the room?
My sister had that same thought. I did consider that for a brief moment. I’m just not sure I’m a “slanted stripe” kind of person. 😀
I liked the full length stripes the best all along so Yay!!
Me too.
All that short stunted design looked a bit unfinished, and rather odd.
This should look magnificent when finally done.
Me, too. I am so happy full stripes are making it on the walls. It looks So. Good!
I wasn’t feeling the love for the partial stripes.
I love the colors you chose. Will you share, if you haven’t already?
Oops! I meant to add that info to the post. You can find all of the colors here:
https://www.addicted2decorating.com/shop-my-house#home-gym
Thank you so much for sharing the colors! I love , love, love , this entire project!
Love the full stripes!! You are awesome.
Oh wow, I think you are going to be so happy with this when done. I’m liking the little white strip in the middle of each color too. The colors are lovely! I’m so glad you didn’t go TOO far before just knowing what was not going to work…twice! Excited to see the progress.
Beautiful! You are so brave and talented and persistent!
Even though I liked the inspiration painting, the freeform looked like a preschool to me. This is much more clean and elegant. I love the full length stripes and can’t wait to see the finished wall when the tape comes off and the white is re-added to cover the freeform colors.
Loving the full length stripes and the touch of white between will look so crisp. Hoping you won’t run short of paint with having used some for your freeflow test. Glad you’re back on track!!
Hi,
I love the colors and the stripes. Too bad you did the extra work to get there but sometimes you just have to make sure you made the right decision!!! Stripes win!
Hi Kristi. I haven’t commented in a while but I’ve been following along. I appreciate your sharing the starts/stops, decision making, changing plans, and everything else you share along the way. I’m loving the vertical stripes! It will look great when you are finished! It will be another beautiful room that makes YOU happy!
I agree with Victoria. It makes me love following your blog knowing the in-between steps because most designs don’t come together as easily as most design blogs portray. You are an inspiration and a teacher! Thanks for all you post and hope you get any and all accolades or success that come your way. Ok, so when can you work on my house?!!😊
Maria B.
Hahaha I love how you share your design/implementation process with all the starts and stops and turns to come out with a final plan that is better than all the previous plans! True genius! Love it!
Really like it! You’re one of the few blogs I read because you walk the reader through your steps to get to the final product. Too many blogs just put the final results which most people can’t identify with getting to on the 1st try. Anyways, love your blog!
I love it! I was one of the few who was team full wall stripes. I didn’t care for white top and bottom, so I’m thrilled you’re going in this direction.(like it matters)😂😂! It’s going to be spectacular when you’re finished just like everything else you do when forced to change your plans! Can’t wait to see final room!
Well it’s not my thing, but it does remind me of Fruit Stripe Gum! I would rather have had a mural that made me feel like I was exercising out of doors, but I know you love stripes! Glad you are happy with the room!
I just love this! The stripes, the colors, it’s great! Can’t wait to see it all done!
It might help to paint a quick white strip over the already colored area where the white stripe goes before you mask it off. Then you won’t have to come back and fix it. You would only have to wait untill it dried in those areas before masking. The floor to ceiling strips are so uplifting and fun. You are amazingly talented!
I think I missed something… weren’t you tearing your hair out because the painters’ tape was pulling paint and paper off your primed drywall? Was there a unique solution or was extending the drying time on the drywall the answer? Or was it just Kristi magic? BTW, once again you’ve arrived at a beautiful solution to your stripes conundrum.
It just needed to dry a little more. It was the humidity that was keeping the paint from drying thoroughly in the amount of time I’m used to, so I just needed to wait a couple more days before taping off the design.
Kristy I’m curious why you wouldn’t paint the white to begin with? Then you have one taping and after you paint the strips you are finished. Love your colors!!
It was all about immediate gratification. 🙂 Either way, I’d have to paint one thing with two coats of paint, let it dry for two days, and then tape off an area and paint something else with two coats of paint. This way took a little extra tape, but I had my immediate gratification of being able to see the colors together instead of having to wait while the white dried for two days before getting to see the colors on the wall. Sometimes immediate gratification wins out, even if it means I have to do a little extra work (i.e., taping) in the long run. 🙂
Kristi, I think the stripes will look awesome when you finished with them! It may not be the original design you had planned, but you know what “they” say… everything happens for a reason. You may end up loving this even more!
And I know that “laughed at by your house” feeling! I think I’ve felt it myself a time or two! 🙂
I really like it! It’s going to be a ‘fun’ room to workout in for both you and Matt.
I’m glad you negotiated a good compromise with the house! 😀 I love the gradient and am glad you were able to have it work in some fashion! Looking at it just makes me happy!
I love it! As I was reading, when I saw your first photo of the stripes I spontaneously exclaimed “Ooh, that looks awesome!” My cat is next to me and opened one eye before going back to sleep. I like to think that means she agrees, even if not as enthusiastically 😆.
I live in a 1930s condo and share your tendencies towards perfectionism. I have 10 foot ceilings with crown molding and the windows start about eight inches down. They are flush with the outside walls so the trim is inside the area where they are recessed about three inches from the wall. When I went to hang full length curtains in my bedroom, I decided to use a level even though normally I can get things almost perfectly level just by eyeballing them.
So I used the level, dealt with the joys of drilling into plaster walls, got the curtains hung, stepped back to admire them…and they looked crooked. Yup, the ceiling and crown molding aren’t level. 😂😂😂 I should have trusted my instincts and just eyeballed it like I usually do!
I always install my drapery rod brackets right up against the crown molding for that very reason. No need to use a level. And if the drapery rod is level and the crown molding isn’t, it’ll stick out like a sore thumb. I learned that the hard way in this house. 😀
Love this! Almost as much as I love that you share the entire process of a project. Not just the pretty “after” photo, with no details of the work involved to get there. Thank you! But I what I really came to say is, “What happened with the rug?” I’m dying over here! 🙂
So pretty