How To Build A Bookcase (And Accomplish The Impossible)
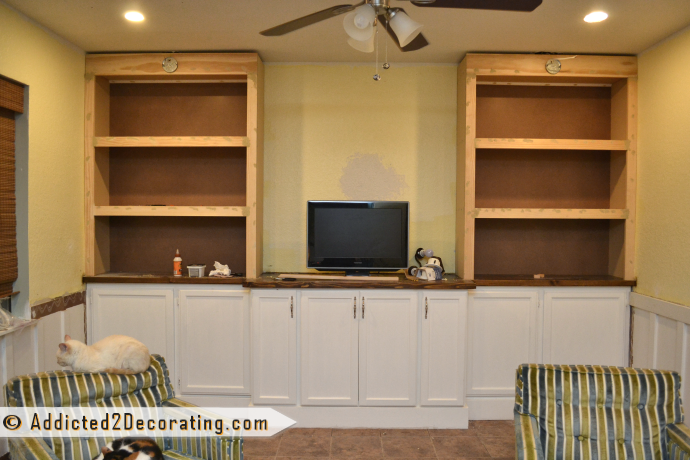
My bookcases are looking more like real, actual, quality bookcases now! Here’s how they looked last night when I went to bed.
And remember how I read that there’s no way to make long MDF shelves sturdy enough so that they won’t bow?
Well, I accomplished the impossible, because these shelves are sturdy enough to hold nothing but old, heavy encyclopedias from one end to the other without bowing and sagging. I’m quite confident of that.
So let me show you how to build a bookcase like this, beginning to end:
I started out by building a very basic bookshelf form. The side pieces are 58 inches by 11 3/4 inches, cut from 1/2 inch MDF. The three horizontal pieces are 45 inches by 11 3/4 inches, also cut from 1/2 inch MDF. I attached the top horizontal piece about four inches from the top of the side pieces in order to leave clearance for the wires and light installation. I put those pieces together using wood glue and my nail gun. Then I attached a piece of 1/4 inch hardboard (the same stuff I used to create my planked walls in my bathroom).
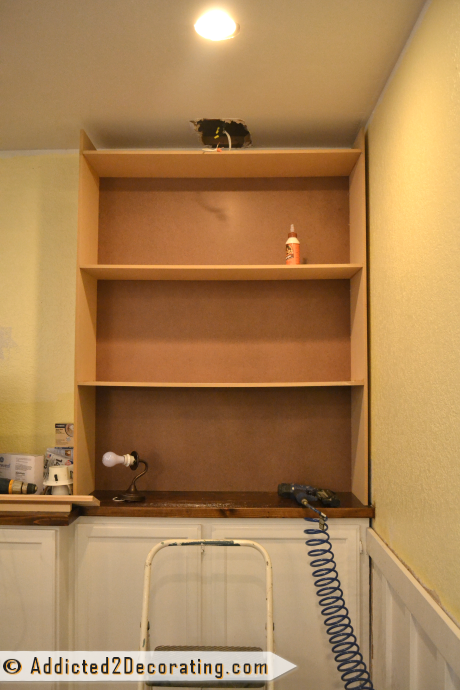
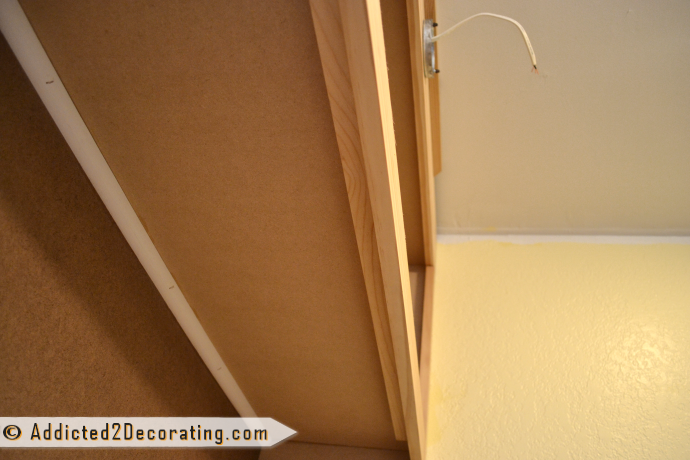
Next, I cut a piece of 1 x 6 lumber to the width of the bookcase, and then determined the placement of the metal plate for the light, and drilled the hole for the wire. I also attached a temporary strip at the top that is the same height as my trim so that I’d know how far down to attach the 1 x 6. Again, I attached it with wood glue and my nail gun.
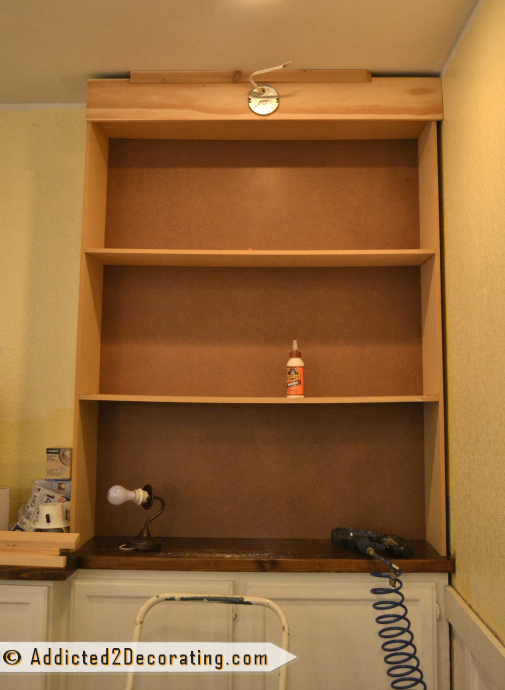
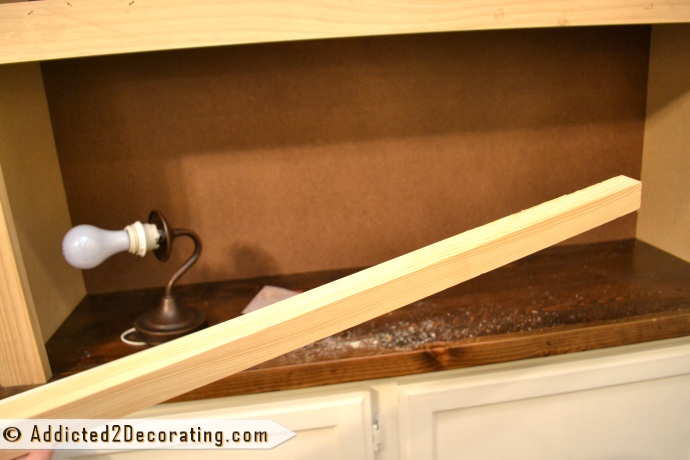
Next I cut two pieces of 1 x 3 lumber and attached them to the sides of the bookcase.
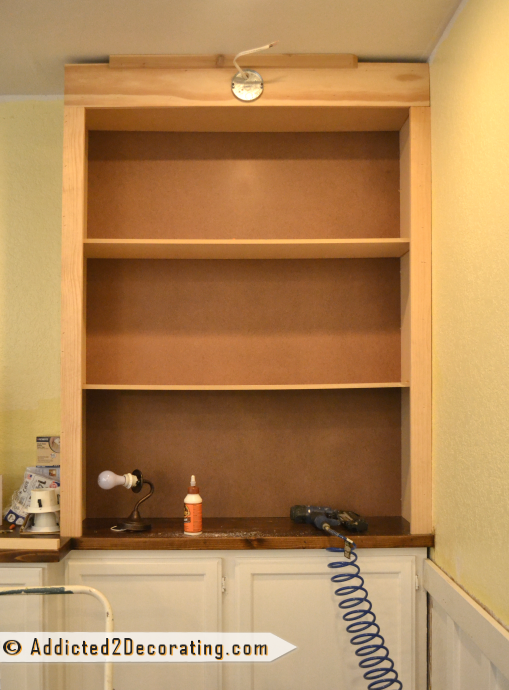
Then I cut more strips of 1 x 3 lumber to attach to the shelves. With this piece attached, the shelves were already very sturdy.

To support the back edges of the shelves, I cut lengths of quarter round and attached it just under the back edge of each shelf. With that, the shelves were very sturdy.

But, since I wanted there to be no question about the structural quality of the shelves, I decided to add one more bit of reinforcement. I used a 1-inch square dowel…
…and attached it right behind the front trim piece on each shelf. I used wood glue, and then nailed it through the front trim piece, as well as through the shelf. The 1 x 3 that I used as the trim covers this square dowel completely. And with that last piece of reinforcement in place, these shelves were amazingly sturdy. I’d be quite confident to put anything on those shelves, regardless of the weight. (Anything within reason, that is. I don’t think I’d use them to store a set of free weights. 🙂 )
I’m always amazed at what a difference the trim makes. Here’s a view of the right bookcase all trimmed out, and the left bookcase without any trim.

And here they both are, all trimmed out. I got all of the nail holes filled with wood filler.
I’m hoping to get it finished today! I still need to sand all of the areas that have wood filler, then caulk, prime, and paint. Then I can install the lights. I’m so thrilled with how it’s turning out, and I’m so anxious to see it finished!!
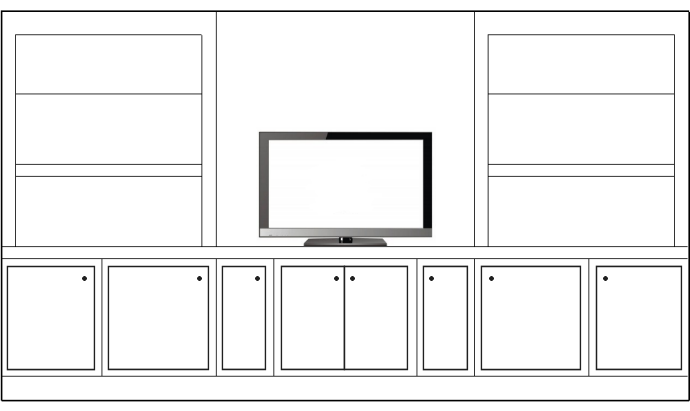
On another note, doesn’t my t.v. look tiny now? It’s always looked small, but now it seems ridiculously tiny next to those big bookcases! 😀

Addicted 2 Decorating is where I share my DIY and decorating journey as I remodel and decorate the 1948 fixer upper that my husband, Matt, and I bought in 2013. Matt has M.S. and is unable to do physical work, so I do the majority of the work on the house by myself. You can learn more about me here.

Looks amazing! You are doing a great job
I LOVE these book shelves. You’ve inspired me to try this on an empty wall in my large eat-in kitchen. I think that I’m going to frame it out slightly different so I can have side supports for the shelves because I’ll be putting heavy kitchen equipment on the shelves and more support will prevent a lot of headaches.
The difference a little trim-work makes is impressive!
Glad to see you sorted out the support issues and looking forward to the end product (as always)!
They look fantastic……great to see your project coming along! You always figure things out…..I will be sure to bookmark your building suggestions..You Rock!
It’s official. You are amazing.
That is all.
Wowsers!!! Fabulous job there!
Those look soooo good! I love the wood trim and know that you’ve reinforced them enough to hold anything. Can’t wait to see them painted and finished. Are you going to put a shelf over the middle section, as you talked about before?
Wow! I love the progress & can’t wait to see it completed. Please don’t be offended, but so far your TV does look a tad too small in the built-ins. When you list the condo, you can always replace it with a large painted square in place of a TV. (You know, a faux TV looking thing-a-ma-jig). Or, you can decorate around the TV which you have a fabulous flair for.
Fantastic. The telly does look a bit small, too bad. This is not the time to spend extra cash on a bigger one. You have done a brilliant job, well done you.
cheers from an overcast Brisbane.
This is looking great!
Seeing your blog name in my in box always makes me happy. I know I’m going to get a treat. I like how you’re so real. Oh yeah, and dang talented, too!! Good job on the book cases — they look totally professional!
awesome!
There you go again, being totally awesome! Those bookshelves look amazingly sturdy and substantial. Great work! The whole set up looks gorgeous, and I can’t wait to see how it looks when it’s done. The lights are going to add so much!
Great job on taking care of all your doubts. I used to ignore them but have figured out it’s best to prevent nightmares than fix them. They’re going to be beautiful when they’re finished.
Good job, Kristi! I’d still like to see the top trim go all the way across the ceiling, but what you have looks pretty darn good! You could take the shelves you had above the cabinets when this started, and install them above the TV to fill that part out. They could easily be uninstalled by the buyer. Thanks for being an inspiration. I don’t think I could even begin to build a bookcase, but I think I’ll give it a go!
Fantastic job! You’re so brave! 🙂
It’s looking exceptionally good. I can’t wait to see the finish. I think you have that MDF handled very well. I think the only thing that would cause a problem is moisture. Nice work!
I predict that you will have a bidding war for your condo!
I love it! Can’t wait to see it all finished.
You make me believe I could do this! Really, you are talented and ingenious!
Your shelves look amazing! You really are very talented. I don’t know how you have the energy and time to get all that you get done. Inspirational!!
They look great! I was wondering how you were going to beef them up and make them stronger. You did it! It’s fun to see a work in progress instead of just before and after photos. Thanks.
Beautiful job….. I just saw the (almost) finished product 😉 I am very impressed and inspired to build some cabinetry and sooo appreciate your sharing of how you did it. Question for you….. I see that you have used 1/4 round in the bookshelves. Is it only at the top or did you use it around the whole inside of the shelves? It’s hard to see that detail in the picture. And at what stage did you install it? Thanks and keep on keepin’ on Kristie you will have the best house on the market in a fw weeks 🙂
Hi Liz~
I actually used the quarter round just along the back wall, and not along the sides of the shelves. I used one piece of quarter round under each shelf, and then used another one on top of each shelf. I installed the quarter round after I attached the trim piece to the front of each shelf. Hope that helps! 🙂
These built-ins are so beautiful! Amazing work! You’ve inspired my fiance and I so we’re starting to plan out how we may do something similar in our home. May I ask if you attached the upper shelves to the wall and if so, how? Thank you for sharing!
Hey this loos really great! Quick question for you – what are you using for nails? I’ve never had any luck with pinning/nailing into the 1/2 inch mdf without the end “grain” splitting. Would love to know the trade secret.
Thanks!
I’ve been looking for instructions just like this! My only question is how did you attach the bookshelf to the top of the cabinets? Or did you just set it on top of the cabinets and attach the bookcases only to the walls?
Thanks!
I only attached them to the wall. If you want to attach them to the countertop, you could use pocket holes (a Kreg Jig is the easiest way to do pocket holes), or you could just use wood glue and glue it into place. I didn’t find that either of those were necessary, though.
Question why are you using MDF? MDF, is heavy, chips/dings/indents/splits easily, and bends over time- esp long shelves with lots of weight on them. I would’ve used cabinet grade plywood, dadoed the sides and inserted the horizontal pieces, glued and pinned them, as it makes a stronger joint. The only good thing about MDF, is it paints easily, but that’s about it.
Just a tip for future readers…
MDF is perfectly fine to use. The edges chip/ding easily, but the face of the MDF doesn’t. Once MDF is edged with solid wood lumber, primed, and painted, it’s very strong and will last forever. It’s all I use to build bookcases, and I’ve never had a problem with shelves sagging. You just have to know the right way to work with it.
Could I ask what size nails you used? I’ve heard MDF will split sometimes when nailing it.
Thanks.
I think I used 1.5″ 16-gauge nails. I’ve used lots of MDF over the years, and I don’t think I’ve ever had it split from shooting nails into it.
You are an inspiration, in many ways. Im working on a similar project. How did you keep the back panel from showing from the sides? thanks.